Loading ...
Loading ...
Loading ...
EN-10
ENGLISHFRANÇAISEESPAÑOL
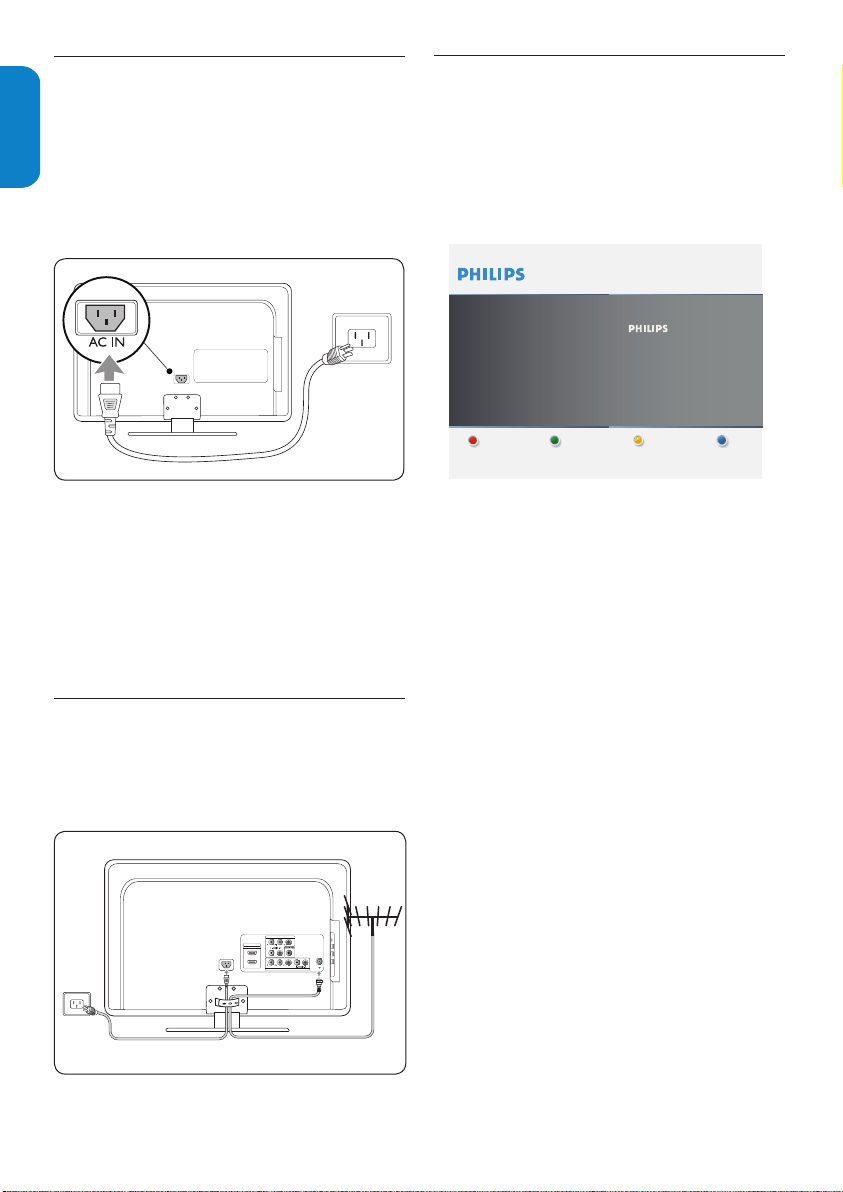
Connect the 4.5 AC power cord
Warning B
Verify that your voltage corresponds with
the voltage printed at the back of the TV.
Do not insert the AC power cord if the
voltage is different.
To connect the AC power cord
AV 1
75 Ω
HDMI 1
HDMI 2 / PC IN
AV 2
AV 1
75 Ω
HDMI 1
HDMI 2 / PC IN
AV 2
AV 1
75 Ω
HDMI 1
HDMI 2 / PC IN
AV 2
AV 1
75 Ω
HDMI 1
HDMI 2 / PC IN
AV 2
SATELLITE
CABLE
OR
Cable Receiver
Box
OR
CABLE
AV 1
75 Ω
HDMI 1
HDMI 2 / PC IN
AV 2
Cable Receiver Box
OR
OR
ANTENNA SATELLITE CABLE
Locate the power connector at the back of the 1.
TV. The location of the power connector varies
according to TV model.
Insert the AC power cord fully into the TV 2.
power connector.
Connect the AC power cord plug to the power 3.
outlet. Ensuring that the cord is tightly secured
at both ends.
4.6 Manage cables
Route your AC power cord, antenna cable and all
other device cables through the cable tie at the back
of the TV. It helps keep your cables tidy and easily
manageable.
AV 1
75 Ω
HDMI 1
HDMI 2 / PC IN
AV 2
AV 1
75 Ω
HDMI 1
HDMI 2 / PC IN
AV 2
4.7 Switch on the TV
Before you switch on the TV, check that the mains
cord is properly connected. Press POWER button
at the side of the TV, or press power button on
the remote control. The TV normally takes 10-15
seconds to start up and the following screen appears
the first time you turn on the TV.
Thank you for your purchase of this TV.
Please proceed with the following steps to set-up your TV. For the BEST
possible picture performance, contact your local Cable / Satellite signal
provider for High Definition signal options available in your area.
Next
Press the GREEN Next button on your remote to proceed.
Follow the on-screen instructions to select your
language and complete your TV setup. Installation
takes approximately 10 minutes.
Note D
If you connect your TV to a cable receiver box or
satellite set-top box, you do not need to install
channels. Press the red button on the remote
control to exit the channel installation stage of
the setup.
Loading ...
Loading ...
Loading ...