Loading ...
Loading ...
Loading ...
29
5
Supplies and user maintenance
TD CARTRIDGE REPLACEMENT
3
Install a new TD cartridge. To install the new cartridge, see page 12, INSTALLING
THE TD CARTRIDGE.
4
Close the front cover and then the side cover by pressing the round projections near
the side cover open button. The indicator will go out and the ready ( ) indicator
will light up.
When closing the covers, be sure to close the front cover securely and then
close the side cover. If the covers are closed in the wrong order, the covers
may be damaged.
DRUM CARTRIDGE REPLACEMENT
The useful life of the drum cartridge is approximately 18,000 copies. When the internal counter
reaches approximately 17,000 copies, the drum replacement required ( ) indicator will light
up indicating that replacement of the drum cartridge will be needed soon. For more information
on purchasing the drum cartridge, see OPTION AND SUPPLY PART NUMBERS AND
STORAGE on page 44. When the indicator begins to blink, the copier will stop operating until
the cartridge is replaced. Replace the drum cartridge at this time.
Do not remove the protective cover on the drum portion (black paper) of a new
drum cartridge before use. The cover protects the drum against external light.
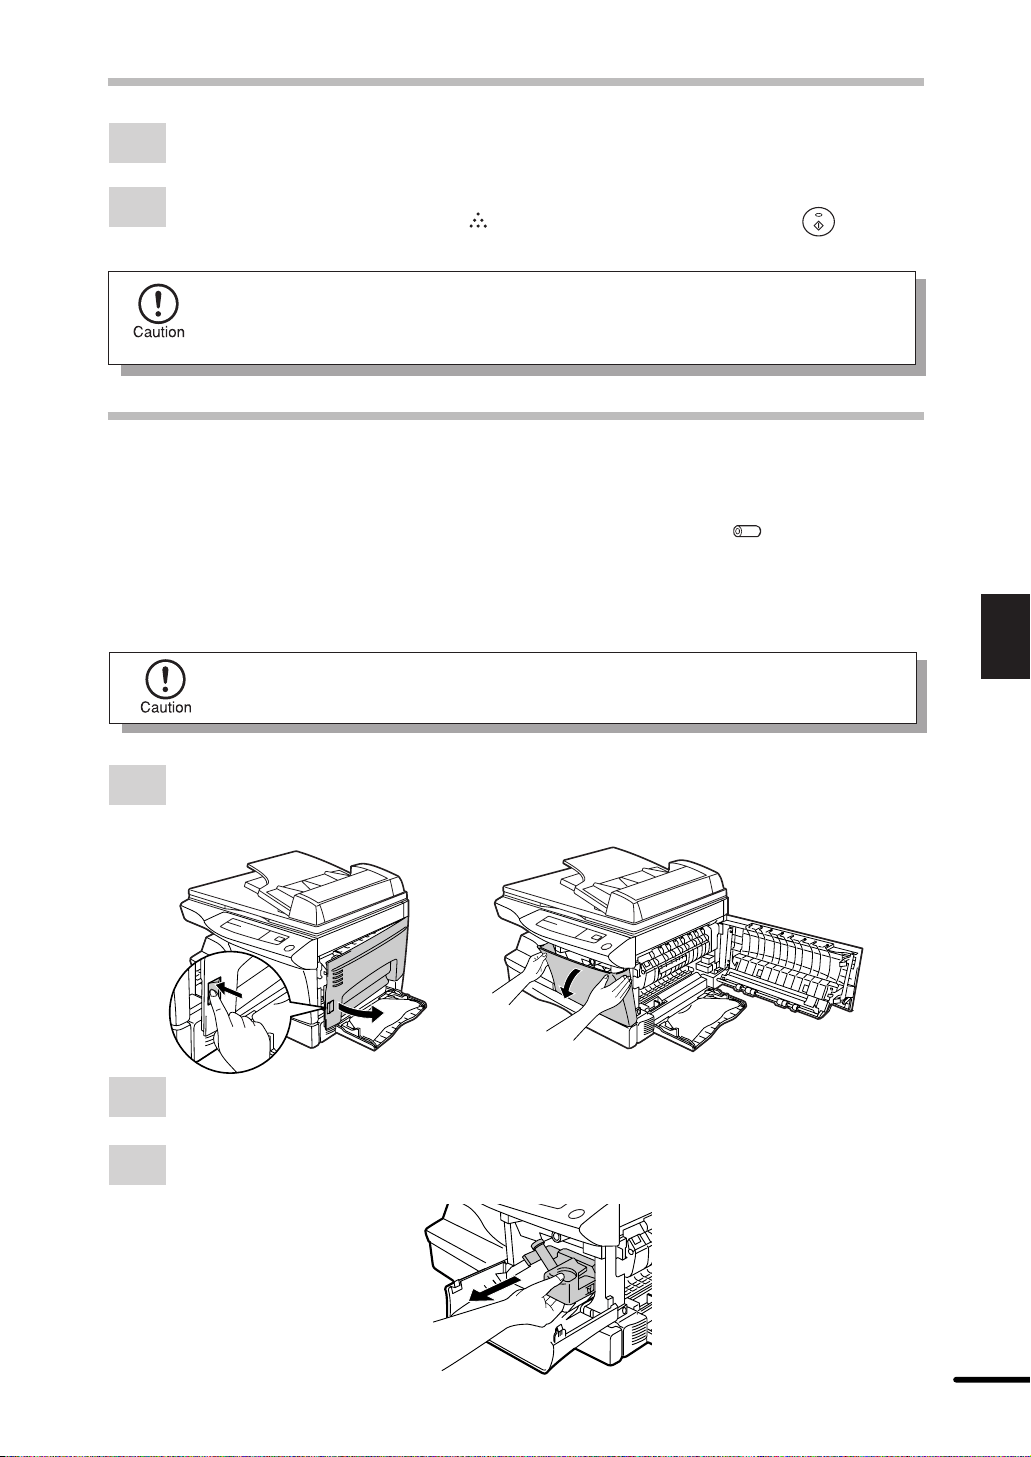
1
Ensure that the bypass tray is open and then open the side cover while pressing the
side cover open button.
Then, push gently on both sides of the front cover to open the cover.
2
Gently pull the TD cartridge out while pressing the lock release button. To remove the
TD cartridge, see page 28, step 2.
3
Hold the handle of the drum cartridge and gently pull the cartridge out. Dispose of the
old drum cartridge in accordance with local regulations.
Loading ...
Loading ...
Loading ...