Loading ...
Loading ...
Loading ...
20_Setting Up
Do not use without the molded end(Bulb) of the plastic tubing .
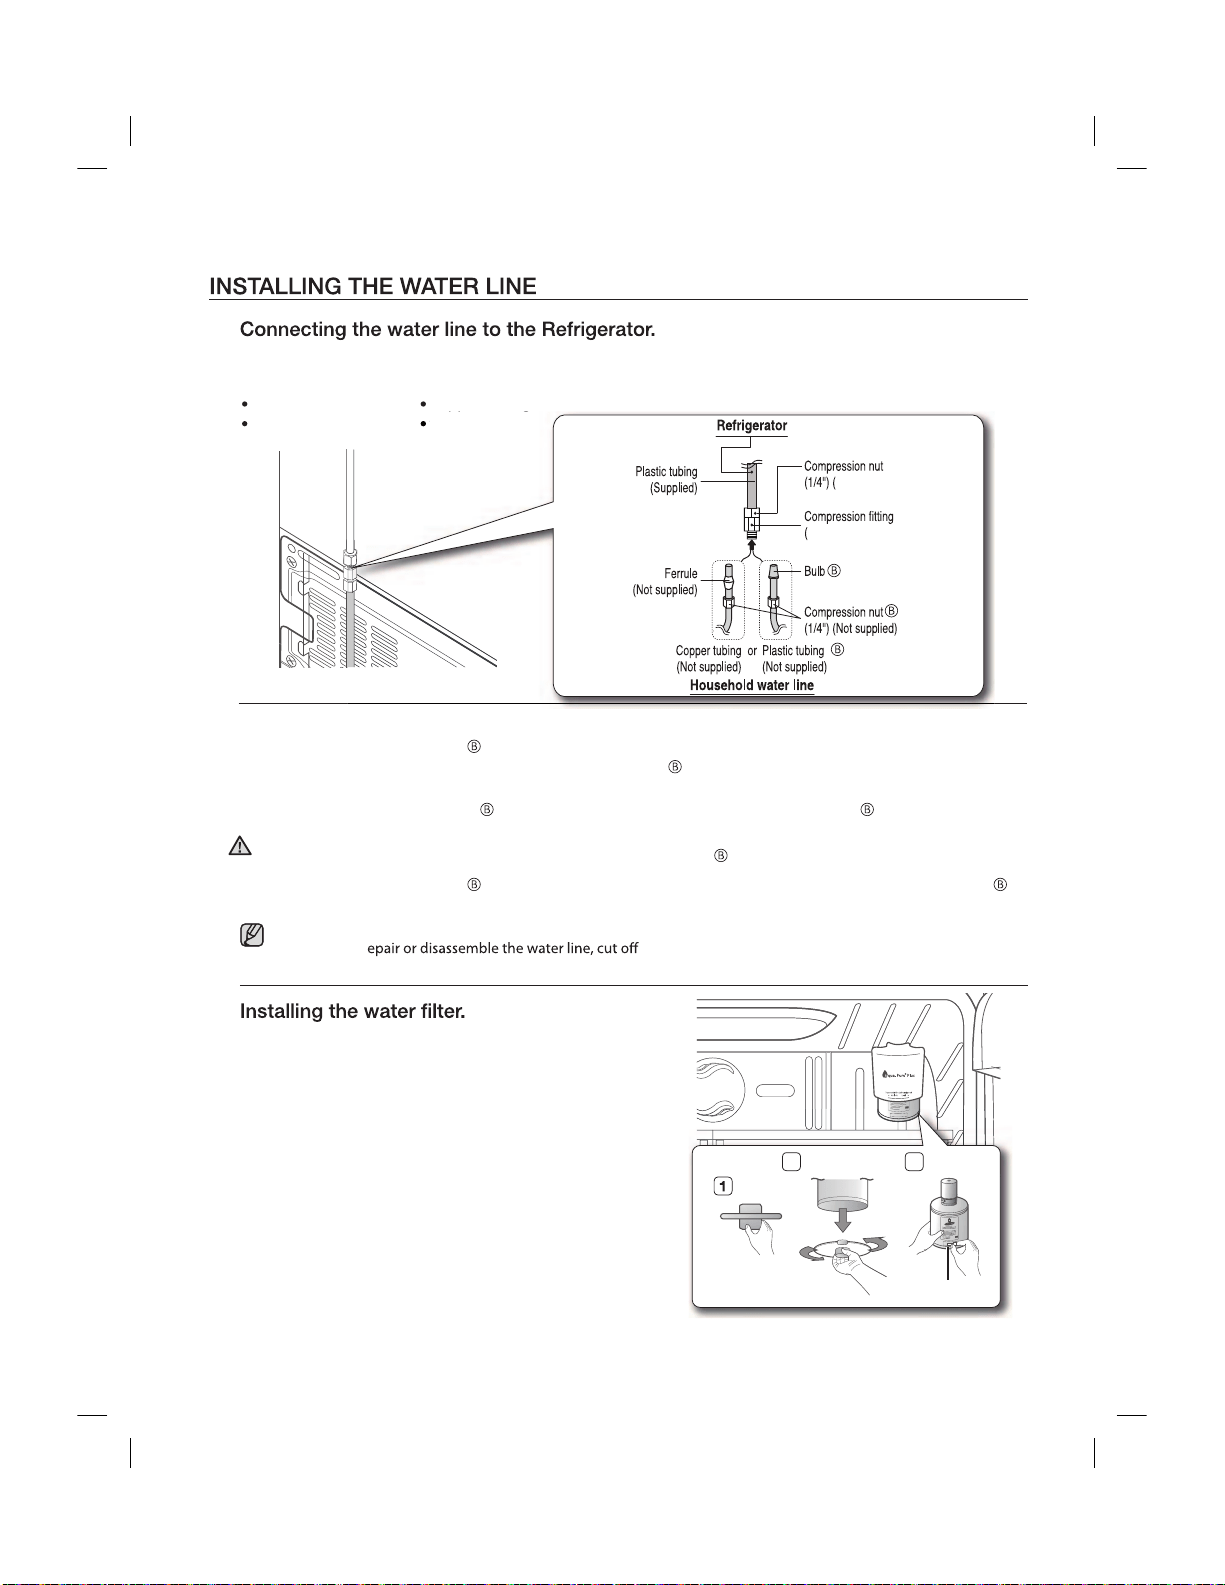
There are several items that you need to purchase to complete this connection. You
may find these items sold as a kit at your local hardware store.
Only connect the water line to a drinkable water source.
If you have to r 1/4“ of the plastic tubing to make sure you get a snug,
leak-free connection.
1/4” compression nut
plastic tubing
copper tubing
ferrule
2. Remove the fixed cap by turning it counter clockwise.
Keep the cap in a safe place for later use if you don’t
use the filter.
.
replacement indicator sticker on the filter as shown.
Place a sticker on the filter that dates six months in
the future. For example, if you install the water filter in
March, put the “SEP” sticker on the filter to remind you
to replace it in September. That way you’ll know when
it is time to replace the filter. Normally, a filter life is
about 6 months.
2 3
Sticker
(month indicator)
1. Tighten the compression nut onto the 1/4” compression fitting.
- If you are using copper tubing, slip the compression nut (not included) and ferrule (not included) on
copper tubing (not included) as shown.
- If you are using plastic tubing , insert the molded end(Bulb) of the plastic tubing into the
compression fitting.
2. Tighten the compression nut onto the compression fitting. Do not over-tighten the compression nut .
3. Turn water on and check for any leakage.
CAUTION
pp g
f
e
rr
u
l
e
Remove the protection cap by turning it counter clockwise.
Keep the cap in a safe place for later use if you don’t
use the filter.
.1
2 Remove the water filter from the box and put a
Assembled)
Assembled)
Loading ...
Loading ...
Loading ...