Loading ...
Loading ...
Loading ...
6
Freezer Leveling and Door Closing
Your freezer has 2 front adjustable legs — one on each side. The
back of the freezer rests on 2 fixed rollers. The base grille covers
the adjustable brake feet and roller assemblies located at the
bottom of the freezer below the freezer door. Before making any
adjustments, remove the base grille and move the freezer to its
final location.
Tools Needed: ¹⁄
4
" hex driver, Phillips-head screwdriver
1. Remove the base grille screws. Grasp the grille firmly and pull
it toward you. Open the freezer door to access the brake feet.
NOTE: To allow the freezer to roll more easily, raise the brake
feet by turning them counterclockwise. The front rollers will
be touching the floor.
2. Move the freezer to its final location.
3. Lower the brake feet by turning them clockwise, until the
rollers are off the floor and both brake feet are snug against
the floor. This keeps the freezer from rolling forward when
opening the freezer door.
IMPORTANT: If you need to make further adjustments
involving the brake feet, you must turn both brake feet the
same amount to keep the freezer level.
4. Make sure the door closes easily. If you are satisfied with the
door opening and closing, skip the next section. If, however,
the door does not close easily or the door pops open, adjust
the tilt.
To Adjust the Cabinet Tilt:
NOTE: Having someone push against the top of the freezer takes
some weight off the brake feet. This makes it easier to turn them.
■ Open the freezer door. Use a ¹⁄
4
" hex driver to turn both brake
feet clockwise the same amount. This will raise the front of
the freezer. It may take several turns to allow the door to
close more easily.
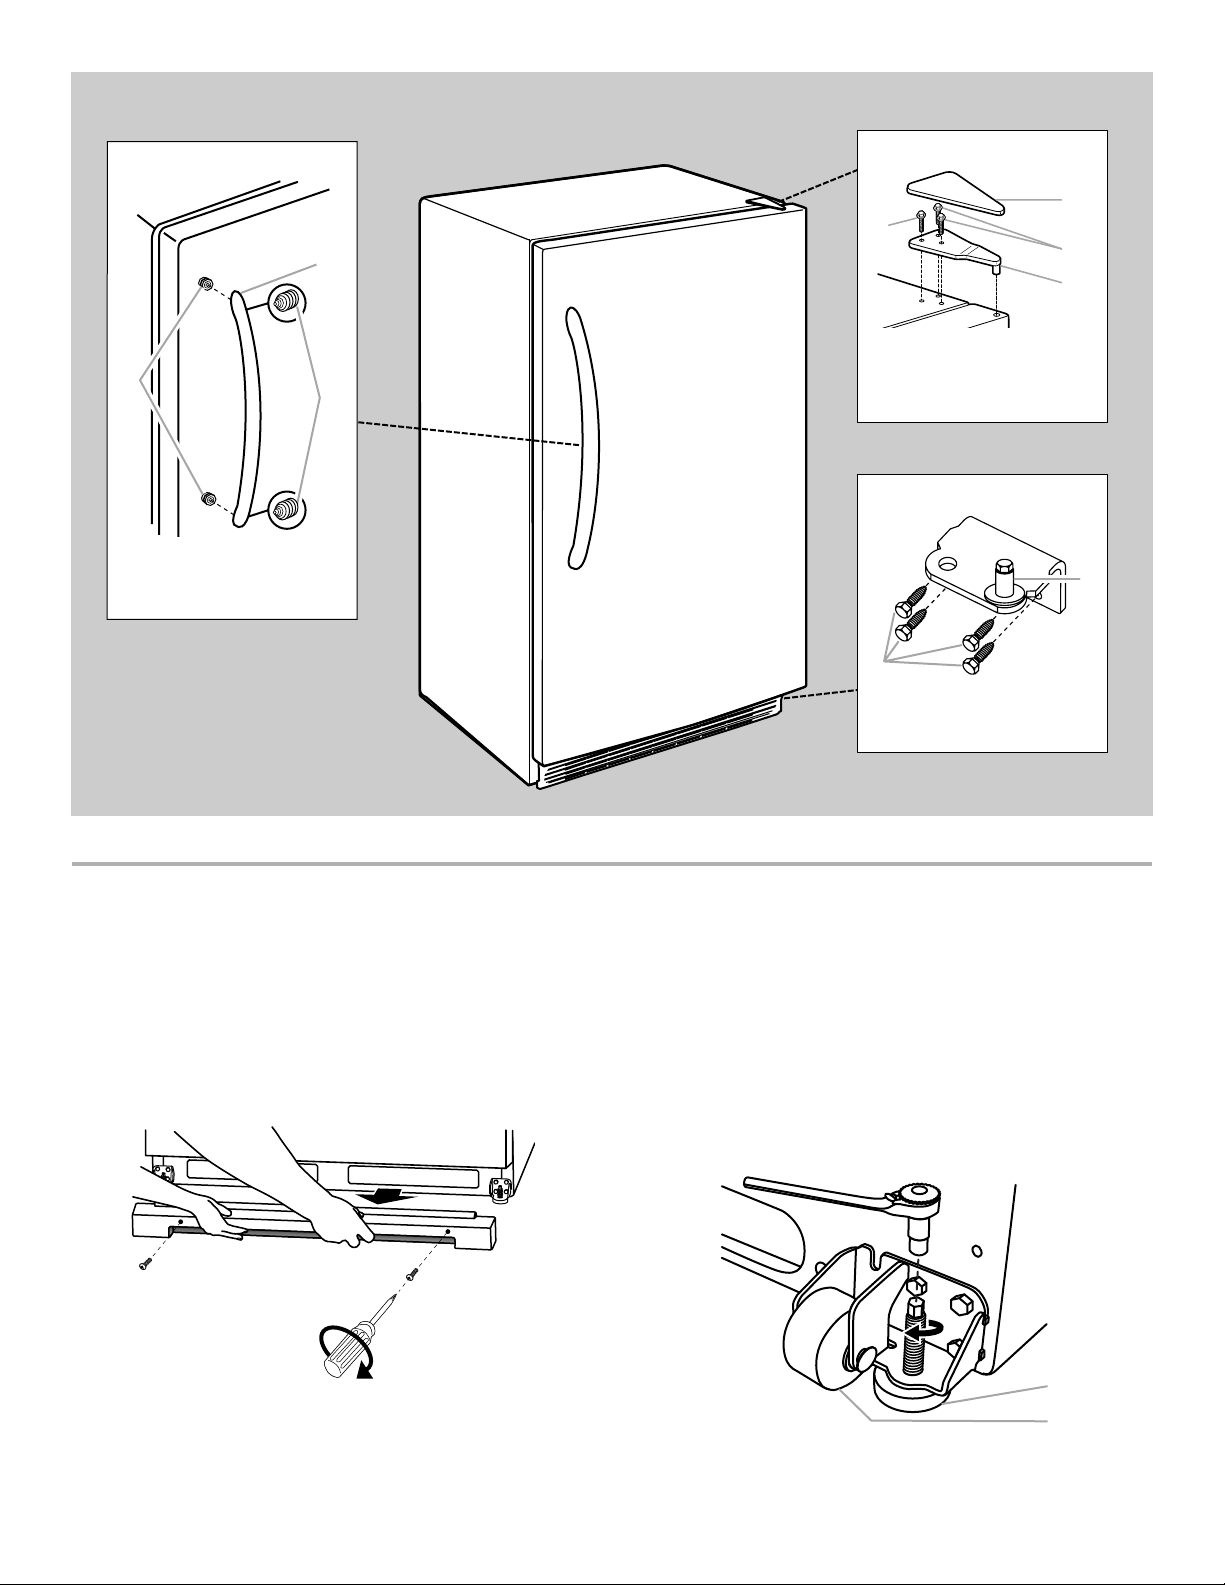
A. Brake foot
B. Front roller
A. Grommet
B. Handle
C. Setscrews
A
B
C
Handle
Door Removal and Replacement
Top Hinge
A. Top Hinge Cover
B.
5
/
16
"
Hex-Head Hinge Screws
C. Top Hinge
A
B
B
C
Bottom Hinge
A. Hinge Pin
B.
3
/
8
"
Hex-Head Hinge Screws
A
B
A
¹⁄₄"
B
Loading ...
Loading ...
Loading ...