Loading ...
Loading ...
Loading ...
2Completing First-Time Setup
The first time you turn on the Display, you can chose how to
setup your VIZIO SmartCast™ Display.
Complete Setup with the VIZIO SmartCast
™
App (recommended):
Download the free VIZIO SmartCast™ App on your smartphone
or tablet to set up your VIZIO display. Use your phone to power
on your display, adjust the volume, switch inputs, play and
control streaming content from your iOS or Android device.
Go to http://www.vizio.com/smartcastapp to get started.
-OR-
Complete Setup with the IR Remote:
Use the included IR remote to manually set up your display.
The VIZIO SmartCast™ App is still VIZIO’s recommended setup
method. Please note that a mobile device (not included) is still
required to cast content from apps like Netix and YouTube.
Before you begin the first-time setup:
• Your Display should be installed and the power cord should
be connected to an electrical outlet.
• Your devices should be connected.
• If you have a wireless network, have the network password
ready.
• If you are connecting to your network with an Ethernet cable,
connect it to the Ethernet port on the Display.
Need help installing the display?
Refer to the printed Quick Start Guide for detailed instructions on
how to install your new E-Series display. You can also nd a digital
copy on support.vizio.com
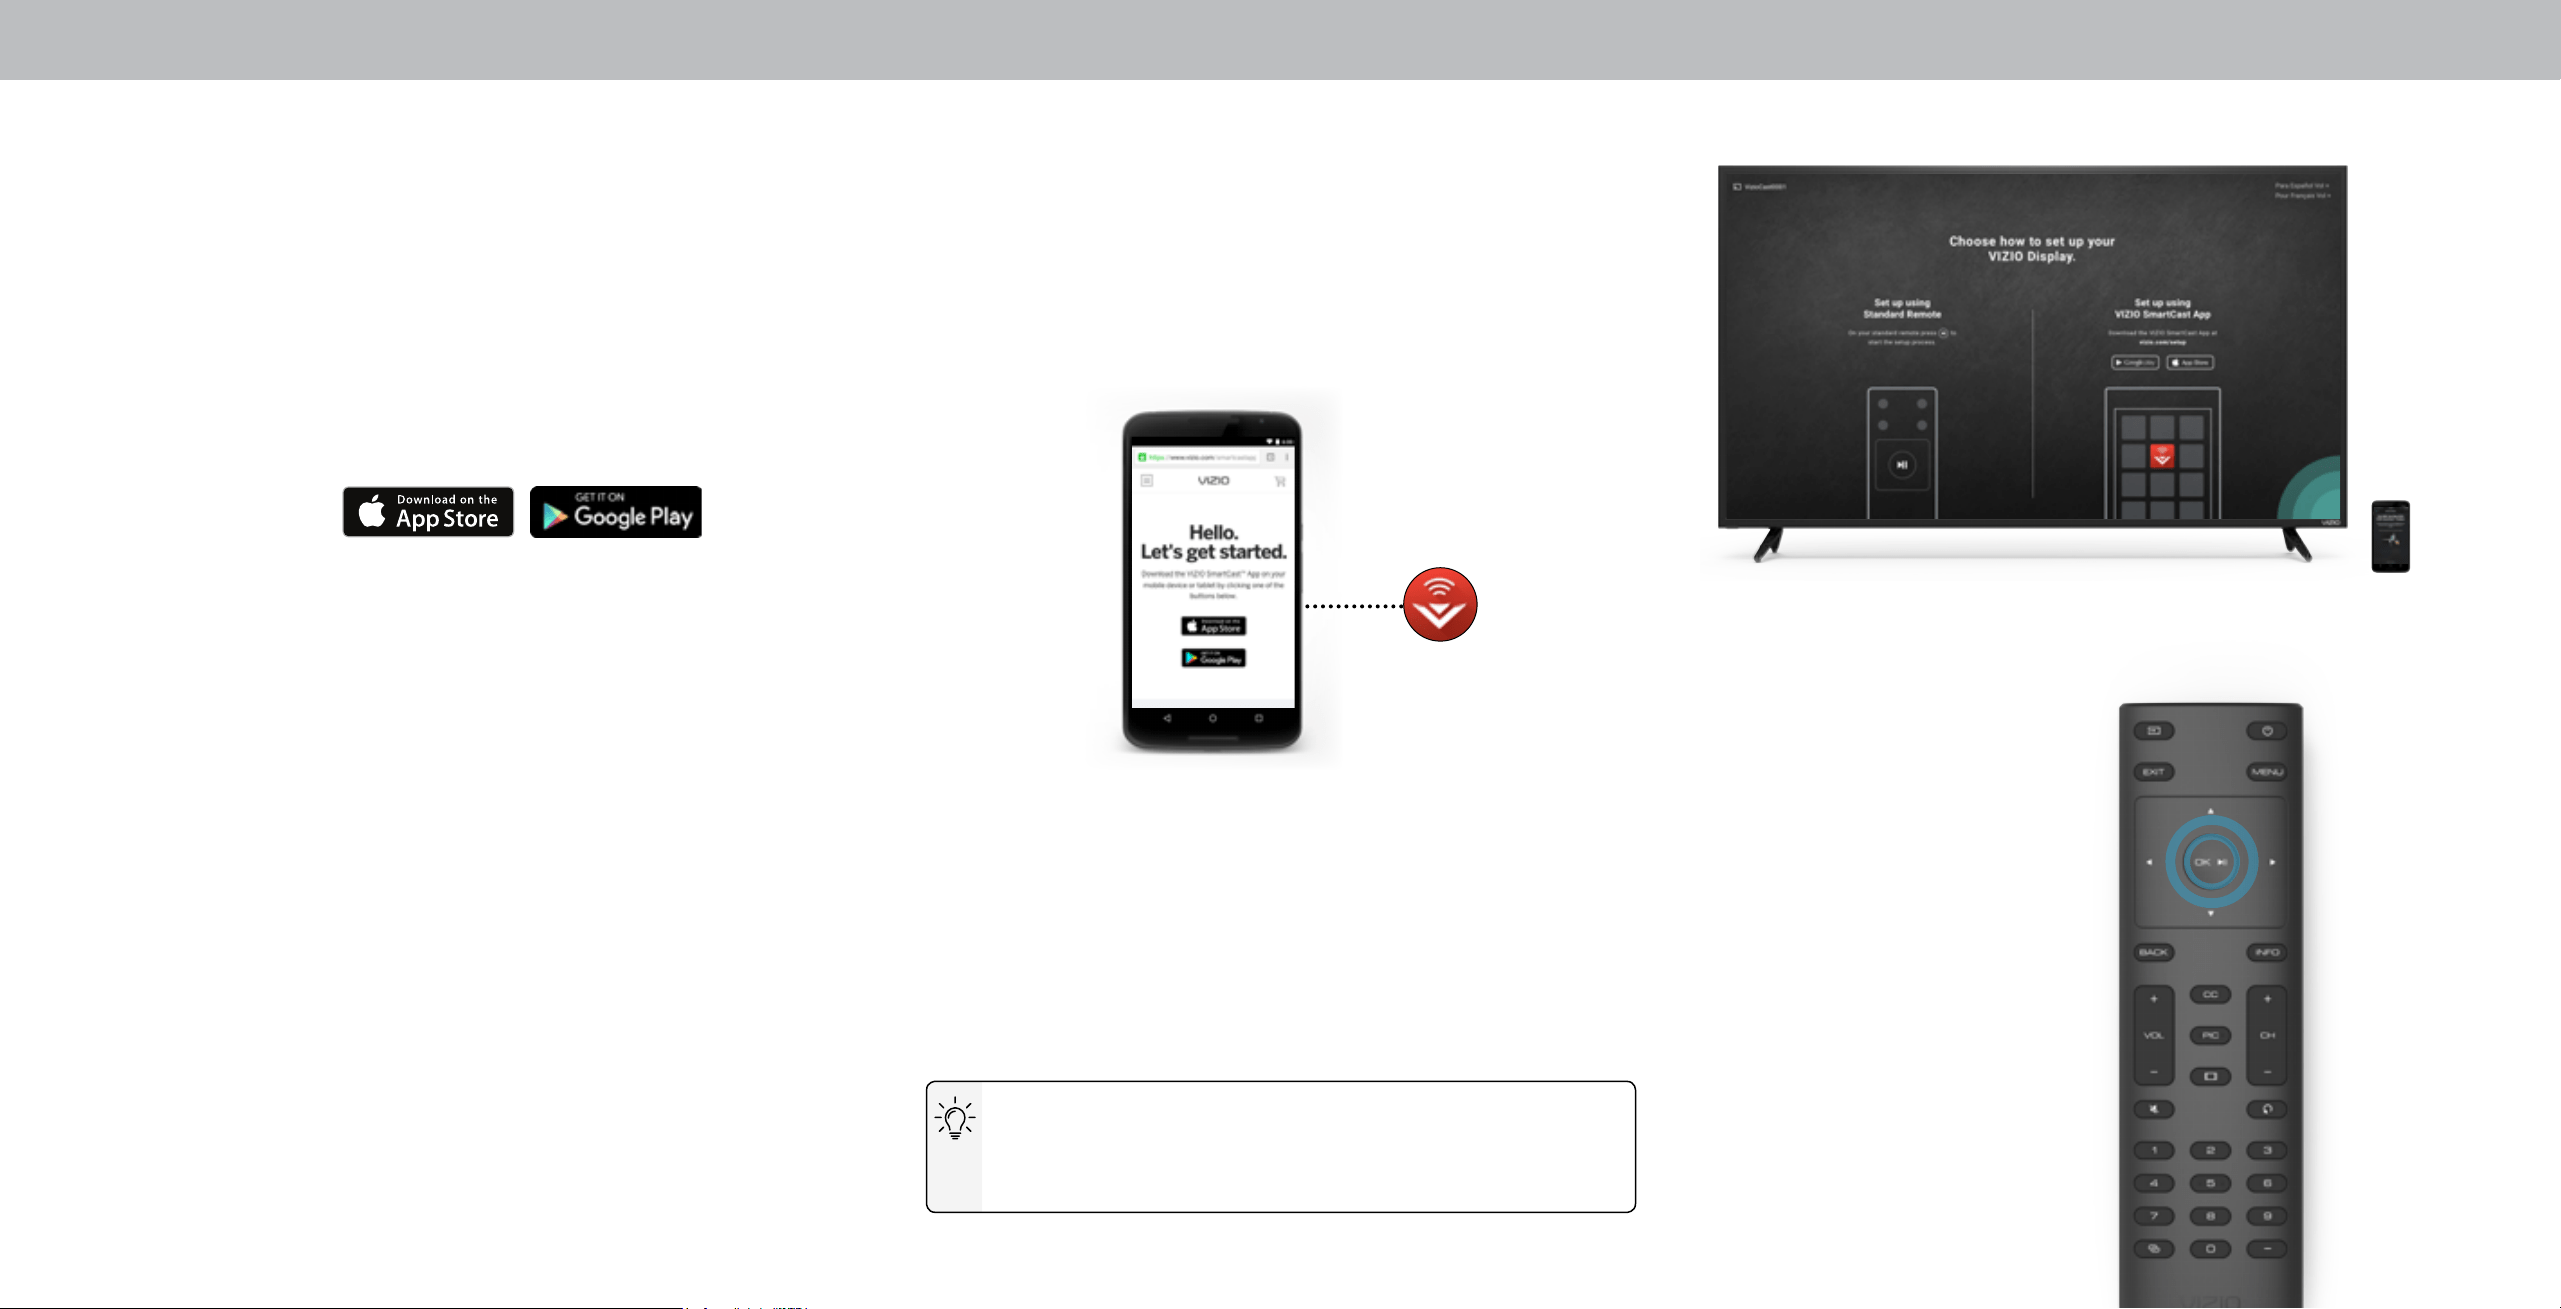
Setup with the VIZIO SmartCast™ App
1. Download the free VIZIO SmartCast™ App on to your mobile
device and launch the app.
2. Pair your mobile device to your display.
3. Follow the instructions your mobile device and display screen to
complete setup.
iOS Device Paring:
a. Select Get Started.
b. Hold your mobile device next to the VIZIO logo on your Display.
Android Device Pairing:
Note the Wi-Fi setup name on the top corner of your Display.
a. Select Get Started and Select your preferred language.
b. Select your Display name from the list shown on your device.
Setup with the IR Remote
1. Press the OK/Play key on your IR
remote during the initial setup
screen.
2. Use the Arrow Keys and the OK/
Play button to select and conrm
settings.
3. Follow the instruction on the
screen to complete setup.
Note: The images shown here are for illustrative purposes only and may be subject to change. The actual on-screen image and text may vary, depending on the model.
10
Loading ...
Loading ...
Loading ...