
Loading ...
Loading ...
Loading ...
Emergencies
–
L
e
v
er the gr
oo
ve with a screwdriver
›››
Fig. 57 (arrow). Next, unclip the clips lo-
cated on the edge of the grille, pulling on it.
–
Remove the 3 screws
›››
Fig. 58
1
and re-
mo
v
e the f
og light.
–
R
emo
ve the bulb connector
2
.
–
Turn the bulb holder
3
to the left and pull.
–
Remove the bulb by pressing on it and turn-
ing it anticl
ockwise at the same time
.
–
R
epl
ace the bulb
, making sure that the fix-
ing guides are in the right position and then
press it and turn it clockwise
–
To install the headlight go back through the
above steps in reverse.
–
Check that the bulb works properly.
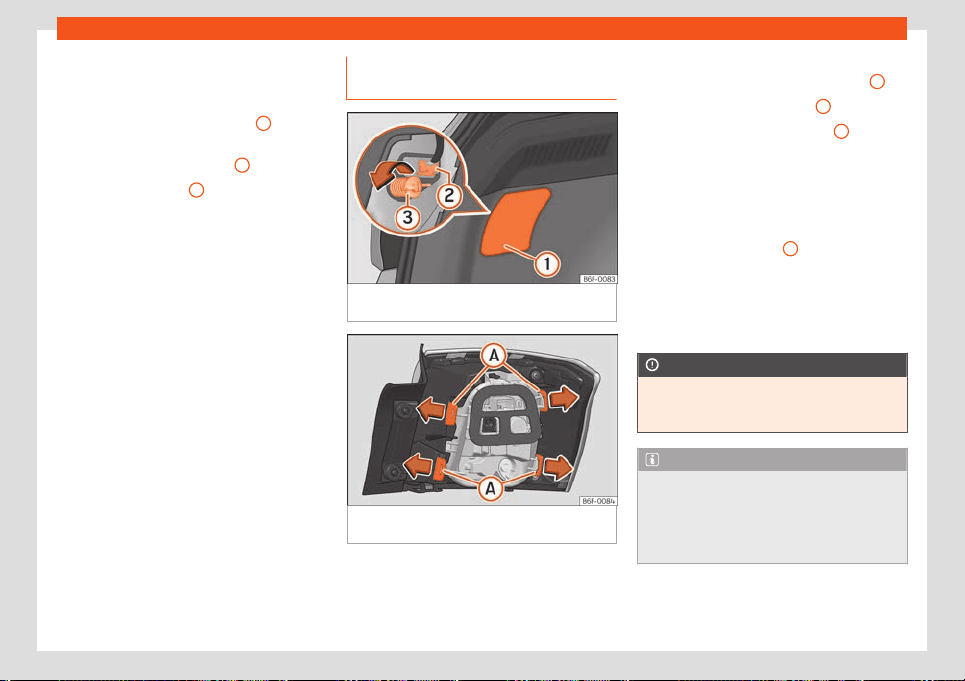
Tail light bulbs located in the body-
work
Fig. 59
Luggage compartment: access to the
bolt securing the t
ail light unit.
Fig. 60
Retaining tabs on reverse side of tail
light.
Follow the steps indicated:
–
Check which of the bulbs is defective.
–
Open the rear lid.
–
R
emo
v
e the lid, l
e
vering the flat side of a
screwdriver into the recess
›››
Fig. 59
1
.
–
Remove the bulb connector
2
.
–
Unscrew the light securing bolt
3
by hand
or using a scr
e
w
driv
er
.
–
Remove the light from the body, gently pull-
ing it toward you, and place on a clean,
smooth surface.
–
Remove the bulb holder unlocking the re-
taining tabs
›››
Fig. 60
A
.
–
Change the damaged bulb.
–
To refit follow the steps in reverse order, tak-
ing special car
e when fitting the bulb hol
d-
er
. The securing t
abs must click int
o place.
CAUTION
Take care when removing the rear light unit
to make sure there is no damage t
o the
paintwork or any of its components.
Note
●
Make sure you have a soft cloth r
eady to
place under the glass on the rear light unit,
to avoid any scratches.
●
For LED lights, you can only change the
turn signal and reverse light bulbs.
60
Loading ...
Loading ...
Loading ...