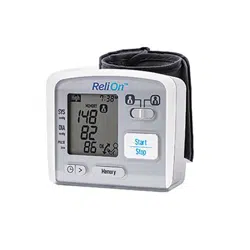
Documents: Go to download!
- Owner's manual - (English)
- UNIT
- DISPLAY
- BATTERY INSTALLATION
- TAKING A MEASUREMENT
- USING THE MEMORY FUNCTION
- CARE AND MAINTENANCE
- ERROR INDICATORS
- TROUBLESHOOTING TIPS
Table of contents
Wrist Blood Pressure Monitor User Manual
UNIT
Main Unit:
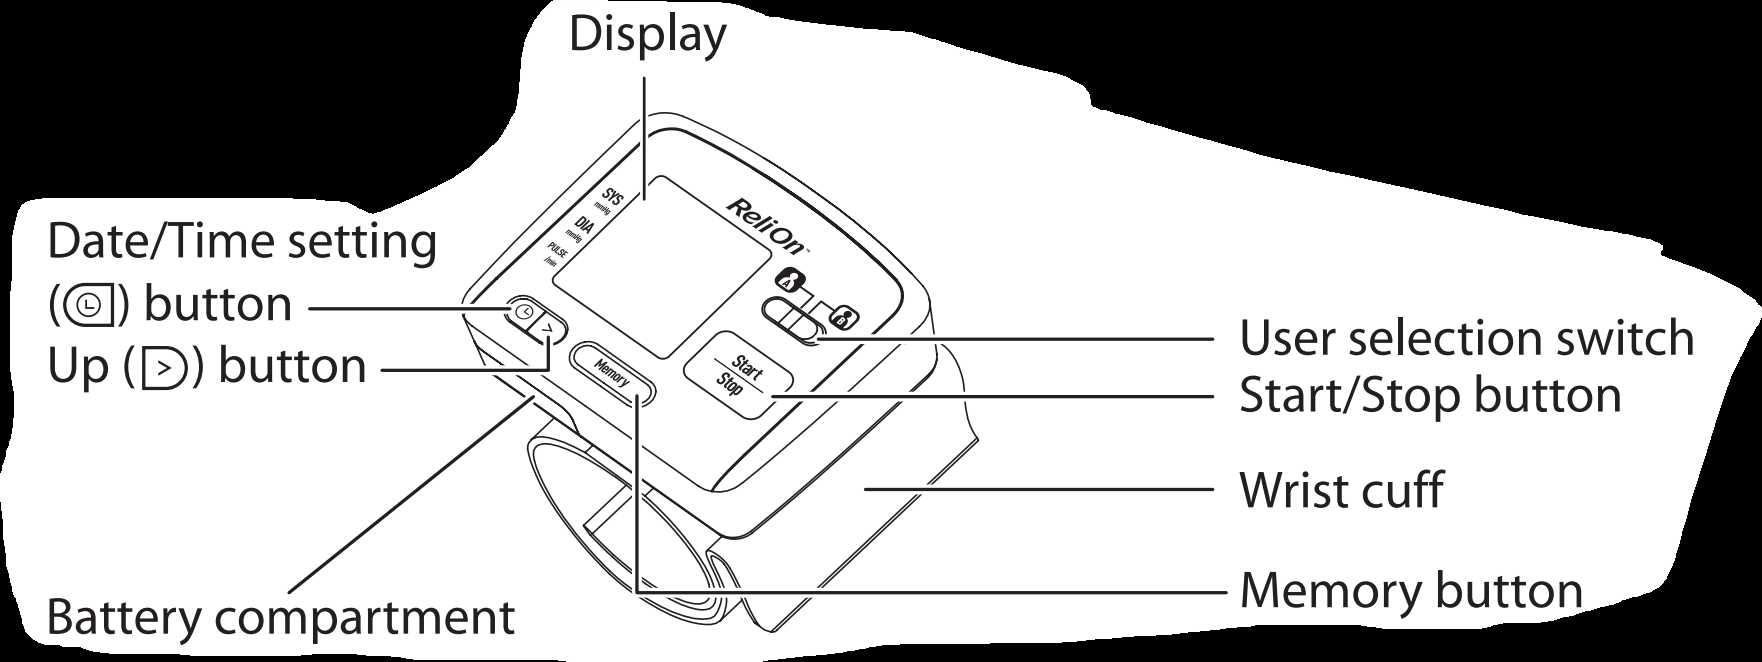
Components:
2 “AAA” Alkaline Batteries | 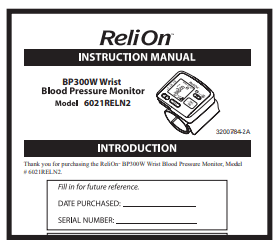 Instruction Manual | 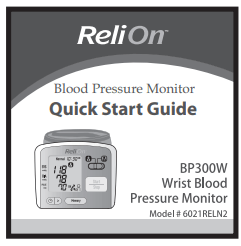 Quick Start Guide |
DISPLAY
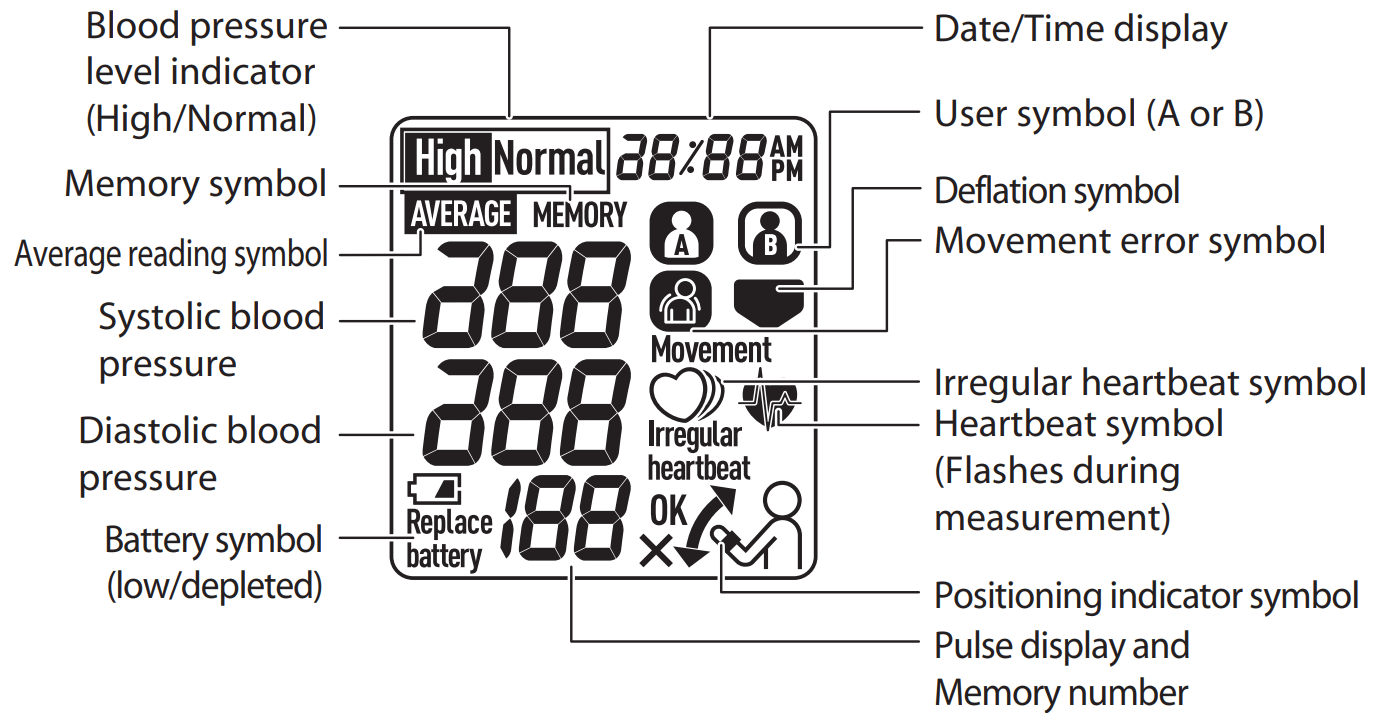
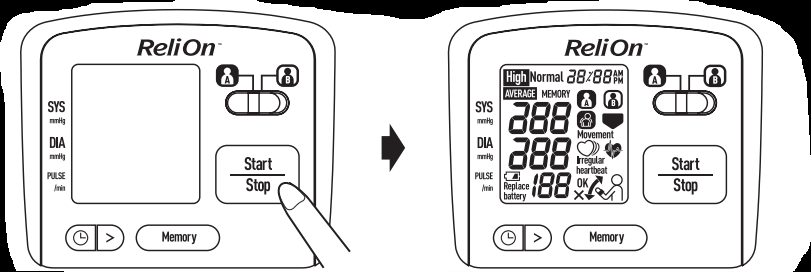
DISPLAY SYMBOL
IRREGULAR HEARTBEAT SYMBOL 
When the monitor detects an irregular rhythm two or more times during the measurement, the Irregular Heartbeat Symbol will appear on the display with the measurement values.
An irregular heartbeat rhythm is defined as a rhythm that varies by 25% less or 25% more than the average rhythm detected while the monitor is measuring the systolic and diastolic blood pressure. If the irregular heartbeat symbol displays with your measurement values, we recommend you consult your physician. Follow the directions of your doctor. | 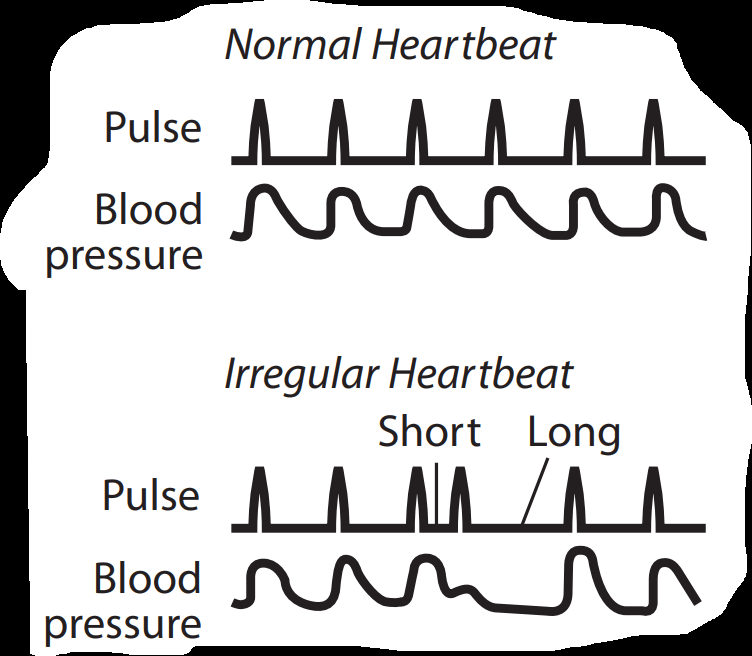 |
MOVEMENT ERROR SYMBOL 
The Movement Error Symbol is displayed if you move your body during the measurement. Please remove the wrist cuff, and wait 2-3 minutes. Re-apply the wrist cuff and take another measurement.
AVERAGE READING SYMBOL 
The Average Reading Symbol is displayed when you press and hold the Memory button for more than 3 seconds. The most recent average reading appears on the display screen.
HEARTBEAT SYMBOL 
The Heartbeat symbol flashes on the display at every heartbeat during the measurement.
BLOOD PRESSURE LEVEL INDICATOR 
If your Systolic Blood Pressure is 135 mmHg or above and/or the Diastolic Blood Pressure is 85 mmHg or above, the High blood pressure level indicator ( If the measurements are within the standard range, the Normal blood pressure level indicator ( | 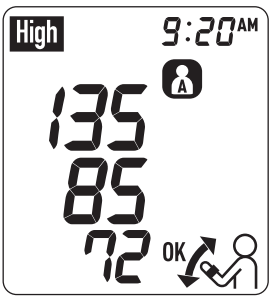 |
2013 ESH/ESC Guidelines for the management of arterial hypertension
Definitions of hypertension by office and home blood pressure levels
| Office | Home | |
| Systolic Blood Pressure | ≥ 140 mmHg | ≥ 135 mmHg |
| Diastolic Blood Pressure | ≥ 90 mmHg | ≥ 85 mmHg |
These are from statistical values for blood pressure.
BATTERY INSTALLATION
| 1. Press the indicator on two sides of the battery cover and slide the cover off in the direction of the arrow. | 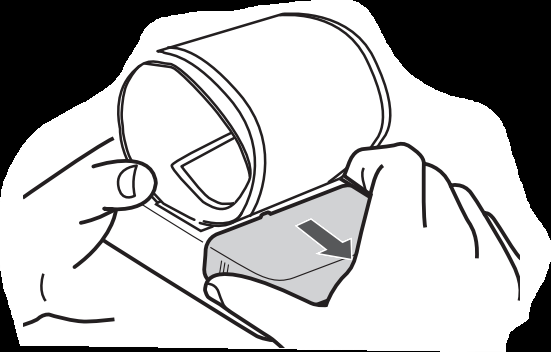 |
| 2. Install 2 “AAA” size batteries so the + (positive) and - (negative) polarities match the polarities of the battery compartment as indicated. | 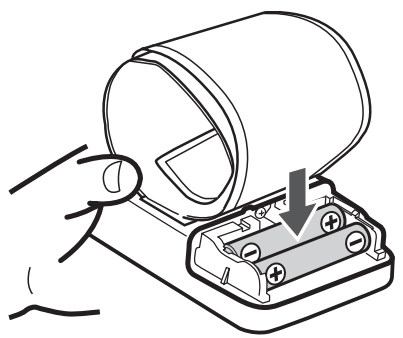 |
| 3. Replace the battery cover. | 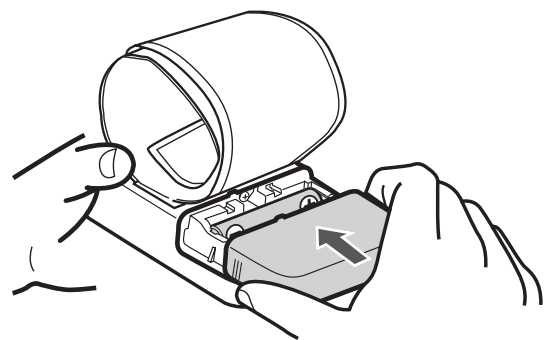 |
NOTES:
- When the depleted battery symbol (
 ) appears on the display, turn the monitor off, then replace all batteries at the same time. Long life alkaline batteries are recommended.
 - Turn the unit off before replacing the batteries. If the batteries are removed while the unit is still on, the date and time will be reset to that of the previous use. The measurement values are not deleted.
- When the batteries are replaced, you may need to reset the date and time. If “-:--” appears on the display, refer to “Setting the Date and Time”.
- The batteries included with the device may have a shorter life.
TAKING A MEASUREMENT
The monitor is designed to store the blood pressure and the pulse rate in the memory for two people (user A or user B) every time a measurement is completed.
1. Sit comfortably with the elbow of the arm being measured resting on a table and elevate cuff wrist to heart level.

2. Select the user ID ( A or B).
3. Press the Start/Stop button. All symbols appear on the display
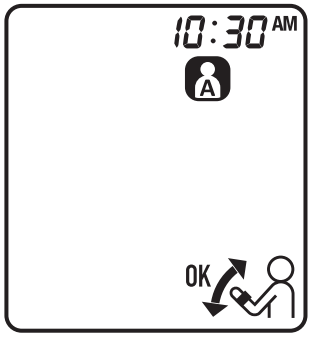
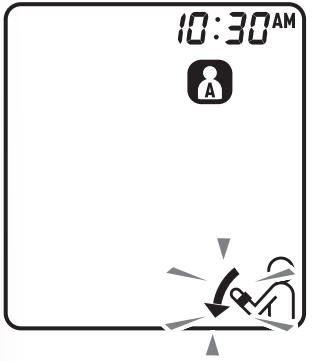
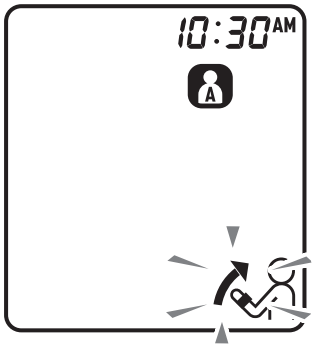
The monitor has a built-in positioning indicator that is used as an aid in determining if the monitor is at the correct height. Due to difference in individual size and physique, this feature may not be helpful in all cases and you may wish to turn off this feature. If you feel the position of the wrist according to positioning indicator's guidance does NOT match your heart height, please turn off this feature.
NOTE: Even if the device is not positioned properly, after 5 seconds the monitor will still start the measurement and the wrist cuff will start to inflate.
| The monitor is in proper position. | The monitor is higher than the heart and needs to be lowered. | The monitor is lower than the heart and needs to be raised. |
 |  |  |

As the cuff inflates, the monitor automatically determines your ideal inflation level. This monitor detects your blood pressure and pulse rate during inflation. The Heartbeat Symbol ( ) flashes at every heartbeat. Remain still and do not move until the entire measurement process is completed.
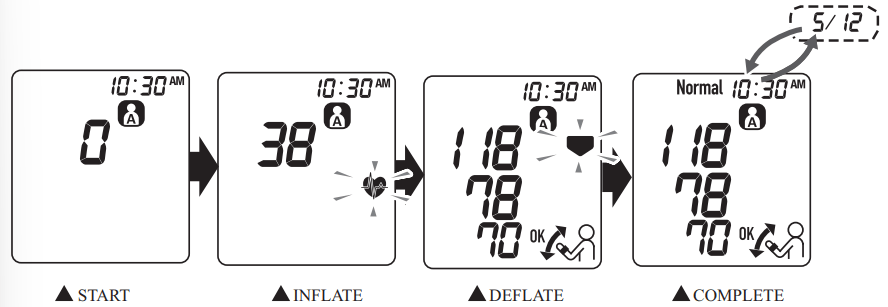
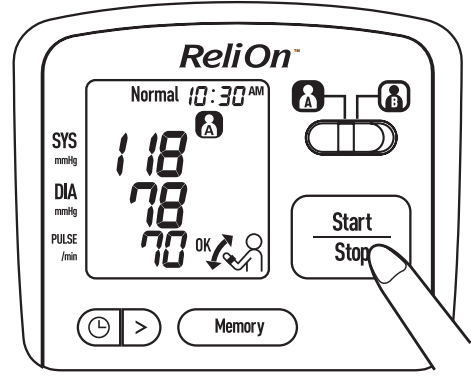
4. Press the Start/Stop button to turn the monitor off.
NOTES:
|  |
USING THE MEMORY FUNCTION
The monitor automatically stores the results up to 90 sets for each user (A and B). It can also calculate an average reading based on the last 3 measurement values taken within 10 minutes.
TO VIEW THE MEASUREMENT VALUES STORED IN MEMORY
1. Select the user ID (A or B).
2. Press the Memory button to display the set of measurement values.
3. Press the Memory button repeatedly to view the values from the more recent to the oldest.
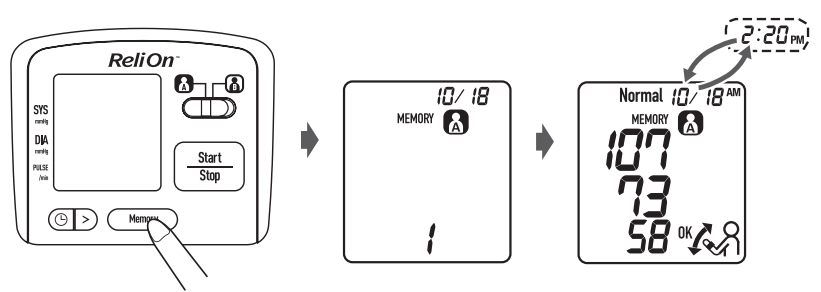
NOTES:
- The memory number appears for a second before the pulse rate is displayed. The newest set is number “1”.
- If the positioning indicator is set to “on” before the measurement, the positioning indicator symbol displayed with the measurement values.
- If the memory is full, the monitor will delete its oldest value.
- The date and time are alternately displayed with the measurement values.
| 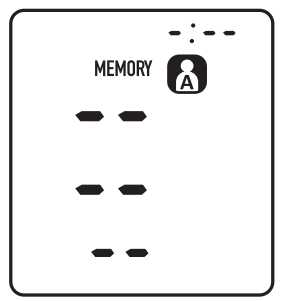 |
4. Press the Start/Stop button to turn the monitor off.
TO VIEW THE AVERAGE READING
1. Select the user ID (A or B).
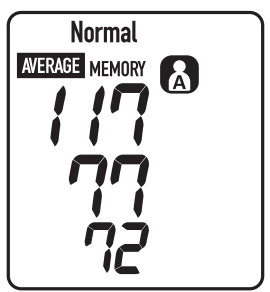
2. While display off or just completing a measurement, press and hold the Memory button for more than 3 seconds.
NOTES:
- If the previous measurement was taken without setting the date and time, the average reading is not calculated.
- If two sets of measurement values are stored in the memory for the 10 minute period, the average is based on the two sets of measurement values. If only one set of measurement values is stored, this is displayed as the average.
TO DELETE ALL VALUES IN THE MEMORY
The values stored in the memory are deleted by user ID.
You cannot partially delete values stored in the memory. All values for the user you select will be deleted.
1. Select the user ID (A or B).
2. Press the Memory button to turn the monitor on.
3. When the memory symbol ( ) appears, while pressing and holding the Memory button, press the Start/Stop button for two seconds to delete all values in the memory.
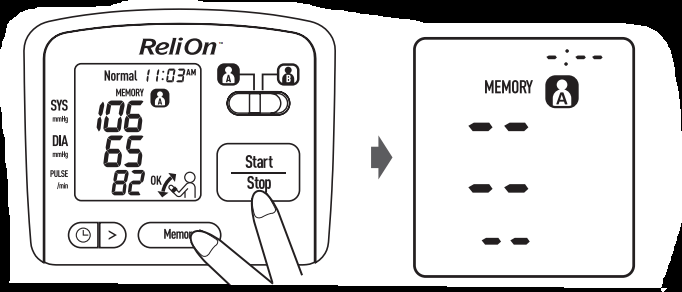
4. Press the Start/Stop button to turn the monitor off.
NOTE: The monitor will automatically turn off after 2 minutes.
CARE AND MAINTENANCE
To keep your digital blood pressure monitor in the best condition and protect the unit from damage, follow the directions listed below:
- Do not forcefully bend the cuff. Do not fold tightly.
- Clean the monitor with a soft dry cloth.
- Do not use any abrasive or harsh cleaners such as bleach.
- Do not attempt to clean the cuff.
CAUTION
- Do not submerge the device or any of the components in water. Do not subject the monitor to extreme hot or cold temperatures, humidity or direct sunlight.
- Store the device and the components in a clean, safe location.
- Do not subject the monitor to strong shocks, such as dropping the unit on the floor.
Remove the batteries if the unit will not be used for three months or longer. Always replace all the batteries with new ones at the same time.
Use the unit in a manner consistent with the instructions provided in this manual.
CAUTION
- Use only authorized parts and accessories. Parts and accessories not approved for use with the device may damage the unit.
- Changes or modification not approved by the manufacturer will void the user warranty. Do not disassemble or attempt to repair the unit or components.
ERROR INDICATORS
SYMBOL | CAUSE | CORRECTION |
|---|---|---|
 | Irregular heartbeats are detected. | Remove the arm cuff. Wait 2-3 minutes and then take another measurement. Repeat the steps in “Taking a Measurement”. If this error continues to appear, contact your physician. |
 | Movement during measurement. | Remain still and do not talk during the measurement. Carefully read and repeat the steps in “Taking a Measurement”. |
| Batteries are low. | Recommend to replace the batteries with new ones ahead of time. Refer to “Battery Installation”. |
 | Batteries are depleted. | Replace the two batteries. Refer to “Battery Installation”. |
 | Wrist cuff not applied correctly. | Apply the wrist cuff correctly. Refer to “Applying the Wrist Cuff”. |
 | Movement during measurement. | Do not hold the wrist cuff. Remain still and do not talk during measurement. Refer to “Taking a Measurement”. |
 | ||
 | Wrist cuff not applied correctly or movement during measurement. | Apply the wrist cuff correctly. Refer to “Applying the Wrist Cuff ”. Remain still and do not talk during measurement. Refer to “Taking a Measurement”. |
 | Arm position changed during measurement. | Remain still until the measurement is complete. Refer to “Taking a Measurement”. |
 | Device error. | Contact Customer Service. |
TROUBLESHOOTING TIPS
| PROBLEM | CAUSES AND SOLUTIONS |
|---|---|
| No power. No display appears on the unit. | Replace both batteries with new ones at the same time. Check the battery installation for proper placement of the battery polarities. |
| Measurement values appear too high or too low | Blood pressure varies constantly. Many factors including stress, time of day, how you wrap the cuff, may affect your blood pressure. Review the sections “Before Taking a Measurement” and “Taking a Measurement”. |
See other models: BP4350 BP7350 PMLLPAD AC-009-UA-C BP785N

 ) will display when the measurement value is displayed.
 ) will display.
