Loading ...
Loading ...
Loading ...
Setting Oven
Controls
FEATURE OVERVIEW
Searing Grill
STAR'IF 1 2
4 5
7 8
O
3
6
9
SEARING GRILL
The Searing Grill provided with your new range allows you to grill food in the oven,
Do not use the Searing Grill without the broiler pan and insert provided with your range. The broiler pan and
its insert allow dripping fat to drain and be kept away from the high heat of the broiler. Do not use Searing Grill on
the cooktop. The Searing Grill is not designed for use on the cooktop. Doing so may result in a fire.
Ftl_l_ Should an oven fire occur, leave the oven door closed and turn off the oven. If the fire continues, throw
baking soda on the fire or use a fire extinguisher. DO NOT put water or flour on the fire, Flour may be explosive.
INSTRUCTIONS PUSH DISPLAY
To use the Searing Grill
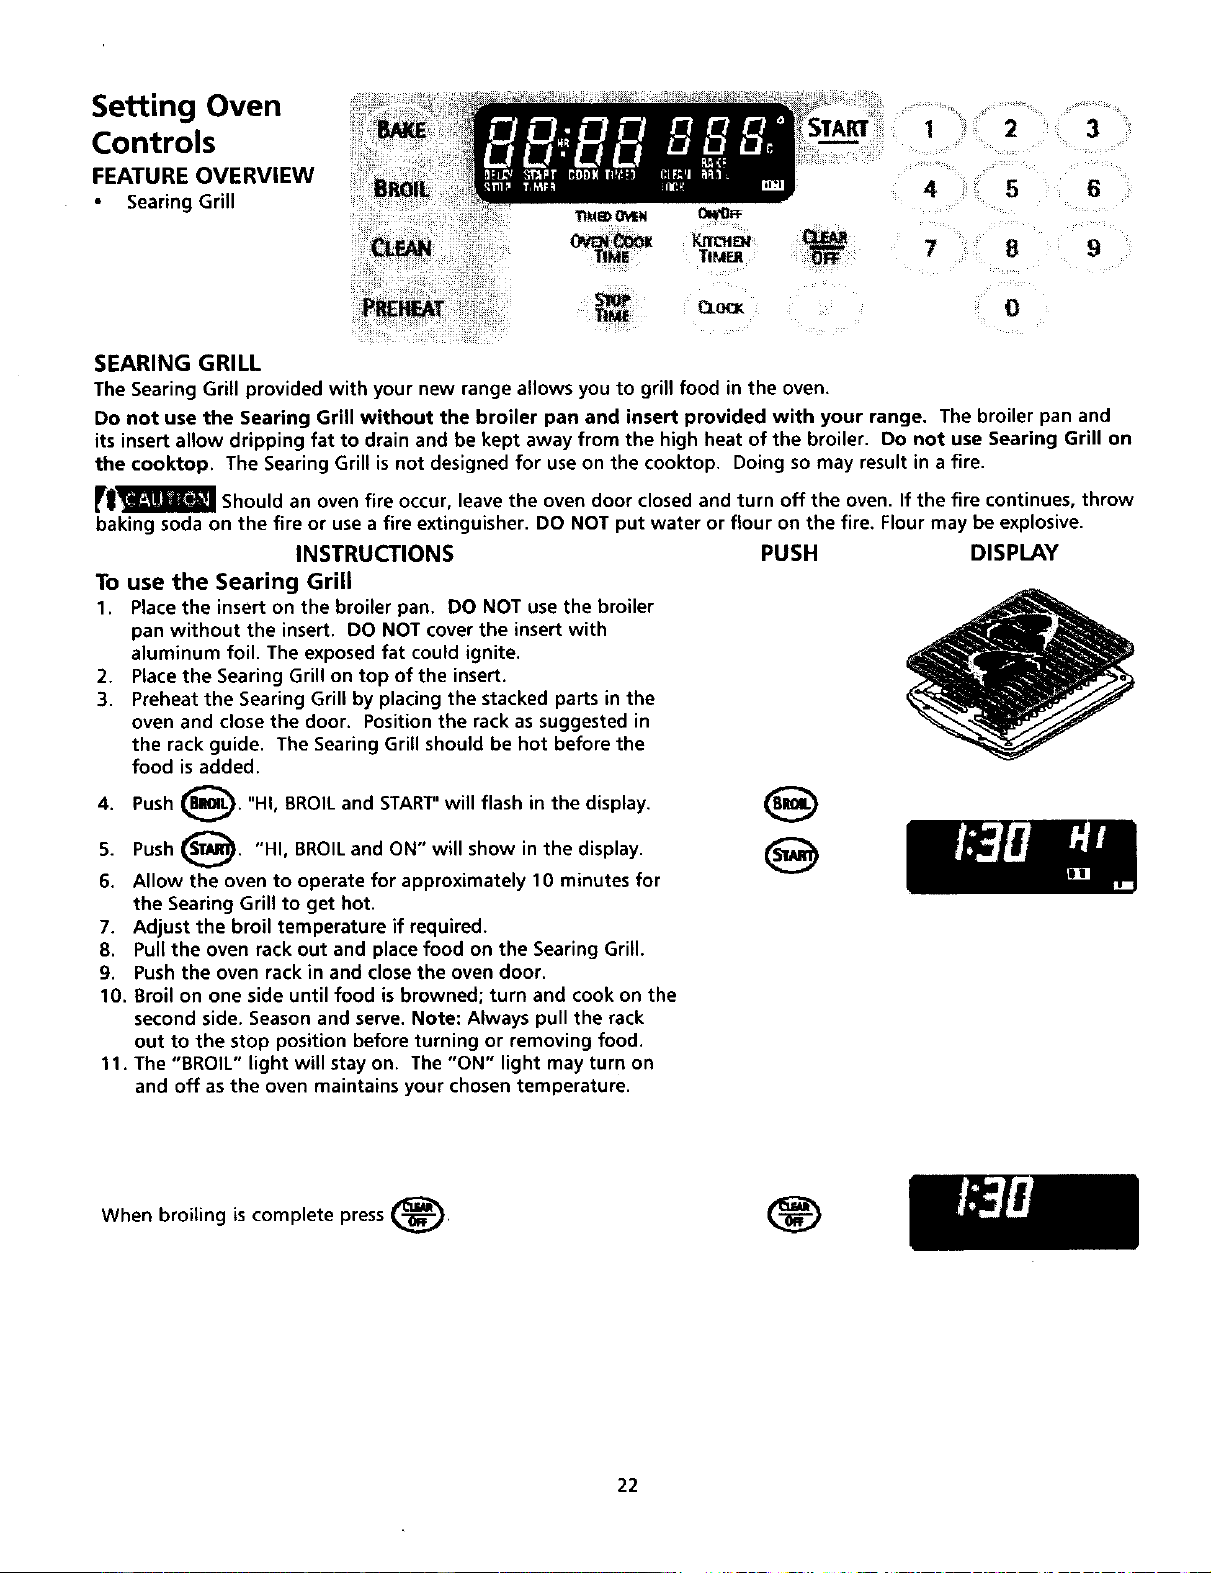
1. Place the insert on the broiler pan. DO NOT use the broiler
pan without the insert. DO NOT cover the insert with
aluminum foil. The exposed fat could ignite.
2. Place the Searing Grill on top of the insert.
3. Preheat the Searing Grill by placing the stacked parts in the
oven and close the door. Position the rack as suggested in
the rack guide. The Searing Grill should be hot before the
food is added.
4. Push E___. "HI, BROIL and START"will flash in the
display.
5. Push _'_. "HI, BROIL and ON" will show in the
display.
6. Allow the oven to operate for approximately 10 minutes for
the Searing Grill to get hot.
7. Adjust the broil temperature if required.
8. Pull the oven rack out and place food on the Searing Grill.
9. Push the oven rack in and close the oven door.
10. Broil on one side until food is browned; turn and cook on the
second side. Season and serve. Note: Always pull the rack
out to the stop position before turning or removing food.
11. The "BROIL" light will stay on. The "ON" light may turn on
and off as the oven maintains your chosen temperature.
When broiling is complete press (_.
22
Loading ...
Loading ...
Loading ...