
>>
<<
Contents
ENG Contents
1. Part Names
1-1. TV
1-2. Remote Control Unit
2. Watching TV
2-1. Displaying an External Equipment Image
2-2. Initial Installation
3. Direct Button Operation
3-1. Changing Channels
3-2. Changing Volume
3-3. MUTE
3-4. FREEZE
3-5. FLASH BACK
3-6. SMART
3-7. NETFLIX
3-8. AUDIO
3-9. Sleep Timer
3-10. AV MODE
3-12. Closed Captions and Digital Closed Captions
3-14. VIEW MODE
4. On-Screen Display Menu
4-1. Introduction
4-3. On-Screen Display Menu Operation
4-4. Menu Operation Buttons
4-5. Initial Setup
4-14. Information
4-17. Picture Settings
4-21. Audio Settings
4-22. Smart TV
4-25. System Options
5. Enjoying Photo/Music/Video Playback
5-1. Preparation
5-2. Selecting the Folders to Play Back
5-4. Playing Back Files on a USB Memory
Device/Home Network Server
5-9. Playing Back Files from a Portable Device or PC
6. Using LINK Operation
6-1. Controlling HDMI Equipment Using LINK Operation
6-4. Link Operation Menu
7. Using a PC
7-1. Adjusting the PC Image
7-2. Setting Audio Input
7-3. Control of the TV
7-9. PC Compatibility Chart
8. Using the Internet
8-1. Connecting to the Internet
8-2. Internet Setup
8-5. Entering Text (Software Keyboard)
8-7. Using the Browser
8-11. Using Keyboard and Mouse
8-12. Using Applications via the Internet
8-14. Notes
9. Appendix
9-1. Removing the Stand
9-2. Setting the TV on the Wall
9-4. Troubleshooting
9-6. Troubleshooting - Error Message
9-7. Information on the Software License for This
Product
10. Specifications
10-1. TV
10-2. Wireless LAN
11-1. Trademarks
12. Dimensional Drawings
The dimensional drawings for the LCD TV set are shown
on the inside back cover.
13. Software License


>>
<<
Part Names
ENG 1-1
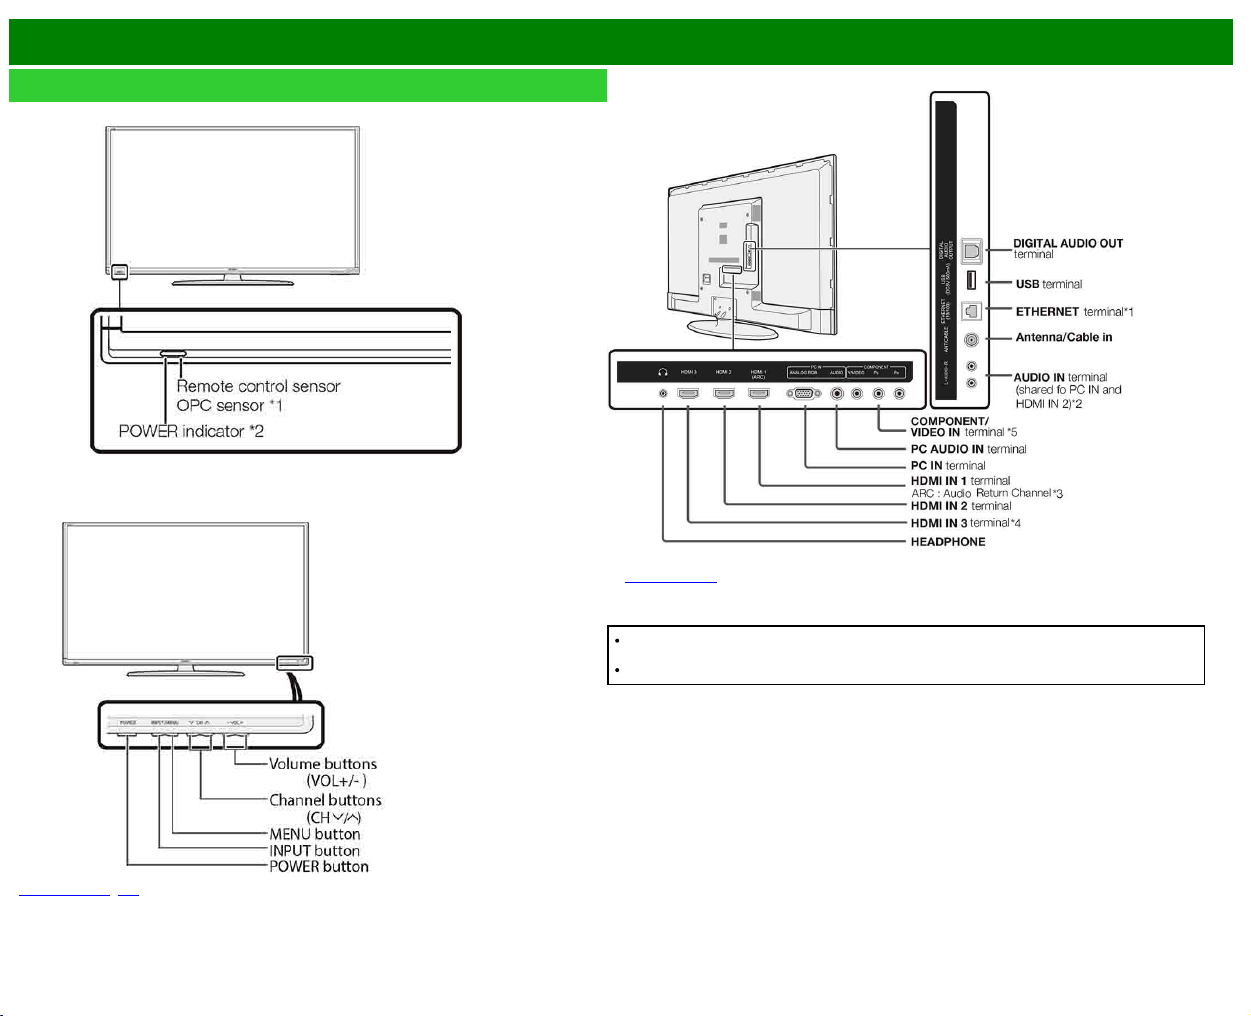
TV
(Front)
(Front)
*
See pages 2-1, 4-4 for button operations.
(Rear)
*1 See the Setup Guide.
*5
See page 4-12 for details on the Input Select function.
The illustrations and on-screen displays in this operation manual are for explanation purposes
and may vary slightly from the actual operations.
The examples used throughout this manual are based on the LC-60LE644U model.
>>
<<
Part Names
ENG 1-2
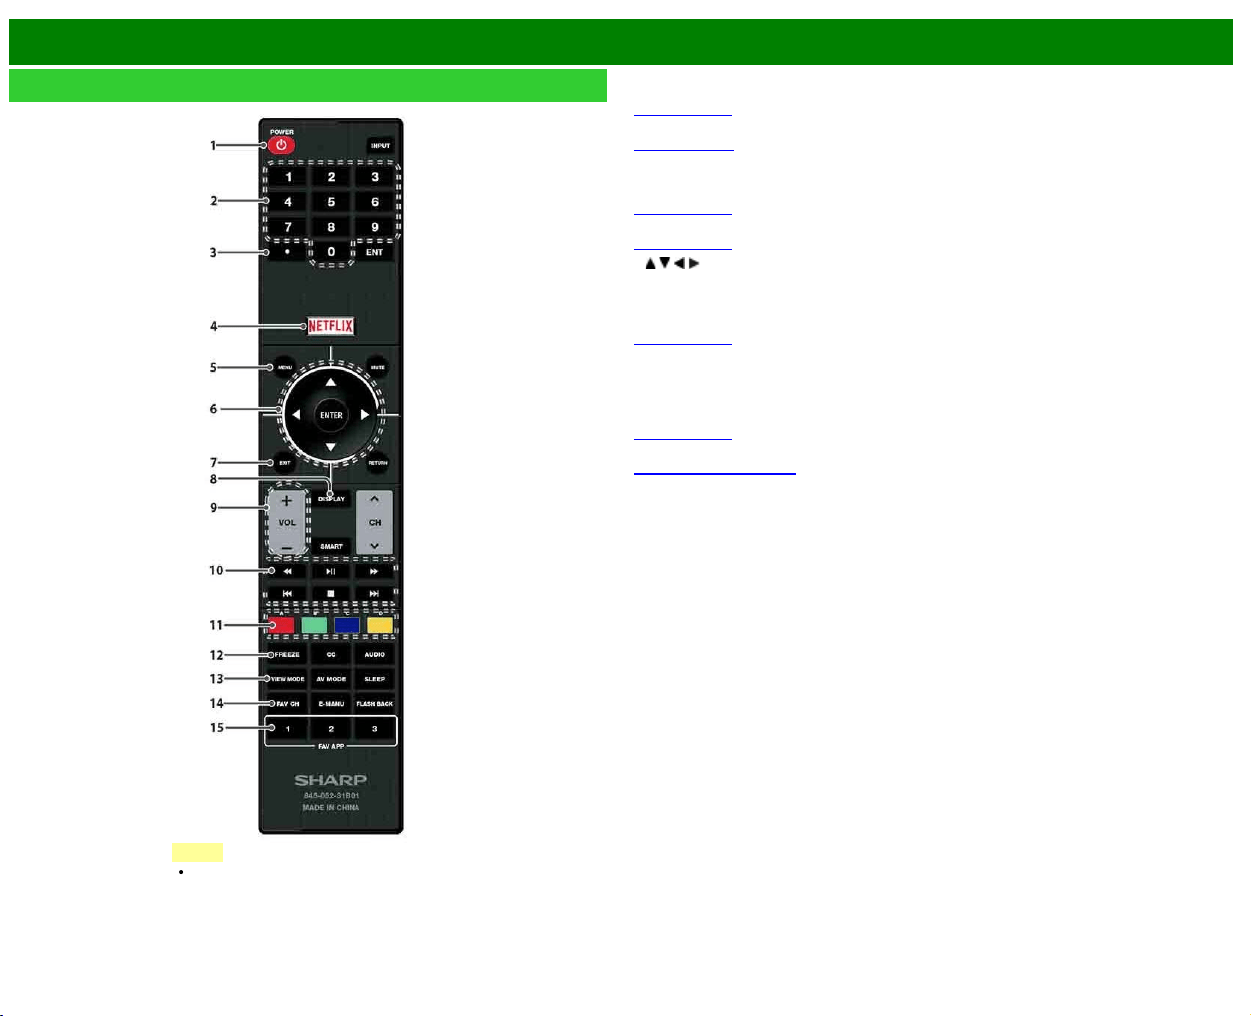
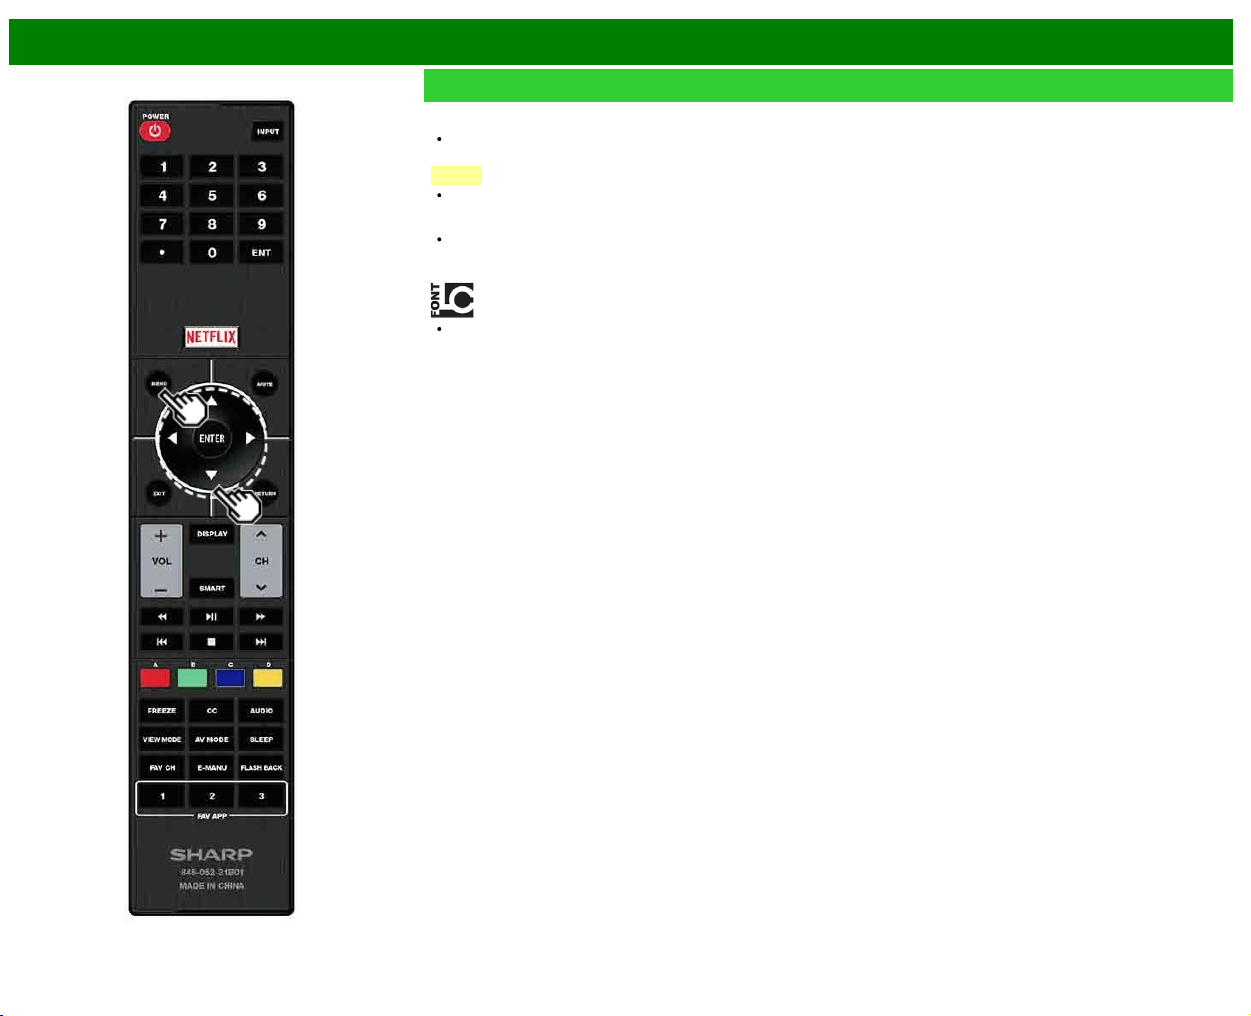
Remote Control Unit
1
POWER:
Switch the TV power on or enter standby.
2
0–9: Set the channel.
(See page 3-1.)
3
• (DOT): Set the channel.
(See pages 3-1
.)
4
NETFLIX: Display the Netflix screen.
If you press the NETFLIX button when the TV is turned off, the TV turns on and the NETFLIX
screen is displayed.
(See page 3-7.)
5
MENU: Display the menu screen.
(See page 4-1.)
6
/ / / , ENTER: Select a desired item on the screen.
7
EXIT: Turn off the menu screen.
8
DISPLAY: Display the channel information.
9
VOL+/-: Set the volume.
(See page 3-2.)
10 External equipment operational buttons: Operate the external equipment.
11
A, B, C, D: Select 4 preset favorite channels in 4 different categories.
While watching, you can toggle the selected channels by pressing
A, B, C and D.
12
FREEZE: Set the still image. Press again to return to normal screen.
(See page 3-4.)
13
VIEW MODE: Select the screen size.
(See pages 3-14 to 3-16.)
14
FAV CH: Set the favorite channels.
15
FAV APP 1, 2, 3: You can assign your favorite applications to these buttons.
NOTE
When using the remote control unit,
point it at the TV.

>>
<<
Part Names
ENG 1-3
Remote Control Unit (Continue)
16 INPUT:
Select a TV input source.
(See page 2-1.)
17
ENT: Jumps to a channel after selecting with the 0–9 buttons.
18
MUTE: Mute the sound.
(See page 3-3.)
19
RETURN: Return to the previous menu screen.
20
CH / : Select the channel.
(See page 3-1.)
21
SMART: Display the application window.
(See page 3-6.)
22 CC: Display captions from a closed-caption source.
(See page 3-12 to 3-13)
23
AUDIO: Selects the MTS/SAP or the audio mode during multichannel audio broadcasts.
(See page 3-8.)
24
AV MODE: Select an audio or video setting.
(See page 3-10.)
25
SLEEP: Set the sleep timer.
(See page 3-9.)
26
E-MANU: Display the operation manual.
27
FLASH BACK: Return to the previous channel or external input mode.
(See page 3-5.)
NOTE
When using the remote control unit,
point it at the TV.
>>
<<
Watching TV
ENG 2-1
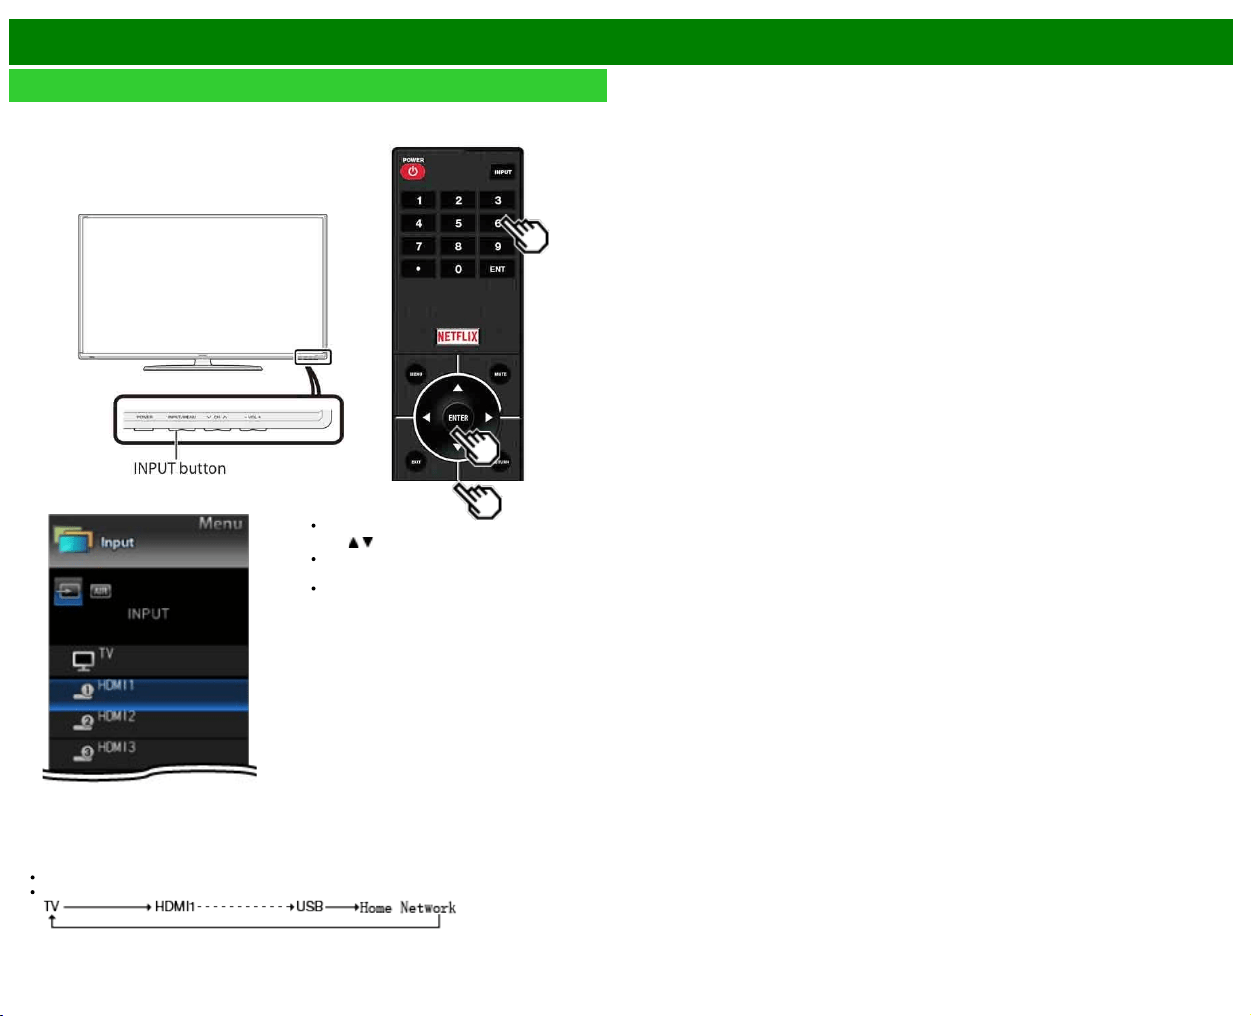
Displaying an External Equipment Image
To view external source images, select the input source by pressing
INPUT on the remote control
unit or on the TV.
Example
1 Press INPUT.
The INPUT list screen displays.
2 Press
/ to select the input source.
An image from the selected source
automatically displays.
If the corresponding input is not plugged
in, you cannot change the input. Be
sure to connect the equipment
beforehand.
You can also select the input source by pressing INPUT.
Each time INPUT is pressed, the input source toggles.
>>
<<
Watching TV
ENG 2-2
Initial Installation
When you turn on the TV for the first time, it will
automatically memorize the broadcasting channels available
in the region where you live. Perform the following steps
before you press POWER on the remote control unit.
1. Insert the batteries into the remote control unit.
2. Connect the antenna cable to the TV.
3. Plug in the AC cord to the AC outlet.
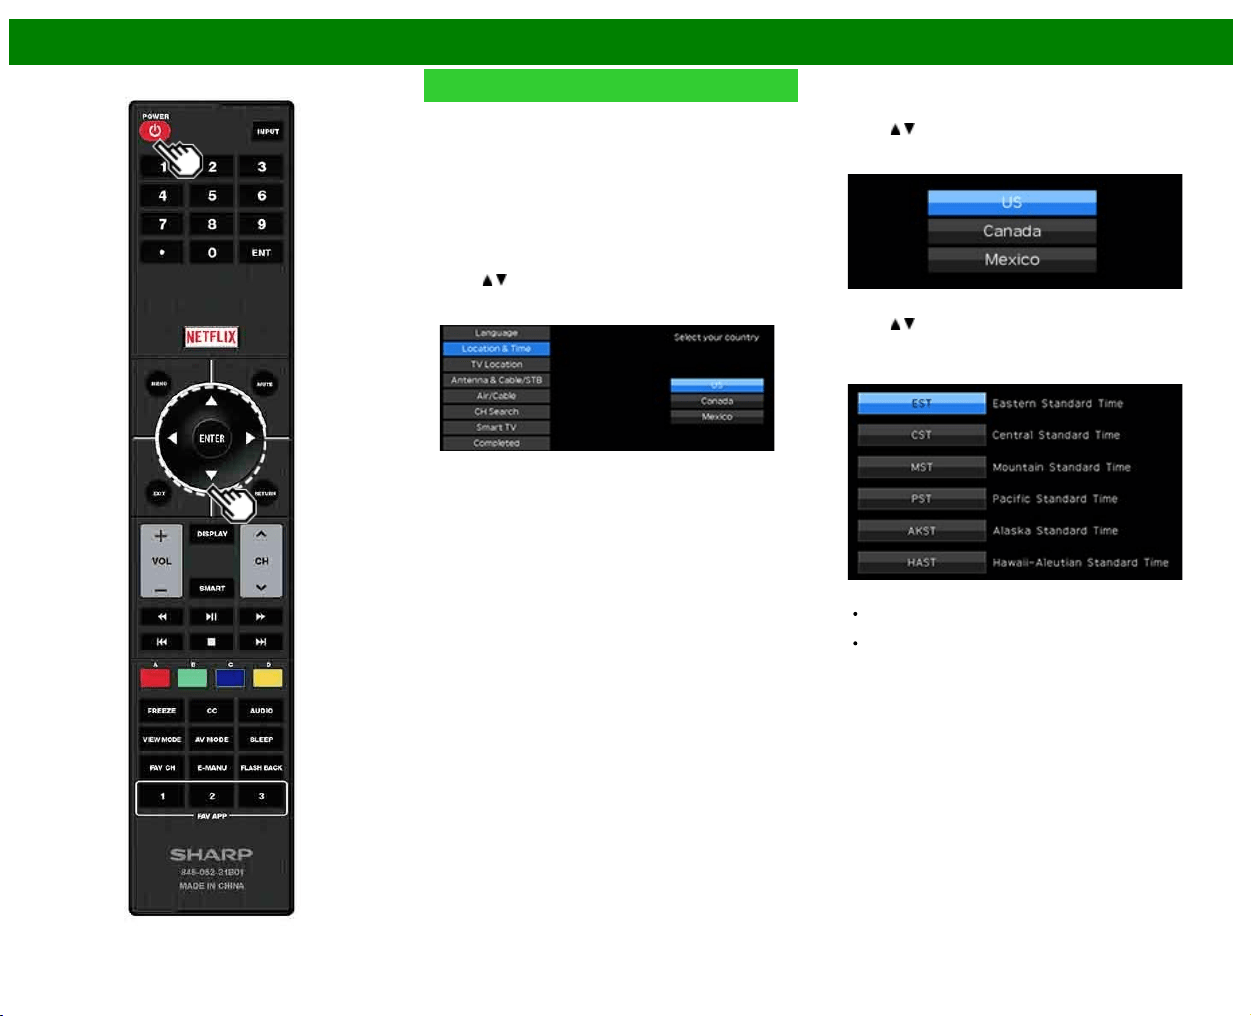
Language (Language setting)
Select from among 3 languages: English, French and
Spanish.
1 Press
/ to select the desired language listed on the
screen, and then press ENTER.
Location & Time
Make settings for the country, area and time zone where
you use the TV.
2 Press
/ to select "United States", "Canada" or
"Mexico", and then press ENTER.
3 Press / to select the time zone where you are using
the TV, and then press ENTER.
Example
The time zone differs depending on the selected
country.
The factory preset value is the time zone for the capital
of the selected country.
>>
<<
Watching TV
ENG 2-3
Initial Installation (Continue)
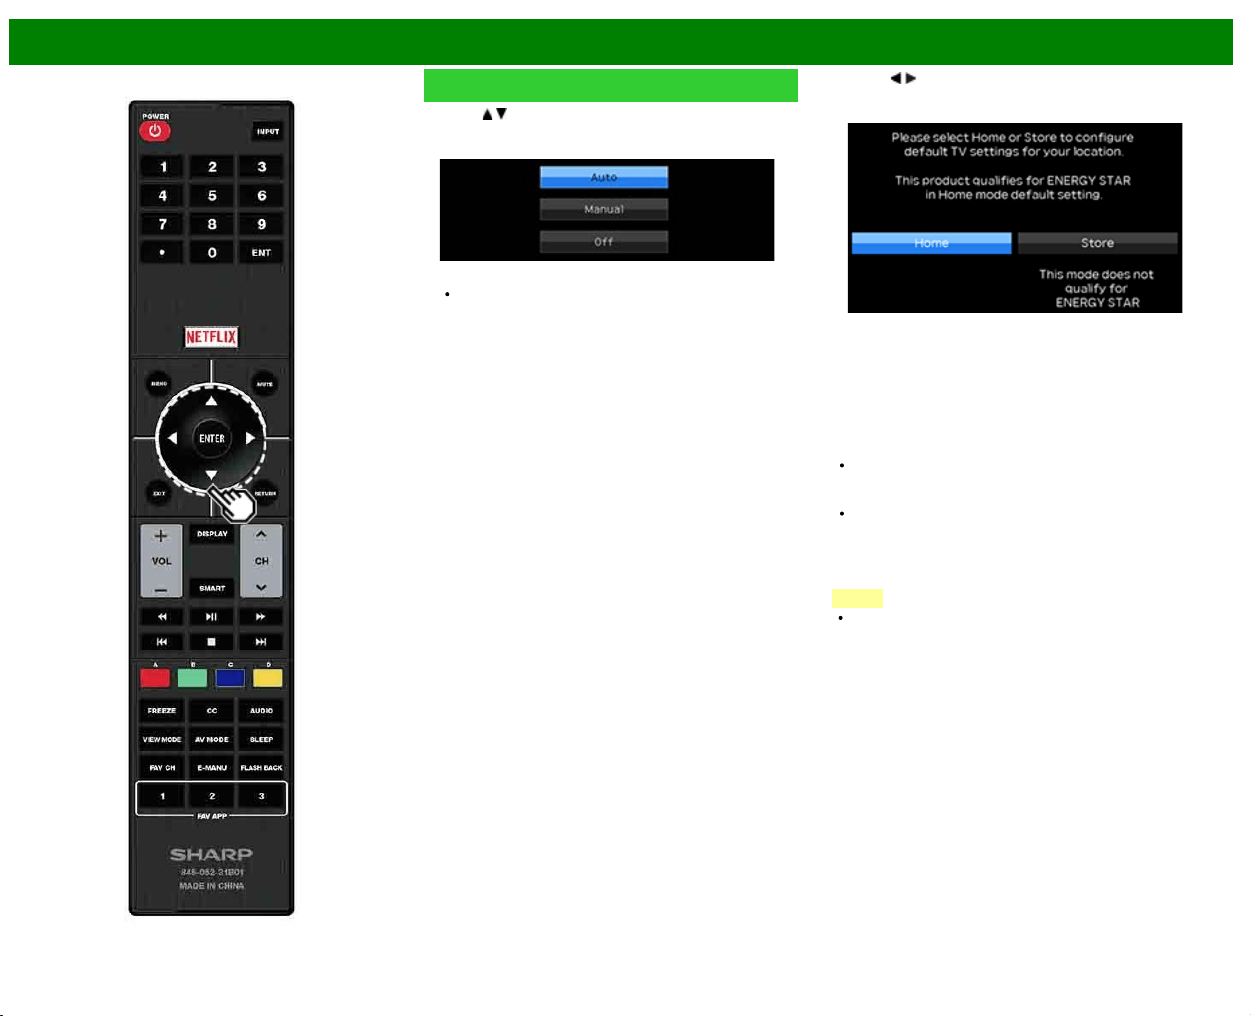
4 Press / to select the Daylight Savings Time, and then
press ENTER.
"Auto" is the default selection.
TV Location
Select "Home" or "Store" for the location where you plan to
install the TV. This product qualifies for ENERGY STAR in
Home mode default setting.
5 Press / to select "Home" or "Store".
Press ENTER to enter the setting.
Home: AV MODE is set to "STANDARD (ENERGY
STAR)".
Store: AV MODE is set to "DYNAMIC (Fixed)". Picture
Reset and Feature Demo can be set.
Picture Reset: AV MODE will be set to "DYNAMIC
(Fixed)" regardless of whether Picture Reset is "On" or
"Off".
If you select "On" and there is no operation for 30
minutes:
- AV MODE will be reset to "DYNAMIC (Fixed)".
When "Off" is selected:
- AV MODE will be set to "DYNAMIC (Fixed)".
Feature Demo: When "On" is selected, after all the
settings are completed, the Feature Demo screen is
displayed if there is no operation for several minutes.
NOTE
ENERGY STAR qualification is based on AV MODE
"STANDARD (ENERGY STAR).
>>
<<
Watching TV
ENG 2-4
Initial Installation (Continue)
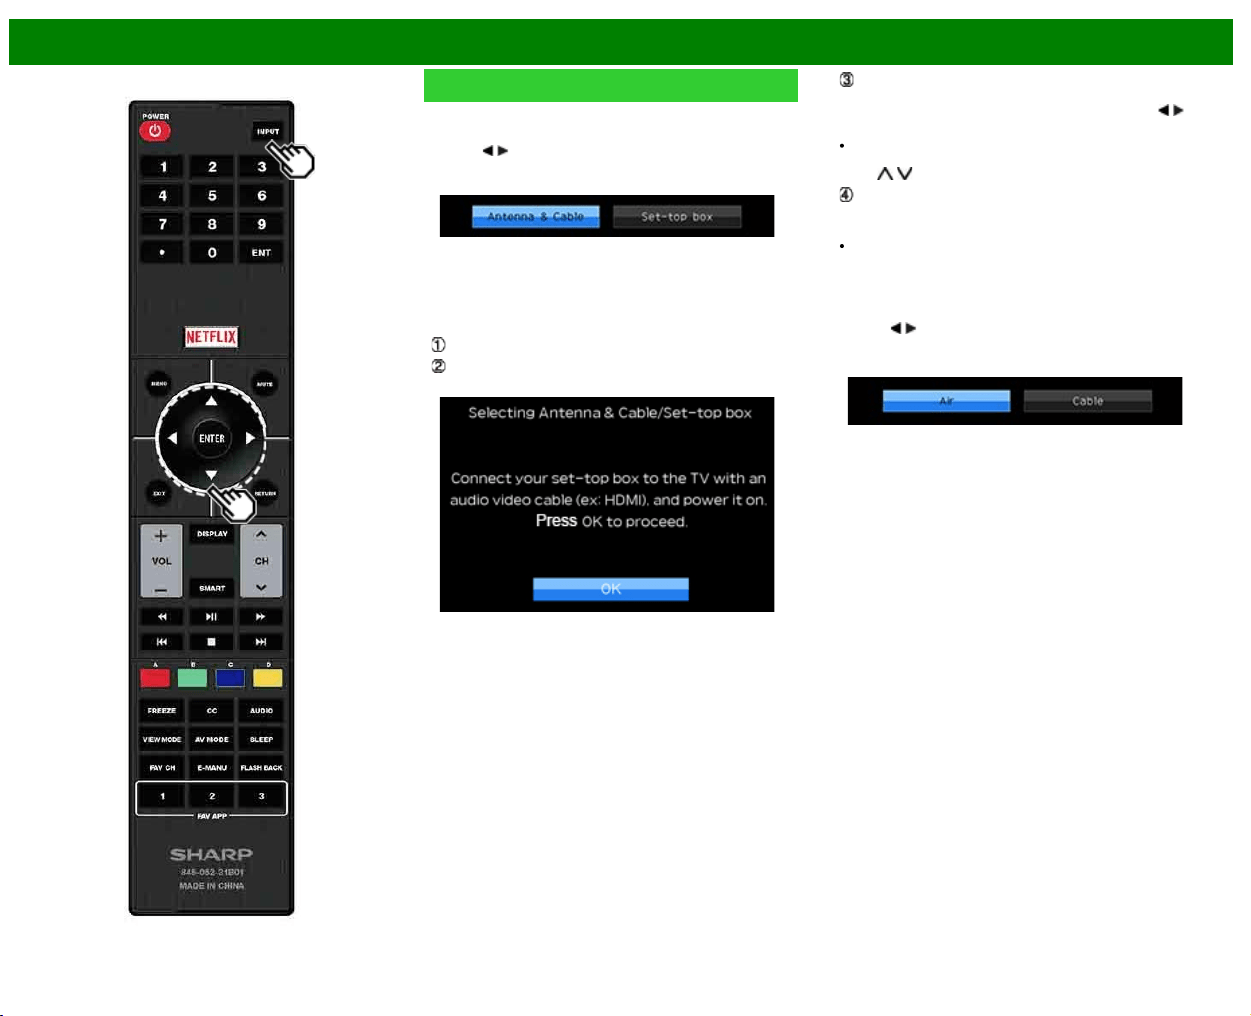
Antenna & Cable/STB
Select the type of connection you will use to watch TV.
6 Press
/ to select "Antenna & Cable" or "Set-top box",
and then press ENTER.
To watch TV via an antenna or cable connection
(without using a set-top box):
Select "Antenna & Cable", and then go to step 7.
To watch TV via a set-top box:
Select "Set-top box", and then press ENTER.
Check that the set-top box connected to the TV is on.
To watch TV, select the input source corresponding to
the terminal connected to the set-top box. When doing
so, you must make the setting to skip "TV". Press
/ to
select "On", and then press ENTER.
When this is set to "On", the channel on the TV cannot
be changed using the remote control unit or menu. (e.g.
CH
/ , Favorite CH, etc.)
Press INPUT to select the input source corresponding to
the terminal connected to the set-top box. Make the
necessary settings on the connected external equipment.
See the operation manual of the connected equipment for
setting up the equipment.
Air/Cable (Antenna setting)
Make sure what kind of connection is made with your TV
when selecting "Air" or "Cable".
7 Press
/ to select "Air" or "Cable".
Press ENTER to enter the setting.
>>
<<
Watching TV
ENG 2-5
Initial Installation (Continue)
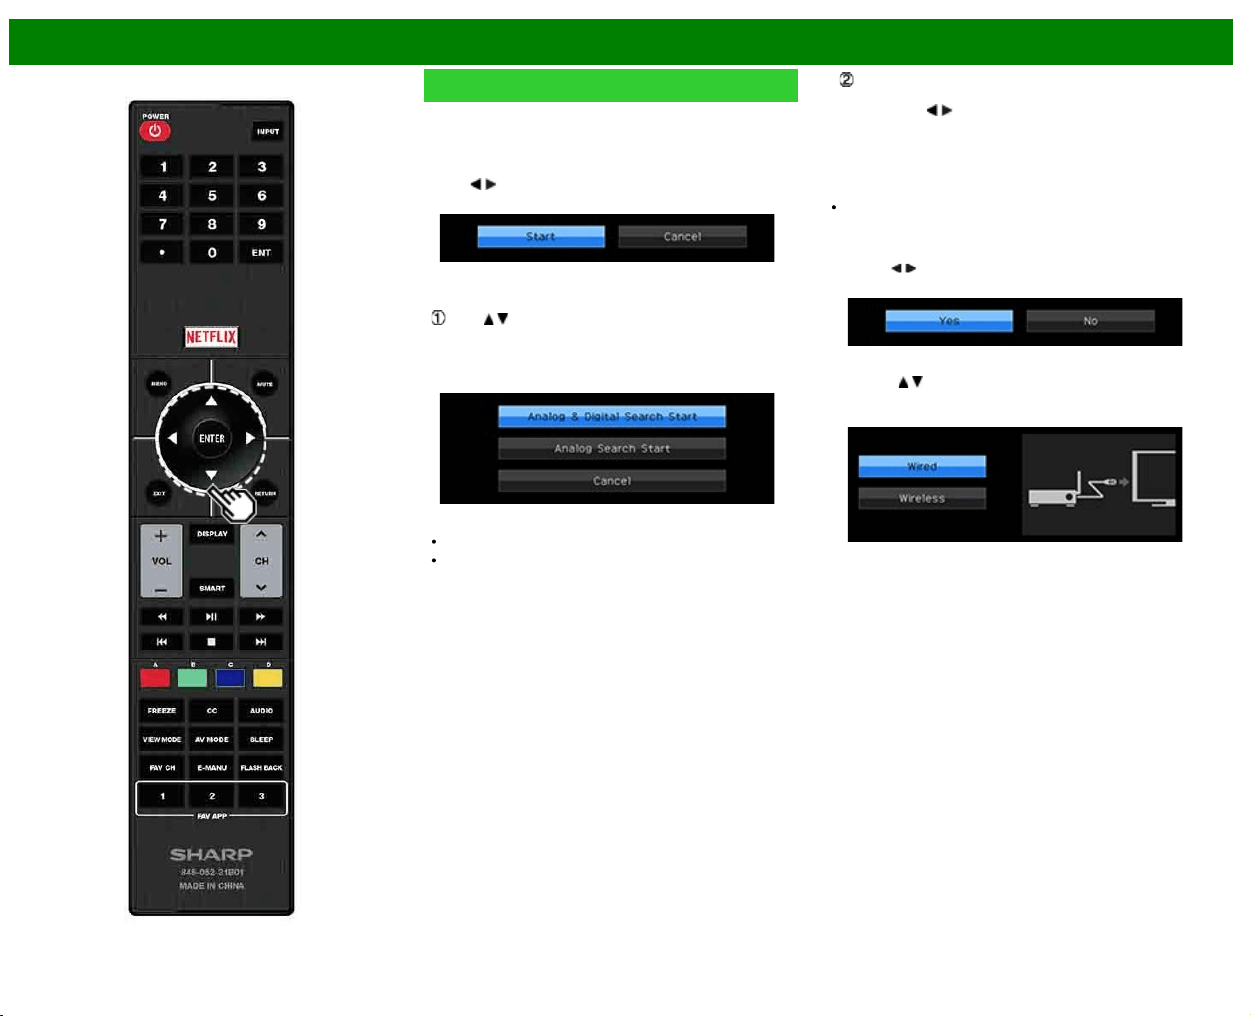
CH Search (Channel search)
Channel auto search makes the TV look for all channels
viewable in the set area.
8 When "Air" is selected in Antenna setting:
Press
/ to select "Start", and then press ENTER.
When "Cable" is selected in Antenna setting:
Press / to select "Analog & Digital Search Start" to
search both analog and digital broadcasts, or to select
"Analog Search Start" to search only analog broadcasts,
and then press ENTER.
The Channel search will start automatically.
To exit the Channel search screen, select "Cancel", and
then press ENTER.
The Channel search results may include scrambled
channels or channels that are not viewable in the set
area. Press
/ to select "Yes", and then press ENTER
to remove scrambled channels.
Smart TV
When you connect to the Internet on the TV, select the
desired connection method and follow the instructions shown
on the display.
Wireless LAN connection is possible only when the WPS
(push button) method is used. If any other method is
used, make settings by Smart TV > Internet Setup >
Internet Connection.
9 Press
/ to select "Yes", and then press ENTER.
10 Press / to select "Wired" or "Wireless", and then
press ENTER.
>>
<<
Watching TV
ENG 2-6
Initial Installation (Continue)
Connection using an ETHERNET cable:
Select "Wired" and press ENTER.
Confirm that the TV is properly connected with the
router, and then press "Next". Follow the instructions on
the display to perform the connection test.
Wireless LAN connection by the WPS method:
Select "Wireless" and press ENTER.
Follow the instructions on the display, and finalize the
connection after testing its viability.
NOTE
After you finish configuring the network settings,
configure the "TV Name Setting".
(See page 8-3.)
When you change the network settings, refer to Smart TV
> Internet Setup > Internet Connection.
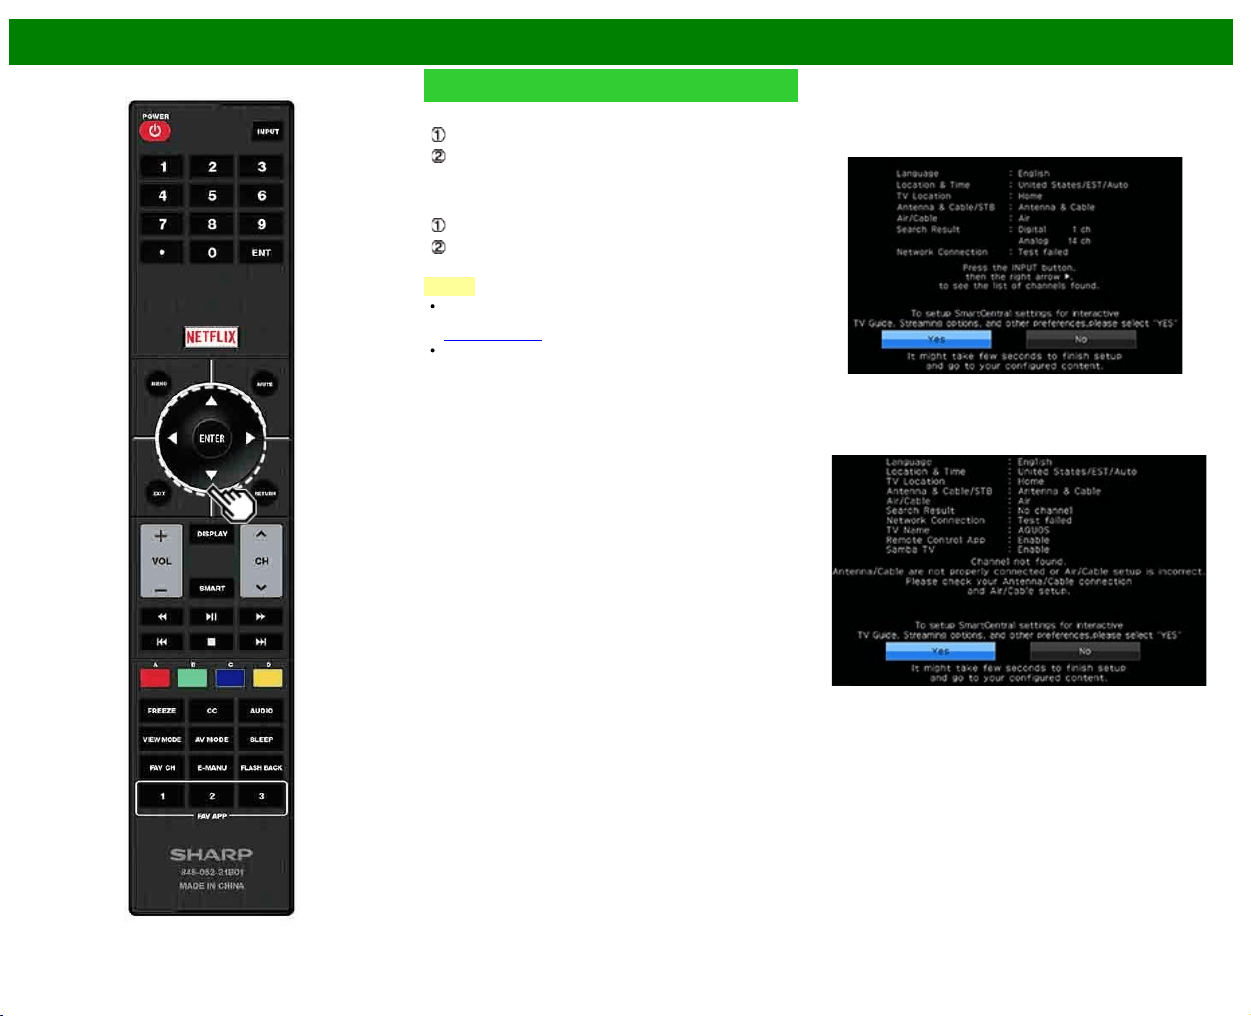
Completed
11 The settings confirmation screen is displayed. Confirm
the information displayed on the screen, and then press
ENTER.
Examples of the settings confirmation screen
When one or more channel is received after "Antenna
& Cable" was selected in step 6 and a search was
carried out.
When no channel is received after "Antenna & Cable"
was selected in step 6 and a search was carried out.
>>
<<
Watching TV
ENG 2-7
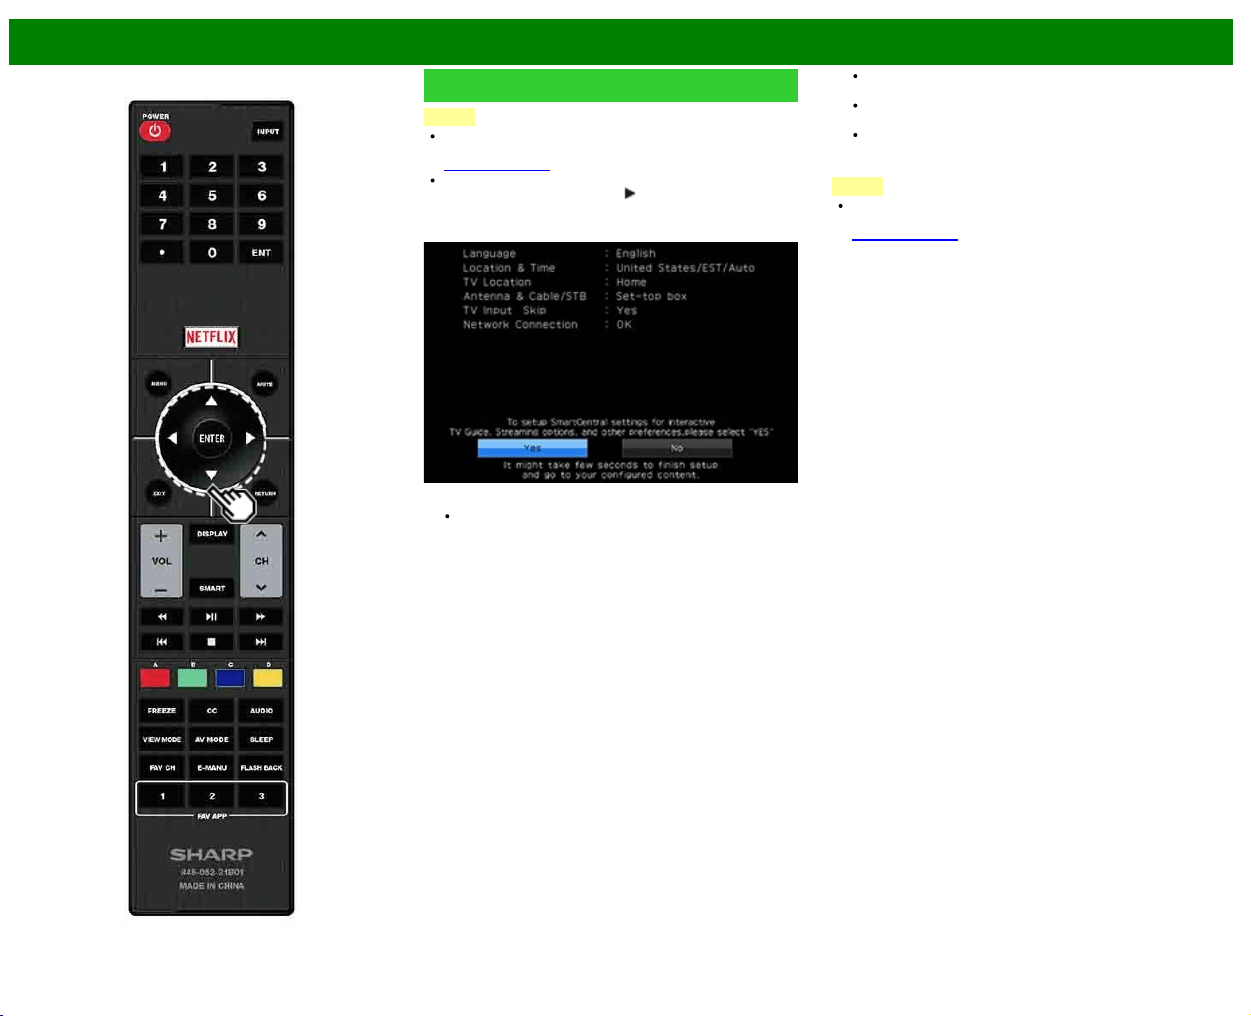
Initial Installation (Continue)
NOTE
If no channel is found, confirm the type of connection
made with your TV and try "Easy Setup" again.
(See page 4-13.)
To see the list of channels found during Channel search,
press INPUT, and then press
.
When "Set-top box" was selected in step 6.
Click "OK" to display the confirmation screen for input
source switching.
Show the input list: You can check the current connection
status of external equipment. Confirm which input
terminal is connected to the set-top box.
OK: Clicking "OK" will complete the Easy Setup procedure.
This may not display correctly depending on the
connected equipment.
This is not displayed correctly when the connected
equipment is off.
To watch TV using a set-top box, press INPUT after
completing the initial settings, and select the input to
which the set-top box is connected.
NOTE
For changing the settings of the Initial Installation, perform
"Easy Setup" on the Initial Setup menu on
(See page 4-13.)
>>
<<
Direct Button Operation
ENG 3-1
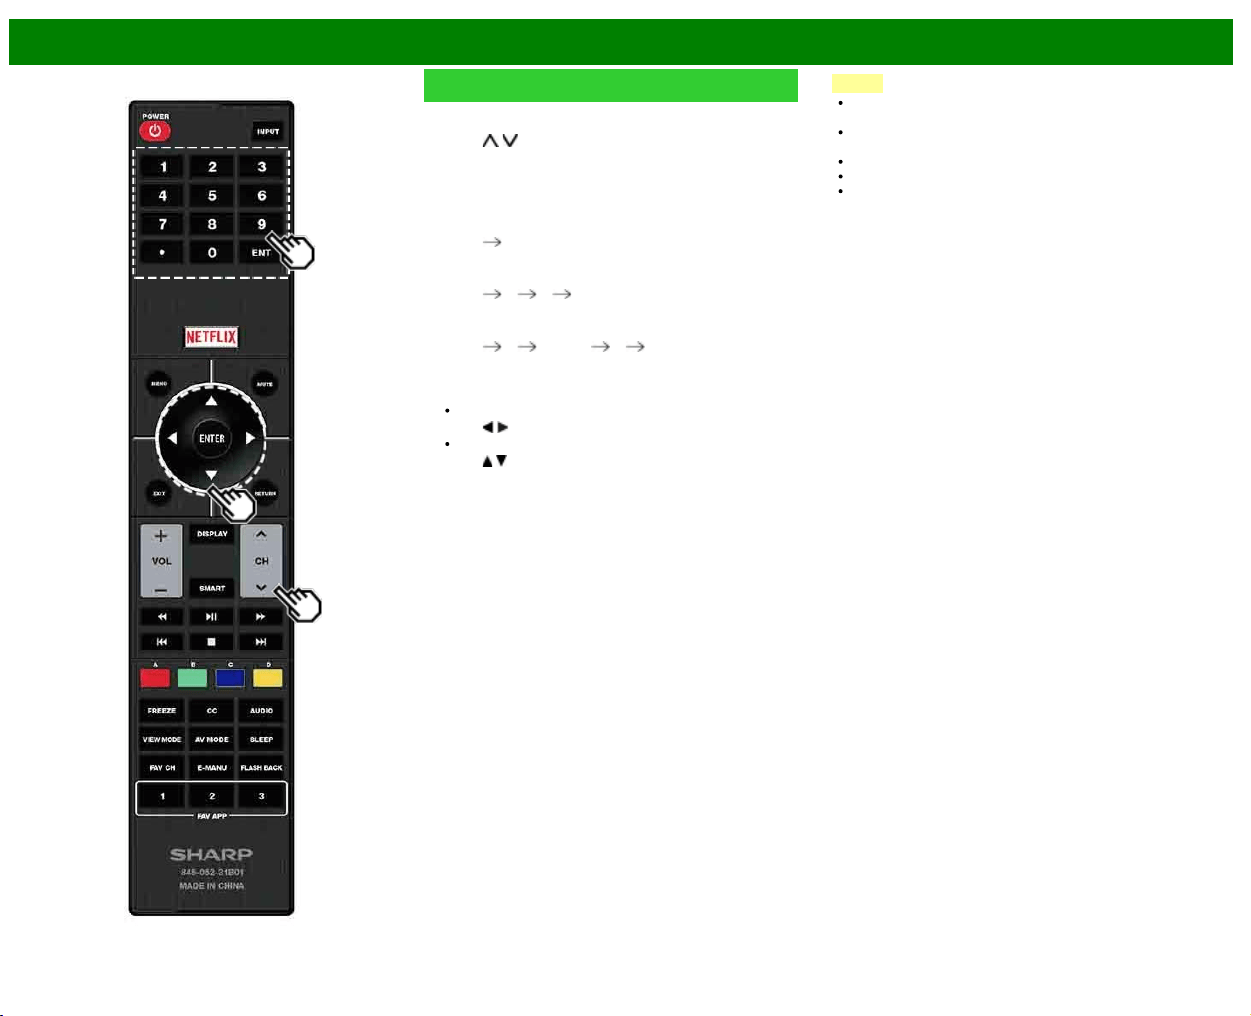
Changing Channels
You can change channels in several ways.
Method 1
Using CH
/ on the remote control unit or on the TV.
Method 2
Using remote control buttons 0-9, • (DOT).
Examples:
To select a 1 or 2-digit channel number (e. g., Channel
5):
Press 5
ENTER
To select a 3-digit channel number (e. g., Channel
115):
Press 1
1 5 ENTER
To select a 4-digit channel number (e. g., Channel
22.1):
Press 2
2 • (DOT) 1 ENTER
Method 3
Selecting the program from the Channel list.
1 Press INPUT on the remote control unit.
The INPUT list displays.
2 Press
/ to select "AIR" or "CABLE".
The Channel list displays.
3 Press
/ to select the desired channel, and then press
ENTER.
NOTE
When selecting a 1-digit channel number, it is not
necessary to press 0 before the number.
When you enter 0-9 only, channel selection will be made
if there is no operation within a few seconds.
If you push "0" by itself, nothing will happen.
Complete the above steps within a few seconds.
When you enter 0-9 and • (DOT), channel selection will
be made if there is no operation within a few seconds.
>>
<<
Direct Button Operation
ENG 3-2
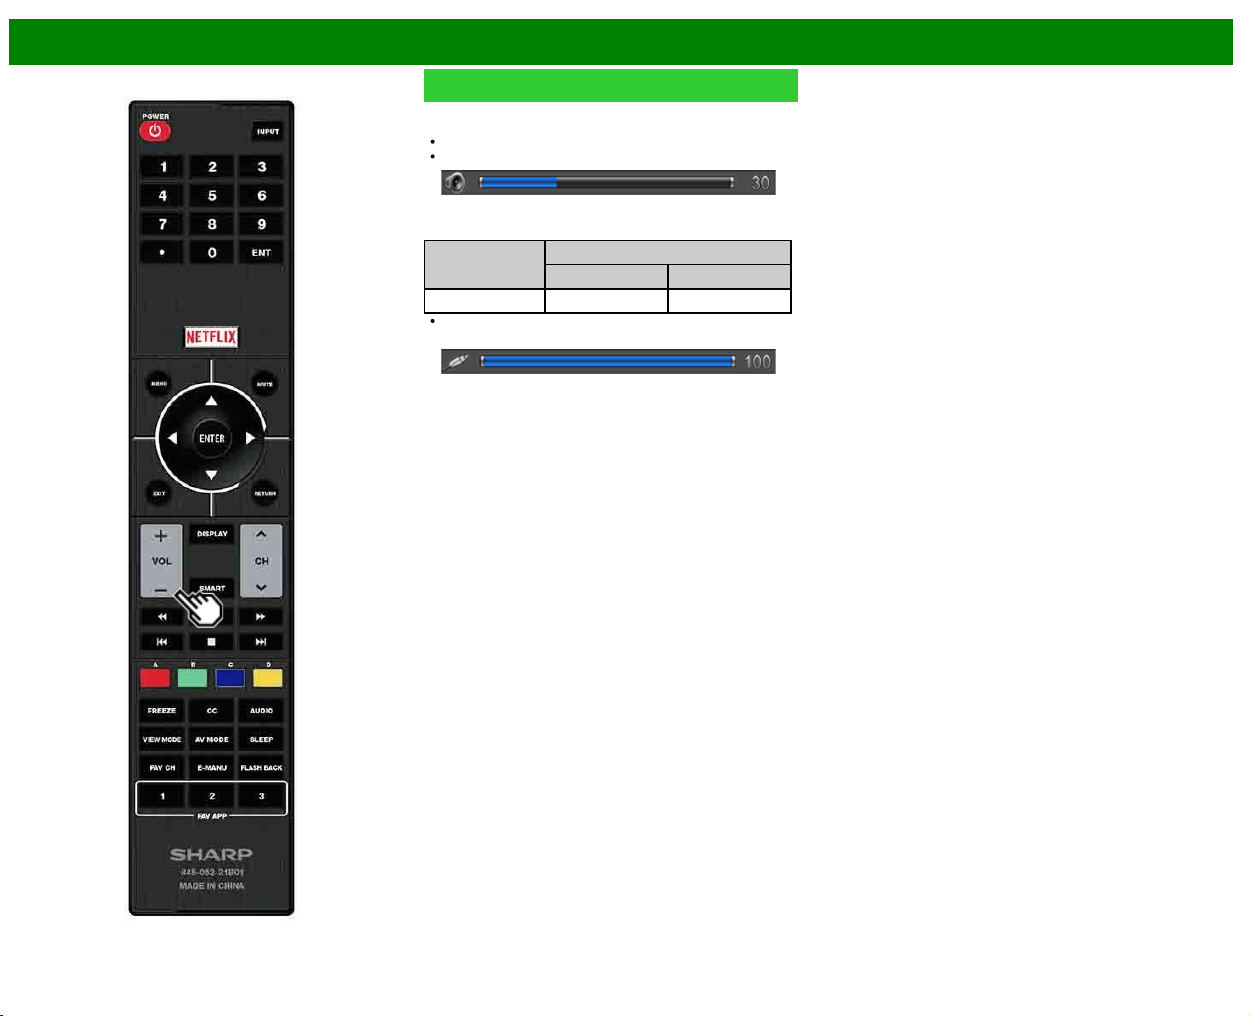
Changing Volume
You can change the volume by pressing VOL+/- on the TV
or on the remote control unit.
To increase the volume, press VOL +.
To decrease the volume, press VOL -.
Audio status
Output device
Output Select
Fixed Variable
Speaker Variable sound Mute
When "Output Select" is set to "Variable", the indicator on
the screen changes as shown below.

>>
<<
Direct Button Operation
ENG 3-3
MUTE
Mutes the current sound output.
Press MUTE.
" " will be displayed on the screen for 30 minutes, and
the sound is silenced.
NOTE
Within 30 minutes of pressing MUTE, mute can be
canceled by pressing VOL+/- or MUTE.
Mute will be canceled after 30 minutes have passed.
However, the TV will not suddenly output a loud sound
as the volume level is set to 0 automatically.

>>
<<
Direct Button Operation
ENG 3-4
FREEZE
Allows you to capture and freeze a moving image that you
are watching.
Press FREEZE.
A moving image is captured.
Press FREEZE again to cancel the function.
NOTE
When this function is not available, "No displaying still
image available." will display.
The still image automatically goes out after 30 minutes.
If you are using the freeze function and a broadcast
activates the V-CHIP BLOCK, the freeze function will be
canceled and a V-CHIP BLOCK message will appear.

>>
<<
Direct Button Operation
ENG 3-6
SMART
Allows you to directly activate various types of applications.
1 Press SMART to display the application window.
Press SMART again to switch back to the currently
tuned channel.
2 Press
/ to select the desired application, and then
press ENTER.
If you changed the display to the list of applications in
step 1, select a category and then an application.
If " " is displayed after you switch to USB mode,
check the USB connection.
If " " or " " is displayed after you switch to
Home Network mode or after you connect to the
Internet, check your TV’s network settings and
connection.
>>
<<
Direct Button Operation
ENG 3-7
NETFLIX
Displays the Netflix screen.
Press NETFLIX.
NOTE
If you press the NETFLIX button when the TV is turned off,
the TV turns on and the NETFLIX screen is displayed.
To enjoy Netflix, you need to make:
—a broadband Internet connection
—settings of Internet Setup
—adjustments for Netflix
>>
<<
Direct Button Operation
ENG 3-8
AUDIO
MTS/SAP stereo mode
The TV has a feature that allows reception of sound other
than the main audio for the program. This feature is called
Multi-channel Television Sound (MTS). The TV with MTS
can receive mono sound, stereo sound
and Secondary Audio Programs (SAP). The SAP feature
allows a TV station to broadcast other information, which
could be audio in another language or something completely
different like weather information.
You can enjoy Hi-Fi stereo sound or SAP broadcasts
where available.
Stereo broadcasts: View programs like live sporting
events, shows and concerts in dynamic stereo sound.
SAP broadcasts: Receive TV broadcasts in either MAIN
or SAP sound.
MAIN sound: The normal program soundtrack (either in
mono or stereo).
SAP sound: Listen to a second language, supplementary
commentary or other information. (SAP is mono sound.)
If stereo sound is difficult to hear.
Obtain a clearer sound by manually switching to fixed
mono-sound mode.
You can change MTS as shown below to match the
television broadcast signal.
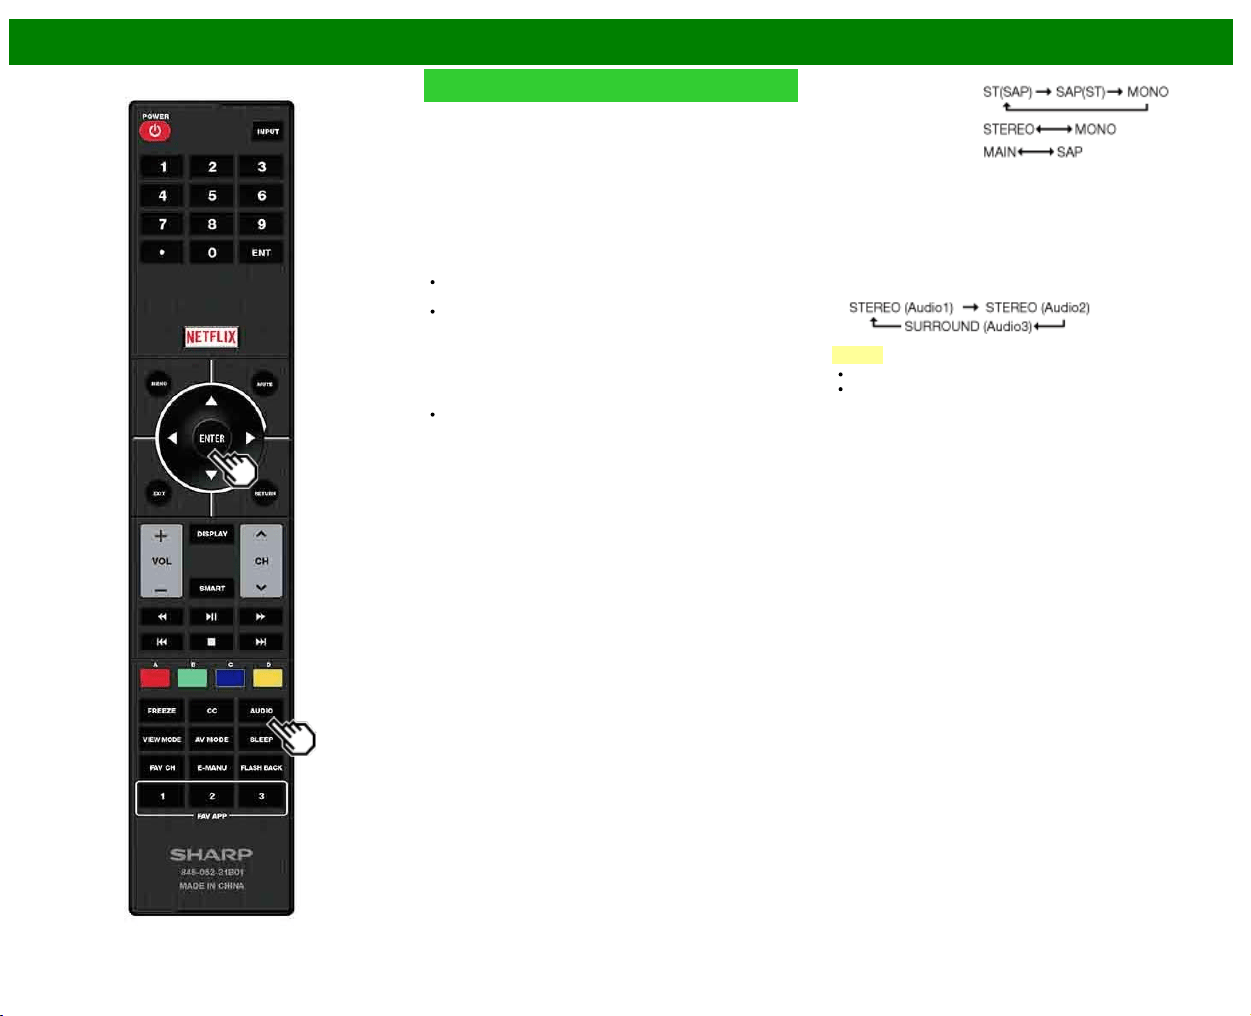
Press AUDIO to toggle between audio modes.
Examples: when receiving MTS and SAP
STEREO mode:
STEREO + SAP mode:
MAIN + SAP mode:
MONO mode: MONO
Digital broadcasting audio mode
The types of audio transmitted in a digital broadcast include
SURROUND as well as MONO and STEREO. In addition, it
is possible for multiple audio tracks to accompany a single
video track.
Press ENTER to toggle between audio modes.
Example: when receiving Digital broadcasting
NOTE
MTS only operates while in TV mode.
You can have the same settings by choosing "Change
Audio" on the menu items.
>>
<<
Direct Button Operation
ENG 3-9
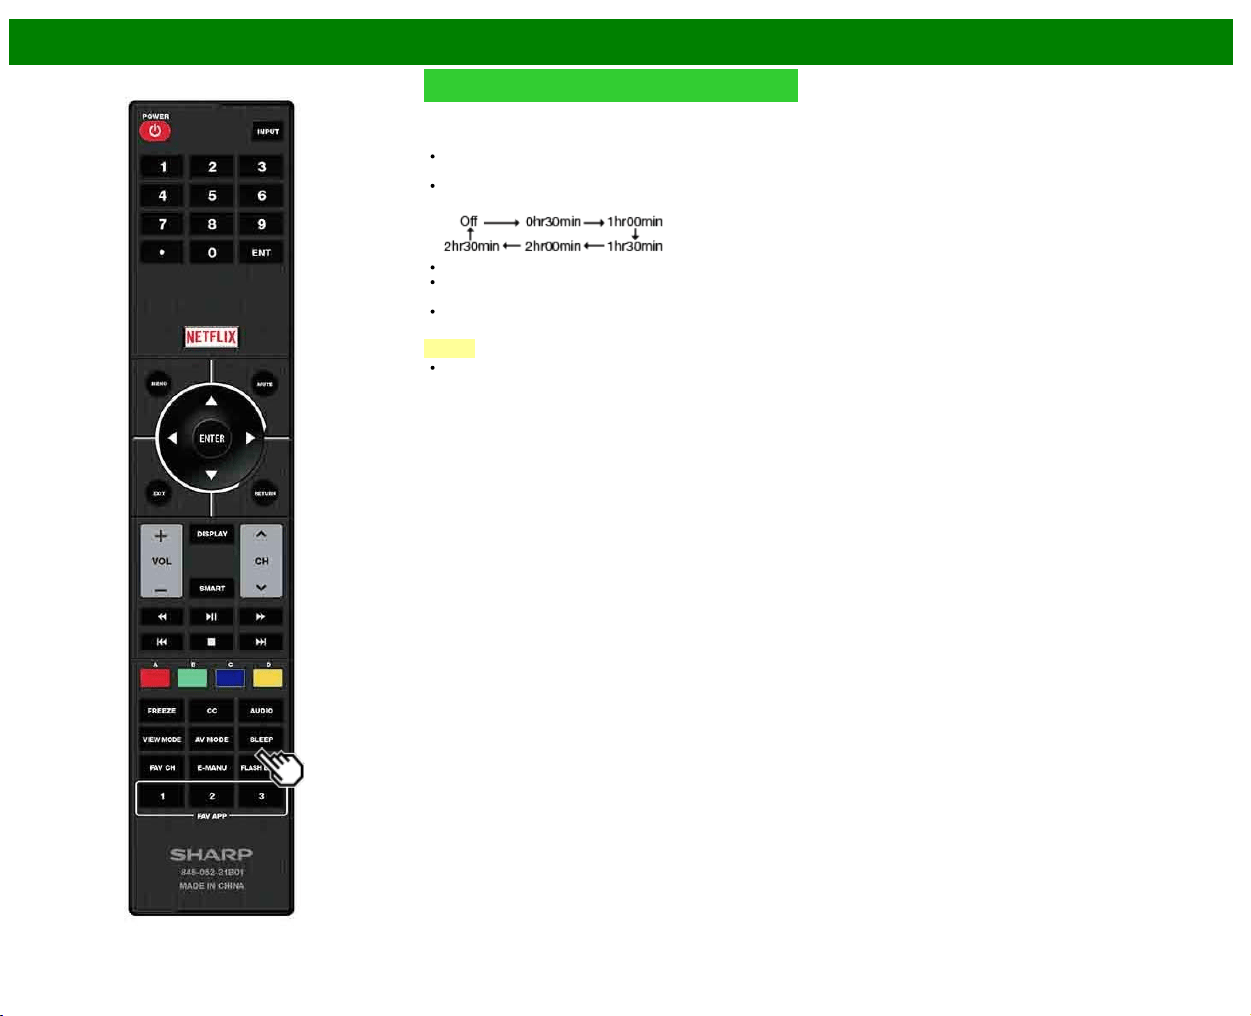
Sleep Timer
Allows you to set a time when the TV automatically switches
to standby.
Press SLEEP.
The remaining time displays when the sleep timer has
been set.
Each time you press SLEEP, the remaining time switches
as shown below.
When set, the time automatically starts counting down.
If you want to adjust the sleep timer, you can press
SLEEP twice then change the time setting.
When it is 5 minutes before the time expires, the
remaining time will start to keep appearing every minute.
NOTE
The TV will enter standby when the remaining time
reaches 0.
>>
<<
Direct Button Operation
ENG 3-10
AV MODE
AV MODE gives you several viewing options to choose from
to best match the surrounding environment of the TV, which
can vary due to factors like room brightness, type of
program watched or the type of device connected.
You can use USER Mode to create customized settings for
each TV input. These settings will be automatically saved on
each input for convenience.
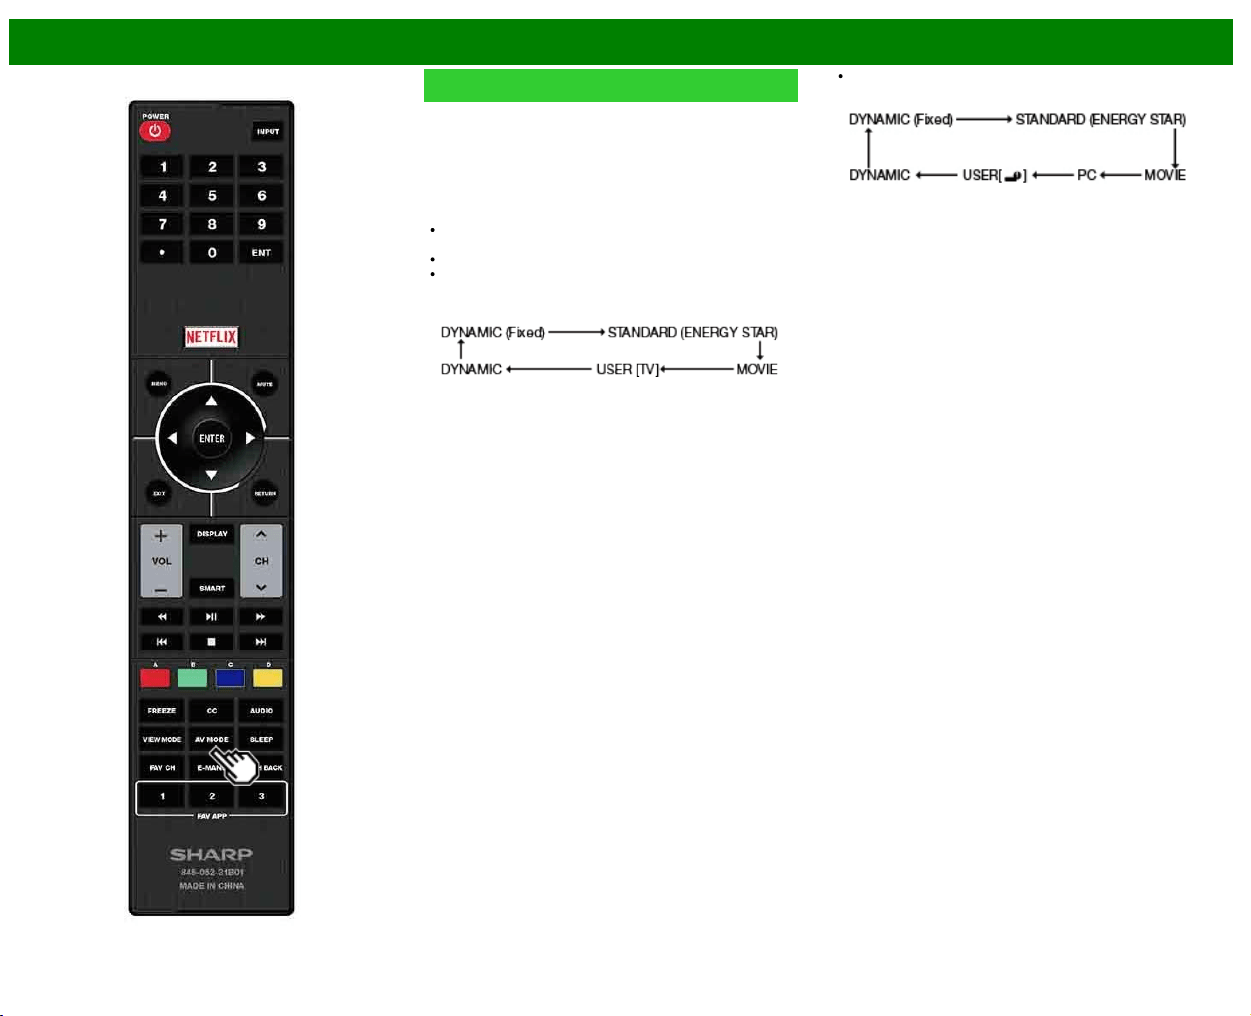
Press AV MODE. Current AV MODE displays.
Press AV MODE again before the mode displayed on the
screen disappears.
The mode changes as shown below:
Example:
When using the COMPONENT/VIDEO or VIDEO
terminals
Example:
When using the PC IN or HDMI IN 1 to 3 terminals
>>
<<
Direct Button Operation
ENG 3-11
AV MODE (Continue)
STANDARD (ENERGY STAR): For a highly defined image
in a normal lighting.
MOVIE: For a movie.
PC: For PC.
USER: Allows the user to customize settings as desired.
You can set the mode for each input source.
DYNAMIC: For a clear-cut image emphasizing high
contrast, useful for sports viewing.
DYNAMIC (Fixed): Changes the image and sound settings
to the factory preset values. No adjustments are allowed.
NOTE
You can select a different AV MODE item for each input
mode. (For example, select STANDARD (ENERGY
STAR) for TV input and DYNAMIC for COMPONENT.)
You cannot set "PC" when the TV is connected to the
Internet.
You cannot set "PC" when selecting the input "Home
Network" or "USB".
You can have the same settings by choosing "AV MODE"
on the menu items.

>>
<<
Direct Button Operation
ENG 3-12
Closed Captions and Digital Closed
Captions
Your TV is equipped with an internal Closed Caption
decoder. It allows you to view conversations, narration and
sound effects as subtitles on your TV. Closed Captions are
available on some TV programs and on some VHS home
video tapes at the discretion of the program provider.
Digital Closed Caption service is a new caption service
available only on digital TV programs (also at the discretion
of the service provider). It is a more flexible system than the
original Closed Caption system, because it allows for a
variety of caption sizes and font styles. When the Digital
Closed Caption service is in use, it will be indicated by the
appearance of a 3-letter abbreviation that also indicates the
language of the Digital Closed Captions: ENG (English),
SPA (Spanish), FRA (French) or other language codes.
Not all programs and VHS videotapes offer closed captions.
Please look for the "
" symbol to ensure that captions will
be shown.
In the Closed Caption system, there can be more than one
caption service provided. Each is identified by its own
number. The "CC1" and "CC2" services display subtitles of
TV programs superimposed over the program’s picture.
In the Closed Caption system, the "Text1" or "Text2"
services display text that is unrelated to the program being
viewed (e.g., weather or news). These services are also
superimposed over the program currently being viewed.
1 Press CC.
This will present the Closed Caption information
display.
2 Press CC while the Closed Caption information is still on
the screen.
Press repeatedly until you select the desired closed
caption service.
Depending on the number of caption services in the
signal being received, you will see information such as
1/2 or 1/4 displayed.
1/2 means "the first of two services".
Example:
If a program has three services (Digital CC(ENG), CC1
and Text1), the closed caption display will toggle in this
sequence:
The CC button keeps a record of the last service selected
in its memory.
If the last closed caption mode (e.g. 1/3 ENG) you
selected is not available for the next program, or on
another channel, the closed caption service that is
available is automatically selected, and this service
appears in parentheses, e.g. "1/3(CC1)".
Closed Caption services that appear in parentheses will
not be stored in the CC button’s memory as your last
selected service. Only services that you have selected
with the CC button are stored.
>>
<<
Direct Button Operation
ENG 3-13
Closed Captions and Digital Closed
Captions (Continue)
Examples:
In a case where there are two closed caption services
provided (for instance, Digital CC(ENG) and CC1), and
Digital CC(ENG) is displayed as your current selection, if
Digital CC(ENG) is not broadcast for the next program, the
other closed caption service, CC1, will be displayed in
parentheses.
A closed caption service appears in parentheses because
the service you selected is not available and a different
service is displayed on your screen. "1/1(CC1)" is displayed
instead of "1/2/ENG".
NOTE
When the program contains no closed caption, "--"
displays in the closed caption information.
If the language code, e.g. "ENG", is not found on Digital
TV programs, "--" will be shown.
Four kinds of closed caption service (CC1, CC2, Text1,
Text2) are potentially available, but a broadcast may
contain none or only some of these services at the
discretion of the program provider.
When a web page is displayed, Closed Captions are not
available.
You can have the same settings by choosing "Change
CC" on the menu items.
>>
<<
Direct Button Operation
ENG 3-14
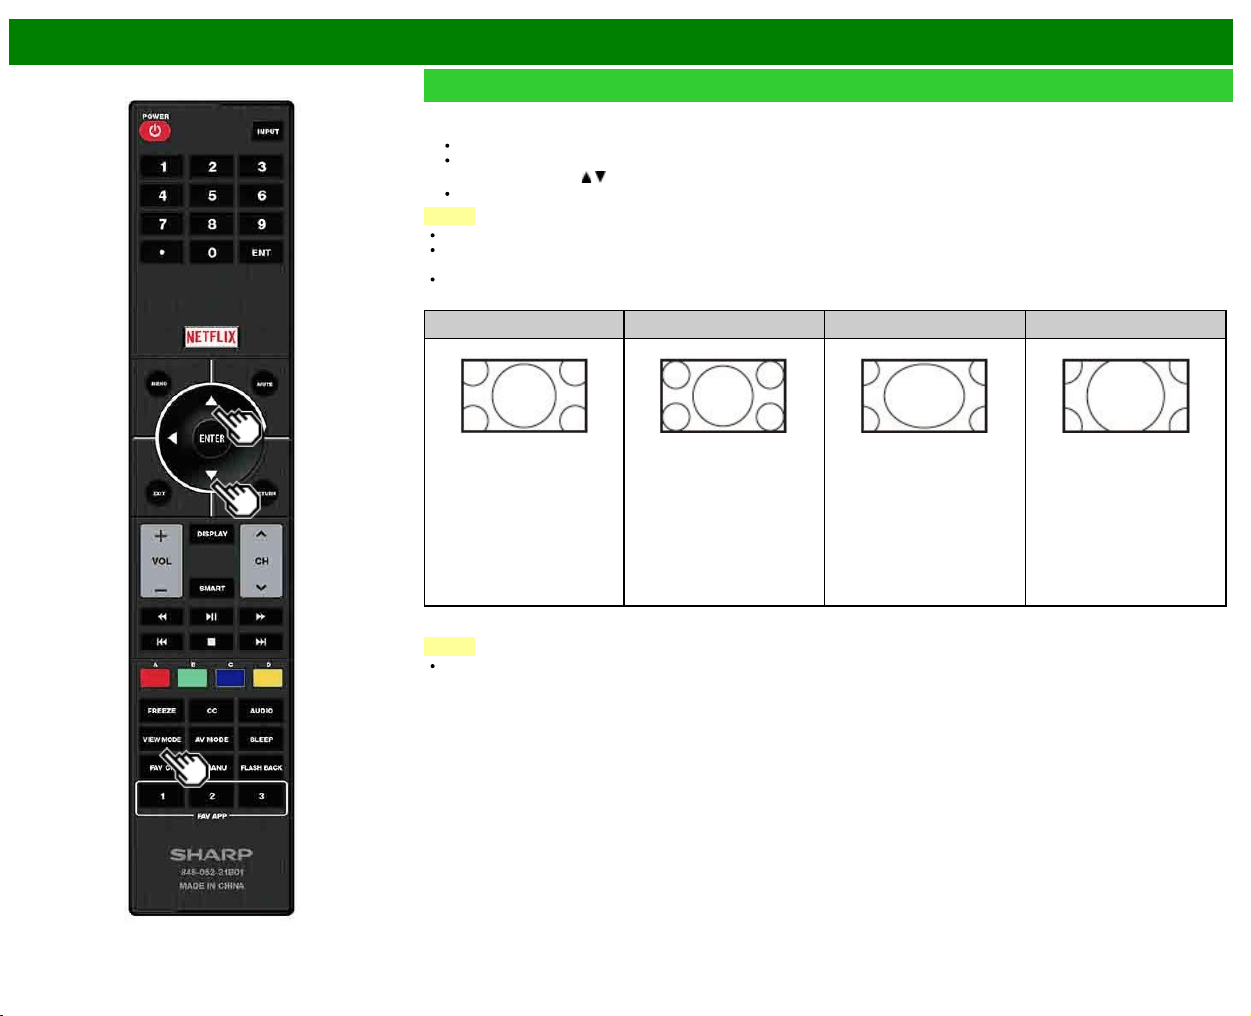
VIEW MODE
You can select the screen size.
1 Press VIEW MODE.
The View Mode menu displays.
The menu lists the View Mode options selectable for the type of video signal currently being received.
2 Press VIEW MODE or
/ while the View Mode menu is displayed to select a desired item on the menu.
You can sequentially select a View Mode that has its own aspect ratio.
NOTE
You can have the same settings by choosing "View Mode" on the menu items.
Each time you press VIEW MODE when a browser screen is shown, the display pattern toggles between a website-only screen
and a TV+Web screen.
Operate this function during the input of other types of signals (such as Full HD).
For HD programs
Stretch
Dot by Dot (Full Screen) S.Stretch (Smart stretch) Zoom
Suitable for viewing wide-
screen 1.78:1 aspect ratio
program, stretch mode will
still show very thin black
bands at the top and
bottom of the screen.
"Dot by Dot" when the
number of pixels on the
screen and the resolution of
the signal are the same.
"Full Screen" when the
number of pixels on the
screen and the resolution of
the signal are different. In
either case, the image fully
fills the screen.
Suitable for stretching 4:3
programs to fill the screen.
Suitable for viewing wide-
screen 2.35:1 aspect-ratio
programs in full screen.
NOTE
When using Dot by Dot or Full Screen, it is possible to see noise or bars around different outer portions of the screen. Please
change view mode to correct this.
>>
<<
Direct Button Operation
ENG 3-15
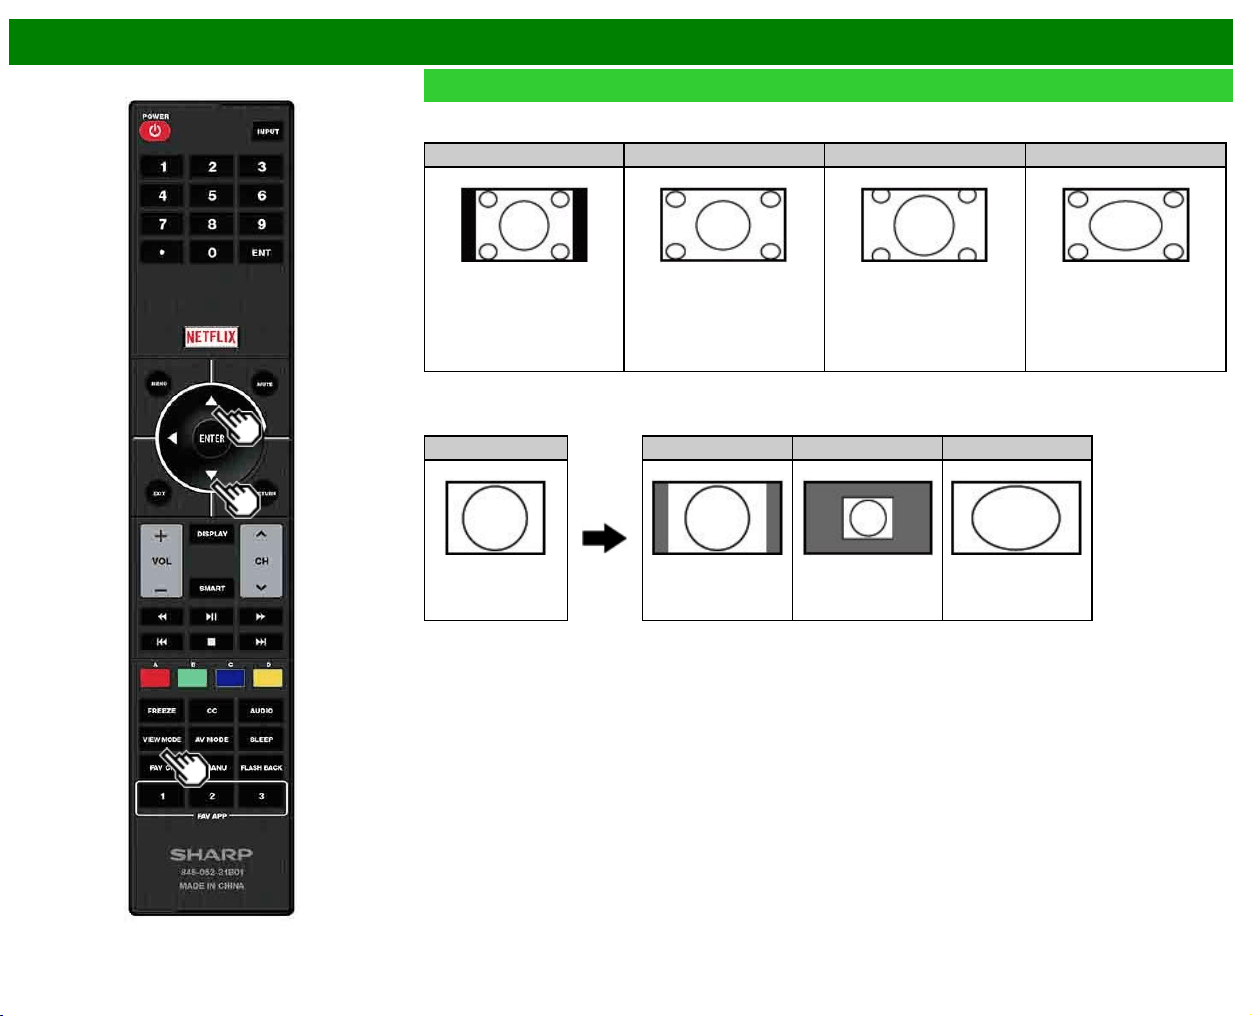
VIEW MODE (Continue)
For 4:3 programs
Example: Screen size images
Side Bar S.Stretch (Smart stretch) Zoom Stretch
Suitable for viewing
conventional 4:3 programs in
their normal format.
Suitable for stretching 4:3
programs to fill the screen.
Suitable for viewing wide-
screen 2.35:1 anamorphic
DVDs in full screen.
This mode is useful for 1.78:1
DVDs. When viewing 1.85:1
DVDs, stretch mode will still
show very thin black bands at
the top and bottom of the
screen.
For USB-Video, Home Network Video or Internet applications
Example: Screen size images
Input signal Auto Original Stretch
Keeps the original
aspect ratio in a full
screen display.
Displays an image by
an original size.
An image fully fills the
screen.
>>
<<
Direct Button Operation
ENG 3-16
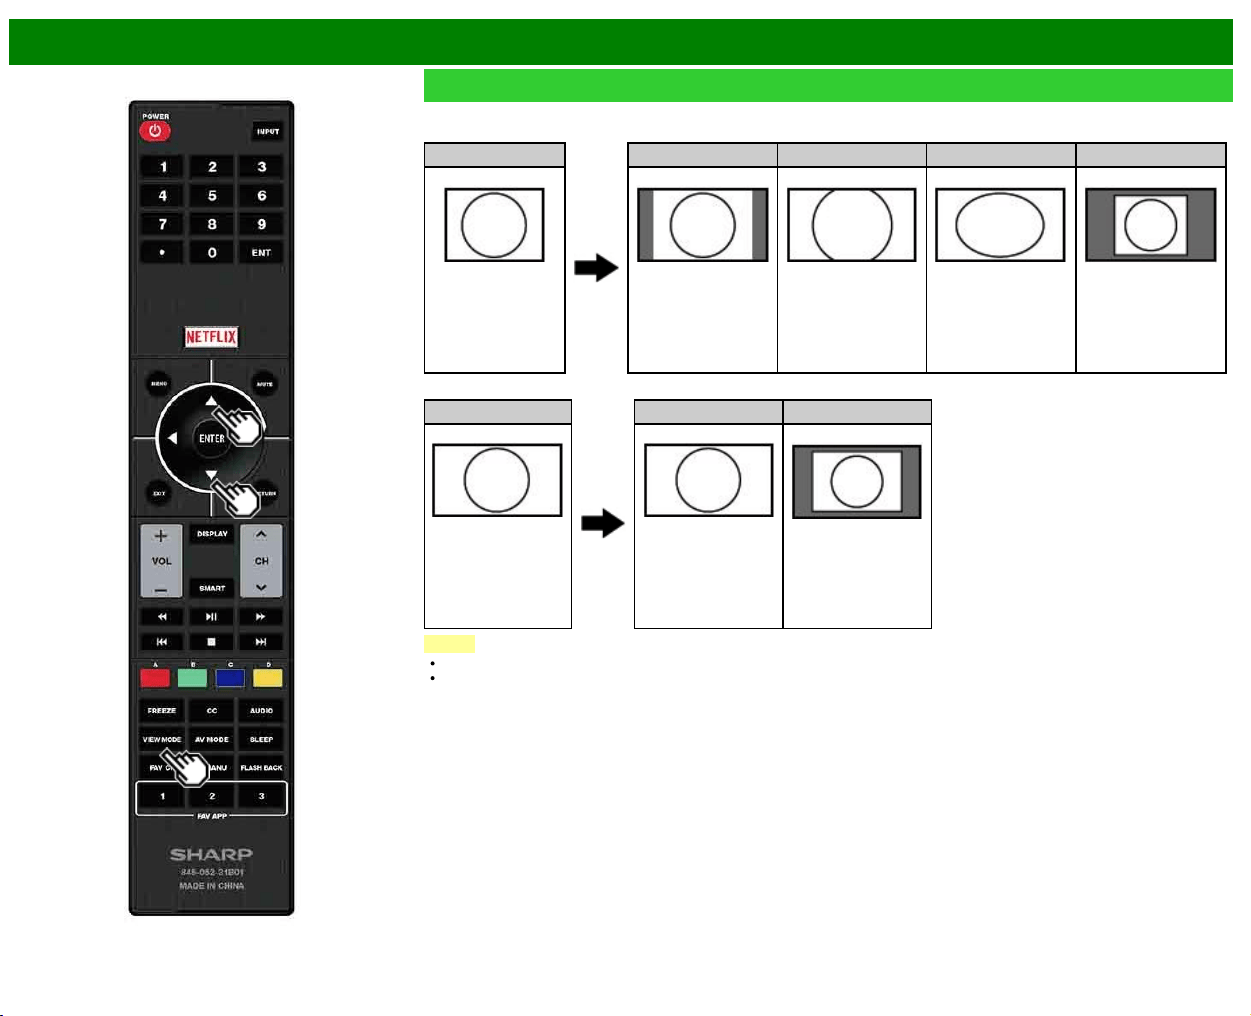
VIEW MODE (Continue)
For PC
Example: Screen size images
Input signal Normal Zoom Stretch Dot by Dot
4:3 Keeps the original
aspect ratio in a full
screen display.
For viewing
widescreen programs.
The top and bottom of
the image are
cropped.
An image fully fills the
screen.
Detects the resolution
of the signal and
displays an image
with the same number
of pixels on the
screen.
Input signal Stretch Dot by Dot
16:9 An image fully fills the
screen.
Detects the resolution
of the signal and
displays an image
with the same number
of pixels on the
screen.
NOTE
Connect the PC before making adjustments. See the Setup Guide.
Selectable screen size may vary with input signal type.
>>
<<
On-Screen Display Menu
ENG 4-1
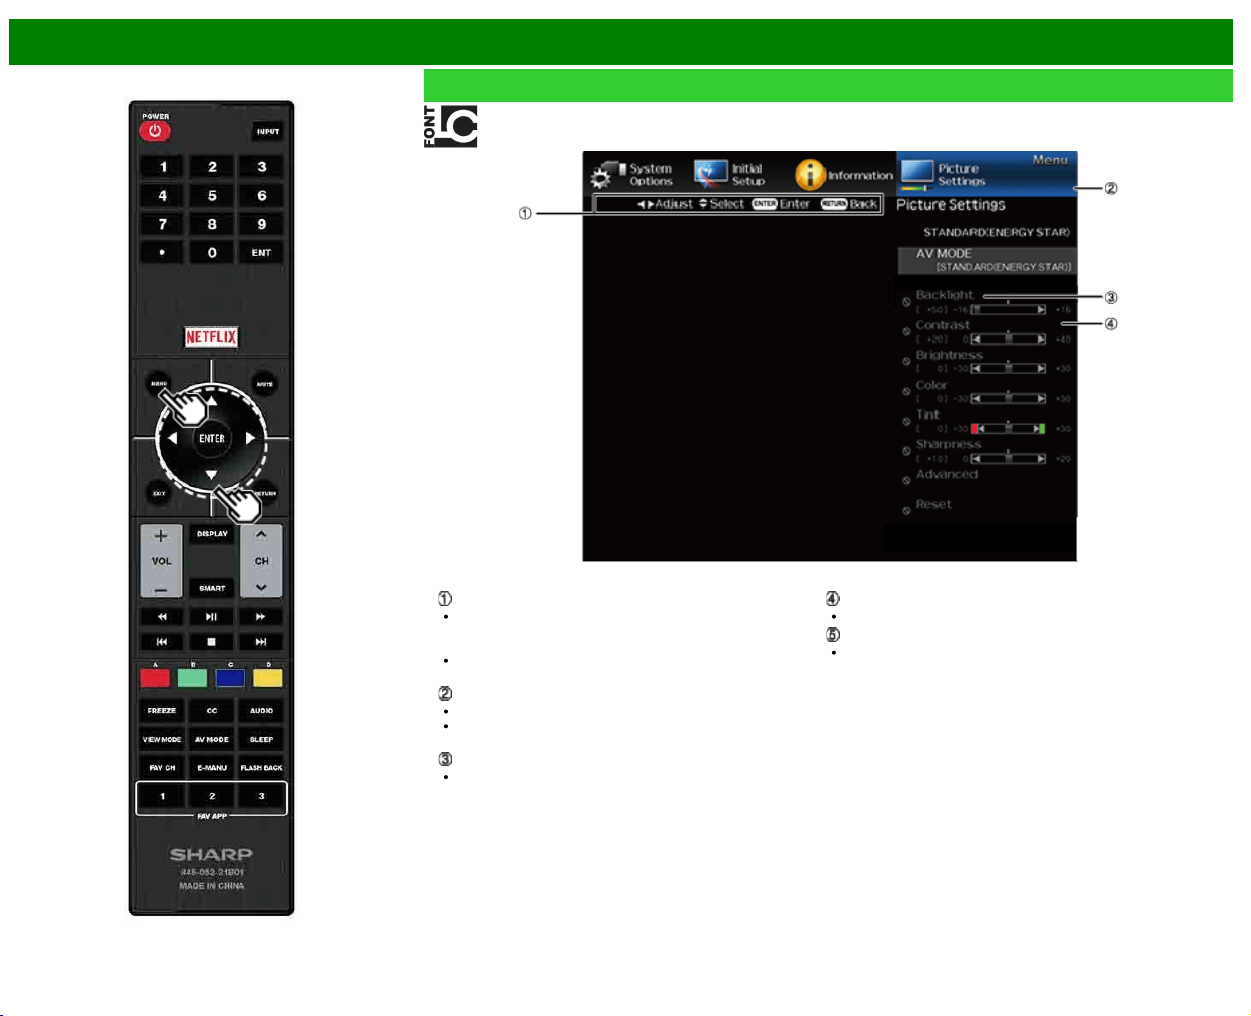
Introduction
LCFONT embedded
Guide display
This indicates the buttons that can be operated on the
displayed screen. The guide display varies depending on
the menu setting screen.
The operations for some selected items may be displayed
in the operational guide bar at the bottom of the screen.
Item displayed in blue
This indicates the item currently selected.
Press ENTER to go to the adjustment screen for this
item.
Item in brackets
This indicates the current setting for the item.
Item displayed in white
This indicates that the item can be selected.
Item displayed in gray
This indicates that the item cannot be selected.
There are various reasons why the items cannot be
selected, but the main reasons are as follows:
— Nothing is connected to the selected input terminal.
— The function is not compatible with the current input
signal.
— When this conflicts with other functions, you must change
the settings for the other functions.
>>
<<
On-Screen Display Menu
ENG 4-2
Introduction (Continue)
About Menu Items
Some menu items may not be displayed depending on the
selected input source.
NOTE
The screens in the operation manual are for explanation
purposes (some are enlarged, others cropped) and may
vary slightly from the actual screens.
The order of explanations for each menu item in the
following pages is not necessarily in accordance with the
alignment of the items on the screen.
LCFONT:
This product is embedded with LC Font technology, which
was developed by SHARP Corporation for clearly
displaying easy-to-read characters on LCD screens.
>>
<<
On-Screen Display Menu
ENG 4-3
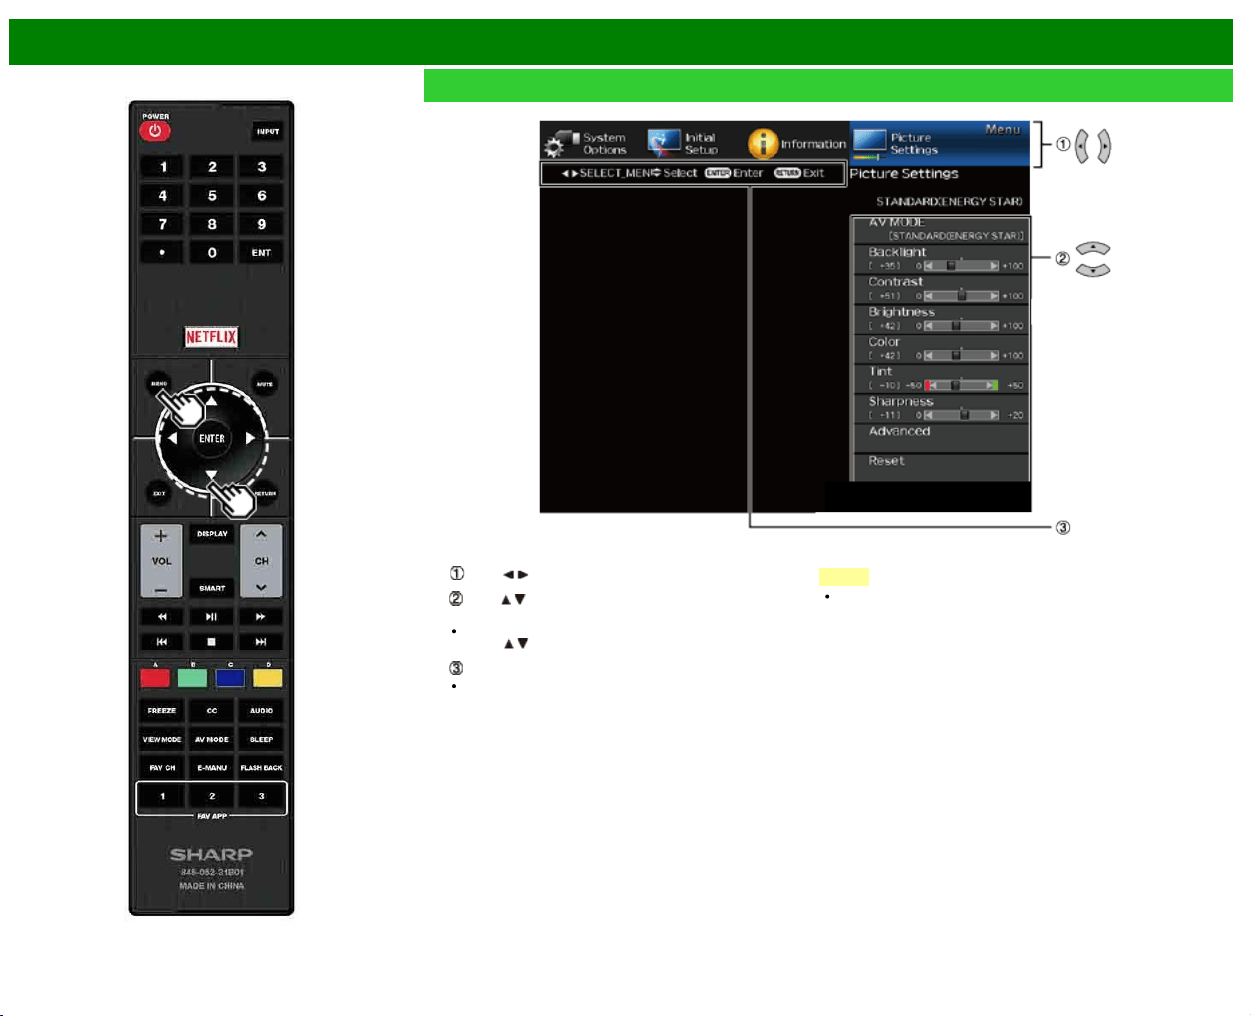
On-Screen Display Menu Operation
Example
1 Press MENU to display the MENU screen.
2
Press / to select the desired menu.
Press / to select a specific adjustment item, and then
press ENTER.
Additional related adjustment items may be displayed.
Press
/ to select the desired item.
Adjust the item while referring to the guide display.
Operations vary depending on the function or item.
Refer to the guide display corresponding to the menu
setting screen for button operations.
3 Press MENU to exit.
NOTE
Menu options differ in the selected input modes, but the
operating procedures are the same.
>>
<<
On-Screen Display Menu
ENG 4-4
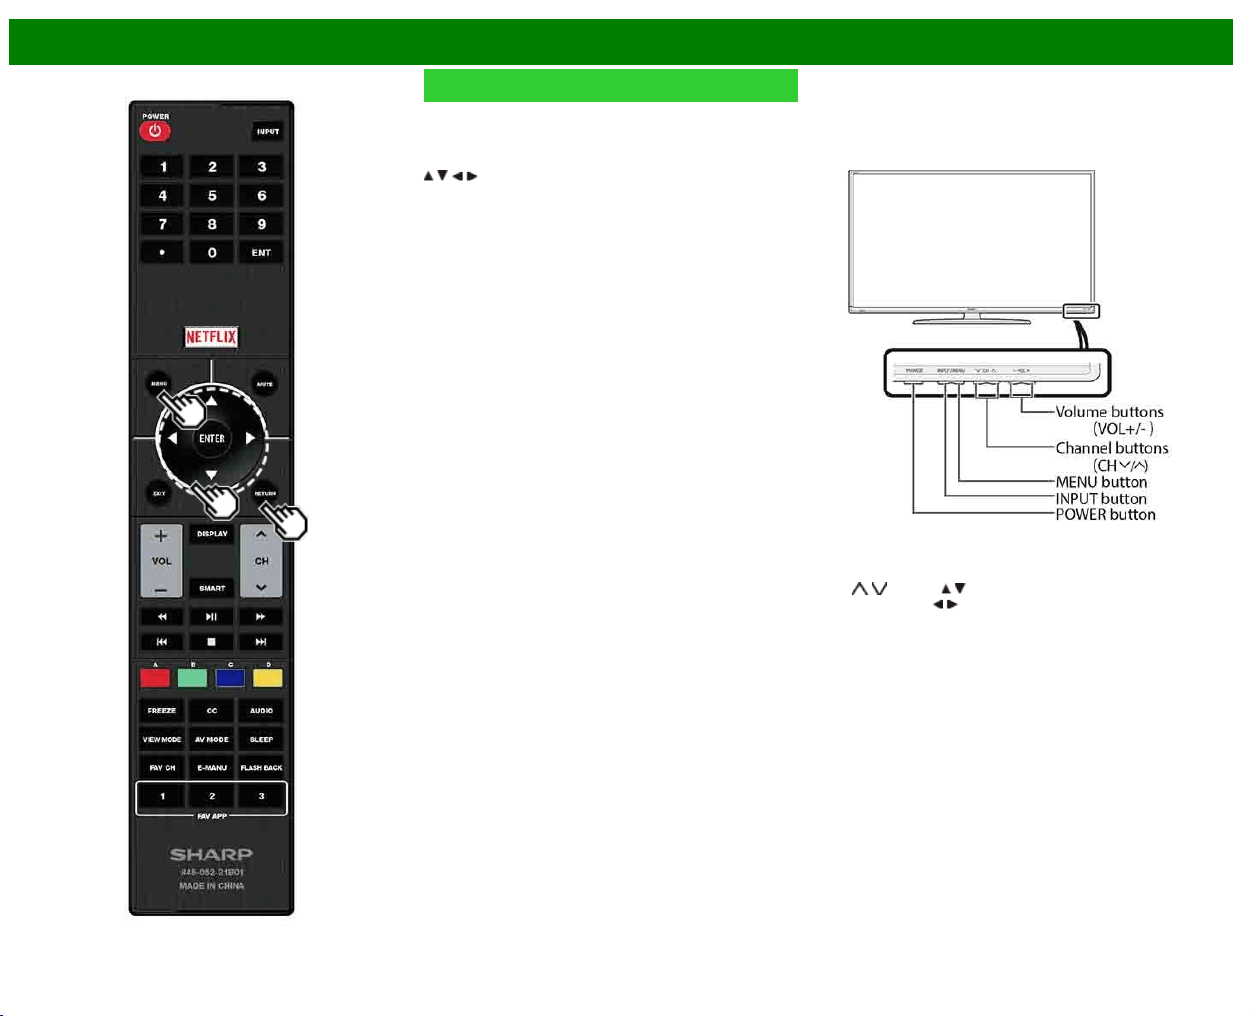
Menu Operation Buttons
Using the remote control
Use the following buttons on the remote control to operate
the menu.
MENU: Press to open or close the menu screen.
/ / / : Press to select a desired item on the screen or
adjust a selected item.
ENTER: Press to go to the next step or complete the
setting.
RETURN: Press to return to the previous step.
Using the control panel of the TV
You can also operate the menu with the control panel of the
TV.
Button operations on the control panel correspond to the
ones on the remote control as shown below.
MENU: MENU on the remote control.
INPUT: ENTER on the remote control.
CH
/ : Cursor / on the remote control.
VOL+/-: Cursor
/ on the remote control.
>>
<<
On-Screen Display Menu
ENG 4-5
Example
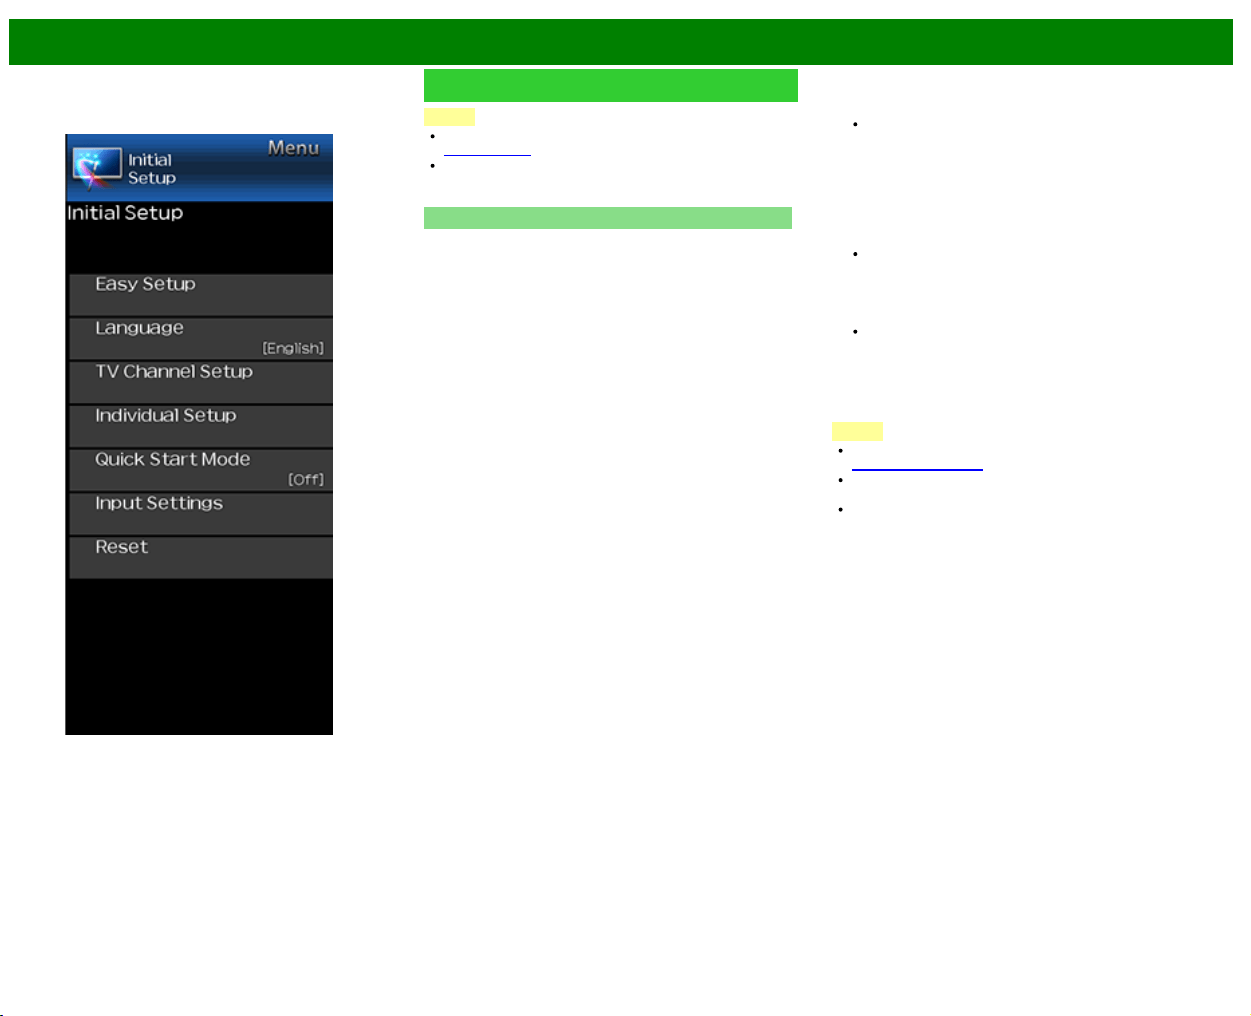
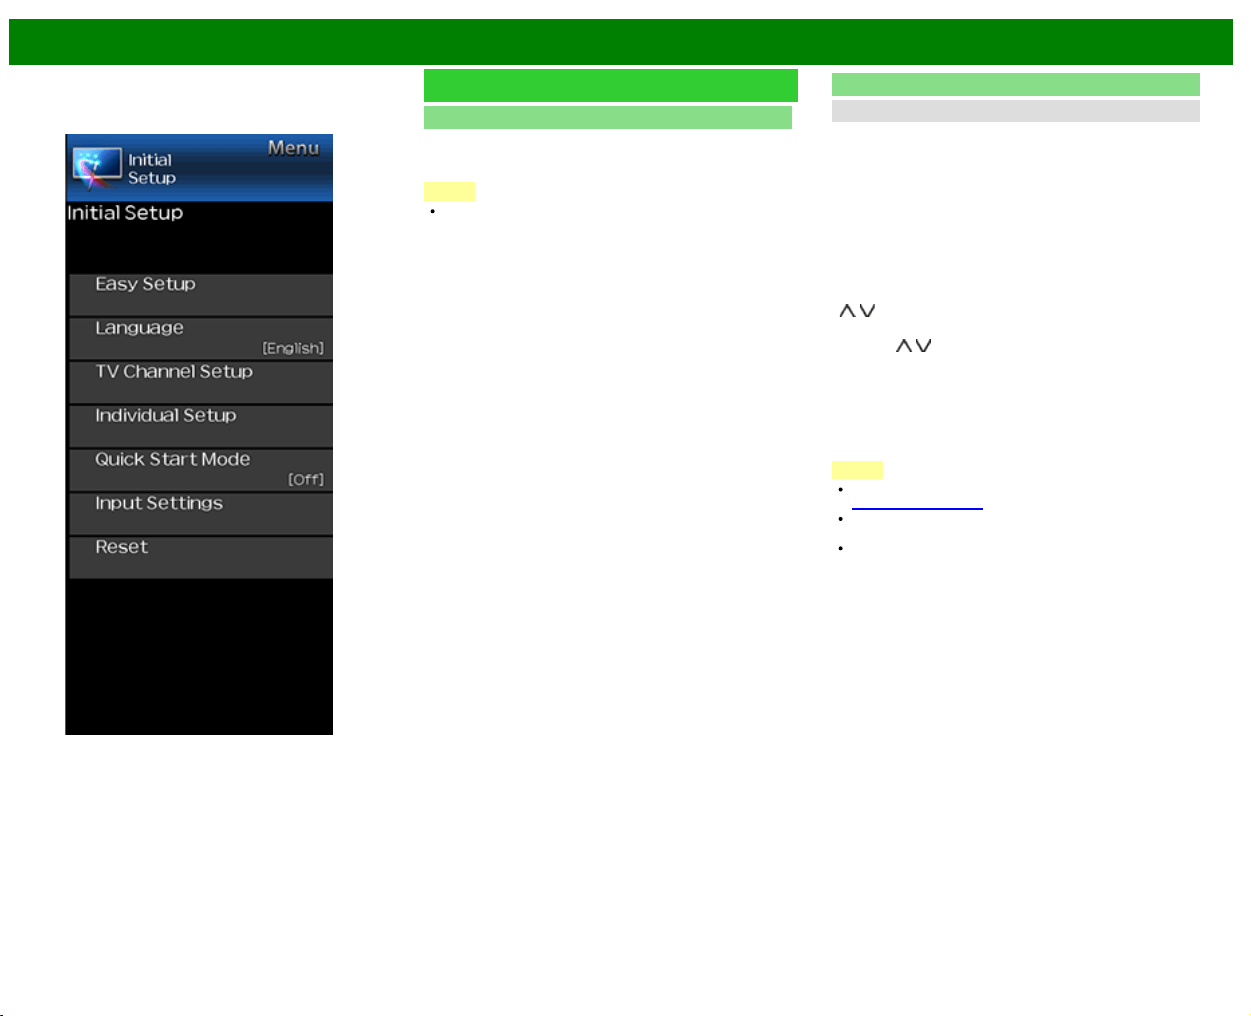
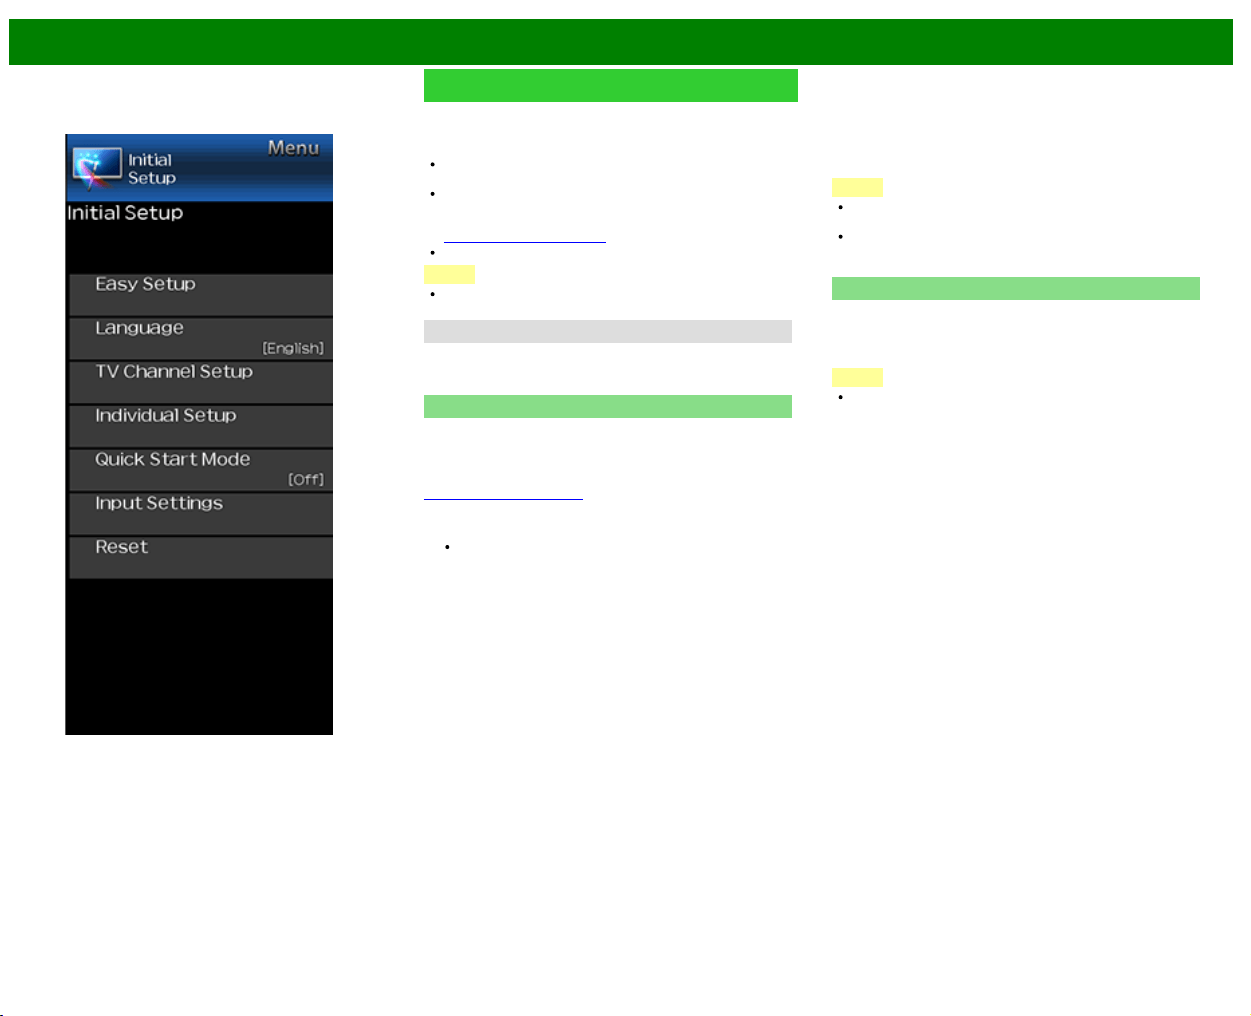
Initial Setup
NOTE
For operating the on-screen display menu,
see page 4-3.
When you select "Easy Setup", "CH Setup", "Parental
Control" or "Reset", you can enter the 4-digit secret
number here.
Easy Setup
You can run Easy Setup again, even after setting up the
preset channels.
Language: Select from among 3 languages (English,
French and Spanish).
Location & Time: Make settings for the country, area and
time zone where you use the TV.
Select your country: Select either "United States",
"Canada" or "Mexico".
Select your time zone: Select your time zone. The
available settings differ depending on the selected country.
Select DST (Daylight Savings Time): Select "Auto",
"Manual" or "Off".
TV Location: Select "Home" or "Store" for the location
where you plan to install the TV. This product qualifies
for ENERGY STAR in Home mode default setting.
Home: AV MODE is set to "STANDARD (ENERGY
STAR)".
Store: AV MODE is set to "DYNAMIC (Fixed)". Picture
Reset and Feature Demo can be set.
Picture Reset: AV MODE will be set to "DYNAMIC
(Fixed)" regardless of whether Picture Reset is "On" or
"Off". If you select "On", AV MODE will be reset to
"DYNAMIC (Fixed)" if there is no operation for 30 minutes.
When "Off" is selected, AV MODE will be set to
"DYNAMIC (Fixed)".
Feature Demo: When "On" is selected, after all the
settings are completed, the Feature Demo screen is
displayed if there is no operation for several minutes.
ENERGY STAR qualification is based on AV MODE
"STANDARD (ENERGY STAR)".
Antenna & Cable/STB: Select the type of connection you
will use to watch TV.
Air/Cable: Make sure what kind of connection is made
with your TV when selecting "Air" or "Cable".
CH Search: Channel auto search makes the TV look for
all channels viewable in the set area.
If "Cable" is selected for Antenna setting, scrambled
channels are removed after the Channel search has
been completed.
Smart TV: When you connect to the Internet on the TV,
confirm the connection method and make adjustments.
Wireless LAN connection is possible only when the
WPS (push button) method is used. If any other
method is used, make settings by Smart TV > Internet
Setup > Internet Connection.
Completed: The settings confirmation screen is displayed.
Confirm the information displayed on the screen.
NOTE
See Initial Installation on
see pages 2-2 to 2-7 for setting each item.
If no channel is found, confirm the type of connection
made with your TV and try "Easy Setup" again.
If you select "Analog Search Start" and initiate the
channel search, the CH Memory for Cable Digital will be
deleted.
>>
<<
On-Screen Display Menu
ENG 4-6
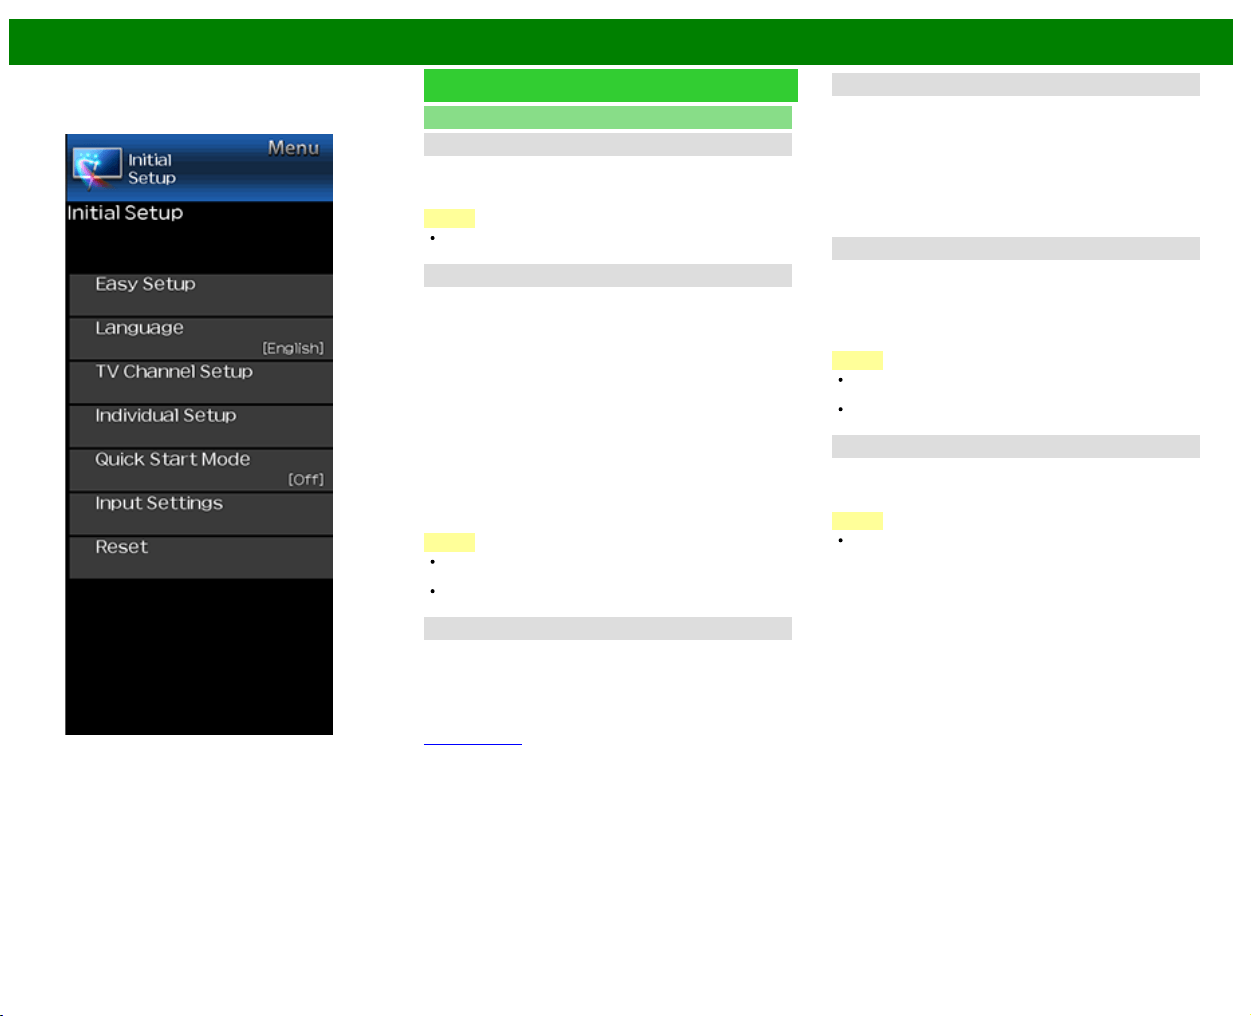
Example
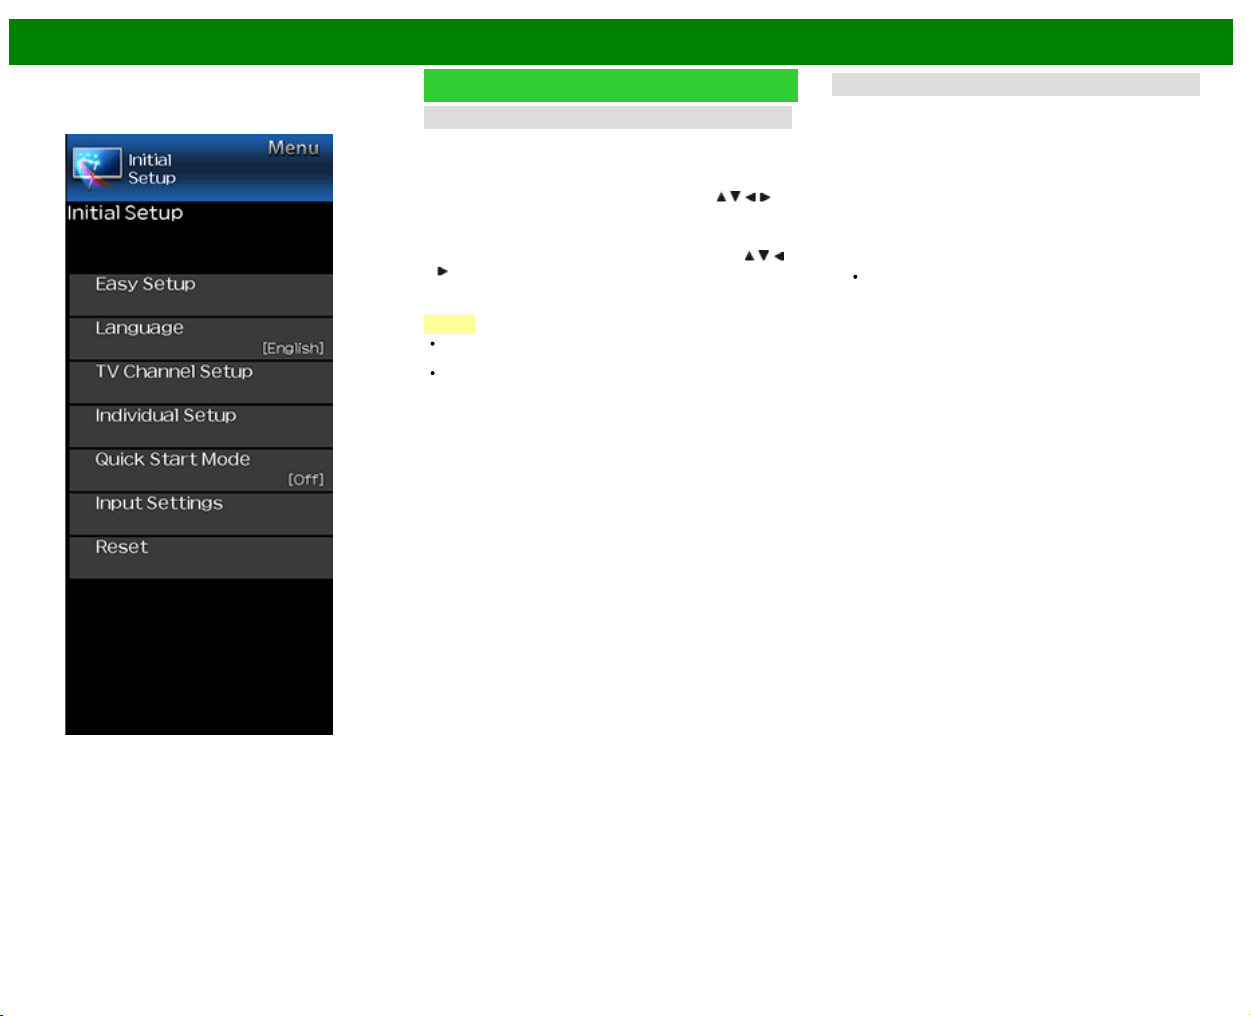
Initial Setup (Continue)
Language
You can also select a language from the Initial Setup menu.
Select from among 3 languages: English, French and
Spanish.
NOTE
To change the language of the manual, select "MENU" >
"Initial Setup" > "Language" to change the language.
TV Channel Setup
Channel Setup
If Initial Installation does not memorize all the channels in
your region, follow the instructions below to manually
memorize the channels.
Air/Cable: Make sure what kind of connection is made
with your TV when selecting "Air" or "Cable".
CH Search: Channel auto search makes the TV look for
all channels viewable in the set area.
CH Memory: You can select the channels to skip in each
ANALOG (Air), ANALOG (Cable), DIGITAL (Air) and
DIGITAL (Cable).
On: Skips channels. (Channel selection disabled using CH
/ .)
Off: Does not skip channels. (Channel selection enabled
using CH
/ .)
Remove Scrambled CH: This function makes the TV look
for and then delete digital cable channels that are
scrambled and so unavailable in the set area. The
process may take more than 20 minutes.
Yes: Starts to remove scrambled channels.
No: This function does not work.
NOTE
See Initial Installation on
see pages 2-2 to 2-7 for setting each item.
If no channel is found, confirm the type of connection
made with your TV and try channel search again.
If you select "Analog Search Start" and initiate the
channel search, the CH Memory for Cable Digital will be
deleted.
>>
<<
On-Screen Display Menu
ENG 4-7
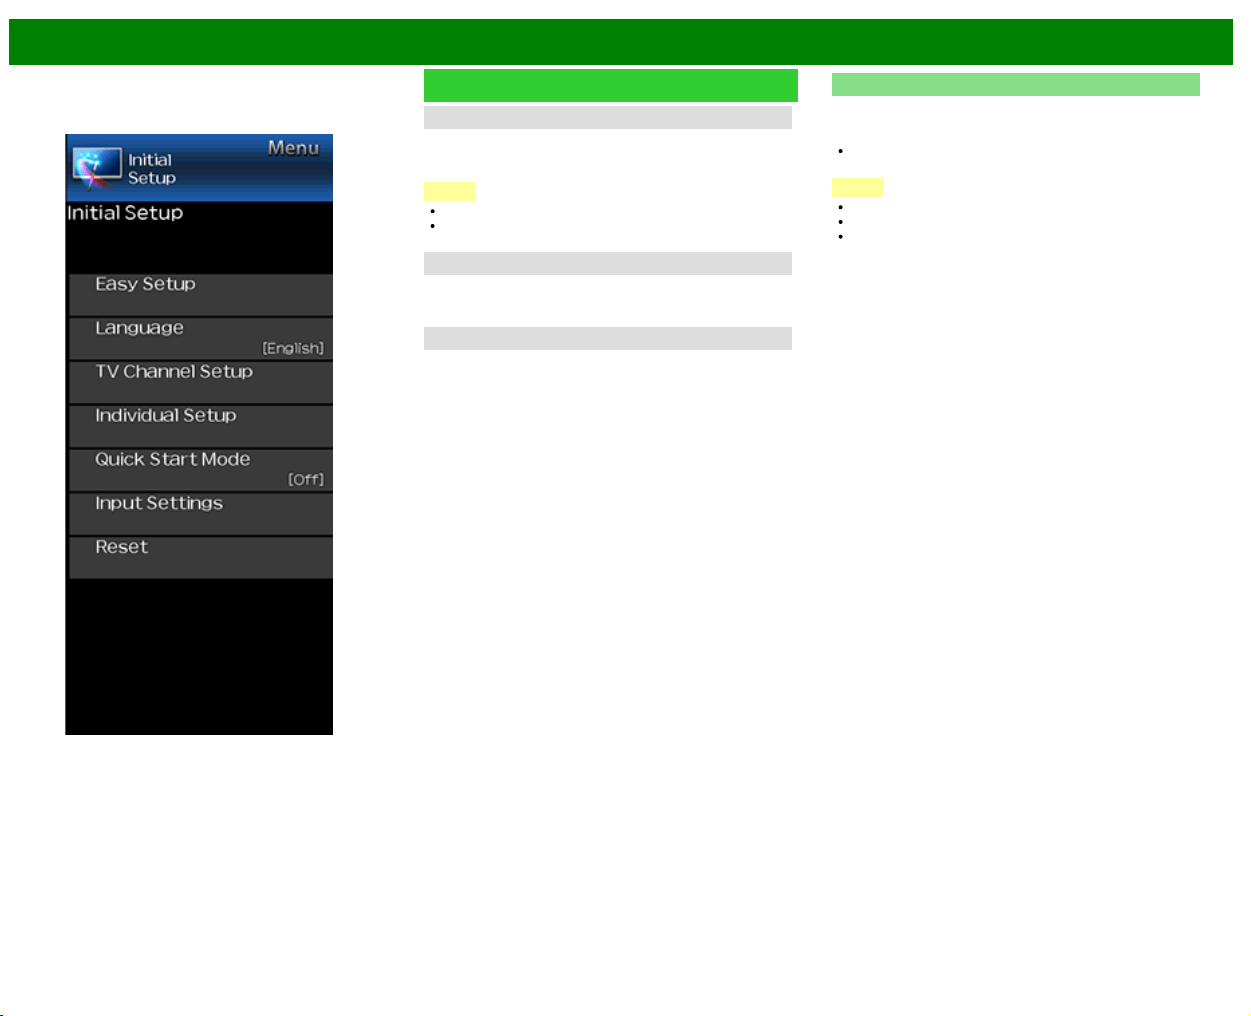
Example
Initial Setup (Continue)
Favorite CH (Favorite Channel Setting)
This function allows you to program 4 favorite channels, in 4
different categories. By setting the favorite channels in
advance, you can select your favorite channels easily.
To register your favorite channel:
Select "Register" and then press ENTER. Press
/ / / to
select the position in the category, and then press ENTER
to register.
To delete your favorite channel:
Select "1 Data Clear" and then press ENTER. Press
/ / /
to select the channel you want to delete, and then
press ENTER. Select "Yes" and then press ENTER.
To delete all the favorite channels, select "All Data Clear".
NOTE
Before setting the channel, select the channel you want
to register as a favorite channel.
You can display the "Favorite CH" screen by pressing
FAVORITE CH on the remote control.
Antenna Setup-DIGITAL
In order to receive digital air broadcasts, you need a digital
broadcast antenna. You can confirm the antenna
configuration through the "Antenna Setup-DIGITAL" screen.
If necessary, adjust the direction of the antenna to obtain the
maximum signal strength.
Signal Strength: The signal strength of DIGITAL channel
is displayed. The signal information is based on the
current channel.
Channel Strength: Input the 2-digit channel number to
check the signal strength of the selected channel. Make
sure the signal is strong enough for each channel.
This function is available for DIGITAL (Air) only.
>>
<<
On-Screen Display Menu
ENG 4-8
Example
Initial Setup (Continue)
Individual Setup
Secret No.
Allows you to use a secret number to protect certain
settings from being accidentally changed.
IMPORTANT:
Three conditions must be met to enable the V-Chip
1. Secret No. is registered.
2. V-Chip/V-Chip (DTV Only) settings have been made.
The "V-Chip (DTV Only)" will only be selectable when a
new rating system can be downloaded via digital
broadcasting in the U.S.
3. "Status" is set to "On".
Setting Secret No.
You can set and change the secret number by using 0-9.
Yes: Changes or sets the Secret No.
No: The confirmation screen to clear the Secret No.
appears when the Secret No. has been set. When the
Secret No. has not been set, the previous screen will be
displayed.
NOTE
As a precautionary measure, make a note of your secret
number and keep it in a familiar place.
Parental Control
(Parental Control Setting)
V-Chip
V-CHIP is an electronic filtering device built into your TV.
This tool gives parents a great degree of control over
broadcasts accessed by their children. It allows parents to
select programs judged suitable for child viewing while
blocking ones judged not suitable. It does so automatically
once you activate the V-CHIP feature in your TV. "V-Chip"
and "Status" will not be selectable from the menu if you do
not first configure your secret number.
The U.S. has two rating systems for viewing content: TV
Parental Guidelines and movie ratings.
The TV Parental Guidelines work in conjunction with the
V-CHIP to help parents screen out inappropriate
television shows from their children.
Movie ratings are used for original movies rated by the
Motion Picture Association of America (MPAA) as
watched on cable TV and not edited for television. The
V-CHIP can also be set to block MPAA-rated movies.
NOTE
The setting automatically enters "Block" for any ratings
below your selection.
If Status is not set to "Enable", the configuration settings
will not work.
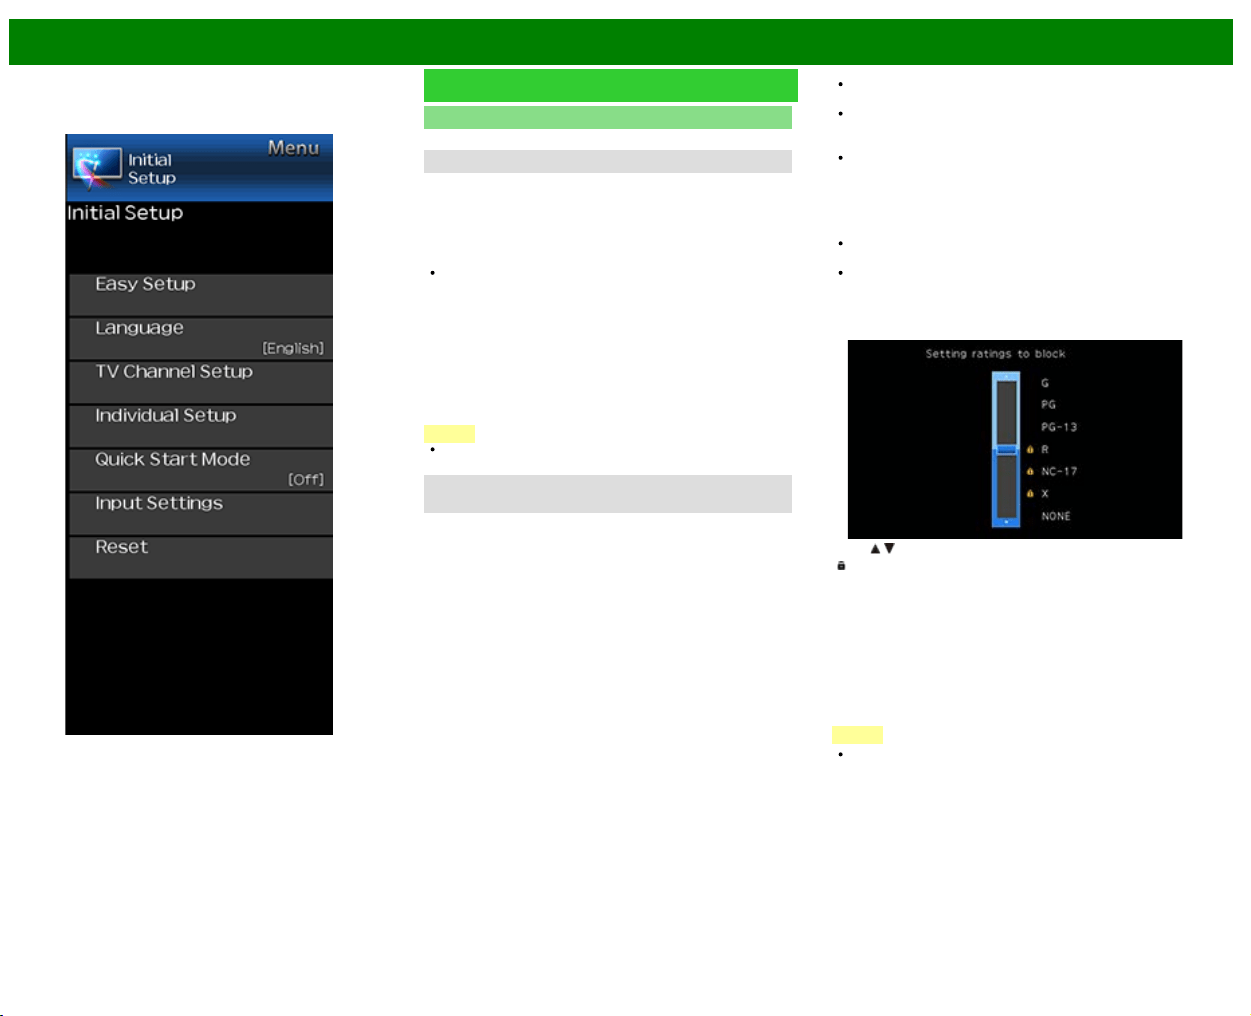
MPAA (Voluntary movie rating system)
Example
Press / to adjust the item to your desired position.
"
" indicates the item is blocked. Press MENU to exit.
G: General audiences. All ages admitted.
PG: Parental guidance suggested. Some material may not
be suitable for children.
PG-13: Parents strongly cautioned. Some material may be
inappropriate for children under 13.
R: Restricted. Under 17 requires accompanying parent or
adult guardian (age varies in some jurisdictions).
NC-17: No one 17 and under admitted.
X: X is an older rating that is unified with NC-17 but may be
encoded in the data of older movies.
NOTE
Voluntary movie rating system only uses an age-based
rating.
>>
<<
On-Screen Display Menu
ENG 4-9
Example
Initial Setup (Continue)
Individual Setup
Parental Control
(Parental Control Setting)
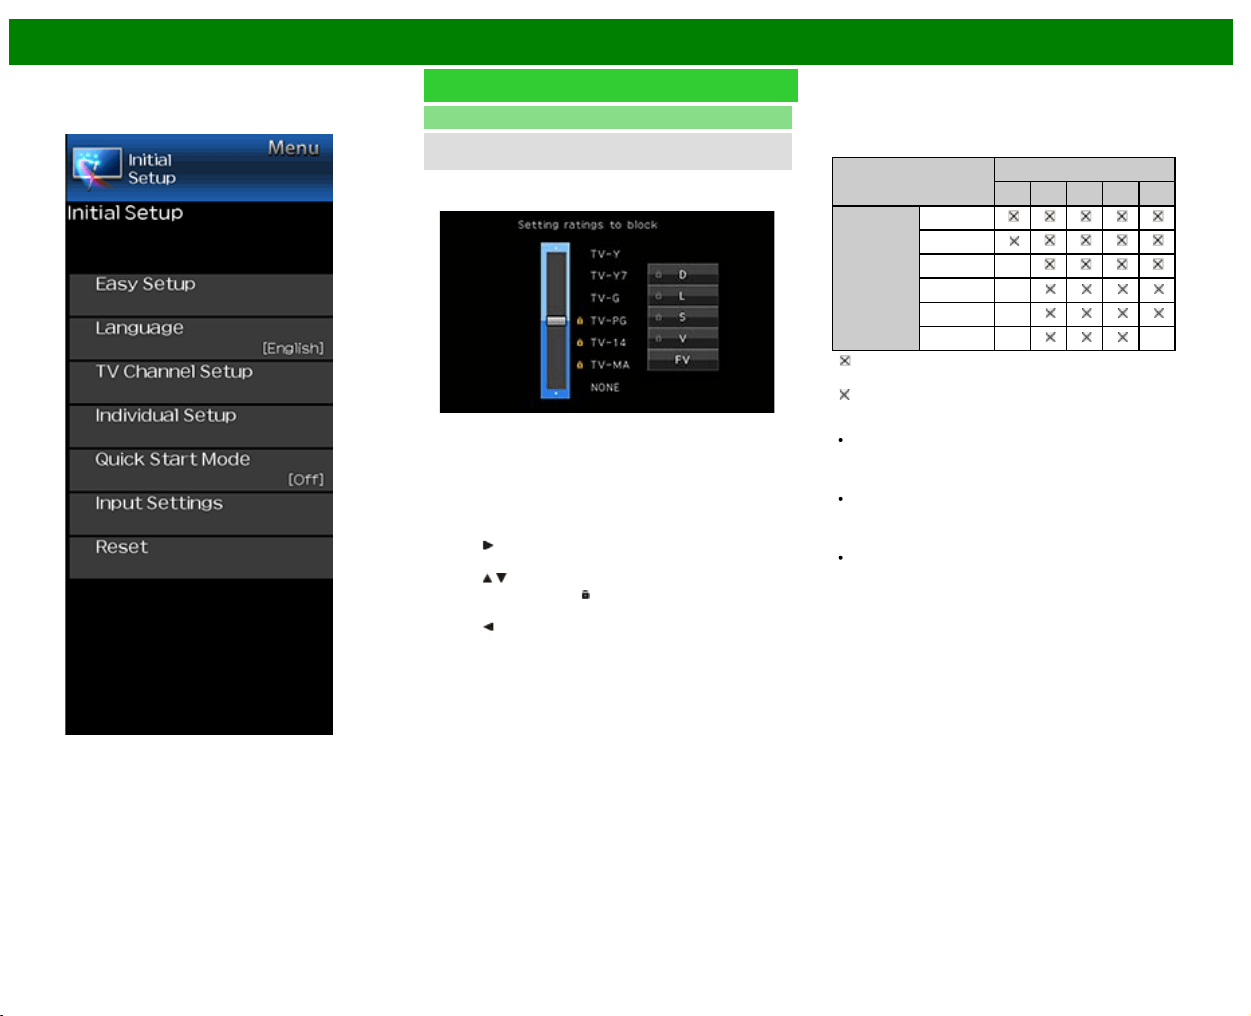
TV Parental Guidelines
Example
Suggested age
TV-Y: All children.
TV-Y7: Directed to older children.
TV-G: General audience.
TV-PG: Parental Guidance suggested.
TV-14: Parents strongly cautioned.
TV-MA: Mature audience only.
When setting an individual content-based rating item:
1 Press
to access blocked content items from the
currently selected age-based rating item.
2 Press / to select an individual item, and then press
ENTER to unblock it ("
" is removed). Repeat the same
steps for the other items.
3 Press
to register after all individual content rating
items are set.
Content
FV: Fantasy violence.
V: Violence.
S: Sexual situation.
L: Adult language.
D: Sexually suggestive dialog.
Rating
Content
FV V S L D
Suggested
age
TV-Y
TV-Y7
TV-G
TV-PG
TV-14
TV-MA
: The content rating can be set, but this rating is not
normally broadcast by TV stations.
: Content rating can be set.
Canadian Rating Systems (Canadian English ratings
and Canadian French ratings)
The TV rating systems in Canada are based on the
Canadian Radio-Television and Telecommunications
Commission (CRTC) policy on violence in television
programming.
While violence is the most important content element to
be rated, the structure developed takes into consideration
other program contents like language, nudity, sexuality
and mature themes.
When setting the V-CHIP on the Canadian system you
can choose either the Canadian English ratings or the
Canadian French ratings.

>>
<<
On-Screen Display Menu
ENG 4-10
Example
Initial Setup (Continue)
Individual Setup
Parental Control
(Parental Control Setting)
Canadian English Ratings
E: Exempt: Includes news, sports, documentaries and
other information programming; talk shows, music
videos, and variety programming.
C: Children: Intended for younger children under the age of
8 years. Pays careful attention to themes that could
threaten their sense of security and well-being.
C8+: Children over 8 years old: Contains no portrayal of
violence as the preferred, acceptable, or only way to
resolve conflict; nor encourage children to imitate
dangerous acts which they may see on the screen.
G: General: Considered acceptable for all age groups.
Appropriate viewing for the entire family, contains very
little violence, physical, verbal or emotional.
PG: Parental Guidance: Intended for a general audience,
but may not be suitable for younger children (under the
age of 8) because it could contain controversial themes
or issues.
14+: Over 14 years: Could contain themes where violence
is one of the dominant elements of the storyline, but it
must be integral to the development of plot or character.
Language usage could be profane and nudity present
within the context of the theme.
18+: Adults: Intended for viewers 18 years and older and
might contain depictions of violence, which while related
to the development of plot, character or themes, are
intended for adult viewing. Could contain graphic
language and portrayals of sex and nudity.
Canadian French Ratings
E: Exempt programming.
G: General: All ages and children, contains minimal direct
violence, but may be integrated into the plot in a
humorous or unrealistic manner.
8ans+: General but inadvisable for young children: May be
viewed by a wide public audience, but could contain
scenes disturbing to children under 8 who cannot
distinguish between imaginary and real situations.
Recommended for viewing with parent.
13ans+: Over 13 years: Could contain scenes of frequent
violent scenes and therefore recommended for viewing
with parent.
16ans+: Over 16 years: Could contain frequent violent
scenes and intense violence.
18ans+: Over 18 years: Only for adult viewing. Could
contain frequent violent scenes and extreme violence.
How to temporarily release the V-CHIP BLOCK
When the V-CHIP BLOCK is working and censors a
broadcast, "V-CHIP HAS BEEN ACTIVATED." displays.
1 Press ENTER while the V-CHIP is working, and then the
secret number setting menu displays.
2 Input the 4-digit secret number by using 0–9. At this time
V-CHIP BLOCK temporarily releases.
>>
<<
On-Screen Display Menu
ENG 4-11
Example
Initial Setup (Continue)
Reactivating the temporarily released V-CHIP BLOCK
You can reactivate the temporarily released V-CHIP BLOCK
as shown below.
Select "Status" setting from the Parental Control menu to
reactivate BLOCK.
Select "V-Chip" setting ("MPAA", "TV Guidelines", "Can.
English Ratings" or "Can. French Ratings") from the
Parental Control to reactivate BLOCK.
(See pages 3-12 to 3-13.)
Switch off the TV power.
NOTE
Performing any of the three above will activate the V-
CHIP BLOCK.
Status
Used to enable or disable the parental control function. This
function will not be selectable from the menu if you do not
first configure your secret number.
Secret No.
Allows you to use a secret number to protect certain
settings from being accidentally changed.
IMPORTANT:
Three conditions must be met to enable the V-Chip
(see pages 3-12 to 3-13):
1. Secret No. is registered.
2. V-Chip/V-Chip (DTV Only) settings have been made.
The "V-Chip (DTV Only)" will only be selectable when
a new rating system can be downloaded via digital
broadcasting in the U.S.
3. "Status" is set to "Enable".
Setting Secret No.
You can set and change the secret number by using 0-9.
Yes: Changes or sets the Secret No.
No: "Delete Secret No." menu will appear when the Secret
No. has been set. When the Secret No. has not been
set, the previous screen will be displayed.
NOTE
As a precautionary measure, make a note of your secret
number and keep it in a familiar place.
If the secret number is cleared, the Status setting
automatically sets to "Off". "V-Chip" and "Status" will not
be selectable from the menu.
Quick Start Mode
When this function is activated, you can reduce the TV's
start-up time or even let the TV in standby mode start
displaying images and so on via the connected equipment
on the network.
NOTE
Setting "Quick Start Mode" to "On" consumes more
power.
>>
<<
On-Screen Display Menu
ENG 4-12
Example
Initial Setup (Continue)
Input Settings
HDMI Setup - Auto View
When you view images sent from external equipment in an
HDMI connection, this function allows the image size on the
TV to automatically switch to an appropriate one.
NOTE
Refer to your external equipment operation manual for the
signal type.
DIGITAL AUDIO
You can output digital audio to an AV amplifier or similar
device whose DIGITAL AUDIO INPUT terminal is connected
to the DIGITAL AUDIO OUT terminal on the TV. Please
select an audio output format compatible with the audio
format of the program you are watching and the equipment
connected.
Off: Close the digital audio output function.
PCM: For connecting to equipment that does not support
Dolby Digital. The same audio (main, sub, or main/sub)
as the audio of the program being viewed is output.
2-channel audio with a sampling rate of 48 kHz or less is
output as linear PCM audio.
Bitstream: For connecting to an audio system that
supports Dolby Digital. Audio is output through both the
main and sub channels.
NOTE
Analog channel audio and video input audio are output in
PCM mode even when "Bitstream" is selected.
PCM digital input signals are output in PCM mode even
when "Bitstream" is selected.
Audio Select
This function sets the terminal to output the computer audio.
The adjustment items vary depending on the input source.
Select the input source corresponding to the terminal
connected to the PC and then adjust the desired item.
To perform the operation, refer to "Initial Setup" >
"Advanced" > "Audio Select".
(See page 3-8.)
Output Select
Allows you to select what controls the audio output.
Fixed: Sound via speaker is adjusted with VOL+/- on the
remote control unit or on the TV.
Sound via the AUDIO OUT terminal is not adjustable and
outputs at a consistent level.
Variable: Sound via the AUDIO OUT terminal is adjusted
with VOL+/- on the remote control unit or on the TV.
Sound via speaker is muted.
Input Select
For image input applied to the COMPONENT IN or VIDEO
IN terminal, switch to “COMPONENT” or “VIDEO”,
respectively.
COMPONENT: Select component video
VIDEO: Select composite video.
NOTE
If no (color) image display, try changing to another signal
type.
Check the operation manual of the external equipment for
the signal type.
Input Skip
This setting allows you to skip the TV, HDMI or PC IN Input
("PC IN, COMPONENT, HDMI 1, HDMI 2, HDMI 3 and
VIDEO") on the Input Selection operation.
NOTE
If you connect external equipment to an HDMI IN terminal
which you have set to be skipped, a notification message
appears on the display when a signal is received from
the connected external equipment. Press "Yes" to reset
the related skipping setting so that the input terminal
becomes available.
>>
<<
On-Screen Display Menu
ENG 4-13
Example
Initial Setup (Continue)
Color System
Select the video signal system compatible with your
equipment from the list below:
Auto/NTSC/PAL-M/PAL-N
NOTE
"Color System" can only be set for the VIDEO IN 1 or 2.
If you have already set the Secret No., input the 4-digit
secret number here.
LINK Setup
Make the settings to use AQUOS LINK.
Set the settings with "Initial Setup" > "Input Settings" > "LINK
Setup".
Fine Sync.
You can adjust the position on the image input from a PC
the settings with "Initial Setup" > "Input Settings" > "Fine
Sync.".
Reset
If complex adjustments are made and the settings cannot be
restored to normal, you can reset the settings to the factory
preset values.
If you have already set the Secret No., input the 4-digit
secret number here.
NOTE
The Channel Setup settings will not be changed.
The Language settings will not be changed.
The TV Location settings will not be changed.
>>
<<
On-Screen Display Menu
ENG 4-14
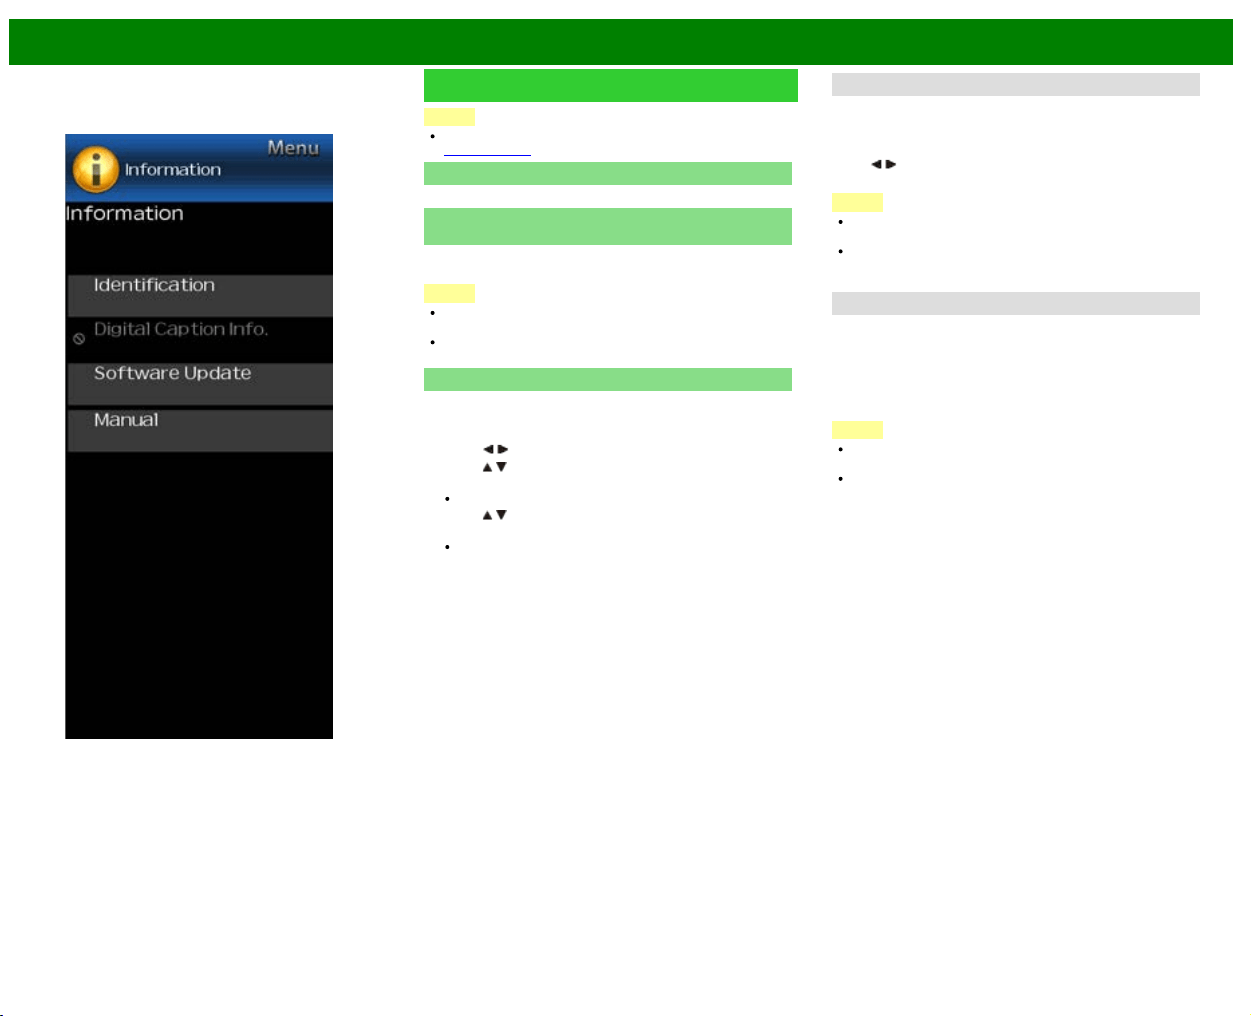
Example
Information
NOTE
For operating the on-screen display menu,
see page 4-3.
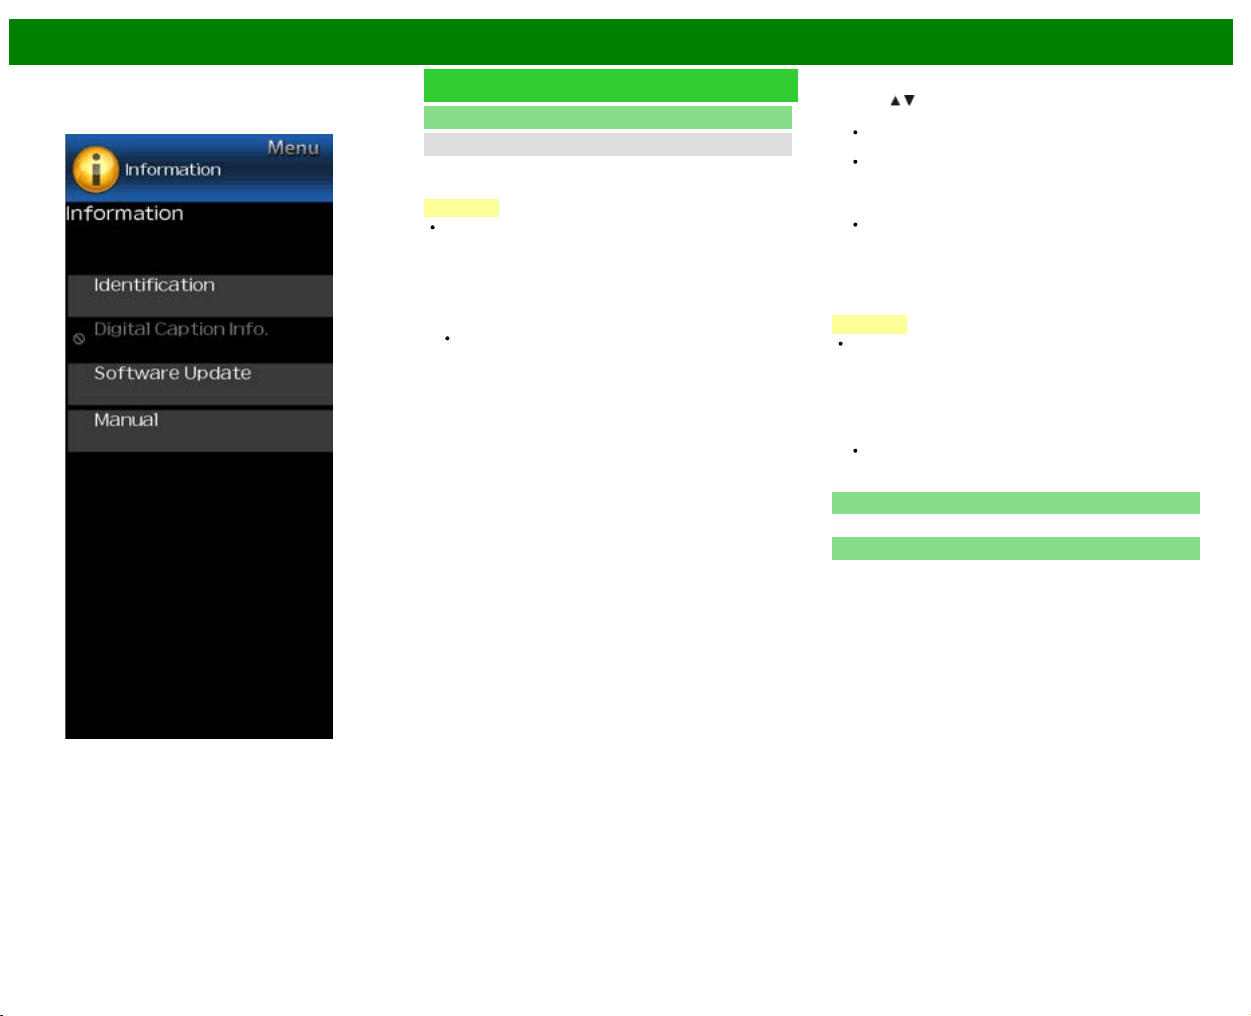
Identification
The current version of the TV software is displayed.
Digital Caption Info.
(Digital Caption Information)
This function allows viewing of digital closed caption
information for the digital broadcast program being viewed.
NOTE
This list is not displayed for analog broadcasts or external
input audio/video.
This information is not included in CC1, CC2, Text1, or
Text2, and is not displayed in a list.
Software Update
This is used to upgrade the system software to enhance the
TV functions.
1 Press MENU to display the MENU screen, and then
press
/ to select "Information".
2 Press
/ to select "Software Update", and then press
ENTER.
If you have already set the Secret No., go to step 3.
3 Press
/ to select "Manual Update" or "Auto Update
Setting", and then press ENTER.
The operations thereafter vary depending on the
setting.
Auto Update Setting
When the TV is on, or when an Internet application is being
accessed, this function enables the TV to connect to the
network and check for updates automatically.
When an update is available, a message is displayed.
Press
/ to select "Yes", and then press ENTER to
display the download screen.
NOTE
This function does not work when a broadband
connection or Internet Setup is not available.
A message may also be displayed when an application is
running.The message varies depending on the
application.
Manual Update
Select the method for manually updating the software.
USB Update: Updates the software using a USB memory
device containing the update file. (See "Updating the
Software with a USB Memory Device".)
Network Update: Downloads the update file via the
network and then updates the software.
NOTE
A broadband connection and Internet Setup are required
to update the software using the network.
It may take time to access and download the update
depending on the Internet connection and other factors.
Updating the Software with a USB Memory Device
To check for the availability of a software update, visit
http://www.sharpusa.com/products/support/. If you have any
questions, please
call 1-800-BE-SHARP (800-237-4277).

>>
<<
On-Screen Display Menu
ENG 4-15
Example
Information (Continue)
Software Update
Manual Update
CAUTION
Do not remove the USB memory device or unplug the
AC cord while the software is being updated.
Be sure to properly follow the whole procedure
described below, step by step. Otherwise, for
example, the TV cannot read the data in the USB
memory device and software updating will fail.
1 Insert the USB memory device with the update file into
the USB terminal on the TV.
2 Press / on the Manual Update screen to select "USB
Update", and then press ENTER.
3 Press ENTER to start checking the data in the USB
memory device.
4 During the data checking, "Checking" blinks.
The current version of the TV software and the version
of the update file on the USB memory device are
displayed.
If the USB memory device is not properly installed or
the correct update file cannot be found on the USB
memory device, an error message is displayed.
Check the file on the USB memory device, and then
reinsert the USB memory device correctly.
>>
<<
On-Screen Display Menu
ENG 4-16
Example
Information (Continue)
Software Update
Manual Update
5 To update the TV software with the update file, select
"Yes", and then press ENTER.
CAUTION
Do not remove the USB memory device or unplug the
AC cord while the software is being updated.
6 When the software is successfully updated, a screen is
displayed indicating that the update process is
completed.
After this screen is displayed, the TV automatically turns
off and then turns on again.
If the update has failed, check the file in the USB
memory device and try Software Update again.
7 Remove the USB memory device.
Updating the Software via the Network
1 Press
/ on the Manual Update screen to select
"Network Update", and then press ENTER.
The TV connects to the network and checks for
updates.
To cancel, press ENTER.
2 The current version of the TV and the latest version of
software are displayed. To update the TV software,
select "Yes", and then press ENTER.
When a server connection cannot be established or an
update is not available, a message is displayed.
If a server connection cannot be established, check
the broadband connection and Internet Setup.
3 After the update file is downloaded, the software update
process begins.
CAUTION
Do not unplug the AC cord while the software is
being updated.
4 When the software is successfully updated, a screen is
displayed indicating that the update process is
completed.
A screen indicating that the update is completed is
displayed. 4 seconds later, the TV restarts automatically.
If the software was not updated successfully, check the
broadband connection and Internet Setup, and then try
updating the software again.
Software License
Displays software version information.
Manual
Displays the built-in operation manual on the screen. You
can read information about how to use this device.
>>
<<
On-Screen Display Menu
ENG 4-17
Example
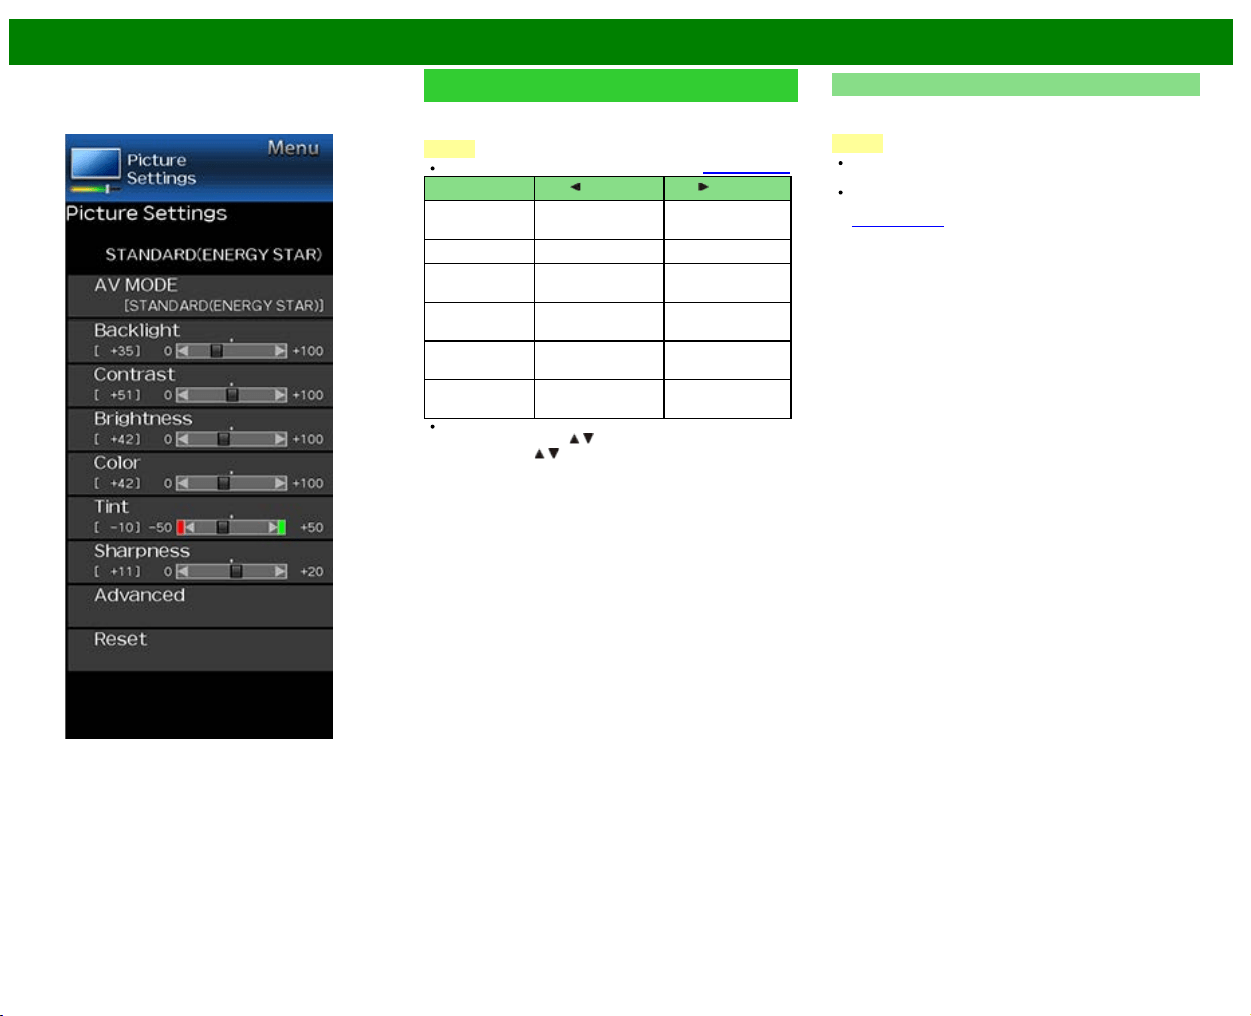
Picture Settings
Adjusts the picture to your preference with the following
picture settings.
NOTE
For operating the on-screen display menu, see page 4-3.
Selected item button button
Backlight The screen dims The screen
brightens
Contrast For less contrast For more contrast
Brightness For less brightness For more
brightness
Color For less color
intensity
For more color
intensity
Tint Skin tones become
reddish
Skin tones
become greenish
Sharpness For less sharpness For more
sharpness
For resetting all Picture adjustment items to the factory
preset values, press
/ to select "Reset", press
ENTER, press
/ to select "Yes", and then press
ENTER.
AV MODE (Changing Pic.Quality)
The audio and video settings can be changed to suit the
program or input content being watched.
NOTE
The selectable items vary depending on the input source
and on the model of your TV.
You can select AV MODE by pressing AV MODE on the
remote control unit.
See page 3-10 for details of AV MODE settings.

>>
<<
On-Screen Display Menu
ENG 4-18
Example
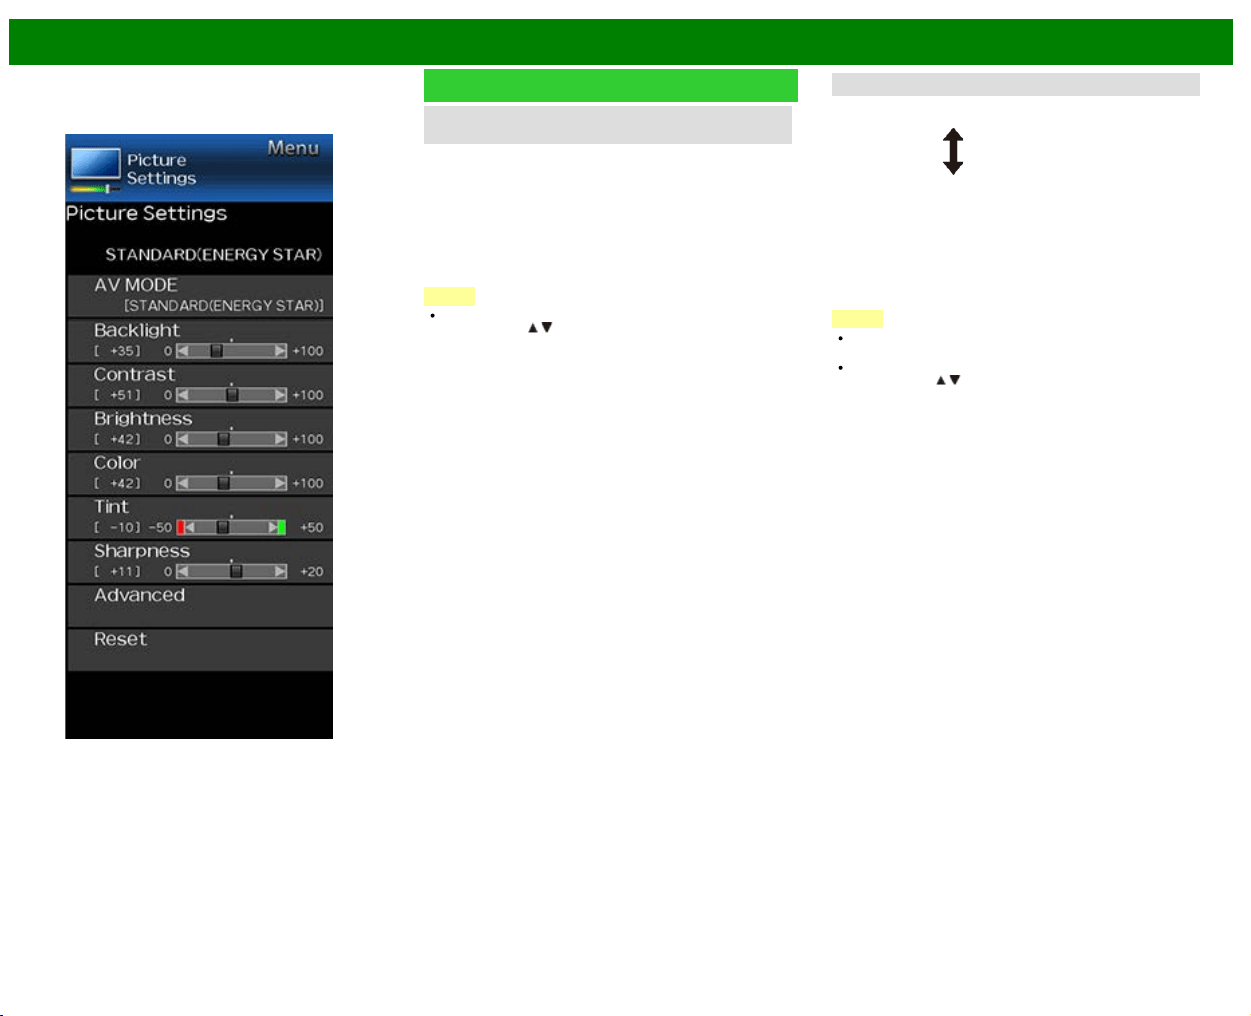
Picture Settings (Continue)
Advanced
Motion Enhancement
Use Motion Enhancement to view fast-action video more
clearly.
Selected item Description
120Hz For obtaining a clearer image.
Off Original image.
NOTE
"Motion Enhancement" may cause image noise. If this
occurs, turn the function "Off".
When AV MODE is set to "PC", or PC format is being
input, "Motion Enhancement" is not available.
Digital Noise Reduction
Produces a clearer video image.
Auto: Automatically adjusts the level of noise reduction.
High/Middle/Low: You can select a desired level for
viewing a clearer video image.
Off: No adjustment.
NOTE
"Digital Noise Reduction" is not available when you set
AV MODE to "PC" or PC format is being input.
>>
<<
On-Screen Display Menu
ENG 4-19
Example
Picture Settings (Continue)
C.M.S.
(Color Management System)
Color tone is managed using the six-color adjustment
setting.
C.M.S.-Hue: This is a standard to adjust the color either
more reddish or more bluish in tone.
C.M.S.-Saturation: Increases or decreases the saturation
of a selected color.
C.M.S.-Value: A higher value makes the image brighter.
A lower value makes the image darker.
NOTE
For resetting all adjustment items to the factory preset
values, press
/ to select "Reset", and then press
ENTER.
Color Temp. (Color Temperature)
For a better white balance, use color temperature correctly.
Low: White
with bluish tone
Middle:
High: White
with reddish tone
Fine tuning the color temperature
To fine tune the color temperature, set "10 Point Setting" to
"On".
You can adjust the "Position" setting. Adjust the set color
temperature from +1 to +10.
White balance can be adjusted between a maximum of +30
and a minimum of –30 for each color temperature.
NOTE
When "Position" is set to "10", you can adjust the white
balance between –30 and 0.
For resetting all adjustment items to the factory preset
values, press
/ to select "Reset", and then press
ENTER.

>>
<<
On-Screen Display Menu
ENG 4-20
Example
Picture Settings (Continue)
Active Contrast
Automatically adjusts the image contrast according to the
scene.
On: Produces high contrast image.
Off: No adjustment.
Film Mode (3:2 pull-down)
This function provides high-quality playback of images
originally encoded at 24 frames/second, such as films.
On: Adjusts effect to reduce judder from film contents.
Off: Normal viewing mode.
NOTE
"Film Mode" does not function depending on input signal
type.
"Film Mode" does not function when you set AV MODE to
"PC".
"Standard" does not function depending on input signal
type.
Monochrome
For viewing a video in monochrome.
Reset
Returns Picture Settings to their factory preset values. To
reset, select "YES" and then press ENTER.
>>
<<
On-Screen Display Menu
ENG 4-21
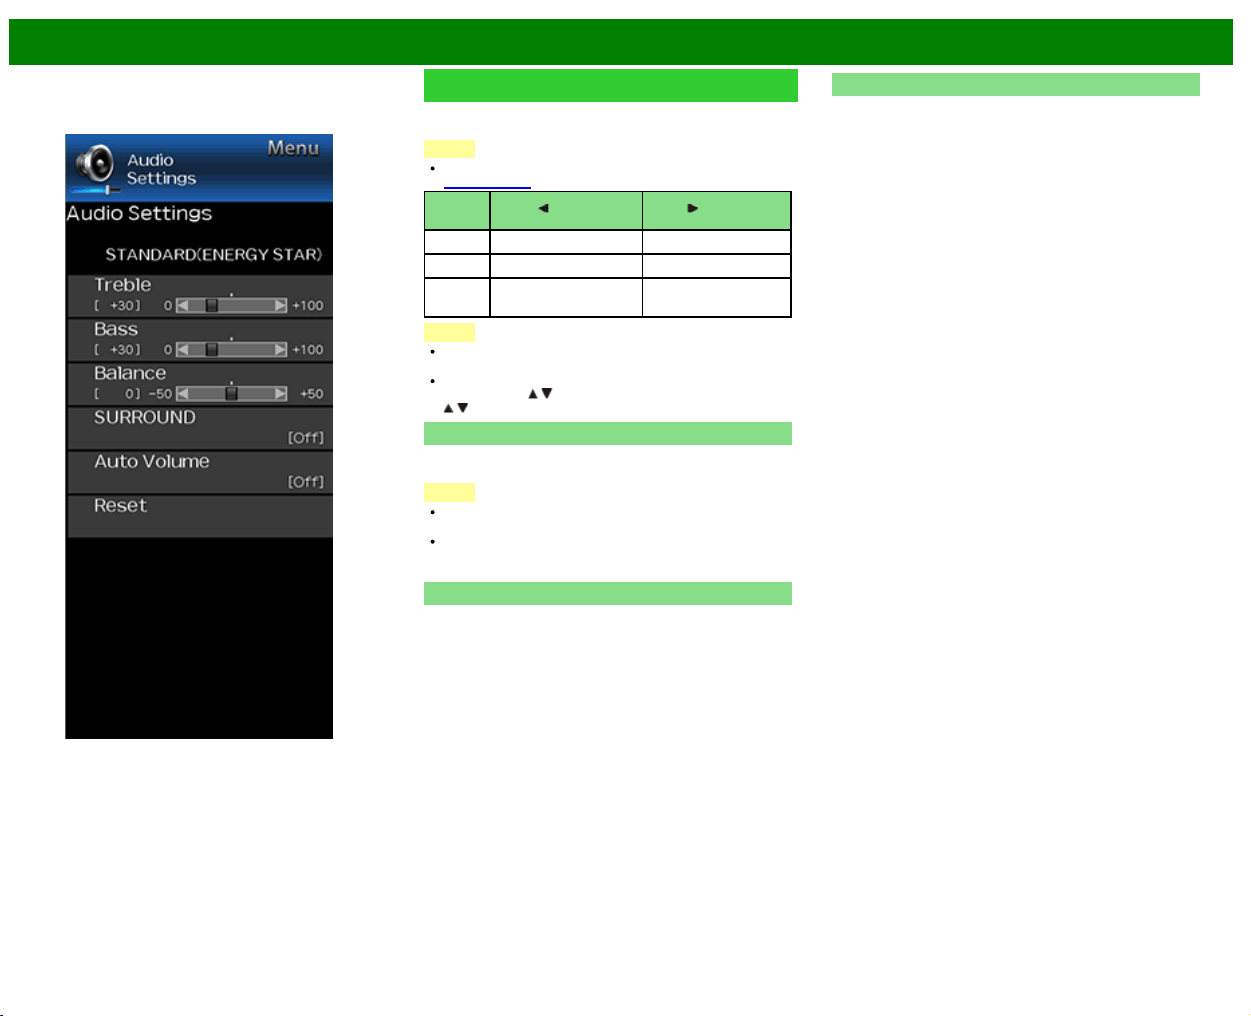
Example
Audio Settings
You can adjust the sound quality to your preference with the
following settings.
NOTE
For operating the on-screen display menu,
see page 4-3.
Selected
item
button button
Treble For weaker treble For stronger treble
Bass For weaker bass For stronger bass
Balance Decrease audio from
the right speaker
Decrease audio from
the left speaker
NOTE
The Audio menu is grayed out when "Output Select" is
set to "Variable".
For resetting Audio adjustment items to the factory preset
values, press
/ to select "Reset", press ENTER, press
/ to select "Yes", and then press ENTER.
SURROUND
The surround function produces Surround effect from the
speakers.
NOTE
The Audio Settings menu is grayed out when "Output
Select" is set to "Variable".
For some discs, setup may be required on your BD/DVD
player. In this case, please refer to the operation manual
of your BD/DVD player.
Auto Volume
Different sound sources sometimes do not have the same
loudness level, such as a program and its commercial
brakes, The Automatic Volume Control(Auto Volume)
reduces this problem by equalizing.
ON: Reduces the loudness gaps among different sound
source. The result is automatically adjusted according to
the sound sources.
OFF: No adjustment.
Reset
Returns Audio Settings to their factory preset values. To
reset, select "YES" and then press ENTER.
>>
<<
On-Screen Display Menu
ENG 4-22
Example
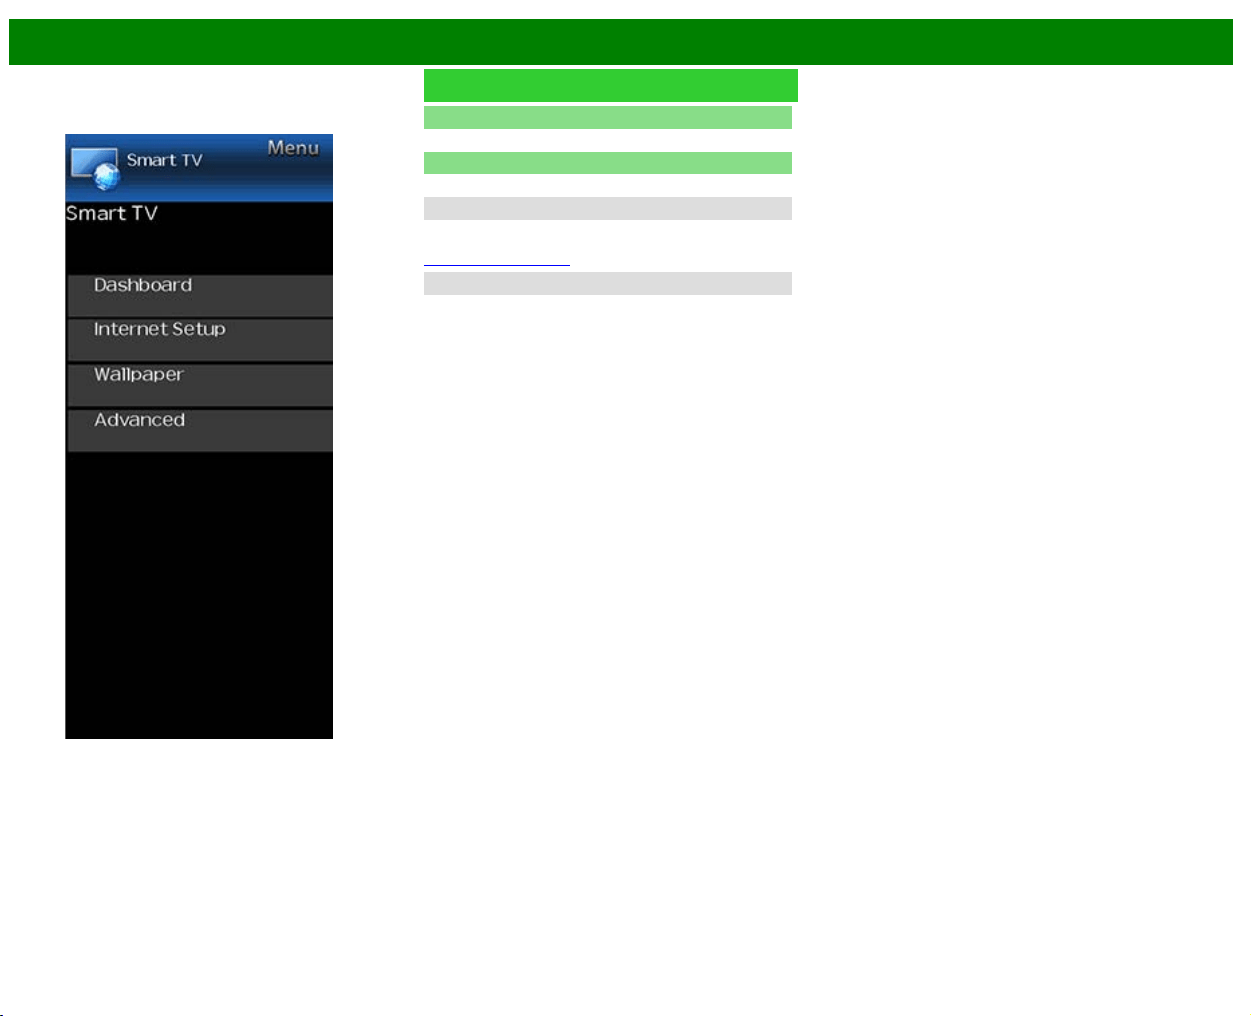
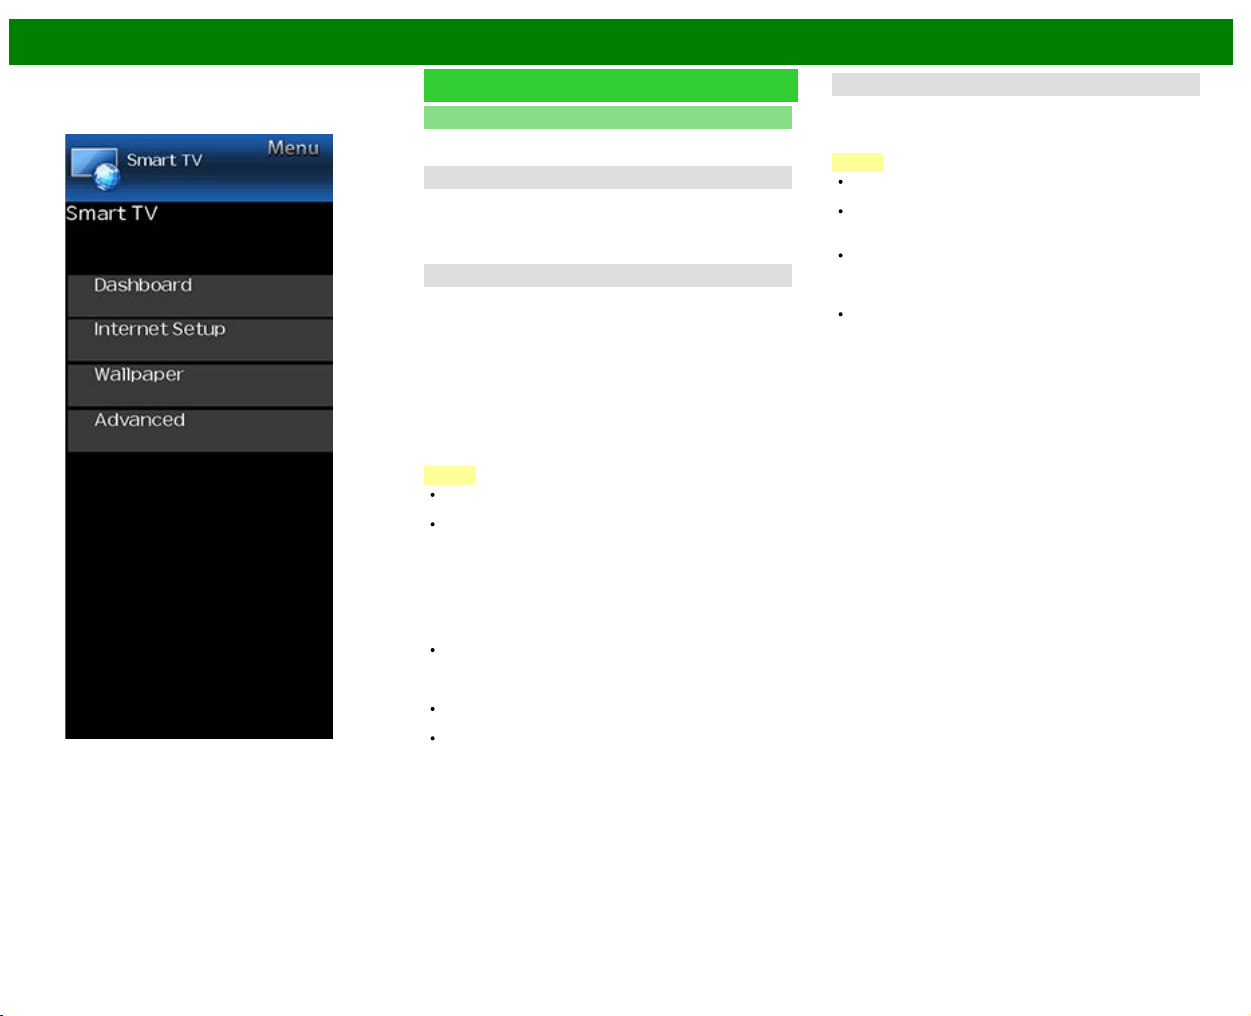
Smart TV
Dashboard
You can display a list of the main Smart TV settings.
Internet Setup
Configures LAN and Internet settings.
Internet Connection
You can connect your TV to the Internet using the setting
item "Internet Connection".
(See pages 8-3 to 8-4.)
Interactive Service
If you do not want other people to connect to the Internet in
your absence, you can make settings to keep the TV away
from the Internet.
>>
<<
On-Screen Display Menu
ENG 4-23
Example
Smart TV (Continue)
Wallpaper
Activating the function will display still images when the TV
is in standby mode.
Wallpaper Mode
Configures Wallpaper Mode settings.
Off: Nothing will be displayed.
On: Still images will be displayed when the TV is in
standby mode.
Data Source
For the wallpaper, you can select either the still images pre-
installed in the TV or your favorite still images stored in the
USB memory device.
Pre-Installed: The images pre-installed in the TV will be
displayed in a slideshow.
USB: Your favorite images stored for the wallpaper will
appear.
If only a single still image is stored in the USB memory
device, that image will be displayed as the wallpaper.
When there are multiple still images in the memory, all
the images will be displayed in a slideshow.
NOTE
Images are displayed in 3-minute intervals as a
slideshow.
When the TV is in Wallpaper mode, you can turn off the
TV by pressing and holding POWER on the TV for 5
seconds.
- Just before the TV turns off, the last image shown
when the TV was turned off appears briefly.
- Your settings may not be saved in some cases.
When you display images by using the USB memory
device:
Create a folder named "WP" in the root directory of the
USB memory device (the first directory when the USB
memory device is opened), and store into the folder the
still images you want to display for the wallpaper.
You must insert the USB memory device to the TV before
turning off the TV.
If there are images on the USB memory device but they
do not appear on the screen, switch to USB mode and
check whether the image files on the USB memory
device are shown correctly.
Timer Setting
You can set the length of time the TV will remain in the
Wallpaper Mode.
3 hours/6 hours/12 hours/24 hours
NOTE
No buttons except for POWER work even while the still
images are being displayed.
If the ready-for-use USB memory device is not inserted,
the still images pre-installed in the TV will be displayed in
a slideshow even when "Data Source" is set to "USB".
Because the USB memory device cannot be detected
immediately after the TV is turned on from standby
mode, the wallpaper pre-installed in the TV may be
displayed even when "Data Source" is set to "USB".
The still images will be displayed until the set time has
elapsed.

>>
<<
On-Screen Display Menu
ENG 4-24
Example
Smart TV (Continue)
Advanced
Netflix Help
You can deactivate the Netflix function. Refer to "Smart TV"
> "Advanced" > "Netflix Help" and select "Deactivate".
VUDU Help
To deactivate the VUDU function, refer to "Smart TV" >
"Advanced" > "VUDU Help" and select "Yes".
(See pages 8-12 to 8-13.)
>>
<<
On-Screen Display Menu
ENG 4-25
Example
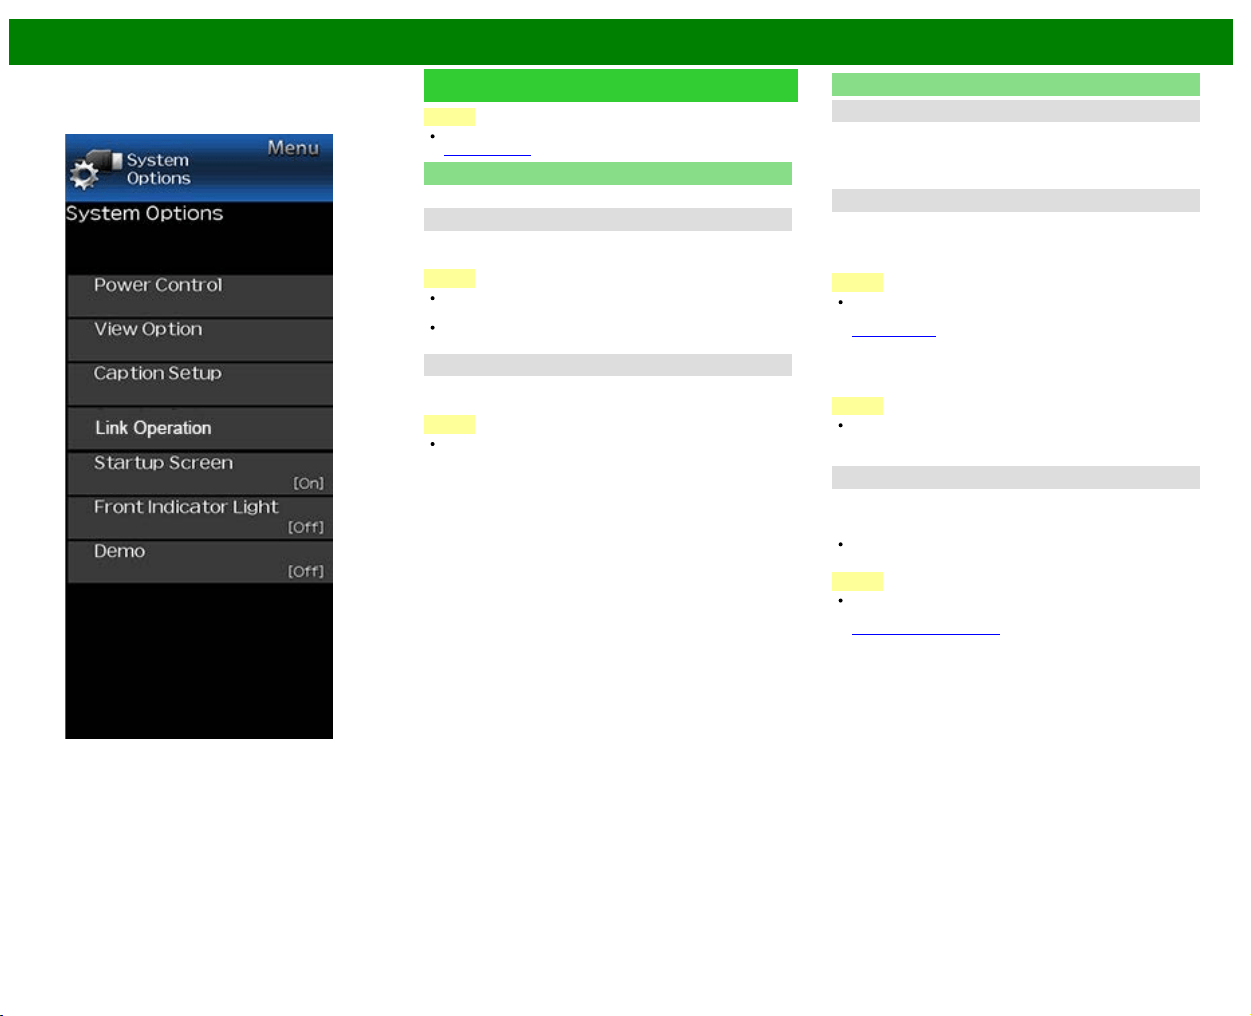
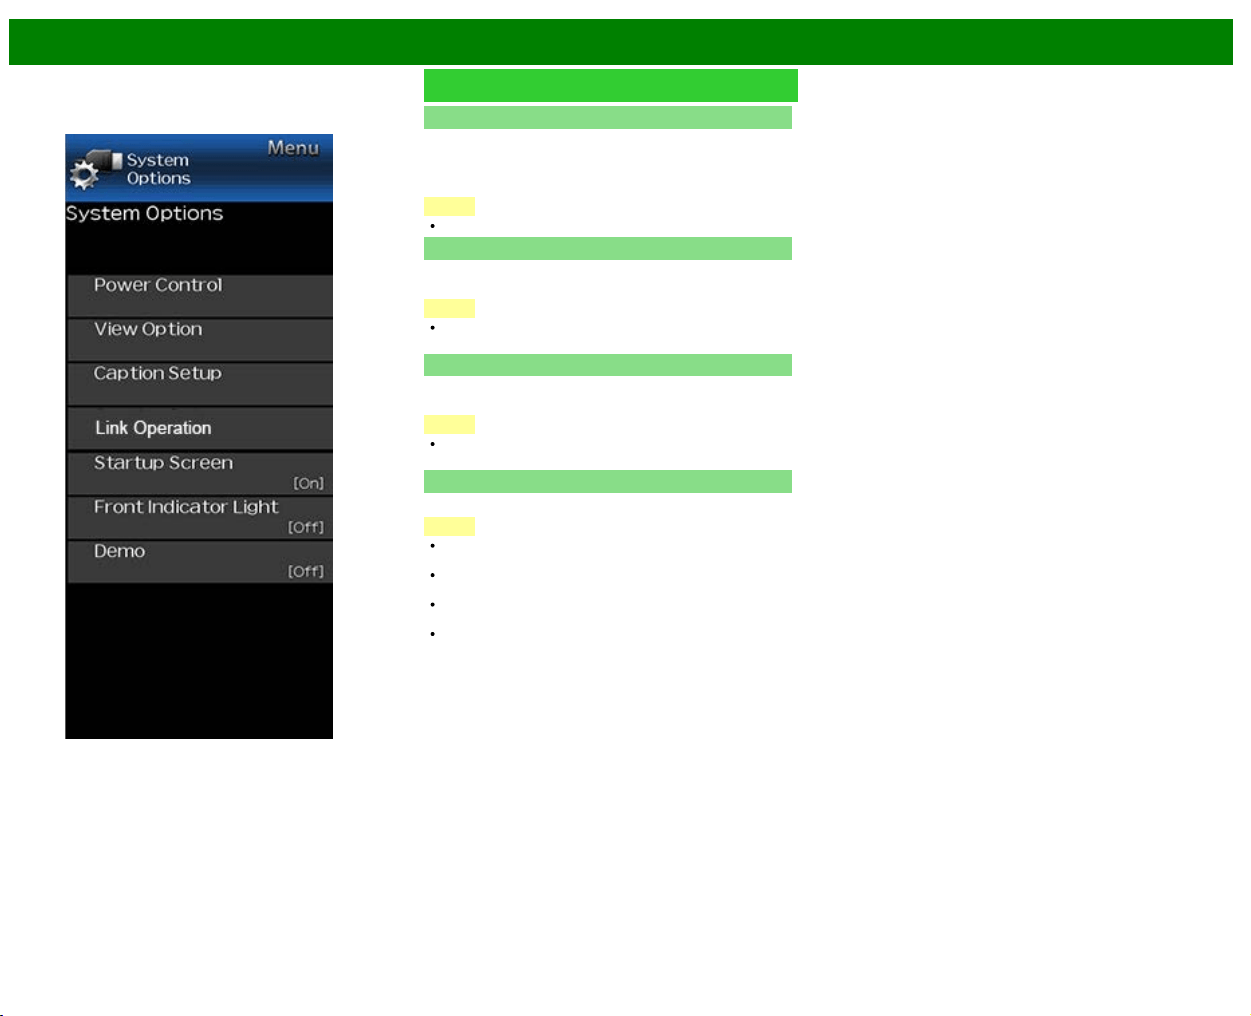
System Options
NOTE
For operating the on-screen display menu,
see page 4-3.
Power Control
Power control setting allows you to save energy.
No Signal Off
When this function is enabled, the TV automatically shuts
down if no signal is received for more than 15 minutes.
NOTE
When it is 5 minutes before the power shuts down, the
remaining time will start to keep appearing every minute.
When a TV program finishes, this function may not
operate.
No Operation Off
When you enable this function, the TV automatically shuts
down if no operation is performed for more than 3 hours.
NOTE
When it is 5 minutes before the power shuts down, the
remaining time will start to keep appearing every minute.
View option
View Mode
This function changes the screen size.
Select "Shortcuts" on the menu to display the View Mode
menu screen.
The View Mode menu varies depending on the input source.
Change Audio
MPX
Allows you to change the audio when multiple audio is
available for the program you are watching.
NOTE
You can change Audio by pressing AUDIO on the remote
control unit.
See page 3-8 for details of Audio function.
Audio Only
When listening to music from a music program, you can
turn the screen off and enjoy audio only.
NOTE
The screen image will return to normal when a button
(except those for audio adjustment, such as VOL,
MUTE) is pressed.
Change CC
Allows you to change the Closed Caption display.
Select "Change CC" on the menu to display the Closed
Caption information.
The information displayed varies depending on the
program you are watching.
NOTE
You can change Closed Caption by pressing CC on the
remote control unit.
See pages 3-12 to 3-13 for details of Closed Caption
function.
>>
<<
On-Screen Display Menu
ENG 4-26
Example
System Options (Continue)
Caption Setup
This function allows you to adjust the closed caption screen
appearance to suit your preference.
Size/Edge Effect/Edge Color/Text Color/Background
Color/Text Opacity/Background Opacity
NOTE
The default value depends on the broadcasting station.
Startup Screen
With this function activated, the SHARP logo will be
displayed when you turn on the TV.
NOTE
This function is not available when the TV is set to "Quick
Start Mode".
Front Indicator Light
When this function is set to "On", the LED on the front of
the TV turns on.
NOTE
"On" is the factory preset value. If you want to turn off
the LED, set the function to "Off".
Demo
You can select the image from several types of demo mode.
NOTE
What kinds of setting item are available depends on the
model of your TV.
This function will be canceled when you press EXIT on
the remote control unit.
"Demo" may not be selected depending on input signal
type or application status.
"Demo" may be automatically canceled depending on
input signal type.
>>
<<
Enjoying Photo/Music/Video Playback
ENG 5-1
Preparation
You can connect the TV to a USB memory device, USB hard drive or Home Network server to
enjoy viewing pictures, listening to music, and watching videos.
NOTE
Depending on the USB memory device/USB hard drive/Home Network server, the TV may not
be able to recognize the recorded data.
It may take time to read the recorded data if the USB memory device/USB hard drive/Home
Network server contains many files or folders.
Use only alphanumeric characters for naming files.
File names over 80 characters (may vary depending on character set) may not be displayed.
Connecting a USB Memory Device/USB Hard Drive
Insert the USB memory device with recorded photos, music or videos into the USB terminal on the
TV.
When connecting a USB hard drive, be sure to use a hard drive with an AC adapter.
Do not remove a USB memory device or memory card from the TV while transferring files, using
the slide show function, or switching screens, or before you exit "USB" from the INPUT list.
Do not insert and remove a USB memory device/USB hard drive to and from the TV repeatedly.
When using a card reader, be sure to insert a USB memory device first.
CAUTION
Do not use a USB extension cable when connecting a USB memory device to the USB
terminal on the TV.
Using a USB extension cable with the USB memory device may prevent the TV from
performing correctly.
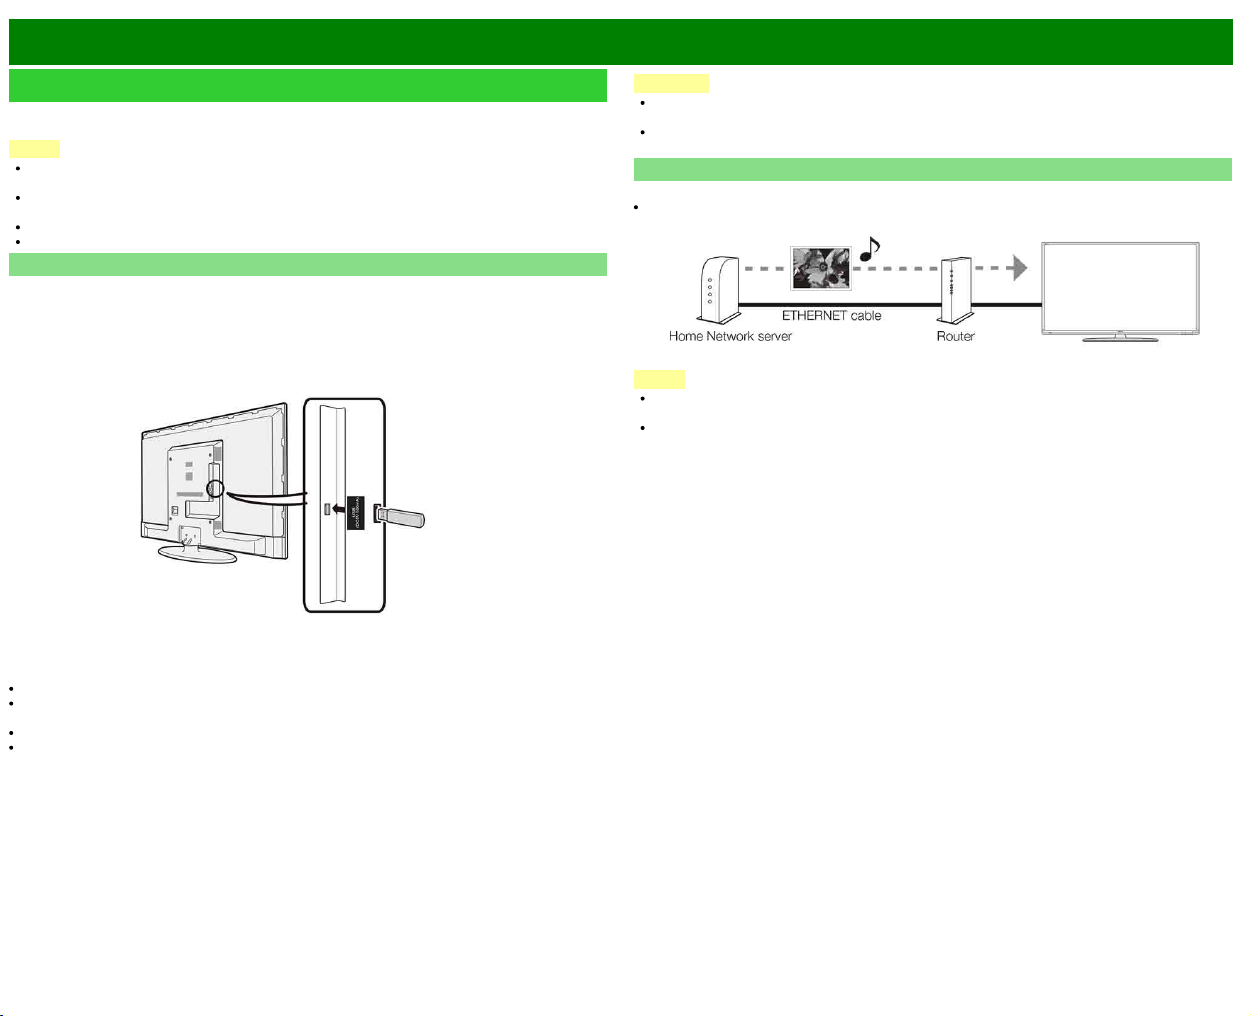
Connecting a Home Network Server
Connect the TV to the Home Network server using an ETHERNET cable.
You can also connect a Home Network server by using a wireless LAN.
NOTE
Do not disconnect a Home Network server from the TV while transferring files, when a screen is
switching to another or before you exit "DLNA" from the INPUT list.
Do not connect and disconnect a Home Network server from the TV repeatedly.
>>
<<
Enjoying Photo/Music/Video Playback
ENG 5-2
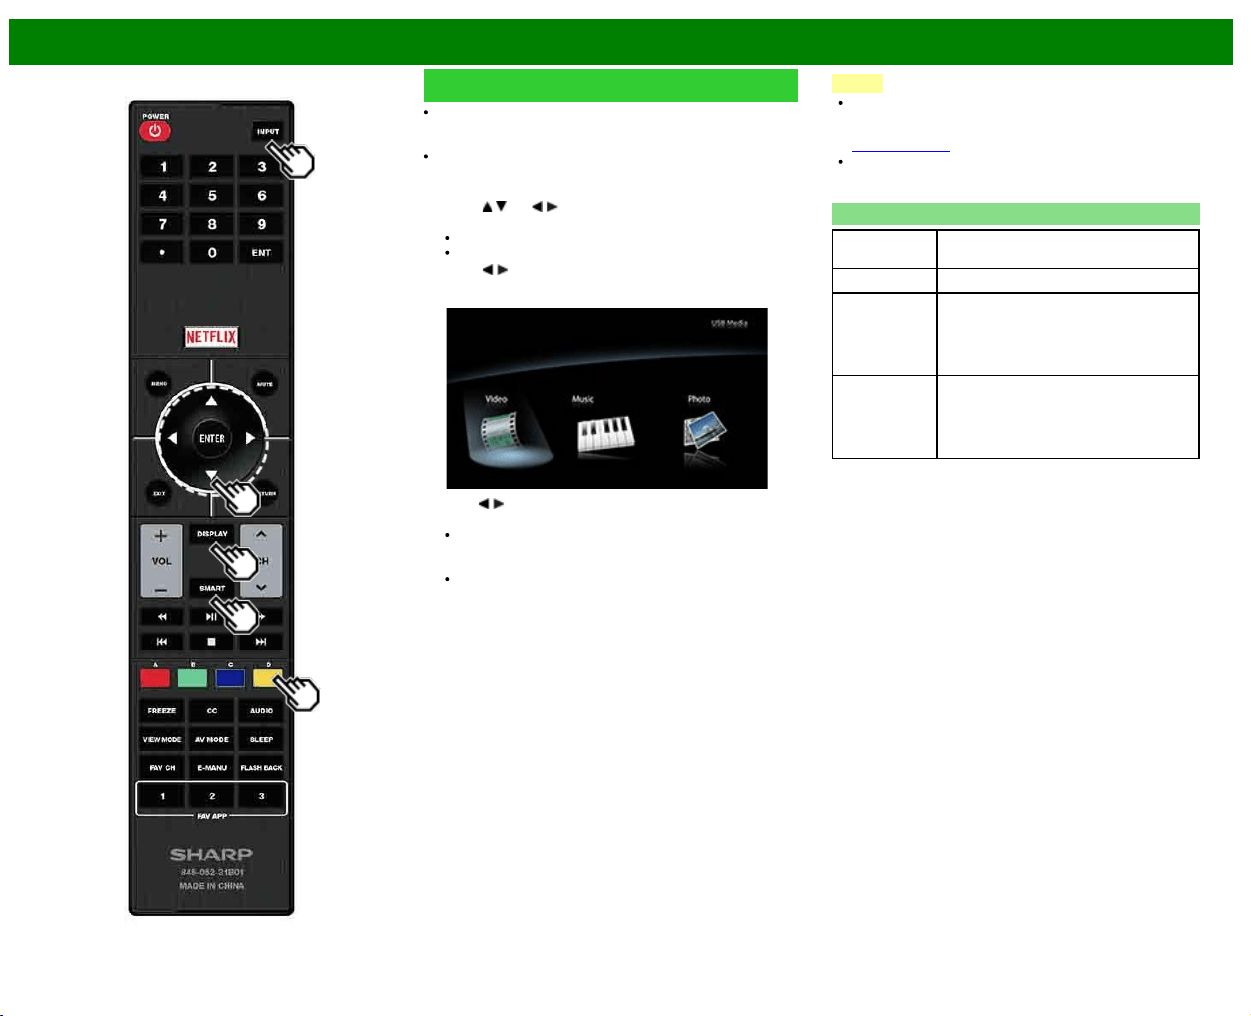
Selecting the Folders to Play Back
To play back data on a USB memory device, insert the
USB memory device on the TV. USB mode is selected
automatically. (Go to step 2)
Use the following procedure to switch back to USB mode
after switching from USB mode to another mode.
1 Select "USB" or "Home Network" from INPUT list screen.
2 Press
/ (or / ) to select the drive/server where you
want to find your files, and then press ENTER.
For USB mode, select the drive.
When in Home Network mode, select the server.
3 Press
/ to select "Photo", "Music" or "Video", and
then press ENTER.
Example
4Press / to select the desired folder, and then press
ENTER.
"VIEW MODE" is fixed during the Music mode. During
"Video mode", you can select ”Auto", "Original" or
"Stretch".
During "Video mode", videos that are smaller than the
number of pixels on the screen are displayed at their
original size.
In these cases, switch "VIEW MODE" to "Auto" to
have the video fill the screen.
NOTE
The Media screen can be displayed even by using the
application window. To display the application window,
press SMART.
(See page 3-6.)
16 is the maximum number of USB drives and 10 is the
maximum number of Home Network servers that can be
displayed.
USB Device Compatibility
USB device USB Memory, USB card reader (Mass
Storage class), USB hard drive
File system FAT/FAT32/NTFS (USB hard drive only)
Photo file
format
JPEG (.jpg) (DCF2.0 compliant)
Multi-Picture Format (.mpo) (CIPA DC-
007 Compliant)
MP Type : Multi view individually image
(stereoscopic view)
Music file
format
MP3 (.mp3)
Bitrate: 32k, 40k, 48k, 56k, 64k, 80k, 96k,
112k, 128k, 160k, 192k, 224k, 256k,
320kbps
Sampling frequency: 32k, 44.1k, 48kHz
>>
<<
Enjoying Photo/Music/Video Playback
ENG 5-3
Selecting the Folders to Play Back
(Continue)
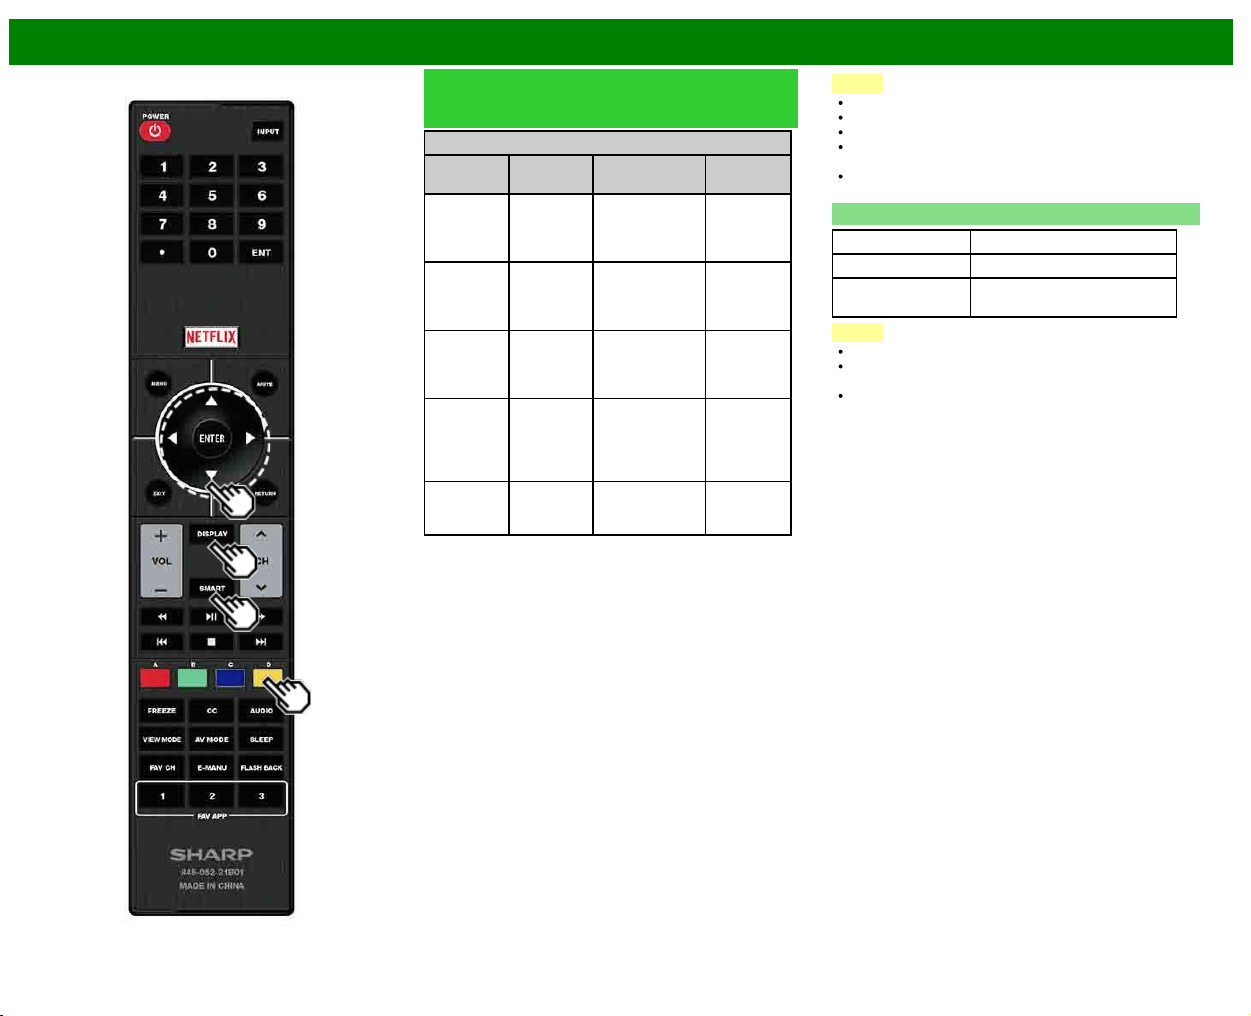
Video file format
File
extension
Container Video Audio
.avi AVI
H.264
MPEG4
Motion Jpeg
MP3
Dolby Digital
LPCM
ADPCM
.mkv MKV
H.264
MPEG4
MP3
Dolby Digital
LPCM
ADPCM
.asf
.wmv
ASF
MPEG4
VC-1
Windows Media
MP3
Dolby Digital
LPCM
WMA
.mp4
.mov
MP4
(SMP4)
H.264
MPEG4
Motion Jpeg
MP3
Dolby Digital
Dolby Digital
Plus
AAC
.mpg
.mpeg
PS
MPEG2
MPEG1
Dolby Digital
MPEG
LPCM
NOTE
Progressive format jpeg files are not supported.
USB 1.1 devices may not be played properly.
Operation using USB hubs is not guaranteed.
Some video file formats may not be played depending on
the file.
Some images may not be displayed in the appropriate
aspect ratio depending on the file format.
Home Network Server Compatibility
Photo file format JPEG
Music file format LPCM, MP3
Video file format MPEG2-PS, MPEG2-TS,
WMV, ASF, MP4, MOV, AVI
NOTE
Progressive format jpeg files are not supported.
Some video file formats may not be played depending on
the file or the server.
WMV, ASF, MP4, MOV and AVI are not Home Network
contents.
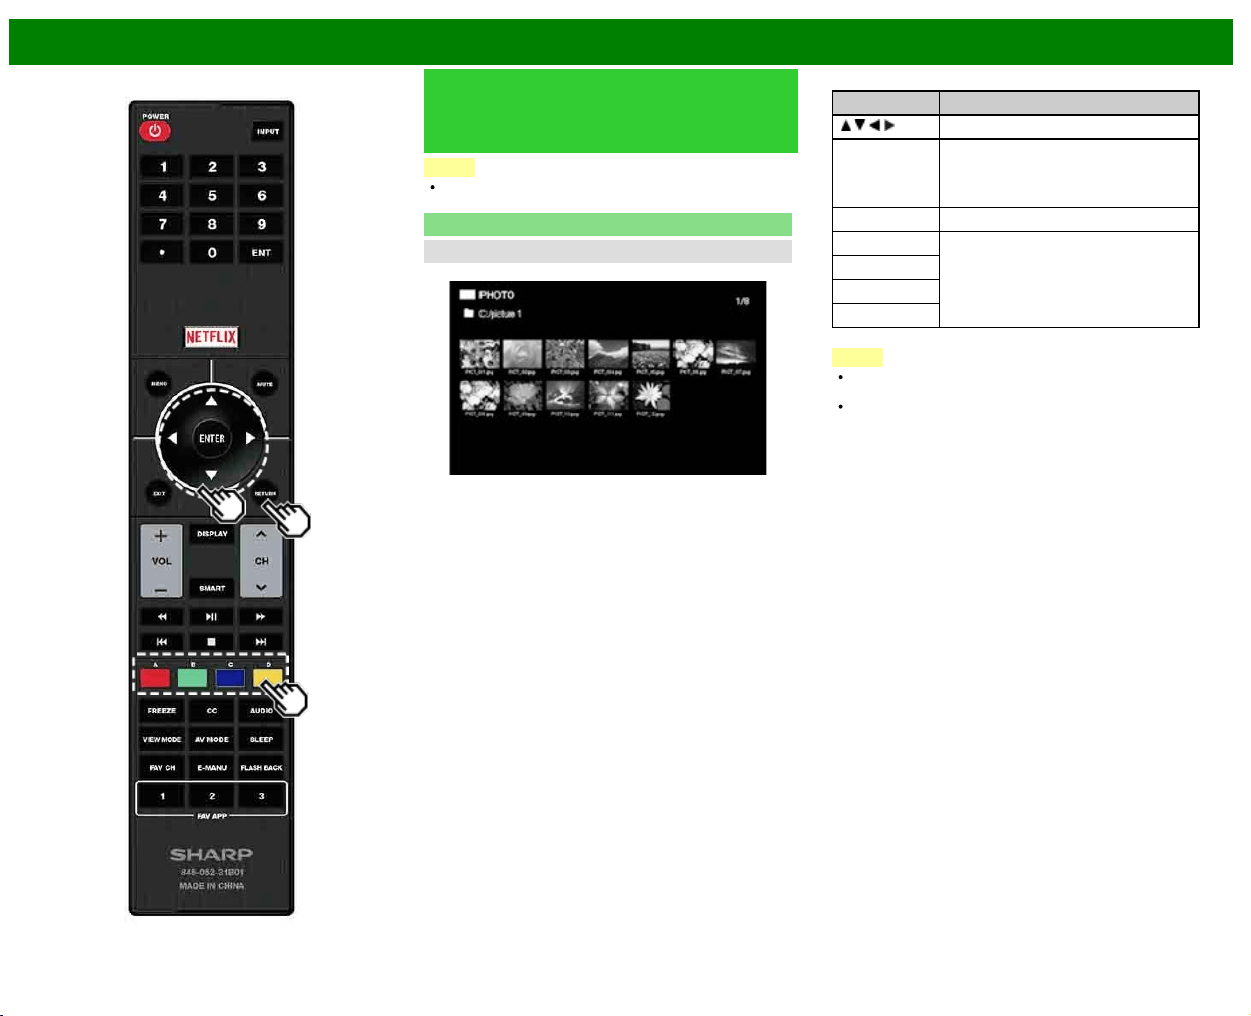
>>
<<
Enjoying Photo/Music/Video Playback
ENG 5-4
Playing Back Files on a USB
Memory Device/Home Network
Server
NOTE
The screen images in this section are for the USB mode.
It may be slightly different in the Home Network mode.
Photo Mode
Viewing Thumbnails
Example
Buttons for thumbnail operations
Buttons Description
/ / / Select a desired item.
ENTER When selecting a folder icon:
Enter this directory.
When selecting a photo thumbnail:
Start the slide show.
RETURN Return to the previous process.
A (red) Clear the file information display.
B (green)*
C (blue)
D (yellow)
*This function is available only for the USB mode.
NOTE
When there are invalid photo files, the X mark will be
displayed for the file. (USB mode only.)
A few seconds after the cursor is positioned on a
thumbnail, the file information is displayed in the right of
the center of the screen.
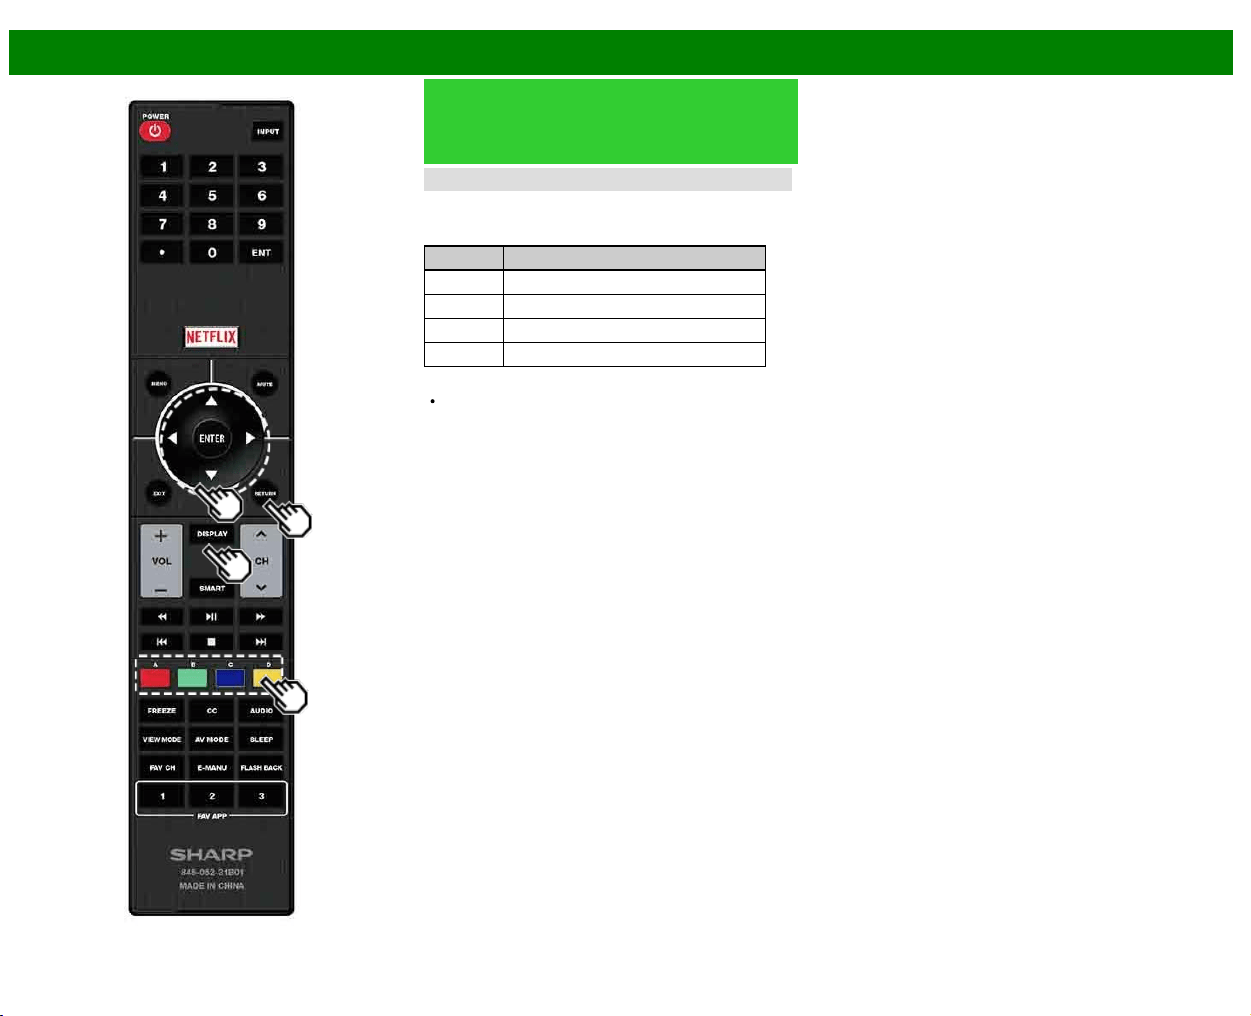
>>
<<
Enjoying Photo/Music/Video Playback
ENG 5-5
Playing Back Files on a USB
Memory Device/Home Network
Server (Continue)
Slide Show
The photos displayed on the thumbnail selection screen are
displayed as a slide show.
Buttons for slide show operation
Buttons Description
RETURN Return to the thumbnail selection screen.
B (green) Displaying/hiding operation guidance
C (blue) Previous file
D (yellow) Next file
NOTE
Rotating photos only applies to the temporarily selected
item and this setting is not saved.
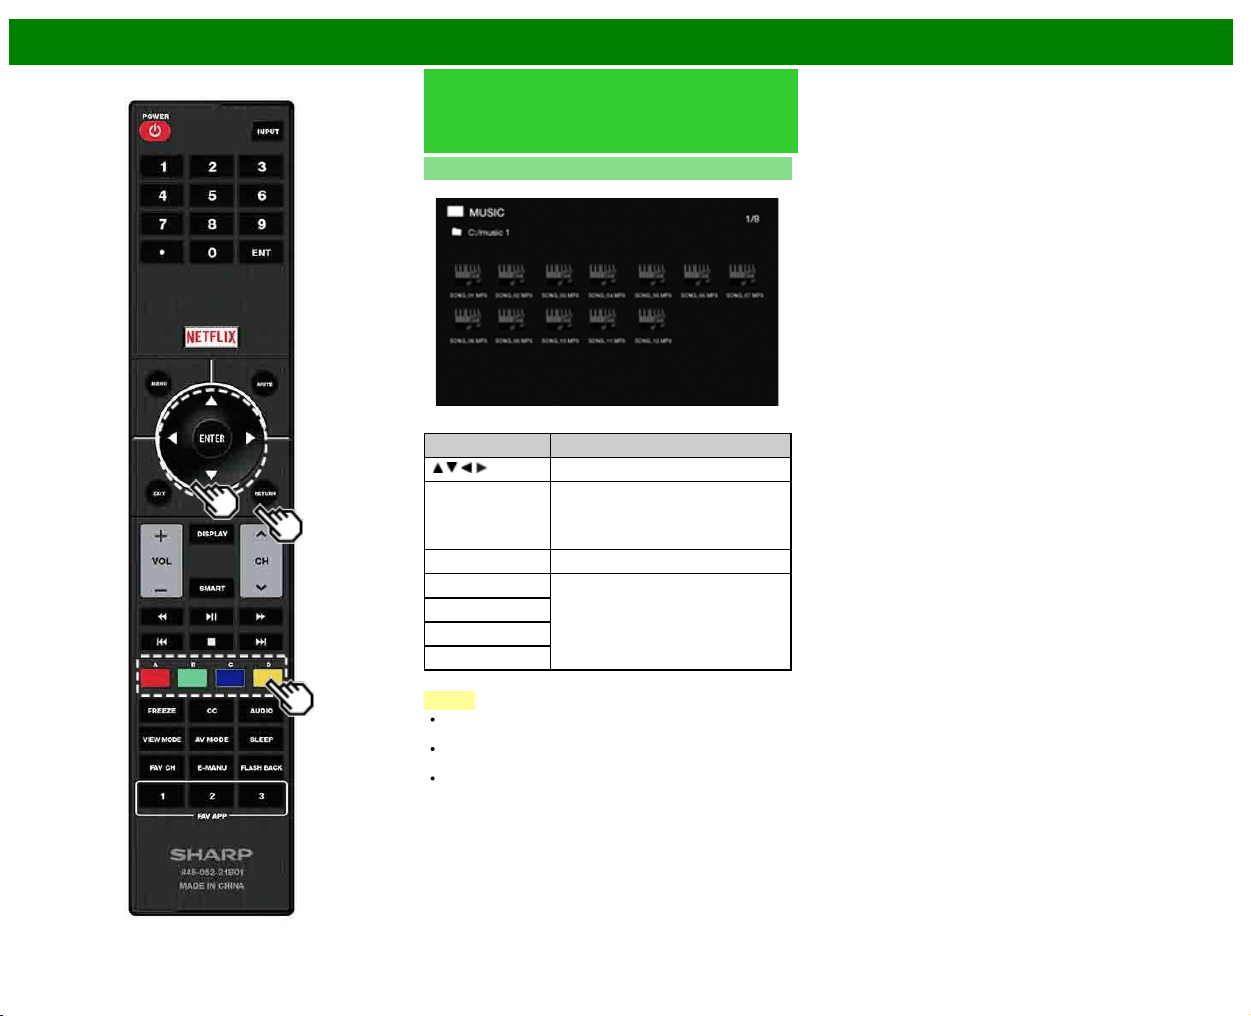
>>
<<
Enjoying Photo/Music/Video Playback
ENG 5-6
Playing Back Files on a USB
Memory Device/Home Network
Server (Continue)
Music Mode
Example
Buttons for music mode
Buttons Description
/ / / Select a desired item.
ENTER When selecting a folder icon:
Enter this directory.
When selecting a music file:
Play music.
RETURN Return to the previous process.
A (red) Clear the file information display.
B (green)
C (blue)
D (yellow)*
* This function is available only for the USB mode.
NOTE
When there are invalid music files, the X mark will be
displayed for the file. (USB mode only.)
The displayed play time may differ slightly from the actual
play time depending on the files.
A few seconds after the cursor is positioned on a
thumbnail, the file information is displayed in the right of
the center of the screen.
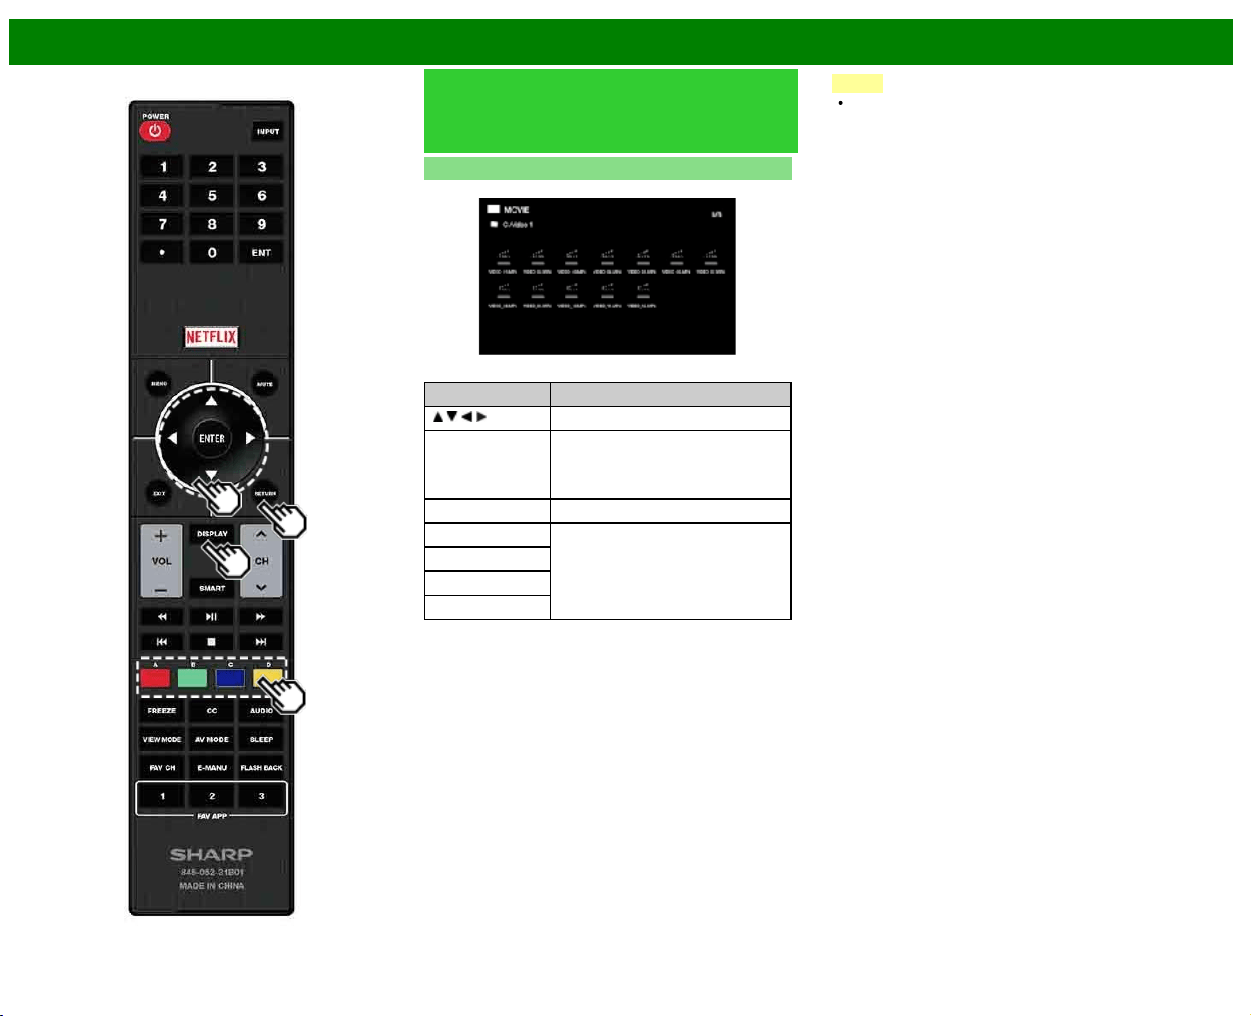
>>
<<
Enjoying Photo/Music/Video Playback
ENG 5-7
Playing Back Files on a USB
Memory Device/Home Network
Server (Continue)
Video Mode
Example
Buttons for file selecting operations
Buttons Description
/ / / Select a desired item.
ENTER When selecting a folder icon:
Enter this directory.
When selecting a video file: Play the
video.
RETURN Return to the previous process.
A (red) Clear the file information display.
B (green)
C (blue)
D (yellow)*
* This function is available only for the USB mode.
NOTE
A few seconds after the cursor is positioned on a
thumbnail, the file information is displayed in the right of
the center of the screen.

>>
<<
Enjoying Photo/Music/Video Playback
ENG 5-8
Playing Back Files on a USB
Memory Device/Home Network
Server (Continue)
Buttons for playing mode
Buttons Description
Frame advance
Stop playback
Fast forward
Fast rewind
A (red) Clear OSD
B (green) Previous file
C (blue) Display/hide operation guide
D (yellow) Next file
RETURN Go back to the file selection screen.
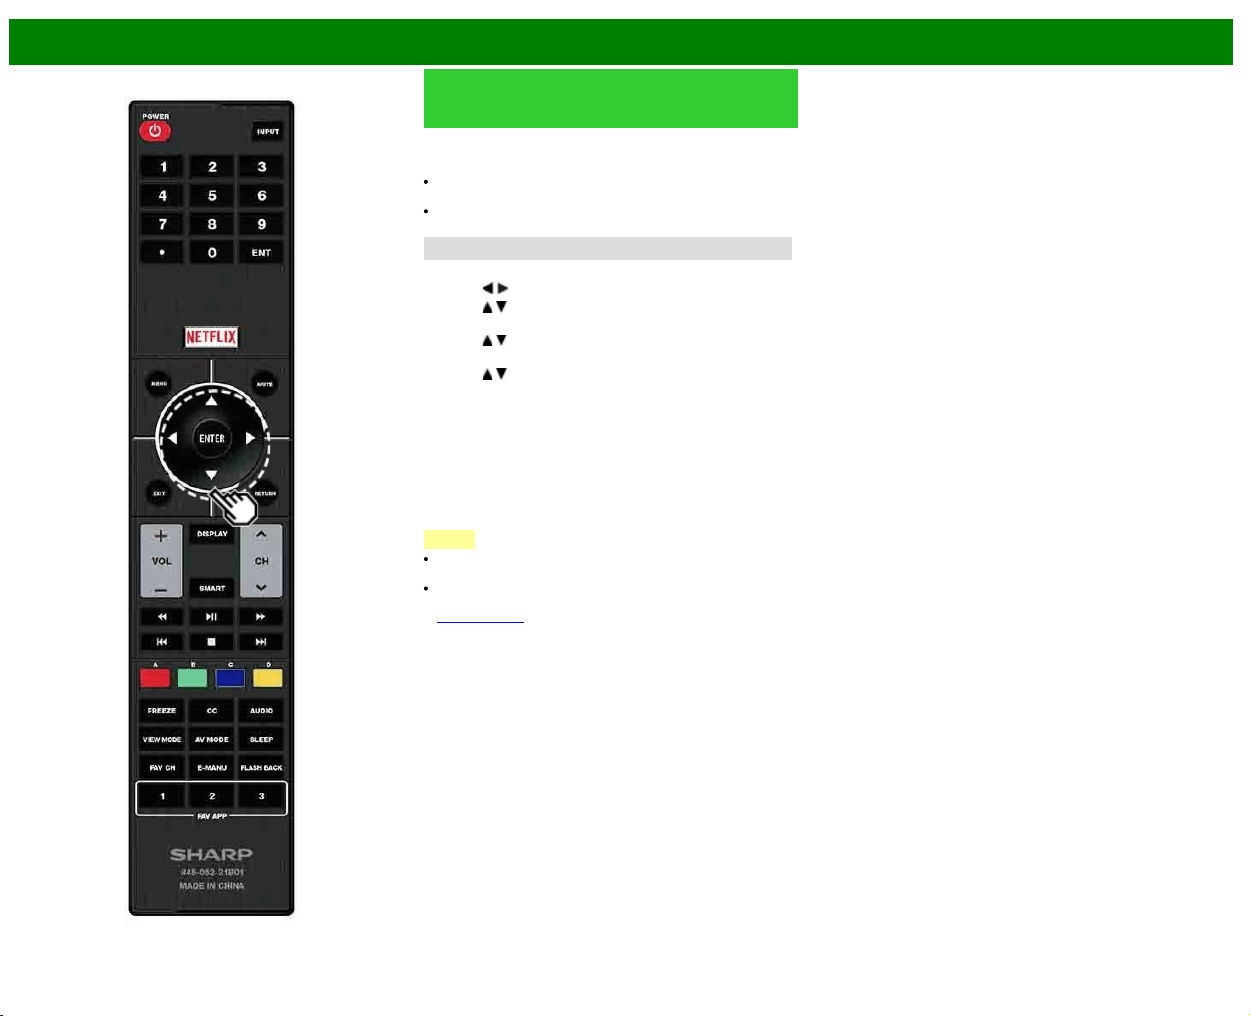
>>
<<
Enjoying Photo/Music/Video Playback
ENG 5-9
Playing Back Files from a Portable
Device or PC
With the remote playback function, you can use your
portable device to play back pictures, video, and music on
the Home Network server.
To use the remote playback function, your portable device
must be a DLNA Certified Digital Media Controller.
A wireless access point is required to use a portable
device.
Set Up Home Network
Make the settings for remote playback.
1 Press
/ to select "Smart TV", and then press ENTER.
2 Press
/ to select "Internet Setup", and then press
ENTER.
3 Press
/ to select "Home Network", and then press
ENTER.
4 Press
/ to select the specific adjustment item, and
then press ENTER to set each item.
Remote Control Play Settings
This setting allows the TV to perform remote playback.
Permitted/Not allowed
Timeout Setup
This sets the time until the TV returns automatically to TV
mode after remote playback ends.
10 sec./60 sec./No
NOTE
This function may not work while an Internet application is
being used.
For information on the compatible formats, see "Home
Network Server Compatibility" on
see page 6-3.

>>
<<
Using LINK Operation
ENG 6-1
Controlling HDMI Equipment Using LINK Operation
What’s LINK Operation?
Using the HDMI CEC (Consumer Electronics Control) protocol, with LINK Operation you can
interactively operate compatible system equipment (Blu-ray disc equipment, AV amplifier, DVD).
LINK Operation allows you to operate the HDMI-connected equipment with one remote control.
NOTE
For connecting the TV to LINK-compatible equipment, use commercially available cables.
Point the remote control toward the TV, not to connected HDMI equipment.
Video noise may occur depending on the type of HDMI cable used. Make sure to use an HDMI-
certified cable.
Up to 3 pieces of HDMI recording equipment and one AV amplifier can be connected using this
system.
These operations affect the HDMI equipment selected as the current input source. If the
equipment does not operate, turn on the equipment and select the appropriate input source
using INPUT.
The LINK feature may not operate properly when an HDMI splitter or AV selector unit is used.
These devices may cause interruptions to the image and/or sound.
Connected LINK-compatible devices can be operated without changing the settings of the remote
control unit.
Control the LINK-compatible audio system
Set the volume of LINK-compatible audio system.
NOTE
The steps in "LINK Setup" on
see page 6-2 need to be completed beforehand.
Refer to this operation manual and the operation manual of the LINK device to be used with this
TV.
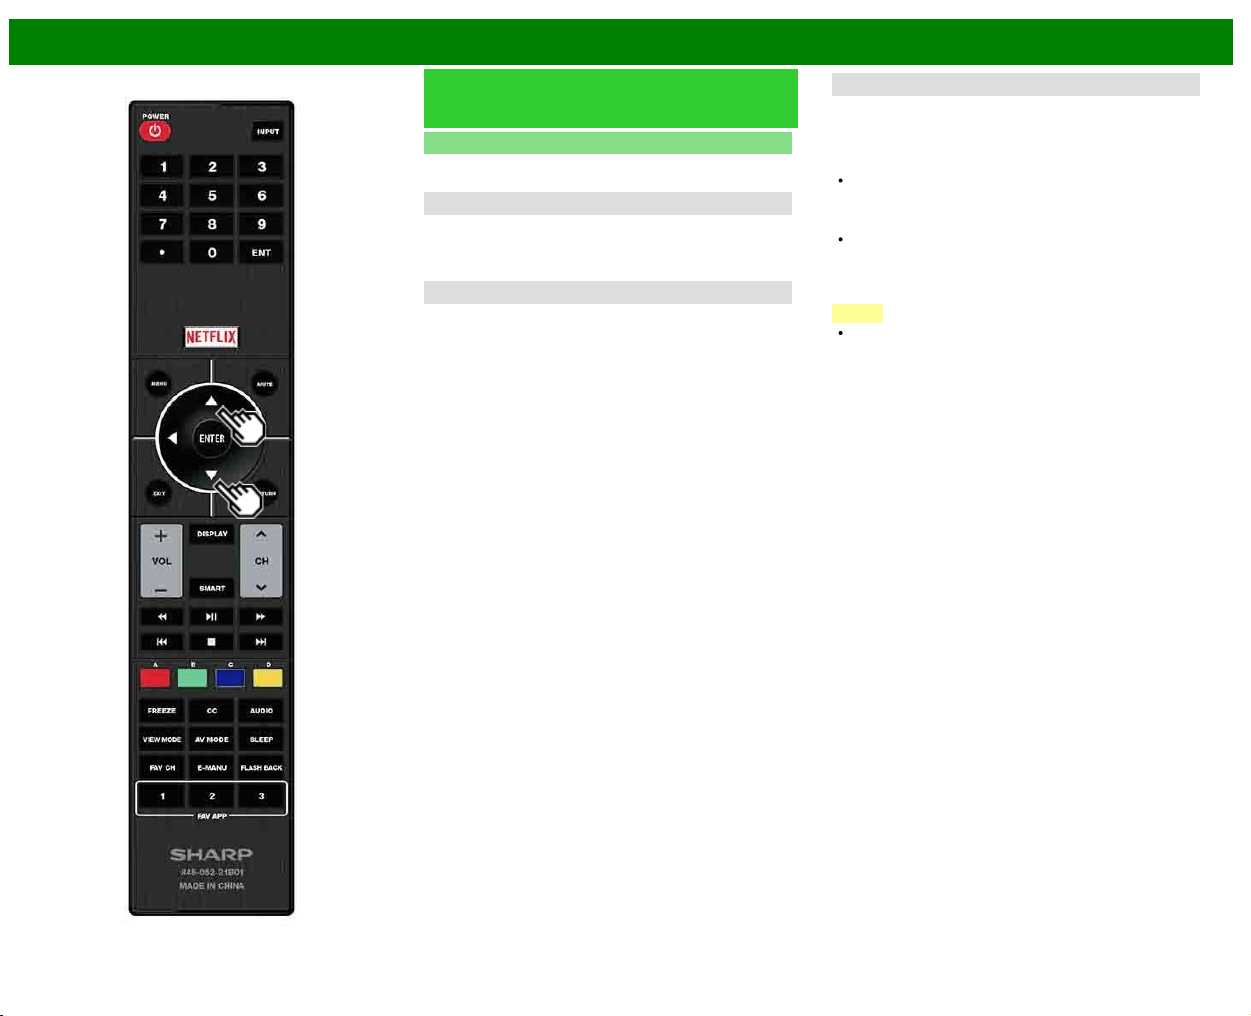
>>
<<
Using LINK Operation
ENG 6-2
Controlling HDMI Equipment Using
LINK Operation (Continue)
LINK Setup
Make the settings to use LINK Operation. Set the settings
with "Initial Setup" > "Input Settings" > "LINK Setup".
Link Operation
Select LINK Operation Control to disable the LINK function
even when a LINK-compatible HDMI device is connected to
the TV. This function prevents the device from starting to
operate unexpectedly.
Auto Power On
If this is activated, the One Touch Play function is enabled.
While the TV is in standby mode, it automatically turns on
and plays back the image from the HDMI source.
Audio Return Channel
This function allows you to listen to the TV audio via audio
equipment without using an optical fiber cable, which
conventionally is required.
Requirements for using an ARC-compatible AV
amplifier:
ARC-compatible AV amplifier connected to the ARC-
compatible HDMI IN terminal. (HDMI IN 1)
(Refer to the operation manual of the ARC-compatible
equipment for details.)
Use of an ARC-compatible cable.
Auto: You can listen to the TV audio with ARC-compatible
audio equipment.
Off: This function does not work.
NOTE
If the TV audio cannot be output from the AV amplifier
even after making the necessary settings, connect the
TV to the AV amplifier with an optical fiber cable and
select "Off".
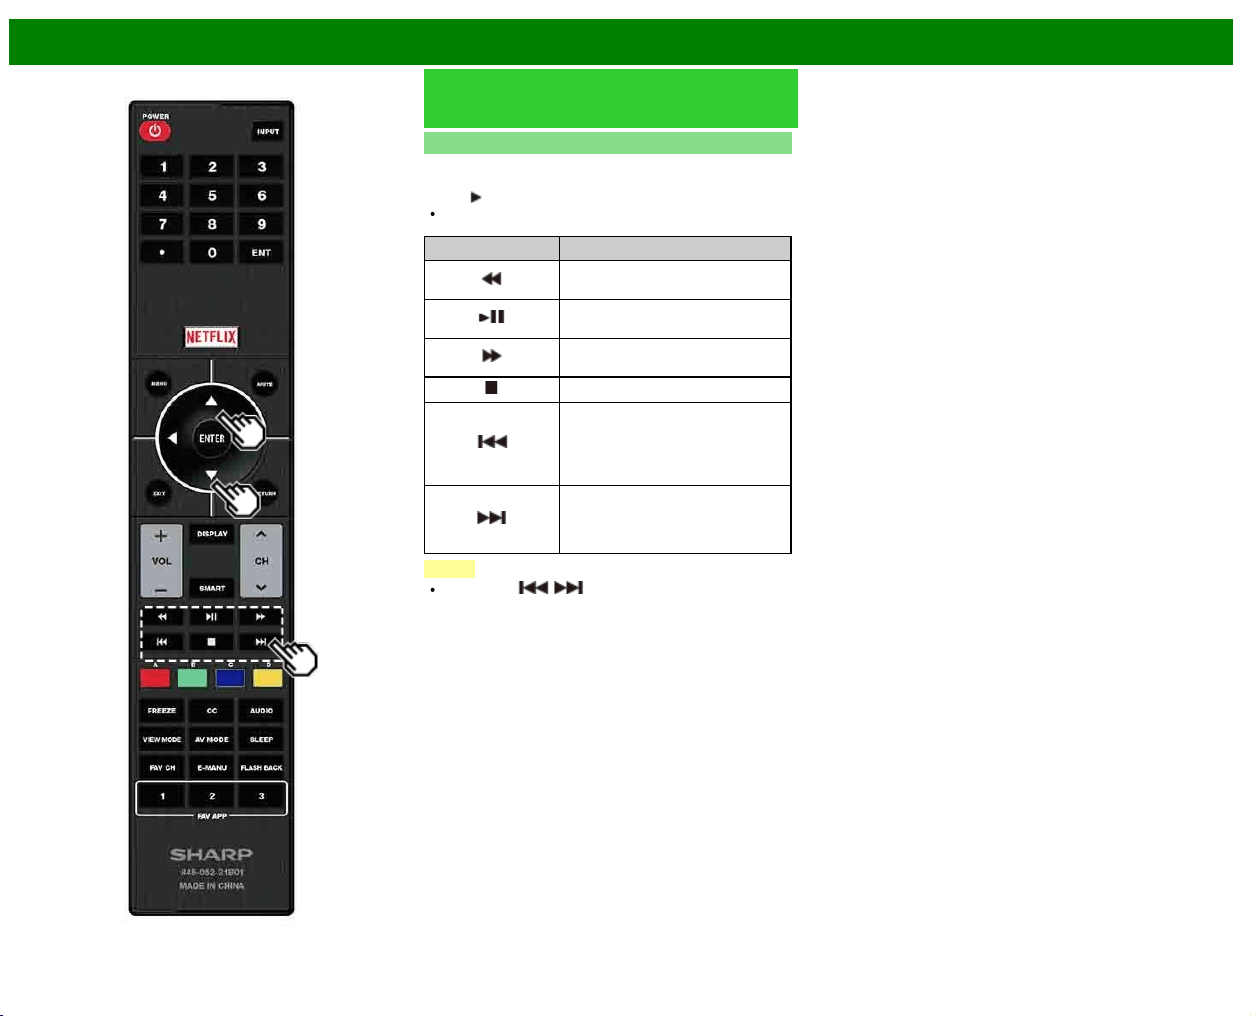
>>
<<
Using LINK Operation
ENG 6-3
Controlling HDMI Equipment Using
LINK Operation (Continue)
One Touch Playback
LINK Operationallows you to operate the HDMI-connected
equipment with one remote control.
Press
to start playing back a title.
The last played program is played back. You can use the
following buttons during broadcast viewing.
Buttons Description
Hold down this button to go in
reverse.
Starts playback.Sets pauses and
still pictures.
Hold down this button to fast
forward.
Stops playback.
Pressing quickly once takes you to
the start of the chapter currently
playing. Each time you press it, you
move back to the start of the
previous chapter.
Pressing quickly once takes you to
the start of the next chapter. Each
time you press it, you move ahead
to the start of the next chapter.
NOTE
The buttons / do not function with the following
Blu-ray disc players currently available.
- BD-HP20U, BD-HP50U
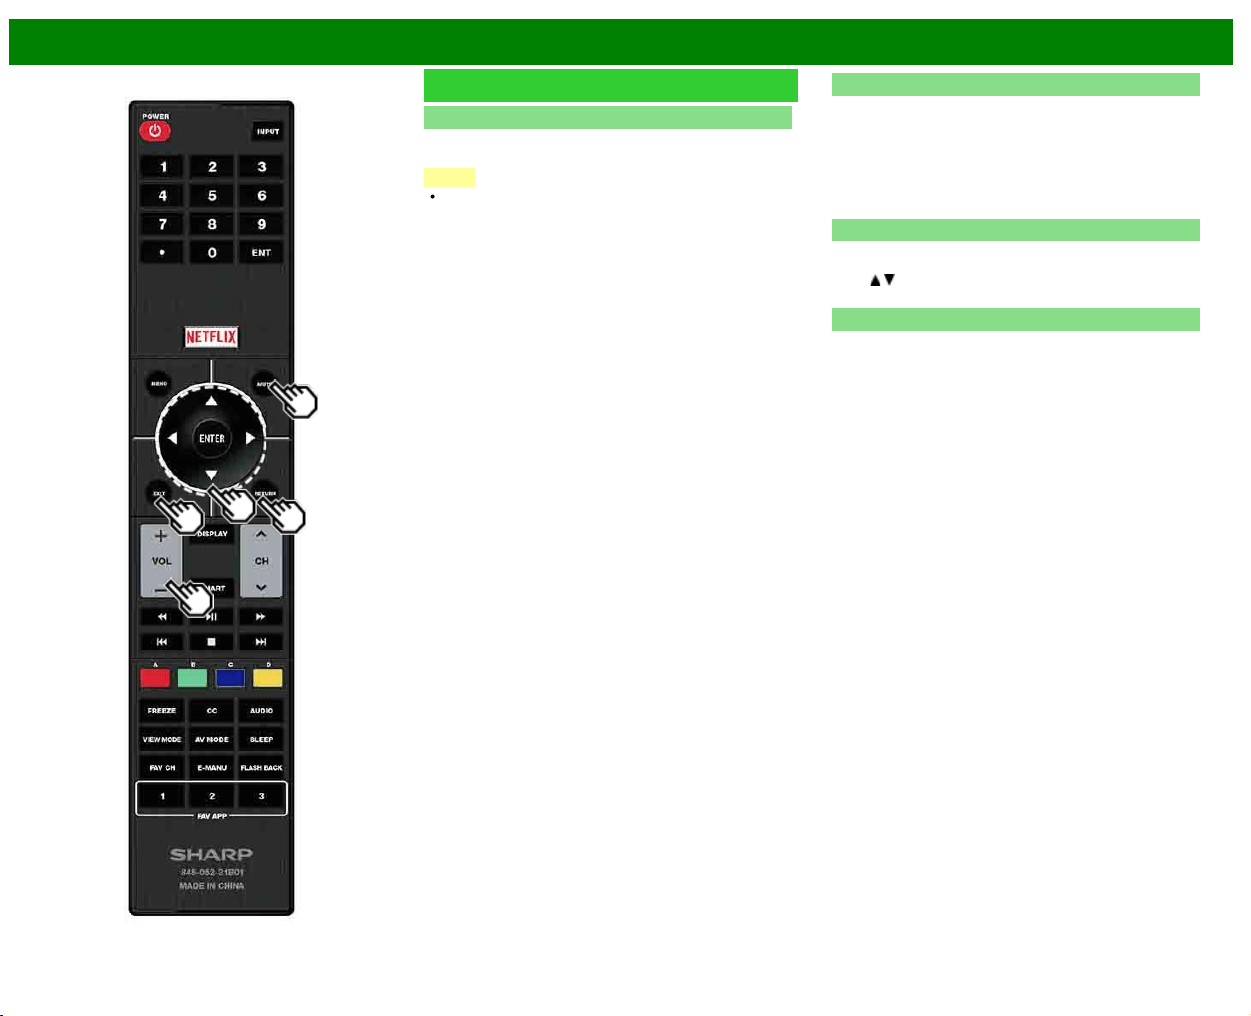
>>
<<
Using LINK Operation
ENG 6-4
Link Operation Menu
Show Start Menu
You can call up a setup menu from the connected LINK-
compatible equipment.
NOTE
Depending on the status of the equipment (recording or in
standby mode, etc), the setup menu will not be
displayed.
Change Audio Output Device
You can select to listen to the TV sound only from the
LINK-compatible audio system.
By AQUOS audio SP: The sound from the TV speaker is
muted and only the sound from the LINK-compatible
audio system is audible.
• You can use VOL+/- and MUTE.
By AQUOS SP: The sound is output from the TV speaker.
HDMI Device Selection
If multiple HDMI devices are connected in a daisy chain, you
can specify which device to control here.
Press
/ to select the desired device from a list of
connected HDMI devices, and then press ENTER.
LINK Setup
You can also display the LINK Setup screen from the Link
Operation Menu.
>>
<<
Using a PC
ENG 7-1
Adjusting the PC Image
You can adjust the position of the image input from a PC the settings with "Initial Setup" > "Input
Settings" > "Fine Sync.".
Fine Sync.
Ordinarily you can easily adjust the picture as necessary to change image position using "Auto
Sync.". In some cases, however, manual adjustment is needed to optimize the image.
Input Signal: Select the input signal.
1024x768
1360x768
Auto Sync.: For automatically adjusting the PC image.
Yes: Auto Sync. starts and "Now adjusting the image." display.
No: This function does not work.
H-Pos.: Centers the image by moving it to the left or right.
V-Pos.: Centers the image by moving it up or down.
Clock: Adjust when the image flickers with vertical stripes.
Phase: Adjust when characters have low contrast or when the image flickers.
NOTE
When "Auto Sync." is successful, "Completed" displays. If not, "Auto Sync." failed.
"Auto Sync." may fail even if "Completed" displays.
"Auto Sync." may fail if the computer image has low resolution, has unclear (black) edges, or is
moved while executing "Auto Sync.".
Be sure to connect the PC to the TV and switch it on before starting "Auto Sync.".
For resetting all "Fine Sync." adjustment items to the factory preset values, press / to select
"Reset", and then press ENTER.
It is not necessary to adjust the "Clock" or "Phase" when a digital signal is being input, so it
cannot be selected.
The default cursor position may not be in the center, because the screen position variable
ranges may be asymmetrical.
The screen position variable ranges depend on the View Mode or the signal type. The ranges
can be seen on the position-setting screen.

>>
<<
Using a PC
ENG 7-2
Setting Audio Input
Audio Select
This function sets the terminal to output the computer audio.
The adjustment items vary depending on the input source. Select the input source corresponding
to the terminal connected to the PC and then adjust the desired item.
To perform the operation, refer to "Initial Setup" > "Input Settings" > "Audio Select".
HDMI 2
HDMI(Digital): Select this when the TV and PC are connected using an HDMI-certified cable and
audio is input via the same cable.
HDMI+Analog: Select this when the TV and PC are connected using an HDMI-certified cable
and the audio is input via a Ø 3.5 mm stereo minijack.
NOTE
When "Audio Select" is set to "HDMI(Digital)", sound will not be produced if you use only an
HDMI-certified cable to connect HDMI-compatible equipment. To produce sound, you should
make an analog audio connection.
If you want to connect HDMI-compatible equipment using only an HDMI-certified cable, set
"Audio Select" to "HDMI(Digital)".

>>
<<
Using a PC
ENG 7-3
Control of the TV
The TV can be controlled from a PC, control panels and other devices using the IP.
Use a cross-type ETHERNET cable (commercially available) or wireless LAN for the connections.
NOTE
This operation system should be used by a person who is accustomed to using computers.
Detailed Settings
Make the detailed settings (Login ID, password, etc.).
Follow the on-screen instructions to configure the settings.
TV Name Setting
Set the name of the TV displayed on other network devices.
Use the software keyboard to set the name.
Communication Conditions for IP
Connect to the TV with the following settings made for IP on the PC.
IP protocol: TCP/IP
Host IP address: Set the IP address on the TV menu
Service: None (Do not select Telnet or SSH)
TCP port#: Set a port number on the TV menu (Control
port)
When you set your ID and password on the TV menu, you need to enter them as soon as you
connect to the TV.
NOTE
When you use this function, make settings for "AQUOS Remote Control".
The connection will be cut off when there has been no communication for 3 minutes.
Communication procedure
Send the control commands from the PC via the IP.
The TV operates according to the received command and sends a response message to the PC.
Do not send multiple commands at the same time.
Wait until the PC receives the OK response before sending the next command.
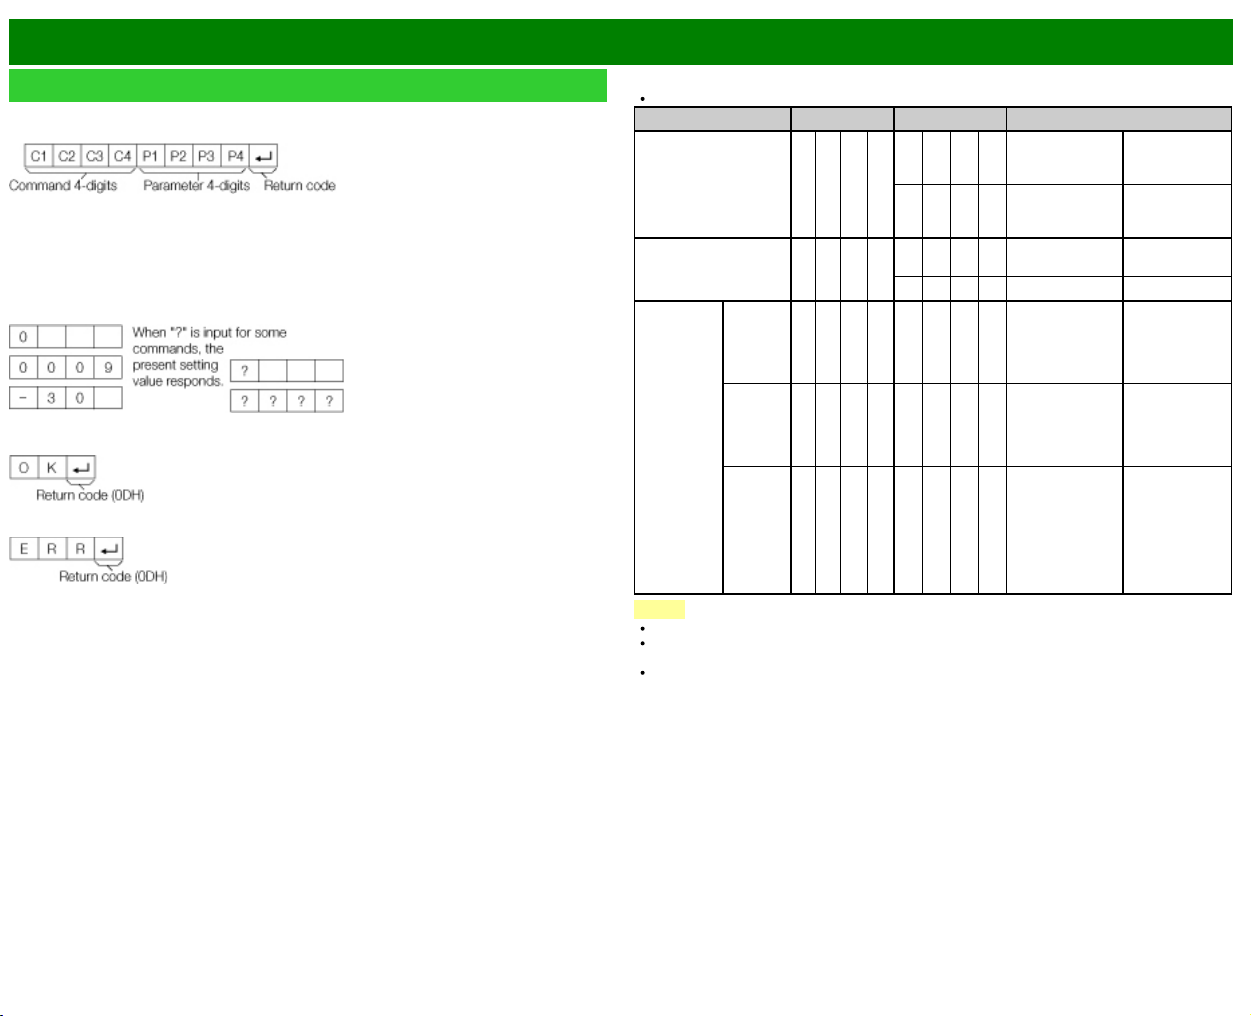
>>
<<
Using a PC
ENG 7-4
Control of the TV (Continue)
Command format
Eight ASCII codes +CR
Command 4-digits: Command. The text of four characters.
Parameter 4-digits: Parameter 0–9, x, blank, ?
Parameter
Input the parameter values, aligning left, and fill with blank(s) for the remainder. (Be sure that 4
values are input for the parameter.)
When the input parameter is not within an adjustable range, "ERR" returns. (Refer to "Response
code format".)
Any numerical value can replace the "x" on the table.
Response code format
Normal response
Problem response
(communication error or incorrect command)
Command table
Commands not indicated here are not guaranteed to operate.
CONTROL ITEM COMMAND PARAMETER CONTROL CONTENTS
POWER ON
COMMAND SETTING
R S P W 0 _ _ _ Off The Power On
command
rejected.
2 _ _ _ On [IP] The Power On
command
accepted.
POWER SETTING P O W R 0 _ _ _ Power Off It shifts to
standby.
1 _ _ _ Power On Power On
INPUT
SELECTION
TOGGLE I T G D x _ _ _ (Toggle) It input-switches
by the toggle. (It
is the same as
an input change
key)
TV I T V D 0 _ _ _ It input-switches
to TV. (A
channel
remains as it is.
(Last memory))
1-8 I A V D * _ _ _ 1: HDMI IN 1,
2: HDMI IN 2,
3: HDMI IN 3,
4: HDMI IN 4,
5: COMPONENT
IN,
6: VIDEO IN 1,
8: PC IN
NOTE
If an underbar (_) appears in the parameter column, enter a space.
If an asterisk (*) appears, enter a value in the range indicated in brackets under CONTROL
CONTENTS.
Any numerical value can replace the "x" on the table.
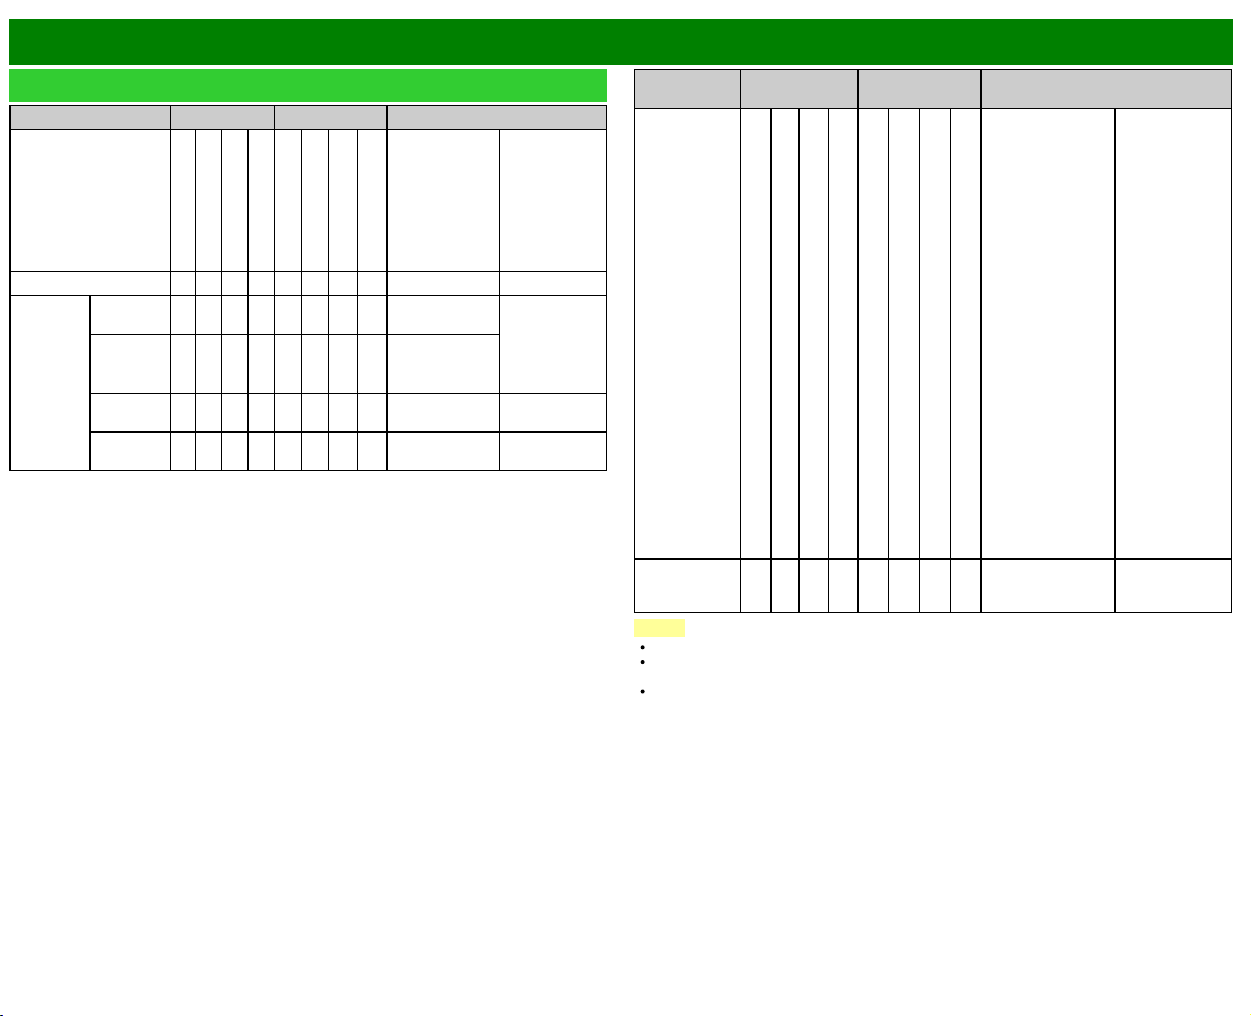
>>
<<
Using a PC
ENG 7-5
Control of the TV (Continue)
CONTROL ITEM COMMAND PARAMETER CONTROL CONTENTS
AV MODE SELECTION A V M D * * * _ 0: (Toggle),
1: STANDARD
(ENERGY
STAR),
2: MOVIE,
4: USER,
5: DYNAMIC
(Fixed),
6: DYNAMIC
Although it can
choose now, it
is toggle
operation in
inside.
VOLUME V O L M * * *_ _ Volume
(0-100)
POSITION H-
POSITION
H P O S * * * _ The screen
position
variable ranges
depend on the
View Mode or
the signal type.
V-
POSITION
V P O S * * * _
CLOCK C L C K * * * _ Only PC mode.
(0-180)
PHASE P H S E * * _ _ Only PC mode.
(0-40)
CONTROL
ITEM
COMMAND PARAMETER CONTROL CONTENTS
VIEW MODE W I D E * * _ _ 0: (Toggle) [AV],
1: Side Bar [AV],
2: S.Stretch [AV]
3: Zoom [AV],
4: Stretch [AV,
USB-Video, Home
Network Video or
Internet
applications],
5: Normal [PC]
6: Zoom [PC],
7: Stretch [PC],
8: Dot by Dot [PC]
[AV],
9: Full Screen [AV]
10: Auto [USB-
Video, USB-Photo,
Home Network
Video, Photo or
Internet
applications],
11: Original [USB-
Video, USB-Photo,
Home Network
Video, Photo or
Internet applications]
0: Although it can
choose now, it is
toggle operation
in inside.
1: Only available
when 4:3 signal
is being input.
5, 6: Only
available when
4:3 signal is
being input.
8: [PC] Available
except when
UXGA is being
input.
[AV] Only
available when
1080i/p is being
input.
9: Only available
when 720p is
being input.
10, 11: Available
when USB-
Video, USB-
Photo, Home
Network Video,
Photo or Internet
application is
used.
MUTE M U T E * _ _ _ 0: (Toggle),
1: On,
2: Off
NOTE
If an underbar (_) appears in the parameter column, enter a space.
If an asterisk (*) appears, enter a value in the range indicated in brackets under CONTROL
CONTENTS.
Any numerical value can replace the "x" on the table.
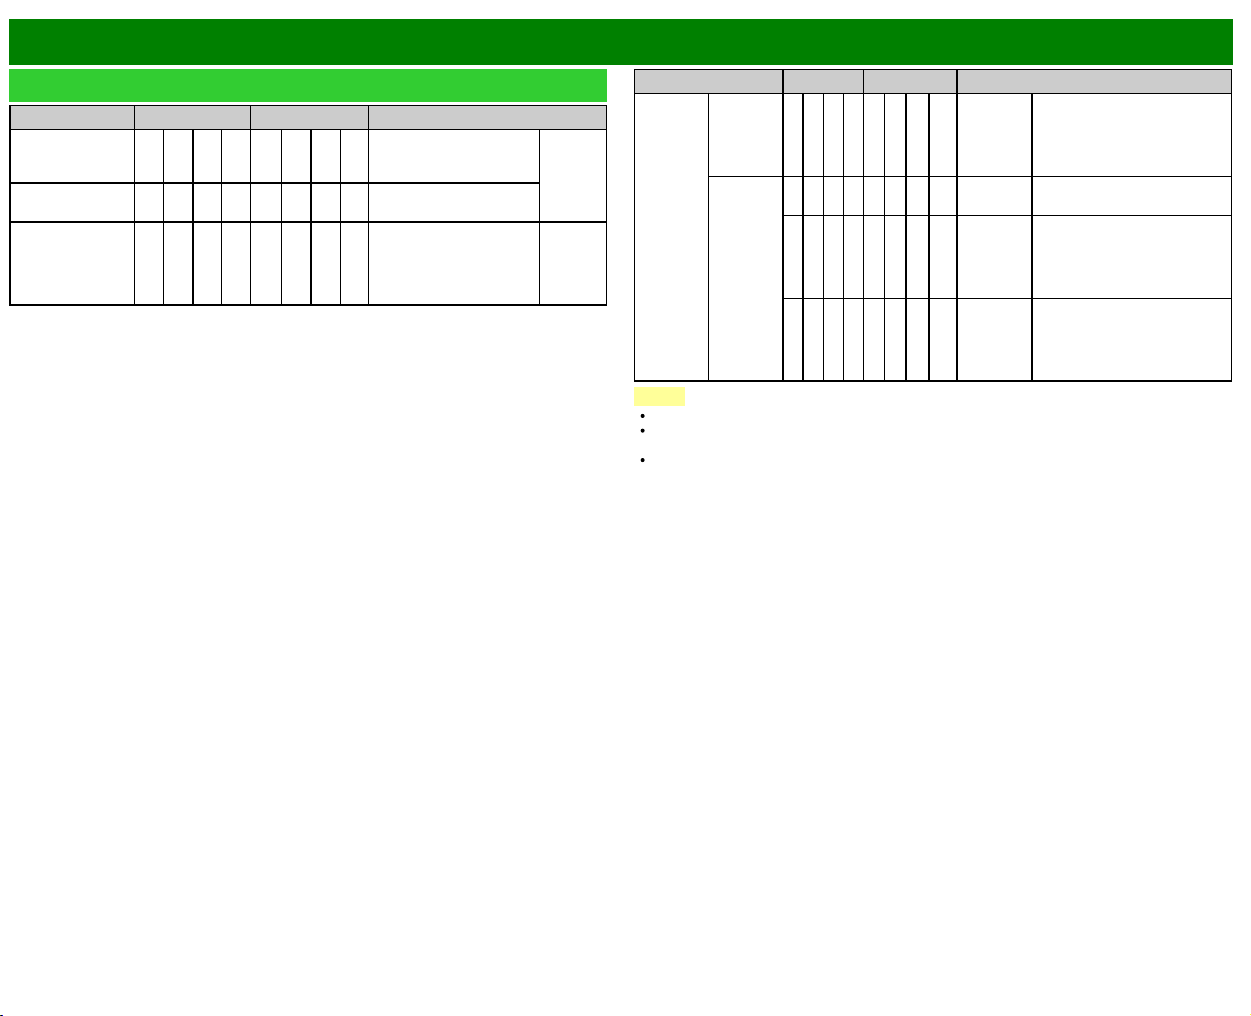
>>
<<
Using a PC
ENG 7-6
Control of the TV (Continue)
CONTROL ITEM COMMAND PARAMETER CONTROL CONTENTS
SURROUND A C S U * _ _ _ 0: (Toggle),
1: On,
2: Off
AUDIO
SELECTION
A C H A x _ _ _ (Toggle)
SLEEP TIMER O F T M * _ _ _ 0: Off,
1: OFF TIMER - 30 MIN.,
2: OFF TIMER - 60 MIN.,
3: OFF TIMER - 90 MIN.,
4: OFF TIMER - 120 MIN.
CONTROL ITEM COMMAND PARAMETER CONTROL CONTENTS
CHANNEL DIRECT
CHANNEL
(ANALOG)
D C C H * * * _ The
channel
number of
TV
(1-135)
An input change is included if it
is not TV display.
In Air, 2-69ch is effective.
In Cable, 1-135ch is effective.
DIRECT
CHANNEL
(DIGITAL)
D A 2 P * * * * (0100-
9999)
DIGITAL Air (Two-Part
numbers, 2-digit plus 2-digit)
D C 2 U * * * _ (1-999) DIGITAL Cable (Two-Part
numbers, 3-digit plus 3-digit)
Front half of DIGITAL CABLE
CHANNEL NO. (Designate
major channel)
D C 2 L * * * _ (0-999) DIGITAL Cable (Two-Part
numbers, 3-digit plus 3-digit)
Rear half of DIGITAL CABLE
CHANNEL NO. (Designate
minor channel)
NOTE
If an underbar (_) appears in the parameter column, enter a space.
If an asterisk (*) appears, enter a value in the range indicated in brackets under CONTROL
CONTENTS.
Any numerical value can replace the "x" on the table.
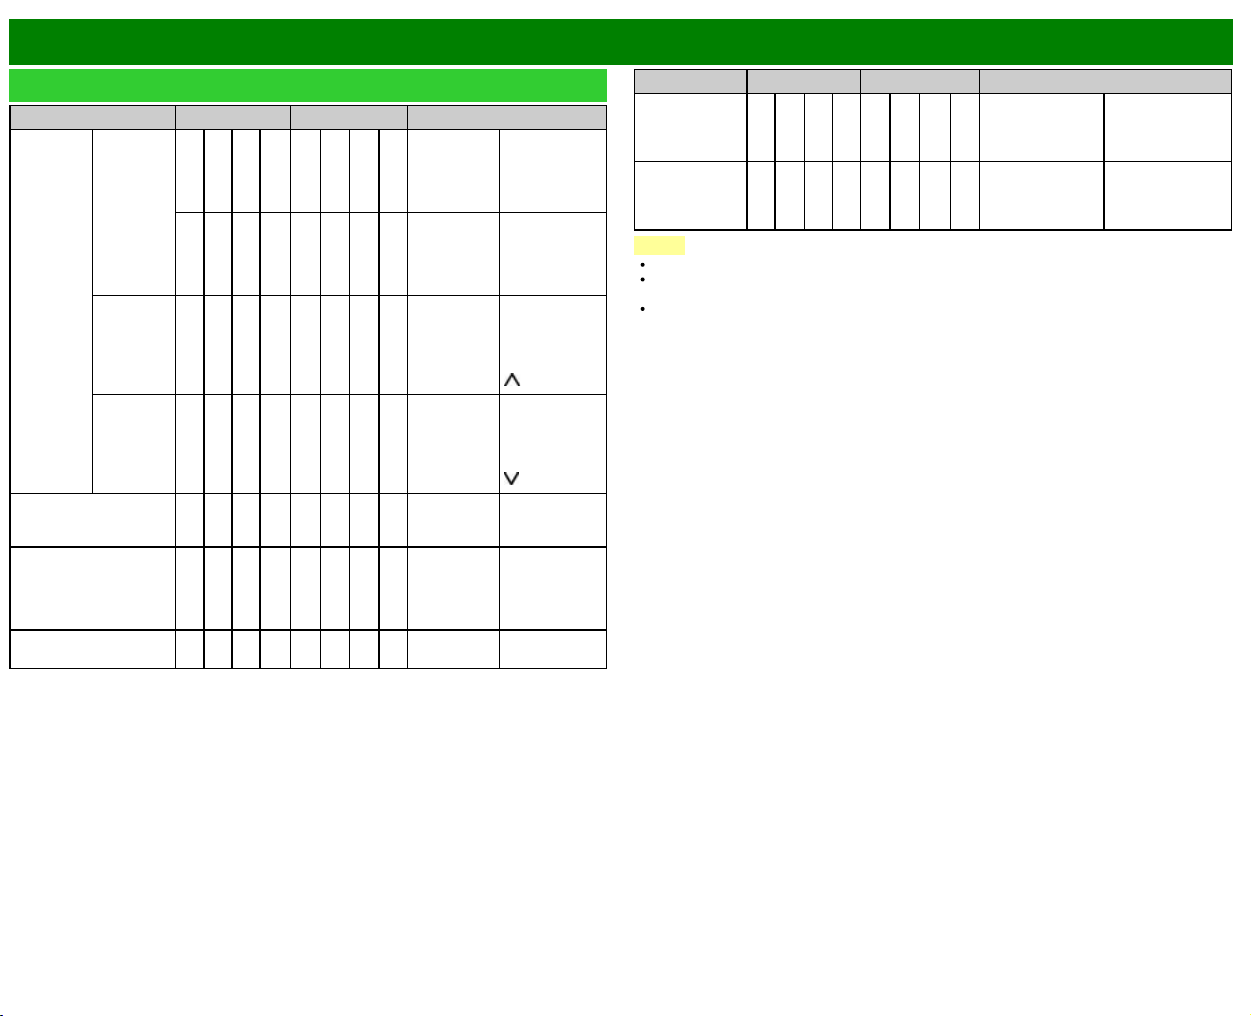
>>
<<
Using a PC
ENG 7-7
Control of the TV (Continue)
CONTROL ITEM COMMAND PARAMETER CONTROL CONTENTS
CHANNEL DIRECT
CHANNEL
(DIGITAL)
D C 1 0 * * * * (0-9999) DIGITAL Cable
(One-Part
numbers, 5-
digit, less than
10,000)
D C 1 1 * * * * (0-6383) DIGITAL Cable
(One-Part
numbers, 5-
digit, more than
10,000)
CH UP C H U P x _ _ _ The channel
number of TV
+1
If it is not TV
display, it will
input-switch to
TV. (same
function as CH
)
CH DOWN C H D W x _ _ _ The channel
number of TV
-1
If it is not TV
display, it will
input-switch to
TV. (same
function as CH
)
CC C L C P x _ _ _ (Toggle) Toggle
operation of a
closed caption.
DEVICE NAME T V N M 1 _ _ _ The device
name set in
“TV Name
Setting” is
displayed.
MODEL NAME M N R D 1 _ _ _ The model
name of the TV
CONTROL ITEM COMMAND PARAMETER CONTROL CONTENTS
SOFTWARE
VERSION
S W V N 1 _ _ _ The current
version of the TV
software is
displayed.
IP PROTOCOL
VERSION
I P P V 1 _ _ _ The currently
supported version
of IP protocol is
displayed.
NOTE
If an underbar (_) appears in the parameter column, enter a space.
If an asterisk (*) appears, enter a value in the range indicated in brackets under CONTROL
CONTENTS.
Any numerical value can replace the "x" on the table.
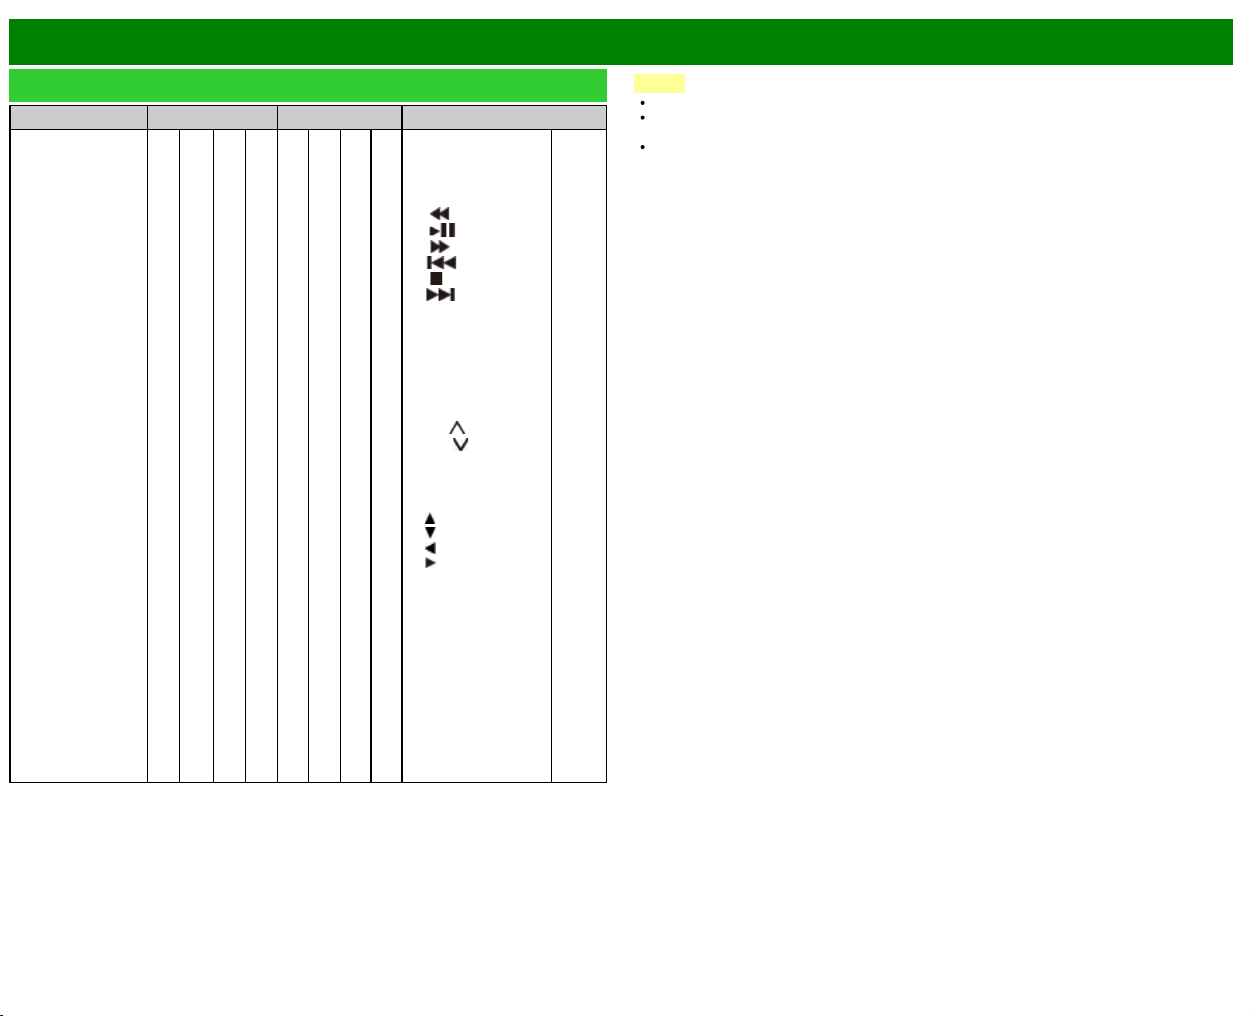
>>
<<
Using a PC
ENG 7-8
Control of the TV (Continue)
CONTROL ITEM COMMAND PARAMETER CONTROL CONTENTS
REMOTE CONTROL
BUTTONS
R C K Y * * _ _ 0-10: 0-9,
11: DOT,
12: ENT,
13: POWER,
14: DISPLAY,
15:
,
16:
,
17:
,
18:
,
19:
,
20:
,
21: SLEEP,
22: CC,
23: AV MODE,
24: VIEW MODE,
25: FLASH BACK,
26: MUTE,
27: VOL -,
28: VOL +,
29: CH
,
30: CH
,
31: INPUT,
32: MENU,
33: SMART,
34: ENTER,
35:
,
36:
,
37:
,
38:
,
39: RETURN,
40: EXIT,
41: FAV CH,
42: AUDIO,
43: A (red),
44: B (green),
45: C (blue),
46: D (yellow),
47: FREEZE,
48: FAV APP 1,
49: FAV APP 2,
50: FAV APP 3,
51: NETFLIX,
52: E-MANU.
NOTE
If an underbar (_) appears in the parameter column, enter a space.
If an asterisk (*) appears, enter a value in the range indicated in brackets under CONTROL
CONTENTS.
Any numerical value can replace the "x" on the table.
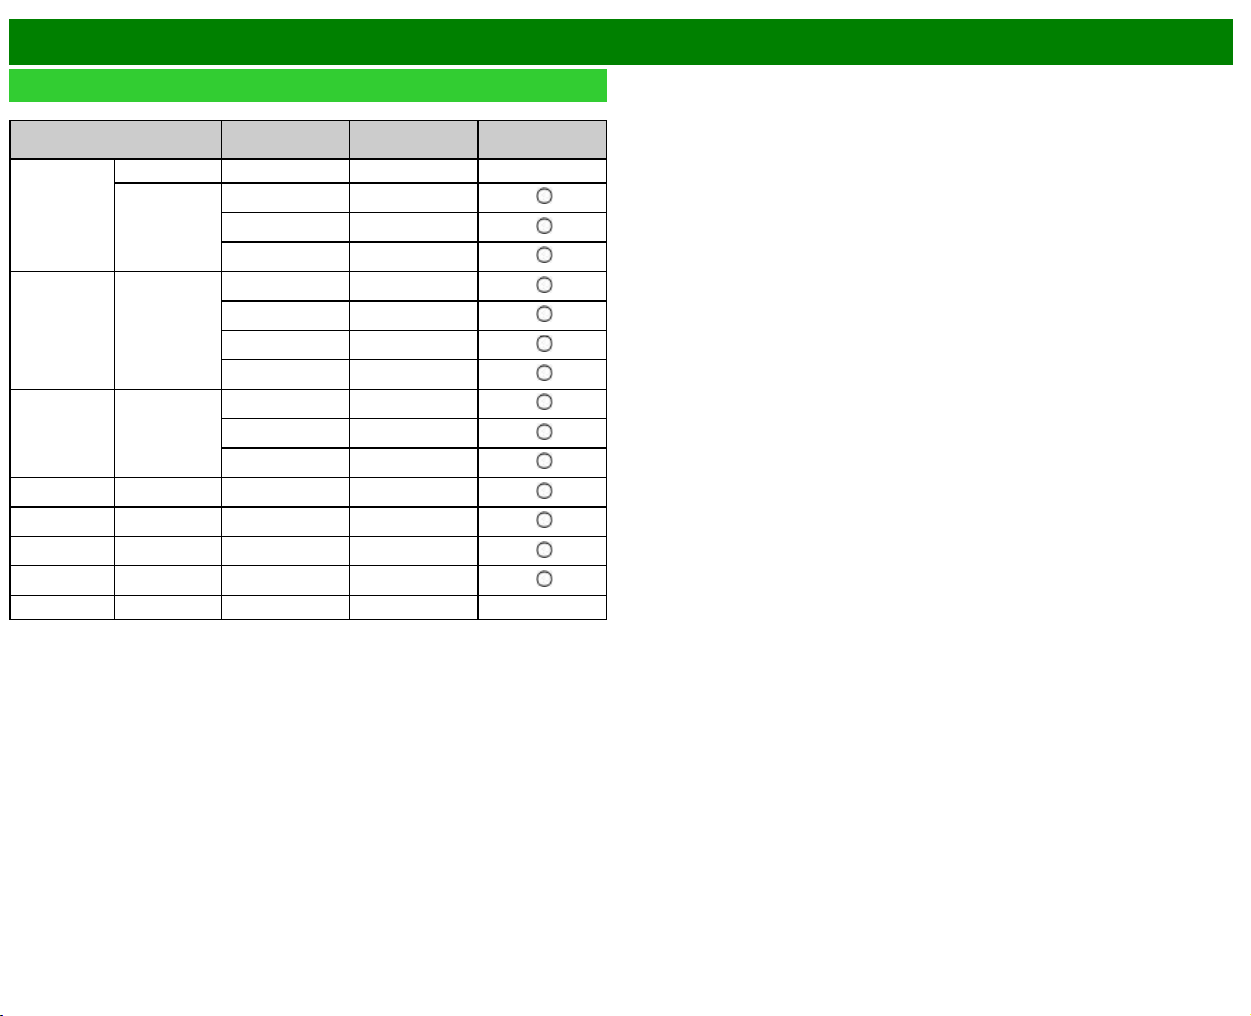
>>
<<
Using a PC
ENG 7-9
PC Compatibility Chart
It is necessary to set the PC correctly to display XGA and WXGA signal.
Resolution
Horizontal
Frequency
Vertical
Frequency
VESA Standard
VGA
720 x 400 31.5 kHz 70 Hz —
640 x 480
31.5 kHz 60 Hz
37.9 kHz 72 Hz
37.5 kHz 75 Hz
SVGA 800 x 600
35.1 kHz 56 Hz
37.9 kHz 60 Hz
48.1 kHz 72 Hz
46.9 kHz 75 Hz
XGA 1024 x 768
48.4 kHz 60 Hz
56.5 kHz 70 Hz
60.0 kHz 75 Hz
WXGA 1360 x 768 47.7 kHz 60 Hz
SXGA 1280 x 1024 64.0 kHz 60 Hz
SXGA+ 1400 x 1050 65.3 kHz 60 Hz
UXGA 1600 x 1200 75.0 kHz 60 Hz
1080p 1920 x 1080 67.5 kHz 60 Hz ―
VGA and XGA are registered trademarks of International Business Machines Corp.
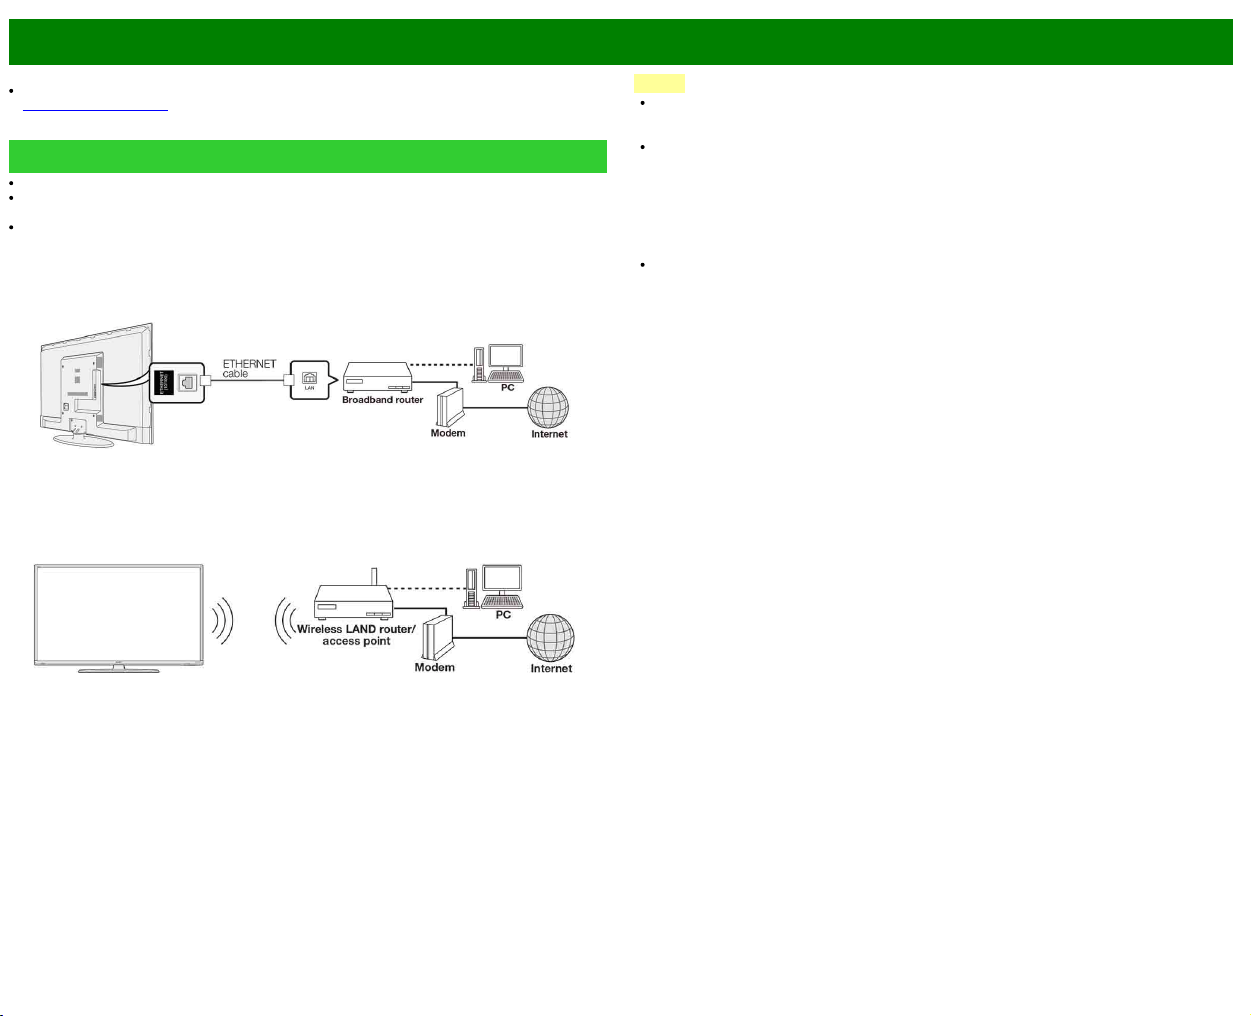
>>
<<
Using the Internet
ENG 8-1
By connecting your TV to a broadband system, you can access the Internet from the TV.
You can enjoy a variety of streaming content and Internet applications.
(See pages 8-3 to 8-4.)
Connecting to the Internet
To connect your TV to the Internet, you must have a broadband Internet connection.
If you do not have a broadband Internet connection, consult the store where you purchased your
TV or ask your Internet service provider or telephone company.
When an Internet connection is made, an Ethernet and wireless connection cannot be used at
the same time. Use only one of the connection types.
Using an ETHERNET cable
Use an ETHERNET cable (commercially available) to connect the ETHERNET terminal on the TV
to your broadband router (commercially available).
Using the wireless LAN
This TV is equipped with a wireless LAN function.
For a wireless LAN connection, you must use "Wireless Setup" to connect the access point and
TV.
NOTE
This TV has a built-in wireless LAN function. Using a separate wireless USB LAN adapter may
result in radio communications that do not comply with regulations on radio communications.
Therefore, do not use a separate wireless LAN adapter.
A wireless LAN connection and performance cannot be guaranteed for all residential
environments. In the following cases, the wireless LAN signal may be poor or drop, or the
connection speed may become slower.
- When used in buildings made with concrete, reinforced steel, or metal
- When placed near objects that obstruct the signal
- When used with other wireless devices that emit the same frequency
- When used in the vicinity of microwave ovens and other devices that emit a magnetic field,
electrostatic charge, or electromagnetic interference
When there is significant interference in the 2.4-GHz frequency (such as from other wireless
LAN devices, Bluetooth® devices, 2.4-GHz cordless telephones, and microwave ovens), it is
recommended that you use a wireless LAN router/access point that supports IEEE802.11a/n (5
GHz) and set the access point to transmit at 5 GHz. For setup details, see the operation
manual of your access point.
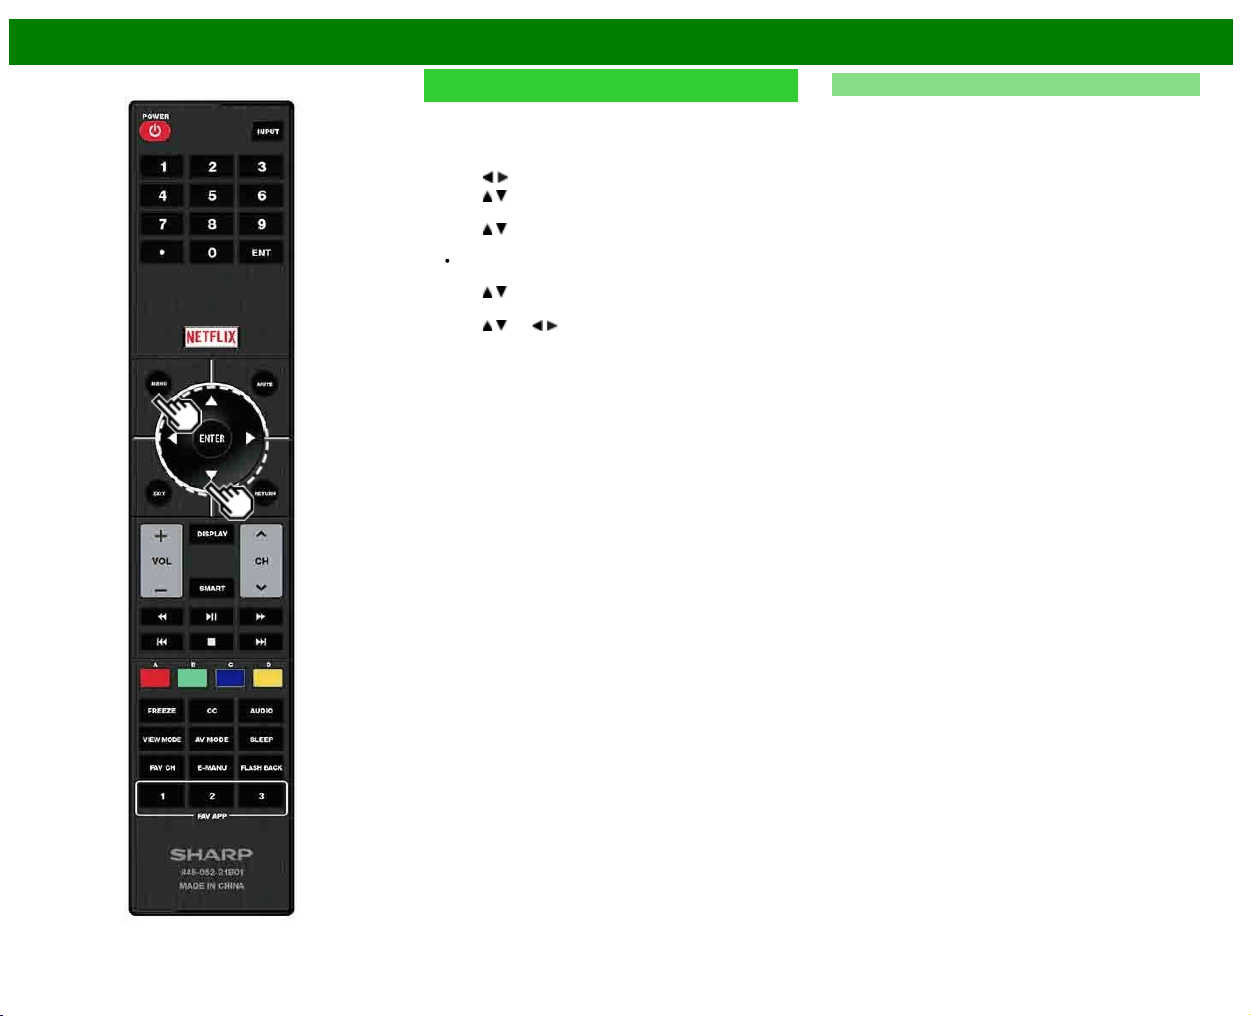
>>
<<
Using the Internet
ENG 8-2
Internet Setup
Perform the procedure below to make adjustments or to
confirm the settings for accessing the Internet.
1 Press MENU to display the MENU screen, and then
press ENTER.
2 Press
/ to select "Smart TV", and then press ENTER.
3 Press
/ to select "Internet Setup", and then press
ENTER.
4 Press
/ to select "Connection Type", "Wired Setup" or
"Wireless Setup", and then press ENTER.
Select ”Wired Setup" or "Wireless Setup" when you
make general adjustments to connect to the Internet.
5 Press
/ to select a specific item, and then press
ENTER.
6 Press
/ (or / ) to select the desired setting, and
then press ENTER.
7 Press MENU to exit.
Connection Type
Select the connection type.
Wired: The signal is detected and setup is performed
automatically. Use "IP Setup" to check and change the
settings as necessary.
Wireless: Configure the access point settings on "Wireless
Setup".
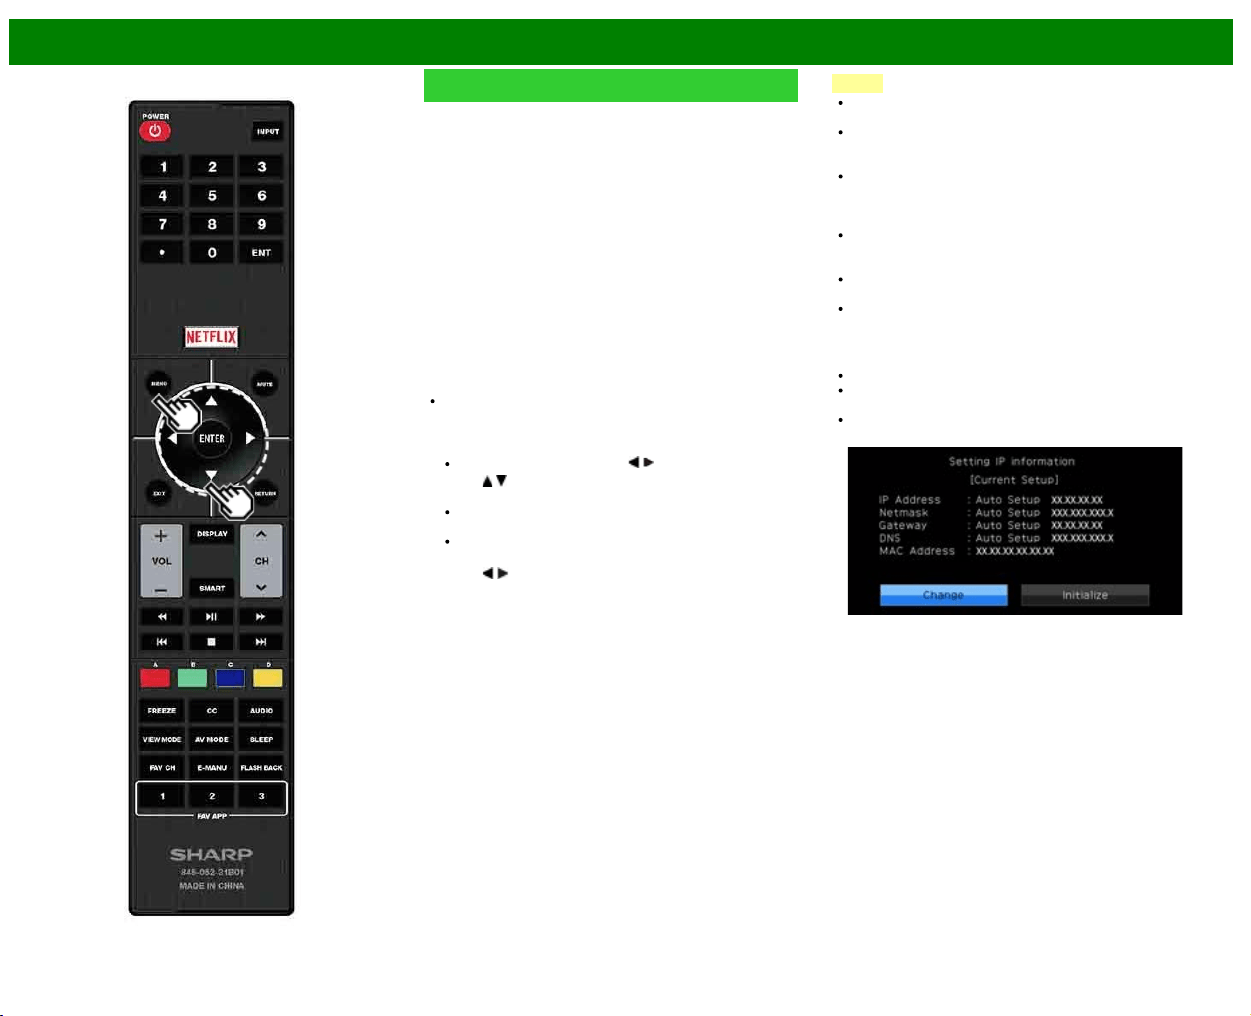
>>
<<
Using the Internet
ENG 8-3
Internet Setup (Continue)
Wireless Setup
Make adjustments and confirm the settings necessary for
wireless LAN connection (such as search for the access
point and registration of it).
WPS push button: Allows the TV to automatically
establish the connection using a button on the access
point.
WPS PIN code: Sets up the connection by registering a
PIN code for the access point.
Selecting wireless network: Searches for and selects the
access point to be connected.
Registering wireless network: Allows you to make the
connection by entering an SSID for the access point.
If your access point supports Wi-Fi Protected Setup (WPS
push button method), it is recommended that you use this
function for the wireless connection. You can press the WPS
button on the access point to configure the settings
automatically.
The name of the WPS button function may differ
depending on the access point. See the operation
manual of the access point for details.
1 Confirm the current settings in "Connection Type".
If "Wired" is selected, press / to select "Wireless".
2 Press
/ to select "Wireless Setup", and then press
ENTER.
Confirm the settings. If each setting item is correct,
press MENU to exit.
If you are configuring the wireless setup for the first
time or changing the settings, go to step 3.
3 Press
/ to select "Change", and then press ENTER.
4 Select the desired connection method and follow the
instructions shown on the display.
5 When a connection is established, the connection details
are displayed. Press ENTER.
NOTE
Operations cannot be guaranteed when used with access
points that do not have Wi-Fi® certification.
A wireless LAN router/access point is required to connect
the TV to the Internet using a wireless LAN. See the
operation manual of your access point for setup.
If your access point is set to a stealth mode (that
prevents detection by other devices), you may not be
able to establish a connection. In this case, disable the
stealth mode on the access point.
A stable connection speed is required to play back
streaming content. Use an Ethernet connection if the
wireless LAN speed is unstable.
Before transferring to a third party or disposal, be sure to
initialize the wireless LAN settings.
Please follow the legislation in your country when using
the wireless LAN outdoors.
IP Setup
You can make adjustments manually for the IP.
Check that numbers are displayed for each setting.
If there are any settings without numbers, specify the
numbers by following the on-screen instructions.
Input the IP address by using remote control buttons 0-9.
Example

>>
<<
Using the Internet
ENG 8-4
Internet Setup (Continue)
Connection Test
After the connecting and setting procedures have been
completed, you can check that the preparation is correct.
Press "Yes" to start the "Connection Test".
When the test results are displayed, follow the
instructions shown on the screen.
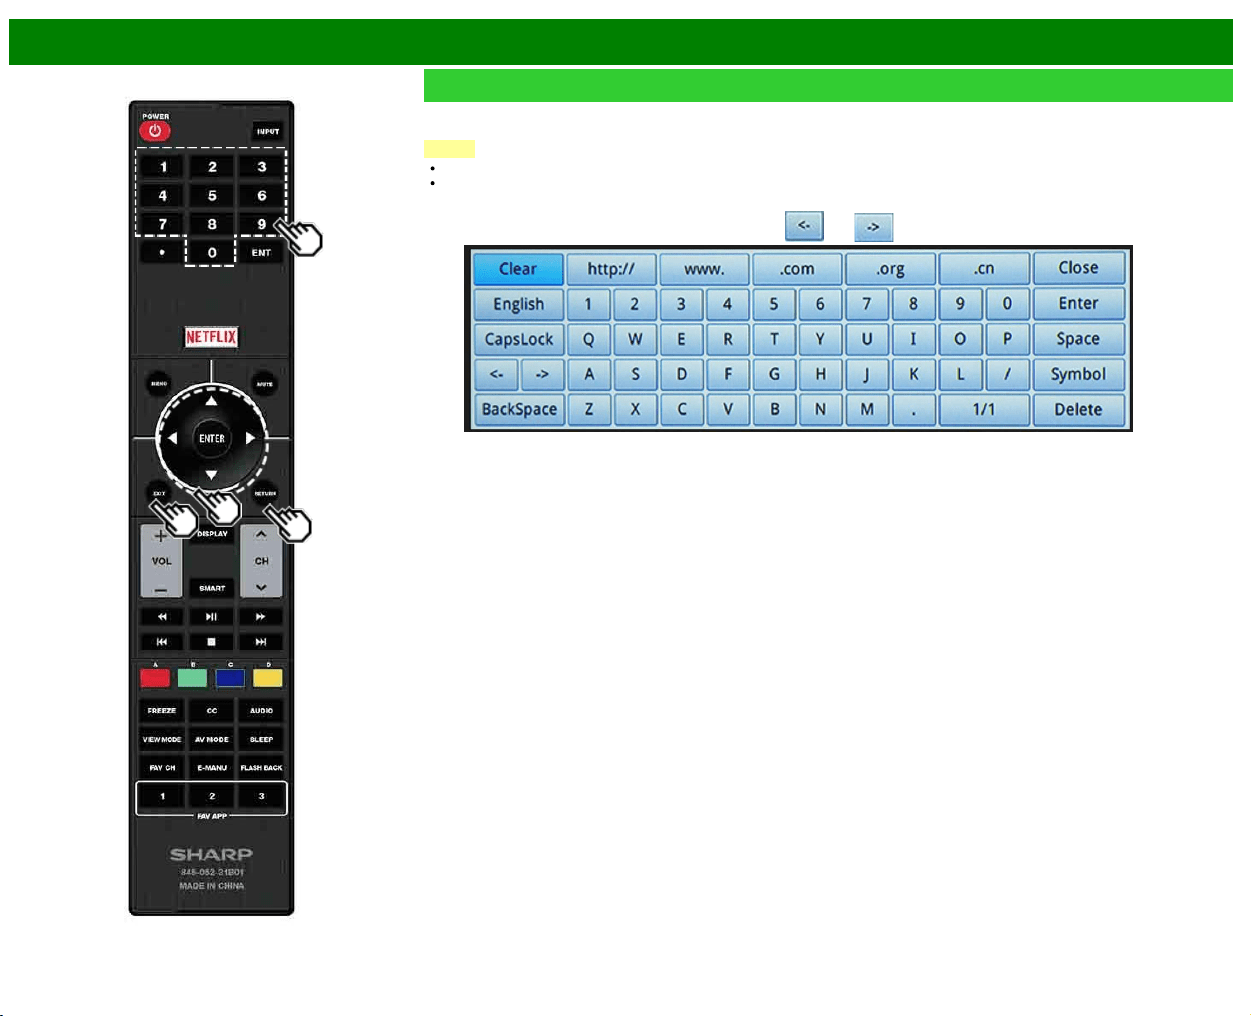
>>
<<
Using the Internet
ENG 8-5
Entering Text (Software Keyboard)
When you are editing an input screen or specifying the Network settings used for accessing the Internet, enter text from the software
keyboard.
NOTE
You can enter up to 128 characters for text.
Some special characters or diacritics may not be available depending on where you enter the text.
CapsLock
If "alphabet" is selected, this switches characters between
uppercase and lowercase.
Each time you press ENTER, the character type switches.
Symbol
Press ENTER to select the type of characters entered:
alphabet, or sign.
BackSpace/Delete
Erases
text one character at a time.
The text you enter is displayed as you type it in.
To move the cursor (the current input position), use "
" or " " on the software keyboard.
While you are entering text, likely input conversion candidates are displayed based on what you typed in.
>>
<<
Using the Internet
ENG 8-6
Entering Text (Software Keyboard)
(Continue)
Enter
Applies the entered information and closes the software
keyboard.
Space
Enters
a space.
Clear
Erases
the character string.
When the cursor is somewhere in a line: the character
string to the right of the cursor will be erased.
When the cursor is at the right end of a line: the entire
line will be erased.
Close
Closes
the software keyboard without applying the entered
information.
Buttons on the
remote control unit
Description
/ / / Moves the focus. When moved at
the far edge, the focus moves to
the opposite edge.
ENTER Performs the processing for the
button currently in the focus.
EXIT Closes the software keyboard
without applying the original input
elements for the entered text.
RETURN
0-9 Directly enters the single-byte
number for that button.

>>
<<
Using the Internet
ENG 8-7
Using the Browser
1 Press SMART, press / (or / ) to select the browser
icon from the application window, and then press
ENTER.
PressSMARTagain to switch back to the currently
tuned channel.
Buttons for Using the Browser
ENTER,
/ / /
Press / / / to select a link that you want to jump,
and then press ENTER.
EXIT
Press the button to return to the TV screen.
RETURN
Press the button to return to the previous page.
NOTE
Restrictions apply to window display.
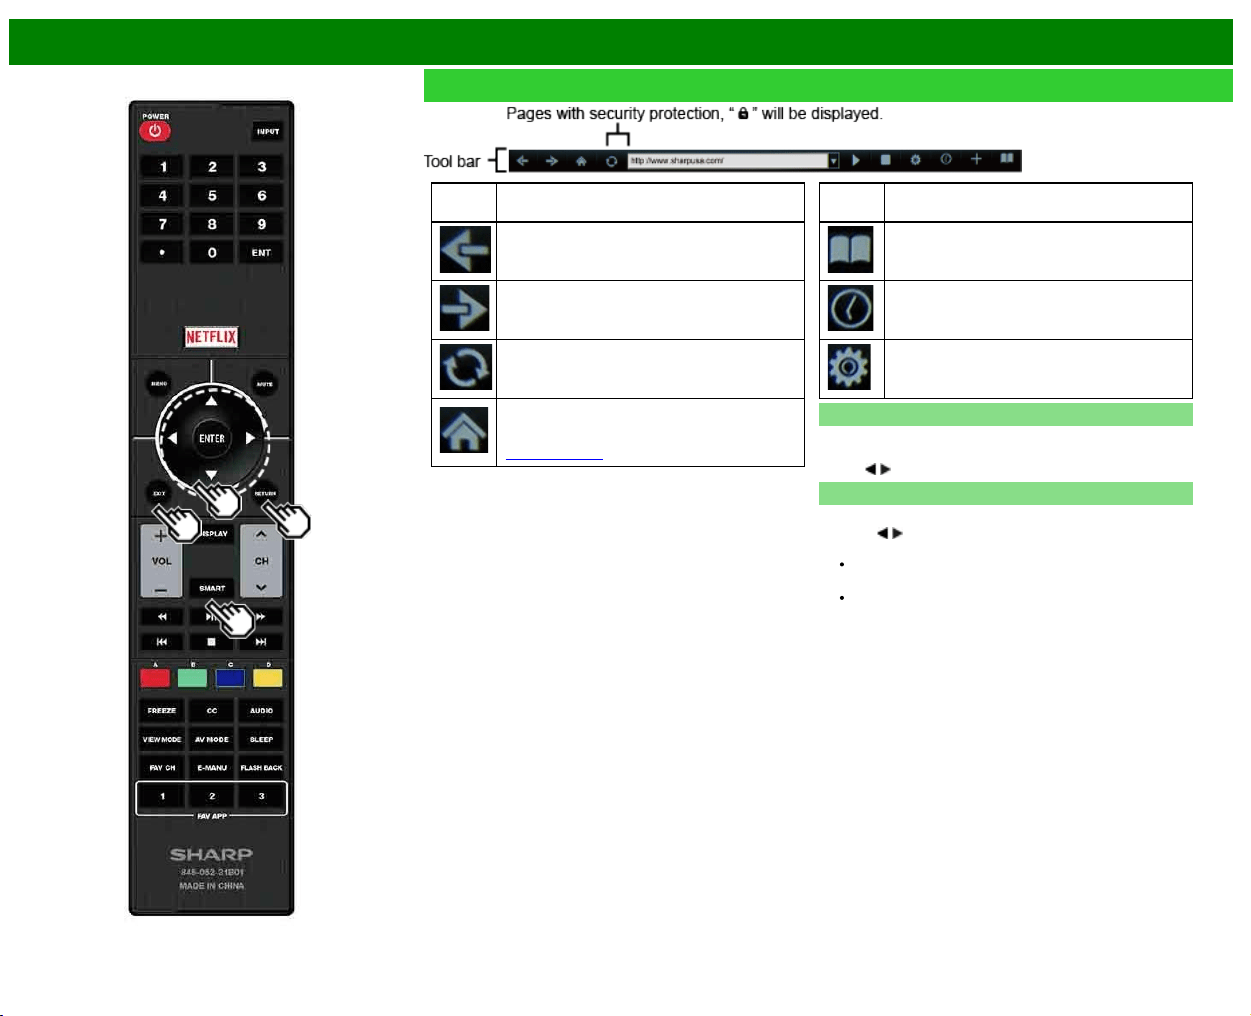
>>
<<
Using the Internet
ENG 8-8
Using the Browser (Continue)
Selected
item
Description
Allows you to go back to the previous page.
Allows you to go to the next page.
Refreshes the page.
Interrupts a page while it is loading.
Displays the home page. You can set the page
displayed as your home page when the browser
starts up.
(See page 8-7.)
Selected
item
Description
Displays the bookmarks list.
Displays your browsing history.
Configures browser settings such as your home
page and browsing security.
Using the Toolbar
You can use the toolbar to control the browser and to specify
settings.
Press
/ to select a function, and then press ENTER.
Browsing Web Contents
You can display the web content you want to enjoy.
1 Press
/ to move to the address area in the toolbar, and
then press ENTER.
The Enter Address menu is displayed.
2 Enter an address, and then press ENTER.
The web content you want to view is displayed.
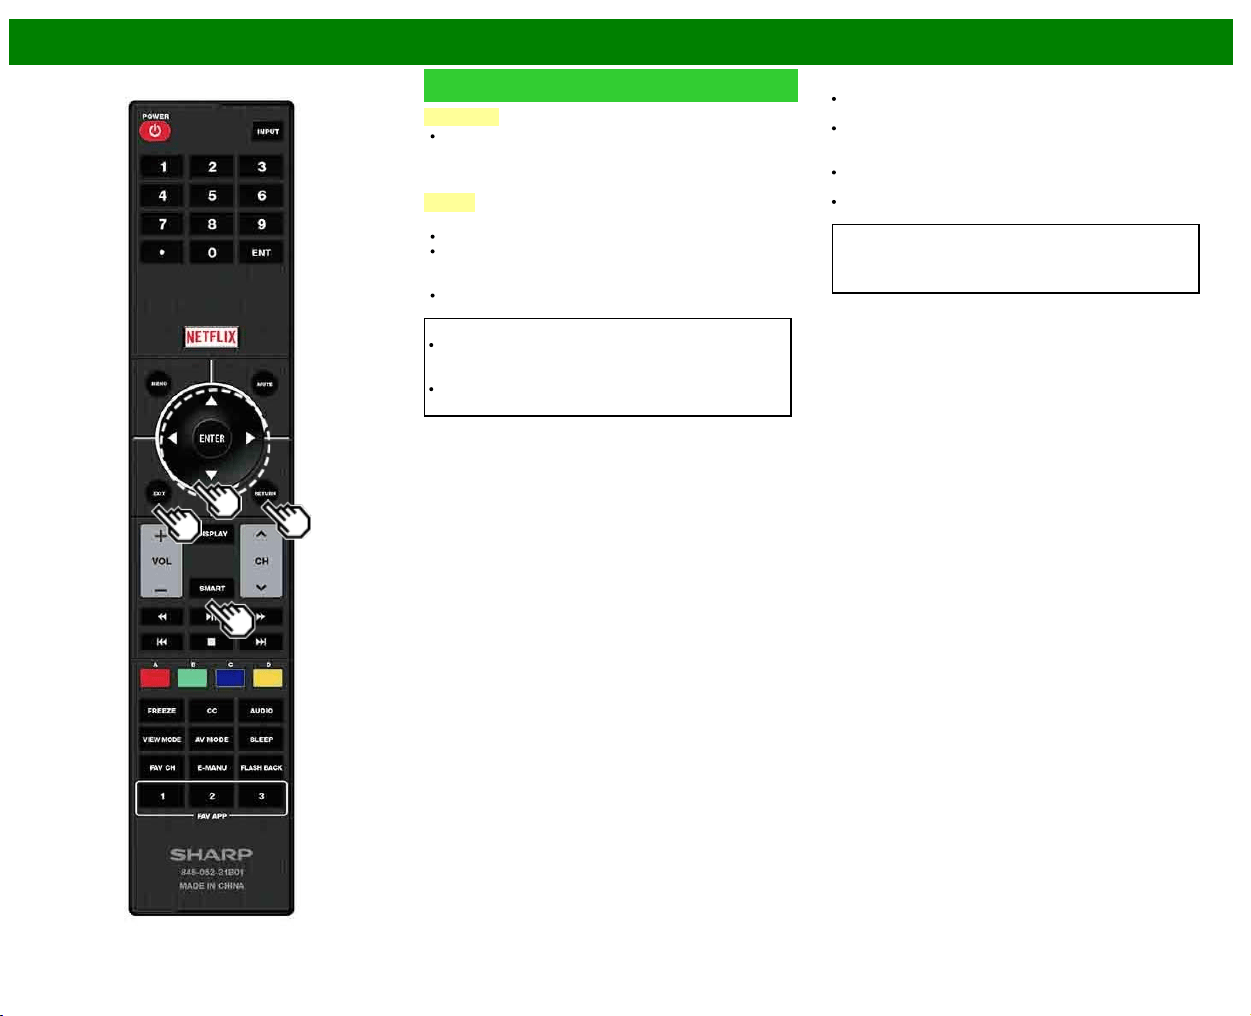
>>
<<
Using the Internet
ENG 8-9
Using the Browser (Continue)
CAUTION
If the power is cut off due to a power failure or the TV
being unplugged while you are using the Internet,
information such as bookmarks or cookies may not be
saved correctly.
NOTE
When a security notification window is displayed:
Press ENTER to close the window.
This window appears when you visit a web page that has
security protection, or when you move from a protected
page to an unprotected page.
In "Security" you can set whether or not this window is
displayed.
To users who access the Internet from a PC
When you access the Internet from this TV, the
procedures may not be the same as regular browser-
based access on a PC.
On some pages, video and audio, text or images may
not be displayed correctly.
About links
Web pages on the Internet often include "links" that allow
you to jump to other web pages (or sites).
"Links" can take various forms, including words or images,
but they always work in the same way letting you jump to
the link destination when you select them.
Selected items (such as links of text input fields) are
enclosed in a frame.
You can jump from a "link" to the corresponding link
destination.
DISCLAIMERS
SHARP corporation bears no responsibility regarding the
content and quality of the content provided by the content
serve provider.

>>
<<
Using the Internet
ENG 8-10
Using the Browser (Continue)
Browser Settings
You can check or modify your browser settings from the
Browser menu.
1 Press
/ to select " " in the toolbar, and then press
ENTER.
2 Press
/ to select and confirm the item you want to
set.
3 Press
/ / / to specify the required setting, and then
press ENTER.
Home Page: You can set the page displayed as your
home page when the browser starts up.
Encoding: You can select the desired encoding from the
list below:
Western (ISO-8859-1)/Unicode (UTF-8)
Page Information: Displays information about the currently
displayed page.
Security:
Secure sites:
When set to "Disabled", HTTPS sites cannot be
accessed.
Security warnings:
When set to "Enabled", displays warning dialogs when
going HTTP
HTTPS.
Certificates: Display the list of certificates. You can
choose to enable/disable a certificate.
Disable certificate are shown unticked in the certificate
list screen.
Cookies:
Accept all: Select this option to accept all cookies.
Reject all: Select this option when you do not want to
accept cookies.
Delete All Cookies: Deletes all your cookies.

>>
<<
Using the Internet
ENG 8-11
Using Keyboard and Mouse
You can use a keyboard or mouse for operating the TV
while using the browser.
When you use the USB devices, connect the device to the
USB terminal on the TV.
NOTE
The keyboard and mouse can only be used on a browser
screen.
The keyboard or mouse may not operate properly
depending on the application being used.
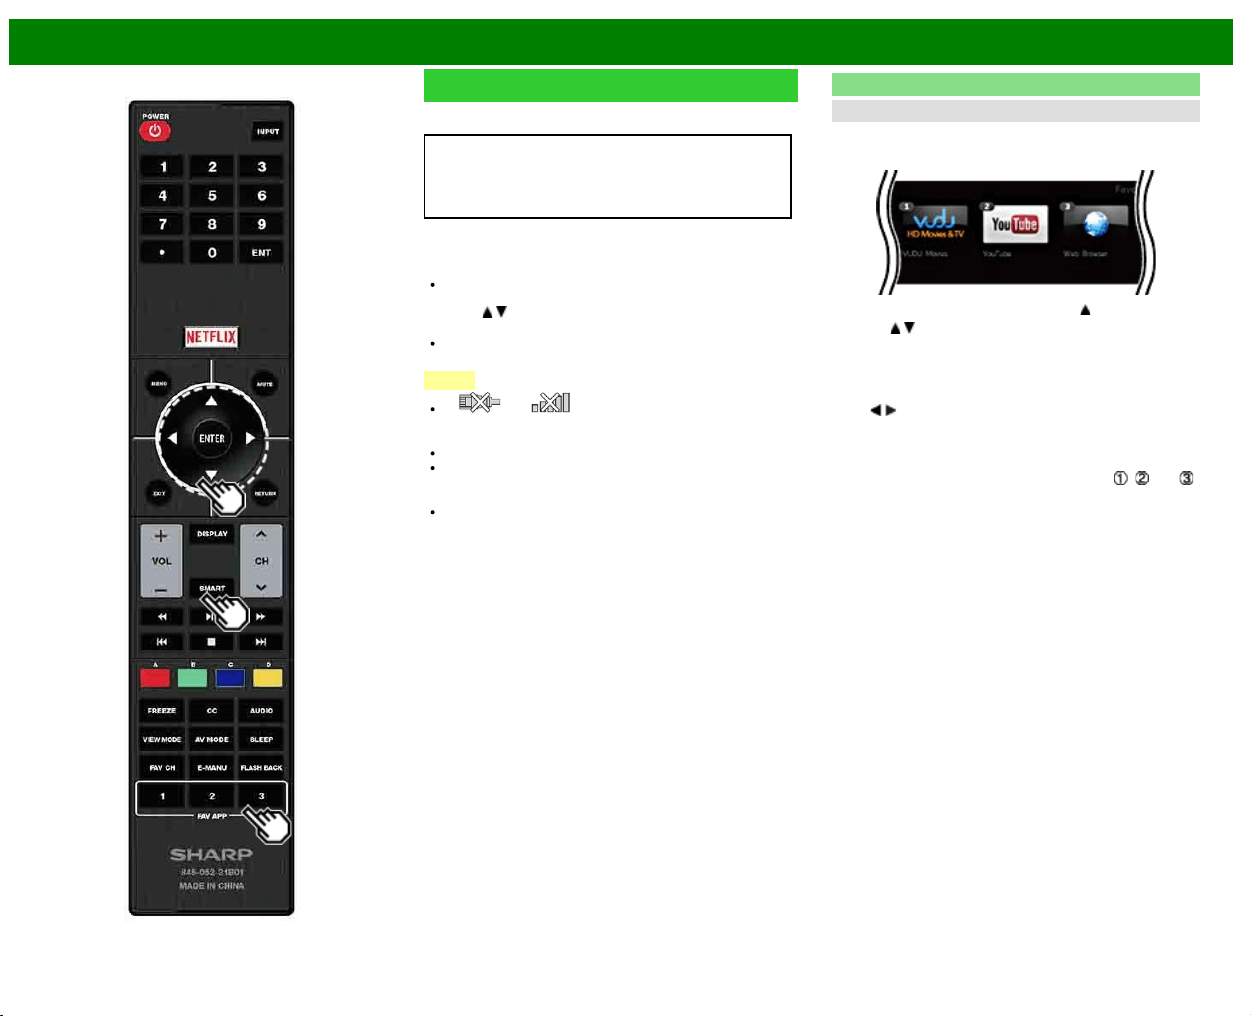
>>
<<
Using the Internet
ENG 8-12
Using Applications via the Internet
By connecting the TV to the Internet, you can enjoy a variety
of broadband content, including videos, music and photos.
Please check that the most current software is loaded on
TV by selecting "Software Update On Information" on
"Software Update"
http://www.sharpusa.com/products/support/
to check for a download of the newest software version.
Use the application window to access your favorite Internet
applications. Press SmartCentral to display the application
window.
Follow the on-screen instructions for each application.
When using this TV to access an Internet application for
the first time, the Disclaimer appears on the screen.
Press
/ to select "Agree", and then press ENTER.
(You must select "Agree" to use the application.)
Check the web site of the provider for details on setup
and use of the functions.
NOTE
If " " or " " is displayed after you connect to
the Internet, check your TV's network settings and
connection.
Additional applications will be available in the future.
These applications are provided by content providers. The
available applications vary depending on your country or
region.
The delivery speed of applications varies depending on
the network speed. Check the web site of the provider
for details on application setup and other information.
Using the Application Window
During Dock Display
You can move the application icons and delete any unused
icons.
Example
1 Select an application, and then press .
2 Press
/ to select "Move App" or "Delete App", and
then press ENTER.
Move the Icons
You can move the icons of the more commonly used
applications closer to the left.
Press
/ to move the icon to the desired location.
Saving Favorite Applications
You can set your favorite applications to the FAV APP1, 2,
and 3 buttons on the remote control for easier startup.
The applications whose icons are moved onto
, and
during Dock Display will be assigned to the FAV APP 1, 2
and 3 buttons respectively.
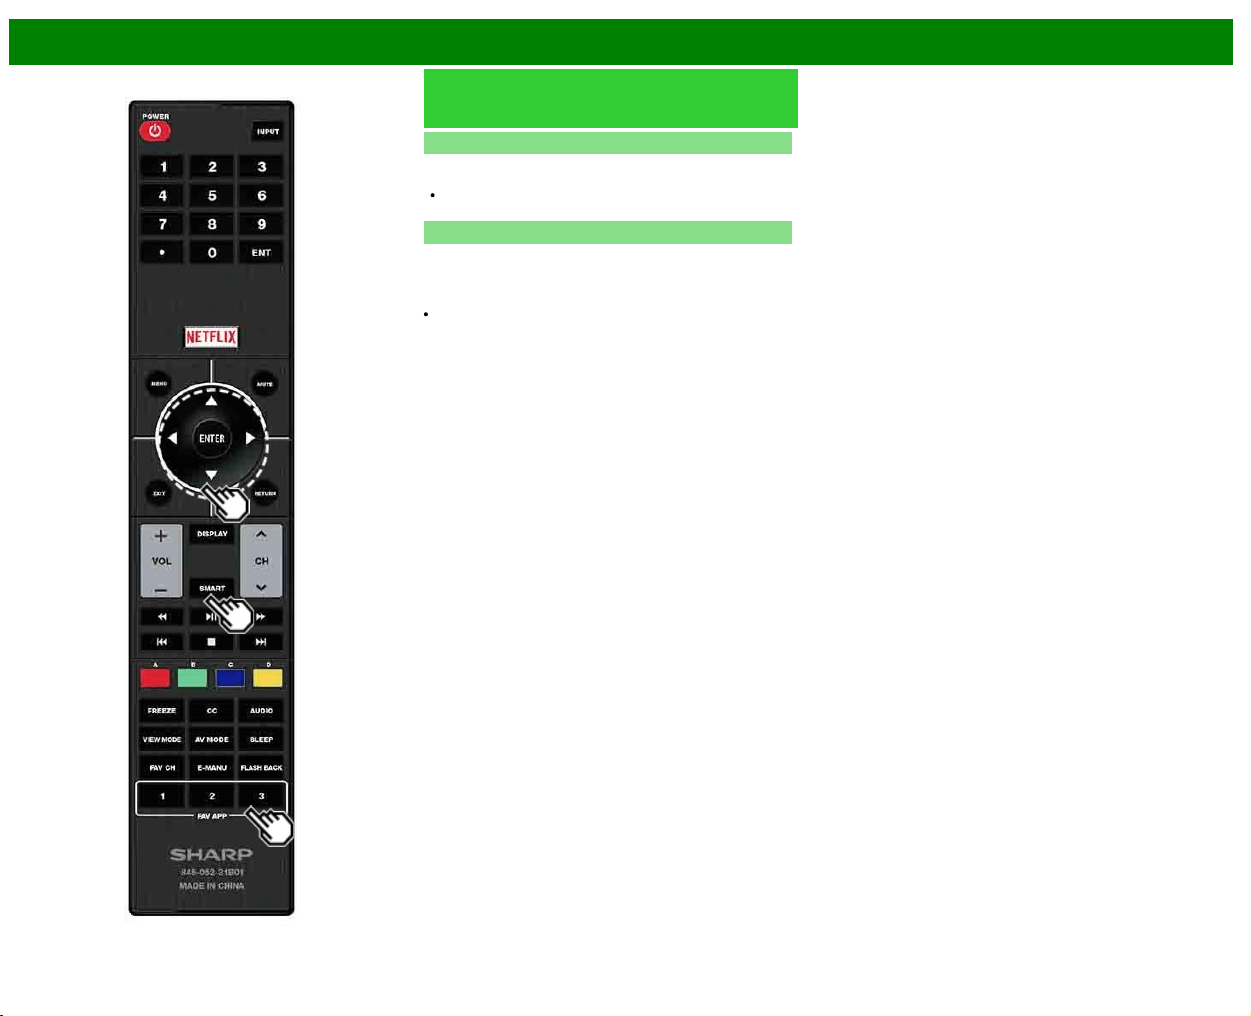
>>
<<
Using the Internet
ENG 8-13
Using Applications via the Internet
(Continue)
Deactivating Netflix Function
You can deactivate the Netflix function. Refer to "Smart TV"
> "Advanced" > "Netflix Help" and select "Deactivate".
To confirm the Netflix status, check the information
displayed on the screen and click "OK".
Deactivating the VUDU Function
To deactivate the VUDU function, refer to "Smart TV" >
"Advanced" > "VUDU Help" and select "Yes".When you
access the Internet application for the first time, the following
appears.
This message is available only in English.
>>
<<
Using the Internet
Notes
DISCLAIMERS
This SHARP device facilitates the access to content and services provided by third parties. The content and services accessible via this device belong to and may be proprietary to third parties.
Therefore, any use of such third party content and services must be in accordance with any authorization or terms of use provided by such content or service provider. SHARP shall not be liable
to you or any third party for your failure to abide by such authorization or terms of use. Unless otherwise specifically authorized by the applicable content or service provider, all third party content
and services provided are for personal and non-commercial use; you may not modify, copy, distribute, transmit, display, perform, reproduce, upload, publish, license, create derivative works from,
transfer or sell in any manner or medium any content or services available via this device.
SHARP is not responsible, nor liable, for customer service-related issues related to the third party content or services. Any questions, comments or service-related inquiries relating to the third
party content or service should be made directly to the applicable content or service provider.
You may not be able to access content or services from the device for a variety of reasons which may be unrelated to the device itself, including, but not limited to, power failure, other Internet
connection, or failure to configure your device properly. SHARP, its directors, officers, employees, agents, contractors and affiliates shall not be liable to you or any third party with respect to such
failures or maintenance outages, regardless of cause or whether or not it could have been avoided.
ALL THIRD PARTY CONTENT OR SERVICES ACCESSIBLE VIA THIS DEVICE IS PROVIDED TO YOU ON AN "AS-IS" AND "AS AVAILABLE" BASIS AND SHARP AND ITS AFFILIATES MAKE
NO WARRANTY OR REPRESENTATION OF ANY KIND TO YOU, EITHER EXPRESS OR IMPLIED, INCLUDING, WITHOUT LIMITATION, ANY WARRANTIES OF MERCHANTABILITY, NON-
INFRINGEMENT, FITNESS FOR A PARTICULAR PURPOSE OR ANY WARRANTIES OF SUITABILITY, AVAILABILITY, ACCURACY, COMPLETENESS, SECURITY, TITLE, USEFULNESS,
LACK OF NEGLIGENCE OR ERROR-FREE OR UNINTERRUPTED OPERATION OR USE OF THE CONTENT OR SERVICES PROVIDED TO YOU OR THAT THE CONTENT OR SERVICES
WILL MEET YOUR REQUIREMENTS OR EXPECTATIONS.
SHARP IS NOT AN AGENT OF AND ASSUMES NO RESPONSIBILITY FOR THE ACTS OR OMISSIONS OF THIRD PARTY CONTENT OR SERVICE PROVIDERS, NOR ANY ASPECT OF THE
CONTENT OR SERVICE RELATED TO SUCH THIRD PARTY PROVIDERS.
IN NO EVENT WILL SHARP AND/OR ITS AFFILIATES BE LIABLE TO YOU OR ANY THIRD PARTY FOR ANY DIRECT, INDIRECT, SPECIAL, INCIDENTAL, PUNITIVE, CONSEQUENTIAL OR
OTHER DAMAGES, WHETHER THE THEORY OF LIABILITY IS BASED ON CONTRACT, TORT, NEGLIGENCE, BREACH OF WARRANTY, STRICT LIABILITY OR OTHERWISE AND
WHETHER OR NOT SHARP AND/OR ITS AFFILIATES HAVE BEEN ADVISED OF THE POSSIBILITY OF SUCH DAMAGES.
Examples of Application Logos
ENG 8-14
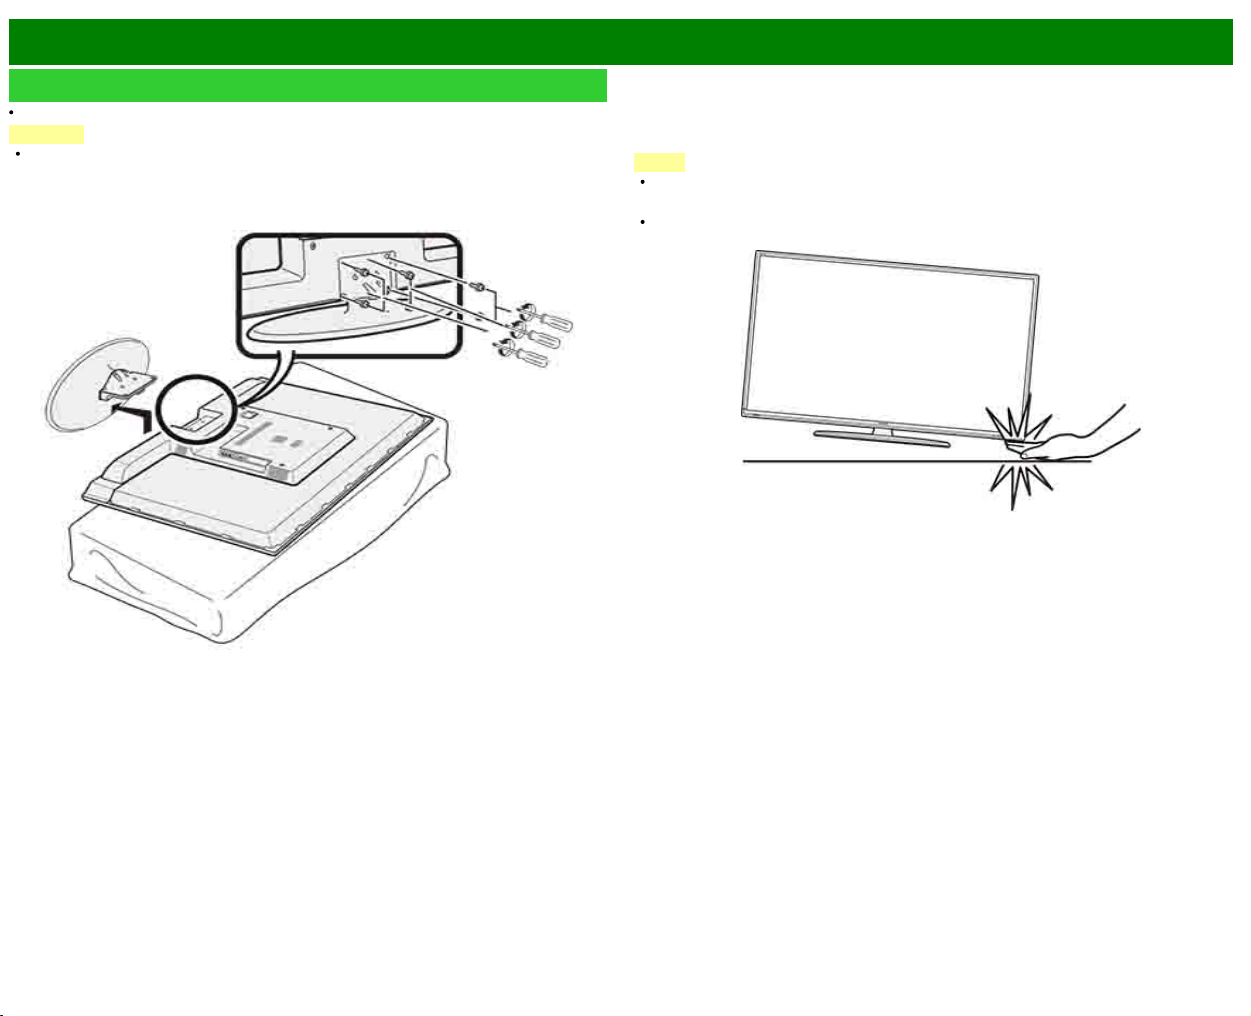
>>
<<
Appendix
ENG 9-1
Removing the Stand
Before detaching (or attaching) the stand, make sure to turn off the TV and unplug the AC cord.
CAUTION
Do not remove the stand from the TV unless using an optional wall mount bracket to
mount it.
Unfasten the six screws used to secure the stand in place.
Example
NOTE
Be sure to always carry the TV by two people holding it with two hands.
In the installation procedure, be careful not to catch your fingers between the TV set and the
floor.

>>
<<
Appendix
ENG 9-2
Setting the TV on the Wall
Wall Mount Kit Specifications
Standard dimensions for wall mount kits are shown below.
The illustration is based on the LC-60LE644U model as an example.
Model
Item LC-60LE644U
Wallmount Footprint (A x B) 400mm x 400mm
The mounting means should be strong enough to bear the weight of the display.
The wall mounting bracket should have UL or related approval.
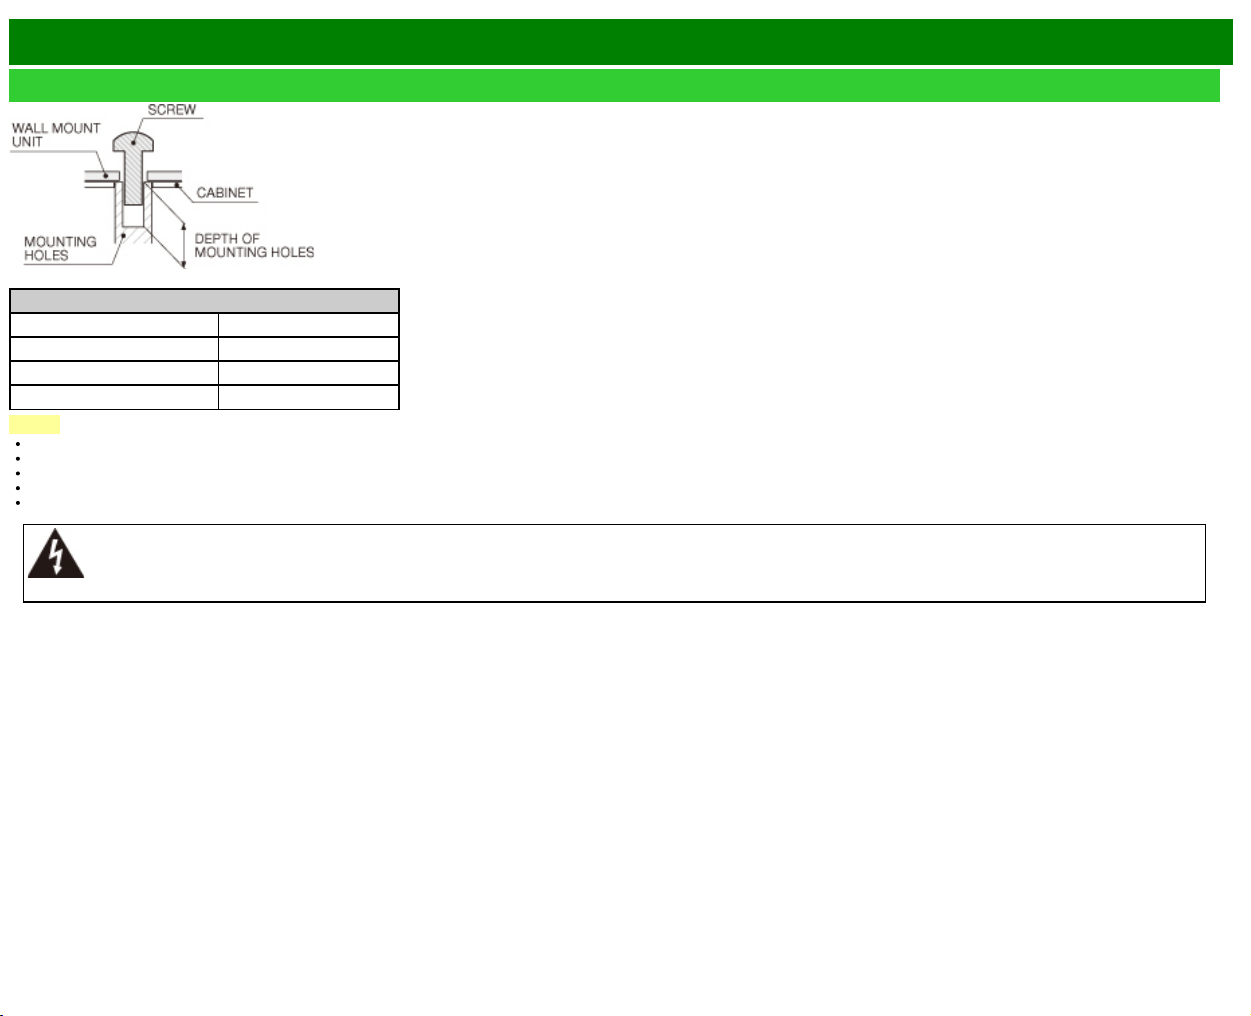
>>
<<
Appendix
ENG 9-3
Setting the TV on the Wall(Continue)
For the screws, refer to the table shown below.
Model
Item LC-60LE644U
Standard Screws M6 (Use 1.0 pitch screws)
Length(Depth of mounting holes) 15/32 (12mm)
Quantity 4pcs
NOTE
Do not mount the TV at a tilt.
Do not use screws that do not comply with the VESA standard screw specifications.
Do not use screws that are longer than the standard length. Screws that are too long may cause damage to the inside of the TV.
Do not fasten the screws too firmly or loosely. This may damage the product or cause the product to fall, leading to personal injury. SHARP is not liable for these kinds of accidents.
SHARP is not liable for product damage or personal injury when a non-VESA or non-specified wall mount is used or the consumer fails to follow the product installation instructions.
Do not install the wall mount kit while your TV is turned on. It may result in personal injury due to electric shock.
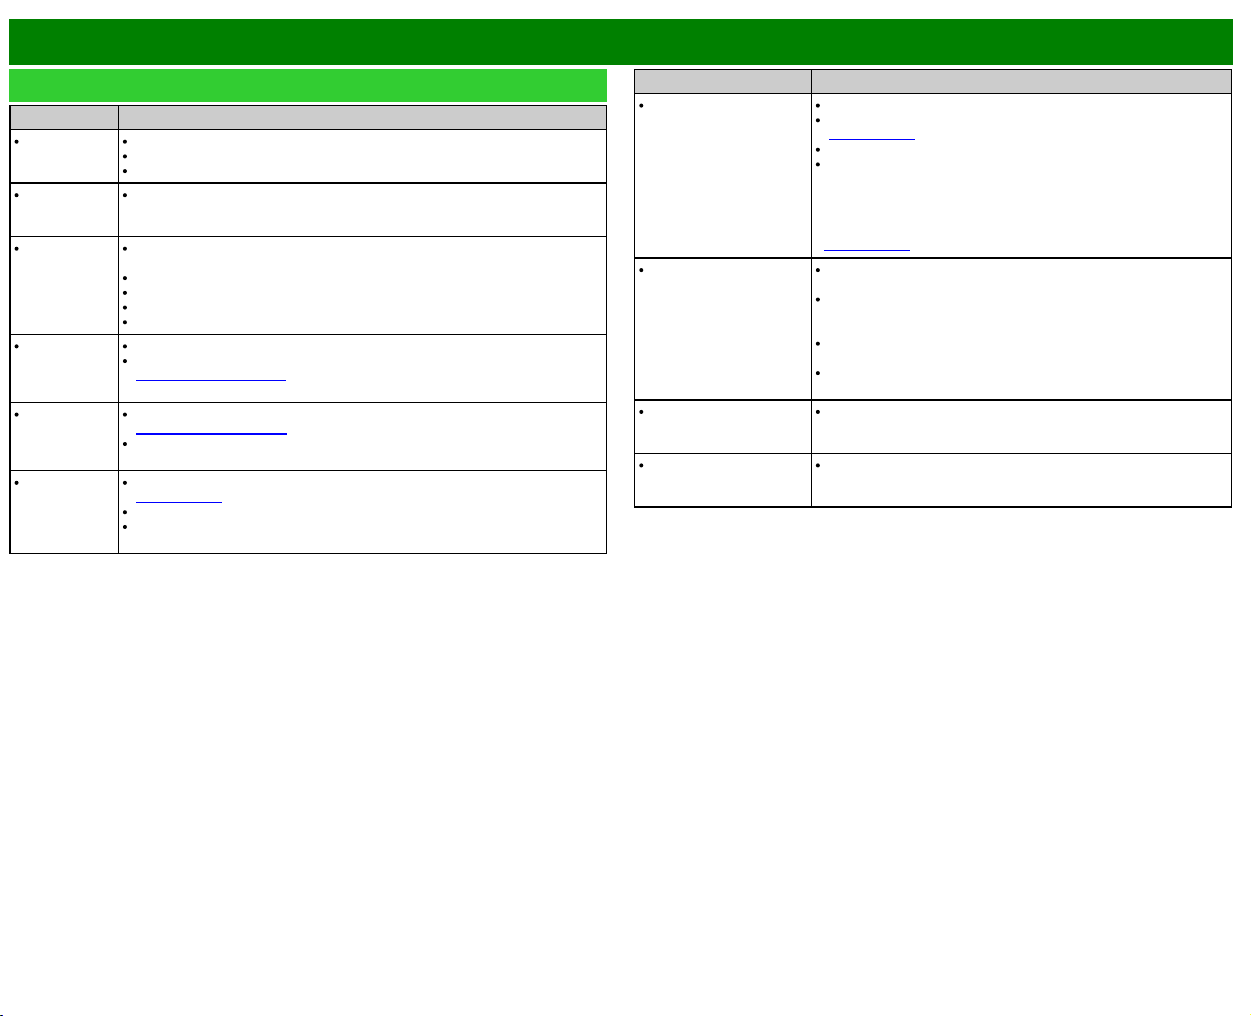
>>
<<
Appendix
ENG 9-4
Troubleshooting
Problem Possible Solution
No power Check if you pressed POWER on the remote control unit.
Is the AC cord disconnected?
Has the power been turned on?
Unit cannot
be operated.
External influences such as lightning, static electricity, may cause improper
operation. In this case, operate the unit after first turning off the power of the
TV or unplugging the AC cord and replugging it in after 1 or 2 minutes.
Remote
control unit
does not
operate.
Is the equipment to be operated by the remote control unit set correctly?
Press TV to set the remote control unit to the setting for operating the TV.
Are batteries inserted with polarity (+, -) aligned?
Are batteries worn out? (Replace with new batteries.)
Are you using it under strong or fluorescent lighting?
Is a fluorescent light illuminated near the remote control sensor?
Picture is cut
off/with
sidebar
screen.
Is the image position correct?
Are screen mode adjustments such as picture size made correctly?
see pages 3-14 to 3-16
Strange color,
light color, or
color
misalignment
Adjust the picture tone.
see pages 4-17 to 4-20
Is the room too bright? The picture may look dark in a room that is too bright.
Power is
suddenly
turned off.
Is the sleep timer set?
see page 3-9
Check the power control settings.
The unit's internal temperature has increased. Remove any objects blocking
vent or clean.
Problem Possible Solution
No picture Is connection to other components correct?
Is the correct input selected?
see page 2-1
Is "On" selected in "Audio Only"?
If the PC image is not displayed, check the following:
- When connecting a laptop PC to the TV, check that display
output mode of the PC is set to external monitor.
- Check the resolution setting on the PC. Is a non-compatible
signal being input?
see page 8-9
Picture quality of HD
programs is poor.
To enjoy HD images from external equipment, you are required to
set up HDMI connection or component connection.
If the program content is not of HD quality, HD images cannot be
displayed. Check that the program you are viewing provides HD
images.
The HD cable/satellite set-top box may need to be configured to
output HD images via cable/satellite.
The cable/satellite broadcast may not support a signal resolution
of 1080p.
The TV sometimes
makes a cracking sound.
This is not a malfunction. This happens when the cabinet slightly
expands and contracts according to change in temperature. This
does not affect the TV's performance.
Some Internet functions
used on a PC are not
available from the TV.
The TV has only limited functions compared with regular PC
browsers.
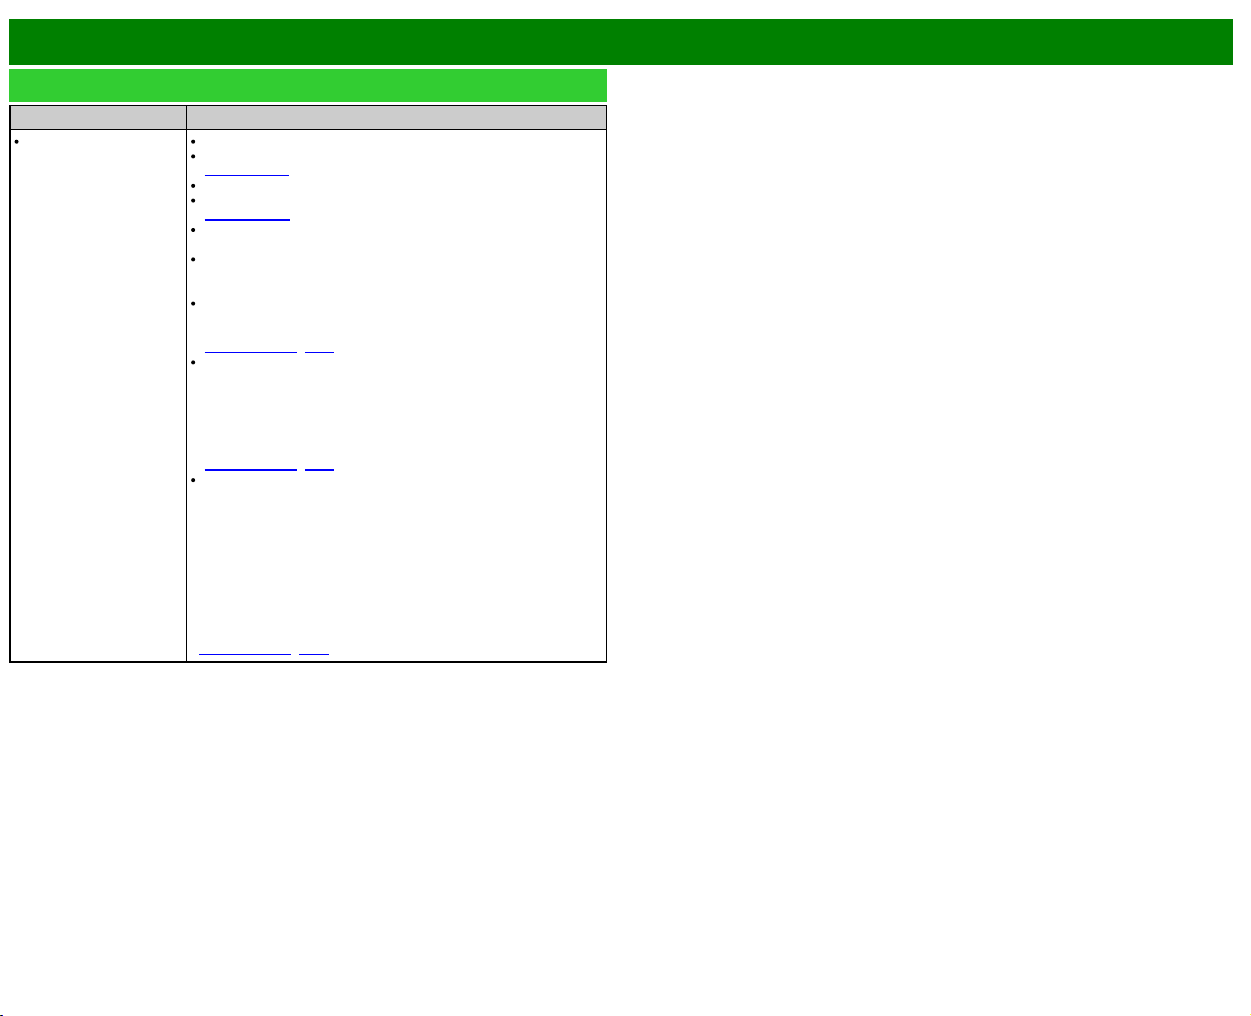
>>
<<
Appendix
ENG 9-5
Troubleshooting (Continue)
Problem Possible Solution
No sound Is connection to other components correct?
Is the volume too low?
see page 3-2
Is "Variable" selected in "Output Select"?
Have you pressed MUTE on the remote control unit?
see page 3-3
Check the audio output of the connected external equipment. Is
the volume too low or muted?
When external equipment is connected via an HDMI cable, you
may need to configure the audio to be output through the HDMI
cable.
When audio is not output from external equipment connected to
the PC IN or HDMI IN 2 terminal, check the "Audio Select"
setting.
See pages 3-8, 4-21
Even when external equipment is connected using an HDMI-
certified cable, an audio cable connection may be required
depending on the type of equipment and the media being played
back. In this case, in addition to connecting an HDMI-certified
cable to the HDMI IN 2 terminal, connect a Ø 3.5 mm stereo
minijack cable to the AUDIO IN terminal and set "Audio Select" to
"HDMI+Analog".
See pages 3-8, 4-21
When connecting a PC via an HDMI-certified cable, check the
following:
- Is the audio output of the PC configured correctly? Check the
audio output settings and output audio format in Sound Properties
on the PC.
The audio formats compatible with this TV are PCM, Dolby Digital
and DTS. With other formats, audio cannot be output.
- Depending on the board, only video signals may be output. In
this case, in addition to connecting an HDMI-certified cable to the
HDMI IN 2 terminal, connect a Ø 3.5 mm stereo minijack cable to
the AUDIO IN terminal and set "Audio Select" to "HDMI+Analog".
See pages 3-8, 4-21
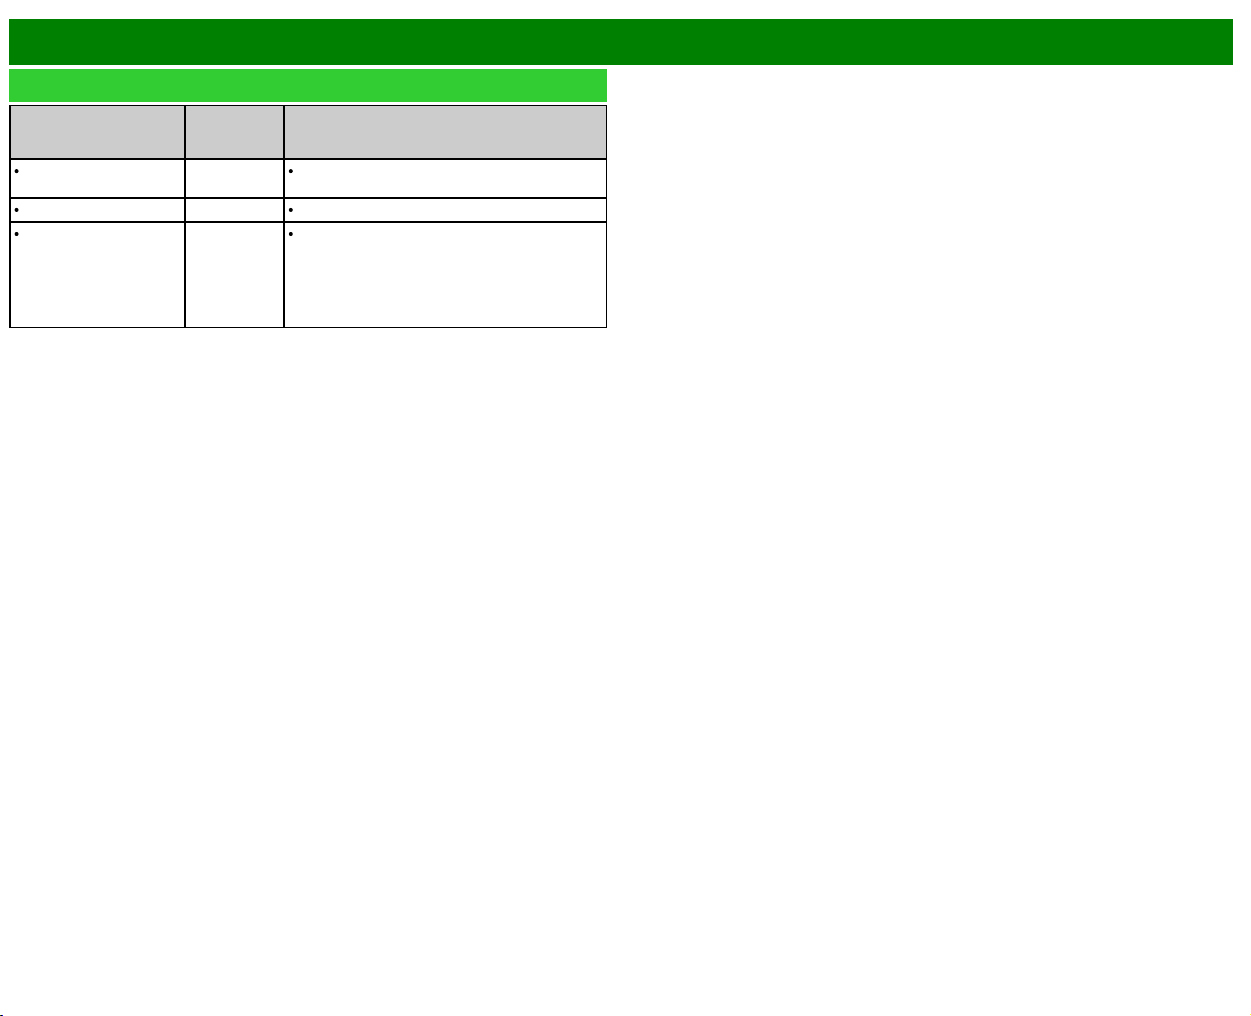
>>
<<
Appendix
ENG 9-6
Troubleshooting - Error Message
The example of an error
message displayed on a
screen
Error code Possible Solution
Failed to receive
broadcast.
E202 Check the antenna cable. Check that the antenna
is correctly setup.
No broadcast now. E203 Check the broadcast time in the program guide.
An incompatible audio
signal has been
received. Check the
output device settings.
— This message is displayed when an audio format
other than PCM or Dolby Digital is input.
- Set the audio output format of connected
external HDMI equipment to PCM or Dolby Digital.
- Refer to the operation manual of the external
equipment for setting details.
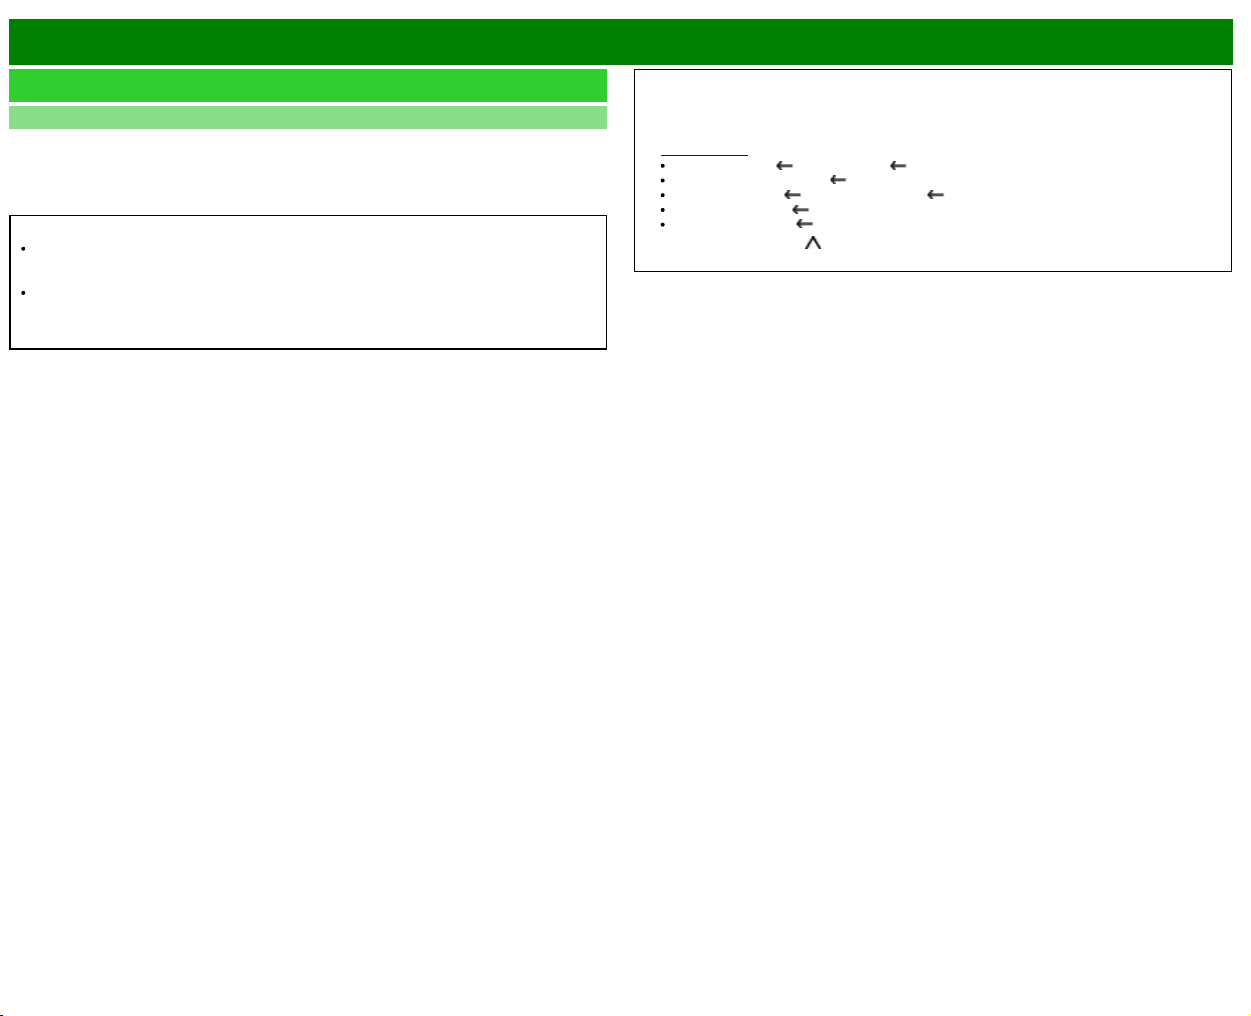
>>
<<
Appendix
ENG 9-7
Information on the Software License for This Product
Software License
You can read the software licenses in the on-screen display menu. Refer to "Information" >
"Software License".
Software composition
The software included in this product is comprised of various software components whose
individual copyrights are held by SHARP or by third parties.
Cautions regarding use in high and low temperature environments
When the unit is used in a low temperature space (e.g. room, office), the picture may leave
trails or appear slightly delayed. This is not a malfunction, and the unit will recover when the
temperature returns to normal.
Do not leave the unit in a hot or cold location. Also, do not leave the unit in a location
exposed to direct sunlight or near a heater, as this may cause the cabinet to deform and the
front panel to malfunction.
Storage temperature: -4°F to +140°F (-20°C to +60°C)
CLEARING THE SECRET NUMBER
If you forget the secret number, clear the secret number using the following procedure.
1 Select an item from the list below to display the secret number input screen. (For operating
the on-screen display menu,
see page 4-3.)
"Color System" ( "Input Settings" Initial Setup menu).
"Easy Setup" or "Reset" ( Initial Setup menu).
"Channel Setup” ( "TV Channel Setup" Initial Setup menu).
"Parental Control" ( Initial Setup menu).
"Software Update" ( Information menu).
2 Press and hold both CH
and VOL+ on the TV simultaneously until the message appears
on the screen.
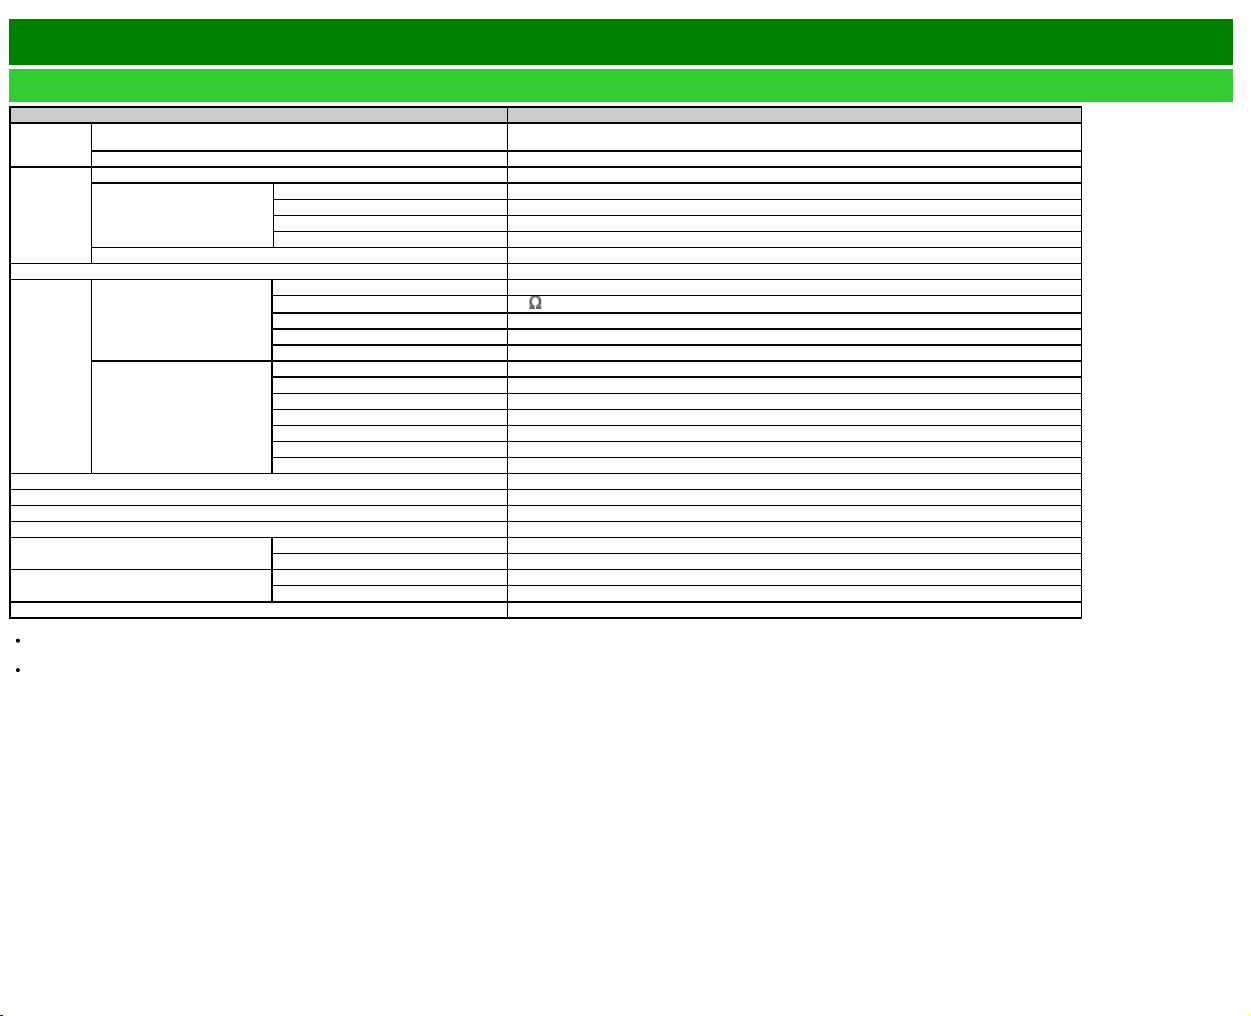
>>
<<
Specifications
TV
Item Model: LC-60LE644U
LCD panel
Size 60" Class (60 1/32" Diagonal)
Resolution 2,073,600 pixels (1,920 x 1,080)
TV Function
TV-standard (CCIR) American TV Standard ATSC/NTSC System
Receiving Channel
VHF/UHF VHF 2-13ch, UHF 14-69ch
CATV 1-135ch (non-scrambled channel only)
Digital Terrestrial Broadcast (8VSB) 2-69ch
Digital cable*1 (64/256 QAM) 1-135ch (non-scrambled channel only)
Audio multiplex BTSC System
Audio out 8W x 2
Terminals
Back panel surface side
L-AUDIO-R L/R
audio
input
ANT/CABLE
75
Unbalance, F Type x 1 for Analog (VHF/UHF/CATV) and Digital (AIR/CABLE)
ETHERNET(10/100) Network connector
USB(DC5V 500mA) Photo/Music/Video mode, Software update, USB keyboard/mouse, Wallpaper Picture
DIGITAL AUDIO OUT Optical Digital audio out x 1 (PCM/Dolby Digital)
Back panel surface down
HEADPHONE HEADPHONE connector
HDMI 3 HDMI in with HDCP
HDMI 2 HDMI in with HDCP, Audio in (Ø 3.5 mm stereo jack)
HDMI 1(ARC) HDMI in with HDCP, ARC
PC IN ANALOG RGB ANALOG RGB (PC) in (15-pin mini D-sub female connector), Audio in (Ø 3.5 mm stereo jack)
PC IN AUDIO Audio in (Ø 3.5 mm stereo jack)
COMPONENT/VIDEO IN COMPONENT in, AV in
OSD language English/French/Spanish
Power Requirement AC 120 V, 60 Hz
On Mode Power 98 W
Power Consumption 150 W
Weight
TV + stand 50.7 lbs./23.0 kg
TV only 43.0 lbs./19.5 kg
Dimensions*2
(W x H x D)(inch)
TV + stand 54 15/64" x 34 17/64" x 13"
TV only 54 15/64" x 31 3/4" x 3 31/32"
Operating temperature +32°F to +104°F (0°C to +40°C)
*1 Emergency alert messages via Cable are unreceivable.
As part of policy of continuous improvement, SHARP reserves the right to make design and specification changes for product improvement without prior notice. The performance specification
figures indicated are nominal values of production units. There may be some deviations from these values in individual units.
On Mode Power Consumption is measured according to Energy Star program requirements for televisions.
ENG 10-1
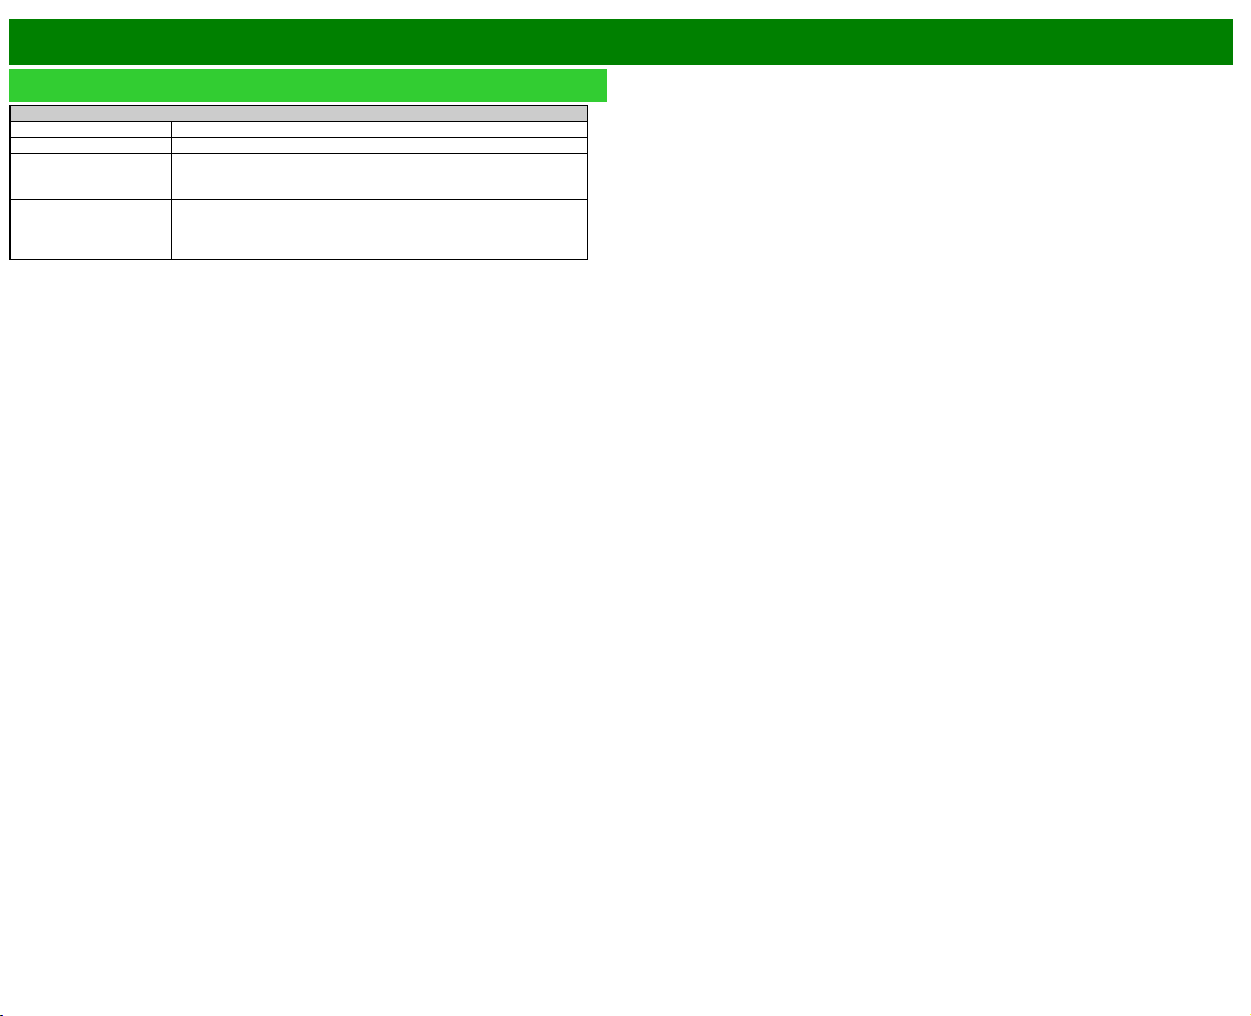
>>
<<
Trademarks
ENG 11-1
SMART is a registered trademark of Sharp Corporation.
Manufactured under license from Dolby Laboratories. Dolby and the double-D symbol
are trademarks of Dolby Laboratories.
The terms HDMI and HDMI High-Definition Multimedia Interface, and the HDMI Logo
are trademarks or registered trademarks of HDMI Licensing LLC in the United States
and other countries.
The Wi-Fi CERTIFIED Logo is a certification mark of the Wi-Fi Alliance.
The Wi-Fi Protected Setup Mark is a mark of the Wi-Fi Alliance.
Wi-Fi CERTIFIED Miracast™ and Miracast™ are trademarks of Wi-Fi Alliance.
This product includes Home Networking Software 'DiXiM' developed by DigiOn, Inc.
and LC logo mark are
registered trademarks of SHARP Corporation.
This product is embedded with LC Font technology, which was developed by
SHARP Corporation for clearly displaying easy-to-read characters on LCD screens.
However, other fonts are used for some screen pages, too.
Netflix and the Netflix logo are the registered trademarks of Netflix, Inc.
VUDU™ is a trademark of VUDU, Inc.
ENERGY STAR® User Information
For more information on the ENERGY STAR program, you can refer to
energystar.gov.
Leaving the ENERGY STAR home mode or enabling optional features will cause an
increase power consumed.
This product qualifies for ENERGY STAR when "Home" is selected for "TV Location".
Setting "TV Location" to "Home" allows the TV to achieve an energy-saving status
for household use.
Products that have earned the ENERGY STAR® are designed to
protect the environment through superior energy efficiency.
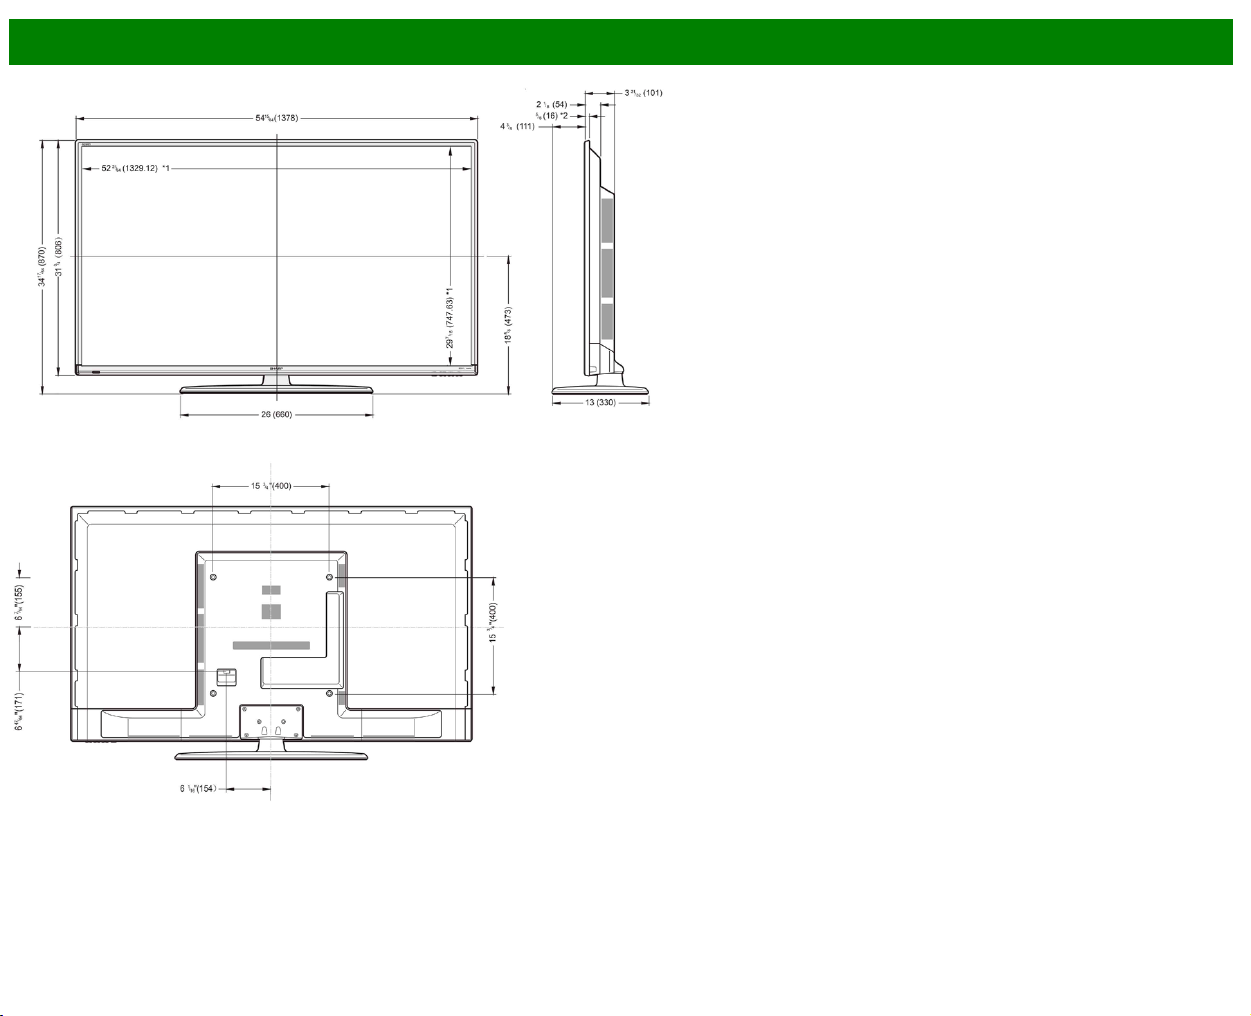

>>
<<
Software License
ENG 13-1
Software composition
The software included in this product is comprised of various software components whose
individual copyrights are held by SHARP or by third parties.
Software developed by SHARP and open source software
The copyrights for the software components and various relevant documents included with this
product that were developed or written by SHARP are owned by SHARP and are protected by the
Copyright Act, international treaties, and other relevant laws. This product also makes use of freely
distributed software and software components whose copyrights are held by third parties. These
include software components covered by a GNU General Public License (hereafter GPL), a GNU
Lesser General Public License (hereafter LGPL) or other license agreement.
Obtaining source code
Some of the open source software licensors require the distributor to provide the source code with
the executable software components. GPL and LGPL include similar requirements. For information
on obtaining the source code for the open source software and for obtaining the GPL, LGPL, and
other license agreement information, visit the following website:
http://www.sharpusa.com/gpl We are unable to answer any questions about the source code for
the open source software. The source code for the software components whose copyrights are
held by SHARP is not distributed.
Acknowledgements
The following open source software components are included in this product:
linux
kernel/busybox/glibc/zlib/libpng/libjpeg/libiconv/DirectFB/OpenSSL/XMLRPC-EPI/
mtd-utils/Expat/Qt/U-Boot/PlayReady/AGG(ver2.3)/device-mapper/libfreetype/cURL/
libxml2/lua/lua-xmlreader/lua-slncrypto/Ffmpeg/SQLite/libzzip/c-ares/librt/libjanus/NTP/
webkit/cairo/fontconfig/icu/libxslt/gtk+/atk/pango/glib2/libpixman/gstreamr/liboil/libcheck/
Droid Sans/ca-bundle.crt/btusb/bthid/pthread/cJSON
Software copyrights
XMLRPC-EPI
Copyright 2000 (c) Epinions, Inc.
libjpeg
This software is copyright (c) 1991-2012, Thomas G. Lane, Guido Vollbeding. Portions of this
software are based in part on the work of the Independent JPEG Group.
SSLeay
Copyright (c) 1995-1998 Eric Young ([email protected])
This product includes cryptographic software written by Eric Young ([email protected]).
Expat
Copyright (c) 1998, 1999, 2000 Thai Open Source Software Center Ltd and Clark Cooper.
Copyright (c) 2001, 2002, 2003, 2004, 2005, 2006 Expat maintainers.
Contact: Nokia Corporation (qt-[email protected])
Qt
The Qt GUI Toolkit is Copyright (c) 2010 Nokia Corporation and/or its subsidiary(-ies).
PlayReady
This product contains technology subject to certain intellectual property rights of Microsoft. Use or
distribution of this technology outside of this product is prohibited without the appropriate lisense(s)
from Microsoft.
Content owners use Microsoft PlayReadyTM content access technology to protect their intellectual
property, including copyrighted content. This device uses PlayReady technology to access
PlayReady-protected content and/or WMDRM-protected content. If the device fails to properly
enforce restrictions on content usage, content owners may require Microsoft to revoke the devicefs
ability to consume PlayReady-protected content. Revocation should not affect unprotected content
or content protected by other content access technologies. Content owners may require you to
upgrade PlayReady to access their content. If you decline an upgrade, you will not be able to
access content that requires the upgrade.
libfreetype
Copyright (c) 2006, 2007, 2008, 2009, 2010 by David Turner, Robert Wilhelm, and Werner
Lemberg. The software is based in part of the work of the Free Type Team.
libxml2
Copyright (c) 1998-2003 Daniel Veillard. All Rights Reserved.
Lua
Copyright (c) 1994-2008 Lua.org, PUC-Rio
Lua-xmlreader
Copyright (c) 2008 A.S. Bradbury
Lua-slncrypto
Copyright (c) 2005 Malete Partner, Berlin, [email protected]
libzzip
Copyright (c) Guido Draheim [email protected]
c-ares
Copyright (c) 1998 by the Massachusetts Institute of Technology.

>>
<<
Software License(Continue)
ENG 13-2
Group 42
Portions copyright (c) 2000 Group 42, Inc. and the Contributing Authors.
zlib
Portions copyright (c) 1995-1996 Jean-loup Gailly and Mark Adler.
RSA Data Security
MD5.CPP - RSA Data Security, Inc., MD5 message-digest algorithm. Copyright (c) 1991-2, RSA
Data Security, Inc. Created 1991. All rights reserved.
Fraunhofer IIS and Thomson Multimedia
MPEG Layer-3 audio compression technology licensed by Fraunhofer IIS and Thomson
Multimedia.
You cannot use the MP3 compressed audio within the Software for real time or live broadcasts.
If you require an MP3 decoder for real time or live broadcasts, you are responsible for obtaining
this MP3 technology license.
Nellymoser, Inc
Speech compression and decompression technology licensed by Nellymoser, Inc.
Sorenson Media, Inc
SorensonTM SparkTM video compression and decompression technology licensed from Sorenson
Media, Inc.
Sun Microsystem, Inc
ADPCM speech compression algorithm is used with the permission of Sun Microsystems, Inc.
NTP
Copyright (c) University of Delaware 1992-2011
Permission to use, copy, modify, and distribute this software and its documentation for any
purpose with or without fee is hereby granted,provided that the above copyright notice appears in
all copies and that both the copyright notice and this permission notice appear in supporting
documentation, and that the name University of Delaware not be used in advertising or publicity
pertaining to distribution of the software without specific, written prior permission. The University of
Delaware makes no representations about the suitability this software for any purpose. It is
provided "as is" without express or implied warranty.
fontconfig
Copyright (c) 2001, 2003 Keith Packard
icu
Copyright (c) 1995-2011 International Business Machines Corporation and others All rights
reserved.
libxslt
Copyright (c) 2001-2002 Daniel Veillard. All Rights Reserved.
cURL
COPYRIGHT AND PERMISSION NOTICE Copyright (c) 1996 - 2009, Daniel Stenberg,
All rights reserved.
Permission to use, copy, modify, and distribute this software for any purpose with or without fee is
hereby granted, provided that the above copyright notice and this permission notice appear in all
copies.
THE SOFTWARE IS PROVIDED "AS IS", WITHOUT WARRANTY OF ANY KIND, EXPRESS OR
IMPLIED, INCLUDING BUT NOT LIMITED TO THE WARRANTIES OF MERCHANTABILITY,
FITNESS FOR A PARTICULAR PURPOSE AND NONINFRINGEMENT OF THIRD PARTY
RIGHTS. IN NO EVENT SHALL THE AUTHORS OR COPYRIGHT HOLDERS BE LIABLE FOR
ANY CLAIM, DAMAGES OR OTHER LIABILITY, WHETHER IN AN ACTION OF CONTRACT,
TORT OR OTHERWISE, ARISING FROM, OUT OF OR IN CONNECTION WITH THE
SOFTWARE OR THE USE OR OTHER DEALINGS IN THE SOFTWARE.
Except as contained in this notice, the name of a copyright holder shall not be used in advertising
or otherwise to promote the sale, use or other dealings in this Software without prior written
authorization of the copyright holder.
libpixman
Copyright (C) 2008 Free Software Foundation, Inc.
OpenSSL
LICENSE ISSUES
The OpenSSL toolkit stays under a dual license, i.e. both the conditions of the OpenSSL License
and the original SSLeay license apply to the toolkit. See below for the actual license texts. Actually
both licenses are BSD-style Open Source licenses. In case of any license issues related to
OpenSSL please contact openssl-[email protected].
OpenSSL License
Copyright (c) 1998-2008 The OpenSSL Project. All rights reserved.
Redistribution and use in source and binary forms, with or without modification, are permitted
provided that the following conditions are met:
1. Redistributions of source code must retain the above copyright notice, this list of conditions and
the following disclaimer.
2. Redistributions in binary form must reproduce the above copyright notice, this list of conditions
and the following disclaimer in the documentation and/or other materials provided with the
distribution.

>>
<<
Software License(Continue)
ENG 13-3
3. All advertising materials mentioning features or use of this software must display the following
acknowledgment:
"This product includes software developed by the OpenSSL Project for use in the OpenSSL
Toolkit. (http://www.openssl.org/)"
4. The names "OpenSSL Toolkit" and "OpenSSL Project" must not be used to endorse or promote
products derived from this software without prior written permission. For written permission, please
contact openssl-[email protected].
5. Products derived from this software may not be called "OpenSSL" nor may "OpenSSL" appear
in their names without prior written permission of the OpenSSL Project.
6. Redistributions of any form whatsoever must retain the following acknowledgment:
"This product includes software developed by the OpenSSL Project for use in the OpenSSL Toolkit
(http://www.openssl.org/)"
THIS SOFTWARE IS PROVIDED BY THE OpenSSL PROJECT "AS IS" AND ANY EXPRESSED
OR IMPLIED WARRANTIES, INCLUDING, BUT NOT LIMITED TO, THE IMPLIED WARRANTIES
OF MERCHANTABILITY AND FITNESS FOR A PARTICULAR PURPOSE ARE DISCLAIMED. IN
NO EVENT SHALL THE OpenSSL PROJECT OR ITS CONTRIBUTORS BE LIABLE FOR ANY
DIRECT, INDIRECT, INCIDENTAL, SPECIAL, EXEMPLARY, OR CONSEQUENTIAL DAMAGES
(INCLUDING, BUT NOT LIMITED TO, PROCUREMENT OF SUBSTITUTE GOODS OR
SERVICES; LOSS OF USE, DATA, OR PROFITS; OR BUSINESS INTERRUPTION) HOWEVER
CAUSED AND ON ANY THEORY OF LIABILITY, WHETHER IN CONTRACT, STRICT LIABILITY,
OR TORT (INCLUDING NEGLIGENCE OR OTHERWISE) ARISING IN ANY WAY OUT OF THE
USE OF THIS SOFTWARE, EVEN IF ADVISED OF THE POSSIBILITY OF SUCH DAMAGE.
This product includes cryptographic software written by Eric Young ([email protected]). This
product includes software written by Tim Hudson ([email protected]).
Original SSLeay License
Copyright (C) 1995-1998 Eric Young ([email protected]) All rights reserved.
This package is an SSL implementation written by Eric Young ([email protected]).
The implementation was written so as to conform with Netscapes SSL.
This library is free for commercial and non-commercial use as long as the following conditions are
aheared to. The following conditions apply to all code found in this distribution, be it the RC4,
RSA, lhash, DES, etc., code; not just the SSL code. The SSL documentation included with this
distribution is covered by the same copyright terms except that the holder is Tim Hudson
Copyright remains Eric Young's, and as such any Copyright notices in the code are not to be
removed. If this package is used in a product, Eric Young should be given attribution as the author
of the parts of the library used. This can be in the form of a textual message at program startup or
in documentation (online or textual) provided with the package.
Redistribution and use in source and binary forms, with or without modification, are permitted
provided that the following conditions are met:
1. Redistributions of source code must retain the copyright notice, this list of conditions and the
following disclaimer.
2. Redistributions in binary form must reproduce the above copyright notice, this list of conditions
and the following disclaimer in the documentation and/or other materials provided with the
distribution.
3. All advertising materials mentioning features or use of this software must display the following
acknowledgement:
"This product includes cryptographic software written by Eric Young ([email protected])"
The word 'cryptographic' can be left out if the rouines from the library being used are not
cryptographic related :-).
4. If you include any Windows specific code (or a derivative thereof) from the apps directory
(application code) you must include an acknowledgement:
"This product includes software written by Tim Hudson ([email protected])"
THIS SOFTWARE IS PROVIDED BY ERIC YOUNG "AS IS" AND ANY EXPRESS OR IMPLIED
WARRANTIES, INCLUDING, BUT NOT LIMITED TO, THE IMPLIED WARRANTIES OF
MERCHANTABILITY AND FITNESS FOR A PARTICULAR PURPOSE ARE DISCLAIMED. IN NO
EVENT SHALL THE AUTHOR OR CONTRIBUTORS BE LIABLE FOR ANY DIRECT, INDIRECT,
INCIDENTAL, SPECIAL, EXEMPLARY, OR CONSEQUENTIAL DAMAGES (INCLUDING, BUT
NOT LIMITED TO, PROCUREMENT OF SUBSTITUTE GOODS OR SERVICES; LOSS OF USE,
DATA, OR PROFITS; OR BUSINESS INTERRUPTION) HOWEVER CAUSED AND ON ANY
THEORY OF LIABILITY, WHETHER IN CONTRACT, STRICT LIABILITY, OR TORT (INCLUDING
NEGLIGENCE OR OTHERWISE) ARISING IN ANY WAY OUT OF THE USE OF THIS
SOFTWARE, EVEN IF ADVISED OF THE POSSIBILITY OF SUCH DAMAGE.
The licence and distribution terms for any publically available version or derivative of this code
cannot be changed. i.e. this code cannot simply be copied and put under another distribution
licence [including the GNU Public Licence.]
Droid Sans
Copyright (C) 2008 The Android Open Source Project

>>
<<
Software License(Continue)
ENG 13-4
UUID
Copyright (C) 1996, 1997, 1998 Theodore Ts'o.
Redistribution and use in source and binary forms, with or without modification, are permitted
provided that the following conditions are met:
1. Redistributions of source code must retain the above copyright notice, and the entire permission
notice in its entirety, including the disclaimer of warranties.
2. Redistributions in binary form must reproduce the above copyright notice, this list of conditions
and the following disclaimer in the documentation and/or other materials provided with the
distribution.
3. The name of the author may not be used to endorse or promote products derived from this
software without specific prior written permission.
THIS SOFTWARE IS PROVIDED "AS IS" AND ANY EXPRESS OR IMPLIED WARRANTIES,
INCLUDING, BUT NOT LIMITED TO, THE IMPLIED WARRANTIES OF MERCHANTABILITY AND
FITNESS FOR A PARTICULAR PURPOSE, ALL OF WHICH ARE HEREBY DISCLAIMED. IN NO
EVENT SHALL THE AUTHOR BE LIABLE FOR ANY DIRECT, INDIRECT, INCIDENTAL,
SPECIAL, EXEMPLARY, OR CONSEQUENTIAL DAMAGES (INCLUDING, BUT NOT LIMITED
TO, PROCUREMENT OF SUBSTITUTE GOODS OR SERVICES; LOSS OF USE, DATA, OR
PROFITS; OR BUSINESS INTERRUPTION) HOWEVER CAUSED AND ON ANY THEORY OF
LIABILITY, WHETHER IN CONTRACT, STRICT LIABILITY, OR TORT (INCLUDING
NEGLIGENCE OR OTHERWISE) ARISING IN ANY WAY OUT OF THE USE OF THIS
SOFTWARE, EVEN IF NOT ADVISED OF THE POSSIBILITY OF SUCH DAMAGE.
liboil
Copyright (c) 2006 David A. Schleef ‹[email protected] ›
All rights reserved.
THIS SOFTWARE IS PROVIDED BY THE AUTHOR "AS IS" AND ANY EXPRESS OR IMPLIED
WARRANTIES, INCLUDING, BUT NOT LIMITED TO, THE IMPLIED WARRANTIES OF
MERCHANTABILITY AND FITNESS FOR A PARTICULAR PURPOSE ARE DISCLAIMED. IN NO
EVENT SHALL THE AUTHOR BE LIABLE FOR ANY DIRECT, INDIRECT, INCIDENTAL,
SPECIAL, EXEMPLARY, OR CONSEQUENTIAL DAMAGES (INCLUDING, BUT NOT LIMITED
TO, PROCUREMENT OF SUBSTITUTE GOODS OR SERVICES; LOSS OF USE, DATA, OR
PROFITS; OR BUSINESS INTERRUPTION) HOWEVER CAUSED AND ON ANY THEORY OF
LIABILITY, WHETHER IN CONTRACT, STRICT LIABILITY, OR TORT (INCLUDING
NEGLIGENCE OR OTHERWISE) ARISING IN ANY WAY OUT OF THE USE OF THIS
SOFTWARE, EVEN IF ADVISED OF THE POSSIBILITY OF SUCH DAMAGE.
ca-bundle.crt
This is a bundle of X.509 certificates of public Certificate Authorities (CA), distributed at the
following URL:
http://curl.haxx.se/docs/caextract.html
These were automatically extracted from Mozilla's root certificates file (certdata.txt). This file can
be found in the mozilla source tree:
http://mxr.mozilla.org/mozilla/source/security/nss/lib/ckfw/builtins/certdata.txt?raw=1
The contents of this file are subject to the Mozilla Public License Version 1.1 (the "License"); you
may not use this file except in compliance with the License. You may obtain a copy of the License
at http://www.mozilla.org/MPL/
Software distributed under the License is distributed on an "AS IS" basis, WITHOUT WARRANTY
OF ANY KIND, either express or implied. See the License for the specific language governing
rights and limitations under the License.
The Original Code is the Netscape security libraries.
The Initial Developer of the Original Code is Netscape Communications Corporation.
Portions created by the Initial Developer are Copyright (C) 1994-2000 the Initial Developer. All
Rights Reserved.
cJSON
Copyright (c) 2009 Dave Gamble
Permission is hereby granted, free of charge, to any person obtaining a copy of this software and
associated documentation files (the "Software"), to deal in the Software without restriction,
including without limitation the rights to use, copy, modify, merge, publish, distribute, sublicense,
and/or sell copies of the Software, and to permit persons to whom the Software is furnished to do
so, subject to the following conditions:
The above copyright notice and this permission notice shall be included in all copies or substantial
portions of the Software.
THE SOFTWARE IS PROVIDED "AS IS", WITHOUT WARRANTY OF ANY KIND, EXPRESS OR
IMPLIED, INCLUDING BUT NOT LIMITED TO THE WARRANTIES OF MERCHANTABILITY,
FITNESS FOR A PARTICULAR PURPOSE AND NONINFRINGEMENT. IN NO EVENT SHALL
THE AUTHORS OR COPYRIGHT HOLDERS BE LIABLE FOR ANY CLAIM, DAMAGES OR
OTHER LIABILITY, WHETHER IN AN ACTION OF CONTRACT, TORT OR OTHERWISE,
ARISING FROM, OUT OF OR IN CONNECTION WITH THE SOFTWARE OR THE USE OR
OTHER DEALINGS IN THE SOFTWARE.

>>
<<
Software License(Continue)
ENG 13-5
DIAL
Copyright (c) 2012 Netflix, Inc.
All rights reserved.
Redistribution and use in source and binary forms, with or without modification, are permitted
provided that the following conditions are met:
Redistributions of source code must retain the above copyright notice, this list of conditions and
the following disclaimer.
Redistributions in binary form must reproduce the above copyright notice, this list of conditions
and the following disclaimer in the documentation and/or other materials provided with the
distribution.
THIS SOFTWARE IS PROVIDED BY NETFLIX, INC. AND CONTRIBUTORS "AS IS" AND ANY
EXPRESS OR IMPLIED WARRANTIES, INCLUDING, BUT NOT LIMITED TO, THE IMPLIED
WARRANTIES OF MERCHANTABILITY AND FITNESS FOR A PARTICULAR PURPOSE ARE
DISCLAIMED. IN NO EVENT SHALL NETFLIX OR CONTRIBUTORS BE LIABLE FOR ANY
DIRECT, INDIRECT, INCIDENTAL, SPECIAL, EXEMPLARY, OR CONSEQUENTIAL DAMAGES
(INCLUDING, BUT NOT LIMITED TO, PROCUREMENT OF SUBSTITUTE GOODS OR
SERVICES; LOSS OF USE, DATA, OR PROFITS; OR BUSINESS INTERRUPTION) HOWEVER
CAUSED AND ON ANY THEORY OF LIABILITY, WHETHER IN CONTRACT, STRICT LIABILITY,
OR TORT (INCLUDING NEGLIGENCE OR OTHERWISE) ARISING IN ANY WAY OUT OF THE
USE OF THIS SOFTWARE, EVEN IF ADVISED OF THE POSSIBILITY OF SUCH DAMAGE.
GNU GENERAL PUBLIC LICENSE
Version 2, June 1991
Copyright (C) 1989, 1991 Free Software Foundation, Inc.,
51 Franklin Street, Fifth Floor, Boston, MA 02110-1301 USA
Everyone is permitted to copy and distribute verbatim copies of this license document, but
changing it is not allowed.
Preamble
The licenses for most software are designed to take away your freedom to share and change it.
By contrast, the GNU General Public License is intended to guarantee your freedom to share and
change free software--to make sure the software is free for all its users. This General Public
License applies to most of the Free Software Foundation's software and to any other program
whose authors commit to using it. (Some other Free Software Foundation software is covered by
the GNU Lesser General Public License instead.) You can apply it to your programs, too.
When we speak of free software, we are referring to freedom, not price. Our General Public
Licenses are designed to make sure that you have the freedom to distribute copies of free
software (and charge for this service if you wish), that you receive source code or can get it if you
want it, that you can change the software or use pieces of it in new free programs; and that you
know you can do these things.
To protect your rights, we need to make restrictions that forbid anyone to deny you these rights or
to ask you to surrender the rights. These restrictions translate to certain responsibilities for you if
you distribute copies of the software, or if you modify it.
For example, if you distribute copies of such a program, whether gratis or for a fee, you must give
the recipients all the rights that you have. You must make sure that they, too, receive or can get
the source code. And you must show them these terms so they know their rights.
We protect your rights with two steps:(1) copyright the software, and (2) offer you this license
which gives you legal permission to copy,
distribute and/or modify the software.
Also, for each author's protection and ours, we want to make certain that everyone understands
that there is no warranty for this free software. If the software is modified by someone else and
passed on, we want its recipients to know that what they have is not the original, so that any
problems introduced by others will not reflect on the original authors' reputations.
Finally, any free program is threatened constantly by software patents. We wish to avoid the
danger that redistributors of a free program will individually obtain patent licenses, in effect making
the program proprietary. To prevent this, we have made it clear that any patent must be licensed
for everyone's free use or not licensed at all.
The precise terms and conditions for copying, distribution and modification follow.
GNU GENERAL PUBLIC LICENSE
TERMS AND CONDITIONS FOR COPYING, DISTRIBUTION AND MODIFICATION
0. This License applies to any program or other work which contains a notice placed by the
copyright holder saying it may be distributed under the terms of this General Public License. The
"Program", below, refers to any such program or work, and a "work based on the Program" means
either the Program or any derivative work under copyright law: that is to say, a work containing the
Program or a portion of it, either verbatim or with modifications and/or translated into another
language. (Hereinafter, translation is included without limitation in the term "modification".) Each
licensee is addressed as "you".
Activities other than copying, distribution and modification are not covered by this License; they are
outside its scope. The act of running the Program is not restricted, and the output from the
Program is covered only if its contents constitute a work based on the Program (independent of
having been made by running the Program). Whether that is true depends on what the Program
does.

>>
<<
Software License(Continue)
ENG 13-6
1. You may copy and distribute verbatim copies of the Program's source code as you receive it, in
any medium, provided that you conspicuously and appropriately publish on each copy an
appropriate copyright notice and disclaimer of warranty; keep intact all the notices that refer to this
License and to the absence of any warranty; and give any other recipients of the Program a copy
of this License along with the Program.
You may charge a fee for the physical act of transferring a copy, and you may at your option offer
warranty protection in exchange for a fee.
2. You may modify your copy or copies of the Program or any portion of it, thus forming a work
based on the Program, and copy and distribute such modifications or work under the terms of
Section 1 above, provided that you also meet all of these conditions:
a) You must cause the modified files to carry prominent notices stating that you changed the files
and the date of any change.
b) You must cause any work that you distribute or publish, that in whole or in part contains or is
derived from the Program or any part thereof, to be licensed as a whole at no charge to all third
parties under the terms of this License.
c) If the modified program normally reads commands interactively when run, you must cause it,
when started running for such interactive use in the most ordinary way, to print or display an
announcement including an appropriate copyright notice and a notice that there is no warranty (or
else, saying that you provide a warranty) and that users may redistribute the program under these
conditions, and telling the user how to view a copy of this License. (Exception: if the Program itself
is interactive but does not normally print such an announcement, your work based on the Program
is not required to print an announcement.)
These requirements apply to the modified work as a whole. If identifiable sections of that work are
not derived from the Program, and can be reasonably considered independent and separate works
in themselves, then this License, and its terms, do not apply to those sections when you distribute
them as separate works. But when you distribute the same sections as part of a whole which is a
work based on the Program, the distribution of the whole must be on the terms of this License,
whose permissions for other licensees extend to the entire whole, and thus to each and every part
regardless of who wrote it.
Thus, it is not the intent of this section to claim rights or contest your rights to work written entirely
by you; rather, the intent is to exercise the right to control the distribution of derivative or collective
works based on the Program.
In addition, mere aggregation of another work not based on the Program with the Program (or with
a work based on the Program) on a volume of a storage or distribution medium does not bring the
other work under the scope of this License.
3. You may copy and distribute the Program (or a work based on it, under Section 2) in object
code or executable form under the terms of Sections 1 and 2 above provided that you also do one
of the following:
a) Accompany it with the complete corresponding machine-readable source code, which must be
distributed under the terms of Sections 1 and 2 above on a medium customarily used for software
interchange; or,
b) Accompany it with a written offer, valid for at least three years, to give any third party, for a
charge no more than your cost of physically performing source distribution, a complete machine-
readable copy of the corresponding source code, to be distributed under the terms of Sections 1
and 2 above on a medium customarily used for software interchange; or,
c) Accompany it with the information you received as to the offer to distribute corresponding
source code. (This alternative is allowed only for noncommercial distribution and only if you
received the program in object code or executable form with such an offer, in accord with
Subsection b above.)
The source code for a work means the preferred form of the work for making modifications to it.
For an executable work, complete source code means all the source code for all modules it
contains, plus any associated interface definition files, plus the scripts used to control compilation
and installation of the executable. However, as a special exception, the source code distributed
need not include anything that is normally distributed (in either source or binary form) with the
major components (compiler, kernel, and so on) of the operating system on which the executable
runs, unless that component itself accompanies the executable.
If distribution of executable or object code is made by offering access to copy from a designated
place, then offering equivalent access to copy the source code from the same place counts as
distribution of the source code, even though third parties are not compelled to copy the source
along with the object code.
4. You may not copy, modify, sublicense, or distribute the Program except as expressly provided
under this License. Any attempt otherwise to copy, modify, sublicense or distribute the Program is
void, and will automatically terminate your rights under this License. However, parties who have
received copies, or rights, from you under this License will not have their licenses terminated so
long as such parties remain in full compliance.

>>
<<
Software License(Continue)
ENG 13-7
5. You are not required to accept this License, since you have not signed it. However, nothing else
grants you permission to modify or distribute the Program or its derivative works. These actions are
prohibited by law if you do not accept this License. Therefore, by modifying or distributing the
Program (or any work based on the Program), you indicate your acceptance of this License to do
so, and all its terms and conditions for copying, distributing or modifying the Program or works
based on it.
6. Each time you redistribute the Program (or any work based on the Program), the recipient
automatically receives a license from the original licensor to copy, distribute or modify the Program
subject to these terms and conditions. You may not impose any further restrictions on the
recipients' exercise of the rights granted herein. You are not responsible for enforcing compliance
by third parties to this License.
7. If, as a consequence of a court judgment or allegation of patent infringement or for any other
reason (not limited to patent issues), conditions are imposed on you (whether by court order,
agreement or otherwise) that contradict the conditions of this License, they do not excuse you from
the conditions of this License. If you cannot distribute so as to satisfy simultaneously your
obligations under this License and any other pertinent obligations, then as a consequence you may
not distribute the Program at all. For example, if a patent license would not permit royalty-free
redistribution of the Program by all those who receive copies directly or indirectly through you, then
the only way you could satisfy both it and this License would be to refrain entirely from distribution
of the Program.
If any portion of this section is held invalid or unenforceable under any particular circumstance, the
balance of the section is intended to apply and the section as a whole is intended to apply in other
circumstances.
It is not the purpose of this section to induce you to infringe any patents or other property right
claims or to contest validity of any such claims; this section has the sole purpose of protecting the
integrity of the free software distribution system, which is implemented by public license practices.
Many people have made generous contributions to the wide range of software distributed through
that system in reliance on consistent application of that system; it is up to the author/donor to
decide if he or she is willing to distribute software through any other system and a licensee cannot
impose that choice.
This section is intended to make thoroughly clear what is believed to be a consequence of the rest
of this License.
8. If the distribution and/or use of the Program is restricted in certain countries either by patents or
by copyrighted interfaces, the original copyright holder who places the Program under this License
may add an explicit geographical distribution limitation excluding those countries, so that
distribution is permitted only in or among countries not thus excluded. In such case, this License
incorporates the limitation as if written in the body of this License.
9. The Free Software Foundation may publish revised and/or new versions of the General Public
License from time to time. Such new versions will be similar in spirit to the present version, but
may differ in detail to address new problems or concerns.
Each version is given a distinguishing version number. If the Program specifies a version number
of this License which applies to it and "any later version", you have the option of following the
terms and conditions either of that version or of any later version published by the Free Software
Foundation. If the Program does not specify a version number of this License, you may choose
any version ever published by the Free Software Foundation.
10. If you wish to incorporate parts of the Program into other free programs whose distribution
conditions are different, write to the author to ask for permission. For software which is copyrighted
by the Free Software Foundation, write to the Free Software Foundation; we sometimes make
exceptions for this. Our decision will be guided by the two goals of preserving the free status of all
derivatives of our free software and of promoting the sharing and reuse of software generally.
NO WARRANTY
11. BECAUSE THE PROGRAM IS LICENSED FREE OF CHARGE, THERE IS NO WARRANTY
FOR THE PROGRAM, TO THE EXTENT PERMITTED BY APPLICABLE LAW. EXCEPT WHEN
OTHERWISE STATED IN WRITING THE COPYRIGHT HOLDERS AND/OR OTHER PARTIES
PROVIDE THE PROGRAM "AS IS" WITHOUT WARRANTY OF ANY KIND, EITHER EXPRESSED
OR IMPLIED, INCLUDING, BUT NOT LIMITED TO, THE IMPLIED WARRANTIES OF
MERCHANTABILITY AND FITNESS FOR A PARTICULAR PURPOSE. THE ENTIRE RISK AS TO
THE QUALITY AND PERFORMANCE OF THE PROGRAM IS WITH YOU. SHOULD THE
PROGRAM PROVE DEFECTIVE, YOU ASSUME THE COST OF ALL NECESSARY SERVICING,
REPAIR OR CORRECTION.
12. IN NO EVENT UNLESS REQUIRED BY APPLICABLE LAW OR AGREED TO IN WRITING
WILL ANY COPYRIGHT HOLDER, OR ANY OTHER PARTY WHO MAY MODIFY AND/OR
REDISTRIBUTE THE PROGRAM AS PERMITTED ABOVE, BE LIABLE TO YOU FOR
DAMAGES, INCLUDING ANY GENERAL, SPECIAL, INCIDENTAL OR CONSEQUENTIAL
DAMAGES ARISING OUT OF THE USE OR INABILITY TO USE THE PROGRAM (INCLUDING
BUT NOT LIMITED TO LOSS OF DATA OR DATA BEING RENDERED INACCURATE OR
LOSSES SUSTAINED BY YOU OR THIRD PARTIES OR A FAILURE OF THE PROGRAM TO
OPERATE WITH ANY OTHER PROGRAMS), EVEN IF SUCH HOLDER OR OTHER PARTY HAS
BEEN ADVISED OF THE POSSIBILITY OF SUCH DAMAGES.

>>
<<
Software License(Continue)
ENG 13-8
END OF TERMS AND CONDITIONS
How to Apply These Terms to Your New Programs
If you develop a new program, and you want it to be of the greatest possible use to the public, the
best way to achieve this is to make it free software which everyone can redistribute and change
under these terms.
To do so, attach the following notices to the program. It is safest to attach them to the start of
each source file to most effectively convey the exclusion of warranty; and each file should have at
least the "copyright" line and a pointer to where the full notice is found.
‹one line to give the program's name and a brief idea of what it does.› Copyright (C) ‹year› ‹name
of author›
This program is free software; you can redistribute it and/or modify it under the terms of the GNU
General Public License as published by the Free Software Foundation; either version 2 of the
License, or (at your option) any later version.
This program is distributed in the hope that it will be useful, but WITHOUT ANY WARRANTY;
without even the implied warranty of MERCHANTABILITY or FITNESS FOR A PARTICULAR
PURPOSE. See the GNU General Public License for more details.
You should have received a copy of the GNU General Public License along with this program; if
not, write to the Free Software Foundation, Inc., 51 Franklin Street, Fifth Floor, Boston, MA 02110-
1301 USA.
Also add information on how to contact you by electronic and paper mail.
If the program is interactive, make it output a short notice like this when it starts in an interactive
mode:
Gnomovision version 69, Copyright (C) year name of author Gnomovision comes with
ABSOLUTELY NO WARRANTY; for details type 'show w'.
This is free software, and you are welcome to redistribute it under certain conditions; type 'show c'
for details.
The hypothetical commands 'show w' and 'show c' should show the appropriate parts of the
General Public License. Of course, the commands you use may be called something other than
'show w' and 'show c'; they could even be mouse-clicks or menu items--whatever suits your
program.
You should also get your employer (if you work as a programmer) or your school, if any, to sign a
"copyright disclaimer" for the program, if necessary. Here is a sample; alter the names:
Yoyodyne, Inc., hereby disclaims all copyright interest in the program 'Gnomovision' (which makes
passes at compilers) written by James Hacker.
‹signature of Ty Coon›, 1 April 1989 Ty Coon, President of Vice
This General Public License does not permit incorporating your program into proprietary programs.
If your program is a subroutine library, you may consider it more useful to permit linking proprietary
applications with the library. If this is what you want to do, use the GNU Lesser General Public
License instead of this License.
GNU LESSER GENERAL PUBLIC LICENSE
Version 2.1, February 1999
Copyright (C) 1991, 1999 Free Software Foundation, Inc.
51 Franklin Street, Fifth Floor, Boston, MA 02110-1301 USA
Everyone is permitted to copy and distribute verbatim copies of this license document, but
changing it is not allowed.
[This is the first released version of the Lesser GPL. It also counts as the successor of the GNU
Library Public License, version 2, hence the version number 2.1.]
Preamble
The licenses for most software are designed to take away your freedom to share and change it.
By contrast, the GNU General Public Licenses are intended to guarantee your freedom to share
and change free software--to make sure the software is free for all its users.
This license, the Lesser General Public License, applies to some specially designated software
packages--typically libraries--of the Free Software Foundation and other authors who decide to
use it. You can use it too, but we suggest you first think carefully about whether this license or the
ordinary General Public License is the better strategy to use in any particular case, based on the
explanations below.
When we speak of free software, we are referring to freedom of use, not price. Our General Public
Licenses are designed to make sure that you have the freedom to distribute copies of free
software (and charge for this service if you wish); that you receive source code or can get it if you
want it; that you can change the software and use pieces of it in new free programs; and that you
are informed that you can do these things.

>>
<<
Software License(Continue)
ENG 13-9
To protect your rights, we need to make restrictions that forbid distributors to deny you these
rights or to ask you to surrender these rights. These restrictions translate to certain responsibilities
for you if you distribute copies of the library or if you modify it.
For example, if you distribute copies of the library, whether gratis or for a fee, you must give the
recipients all the rights that we gaveyou. You must make sure that they, too, receive or can get the
source code. If you link other code with the library, you must provide complete object files to the
recipients, so that they can relink them with the library after making changes to the library and
recompiling it. And you must show them these terms so they know their rights.
We protect your rights with a two-step method: (1) we copyright the library, and (2) we offer you
this license, which gives you legal permission to copy, distribute and/or modify the library.
To protect each distributor, we want to make it very clear that there is no warranty for the free
library. Also, if the library is modified by someone else and passed on, the recipients should know
that what they have is not the original version, so that the original author's reputation will not be
affected by problems that might be introduced by others.
Finally, software patents pose a constant threat to the existence of any free program. We wish to
make sure that a company cannot effectively restrict the users of a free program by obtaining a
restrictive license from a patent holder. Therefore, we insist that any patent license obtained for a
version of the library must be consistent with the full freedom of use specified in this license.
Most GNU software, including some libraries, is covered by the ordinary GNU General Public
License. This license, the GNU Lesser General Public License, applies to certain designated
libraries, and is quite different from the ordinary General Public License. We use this license for
certain libraries in order to permit linking those libraries into non-free programs.
When a program is linked with a library, whether statically or using a shared library, the
combination of the two is legally speaking a combined work, a derivative of the original library. The
ordinary General Public License therefore permits such linking only if the entire combination fits its
criteria of freedom. The Lesser General Public License permits more lax criteria for linking other
code with the library.
We call this license the "Lesser" General Public License because it does Less to protect the user's
freedom than the ordinary General Public License. It also provides other free software developers
Less of an advantage over competing non-free programs. These disadvantages are the reason we
use the ordinary General Public License for many libraries. However, the Lesser license provides
advantages in certain special circumstances.
For example, on rare occasions, there may be a special need to encourage the widest possible
use of a certain library, so that it becomes a de-facto standard. To achieve this, non-free
programs must be allowed to use the library. A more frequent case is that a free library does the
same job as widely used non-free libraries. In this case, there is little to gain by limiting the free
library to free software only, so we use the Lesser General Public License.
In other cases, permission to use a particular library in non-free programs enables a greater
number of people to use a large body of free software. For example, permission to use the GNU
C Library in non-free programs enables many more people to use the whole GNU operating
system, as well as its variant, the GNU/Linux operating system.
Although the Lesser General Public License is Less protective of the users' freedom, it does
ensure that the user of a program that is linked with the Library has the freedom and the
wherewithal to run that program using a modified version of the Library.
The precise terms and conditions for copying, distribution and modification follow. Pay close
attention to the difference between a "work based on the library" and a "work that uses the library".
The former contains code derived from the library, whereas the latter must be combined with the
library in order to run.
GNU LESSER GENERAL PUBLIC LICENSE
TERMS AND CONDITIONS FOR COPYING, DISTRIBUTION AND MODIFICATION
0. This License Agreement applies to any software library or other program which contains a
notice placed by the copyright holder or other authorized party saying it may be distributed under
the terms of this Lesser General Public License (also called "this License"). Each licensee is
addressed as "you".
A "library" means a collection of software functions and/or data prepared so as to be conveniently
linked with application programs (which use some of those functions and data) to form
executables.
The "Library", below, refers to any such software library or work which has been distributed under
these terms. A "work based on the Library" means either the Library or any derivative work under
copyright law: that is to say, a work containing the Library or a portion of it, either verbatim or with
modifications and/or translated straightforwardly into another language. (Hereinafter, translation is
included without limitation in the term "modification".)
"Source code" for a work means the preferred form of the work for making modifications to it. For
a library, complete source code means all the source code for all modules it contains, plus any
associated interface definition files, plus the scripts used to control compilation and installation of
the library.

>>
<<
Software License(Continue)
ENG 13-10
Activities other than copying, distribution and modification are not covered by this License; they are
outside its scope. The act of running a program using the Library is not restricted, and output from
such a program is covered only if its contents constitute a work based on the Library (independent
of the use of the Library in a tool for writing it). Whether that is true depends on what the Library
does and what the program that uses the Library does.
1. You may copy and distribute verbatim copies of the Library's complete source code as you
receive it, in any medium, provided that you conspicuously and appropriately publish on each copy
an appropriate copyright notice and disclaimer of warranty; keep intact all the notices that refer to
this License and to the absence of any warranty; and distribute a copy of this License along with
the Library.
You may charge a fee for the physical act of transferring a copy, and you may at your option offer
warranty protection in exchange for a fee.
2. You may modify your copy or copies of the Library or any portion of it, thus forming a work
based on the Library, and copy and distribute such modifications or work under the terms of
Section 1 above, provided that you also meet all of these conditions:
a) The modified work must itself be a software library.
b) You must cause the files modified to carry prominent notices stating that you changed the files
and the date of any change.
c) You must cause the whole of the work to be licensed at no charge to all third parties under the
terms of this License.
d) If a facility in the modified Library refers to a function or a table of data to be supplied by an
application program that uses the facility, other than as an argument passed when the facility is
invoked, then you must make a good faith effort to ensure that, in the event an application does
not supply such function or table, the facility still operates, and performs whatever part of its
purpose remains meaningful.
(For example, a function in a library to compute square roots has a purpose that is entirely well-
defined independent of the application. Therefore, Subsection 2d requires that any application-
supplied function or table used by this function must be optional: if the application does not supply
it, the square root function must still compute square roots.)
These requirements apply to the modified work as a whole. If identifiable sections of that work are
not derived from the Library, and can be reasonably considered independent and separate works
in themselves, then this License, and its terms, do not apply to those sections when you distribute
them as separate works. But when you distribute the same sections as part of a whole which is a
work based on the Library, the distribution of the whole must be on the terms of this License,
whose permissions for other licensees extend to the entire whole, and thus to each and every part
regardless of who wrote it.
Thus, it is not the intent of this section to claim rights or contest your rights to work written entirely
by you; rather, the intent is to exercise the right to control the distribution of derivative or collective
works based on the Library.
In addition, mere aggregation of another work not based on the Library with the Library (or with a
work based on the Library) on a volume of a storage or distribution medium does not bring the
other work under the scope of this License.
3. You may opt to apply the terms of the ordinary GNU General Public License instead of this
License to a given copy of the Library. To do this, you must alter all the notices that refer to this
License, so that they refer to the ordinary GNU General Public License, version 2, instead of to
this License. (If a newer version than version 2 of the ordinary GNU General Public License has
appeared, then you can specify that version instead if you wish.) Do not make any other change
in these notices.
Once this change is made in a given copy, it is irreversible for that copy, so the ordinary GNU
General Public License applies to all subsequent copies and derivative works made from that
copy.
This option is useful when you wish to copy part of the code of the Library into a program that is
not a library.
4. You may copy and distribute the Library (or a portion or derivative of it, under Section 2) in
object code or executable form under the terms of Sections 1 and 2 above provided that you
accompany it with the complete corresponding machine-readable source code, which must be
distributed under the terms of Sections 1 and 2 above on a medium customarily used for software
interchange.
If distribution of object code is made by offering access to copy from a designated place, then
offering equivalent access to copy the source code from the same place satisfies the requirement
to distribute the source code, even though third parties are not compelled to copy the source
along with the object code.

>>
<<
Software License(Continue)
ENG 13-11
5. A program that contains no derivative of any portion of the Library, but is designed to work with
the Library by being compiled or linked with it, is called a "work that uses the Library". Such a
work, in isolation, is not a derivative work of the Library, and therefore falls outside the scope of
this License.
However, linking a "work that uses the Library" with the Library creates an executable that is a
derivative of the Library (because it contains portions of the Library), rather than a "work that uses
the library". The executable is therefore covered by this License. Section 6 states terms for
distribution of such executables.
When a "work that uses the Library" uses material from a header file that is part of the Library, the
object code for the work may be a derivative work of the Library even though the source code is
not. Whether this is true is especially significant if the work can be linked without the Library, or if
the work is itself a library. The threshold for this to be true is not precisely defined by law.
If such an object file uses only numerical parameters, data structure layouts and accessors, and
small macros and small inline functions (ten lines or less in length), then the use of the object file
is unrestricted, regardless of whether it is legally a derivative work. (Executables containing this
object code plus portions of the Library will still fall under Section 6.)
Otherwise, if the work is a derivative of the Library, you may distribute the object code for the work
under the terms of Section 6. Any executables containing that work also fall under Section 6,
whether or not they are linked directly with the Library itself.
6. As an exception to the Sections above, you may also combine or link a "work that uses the
Library" with the Library to produce a work containing portions of the Library, and distribute that
work under terms of your choice, provided that the terms permit modification of the work for the
customer's own use and reverse engineering for debugging such modifications.
You must give prominent notice with each copy of the work that the Library is used in it and that
the Library and its use are covered by this License. You must supply a copy of this License. If the
work during execution displays copyright notices, you must include the copyright notice for the
Library among them, as well as a reference directing the user to the copy of this License. Also,
you must do one of these things:
a) Accompany the work with the complete corresponding machine-readable source code for the
Library including whatever changes were used in the work (which must be distributed under
Sections 1 and 2 above); and, if the work is an executable linked with the Library, with the
complete machine-readable "work that uses the Library", as object code and/or source code, so
that the user can modify the Library and then relink to produce a modified executable containing
the modified Library. (It is understood that the user who changes the contents of definitions files in
the Library will not necessarily be able to recompile the application to use the modified definitions.)
b) Use a suitable shared library mechanism for linking with the Library. A suitable mechanism is
one that (1) uses at run time a copy of the library already present on the user's computer system,
rather than copying library functions into the executable, and (2) will operate properly with a
modified version of the library, if the user installs one, as long as the modified version is interface-
compatible with the version that the work was made with.
c) Accompany the work with a written offer, valid for at least three years, to give the same user
the materials specified in Subsection 6a, above, for a charge no more than the cost of performing
this distribution.
d) If distribution of the work is made by offering access to copy from a designated place, offer
equivalent access to copy the above specified materials from the same place.
e) Verify that the user has already received a copy of these materials or that you have already
sent this user a copy.
For an executable, the required form of the "work that uses the Library" must include any data and
utility programs needed for reproducing the executable from it. However, as a special exception,
the materials to be distributed need not include anything that is normally distributed (in either
source or binary form) with the major components (compiler, kernel, and so on) of the operating
system on which the executable runs, unless that component itself accompanies the executable.
It may happen that this requirement contradicts the license restrictions of other proprietary libraries
that do not normally accompany the operating system. Such a contradiction means you cannot
use both them and the Library together in an executable that you distribute.
7. You may place library facilities that are a work based on the Library side-by-side in a single
library together with other library facilities not covered by this License, and distribute such a
combined library, provided that the separate distribution of the work based on the Library and of
the other library facilities is otherwise permitted, and provided that you do these two things:
a) Accompany the combined library with a copy of the same work based on the Library,
uncombined with any other library facilities. This must be distributed under the terms of the
Sections above.
b) Give prominent notice with the combined library of the fact that part of it is a work based on the
Library, and explaining where to find the accompanying uncombined form of the same work.

>>
<<
Software License(Continue)
ENG 13-12
8. You may not copy, modify, sublicense, link with, or distribute the Library except as expressly
provided under this License. Any attempt otherwise to copy, modify, sublicense, link with, or
distribute the Library is void, and will automatically terminate your rights under this License.
However, parties who have received copies, or rights, from you under this License will not have
their licenses terminated so long as such parties remain in full compliance.
9. You are not required to accept this License, since you have not signed it. However, nothing else
grants you permission to modify or distribute the Library or its derivative works. These actions are
prohibited by law if you do not accept this License. Therefore, by modifying or distributing the
Library (or any work based on the Library), you indicate your acceptance of this License to do so,
and all its terms and conditions for copying, distributing or modifying the Library or works based on
it.
10. Each time you redistribute the Library (or any work based on the Library), the recipient
automatically receives a license from the original licensor to copy, distribute, link with or modify the
Library subject to these terms and conditions. You may not impose any further restrictions on the
recipients' exercise of the rights granted herein. You are not responsible for enforcing compliance
by third parties with this License.
11. If, as a consequence of a court judgment or allegation of patent infringement or for any other
reason (not limited to patent issues), conditions are imposed on you (whether by court order,
agreement or otherwise) that contradict the conditions of this License, they do not excuse you from
the conditions of this License. If you cannot distribute so as to satisfy simultaneously your
obligations under this License and any other pertinent obligations, then as a consequence you may
not distribute the Library at all. For example, if a patent license would not permit royalty-free
redistribution of the Library by all those who receive copies directly or indirectly through you, then
the only way you could satisfy both it and this License would be to refrain entirely from distribution
of the Library.
If any portion of this section is held invalid or unenforceable under any particular circumstance, the
balance of the section is intended to apply, and the section as a whole is intended to apply in
other circumstances.
It is not the purpose of this section to induce you to infringe any patents or other property right
claims or to contest validity of any such claims; this section has the sole purpose of protecting the
integrity of the free software distribution system which is implemented by public license practices.
Many people have made generous contributions to the wide range of software distributed through
that system in reliance on consistent application of that system; it is up to the author/donor to
decide if he or she is willing to distribute software through any other system and a licensee cannot
impose that choice.
This section is intended to make thoroughly clear what is believed to be a consequence of the rest
of this License.
12. If the distribution and/or use of the Library is restricted in certain countries either by patents or
by copyrighted interfaces, the original copyright holder who places the Library under this License
may add an explicit geographical distribution limitation excluding those countries, so that
distribution is permitted only in or among countries not thus excluded. In such case, this License
incorporates the limitation as if written in the body of this License.
13. The Free Software Foundation may publish revised and/or new versions of the Lesser General
Public License from time to time. Such new versions will be similar in spirit to the present version,
but may differ in detail to address new problems or concerns.
Each version is given a distinguishing version number. If the Library specifies a version number of
this License which applies to it and "any later version", you have the option of following the terms
and conditions either of that version or of any later version published by the Free Software
Foundation. If the Library does not specify a license version number, you may choose any version
ever published by the Free Software Foundation.
14. If you wish to incorporate parts of the Library into other free programs whose distribution
conditions are incompatible with these, write to the author to ask for permission. For software
which is copyrighted by the Free Software Foundation, write to the Free Software Foundation; we
sometimes make exceptions for this. Our decision will be guided by the two goals of preserving the
free status of all derivatives of our free software and of promoting the sharing and reuse of
software generally.
NO WARRANTY
15. BECAUSE THE LIBRARY IS LICENSED FREE OF CHARGE, THERE IS NO WARRANTY
FOR THE LIBRARY, TO THE EXTENT PERMITTED BY APPLICABLE LAW. EXCEPT WHEN
OTHERWISE STATED IN WRITING THE COPYRIGHT HOLDERS AND/OR OTHER PARTIES
PROVIDE THE LIBRARY "AS IS" WITHOUT WARRANTY OF ANY KIND, EITHER EXPRESSED
OR IMPLIED, INCLUDING, BUT NOT LIMITED TO, THE IMPLIED WARRANTIES OF
MERCHANTABILITY AND FITNESS FOR A PARTICULAR PURPOSE. THE ENTIRE RISK AS TO
THE QUALITY AND PERFORMANCE OF THE LIBRARY IS WITH YOU. SHOULD THE LIBRARY
PROVE DEFECTIVE, YOU ASSUME THE COST OF ALL NECESSARY SERVICING, REPAIR OR
CORRECTION.

>>
<<
Software License(Continue)
ENG 13-13
16. IN NO EVENT UNLESS REQUIRED BY APPLICABLE LAW OR AGREED TO IN WRITING
WILL ANY COPYRIGHT HOLDER, OR ANY OTHER PARTY WHO MAY MODIFY AND/OR
REDISTRIBUTE THE LIBRARY AS PERMITTED ABOVE, BE LIABLE TO YOU FOR DAMAGES,
INCLUDING ANY GENERAL, SPECIAL, INCIDENTAL OR CONSEQUENTIAL DAMAGES
ARISING OUT OF THE USE OR INABILITY TO USE THE LIBRARY (INCLUDING BUT NOT
LIMITED TO LOSS OF DATA OR DATA BEING RENDERED INACCURATE OR LOSSES
SUSTAINED BY YOU OR THIRD PARTIES OR A FAILURE OF THE LIBRARY TO OPERATE
WITH ANY OTHER SOFTWARE), EVEN IF SUCH HOLDER OR OTHER PARTY HAS BEEN
ADVISED OF THE POSSIBILITY OF SUCH DAMAGES.
END OF TERMS AND CONDITIONS
How to Apply These Terms to Your New Libraries
If you develop a new library, and you want it to be of the greatest possible use to the public, we
recommend making it free software that everyone can redistribute and change. You can do so by
permitting redistribution under these terms (or, alternatively, under the terms of the ordinary
General Public License).
To apply these terms, attach the following notices to the library. It is safest to attach them to the
start of each source file to most effectively convey the exclusion of warranty; and each file should
have at least the "copyright" line and a pointer to where the full notice is found.
‹one line to give the library's name and a brief idea of what it does.›
Copyright (C) ‹year› ‹name of author›
This library is free software; you can redistribute it and/or modify it under the terms of the GNU
Lesser General Public License as published by the Free Software Foundation; either version 2.1 of
the License, or (at your option) any later version.
This library is distributed in the hope that it will be useful, but WITHOUT ANY WARRANTY; without
even the implied warranty of MERCHANTABILITY or FITNESS FOR A PARTICULAR PURPOSE.
See the GNU Lesser General Public License for more details.
You should have received a copy of the GNU Lesser General Public License along with this
library; if not, write to the Free Software Foundation, Inc., 51 Franklin Street, Fifth Floor, Boston,
MA 02110-1301 USA
Also add information on how to contact you by electronic and paper mail.
You should also get your employer (if you work as a programmer) or your school, if any, to sign a
"copyright disclaimer" for the library, if necessary. Here is a sample; alter the names:
Yoyodyne, Inc., hereby disclaims all copyright interest in the library 'Frob' (a library for tweaking
knobs) written by James Random Hacker.
‹signature of Ty Coon›, 1 April 1990
Ty Coon, President of Vice
That's all there is to it!
Apache License
Version 2.0, January 2004
http://www.apache.org/licenses/
TERMS AND CONDITIONS FOR USE, REPRODUCTION, AND DISTRIBUTION
1. Definitions.
"License" shall mean the terms and conditions for use, reproduction, and distribution as defined by
Sections 1 through 9 of this document.
"Licensor" shall mean the copyright owner or entity authorized by the copyright owner that is
granting the License.
"Legal Entity" shall mean the union of the acting entity and all other entities that control, are
controlled by, or are under common control with that entity. For the purposes of this definition,
"control" means (i) the power, direct or indirect, to cause the direction or management of such
entity, whether by contract or otherwise, or (ii) ownership of fifty percent (50%) or more of the
outstanding shares, or (iii) beneficial ownership of such entity.
"You" (or "Your") shall mean an individual or Legal Entity exercising permissions granted by this
License.
"Source" form shall mean the preferred form for making modifications, including but not limited to
software source code, documentation source, and configuration files.
"Object" form shall mean any form resulting from mechanical transformation or translation of a
Source form, including but not limited to compiled object code, generated documentation, and
conversions to other media types.

>>
<<
Software License(Continue)
ENG 13-14
"Work" shall mean the work of authorship, whether in Source or Object form, made available under
the License, as indicated by a copyright notice that is included in or attached to the work (an
example is provided in the Appendix below).
"Derivative Works" shall mean any work, whether in Source or Object form, that is based on (or
derived from) the Work and for which the editorial revisions, annotations, elaborations, or other
modifications represent, as a whole, an original work of authorship. For the purposes of this
License, Derivative Works shall not include works that remain separable from, or merely link (or
bind by name) to the interfaces of, the Work and Derivative Works thereof.
"Contribution" shall mean any work of authorship, including the original version of the Work and
any modifications or additions to that Work or Derivative Works thereof, that is intentionally
submitted to Licensor for inclusion in the Work by the copyright owner or by an individual or Legal
Entity authorized to submit on behalf of the copyright owner. For the purposes of this definition,
"submitted" means any form of electronic, verbal, or written communication sent to the Licensor or
its representatives, including but not limited to communication on electronic mailing lists, source
code control systems, and issue tracking systems that are managed by, or on behalf of, the
Licensor for the purpose of discussing and improving the Work, but excluding communication that
is conspicuously marked or otherwise designated in writing by the copyright owner as "Not a
Contribution."
"Contributor" shall mean Licensor and any individual or Legal Entity on behalf of whom a
Contribution has been received by Licensor and subsequently incorporated within the Work.
2. Grant of Copyright License. Subject to the terms and conditions of this License, each
Contributor hereby grants to You a perpetual, worldwide, non-exclusive, no-charge, royalty-free,
irrevocable copyright license to reproduce, prepare Derivative Works of, publicly display, publicly
perform, sublicense, and distribute the Work and such Derivative Works in Source or Object form.
3. Grant of Patent License. Subject to the terms and conditions of this License, each Contributor
hereby grants to You a perpetual, worldwide, non-exclusive, no-charge, royalty-free, irrevocable
(except as stated in this section) patent license to make, have made, use, offer to sell, sell, import,
and otherwise transfer the Work, where such license applies only to those patent claims licensable
by such Contributor that are necessarily infringed by their Contribution(s) alone or by combination
of their Contribution(s) with the Work to which such Contribution(s) was submitted. If You institute
patent litigation against any entity (including a cross-claim or counterclaim in a lawsuit) alleging
that the Work or a Contribution incorporated within the Work constitutes direct or contributory
patent infringement, then any patent licenses granted to You under this License for that Work shall
terminate as of the date such litigation is filed.
4. Redistribution. You may reproduce and distribute copies of the Work or Derivative Works thereof
in any medium, with or without modifications, and in Source or Object form, provided that You
meet the following conditions:
You must give any other recipients of the Work or Derivative Works a copy of this License; and
You must cause any modified files to carry prominent notices stating that You changed the files;
and
You must retain, in the Source form of any Derivative Works that You distribute, all copyright,
patent, trademark, and attribution notices from the Source form of the Work, excluding those
notices that do not pertain to any part of the Derivative Works; and
If the Work includes a "NOTICE" text file as part of its distribution, then any Derivative Works that
You distribute must include a readable copy of the attribution notices contained within such
NOTICE file, excluding those notices that do not pertain to any part of the Derivative Works, in at
least one of the following places: within a NOTICE text file distributed as part of the Derivative
Works; within the Source form or documentation, if provided along with the Derivative Works; or,
within a display generated by the Derivative Works, if and wherever such third-party notices
normally appear. The contents of the NOTICE file are for informational purposes only and do not
modify the License. You may add Your own attribution notices within Derivative Works that You
distribute, alongside or as an addendum to the NOTICE text from the Work, provided that such
additional attribution notices cannot be construed as modifying the License. You may add Your
own copyright statement to Your modifications and may provide additional or different license
terms and conditions for use, reproduction, or distribution of Your modifications, or for any such
Derivative Works as a whole, provided Your use, reproduction, and distribution of the Work
otherwise complies with the conditions stated in this License.
5. Submission of Contributions. Unless You explicitly state otherwise, any Contribution intentionally
submitted for inclusion in the Work by You to the Licensor shall be under the terms and conditions
of this License, without any additional terms or conditions. Notwithstanding the above, nothing
herein shall supersede or modify the terms of any separate license agreement you may have
executed with Licensor regarding such Contributions.

>>
<<
Software License(Continue)
ENG 13-15
6. Trademarks. This License does not grant permission to use the trade names, trademarks,
service marks, or product names of the Licensor, except as required for reasonable and customary
use in describing the origin of the Work and reproducing the content of the NOTICE file.
7. Disclaimer of Warranty. Unless required by applicable law or agreed to in writing, Licensor
provides the Work (and each Contributor provides its Contributions) on an "AS IS" BASIS,
WITHOUT WARRANTIES OR CONDITIONS OF ANY KIND, either express or implied, including,
without limitation, any warranties or conditions of TITLE, NON-INFRINGEMENT,
MERCHANTABILITY, or FITNESS FOR A PARTICULAR PURPOSE. You are solely responsible
for determining the appropriateness of using or redistributing the Work and assume any risks
associated with Your exercise of permissions under this License.
8. Limitation of Liability. In no event and under no legal theory, whether in tort (including
negligence), contract, or otherwise, unless required by applicable law (such as deliberate and
grossly negligent acts) or agreed to in writing, shall any Contributor be liable to You for damages,
including any direct, indirect, special, incidental, or consequential damages of any character
arising as a result of this License or out of the use or inability to use the Work (including but not
limited to damages for loss of goodwill, work stoppage, computer failure or malfunction, or any and
all other commercial damages or losses), even if such Contributor has been advised of the
possibility of such damages.
9. Accepting Warranty or Additional Liability. While redistributing the Work or Derivative Works
thereof, You may choose to offer, and charge a fee for, acceptance of support, warranty,
indemnity, or other liability obligations and/or rights consistent with this License. However, in
accepting such obligations, You may act only on Your own behalf and on Your sole responsibility,
not on behalf of any other Contributor, and only if You agree to indemnify, defend, and hold each
Contributor harmless for any liability incurred by, or claims asserted against, such Contributor by
reason of your accepting any such warranty or additional liability.
END OF TERMS AND CONDITIONS
APPENDIX: How to apply the Apache License to your work
To apply the Apache License to your work, attach the following boilerplate notice, with the fields
enclosed by brackets "[]" replaced with your own identifying information. (Don't include the
brackets!) The text should be enclosed in the appropriate comment syntax for the file format. We
also recommend that a file or class name and description of purpose be included on the same
"printed page" as the copyright notice for easier identification within third-party archives.
Copyright [yyyy] [name of copyright owner]
Licensed under the Apache License, Version 2.0 (the "License"); you may not use this file except
in compliance with the License. You may obtain a copy of the License at
http://www.apache.org/licenses/LICENSE-2.0
Unless required by applicable law or agreed to in writing, software distributed under the License is
distributed on an "AS IS" BASIS, WITHOUT WARRANTIES OR CONDITIONS OF ANY KIND,
either express or implied. See the License for the specific language governing permissions and
limitations under the License.
Fonts are (c) Bitstream (see below). DejaVu changes are in public domain. Glyphs imported from
Arev fonts are (c) Tavmjong Bah (see below)
Bitstream Vera Fonts Copyright
------------------------------
Copyright (c) 2003 by Bitstream, Inc. All Rights Reserved. Bitstream Vera is a trademark of
Bitstream, Inc. Permission is hereby granted, free of charge, to any person obtaining a copy of the
fonts accompanying this license ("Fonts") and associated documentation files (the "Font
Software"), to reproduce and distribute the Font Software, including without limitation the rights to
use, copy, merge, publish, distribute, and/or sell copies of the Font Software, and to permit
persons to whom the Font Software is furnished to do so, subject to the following conditions:
The above copyright and trademark notices and this permission notice shall be included in all
copies of one or more of the Font Software typefaces.
The Font Software may be modified, altered, or added to, and in particular the designs of glyphs
or characters in the Fonts may be modified and additional glyphs or characters may be added to
the Fonts, only if the fonts are renamed to names not containing either the words "Bitstream" or
the word
"Vera".
This License becomes null and void to the extent applicable to Fonts or Font Software that has
been modified and is distributed under the "Bitstream Vera" names.
The Font Software may be sold as part of a larger software package but no copy of one or more
of the Font Software typefaces may be sold by itself.

>>
<<
Software License(Continue)
ENG 13-16
THE FONT SOFTWARE IS PROVIDED "AS IS", WITHOUT WARRANTY OF ANY KIND,
EXPRESS
OR IMPLIED, INCLUDING BUT NOT LIMITED TO ANY WARRANTIES OF MERCHANTABILITY,
FITNESS FOR A PARTICULAR PURPOSE AND NONINFRINGEMENT OF COPYRIGHT,
PATENT, TRADEMARK, OR OTHER RIGHT. IN NO EVENT SHALL BITSTREAM OR THE
GNOME FOUNDATION BE LIABLE FOR ANY CLAIM, DAMAGES OR OTHER LIABILITY,
INCLUDING ANY GENERAL, SPECIAL, INDIRECT, INCIDENTAL, OR CONSEQUENTIAL
DAMAGES, WHETHER IN AN ACTION OF CONTRACT, TORT OR OTHERWISE, ARISING
FROM, OUT OF THE USE OR INABILITY TO USE THE FONT SOFTWARE OR FROM OTHER
DEALINGS IN THE FONT SOFTWARE.
Except as contained in this notice, the names of Gnome, the Gnome Foundation, and Bitstream
Inc., shall not be used in advertising or otherwise to promote the sale, use or other dealings in this
Font Software without prior written authorization from the Gnome Foundation or Bitstream Inc.,
respectively. For further information, contact: fonts at gnome dot org.
Arev Fonts Copyright
------------------------------
Copyright (c) 2006 by Tavmjong Bah. All Rights Reserved.
Permission is hereby granted, free of charge, to any person obtaining a copy of the fonts
accompanying this license ("Fonts") and associated documentation files (the "Font Software"), to
reproduce and distribute the modifications to the Bitstream Vera Font Software, including without
limitation the rights to use, copy, merge, publish, distribute, and/or sell copies of the Font
Software, and to permit persons to whom the Font Software is furnished to do so, subject to the
following conditions:
The above copyright and trademark notices and this permission notice shall be included in all
copies of one or more of the Font Software typefaces.
The Font Software may be modified, altered, or added to, and in particular the designs of glyphs
or characters in the Fonts may be modified and additional glyphs or characters may be added to
the Fonts, only if the fonts are renamed to names not containing either the words "Tavmjong Bah"
or the word "Arev".
This License becomes null and void to the extent applicable to Fonts or Font Software that has
been modified and is distributed under the "Tavmjong Bah Arev" names.
The Font Software may be sold as part of a larger software package but no copy of one or more
of the Font Software typefaces may be sold by itself.
THE FONT SOFTWARE IS PROVIDED "AS IS", WITHOUT WARRANTY OF ANY KIND,
EXPRESS OR IMPLIED, INCLUDING BUT NOT LIMITED TO ANY WARRANTIES OF
MERCHANTABILITY, FITNESS FOR A PARTICULAR PURPOSE AND NONINFRINGEMENT OF
COPYRIGHT, PATENT, TRADEMARK, OR OTHER RIGHT. IN NO EVENT SHALL TAVMJONG
BAH BE LIABLE FOR ANY CLAIM, DAMAGES OR OTHER LIABILITY, INCLUDING ANY
GENERAL, SPECIAL, INDIRECT, INCIDENTAL, OR CONSEQUENTIAL DAMAGES, WHETHER
IN AN ACTION OF CONTRACT, TORT OR OTHERWISE, ARISING FROM, OUT OF THE USE
OR INABILITY TO USE THE FONT SOFTWARE OR FROM OTHER DEALINGS IN THE FONT
SOFTWARE.
Except as contained in this notice, the name of Tavmjong Bah shall not be used in advertising or
otherwise to promote the sale, use or other dealings in this Font Software without prior written
authorization from Tavmjong Bah. For further information, contact: tavmjong @ free. fr.


>>
<<
Table des matières
FRA Table des matières
1. Nomenclature
1-1. Téléviseur
1-2. Télécommande
2. Pour regarder la télévision
2-1. Affichage de l'image d'un appareil externe
2-2. Installation initiale
3. Touche de fonctionnement direct
3-1. Modifier les canaux
3-2. Changer le volume
3-3. MUTE
3-4. FREEZE
3-5. FLASH BACK
3-6. SMART
3-7. NETFLIX
3-8. AUDIO
3-9. Minuterie d'extinction
3-10. AV MODE
3-12. Sous-titrage et sous-titrage numérique
3-14. VIEW MODE
4. Menu d'affichage sur l'écran
4-1. Introduction
4-3. Fonctionnement du menu d'affichage sur l'écran
4-4. Touches d'opération du menu
4-5. Configuration initiale
4-14. Renseignements
4-17. Réglages d'image
4-21. Réglages audio
4-22. Smart TV
4-25. Options de système
5. Lecture de morceaux de photos/musique/vidéo
5-1. Préparatifs
5-2. Sélection des dossiers pour la lecture
5-4. Lecture de fichiers sur un périphérique mémoire
USB/serveur réseau personnel
5-9. Lecture de fichiers à partir d'un périphérique
portable ou d'un ordinateur
6. Utilisation d'Fonction de lien
6-1. Vérification de dispositifs HDMI à l'aide d'Fonction
de lien
6-4. Menu Fonction de lien
7. Utilisation d'un ordinateur
7-1. Ajustement de l'image d'un ordinateur
7-2. Réglage de l'entrée Audio
7-3. Commande du téléviseur
7-9. Tableau des ordinateurs compatibles
8. Utilisation d'Internet
8-1. Raccordement à Internet
8-2. Réglage Internet
8-5. Saisie d'un texte (Clavier logiciel)
8-7. Utilisation du navigateur
8-11. Utilisation du clavier et de la souris
8-12. Utilisation d'applications via Internet
8-14. Remarques
9. Annexe
9-1. Dépose du socle
9-2. Montage du téléviseur sur un mur
9-4. Guide de dépannage
9-6. Guide de dépannage - Message d'erreur
9-7. Informations sur la licence d'utilisation du logiciel
pour ce produit
10. Fiche technique
10-1. Téléviseur
10-2. LAN sans-fil
11-1. Marques
12. Schémas dimensionnels
Les «Schémas dimensionnels» du téléviseur LCD se
trouvent sur la face interne du couvercle arrière.
13. Licence de logiciel
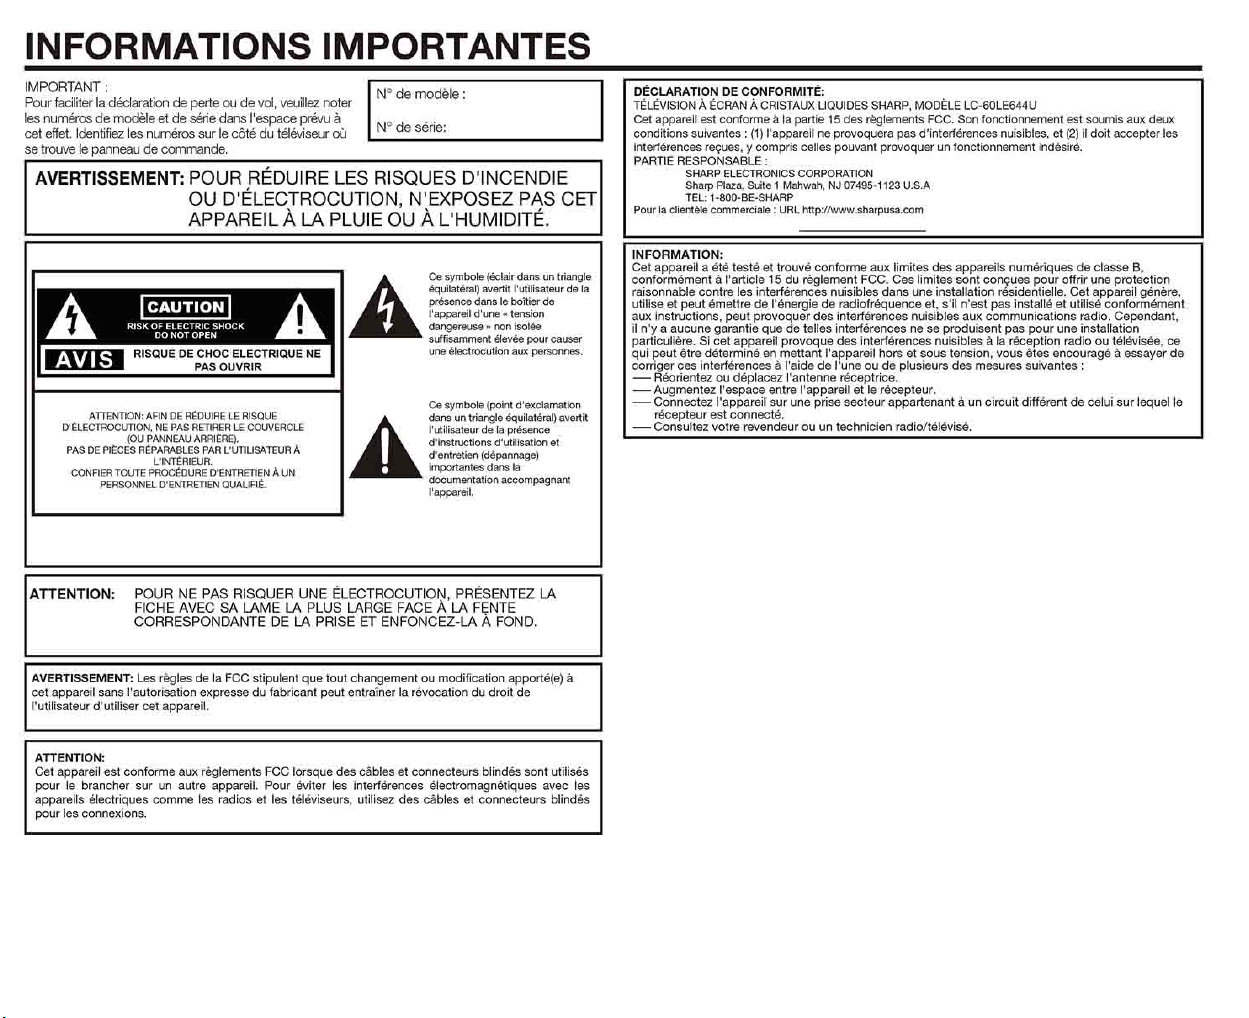
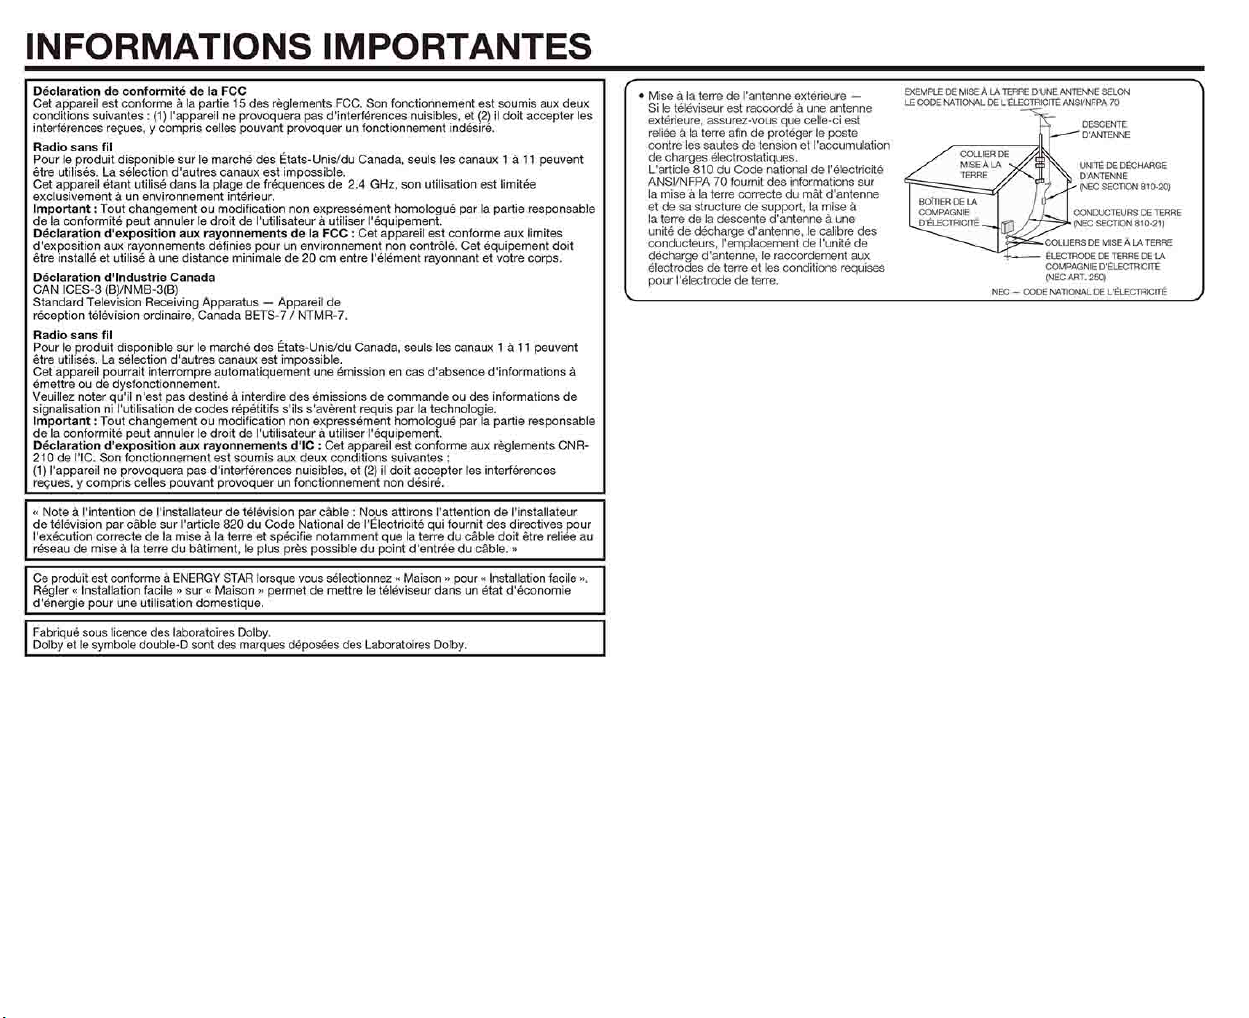

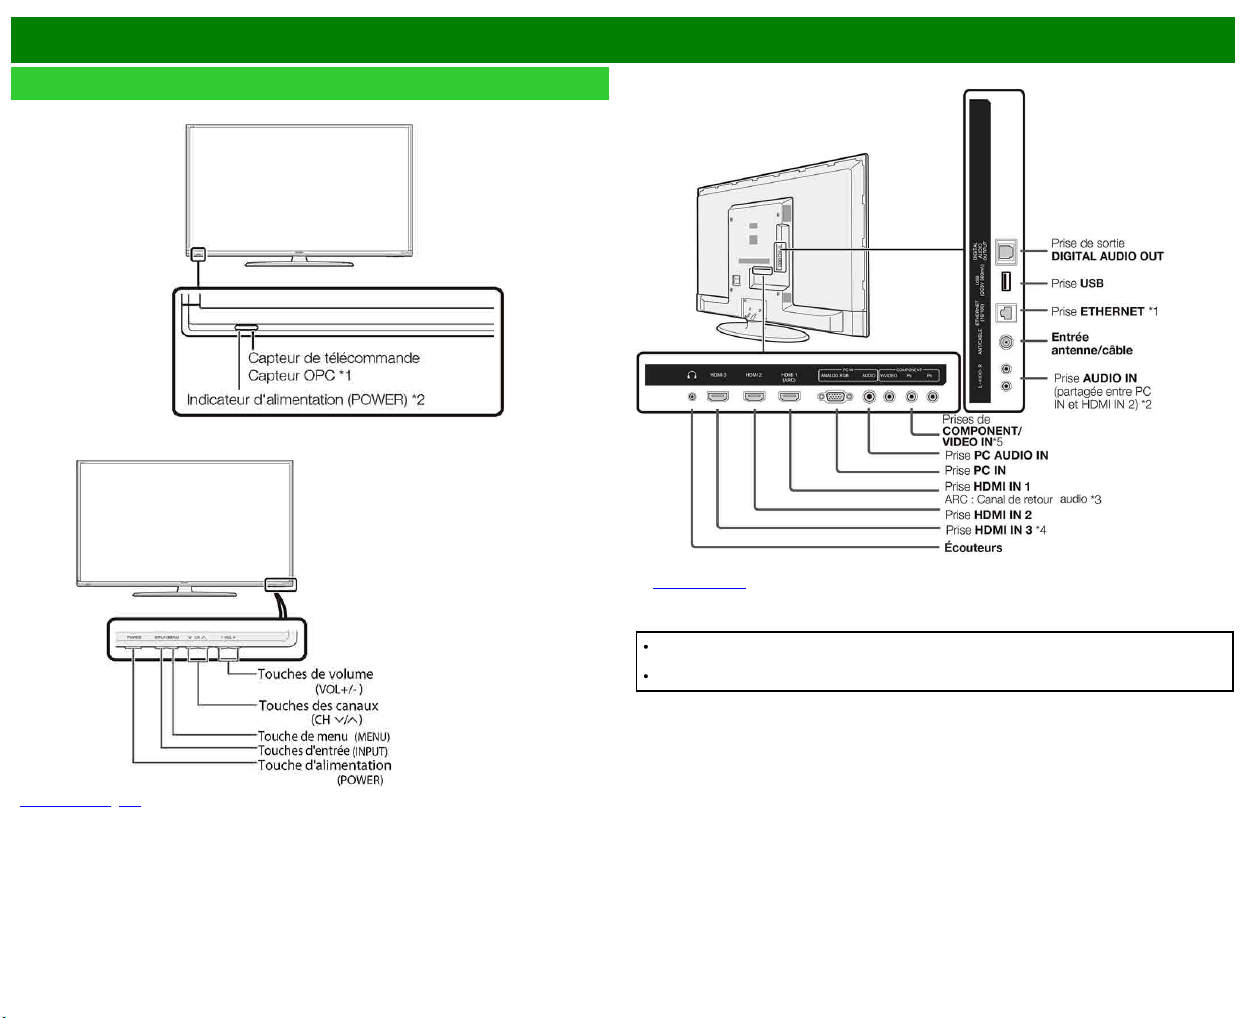
>>
<<
Nomenclature
FRA 1-1
Téléviseur
(avant)
(avant)
*
Voir pages 2-1, 4-4 pour l'utilisation des touches.
(arrière)
*1 Voir le Guide de configuration.
*5
Voir page 4-12 pour plus de détails sur la fonction Sélection d'entrée.
Les illustrations et les affichages à l'écran dans ce mode d'emploi sont présentés à titre
explicatif et peuvent varier légèrement des opérations réelles.
Les Exemples utilisés dans ce mode d'emploi sont basés sur le modèle LC-60LE644U.
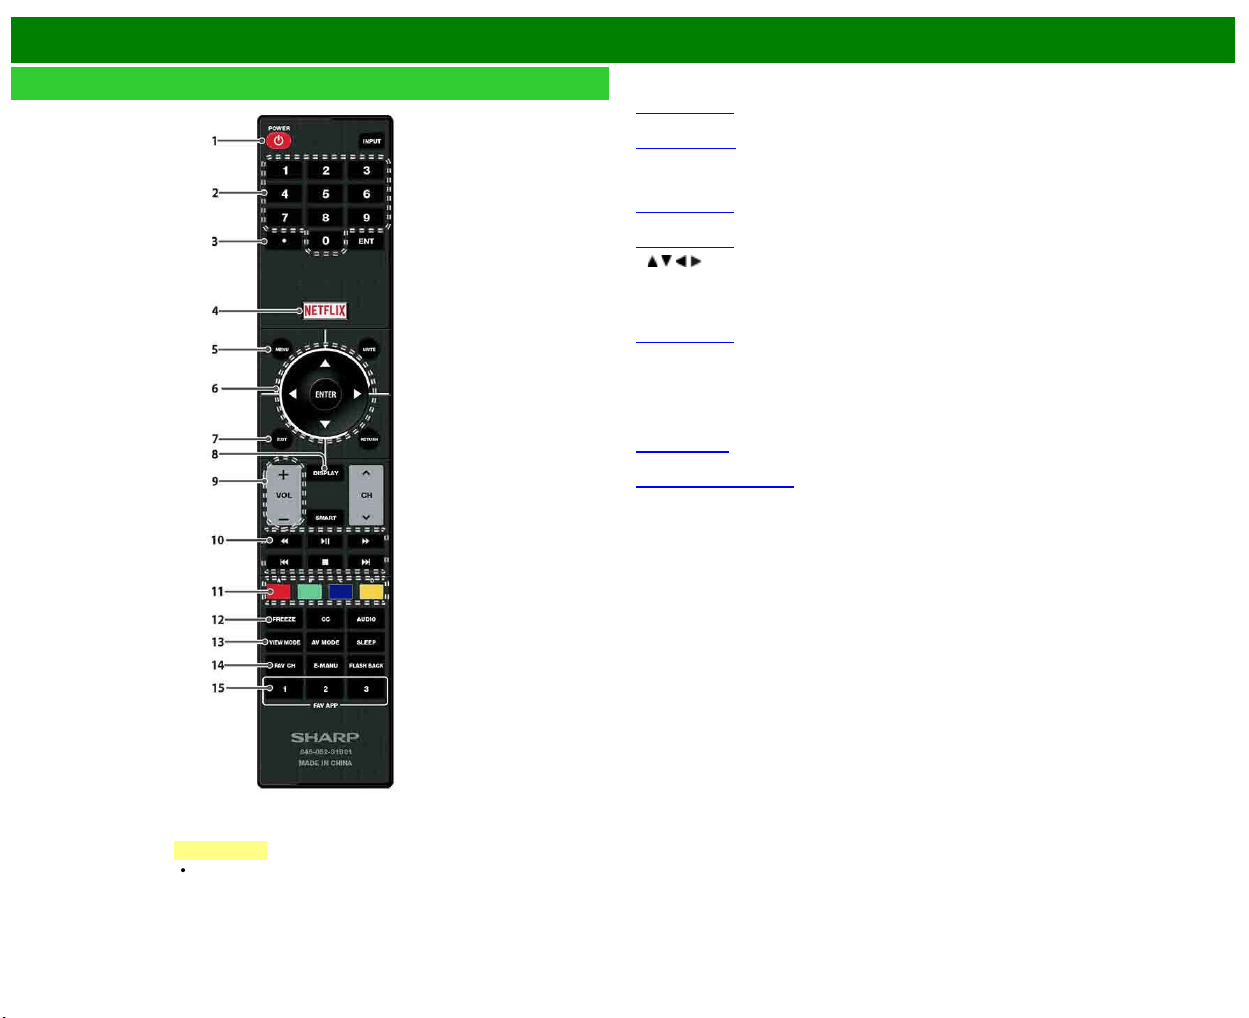
>>
<<
Nomenclature
FRA 1-2
Télécommande
1
POWER :
Commute le téléviseur sous tension ou en attente.
2
0–9 : Règle le canal.
(Voir page 3-1.)
3
• (POINT) : Règle le canal.
(Voir pages 3-1
.)
4
NETFLIX : Affiche l'écran de Netflix.
Si vous actionnez le bouton NETFLIX lorsque le téléviseur est éteint, celui-ci s'allume et l'écran
NETFLIX s'affiche.
(Voir page 3-7.)
5
MENU : Affiche l'écran du menu.
(Voir page 4-1.)
6
/ / / , ENTER : Sélectionne une rubrique désirée sur l'écran.
7
EXIT : Éteint l'écran du menu.
8
DISPLAY : Affiche les informations sur le canal.
9
VOL+/- : Règle le volume.
(Voir page 3-2.)
10
Touches d'opération de l'appareil externe : Opèrent l'appareil externe.
11
A, B, C, D : Sélectionne vos 4 canaux prédéfinis préférés dans 4 catégories différentes.
Lorsque vous regardez la télévision, vous pouvez commuter entre les canaux prédéfinis en
appuyant sur
A, B, C ou D.
12
FREEZE : Règle l'image fixe. Appuyez de nouveau pour revenir à l'écran normal.
(Voir page 3-4.
13 VIEW MODE :
Sélectionne la taille de l'écran.
(Voir pages 3-14 à 3-16.)
14
FAV CH : Règle les canaux préférés.
15
FAV APP 1, 2, 3 : Vous pouvez attribuer vos applications favorites à ces boutons.
REMARQUE
Pour utiliser la télécommande,
dirigez-la vers le téléviseur.

>>
<<
Nomenclature
FRA 1-3
Télécommande (Suite)
16
INPUT :
Sélectionne une source d'entrée du téléviseur.
(Voir page 2-1.)
17
ENT : Saute à un canal après sélection au moyen des touches 0–9.
18
MUTE : Coupe le son.
(Voir page 3-3.)
19
RETURN : Revient à l'écran du menu précédent.
20
CH / : Sélectionne le canal.
(Voir page 3-1.)
21
SMART : Affiche la fenêtre des applications.
(Voir page 3-6.)
22
CC : Affiche les sous-titres d'une source avec sous-titrage.
(Voir pages 3-12 à 3-13.)
23
AUDIO : Sélectionne MTS/SAP ou le mode audio pendant les émissions multi audio.
(Voir page 3-8.)
24
AV MODE : Sélectionne un réglage audio ou vidéo.
(Voir page 3-10.)
25
SLEEP : Règle la minuterie d'extinction.
(Voir page 3-9.)
26 E-
MANU : Affichage du mode d'emploi.
27
FLASH BACK : Revient au canal précédent ou au mode d'entrée externe.
(Voir page 3-5.)
REMARQUE
Pour utiliser la télécommande,
dirigez-la vers le téléviseur.
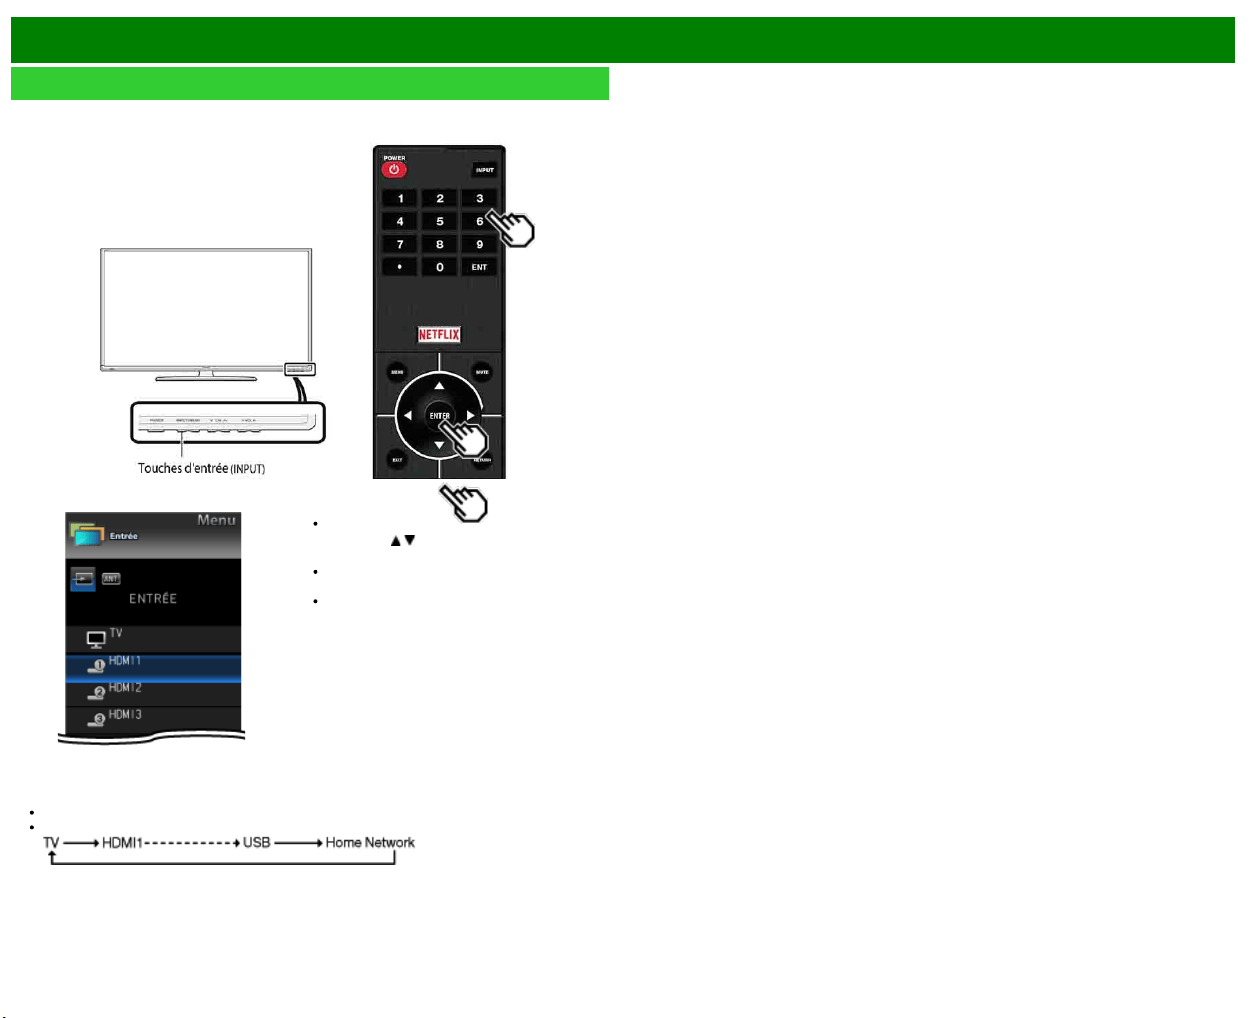
>>
<<
Pour regarder la télévision
FRA 2-1
Affichage de l'image d'un appareil externe
Pour regarder des images d'une source externe, sélectionnez la source d'entrée en appuyant sur
INPUT
sur la télécommande ou sur le téléviseur.
Exemple
1 Appuyez sur INPUT.
L'écran Liste d'entrée s'affiche.
2 Appuyez sur
/ pour sélectionner la
source d'entrée.
L'image de la source sélectionnée
s'affiche automatiquement.
Si la source correspondante n'est pas
connectée, vous ne pourrez pas
changer la source. Veillez à raccorder
au préalable l'appareil.
Vous pouvez également sélectionner la source d'entrée en appuyant sur INPUT.
A chaque pression sur INPUT, la source d'entrée change.
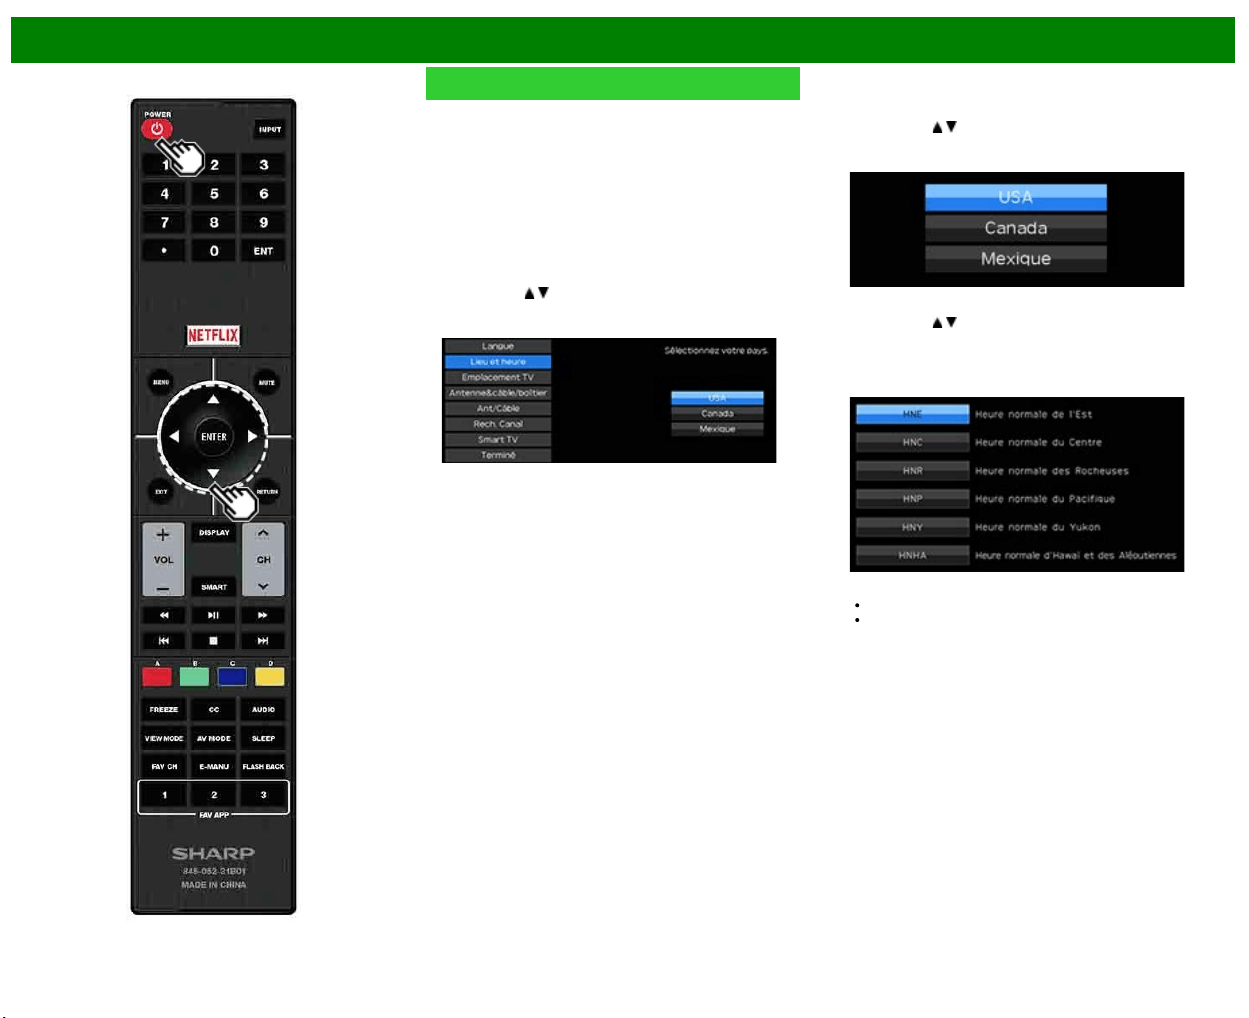
>>
<<
Pour regarder la télévision
FRA 2-2
Installation initiale
Lorsque vous mettez le téléviseur sous tension pour la
première fois, il mémorise automatiquement les canaux de
télévision de la région où vous habitez. Procédez aux
étapes suivantes avant d'appuyer sur POWER de la
télécommande.
1. Introduisez les piles dans la télécommande.
2. Branchez le câble d'antenne sur le téléviseur.
3. Branchez le cordon secteur dans la prise secteur.
Langue (Réglage de la langue)
Sélectionnez parmi 3 langues : anglais, français et
espagnol.
1 Appuyez sur
/ pour sélectionner la langue désirée sur
la liste à l'écran, et appuyez ensuite sur ENTER.
Lieu et heure
Effectuez les réglages pour le pays, la zone et le fuseau
horaire où vous utilisez le téléviseur.
2 Appuyez sur
/ pour sélectionner «USA», «Canada»
ou «Mexique», et appuyez ensuite sur ENTER.
3 Appuyez sur / pour sélectionner le fuseau horaire où
vous utilisez le téléviseur, et appuyez ensuite sur
ENTER.
Exemple
Le fuseau horaire diffère selon le pays sélectionné.
La valeur présélectionnée à l'usine est le fuseau
horaire de la capitale du pays sélectionné.
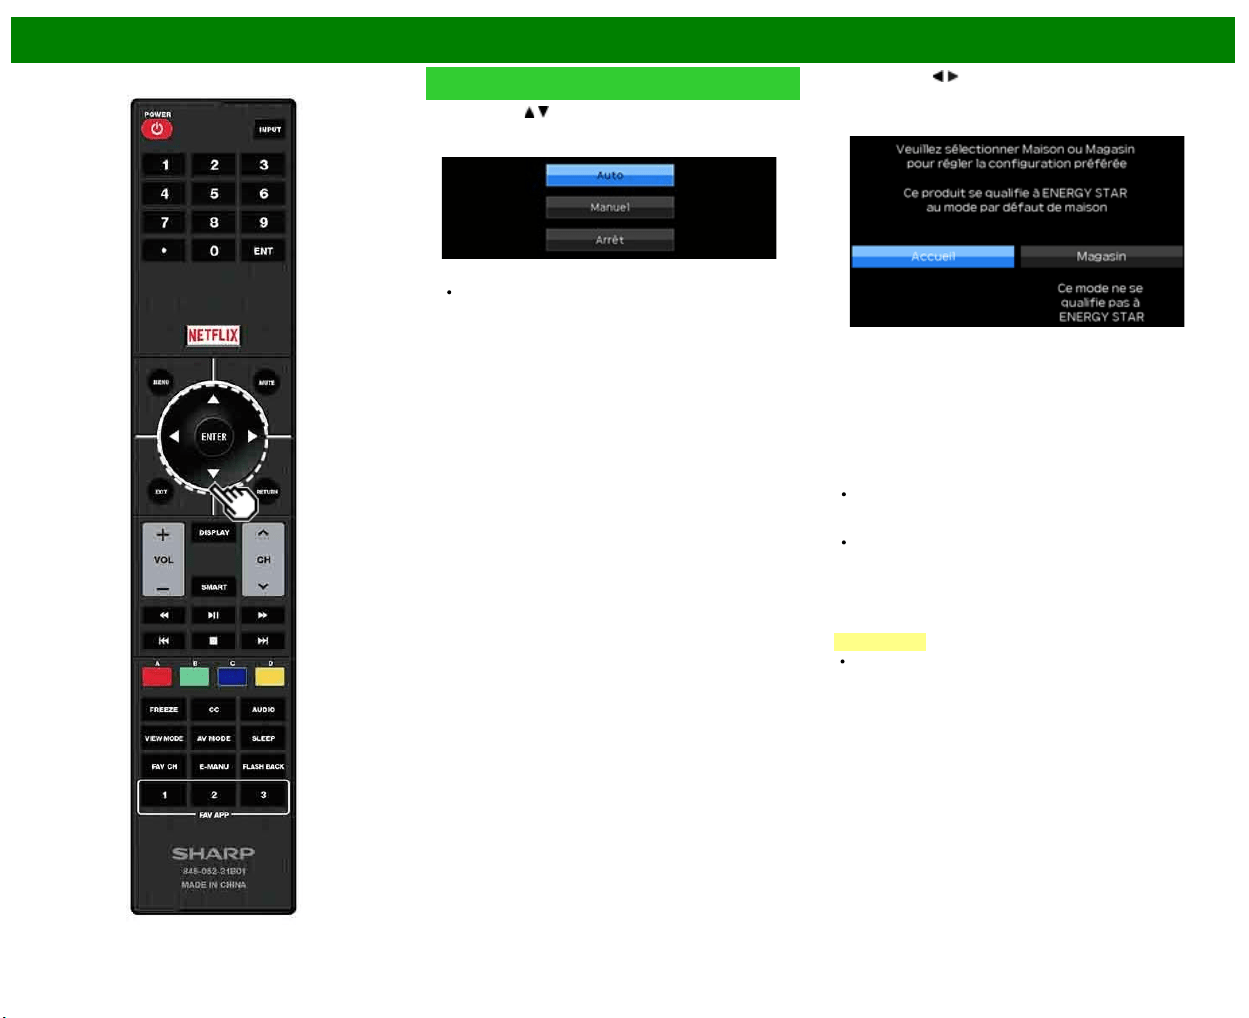
>>
<<
Pour regarder la télévision
FRA 2-3
Installation initiale (Suite)
4 Appuyez sur / pour sélectionner l'heure d'été, et
appuyez ensuite sur ENTER.
«Auto» est la sélection par défaut.
Emplacement TV
Sélectionnez «Maison» ou «Magasin» comme emplacement
d'installation du téléviseur. Ce produit est conforme à
ENERGY STAR avec le réglage par défaut du mode
Maison.
5 Appuyez sur / pour sélectionner «Maison» ou
«Magasin».
Appuyez sur ENTER pour valider le réglage.
Maison : MODE AV est réglé sur «STANDARD (ENERGY
STAR)».
Magasin : MODE AV est réglé sur «DYNAMIQUE(Fixé)».
Il est possible de régler Reconfigurer image et Démo
des fonctions.
Reconfigurer image : MODE AV est réglé sur
«DYNAMIQUE(Fixé)» que Reconfigurer image soit réglé
sur «Marche» ou «Arrêt».
Si vous sélectionnez «Marche» et qu'il n'y a aucune
opération pendant 30 minutes :
- MODE AV est réinitialisé sur «DYNAMIQUE(Fixé)».
Lorsque «Arrêt» est sélectionné :
- MODE AV est réglé sur «DYNAMIQUE(Fixé)».
Démo des fonctions : Quand «Marche» est sélectionné,
une fois tous les réglages terminés, l'écran démo des
fonctions s'affiche s'il n'y a pas d'opération pendant
plusieurs minutes.
REMARQUE
La qualification ENERGY STAR est basée sur le MODE
AV «STANDARD (ENERGY STAR)».
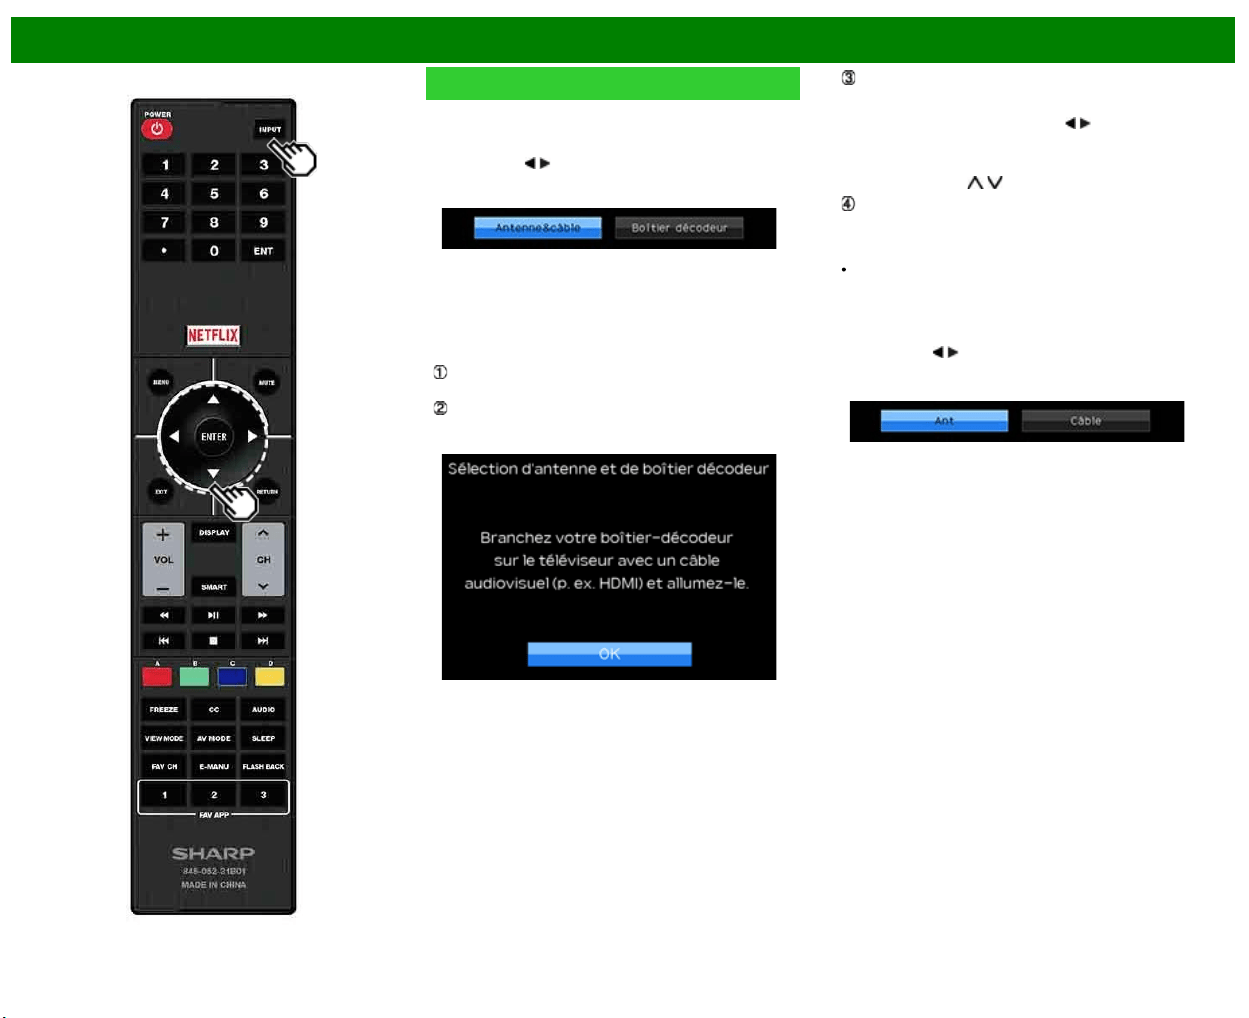
>>
<<
Pour regarder la télévision
FRA 2-4
Installation initiale (Suite)
Antenne&câble/boîtier
Sélectionnez le type de connexion que vous utiliserez pour
regarder la TV.
6 Appuyez sur
/ pour sélectionner «Antenne&câble» ou
«Boîtier décodeur», et appuyez ensuite sur ENTER.
Pour regarder la TV par le biais d'une connexion par
antenne ou par câble (sans utiliser de boîtier
décodeur) :
Sélectionnez «Antenne&câble» puis passez à l'étape 7.
Pour regarder la TV par le biais d'un boîtier décodeur :
Sélectionnez «Boîtier décodeur» et appuyez ensuite sur
ENTER.
Assurez-vous que le décodeur connecté au téléviseur
est en marche.
Pour regarder la télévision, sélectionnez la source
d'entrée correspondant à la borne raccordée au
décodeur. Ce faisant, vous devez faire en sorte que le
réglage ignore «TV». Appuyez sur
/ pour sélectionner
«Marche», et appuyez ensuite sur ENTER.Lorsqu'il est
réglé sur «Marche», la canal du téléviseur ne peut pas
être modifiée à l'aide de la télécommande ou du menu.
(par Exemple. CH
/ , Canal préféré, etc.)
Appuyez sur INPUT pour sélectionner la source d'entrée
correspondant à la borne raccordée au décodeur.
Procédez aux réglages nécessaires sur l'équipement
externe raccordé.
Consultez le mode d'emploi de l'équipement raccordé
pour sa configuration.
Ant/Câble (Réglage de l'antenne)
Vérifiez le type de branchement qui est effectué avec votre
téléviseur «Ant» ou «Câble».
7 Appuyez sur
/ pour sélectionner «Ant» ou «Câble».
Appuyez sur ENTER pour valider le réglage.
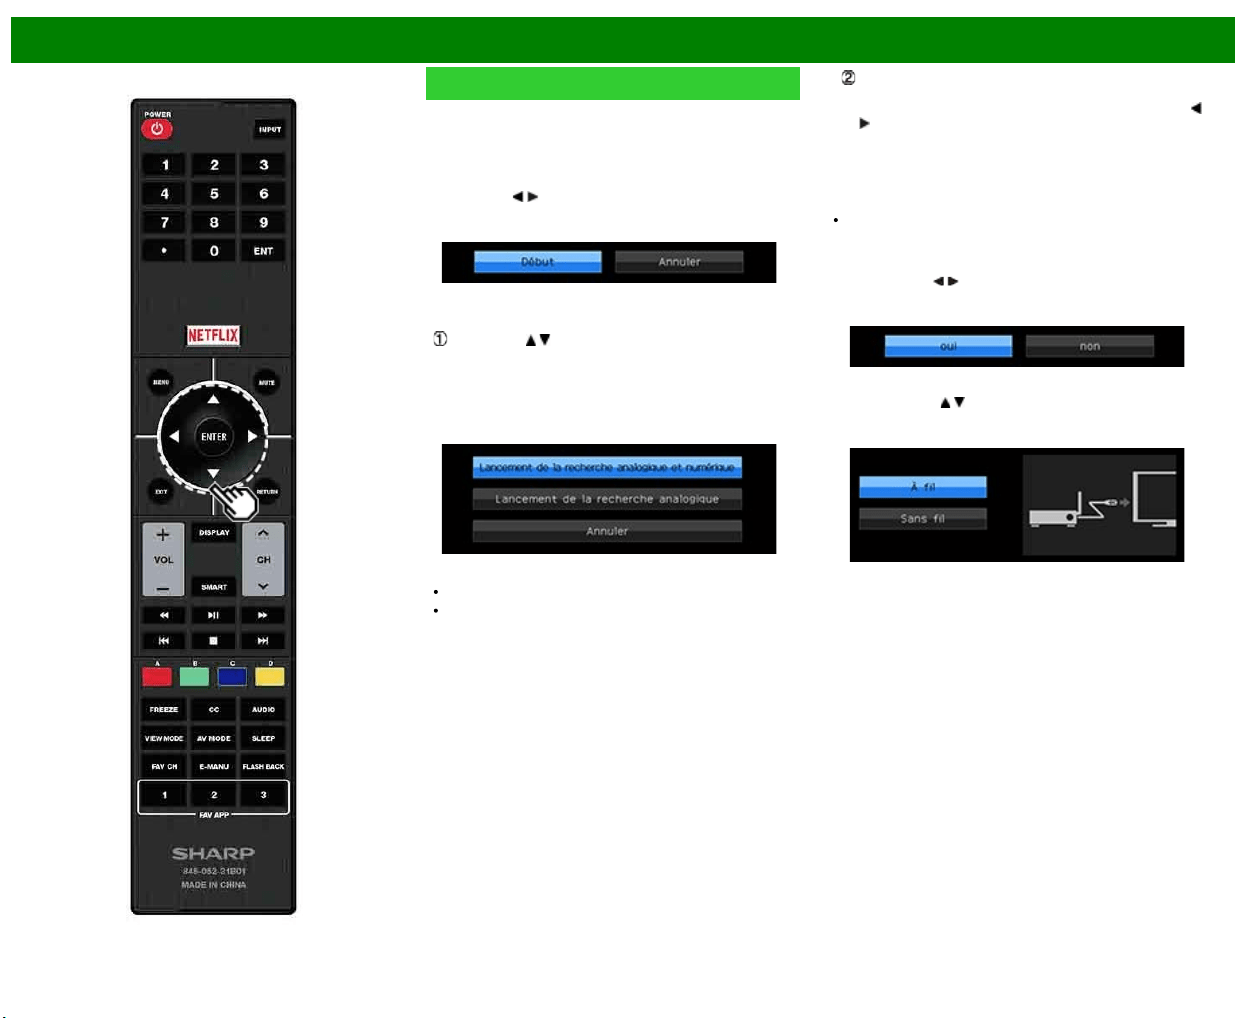
>>
<<
Pour regarder la télévision
FRA 2-5
Installation initiale (Suite)
Rech. Canal (Recherche des canaux)
Avec la recherche automatique des canaux, le téléviseur
recherche tous les canaux visibles dans la région
déterminée.
8 Avec «Ant» sélectionné dans Réglage de l'antenne :
Appuyez sur
/ pour sélectionner «Début», et appuyez
ensuite sur ENTER.
Avec «Câble» sélectionné dans Réglage de l'antenne :
Appuyez sur / pour sélectionner «Lancement de la
recherche analogique et numérique» afin de rechercher
à la fois les émissions analogiques et numériques, o
pour sélectionner «Lancement de la recherche
analogique» pour rechercher uniquement les émissions
analogiques, et appuyez ensuite sur ENTER.
La recherche de canaux démarre automatiquement.
Pour quitter l'écran de recherche de canaux,
sélectionnez «Annuler» et appuyez ensuite sur ENTER.
Les résultats de la recherche de canaux peuvent
comprendre des canaux cryptées ou des canaux qui ne
sont pas visibles dans la zone configurée. Appuyez sur
/ pour sélectionner «oui», et appuyez ensuite sur
ENTER pour supprimer les canaux cryptées.
Smart TV
Lorsque vous vous connectez à Internet via le téléviseur,
sélectionnez la méthode de connexion souhaitée et suivez
les instructions apparaissant à l'écran.
Vous ne pouvez utiliser la connexion LAN sans fil que si la
méthode WPS (bouton-poussoir) est utilisée. Si une autre
méthode est utilisée, effectuez les réglages via Smart TV
> Configuration Internet > Configuration de réseau.
9 Appuyez sur
/ pour sélectionner «oui», et appuyez
ensuite sur ENTER.
10 Appuyez sur / pour sélectionner «À fil» ou «Sans
fil», et appuyez ensuite sur ENTER.
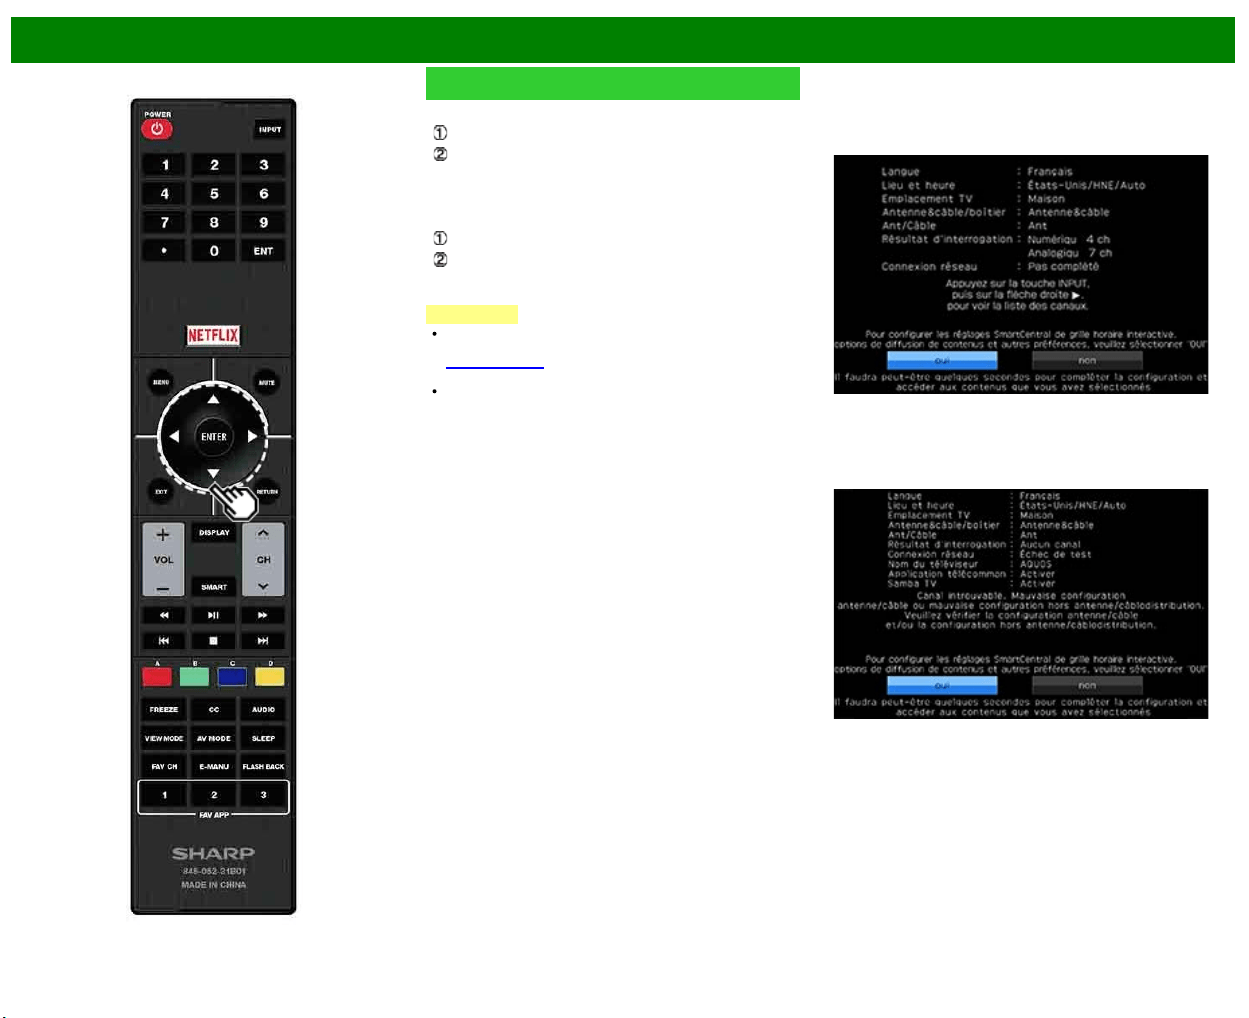
>>
<<
Pour regarder la télévision
FRA 2-6
Installation initiale (Suite)
Connexion à l'aide d'un câble ETHERNET
Sélectionnez «À fil» et appuyez sur ENTER.
Confirmez que le téléviseur est correctement raccordé
au routeur puis appuyez sur «Suiv.». Suivez les
instructions apparaissant à l'écran pour tester la
connexion.
Connexion LAN sans fil via la méthode WPS :
Sélectionnez «Sans fil» et appuyez sur ENTER.
Suivez les instructions apparaissant à l'écran, et
finalisez la configuration de la connexion après avoir
testé sa viabilité.
REMARQUE
Après avoir fini de configurer les paramètres réseau,
configurez le paramètre «Sél. nom appareil».
(Voir page 8-3.)
Lorsque vous modifiez les paramètres réseau, reportez-
vous à Smart TV > Configuration Internet > Configuration
de réseau.
Terminé
11 L'écran de confirmation des réglages est affiché.
Confirmez les informations affichées à l'écran, et
appuyez ensuite sur ENTER.
Exemples de l'écran de confirmation des réglages
Lorsqu'un ou plusieurs canaux sont reçus après la
sélection de «Antenne&câble» à l'étape 6 et qu'une
recherche a été effectuée.
Lorsque aucun canal n'est reçu après la sélection de
«Antenne&câble» à l'étape 6 et qu'une recherche a été
effectuée.
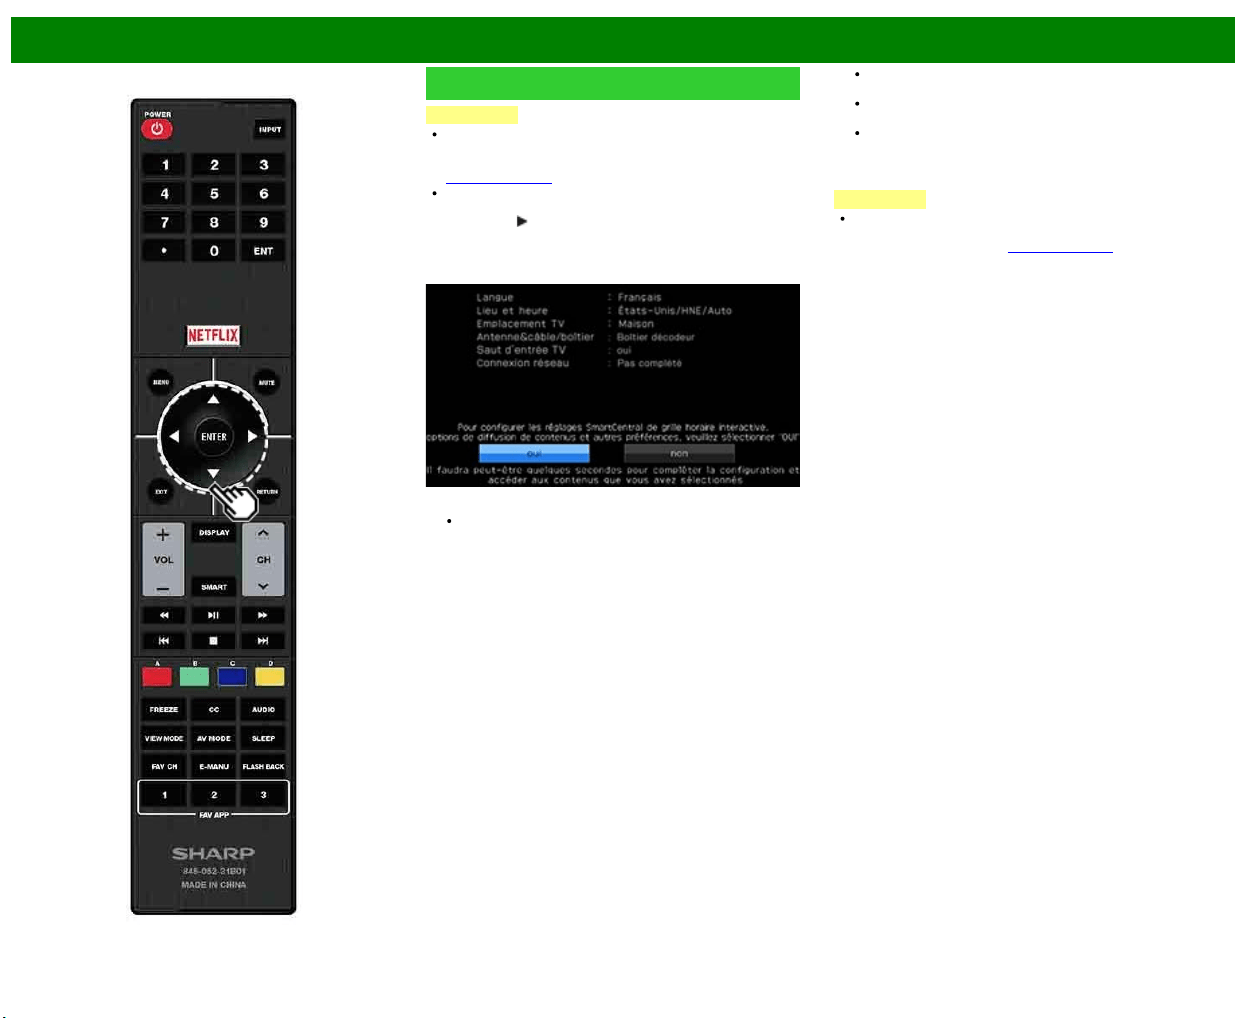
>>
<<
Pour regarder la télévision
FRA 2-7
Installation initiale (Suite)
REMARQUE
Si aucun canal n'est trouvé, vérifiez le type de
branchement qui a été effectué avec votre téléviseur et
tentez de nouveau «Configuration facile».
(Voir page 4-13.)
Pour consulter la liste des canaux trouvés pendant une
recherche de canaux, appuyez sur INPUT, et appuyez
ensuite sur
.
Lorsque «Boîtier décodeur» a été sélectionné à l'étape
6.
Cliquez sur «OK» pour afficher l'écran de confirmation
pour la commutation des sources d'entrée.
Afficher les entrées : Vous pouvez vérifier l'état de
connexion en cours de l'équipement externe. Confirmez
quelle borne d'entrée est connectée au boîtier décodeur.
OK : Cliquer sur «OK» terminera la procédure
d'Autoinstallation.
L'affichage peut être incorrect selon l'équipement
connecté.
L'affichage est incorrect lorsque l'équipement connecté
est éteint.
Pour regarder la TV par le biais d'un boîtier décodeur,
appuyez sur INPUT après avoir terminé les réglages
initiaux, et sélectionnez l'entrée sur laquelle le boîtier
décodeur est connecté.
REMARQUE
Pour changer les réglages de l'installation initiale,
procédez «Configuration facile» dans le menu
Configuration initiale à la
(Voir page 4-13.)
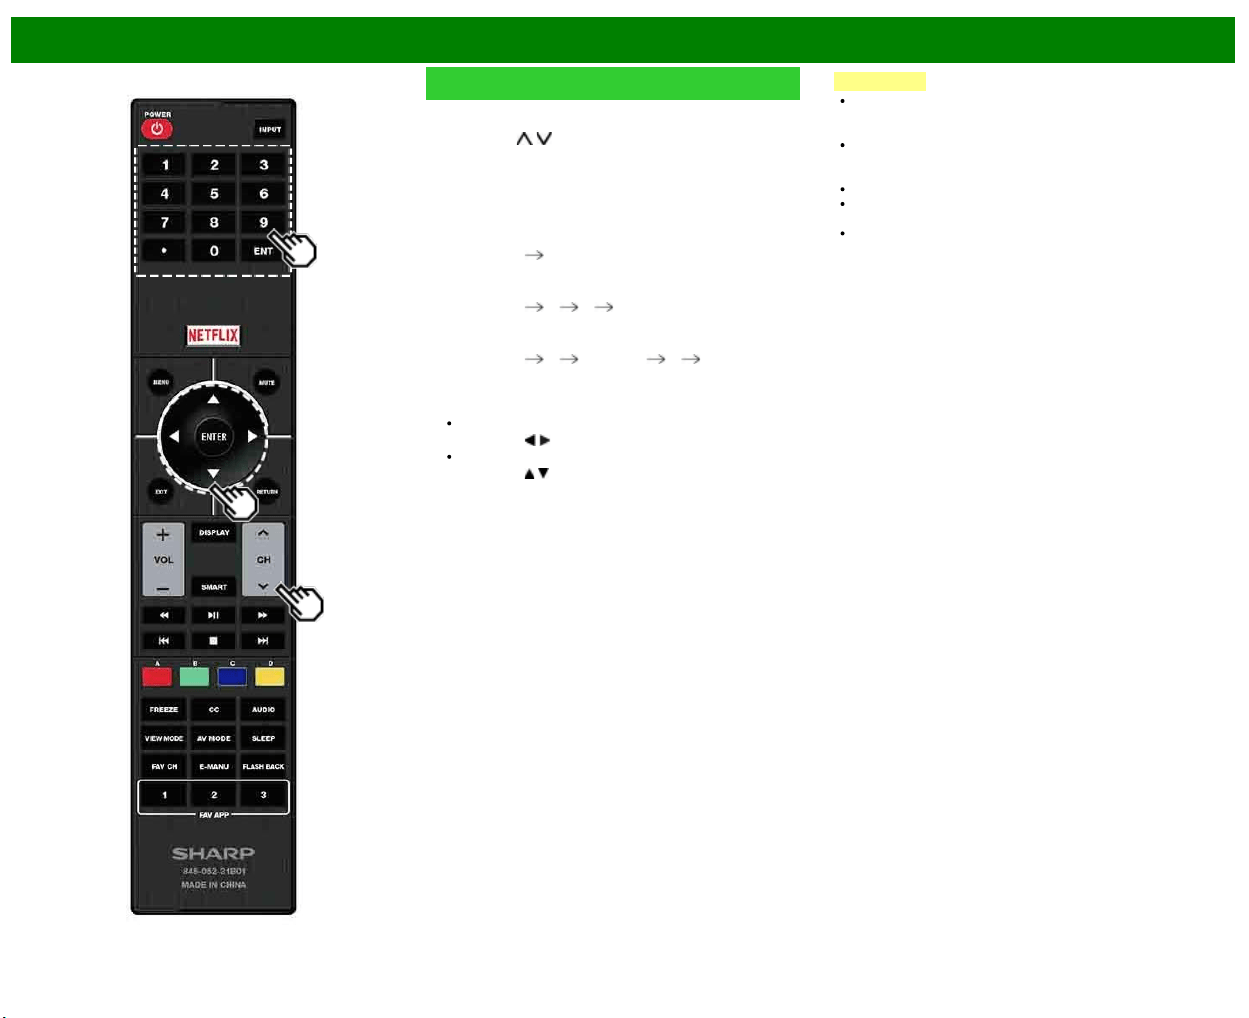
>>
<<
Touche de fonctionnement direct
FRA 3-1
Modifier les canaux
Vous pouvez modifier les canaux de différentes façons.
Méthode 1
En utilisant CH
/ de la télécommande ou sur le
téléviseur.
Méthode 2
Utilisation des touches de la télécommande 0-9, • (POINT).
Exemples :
Pour sélectionner un numéro de canal à 1 ou 2 chiffres
(par ex. le canal 5) :
Appuyez sur 5
ENTER
Pour sélectionner un numéro de canal à 3 chiffres (par
ex. le canal 115) :
Appuyez sur 1
1 5 ENTER
Pour sélectionner un numéro de canal à 4 chiffres (par
ex. le canal 22.1) :
Appuyez sur 2
2 • (POINT) 1 ENTER
Méthode 3
Sélection du programme dans Liste CH.
1 Appuyez sur INPUT sur la télécommande.
La liste d'entrée s'affiche.
2 Appuyez sur
/ pour sélectionner «Ant» ou «Câble».
La liste des canaux s'affiche.
3 Appuyez sur
/ pour sélectionner la chaîne de votre
choix, et appuyez ensuite sur ENTER.
REMARQUE
Lorsque vous sélectionnez un numéro de canal à 1
chiffre, il n'est pas nécessaire d'appuyer sur 0 avant le
chiffre.
Quand vous saisissez 0-9 uniquement, la sélection du
canal sera accomplie s'il n'y a pas d'opération pendant
quelques secondes.
En appuyant sur «0» tout seul, rien ne se produira.
Effectuez les opérations ci-dessus en quelques
secondes.
Quand vous saisissez 0-9 et • (POINT), la sélection du
canal sera accomplie s'il n'y a pas d'opération pendant
quelques secondes.
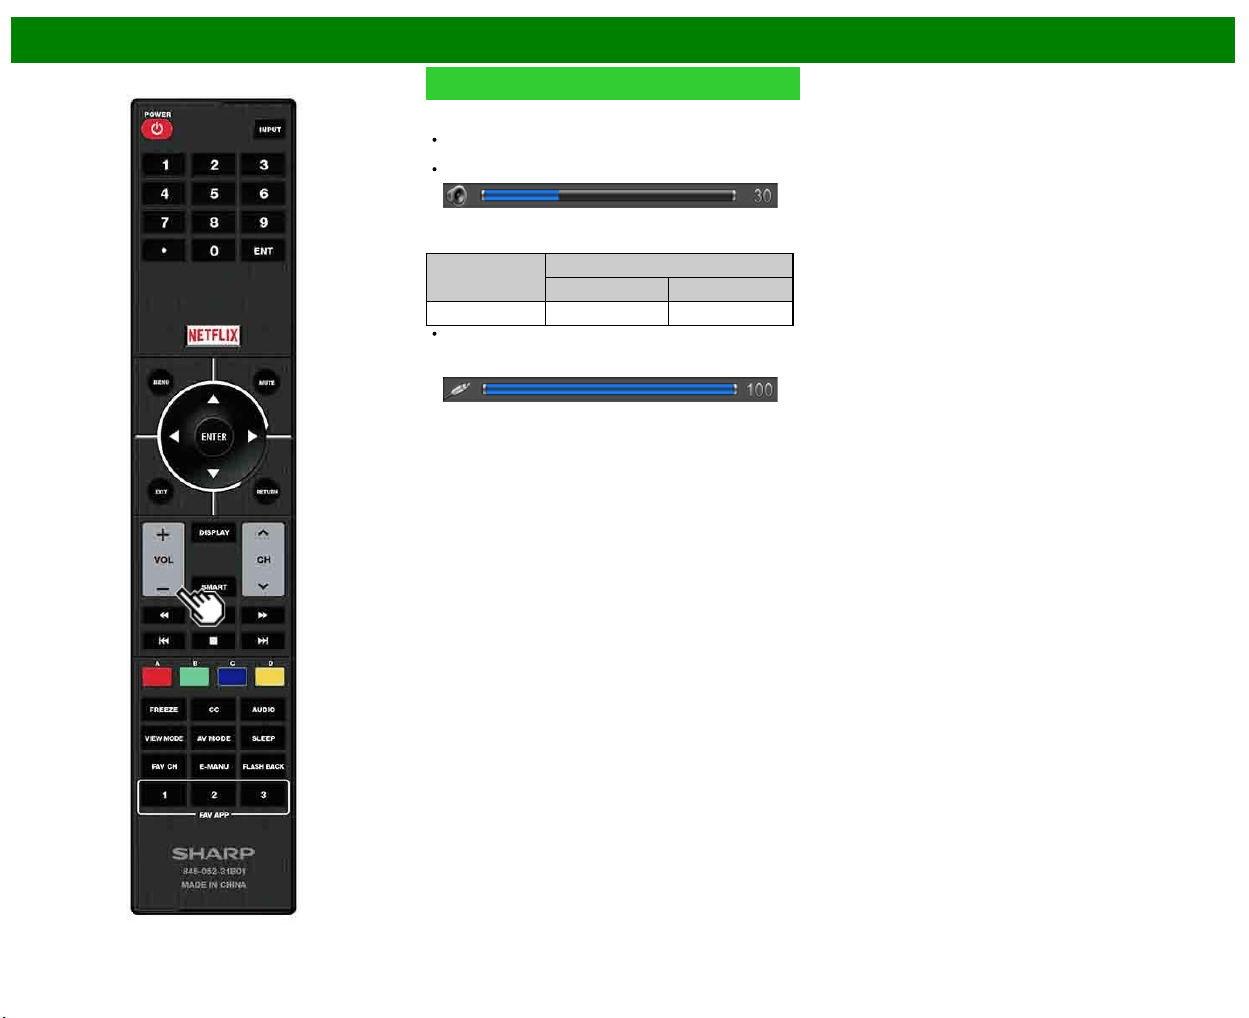
>>
<<
Touche de fonctionnement direct
FRA 3-2
Changer le volume
Vous pouvez changer le volume en appuyant sur VOL+/-
sur le téléviseur ou sur la télécommande.
Pour augmenter le volume, appuyez sur
VOL +.
Pour diminuer le volume, appuyez sur VOL -.
Statut audio
Appareil de
sortie
Sélect. sortie
Fixe Variable
Haut-parleur Son variable Sourdine
Lorsque «Sélect. sortie» est réglé sur «Variable»,
l'indicateur à l'écran change de la manière indiquée ci-
dessous.
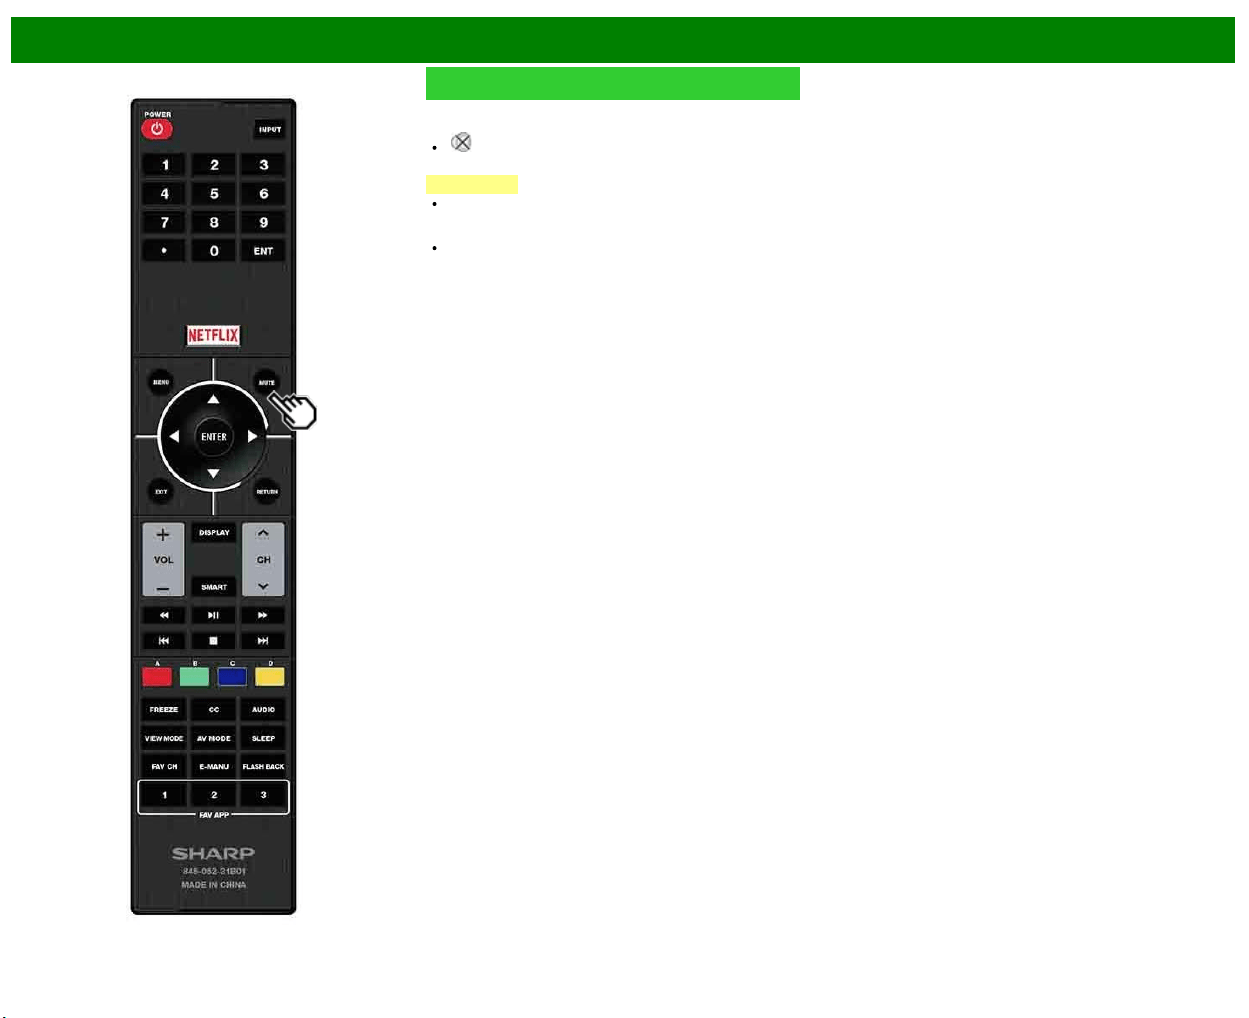
>>
<<
Touche de fonctionnement direct
FRA 3-3
MUTE
Coupe la sortie de son en cours.
Appuyez sur MUTE.
« » est affiché pendant 30 minutes à l'écran, et le son
est coupé.
REMARQUE
En appuyant sur MUTE durant les 30 minutes, la
sourdine peut être annulée en appuyant sur VOL+/- ou
MUTE.
La sourdine est annulée lorsque 30 minutes se sont
écoulées. Toutefois, le son ne sort pas brusquement à
plein volume car le niveau du volume est
automatiquement réglé sur 0.

>>
<<
Touche de fonctionnement direct
FRA 3-4
FREEZE
Vous permet de capturer et faire un arrêt sur image d'une
image mobile en cours de visionnement.
Appuyez sur FREEZE.
Une image mobile est saisie.
Appuyez à nouveau sur FREEZE pour annuler la
fonction.
REMARQUE
Si cette fonction n'est pas disponible, «Pas d'affichage
d'image fixe disponible.» s'affiche.
L'image fixe disparaît automatiquement au bout de 30
minutes.
Si vous utilisez la fonction d'arrêt sur image et qu'une
émission active le BLOCAGE V-CHIP, la fonction d'arrêt
sur image sera annulée et un message BLOCAGE V-
CHIP apparaîtra.
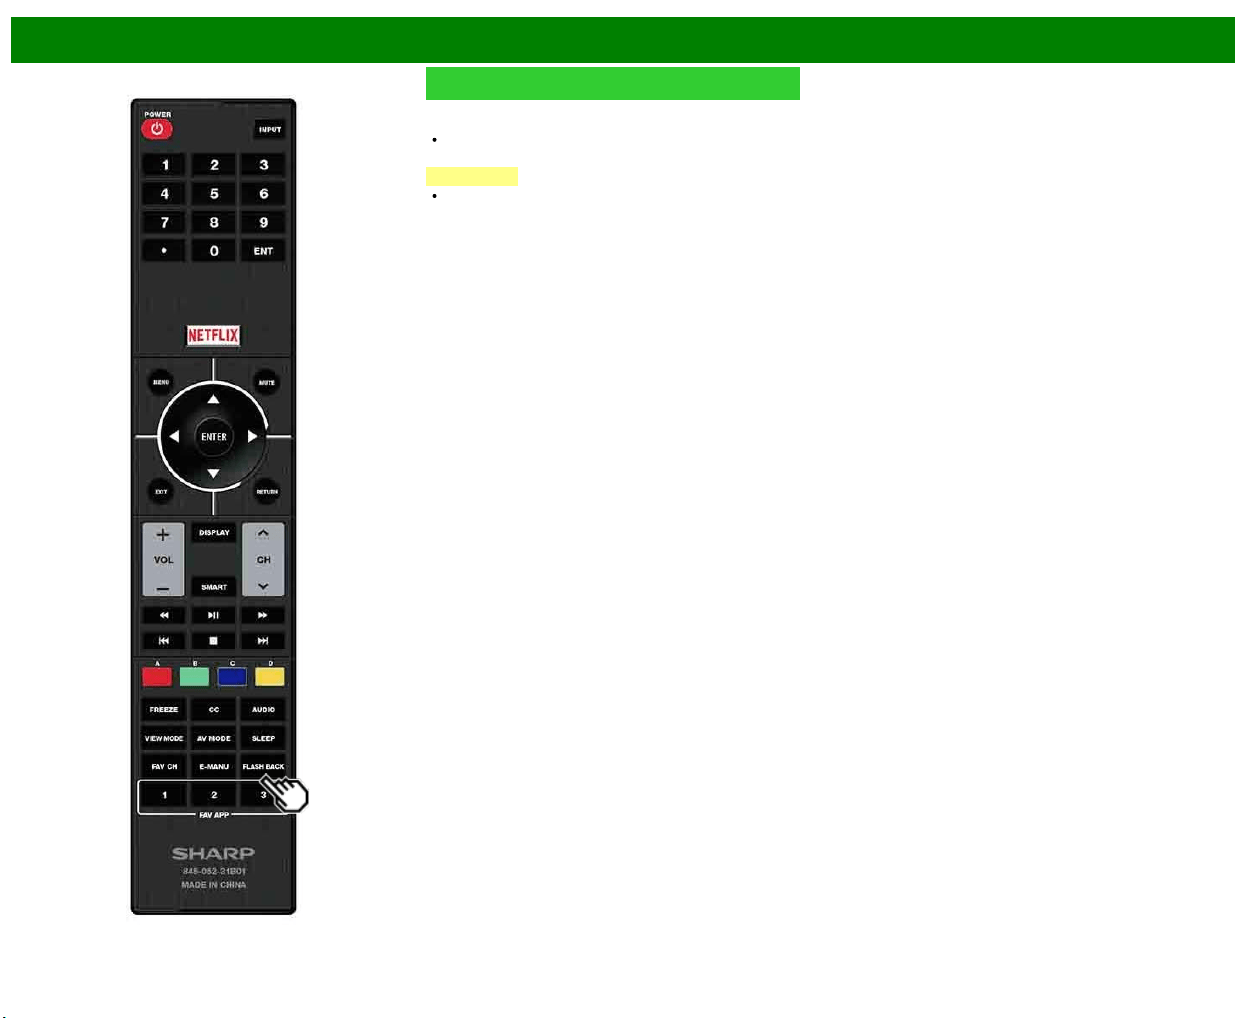
>>
<<
Touche de fonctionnement direct
FRA 3-5
FLASH BACK
Appuyez sur FLASHBACK pour passer au canal
précédemment syntonisé ou au mode d'entrée précédent.
Appuyez à nouveau sur FLASHBACK pour revenir au
canal actuellement syntonisé.
REMARQUE
FLASH BACK ne fonctionne pas si aucun canal n'a été
changé après la mise sous tension du téléviseur.
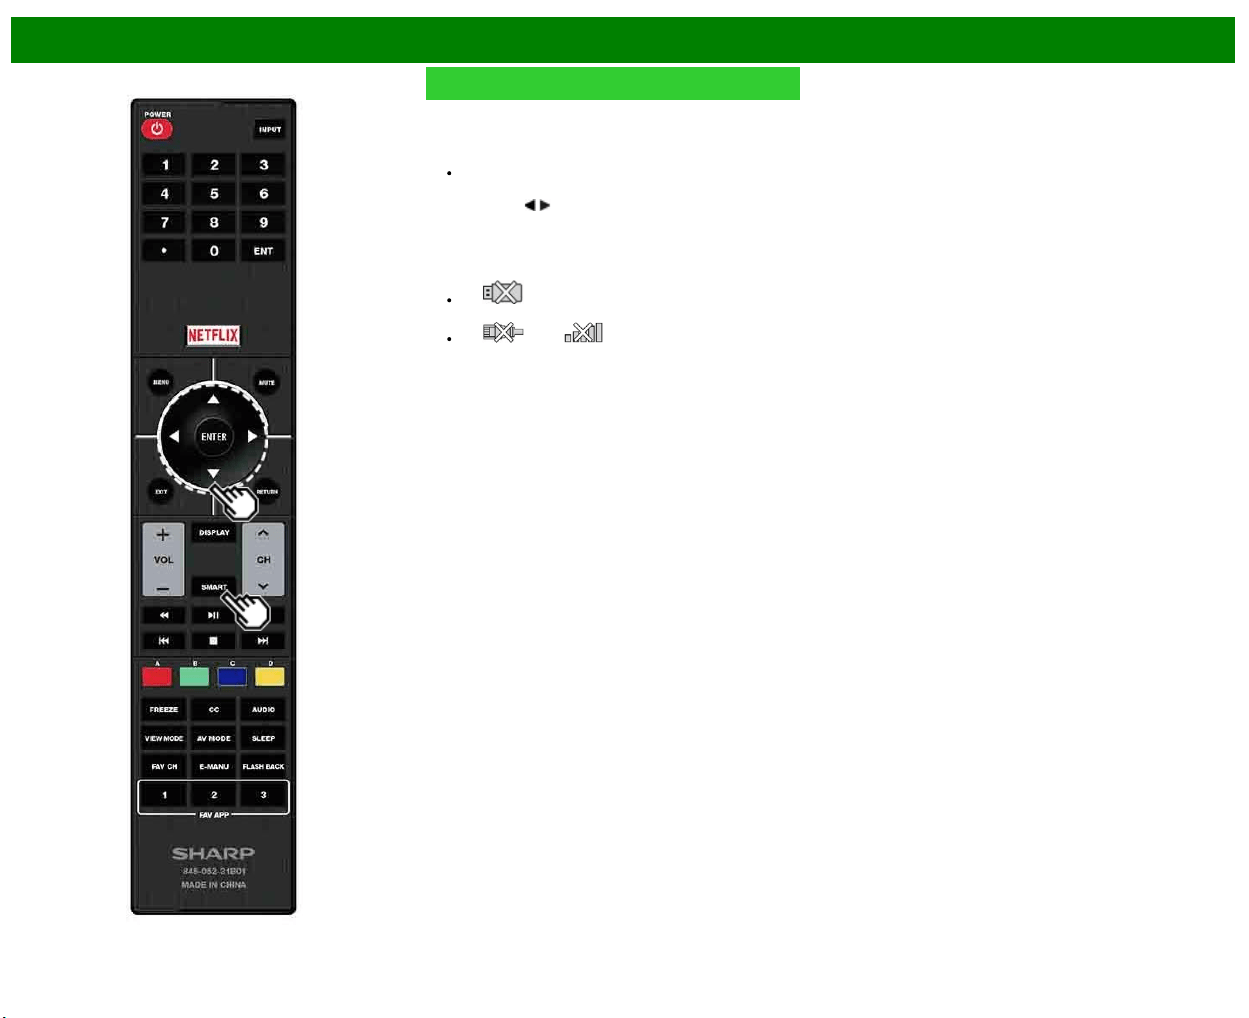
>>
<<
Touche de fonctionnement direct
FRA 3-6
SMART
Vous permet d'activer directement divers types
d'applications.
1 Appuyez à nouveau sur SMART pour revenir au canal
actuellement syntonisé.
Appuyez à nouveau sur SMART pour revenir au canal
actuellement syntonisé.
2 Appuyez sur
/ pour sélectionner l'application de votre
choix, et appuyez ensuite sur ENTER.
Si vous avez modifié l'affichage de la liste des applications
à
l'étape
1,
sélectionnez
une
catégorie,
puis
une
application
1, select a category and then an application.
Si « » s'affiche après que vous avez commuté
en mode USB, vérifiez la connexion USB.
Si « » ou « » s'affiche après que vous
avez commuté sur le mode Réseau personnel ou
après que vous vous êtes connecté à Internet, vérifiez
les réglages du réseau et la connexion de votre
téléviseur.

>>
<<
Touche de fonctionnement direct
FRA 3-7
NETFLIX
Affiche l'écran Netflix.
Appuyez sur NETFLIX.
REMARQUE
Si vous actionnez le bouton NETFLIX lorsque le téléviseur
est éteint, celui-ci s'allume et l'écran NETFLIX s'affiche.
Pour profiter de Netflix, vous devez effectuer/avoir :
—une connexion Internet à haut débit
—des réglages de Configuration Internet
—des ajustements pour Netflix
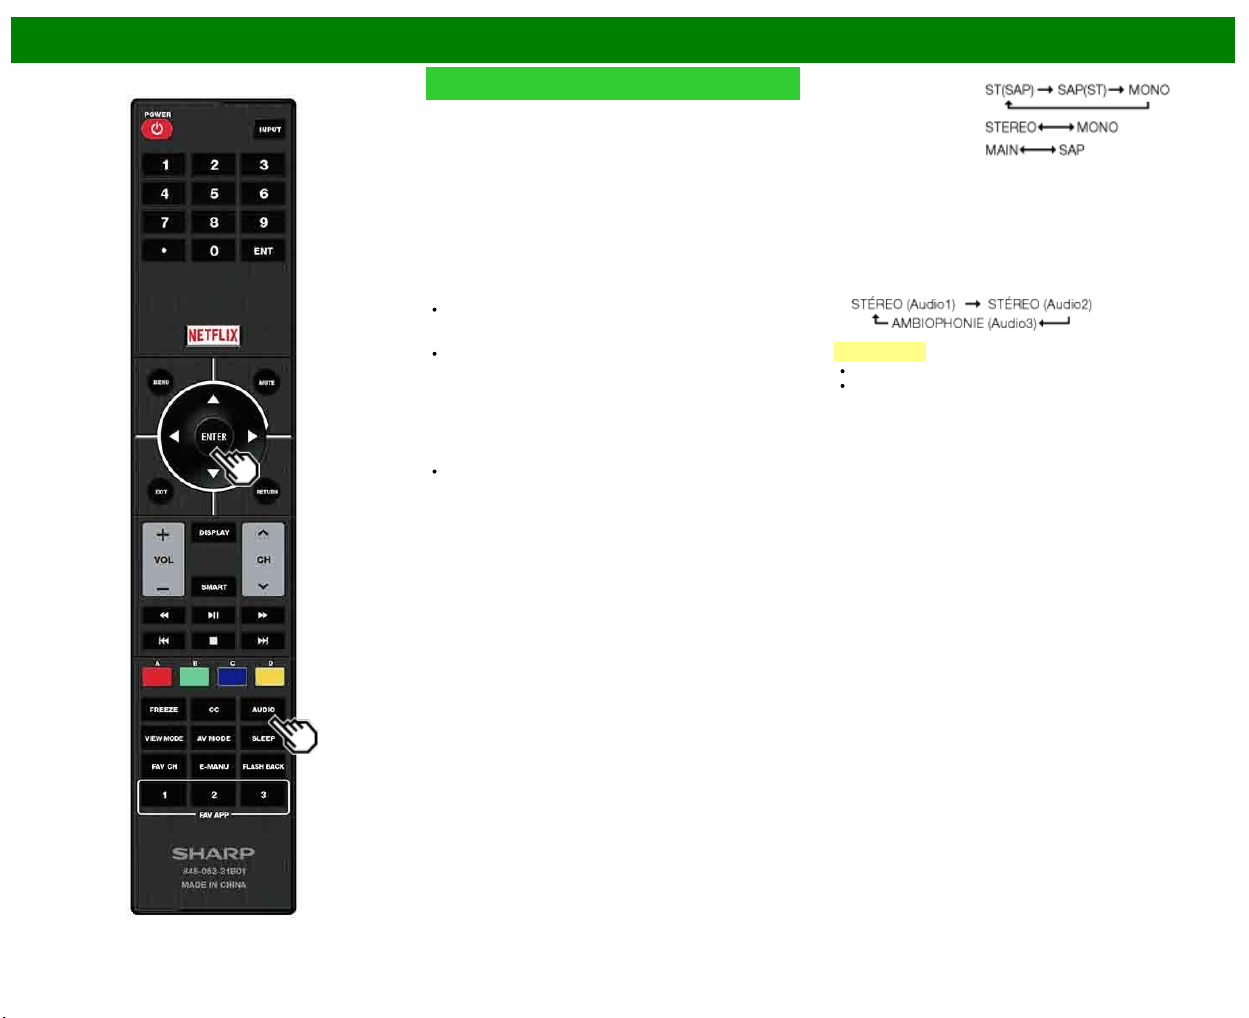
>>
<<
Touche de fonctionnement direct
FRA 3-8
AUDIO
Mode stéréo MTS/SAP
Le téléviseur est doté d'une fonction permettant la réception
sonore d'un autre son que le son principal de l'émission.
Cette fonction est appelée Son télévisé multicanaux (Multi-
channel Television Sound : MTS). Le téléviseur doté de la
fonction MTS peut recevoir le son mono, le son stéréo et les
programmes audio secondaires (SAP). Cette fonction SAP
permet à une station de télévision de diffuser d'autres
informations, comme le son dans une autre langue ou
quelque chose d'entièrement différent, comme le bulletin
météorologique par Exemple.
Vous pourrez apprécier le son stéréo Hi-fi ou les
émissions SAP disponibles.
Émissions stéréo : Pour regarder des programmes
comme des manifestations sportives, des spectacles
et des concerts avec un son stéréo dynamique.
Émissions SAP : Pour la réception des émissions avec
le son MAIN ou le son SAP.
Son MAIN (principal) : piste sonore normale de l'émission
(en mono ou en stéréo).
Son SAP : pour l'écoute d'une seconde langue, d'un
commentaire supplémentaire ou d'une autre information.
(SAP est un son mono.)
Si le son stéréo est difficile à entendre.
Obtenez un son plus net en passant manuellement au
mode de son mono fixe.
Vous pouvez modifier MTS comme indiqué ci-dessous pour
qu'il corresponde au signal de l'émission de télévision.
Appuyez sur AUDIO pour basculer entre les modes audio.
Exemples : pour la réception MTS et SAP
Mode STÉRÉO :
Mode STÉRÉO + SAP :
Mode MAIN + SAP :
Mode MONO : MONO
Mode audio d'émission numérique
Les types audio transmis dans une émission numérique sont
AMBIOPHONIE ainsi que MONO et STÉRÉO. En outre, il
est possible pour les pistes audio multiples d'accompagner
une piste vidéo simple.
Appuyez sur ENTER pour basculer entre les modes audio.
Exemple : lors de la réception d'émissions numériques
REMARQUE
MTS ne fonctionne qu'en mode TV.
Vous pouvez obtenir les mêmes réglages en choisissant
«Changer audio» dans les rubriques du menu.
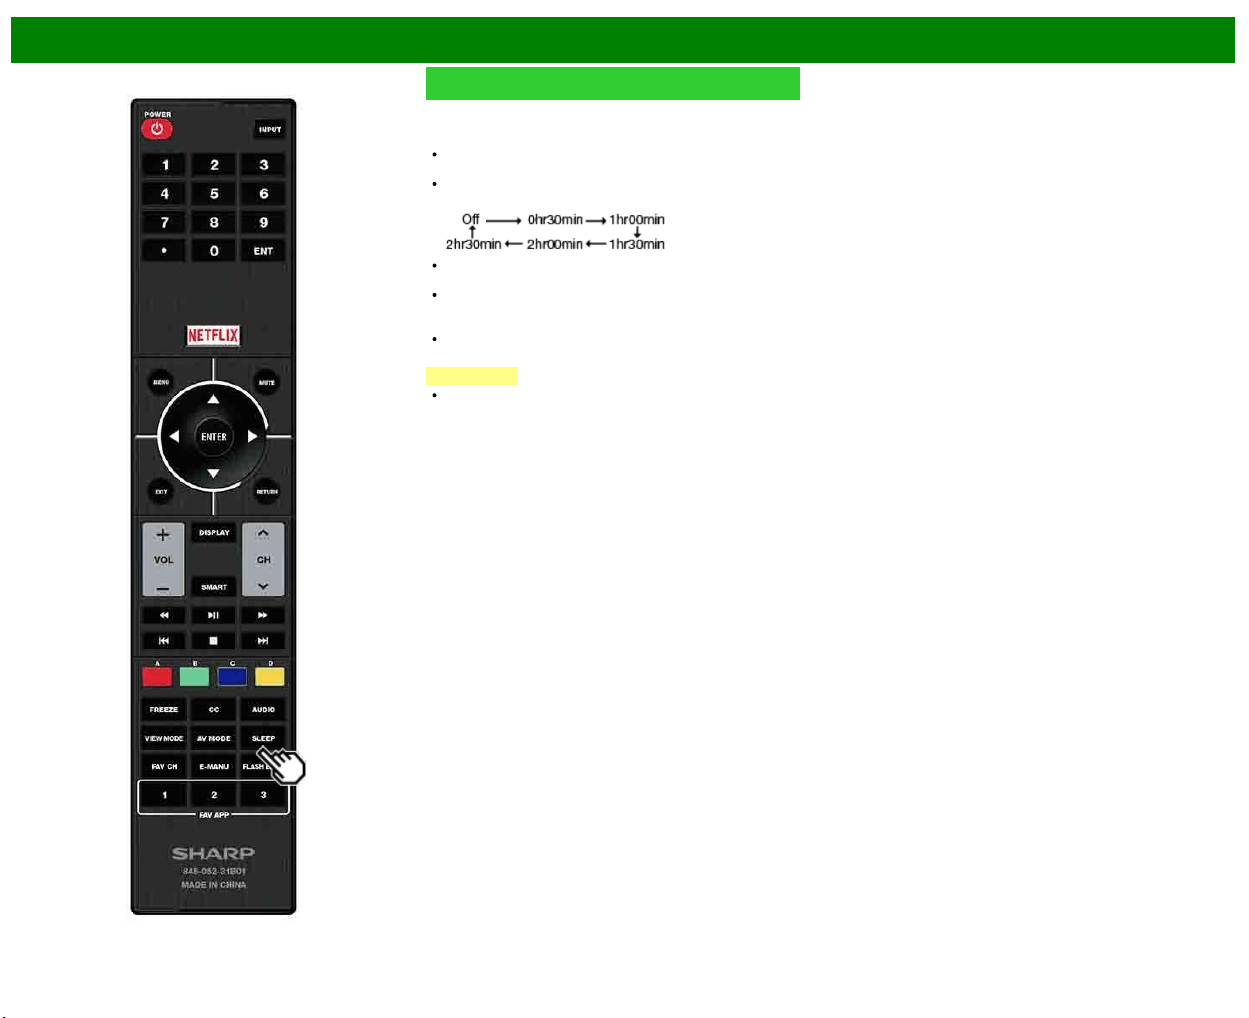
>>
<<
Touche de fonctionnement direct
FRA 3-9
Minuterie d'extinction
Vous permet de régler l'heure à laquelle le téléviseur se
mettra automatiquement en mode d'attente.
Appuyez sur SLEEP.
Le temps restant s'affiche lorsque la minuterie a été
réglée.
A chaque pression sur SLEEP, le temps restant change
de la manière suivante.
Le compte à rebours commence automatiquement
lorsque la minuterie d'extinction est réglée.
Si vous désirez ajuster la minuterie d'extinction, vous
pouvez appuyer deux fois sur SLEEP, puis changez le
réglage de l'heure.
5 minutes avant l'expiration de la durée réglée, la durée
restante s'affiche toutes les minutes.
REMARQUE
Le téléviseur entrera en attente lorsque le temps restant
atteindra 0.

>>
<<
Touche de fonctionnement direct
FRA 3-10
AV MODE
Le MODE AV vous offre plusieurs options de visionnement
à partir desquelles vous pouvez sélectionner celle qui
convient le mieux à l'environnement du téléviseur, qui peut
varier en raison de facteurs comme la luminosité de la
pièce, le type de programme regardé ou le type de l'appareil
connecté.
Appuyez sur AV MODE. Le MODE AV actuel s'affiche.
Appuyez de nouveau sur AV MODE avant que le mode
affiché à l'écran ne disparaisse.
Le mode change comme indiqué ci-dessous :
Exemple:
Lorsque
vous
utilisez
les
bornes
COMPONENT /
VIDEO
ou
VIDEO
Exemple:
Lorsque
vous
utilisez
le
PC
IN ou
HDMI
IN 1
à
3
bornes
>>
<<
Touche de fonctionnement direct
FRA 3-11
AV MODE (Suite)
STANDARD (ENERGY STAR) : Pour une image haute
définition sous un éclairage normal.
CINÉMA : Pour un film.
PC : Pour PC.
UTILISATEUR : Permet à l'utilisateur de personnaliser les
réglages. Vous pouvez régler le mode pour chaque
source d'entrée.
DYNAMIQUE : Pour une image nette avec des contrastes
accentués, pratique pour regarder les sports.
DYNAMIQUE(Fixé) : Change les réglages de l'image et du
son aux valeurs préréglées d'usine. Aucun ajustement
n'est toléré.
REMARQUE
Vous pouvez sélectionner une rubrique du MODE AV
différente pour chaque mode d'entrée. (Par Exemple,
sélectionnez STANDARD (ENERGY STAR) pour l'entrée
TV et DYNAMIQUE pour COMPOSANT.)
Vous ne pouvez pas régler les options «PC» lorsque le
téléviseur est connecté à Internet.
Vous ne pouvez pas régler l'option «PC» lorsque la
source d'entrée est «Réseau personnel(Home Network)»
ou «USB».
Vous pouvez obtenir les mêmes réglages en choisissant
«MODE AV» dans les rubriques du menu.
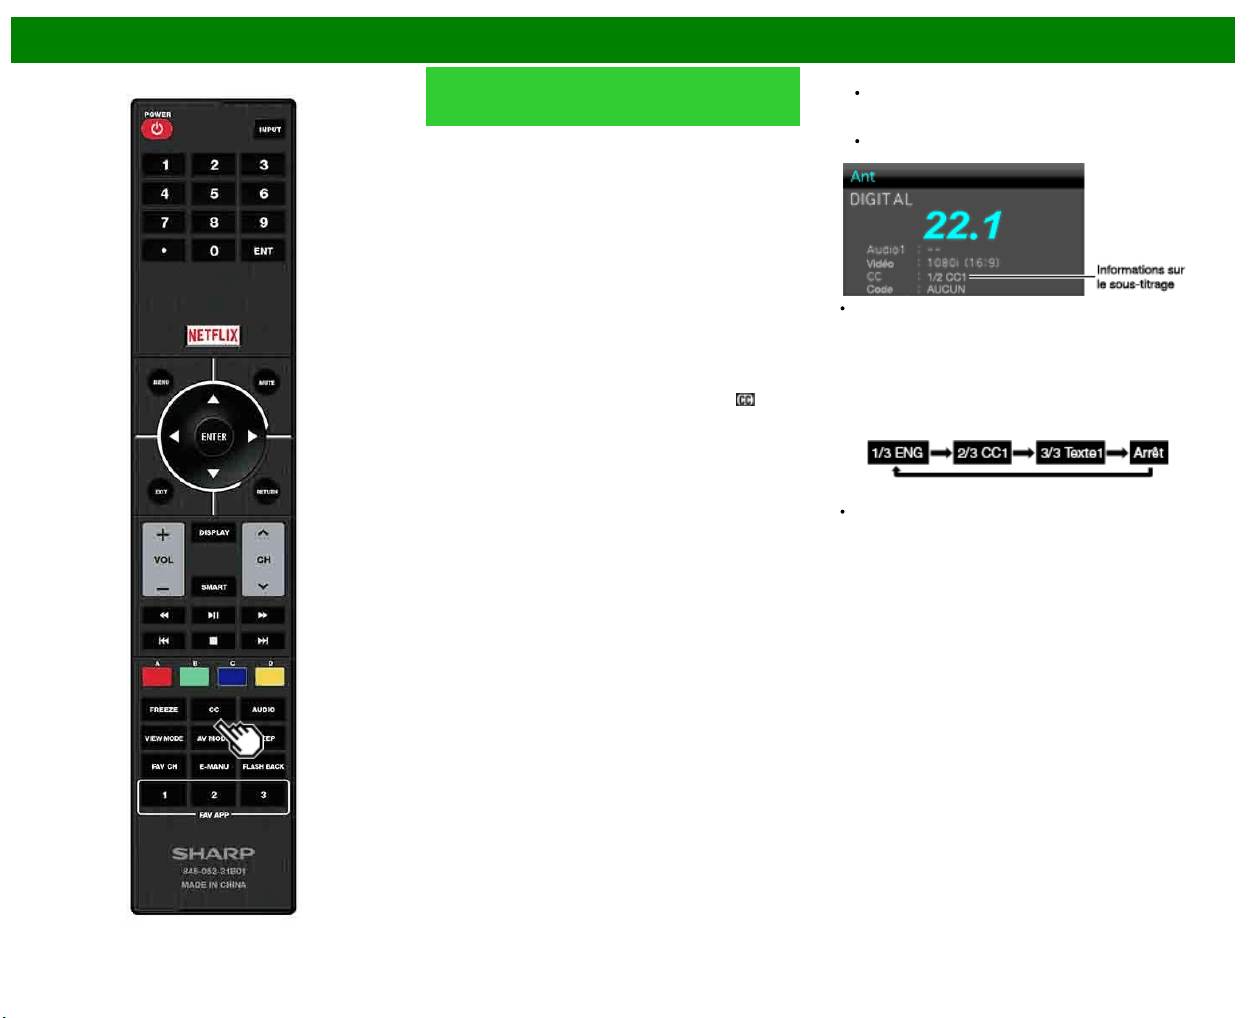
>>
<<
Touche de fonctionnement direct
FRA 3-12
Sous-titrage et sous-titrage
numérique
Votre téléviseur est doté d'un décodeur de sous-titres
interne. Ce qui vous permet de regarder des conversations,
des narrations et des effets sonores sous forme de sous-
titres sur votre téléviseur. Le sous-titrage est disponible sur
certains programmes télévisés et sur certaines cassettes
vidéo VHS, au gré du fournisseur de programme.
Le sous-titrage numérique est un nouveau service de sous-
titres disponible uniquement sur les programmes de
télévision numérique (également au gré du fournisseur de
service). Il s'agit d'un système plus flexible que le système
de Sous-titrage original, car il offre un large choix de
formats de sous-titre et de styles de police. Lorsque le
sous-titrage numérique est utilisé, il sera indiqué sous
l'apparence d'une abréviation à 3 lettres indiquant également
la langue des sous-titres numériques : ENG (Anglais) ou
SPA (Espagnol) ou FRA (Français) ou d'autres codes de
langue.
Tous les programmes et les cassettes vidéo VHS ne sont
pas dotés de sous-titres. Recherchez le symbole «
»
pour vous assurer que les sous-titres seront indiqués.
Dans le système de Sous-titrage, plus d'un service de sous-
titre peut être fourni. Chacun est identifié par son propre
numéro. Les services «CC1» et «CC2» affichent les sous-
titres des programmes télévisés superposés sur l'image des
programmes.
Dans le système de Sous-titrage, les services «Texte1» ou
«Texte2» affichent un texte sans rapport avec le programme
actuellement visionné (par Exemple, la météo ou les
informations). Ces services sont également superposés sur
le programme que vous êtes entrain de regarder.
1 Appuyez sur CC.
Ceci affichera les informations sur le sous-titrage.
2 Appuyez sur CC pendant que les informations sur le
sous-titrage sont à l'écran.
Appuyez de façon répétée jusqu'à la sélection du
service de sous-titrage désiré.
Selon le nombre de services de sous-titrage dans le
signal reçu, vous verrez des informations comme 1/2 ou
1/4 s'afficher.
1/2 indique le «premier des deux services».
Exemple :
Si le programme comprend 3 services (Numérique CC
(ENG), CC1 et Texte1), le sous-titrage change dans cet
ordre :
La touche CC garde en mémoire le dernier service
sélectionné.
Si le dernier mode de sous-titrage (par Exemple, 1/3
ENG) que vous avez sélectionné n'est pas disponible
pour le prochain programme, ou sur un autre canal, le
service de sous-titrage disponible est automatiquement
sélectionné et il apparaît entre parenthèses, par Exemple
«1/3 (CC1)».
Les services de sous-titrage qui apparaissent entre
parenthèses ne seront pas gardés dans la mémoire de la
touche CC en tant que dernier service sélectionné. Seuls
les services que vous avez sélectionnés avec la touche
CC sont enregistrés.
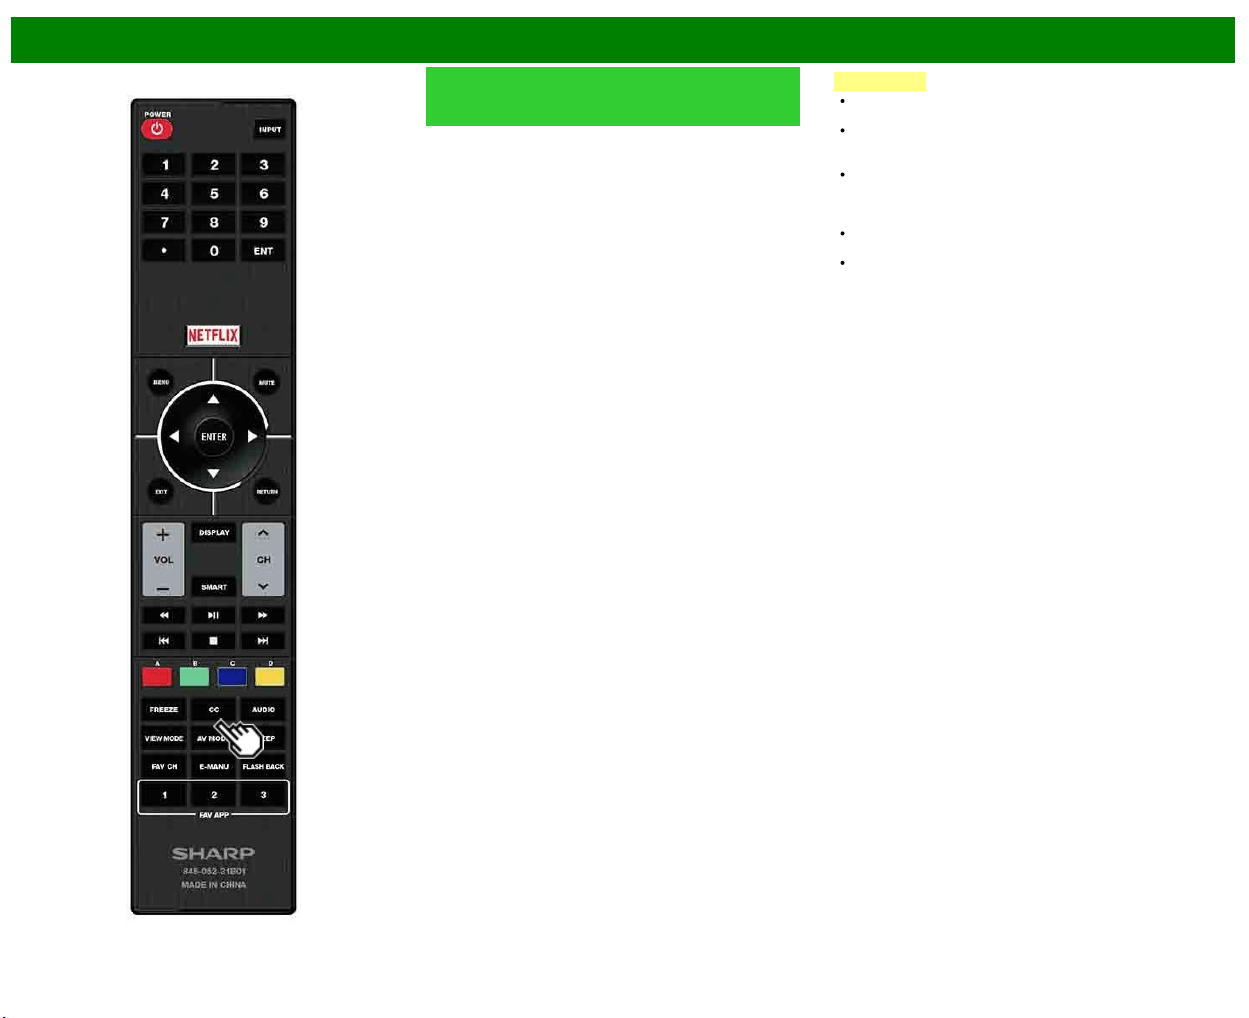
>>
<<
Touche de fonctionnement direct
FRA 3-13
Sous-titrage et sous-titrage
numérique (Suite)
Exemples :
Au cas où deux services de sous-titrage seraient fournis,
(par Exemple, Numérique CC(ENG) et CC1) et que
Numérique CC(ENG) s'affiche en tant que sélection actuelle,
si Numérique CC(ENG) n'est pas transmis pour le prochain
programme, l'autre service de sous-titre, CC1, sera affiché
entre parenthèses.
Un service de sous-titrage apparaît entre parenthèses parce
que le service que vous avez sélectionné n'est pas
disponible et qu’un service différent est affiché sur votre
écran. «1/1(CC1)» est affiché au lieu de «1/2/ENG».
REMARQUE
Si le programme ne contient aucun sous-titre, «--»
s'affiche dans les informations sur le sous-titrage.
Si le code de la langue n'est pas trouvé, par Exemple,
«ENG» n'est pas trouvé sur les émissions de télévision
numérique, «--» apparaîtra.
Quatre types de service de sous-titrage (CC1, CC2,
Texte1, Texte2) sont potentiellement disponibles, mais il
se peut qu'une émission n'en contienne aucun ou
seulement une partie, au gré du fournisseur de service.
Si une page Web est affichée, le sous-titrage n'est pas
disponible.
Vous pouvez obtenir les mêmes réglages en choisissant
«Changer cc» dans les rubriques du menu.
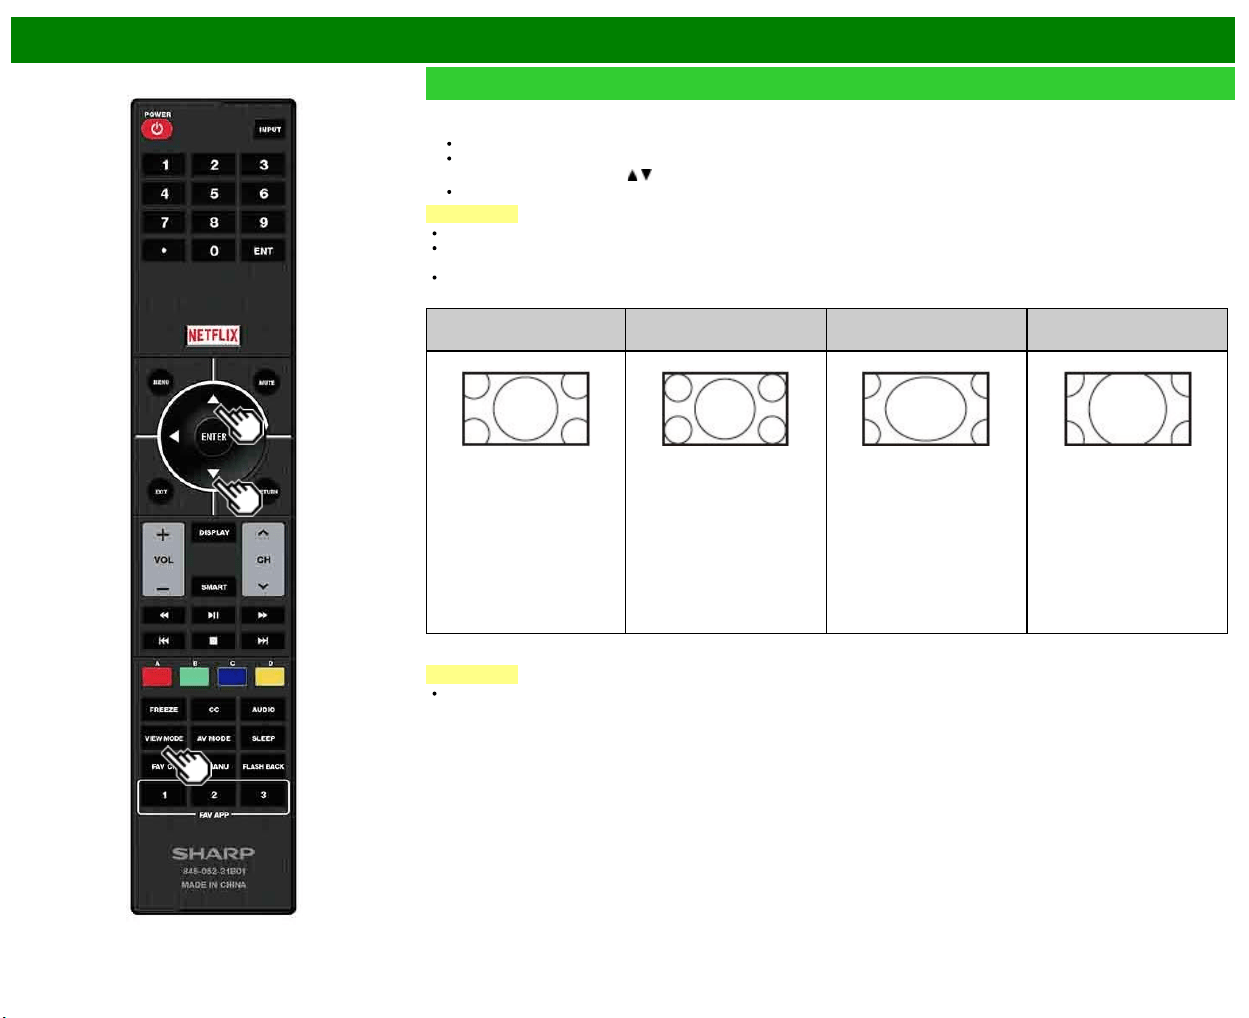
>>
<<
Touche de fonctionnement direct
FRA 3-14
VIEW MODE
Vous pouvez sélectionner la taille de l'image.
1 Appuyez sur VIEW MODE.
Le menu Mode vue s'affiche.
Le menu donne une liste des options du Mode vue sélectionnables pour le type de signal vidéo actuellement reçu.
2 Appuyez sur VIEW MODE ou
/ lorsque le menu du Mode vue est affiché pour sélectionner la rubrique désirée sur le menu.
Vous pouvez ensuite sélectionner un Mode vue ayant son propre rapport hauteur/largeur.
REMARQUE
Vous pouvez obtenir les mêmes réglages en choisissant «Mode vue» dans les rubriques du menu.
Chaque fois que vous appuyez sur VIEW MODE lorsqu’un écran de navigateur est affiché; le modèle d’affichage change entre un
écran Site web seul et un écran TV+Web.
Exécutez cette fonction pendant l'entrée d'autres types de signaux (tels que Full HD).
Pour les programmes HD
Allonge
Pt par Pt (Plein Écran)
Allonge Smart
(Intelligent allongé)
Zoom
Convient au visionnement
d'émissions au rapport de
format grand écran 1,78 :
1. Le mode allongé
présente encore de très
minces bandes noires en
haut et en bas de l'écran.
«Pt par Pt» lorsque le nombre
de pixels sur l'écran et la
résolution du signal sont
identiques.
«Plein Écran» lorsque le
nombre de pixels sur
l'écran et la résolution du
signal sont différentes.
Dans un cas comme dans
l'autre, image occupe la
totalité de l'écran.
Convient pour allonger les
émissions en 4 : 3 et
remplir l'écran.
Convient au visionnement
d'émissions au rapport de
format grand écran 2,35 : 1
sur un affichage plein
écran.
REMARQUE
Si vous utilisez Pt par Pt ou Plein Écran, il se peut qu'apparaissent des parasites ou des barres aux abords des différentes
parties extérieures de l'écran. Changez le mode de vue pour y remédier.
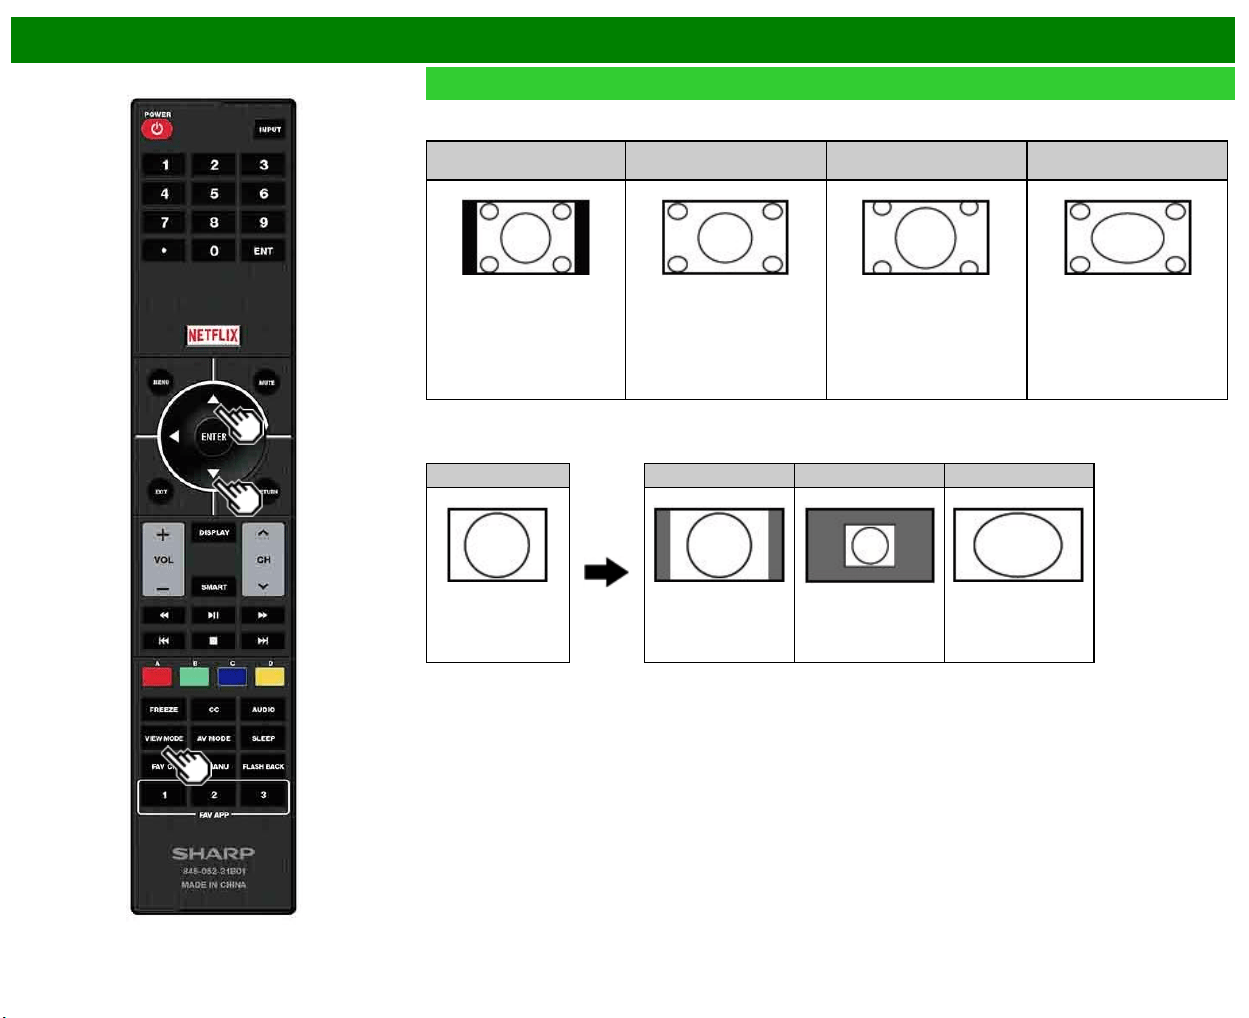
>>
<<
Touche de fonctionnement direct
FRA 3-15
VIEW MODE (Suite)
Pour programmes 4 : 3
Exemple : Taille des images à l'écran
Barre Latérale
Allonge Smart
(Intelligent allongé)
Zoom Allonge
Convient pour regarder des
émissions ordinaires en 4 : 3
dans leur format normal.
Convient pour allonger les
émissions en 4 : 3 et remplir
l'écran.
Convient pour regarder des
DVD anamorphiques grand
écran 2,35 : 1 sur plein écran.
Ce mode est pratique pour les
DVD 1,78 : 1.
Lors du visionnement de DVD
1,85 : 1, le mode allongé
présente encore de très
minces bandes noires en haut
et en bas de l'écran.
Pour USB-Vidéo, Réseau personnel vidéo ou applications Internet
Exemple : Taille des images à l'écran
Signal d'entrée Auto Original Allonge
Conserve le rapport
hauteur/largeur
original dans un
affichage plein écran.
Affiche une image en
taille originale.
L'image remplit
entièrement l'écran.
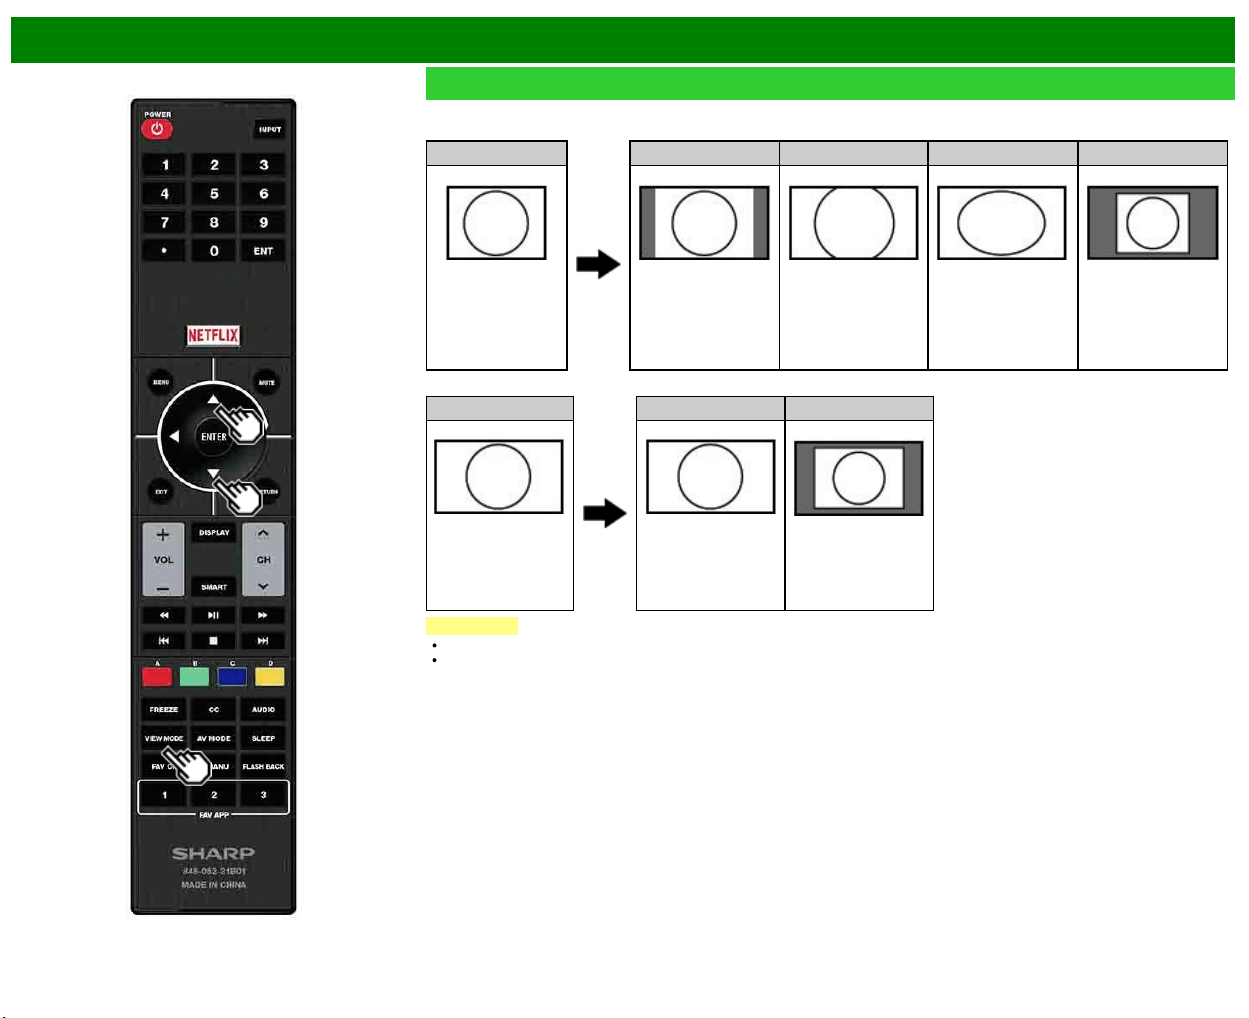
>>
<<
Touche de fonctionnement direct
FRA 3-16
VIEW MODE (Suite)
Pour PC
Exemple : Taille des images à l'écran
Signal d'entrée Normal Zoom Allonge Pt par Pt
4 : 3 Conserve le rapport
hauteur/largeur
original dans un
affichage plein écran.
Convient aux
émissions au rapport
de format grand
écran. Le haut et le
bas de l'image sont
coupés.
L'image remplit
entièrement l'écran.
Détecte la résolution
du signal et affiche
une image avec le
même nombre de
pixels à l'écran.
Signal d'entrée Allonge Pt par Pt
16 : 9 L'image remplit
entièrement l'écran.
Détecte la résolution
du signal et affiche
une image avec le
même nombre de
pixels à l'écran.
REMARQUE
Branchez l'ordinateur avant de procéder aux réglages. Voir le Guide de configuration.
La taille de l'image sélectionnable peut varier selon le type de signal.
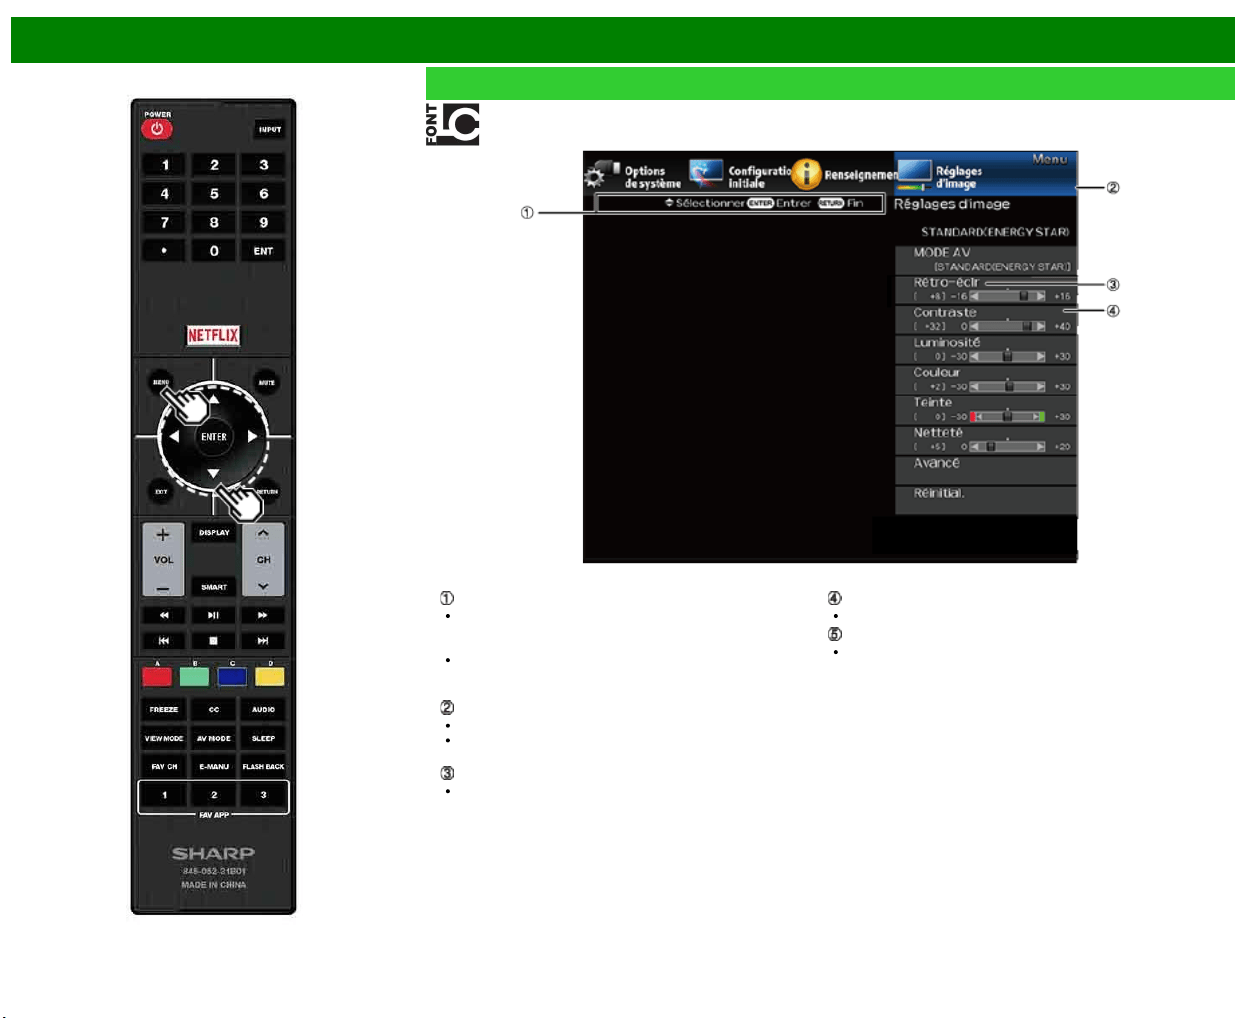
>>
<<
Menu d'affichage sur l'écran
FRA 4-1
Introduction
LCFONT intégrée
Guide d'affichage
Ceci représente les boutons qui peuvent être utilisés sur
l'écran affiché. Le guide d'affichage varie en fonction de
l'écran de réglage du menu.
Les opérations de certaines rubriques sélectionnées
peuvent s'afficher dans la barre du guide opérationnel en
bas de l'écran.
Rubrique affichée en bleu
Ceci indique la rubrique actuellement sélectionnée.
Appuyez sur ENTER pour avancer à l'écran de réglage
pour cette rubrique.
Rubrique entre crochets
Ceci indique le réglage actuel pour la rubrique.
Rubrique affichée en blanc
Ceci indique qu'une rubrique peut être sélectionnée.
Rubrique affichée en gris
Ceci indique que la rubrique ne peut pas être
sélectionnée.
Il existe diverses raisons pour lesquelles les rubriques ne
peuvent pas être sélectionnées, mais les principales
raisons sont les suivantes :
— Aucun appareil n'est raccordé à la prise d'entrée
sélectionnée.
— La fonction n'est pas compatible avec le signal d'entrée
actuel.
— En cas de conflit avec d'autres fonctions, vous devez
modifier les paramètres des autres fonctions.

>>
<<
Menu d'affichage sur l'écran
FRA 4-2
Introduction (Suite)
À propos les rubriques du menu
Certaines rubriques du menu peuvent ne pas s'afficher
selon la source d'entrée sélectionnée.
REMARQUE
Les écrans dans le mode d'emploi ne sont qu'à titre
explicatif (certains sont agrandis; d'autres coupés) et
peuvent légèrement varier des écrans réels.
Dans les pages suivantes, l'ordre des explications de
chaque rubrique du menu n'est pas nécessairement
conforme à la position des rubriques à l'écran.
LCFONT :
Ce produit intègre la technologie LC Font, qui a été
développée par SHARP Corporation pour afficher de
manière nette et facile à lire des caractères sur les écrans
LCD.
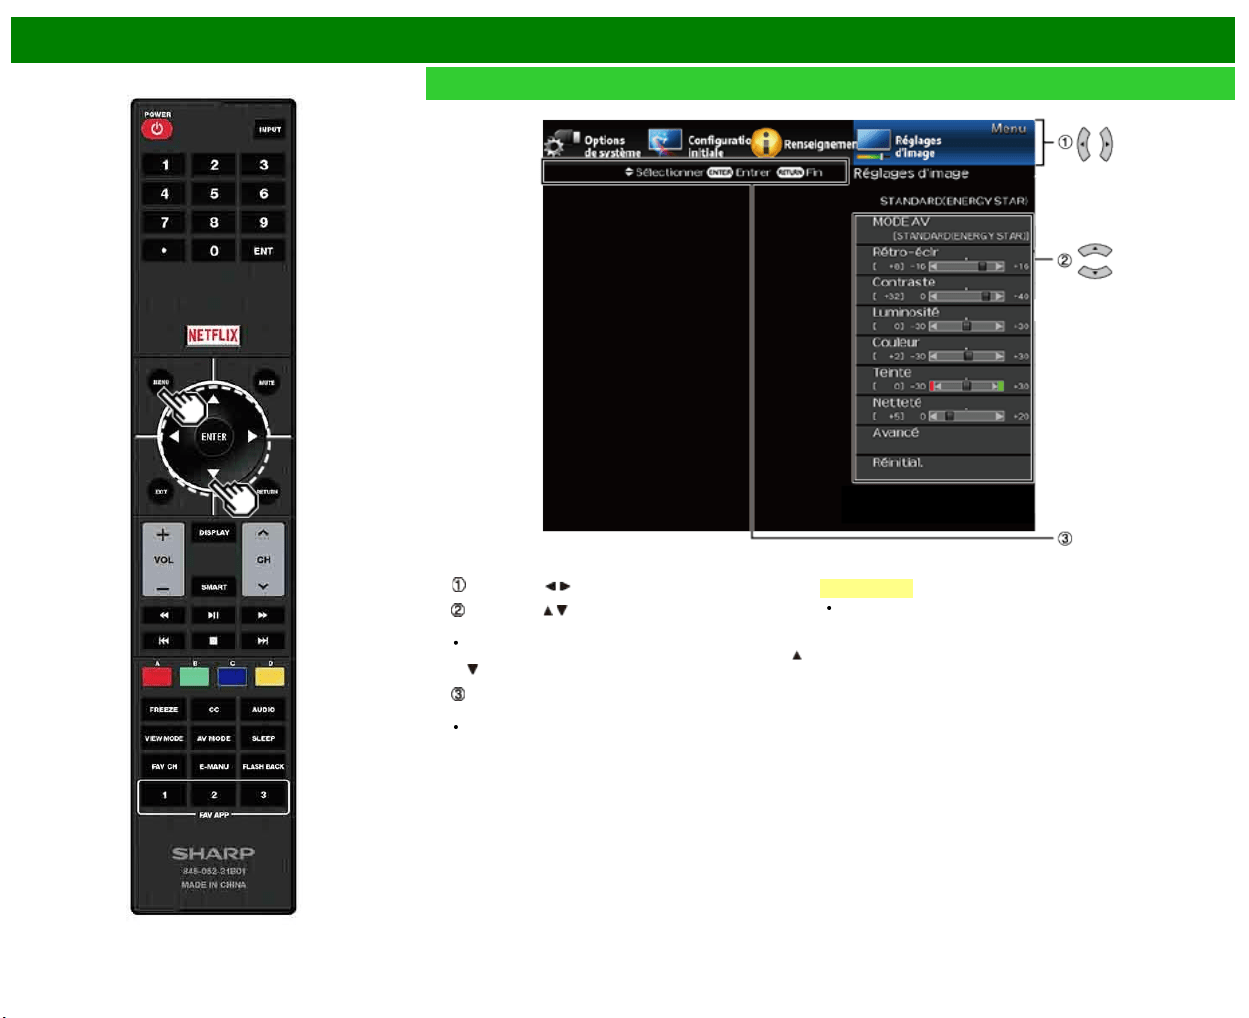
>>
<<
Menu d'affichage sur l'écran
FRA 4-3
Fonctionnement du menu d'affichage sur l'écran
Exemple
1 Appuyez sur MENU pour afficher l'écran MENU.
2
Appuyez sur / pour sélectionner le menu désiré.
Appuyez sur / pour sélectionner une rubrique de
réglage spécifique, et appuyez ensuite sur ENTER.
Il est possible que des rubriques d'ajustement
supplémentaires appropriées s'affichent. Appuyez sur
/
pour sélectionner la rubrique de votre choix.
Ajustez la rubrique tout en consultant le guide
d'affichage.
Les opérations varient selon la fonction ou la rubrique.
Consultez le guide d'affichage correspondant à l'écran
de réglage du menu de fonctionnement de la touche.
3 Appuyez sur MENU pour quitter.
REMARQUE
Les options du menu sont différentes selon les modes
d'entrée sélectionnés, mais les marches à suivre sont les
mêmes.
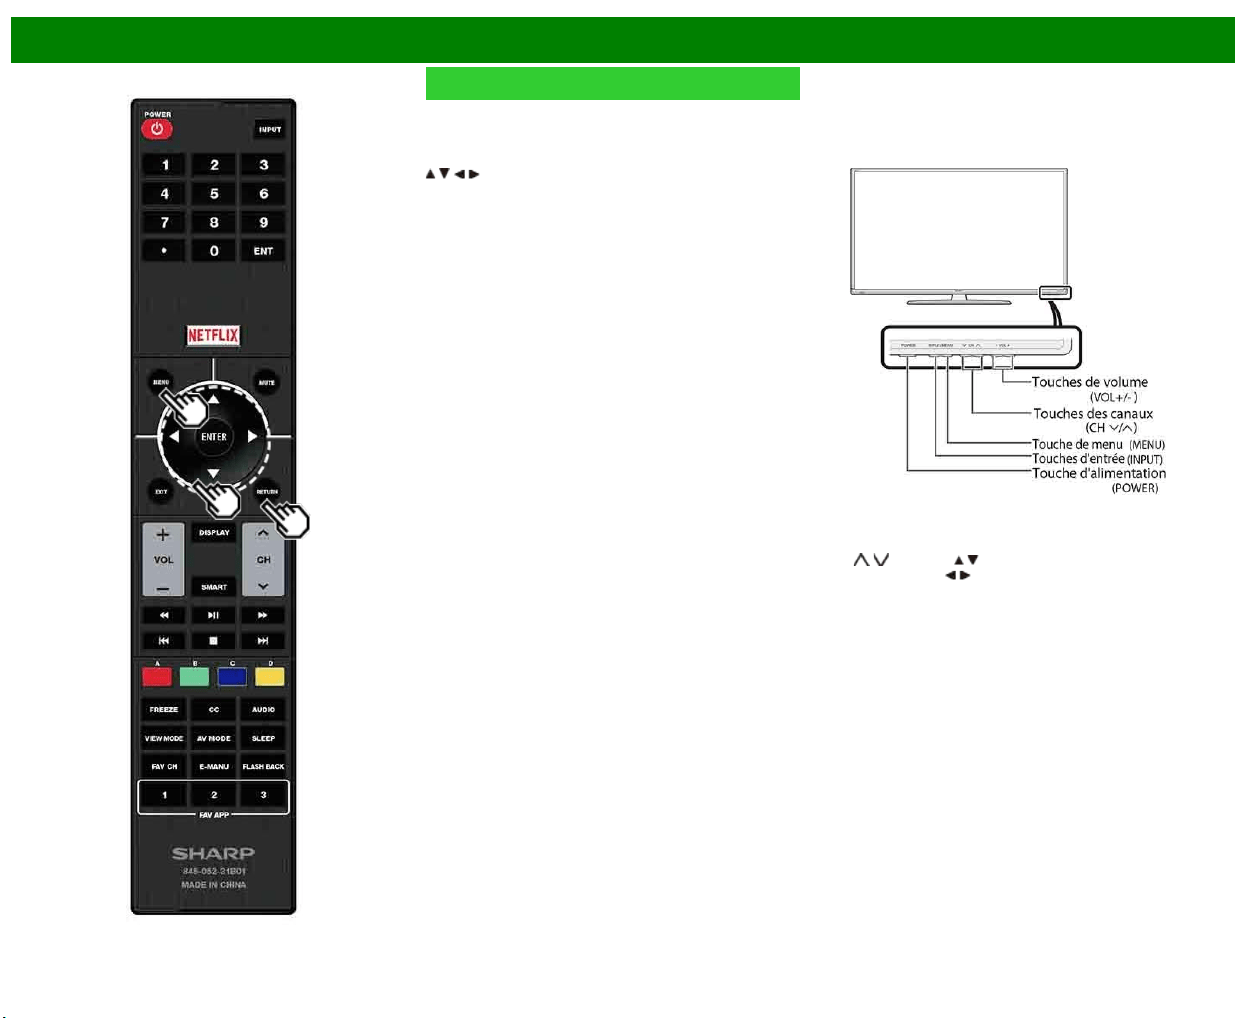
>>
<<
Menu d'affichage sur l'écran
FRA 4-4
Touches d'opération du menu
Utilisation de la télécommande
Utilisez les touches suivantes de la télécommande pour
opérer le menu.
MENU : Appuyez pour ouvrir ou fermer l'écran du menu.
/ / / : Appuyez pour sélectionner une rubrique désirée
sur l'écran ou ajuster une rubrique sélectionnée.
ENTER : Appuyez pour avancer à l'étape suivante ou
valider le réglage.
RETURN : Appuyez pour revenir à l'étape précédente.
Utilisation du tableau de commande du téléviseur
Vous pouvez aussi utiliser le tableau de commande du
téléviseur pour les réglages de menu.
Les touches du tableau de commande correspondent a celle
de la télécommande, comme indique ci-dessous.
MENU : MENU sur la télécommande
INPUT : ENTER sur la télécommande
CH
/ : Curseur / de la télécommande
VOL+/- : Curseur
/ de la télécommande

>>
<<
Menu d'affichage sur l'écran
FRA 4-5
Exemple
Configuration initiale
REMARQUE
Pour utiliser le d'affichage sur l'écran,
voir page 4-3.
Si vous sélectionnez «Configuration facile», «Channel
Setup», «Contrôle parental» et «Reinitial.», vous pouvez
saisir le numéro secret à 4 chiffres ici.
Configuration facile
Vous pouvez exécuter à nouveau l'installation automatique
même après avoir prédéfini ces canaux.
Langue : Sélectionnez parmi 3 langues (anglais, français
et espagnol).
Lieu et heure : Effectuez les réglages pour le pays, la
zone et le fuseau horaire où vous utilisez le téléviseur.
Choisissez votre pays : Sélectionnez soit «États-Unis»,
«Canada» ou «Mexique».
Sélectionnez votre fuseau horaire : Sélectionnez votre
fuseau horaire. Les réglages disponibles diffèrent selon le
pays sélectionné.
Sélectionnez HA (heure avancée) : Sélectionnez «Auto»,
«Manuel» ou «Arrêt».
Emplacement TV : Sélectionnez «Maison» ou «Magasin»
comme emplacement d'installation du téléviseur. Ce
produit est conforme à ENERGY STAR avec le réglage
par défaut du mode Maison.
Maison : MODE AV est réglé sur «STANDARD (ENERTY
STAR)».
Magasin : MODE AV est réglé sur «DYNAMIQUE(Fixé)».
Il est possible de régler Reconfigurer image et Démo des
fonctions.
Reconfigurer image : MODE AV est réglé sur
«DYNAMIQUE (Fixé)», que Reconfigurer image soit réglé
sur «Marche» ou sur «Arrêt». Si «Marche» est sélectionné,
le MODE AV est réinitialisé sur «DYNAMIQUE(Fixé)» s'il
n'y a pas d'opération pendant 30 minutes. Quand «Arrêt»
est sélectionné, le MODE AV est réglé sur
«DYNAMIQUE(Fixé)».
Démo des fonctions : Quand «Marche» est sélectionné,
une fois tous les réglages terminés, l'écran Démo des
fonctions s'affiche s'il n'y a pas d'opération pendant
plusieurs minutes.
La qualification ENERGY STAR est basée sur le
MODE AV «STANDARD (ENERGY STAR)».
Antenne&câble/boîtier : Sélectionnez le type de
connexion que vous utiliserez pour regarder la TV.
Ant/Câble : Vérifiez le type de branchement qui est
effectué avec votre téléviseur «Ant» ou «Câble».
Rech. Canal : Avec la recherche automatique des canaux,
le téléviseur recherche tous les canaux visibles dans la
région déterminée.
Si «Câble» est sélectionné pour le réglage de
l'antenne, les canaux cryptées seront supprimées une
fois la recherche de canal terminée.
Smart TV : Lorsque vous vous connectez à Internet via le
téléviseur, confirmez la méthode de
connexion et procéder à des réglages.
Vous ne pouvez utiliser la connexion LAN sans fil que
si la méthode WPS (bouton-poussoir) est utilisée. Si
une autre méthode est utilisée, effectuez les réglages
via Smart TV > Configuration Internet > Configuration
de réseau.
Terminé : L'écran de confirmation des réglages est
affiché. Confirmez les informations affichées à l'écran.
REMARQUE
Reportez-vous à l'Installation initiale aux
voir pages 2-2 à 2-7 pour régler chaque rubrique.
Si aucun canal n'est trouvé, vérifiez le type de
branchement qui a été effectué avec votre téléviseur et
tentez de nouveau «Configuration facile».
Si vous sélectionnez «Lancement de la recherche
analogique» et lancez la recherche de canal, la mémoire
du canal pour Câble Digital sera effacée.
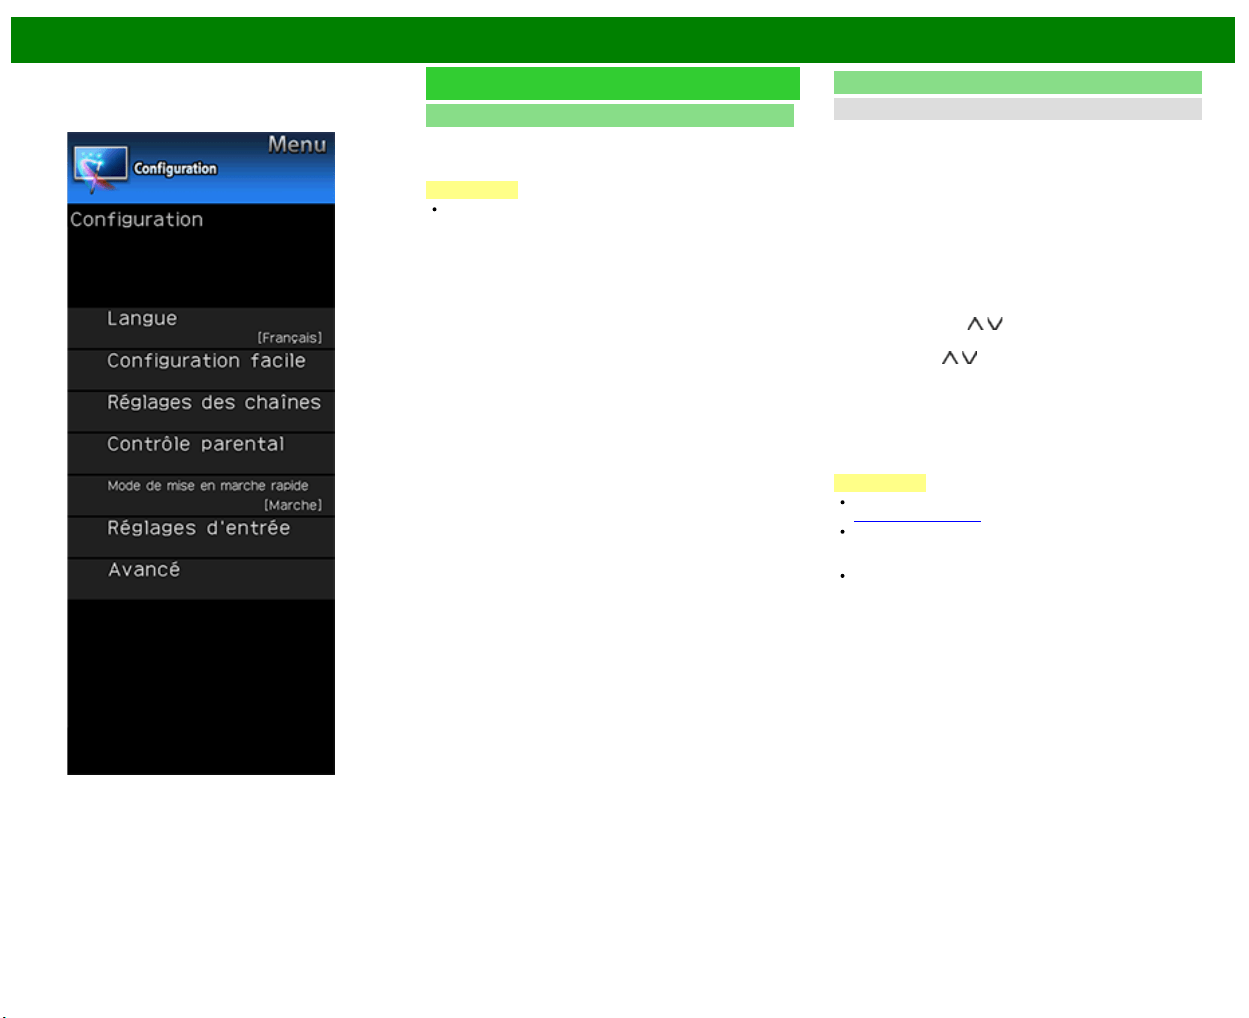
>>
<<
Menu d'affichage sur l'écran
FRA 4-6
Exemple
Configuration initiale (Suite)
Langue
Vous pouvez également sélectionner une langue à partir du
menu Configuration initiale. Sélectionnez parmi 3 langues :
anglais, français et espagnol.
REMARQUE
Pour modifier la langue du manuel, sélectionnez «Menu»
> «Configuration initiale» > «Langue» pour changer de
langue.
Réglages des chaînes
Channel Setup
Suivez les instructions ci-dessous pour mémoriser
manuellement les canaux si l'installation initiale ne mémorise
pas tous les canaux de votre région.
Ant/Câble : Vérifiez le type de branchement qui est
effectué avec votre téléviseur «Ant» ou «Câble».
Rech. Canal : Avec la recherche automatique des canaux,
le téléviseur recherche tous les canaux visibles dans la
région déterminée.
Mem. Canal : Vous pouvez sélectionner les canaux à
ignorer dans le cas de ANALOG (Ant), ANALOG (Câble),
DIGITAL(Ant) et DIGITAL (Câble).
Marche : Omet les canaux. (Sélection des canaux
désactivée avec CH
/ .)
Arrêt : N'omet pas les canaux. (Sélection des canaux
activée avec CH
/ .)
Suppr. CH cryptée : Cette fonction recherche les canaux
numérique câblés cryptés dans la zone sélectionnée et
les efface. Cette opération peut prendre plus de 20
minutes.
oui : Lance l'effacement des canaux cryptés.
non : La fonction ne marche pas.
REMARQUE
Reportez-vous à l'Installation initiale aux
voir pages 2-2 à 2-7pour régler chaque rubrique.
Si aucun canal n'est trouvé, vérifiez le type de
branchement qui a été effectué avec votre téléviseur et
tentez de nouveau la recherche des canaux.
Si vous sélectionnez «Lancement de la recherche
analogique» et lancez la recherche de canal, la mémoire
du canal pour Câble Digital sera effacée.
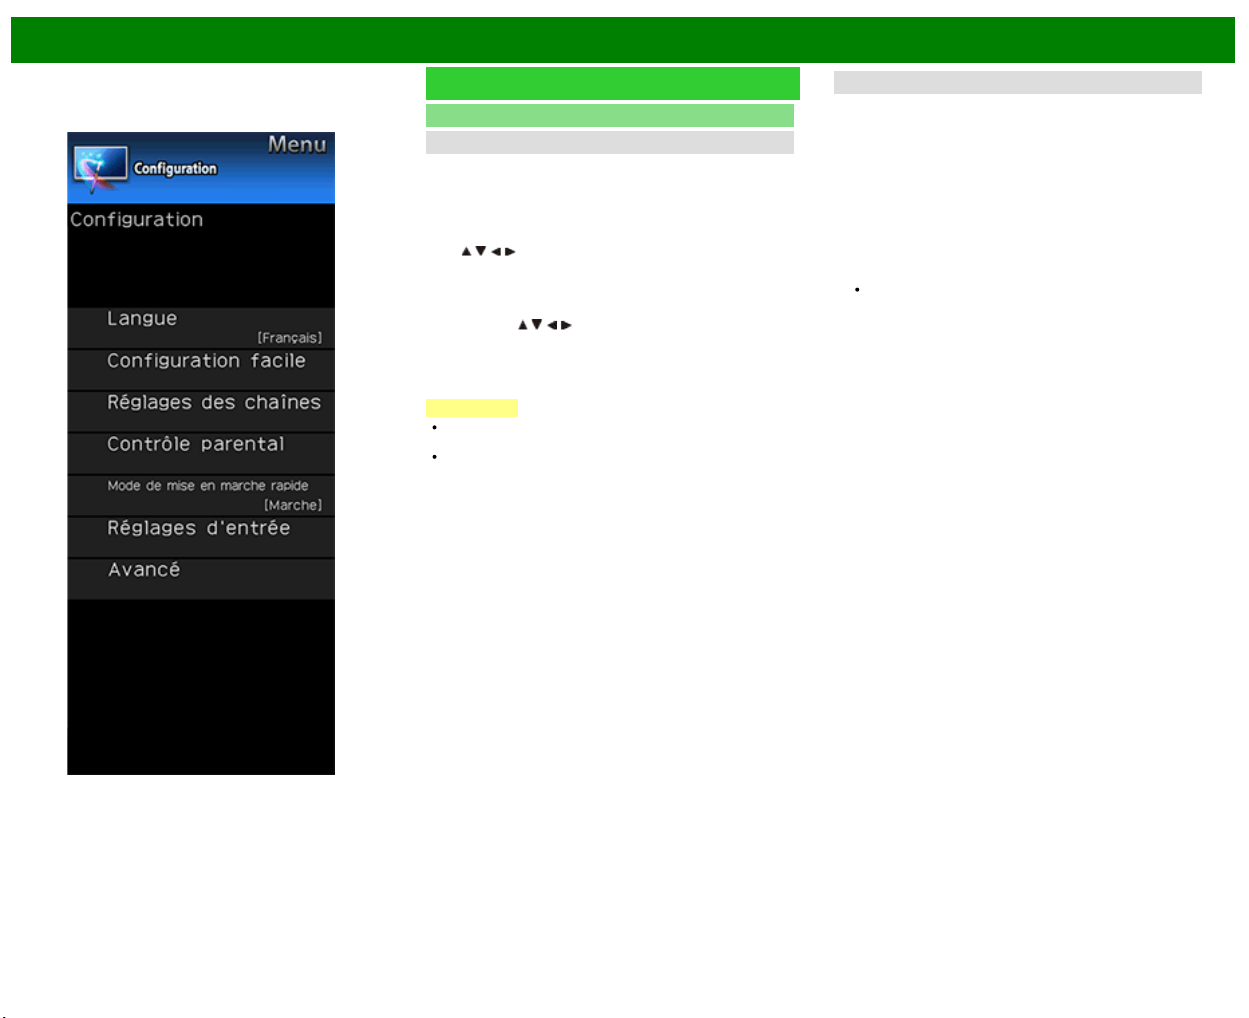
>>
<<
Menu d'affichage sur l'écran
FRA 4-7
Exemple
Configuration initiale (Suite)
Réglages des chaînes
Canal préféré (Réglage des canaux préférés)
Cette fonction vous permet de régler vos quatre canaux
préférés, dans 4 catégories différentes. En réglant ces
canaux au préalable, vous pourrez par la suite les
sélectionner facilement.
Pour enregistrer les canaux favoris :
Sélectionnez «Inscrire» puis appuyez sur ENTER. Appuyez
sur
/ / / pour sélectionner la position dans la
catégorie puis appuyez sur ENTER pour provoquer
l'enregistrement.
Pour effacer les canaux favoris :
Sélectionnez «1 donnée effacée» puis appuyez sur ENTER.
Appuyez sur
/ / / pour sélectionner le canal à effacer
puis appuyez sur ENTER. Sélectionnez «oui» puis
appuyez sur ENTER.
Pour effacer tous les canaux favoris, sélectionnez «Toutes
dn. eff.».
REMARQUE
Avant de régler le canal, sélectionnez le canal que vous
souhaitez enregistrer comme canal favori.
Vous pouvez afficher l'écran «Canal préféré» en
appuyant sur FAVORITE CH sur la télécommande.
Rég. antenne-DIGITAL
Pour recevoir des émissions numériques hertziennes, vous
aurez besoin d'une antenne d'émission numérique. Vous
pouvez confirmer la configuration de l'antenne sur l'écran
«Rég. antenne-DIGITAL». Au besoin, ajustez le sens de
l'antenne pour obtenir la force de signal maximum.
Force du signal : La force du signal du canal DIGITAL
s'affiche. Les informations du signal sont basées sur le
canal actuel.
Force du canal : Entrez le numéro du canal à 2 chiffres
pour vérifier la force du signal du canal sélectionné.
Assurez-vous que le signal est suffisamment fort pour
chaque canal.
Cette fonction n'est disponible que pour DIGITAL (Ant).
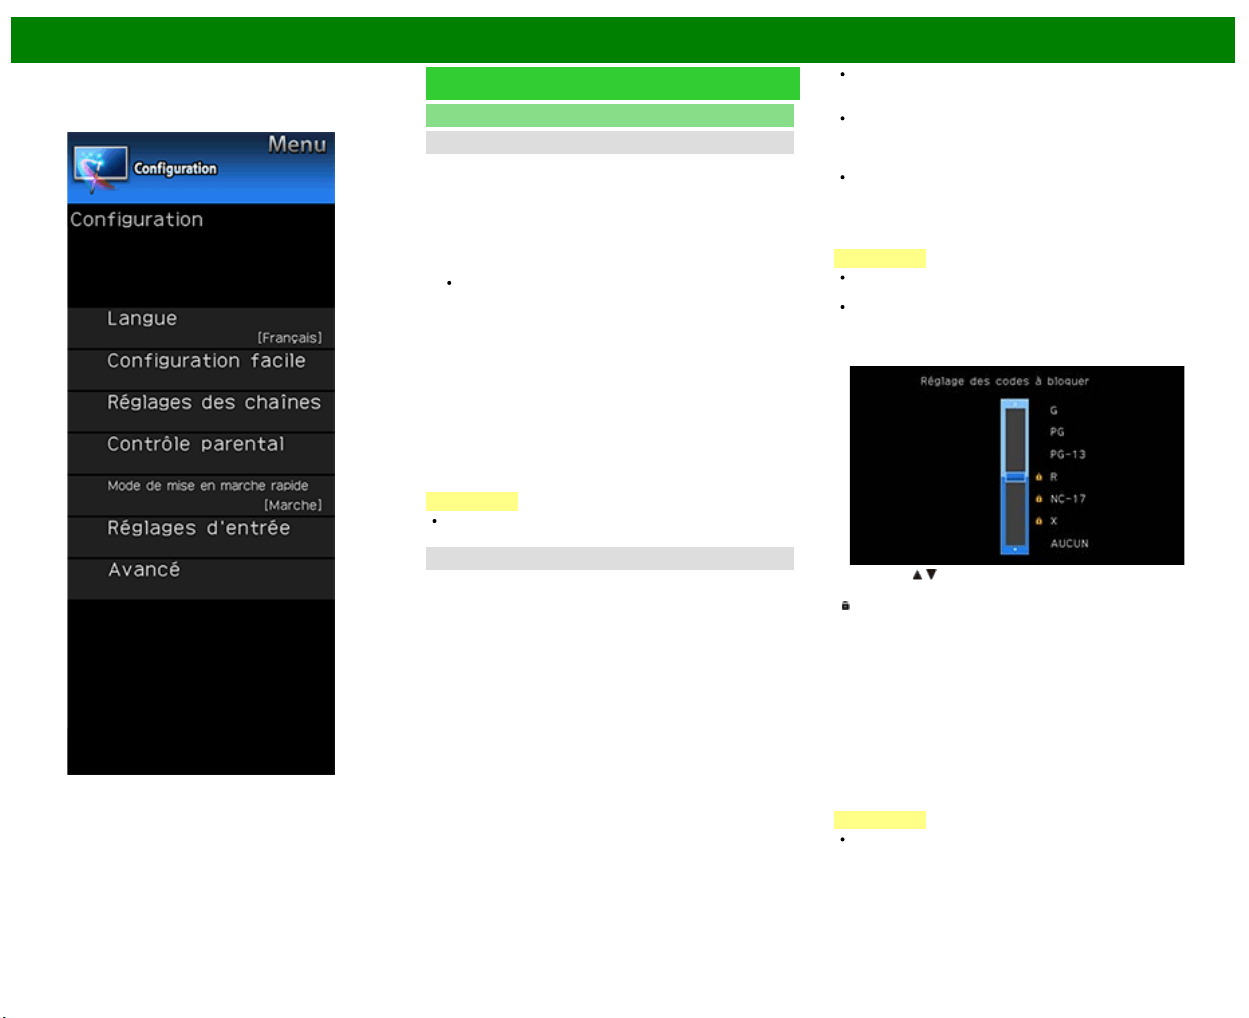
>>
<<
Menu d'affichage sur l'écran
FRA 4-8
Exemple
Configuration initiale (Suite)
Configuration individuelle
No. secret
Vous permet d'utiliser un numéro secret pour protéger
certains réglages d'être accidentellement changés.
IMPORTANT :
Trois conditions doivent être remplies pour activer V-Chip :
1. Le numéro secret doit être enregistré.
2. Les réglages V-Chip/V-Chip (DTV uniquement) ont été
effectués.
La fonction «V-Chip (DTV uniquement)» ne sera
sélectionnable que lorsqu'un nouveau système de
restriction peut être téléchargé via une émission
numérique aux États-Unis.
3. «Etat» est réglé sur «Marche».
Nouveau No. secret
Vous pouvez définir et changer le numéro secret par
utilisation de 0-9.
oui : Change ou définit le numéro secret.
non : L'écran de confirmation permettant d'effacer le
numéro secret s'affiche lorsque celui-ci a été défini.
Lorsque le numéro secret n'a pas été défini, l'écran
précédent s'affiche.
REMARQUE
Par mesure de précaution, notez votre numéro secret et
conservez-le dans un endroit sûr.
Contrôle parental
V-Chip
V-CHIP est un dispositif de filtrage électronique intégré dans
votre téléviseur. Cet outil donne aux parents un large degré
de contrôle sur les émissions accessibles aux enfants. Il leur
permet de sélectionner des programmes jugés convenables
pour leurs enfants, tout en bloquant ceux qu'ils réprouvent.
Ceci se fait automatiquement lorsque vous activez la
fonction V-CHIP de votre téléviseur. «V-Chip» et «Etat» ne
sont pas sélectionnables à partir du menu si vous ne
configurez pas tout d'abord votre numéro secret.
Les Etats-Unis ont deux systèmes de codes pour vérifier
le contenu des programmes : les directives télévisées
parentales et le code des films.
Les directives télévisées parentales travaillent en
conjonction avec V-CHIP pour aider les parents à
sélectionner les spectacles télévisés qu'ils jugent
inappropriés pour leurs enfants.
Le code des films est utilisé pour les films originaux
classifiés par la Motion Picture Association of America
(MPAA) diffusés sur le câble, sans être édités pour la
télévision. V-CHIP peut également être réglé pour
bloquer les films classifiés par la MPAA.
REMARQUE
Le réglage active automatiquement le «Blocage» pour
tous les codes inférieurs à votre sélection.
Si Etat n'est pas réglé sur «PERMETTRE», les réglages
de configuration ne sont pas opérationnels.
MPAA (Système volontaire de codage des films)
Exemple
Appuyez sur / pour régler la rubrique sur la position
désirée.
«
» indique que la rubrique est bloquée. Appuyez sur
MENU pour quitter.
G : Toutes les audiences. Tous les âges sont admis.
PG : Des directives parentales sont recommandées.
Certaines scènes risquent de ne pas convenir aux enfants.
PG-13 : Parents mis en garde. Certaines scènes risquent
de ne pas convenir aux enfants de moins de 13 ans.
R : Interdit. Les enfants de moins de 17 ans doivent avoir
un parent ou un adulte les accompagnant (l'âge varie selon
les juridictions).
NC-17 : Interdit aux enfants de moins de 17 ans.
X : La classe X est maintenant ancienne et a été unifiée
avec la classe NC-17. Elle est encore codée dans les
données de films anciens.
REMARQUE
Le système volontaire de codage des films utilise
uniquement un codage par âge.
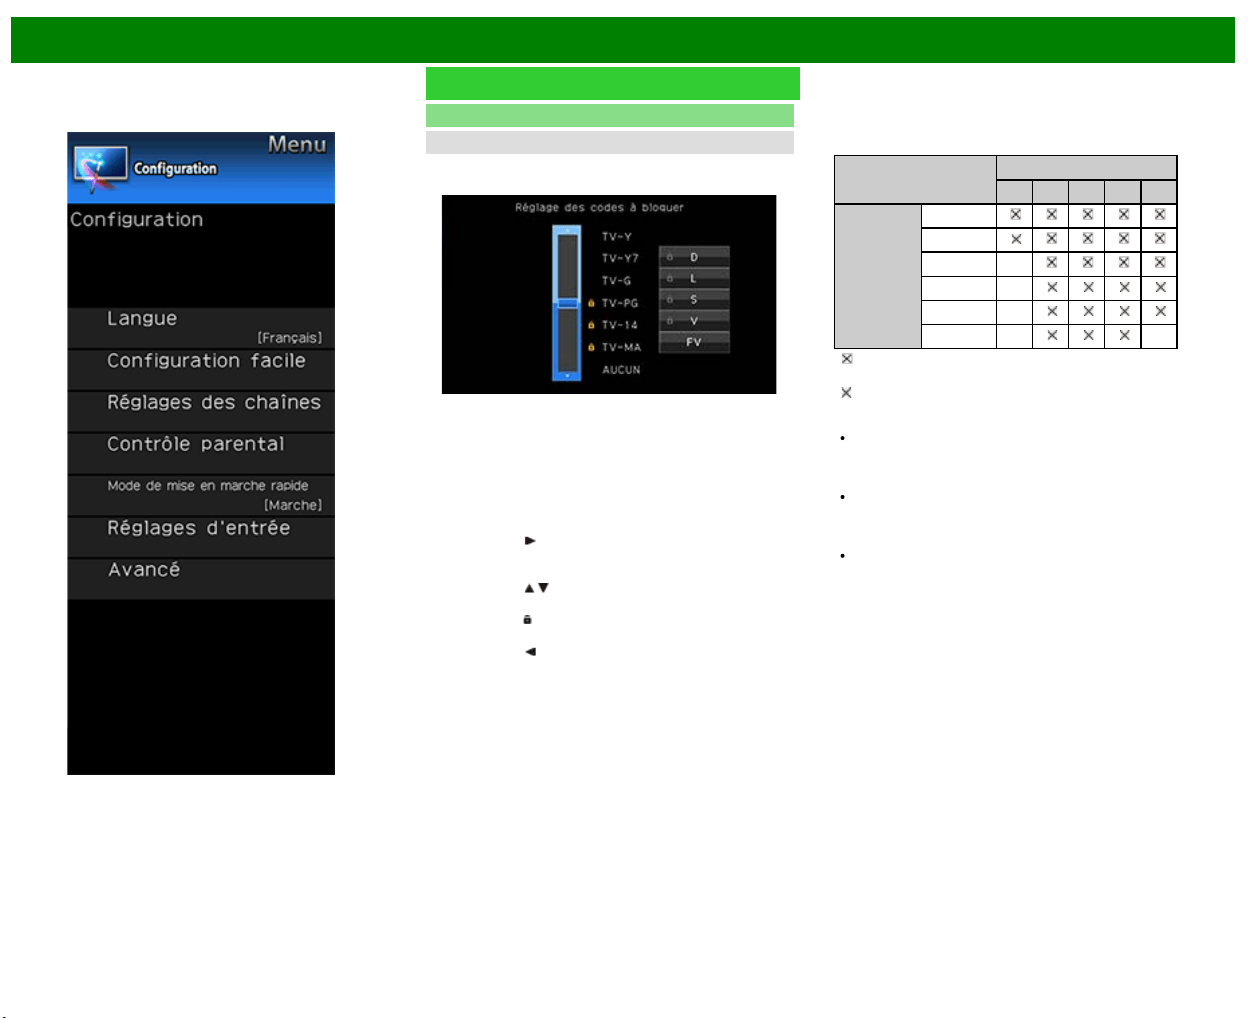
>>
<<
Menu d'affichage sur l'écran
FRA 4-9
Exemple
Configuration initiale (Suite)
Configuration individuelle
Contrôle parental
Directives télévisées parentales
Exemple
Age suggéré
TV-Y : Tous les enfants.
TV-Y7 : Destiné aux enfants plus ages.
TV-G : Grand public.
TV-PG : Directives parentales suggérées.
TV-14 : Parents mis en garde.
TV-MA : Public adulte uniquement.
Pour régler une rubrique de classification basée sur un
contenu individuel :
1 Appuyez sur
pour accéder aux rubriques dont le
contenu est bloqué à partir de la rubrique de
classification basée sur l'âge actuellement sélectionnée.
2 Appuyez sur
/ pour sélectionner une rubrique
individuelle, et appuyez ensuite sur ENTER pour la
débloquer («
» est retiré). Procédez de la même
manière pour les autres rubriques.
3 Appuyez sur
pour enregistrer après avoir réglé toutes
les rubriques de classification à contenu individuel.
Contenu
FV : Fantaisie avec violence.
V : Violence.
S : Scènes de sexe.
L : Langage adulte.
D : Dialogue à caractère sexuel.
Code
Contenu
FV V S L D
Age
suggéré
TV-Y
TV-Y7
TV-G
TV-PG
TV-14
TV-MA
: Le code du contenu peut être réglé, mais il n'est
généralement pas codé dans les émissions.
: Le code du contenu peut être réglé.
Systèmes de codage du Canada (Codes anglais et
français du Canada)
Les systèmes de codage du Canada sont basés sur la
politique de la Commission Canadienne de Radio-
Télévision et de Télécommunications (CRTC) sur la
violence dans les programmes télévisés.
Si la violence constitue le principal élément du codage, la
structure développée tient également compte d'autres
parties du contenu, comme le langage, la nudité, la
sexualité et les thèmes pour adultes.
Lorsque vous réglez V-CHIP sur le système canadien,
vous pouvez choisir soit les codes anglais du Canada,
soit les codes français du Canada.
>>
<<
Menu d'affichage sur l'écran
FRA 4-10
Exemple
Configuration initiale (Suite)
Configuration individuelle
Contrôle parental
Codes anglais du Canada
E : Exempté : Inclut les informations, les sports, les
documentaires et les autres programmes d'informations;
les causeries, vidéos musicales, et les programmes de
variétés.
C : Enfants : Destiné aux jeunes enfants de moins de 8
ans. Apporte une attention particulière aux thèmes
pouvant menacer leur sens de la sécurité et leur bien-
être.
C8+ : Enfants de plus de 8 ans : Ne contient pas de
scène de violence en tant que moyen préféré,
acceptable ou unique pour résoudre un conflit.
N'encourage pas non plus les enfants à imiter des actes
dangereux qu'ils ont pu voir à l'écran.
G : Grand public : Considéré comme acceptable pour tous
les groupes d'âge. Peut être vu par toute la famille,
contient très peu de violence physique, verbale ou
émotionnelle.
PG : Directives parentales : Destiné au grand public mais
peut ne pas convenir aux jeunes enfants (de moins de 8
ans) car il peut contenir des thèmes ou des questions
controversées.
14+ : Plus de 14 ans : Peut contenir des thèmes où la
violence est l'un des éléments prédominants de l'histoire,
mais doit faire partie du développement de l'intrigue ou
du personnage. Le langage utilisé peut être cru et des
scènes de nu être visibles dans le contexte du thème.
18+ : Adultes : Destiné aux spectateurs de 18 ans et plus
et pouvant contenir des scènes de violence qui, tout en
étant en relation avec le développement de l'intrigue, du
personnage ou des thèmes, s'adressent exclusivement
aux adultes. Peut contenir du langage graphique et des
scènes de sexe et de nudité.
Codes français du Canada
E : Programmation exemptée.
G : Grand public : Tous les âges et les enfants; contient
un minimum de violence directe, mais elle peut être
intégrée à l'intrigue de manière humoristique ou
fantaisiste.
8ans+ : Grand public mais déconseillé aux jeunes enfants
: Peut être regardé par un vaste public mais peut
contenir des scènes pouvant perturber les enfants de
moins de 8 ans qui ne peuvent pas faire la distinction
entre des situations imaginaires et réelles.
Le visionnement avec les parents est recommandé.
13ans+ : Plus de 13 ans : Peut contenir des scènes de
violence fréquentes et il est donc préférable de regarder
l'émission avec les parents.
16ans+ : Plus de 16 ans : Peut contenir des scènes de
violence fréquente et de violence intense.
18ans+ : Plus de 18 ans : Réservé aux adultes. Peut
contenir des scènes de violence fréquente et de violence
intense.
Comment libérer provisoirement le blocage V-CHIP
Le blocage V-CHIP fonctionne et censure une émission.
«PUCE V ACTIVER» est affiché.
1 Appuyez sur ENTER lorsque V-CHIP fonctionne et le
menu de réglage du numéro secret s'affiche.
2 Entrez le numéro à 4 chiffres à l'aide de 0–9. A ce
moment-là, le blocage V-CHIP est provisoirement libéré.
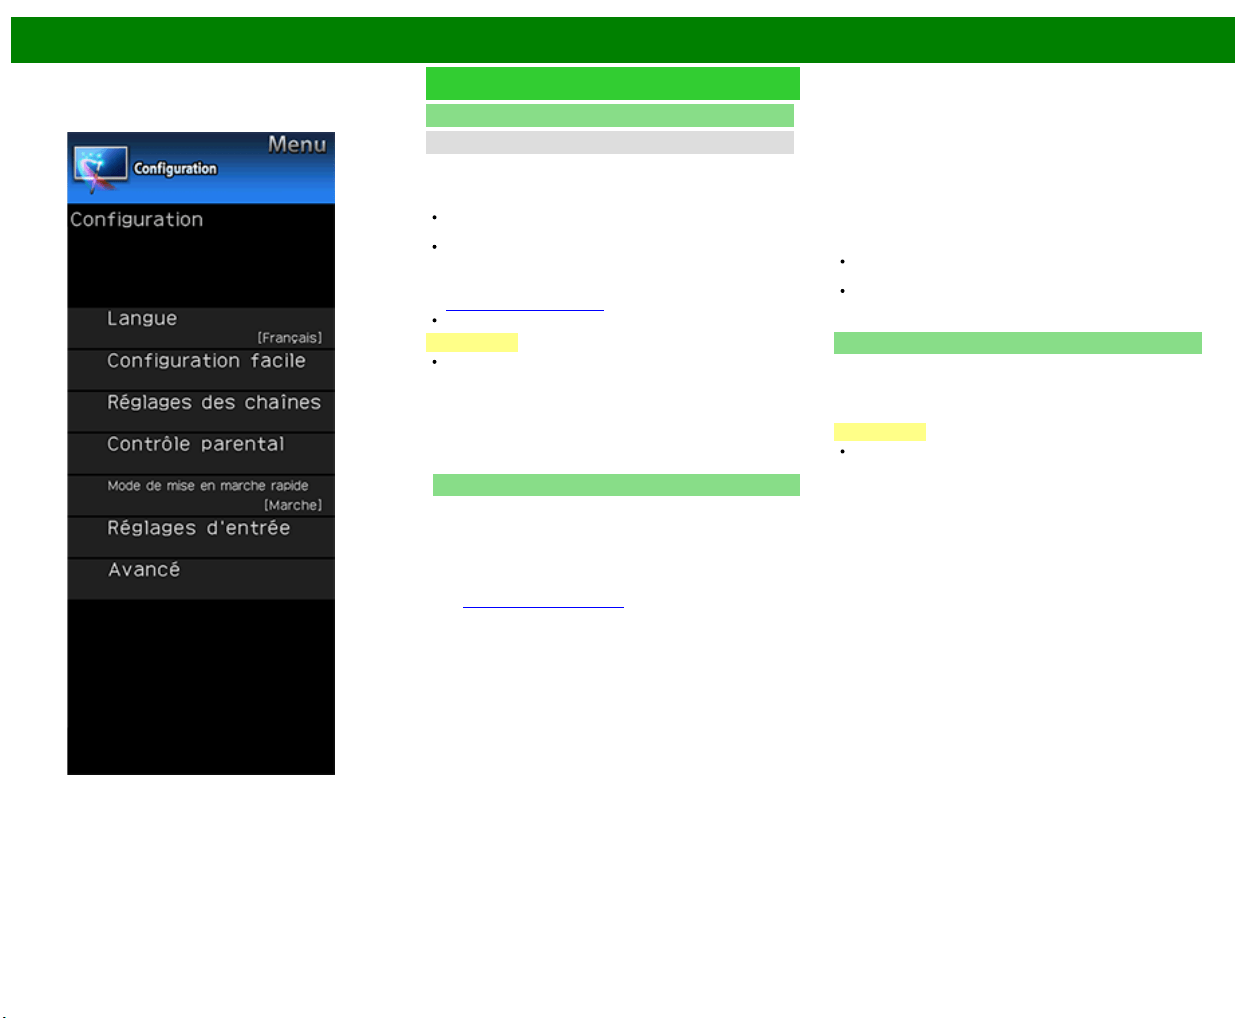
>>
<<
Menu d'affichage sur l'écran
FRA 4-11
Exemple
Configuration initiale (Suite)
Configuration individuelle
Contrôle parental
Réactivation du blocage V-CHIP provisoirement libéré
Vous pouvez réactiver le blocage V-CHIP provisoirement
libéré comme indiqué ci-dessous.
Sélectionnez le réglage «Etat» à partir du menu Contrôle
parental pour réactiver BLOCAGE.
Sélectionnez le réglage «V-Chip» («MPAA», «TV
Guidelines», «Codes ang. Canada» ou «Codes Fr.
Canada») à partir du verrouillage enfant pour réactiver
BLOCAGE.
(Voir pages 3-12 à 3-13.)
Mettez le téléviseur hors tension.
REMARQUE
L'une des trois méthodes ci-dessus permet d'activer le
blocage V-CHIP.
Etat
Utilisé pour mettre en marche ou arrêter la fonction de
contrôle parental. Cette fonction n'est pas sélectionnable à
partir du menu si vous n'avez pas défini de numéro secret.
No. Secret
Vous permet d'utiliser un numéro secret pour protéger
certains réglages d'être accidentellement changé.
IMPORTANT:
Trois conditions doivent être remplies pour activer la V-
Chip
(Voir pages 3-12 à 3-13.)
1.No. secret est inscrit.
2.V-Chip / V-Chip (DTV uniquement) paramètres ont été
faites.Le «V-Chip (DTV uniquement)" ne peuvent être
sélectionnés quand un nouveau système de notation
peut être téléchargé via la diffusion numérique aux
États-Unis
3."Status" est réglé sur "Activer".
Réglage de numéro secret
Vous pouvez définir et modifier le code secret en
utilisant 0-9.
Oui: Modifie ou définit le numéro secret.
Non: "Supprimer numéro secret" menu s'affiche
lorsque le numéro secret a été défini. Lorsque le
numéro secret n'a pas été réglée, l'écran précédent
s'affiche.
NOTE
Par mesure de précaution, faire une note de votre code
secret et conservez-le dans un endroit familier.
Si le nombre secret est annulé, le réglage Etat est
automatiquement réglé sur "Off". "V-Chip" et "Etat" n'est
pas sélectionnable dans le menu.
Mode de mise en marche rapide
Lorsque cette fonction est activée, vous pouvez réduire le
temps de démarrage du téléviseur ou même le laisser en
mode veille, et commencer à afficher les images et ainsi de
suite via l'équipement connecté sur le réseau.
REMARQUE
Configurer le «Mode de mise en marche rapide» sur
«ON» consomme plus d'électricité.
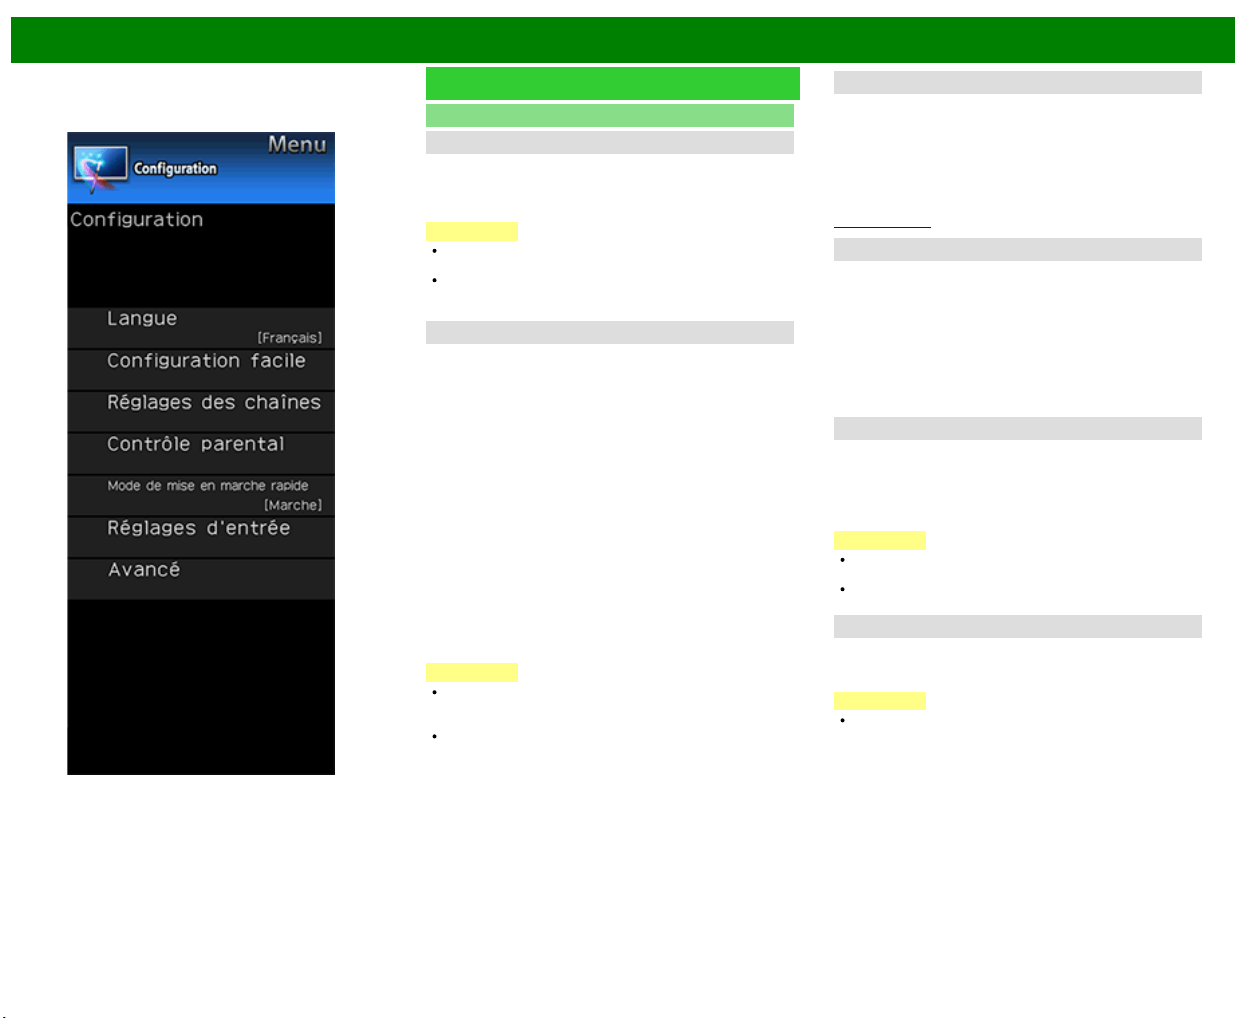
>>
<<
Menu d'affichage sur l'écran
FRA 4-12
Exemple
Configuration initiale (Suite)
Réglages d'entrée
Réglage HDMI - Visionnement auto.
Lorsque vous regardez des images envoyées depuis
l'équipement externe via une connexion HDMI, cette fonction
permet d'ajuster automatiquement la taille de l'image au
téléviseur.
REMARQUE
Reportez-vous au mode d'emploi de votre appareil
externe pour le type de signal.
Lorsque vous raccordez un adaptateur/câble de
conversion DVI-HDMI sur la prise HDMI IN, l'image peut
ne pas être reçue clairement.
DIGITAL AUDIO
Vous pouvez émettre un son audio numérique vers un ampli
AV ou appareil similaire dont la prise d'entrée audio
numérique (DIGITAL AUDIO INPUT) est raccordée à la
prise de sortie audio numérique (DIGITAL AUDIO OUT) du
téléviseur. Sélectionnez un format de sortie audio
compatible avec le format audio du programme que vous
regardez et l'appareil raccordé.
Off:Fermez la fonction de sortie audio numérique.
PCM : Pour la connexion à l'équipement ne prenant pas
en charge le format Dolby Digital et DTS. Un audio
identique (principal, auxiliaire, ou principal/auxiliaire) à
celui du programme en cours de visionnement est
reproduit.
L'audio 2 canaux avec un taux d'échantillonnage de 48
kHz ou inférieur est reproduit sous la forme d'un audio
PCM linéaire.
Flux binaire : Pour la connexion à un système audio
prenant en charge le format Dolby Digital et DTS. L'audio
est reproduit via les canaux principaux et les canaux
auxiliaires.
REMARQUE
L'audio du canal analogique et l'audio de l'entrée vidéo
sont reproduits en mode PCM même si «Flux binaire»
est sélectionné.
Les signaux d'entrée numériques PCM sont reproduits en
mode PCM même si «Flux binaire» est sélectionné.
Sélection Audio
Cette fonction règle la prise pour qu'elle reproduise le son
de l'ordinateur.
Les rubriques d'ajustement varient en fonction de la source
d'entrée. Sélectionnez la source d'entrées
correspondant à la prise raccordée à l'ordinateur et ajustez
la rubrique de votre choix.
Pour effectuer cette opération; consultez «Configuration
initiale» > «Réglages d'entrée» > «Sélection Audio».
(Voir page 3-8.)
Sélect. sortie
Vous permet de sélectionner ce qui commande la sortie
audio.
Fixe : Le son par le haut-parleur se règle avec VOL+/-
sur la télécommande ou sur le téléviseur.
Le son par la prise AUDIO OUT n'est pas réglable et sort
à un niveau constant.
Variable : Le son par la prise AUDIO OUT se règle avec
VOL+/- sur la télécommande ou sur le téléviseur.
Le son par le haut-parleur est coupé.
Sélect d'entrée
Lorsque l'entrée d'image appliquée au terminal
COMPONENT IN ou VIDEO IN, activez «CONPOSANT» ou
«AV-Y/C» respectivement.
CONPOSANT : Sélectionnez vidéo composante.
AV-Y/C : Sélectionnez vidéo composite.
REMARQUE
Si aucune image (couleur) ne s'affiche, tentez de passer
sur un autre type de signal.
Consultez le mode d'emploi de l'appareil externe pour le
type de signal.
Saut entrée
Ce réglage vous permet de sauter l'entrée TV, HDMI ou PC
IN («PC IN, COMPONENT, HDMI 1, HDMI 2, HDMI 3 et
VIDEO») lors des opérations de Sélection d'entrée.
REMARQUE
Si vous connectez un equipement externe a une prise
HDMI IN que vous avez configuree pour etre ignoree, un
message de notification apparait sur l'ecran lorsqu'un
signal est recu de l'equipement externe connecte.
Appuyez sur «oui» pour reinitialiser le reglage lie au saut
afin que la prise d'entree devienne disponible.
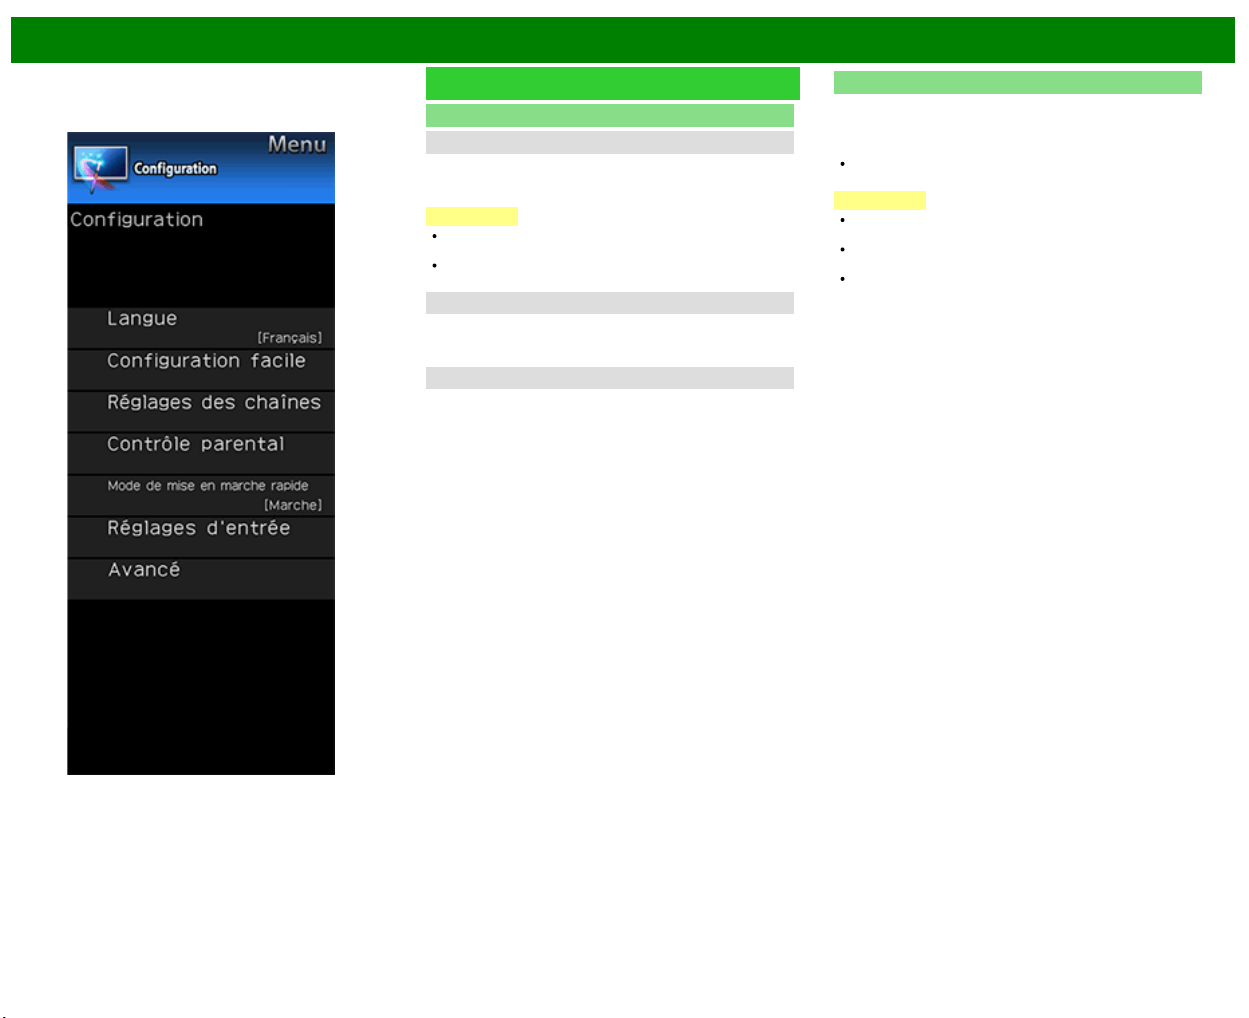
>>
<<
Menu d'affichage sur l'écran
FRA 4-13
Exemple
Configuration initiale (Suite)
Réglages d'entrée
Système Couleur
Sélectionnez le système de signal vidéo compatible avec
votre appareil dans la liste ci-dessous.
Auto/NTSC/PAL-M/PAL-N
REMARQUE
«Système Couleur» ne peut être réglé que pour VIDEO
IN 1 ou COMPONENT/VIDEO IN.
Si vous avez déjà réglé le numéro secret, entrez ce
numéro à 4 chiffres ici.
Réglage LINK
Effectuez les réglages pour utiliser AQUOS LINK.
Configurez les réglages avec «Configuration initiale» >
«Réglages d'entrée» > «Réglage LINK».
Réglage de Sync.fine
Vous pouvez ajuster la position de l'entrée d'image à partir
d'un PC et les réglages avec «Configuration initiale» >
«Réglages d'entrée» > «Réglage de Sync.fine».
Réinitial.
Si vous procédez à des ajustements complexes et que les
réglages ne peuvent pas être ramenés à la normale, vous
pouvez réinitialiser les réglages aux valeurs préréglées
d'usine.
Si vous avez déjà réglé le numéro secret, entrez ce
numéro à 4 chiffres ici.
REMARQUE
Les paramètres de Réglage des canaux ne seront pas
modifiés.
Les paramètres de Réglage de la langue ne seront pas
modifiés.
Les réglages de Emplacement TV ne seront pas
modifiés.
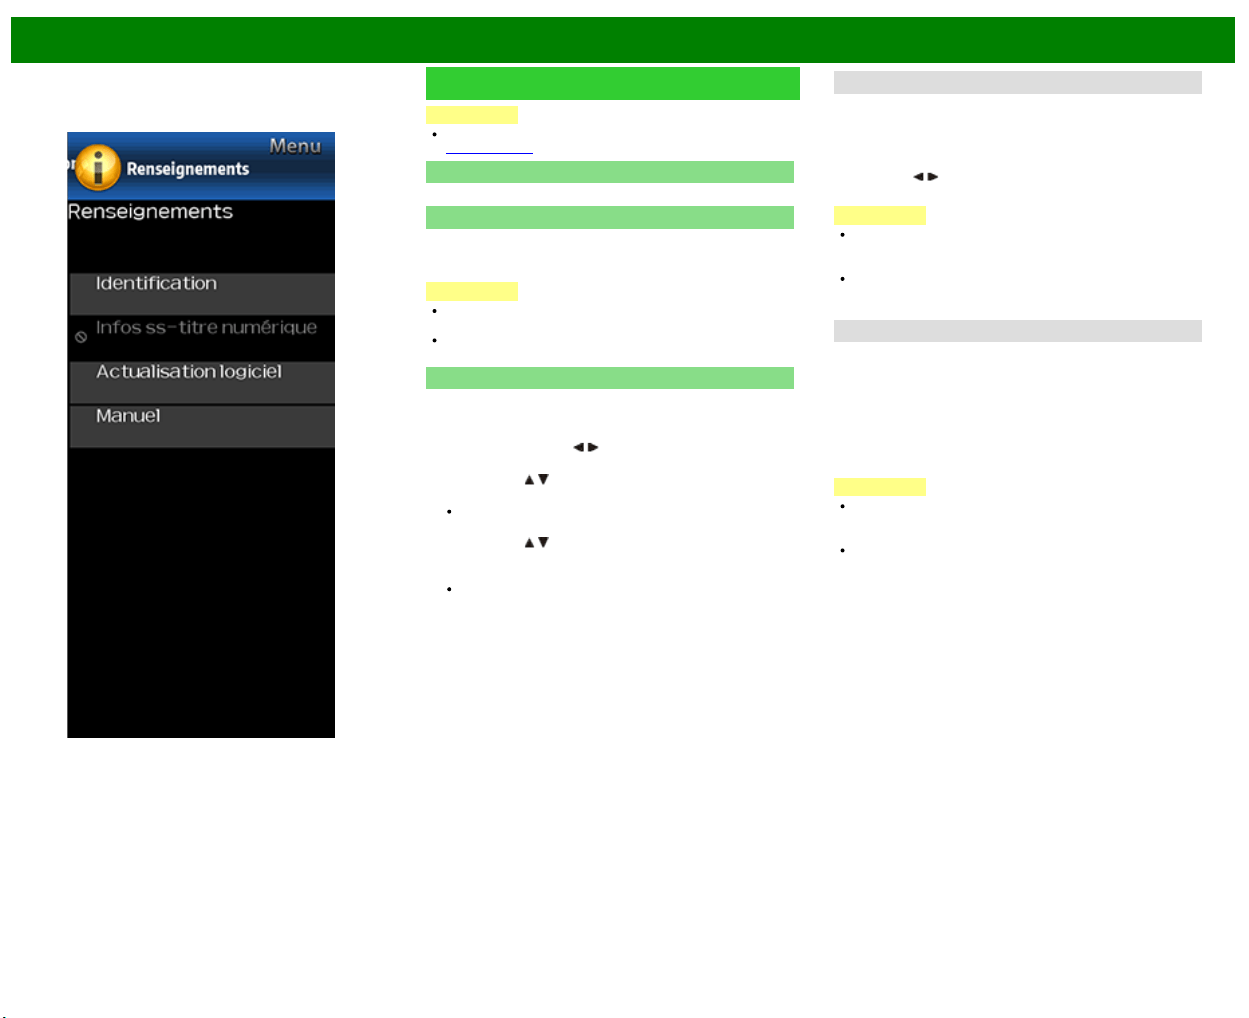
>>
<<
Menu d'affichage sur l'écran
FRA 4-14
Exemple
Renseignements
REMARQUE
Pour utiliser le d'affichage sur l'écran,
voir page 4-3.
Identification
La version actuelle du logiciel de TV s'affiche.
Infos ss-titre numérique
Cette fonction permet d'afficher les sous-titres fermés de
programmes en provenance de sources transmises en
numérique.
REMARQUE
Cette liste ne s'affiche pas pour les transmissions
analogiques et l'entrée audio/vidéo externe.
Ces données ne sont pas comprises dans CC1, CC2,
Texte1, ou Texte2 et ne sont pas affichées dans la liste.
Actualisation logiciel
Ceci permet de mettre à niveau le logiciel du système afin
d'améliorer les fonctions du téléviseur.
1 Appuyez sur MENU pour afficher l'écran MENU, et
appuyez ensuite sur
/ pour sélectionner
«Renseignements».
2 Appuyez sur
/ pour sélectionner «Actualisation
logiciel», et appuyez ensuite sur ENTER.
Si vous avez déjà défini le numéro secret, passez à
l'étape 3.
3 Appuyez sur
/ pour sélectionner «Mise à jour
manuelle» ou «Réglage de mise à jour
automatique», et appuyez ensuite sur ENTER.
Les opérations ci-après varient en fonction du réglage.
Réglage de mise à jour automatique
Lorsque votre téléviseur est allumé ou lorsqu'une application
Internet est accédée, cette fonction permet au téléviseur de
se connecter au réseau et de vérifier automatiquement les
mises à jour.
Lorsqu'une mise à jour est disponible un message s'affiche.
Appuyez sur
/ pour sélectionner «oui», et appuyez
ensuite sur ENTER pour afficher l'écran de téléchargement.
REMARQUE
Cette fonction n'est pas opérationnelle si une connexion à
large bande ou si la Configuration Internet ne sont pas
disponibles.
Un message peut également s'afficher lorsqu'une
application est en cours d'exécution. Le message varie
en fonction de l'application.
Mise à jour manuelle
Sélectionnez la méthode pour mettre manuellement à jour le
logiciel.
Mise à jour USB : Met à jour le logiciel à l'aide d'un
périphérique mémoire USB qui contient le fichier de mise
à jour. (Voir «Mise à jour du logiciel à l'aide d'un
périphérique mémoire USB».)
Mise à jour en réseau : Télécharge le fichier de mise à
jour via le réseau, puis met à jour le logiciel.
REMARQUE
Une connexion à large bande et la Configuration Internet
se sont requises pour mettre à jour le logiciel à l'aide du
réseau.
L'accès et le téléchargement de la mise à jour peuvent
prendre un certain temps en fonction de la connexion
Internet et d'autres facteurs.
Mise à jour du logiciel à l'aide d'un périphérique
mémoire USB
Pour vérifier la disponibilité d'une mise à jour de logiciel,
consultez le site
http://www.sharpusa.com/products/support/. Si vous avez
des questions, veuillez appeler le
1-800-BE-SHARP (800-237-4277).
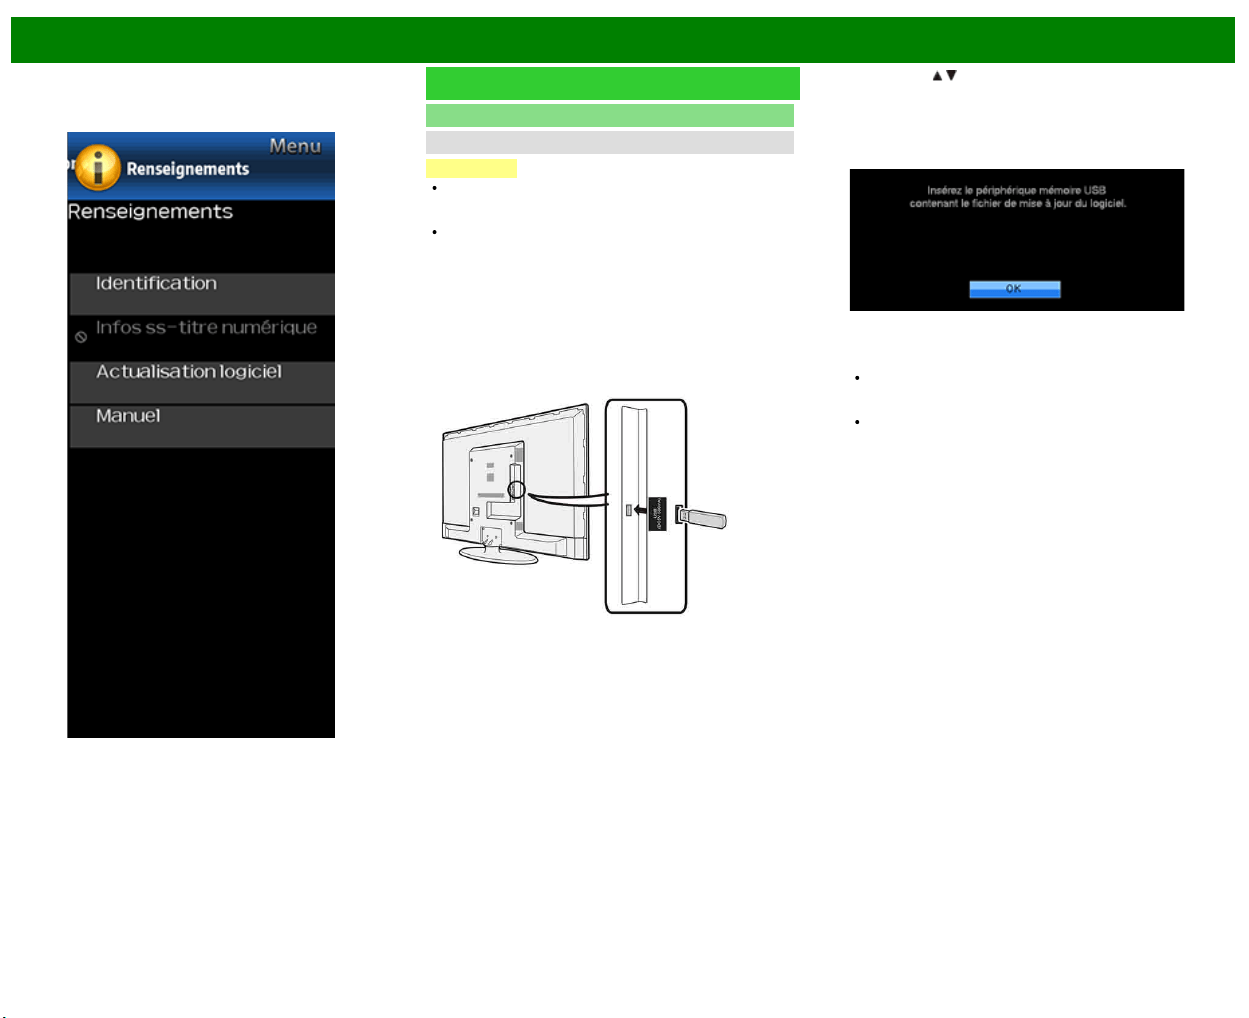
>>
<<
Menu d'affichage sur l'écran
FRA 4-15
Exemple
Renseignements (Suite)
Actualisation logiciel
Mise à jour manuelle
ATTENTION
Ne retirez pas le périphérique mémoire USB de
l'appareil, et ne débranchez pas le cordon du secteur
pendant toute la durée de mise à jour du logiciel.
Assurez-vous de bien suivre pas à pas toute la
procédure décrite ci-dessous. Sinon, par Exemple, le
téléviseur ne pourra pas lire les données du
périphérique mémoire USB et la mise à jour du
logiciel échouera.
1 Insérez le périphérique mémoire USB comportant le
fichier de mise à jour dans la prise USB du téléviseur.
2 Appuyez sur / sur l'écran Mise à jour manuelle pour
sélectionner «Mise à jour USB», et appuyez ensuite sur
ENTER.
3 Appuyez sur ENTER pour lancer la vérification des
données sur le périphérique mémoire USB.
4 Le message «Vérification» clignote à l'écran pendant la
procédure de vérification des données.
La version actuelle du logiciel de la TV, ainsi que celle
du fichier de mise à jour contenu sur le périphérique
mémoire USB s'affichent toutes deux à l'écran.
Un message d'erreur s'affiche lorsque la clé de
mémoire USB ne contient aucun fichier de mise à
jour, ou si elle a été incorrectement insérée. Vérifiez
alors le fichier sur le périphérique mémoire USB, ou
réinsérez éventuellement le périphérique mémoire
USB.
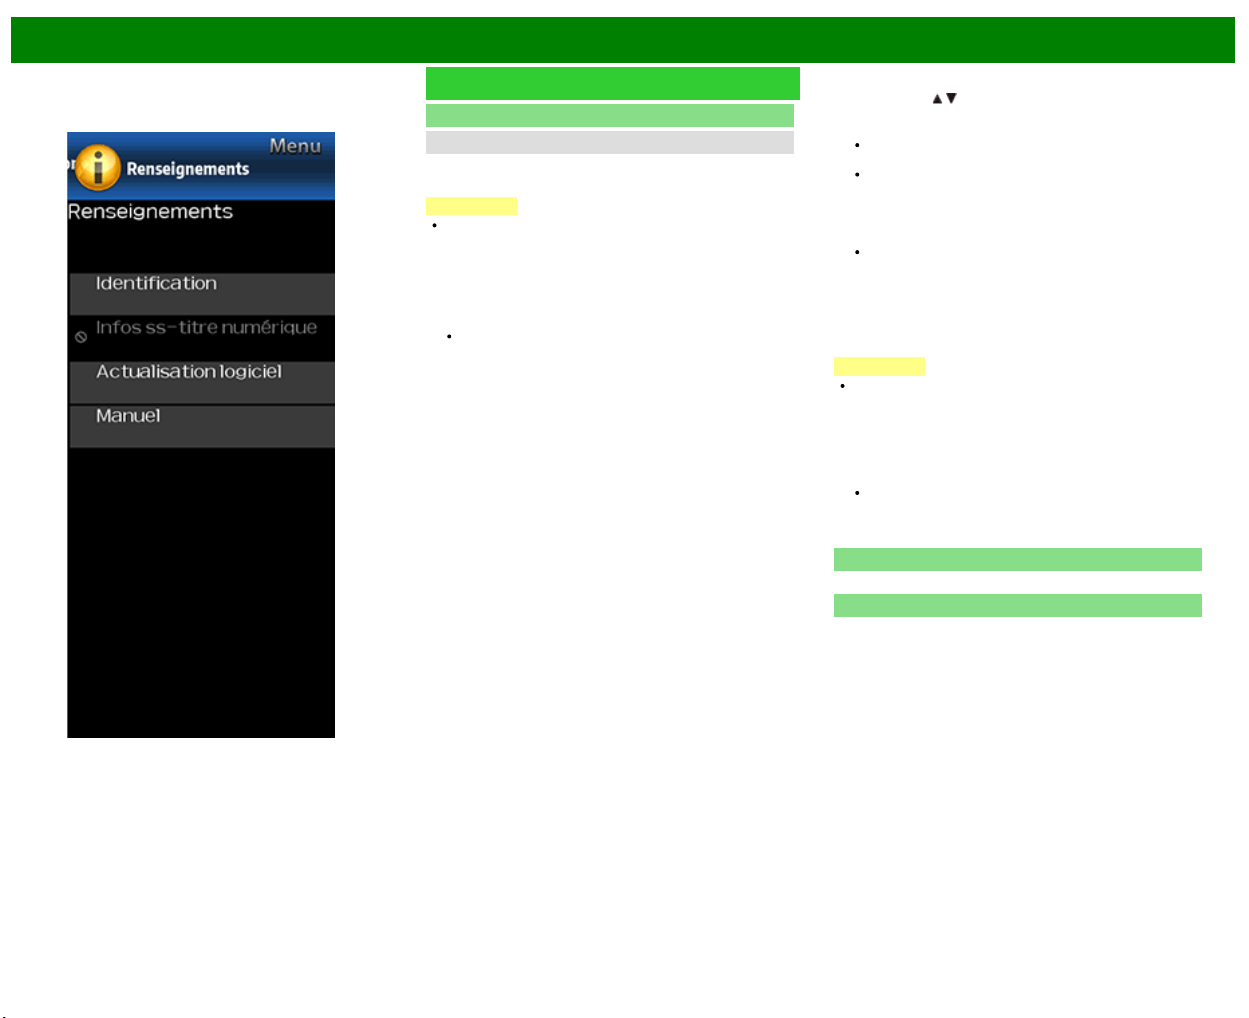
>>
<<
Menu d'affichage sur l'écran
FRA 4-16
Exemple
Renseignements (Suite)
Actualisation logiciel
Mise à jour manuelle
5 Pour lancer la mise à jour du logiciel de la TV,
sélectionnez «oui», et appuyez ensuite sur ENTER.
ATTENTION
Ne retirez pas le périphérique mémoire USB de
l'appareil, et ne débranchez pas le cordon du secteur
pendant toute la durée de mise à jour du logiciel.
6 Une fois le logiciel mis à jour, un message s'affiche à
l'écran pour indiquer le succès de l'opération.
La TV s'éteint alors, avant de se rallumer automatiquement
par la suite.
En cas d'échec de la mise à jour, vérifiez l'intégrité du
fichier présent sur le périphérique mémoire USB avant
de relancer la mise à jour du logiciel.
7 Retirer le périphérique mémoire USB.
Mise à jour du logiciel via le réseau
1 Appuyez sur
/ sur l'écran de Mise à jour manuelle
pour sélectionner «Mise à jour en réseau», et appuyez
ensuite sur ENTER.
Le téléviseur se connecte au réseau et vérifie la
présence de mises à jour.
Pour annuler, appuyez sur ENTER.
2 La version actuelle du téléviseur et la dernière version
du logiciel sont affichées. Pour mettre à jour le logiciel
du téléviseur, sélectionnez «oui», et appuyez ensuite sur
ENTER.
Lorsqu'une connexion au serveur ne peut pas être
établie ou qu'une mise à jour n'est pas disponible, un
message s'affiche. Si aucune connexion serveur ne
peut être établie, vérifiez la connexion à large bande
et la Configuration Internet.
3 Après le téléchargement du fichier de mise à jour, le
processus de mise à jour du logiciel commence.
ATTENTION
Ne débranchez pas le cordon secteur lorsque le
logiciel est en cours de mise à jour.
4 Une fois le logiciel correctement mis à jour, un écran
s'affiche et indique que le processus est terminé.
Un écran indiquant que la mise à jour est terminée
s'affiche. 4 secondes plus tard, le téléviseur redémarre
automatiquement.
Si le logiciel n'a pas réussi à procéder à la mise à jour,
vérifiez la connexion à large bande et la Configuration
Internet, puis essayez à nouveau de procéder à la
mise à jour.
Licence de logiciel
Affiche l'information sur la version du logiciel.
Manuel
Affiche le mode d'emploi intégré sur l'écran. Vous pouvez
lire des informations sur les modalités d'utilisation de cet
appareil.
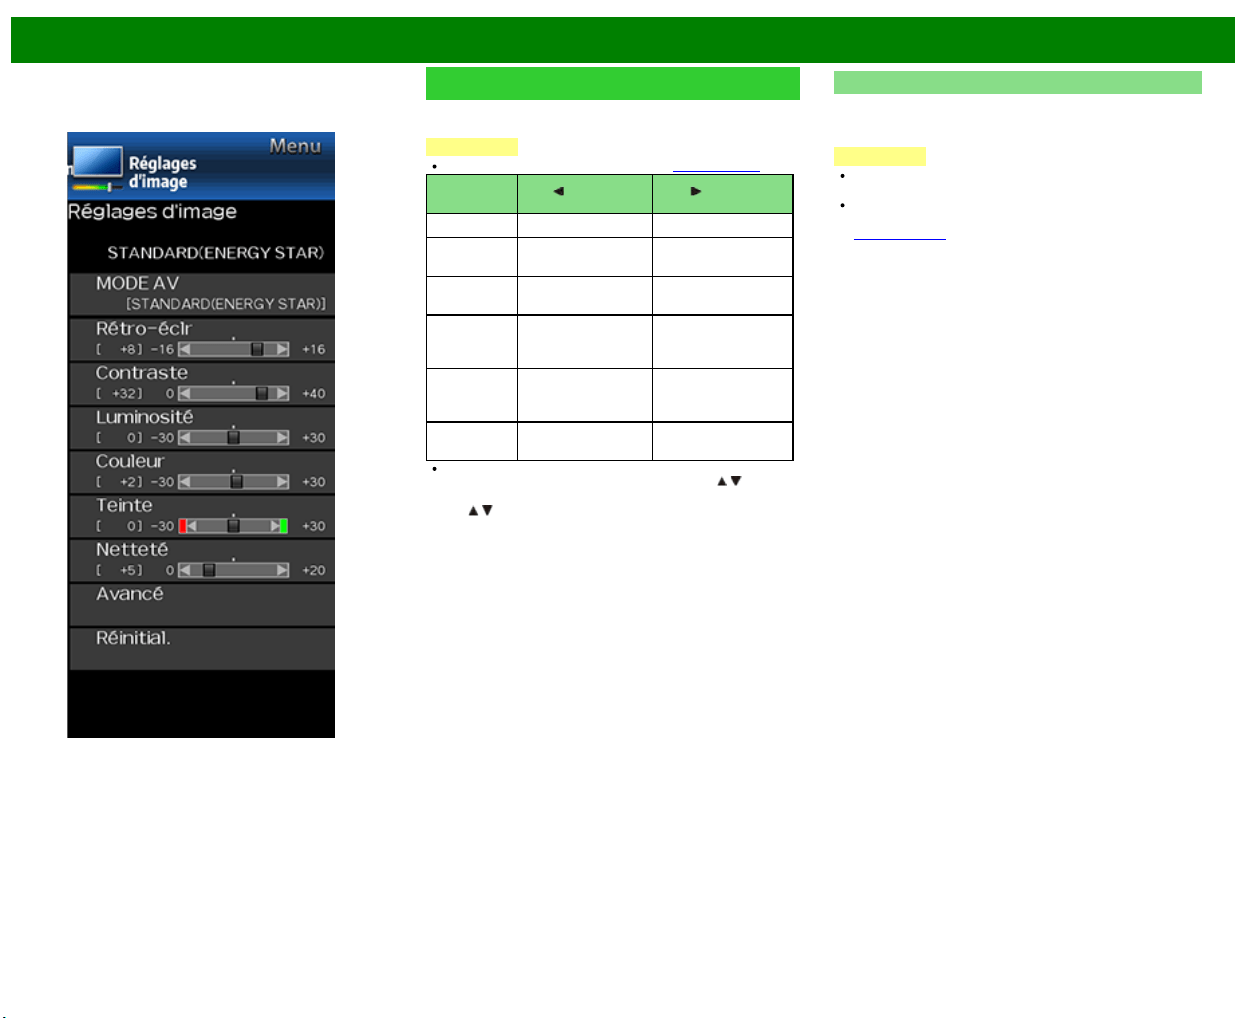
>>
<<
Menu d'affichage sur l'écran
FRA 4-17
Exemple
Réglages d'image
Ajustez l'image selon vos préférences avec les réglages de
l'image suivants.
REMARQUE
Pour utiliser le d'affichage sur l'écran, voir page 4-3.
Rubrique
sélectionnée
Touche Touche
Rétro-éclr L'écran s'assombrit L'écran s'illumine
Contraste Pour diminuer le
contraste
Pour augmenter le
contraste
Luminosité Pour diminuer la
luminosité
Pour augmenter la
luminosité
Couleur Pour diminuer
l'intensité des
couleurs
Pour augmenter
l'intensité des
couleurs
Teinte Les tons chair
deviennent plus
rouges
Les tons chair
deviennent plus
verts
Netteté Pour diminuer la
netteté
Pour augmenter la
netteté
Pour remettre toutes les rubriques de réglage de l'image
aux valeurs préréglées d'usine, appuyez sur
/ pour
sélectionner «Réinitial.», appuyez sur ENTER, appuyez
sur
/ pour sélectionner «oui», et appuyez ensuite sur
ENTER.
MODE AV (Changer qualité d'image)
Il est possible de modifier les réglages audio et vidéo afin
de les adapter au programme ou au contenu entré que vous
regardez.
REMARQUE
Les éléments sélectionnables varient selon la source
d'entrée et le modèle de votre téléviseur.
Vous pouvez sélectionner MODE AV en appuyant sur AV
MODE sur la télécommande.
Voir page 3-10 pour les détails des réglages du MODE
AV.
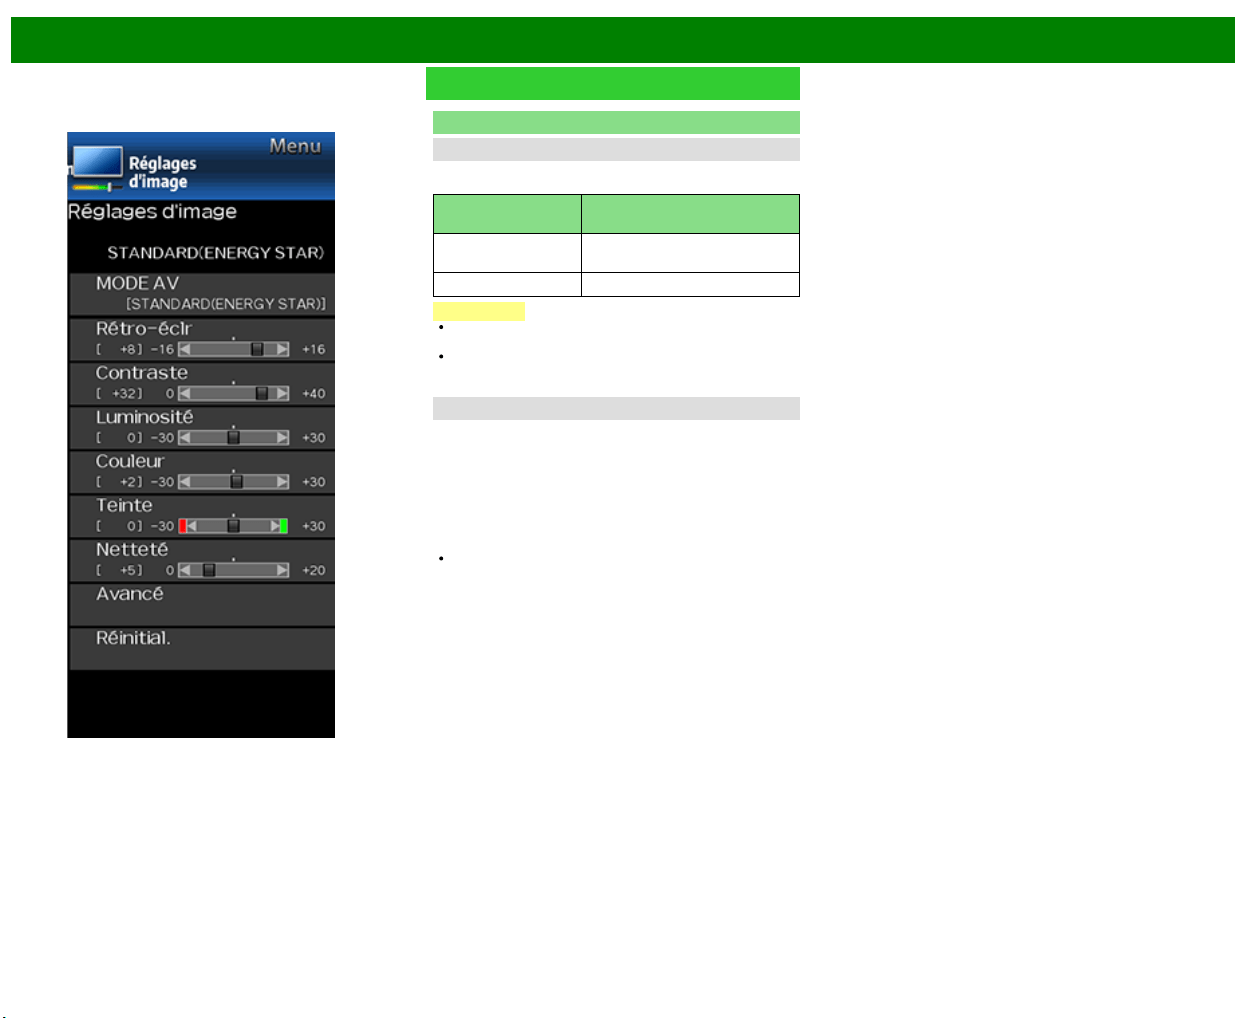
>>
<<
Menu d'affichage sur l'écran
FRA 4-18
Exemple
Réglages d'image (Suite)
Avancé
Optimisation de mouvement
Utilisez Optimisation de mouvement pour visualiser des
vidéos aux actions rapides plus clairement.
Rubrique
sélectionnée
Description
120Hz Pour obtenir une image plus
nette.
Arrêt Image originale.
REMARQUE
«Optimisation de mouvement» peut être à l'origine d'un
bruit d'image. Le cas échéant, désactivez-la.
Lorsque MODE AV est réglé sur «PC», ou qu'un format
d'ordinateur est entré, «Optimisation de mouvement»
n'est pas disponible.
Réduction bruit
Procure une image vidéo plus nette.
Auto : Ajuste automatiquement le niveau de réduction du
bruit.
Haut/Moyen/Bas : Vous pouvez sélectionner le niveau
souhaité pour afficher une image vidéo plus nette.
Arrêt : Pas de réglage.
REMARQUE
«Réduction bruit» n'est pas disponible si vous réglez
MODE AV sur «PC» ou qu'un format PC est entré.
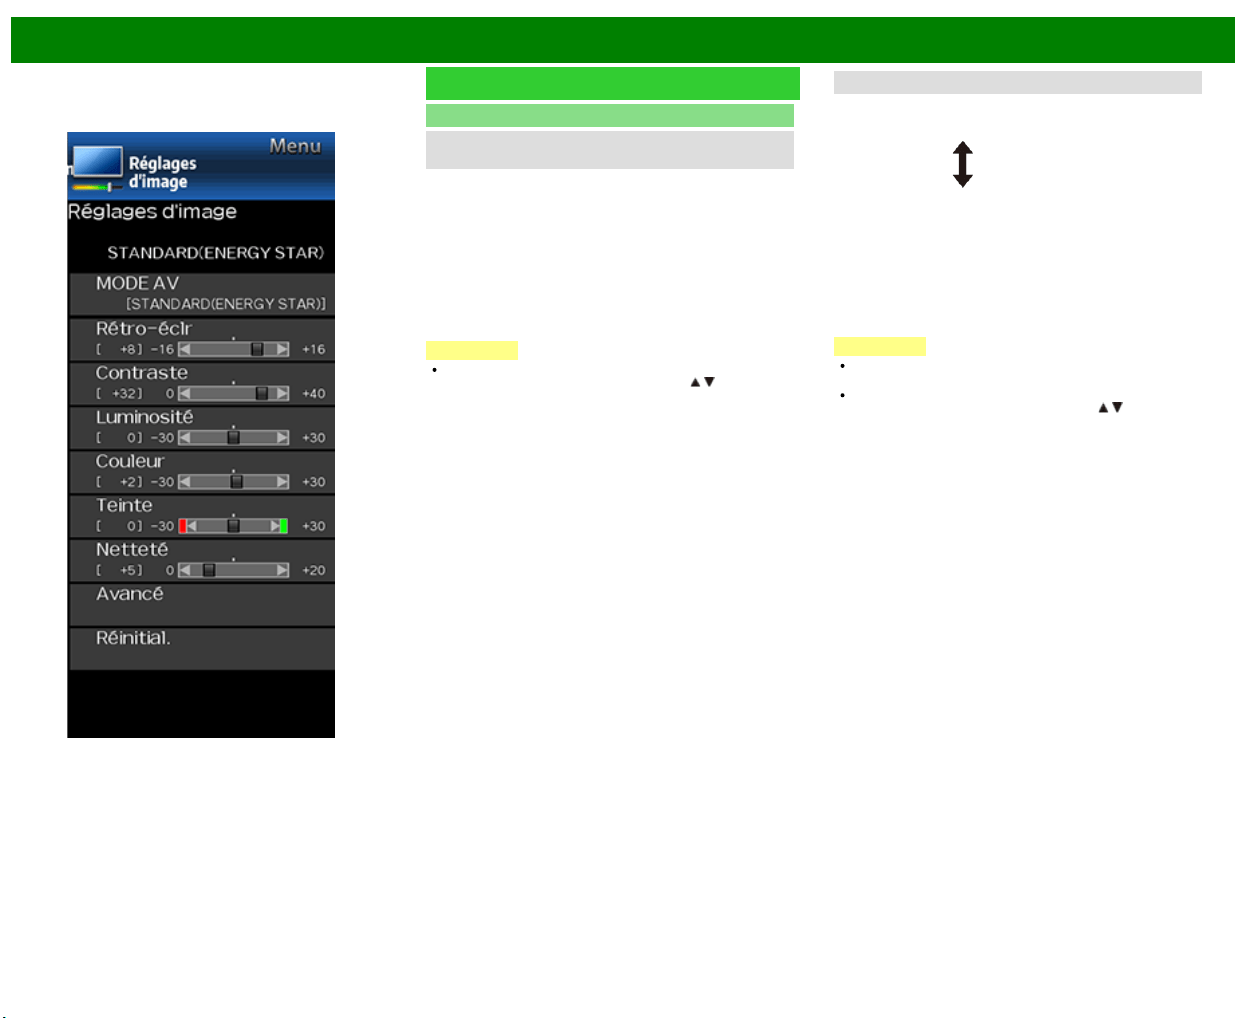
>>
<<
Menu d'affichage sur l'écran
FRA 4-19
Exemple
Réglages d'image (Suite)
Avancé
C.M.S.
(Système de gestion des couleurs)
La tonalité des couleurs est gérée en utilisant le réglage
d'accord du système de six couleurs.
C.M.S.-Teintes : Il s'agit d'une norme pour ajuster la
couleur avec une nuance de rouge ou une nuance de
bleu.a
C.M.S.-Saturations : Augmente ou diminue la saturation
de la couleur sélectionnée.
C.M.S.-Valeurs : Une valeur supérieure rend l'image plus
claire.
Une valeur inférieure rend l'image plus sombre.
REMARQUE
Pour remettre toutes les rubriques de réglage aux
valeurs préréglées d'usine, appuyez sur
/ pour
sélectionner «Réinitial.», et appuyez ensuite sur ENTER.
Température de couleur
Pour une meilleure balance des blancs, utilisez la correction
de température de la couleur.
Bas : Blanc avec nuance bleue
Moyen :
Haut
: Blanc avec nuance rouge
Réglage précis de la température de couleur
Pour régler précisément la couleur de température,
configurez «Réglage à 10 points» sur «Marche».
Vous pouvez ajuster le réglage «Position». Ajustez la
température de couleur réglée de +1 à +10.
Il est possible de régler la balance des blancs entre un
maximum de +30 et un minimum de –30 pour chaque
couleur de température.
REMARQUE
Lorsque «Position» est réglé sur «10», vous pouvez
ajuster la balance des blancs entre –30 et 0.
Pour remettre toutes les rubriques de réglage aux
valeurs préréglées d'usine, appuyez sur
/ pour
sélectionner «Réinitial.», et appuyez ensuite sur ENTER.
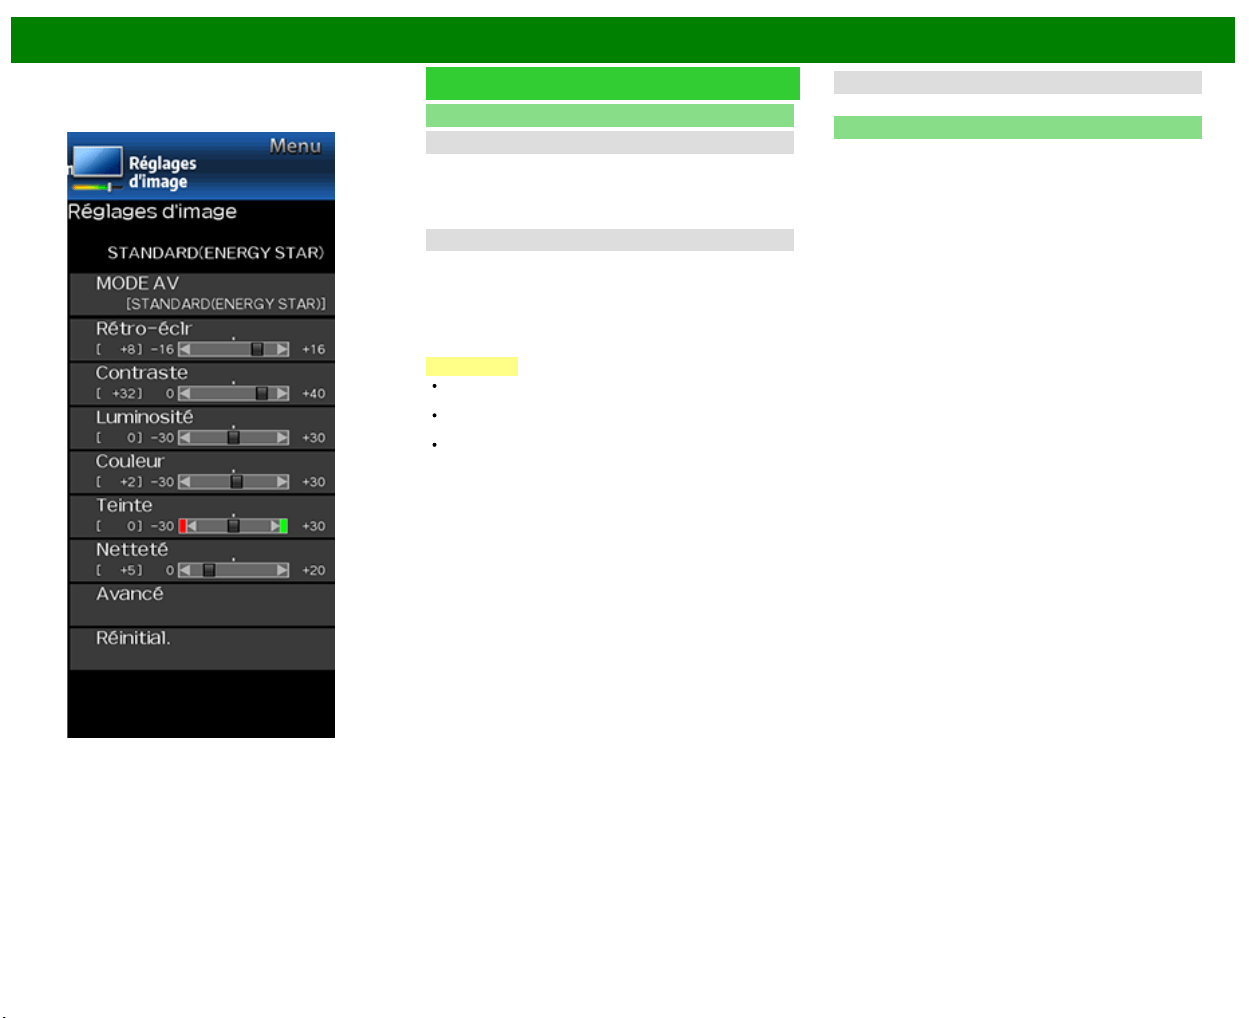
>>
<<
Menu d'affichage sur l'écran
FRA 4-20
Exemple
Réglages d'image (Suite)
Avancé
Contraste actif
Permet d'ajuster automatiquement le contraste de l'image
en fonction de la scène.
Marche : Produit une image au contraste élevé.
Arrêt : Aucun ajustement.
Mode film (3 : 2 déroulant)
Cette fonction fournit une lecture de haute qualité des
images codées à l'origine à 24 images/seconde, comme les
films.
Standard : Règle l'effet pour réduire le bruit du contenu
film.
Arrêt : Mode de visionnement normal.
REMARQUE
«Mode film» est inopérationnel en fonction du type de
signal d'entrée.
«Mode film» est inopérant lorsque vous réglez MODE AV
sur le MODE «PC».
«Standard» est inopérationnel en fonction du type de
signal d'entrée.
Noir et blanc
Pour regarder une vidéo en noir et blanc.
Réinitial.
Rétablit les paramètres d'image prédéfinis. Pour réinitialiser,
sélectionnez «oui» puis appuyez sur ENTER.
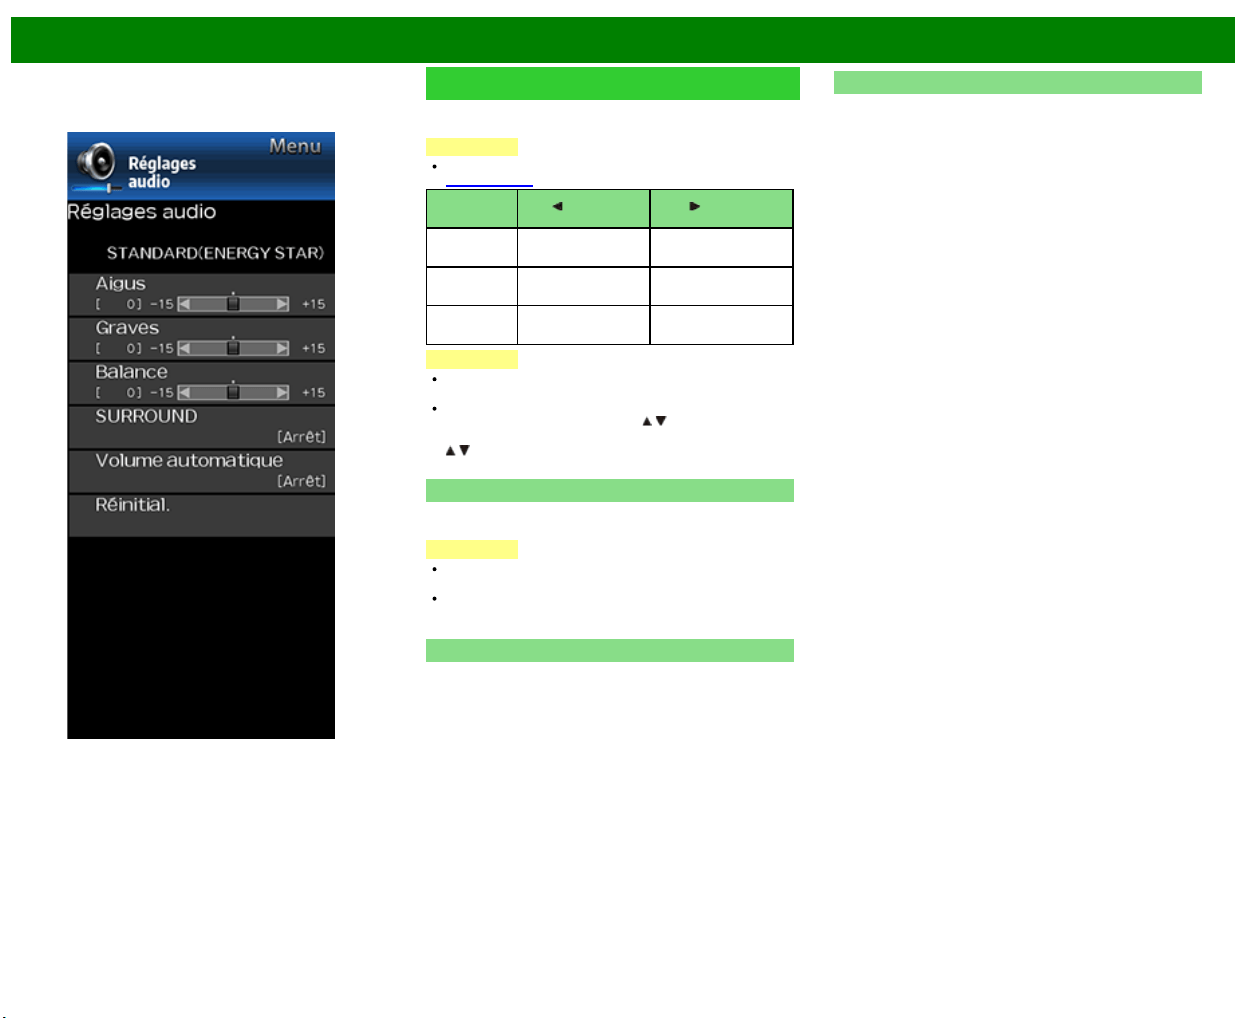
>>
<<
Menu d'affichage sur l'écran
FRA 4-21
Exemple
Réglages audio
Vous pouvez régler la qualité du son selon vos préférences
avec les réglages suivants.
REMARQUE
Pour utiliser le d'affichage sur l'écran,
voir page 4-3.
Rubrique
sélectionnée
Touche Touche
Aigus Pour diminuer les
aigus
Pour augmenter les
aigus
Graves Pour diminuer les
graves
Pour augmenter les
graves
Balance Diminue le son du
haut-parleur droit
Diminue le son du
haut-parleur gauche
REMARQUE
Le menu audio est estompé en gris lorsque «Sélect.
sortie» est réglé sur «Variable».
Pour remettre les rubriques de réglage audio aux valeurs
préréglées d'usine, appuyez sur
/ pour sélectionner
«Réinitial.», appuyez sur ENTER, et appuyez ensuite sur
/ pour sélectionner «oui», et appuyez ensuite sur
ENTER.
SURROUND
La fonction d'ambiophonie produit un effet d'ambiophonie
grâce aux haut-parleurs.
REMARQUE
Le menu Réglages audio est estompé en gris lorsque
«Sélect. sortie» est réglé sur «Variable».
Pour certains disques, un réglage peut être requis sur
votre lecteur BD/DVD. Dans ce cas, veuillez vous
reporter au mode d'emploi de votre lecteur BD/DVD.
Volume automatique
Il arrive que différentes sources audio n'aient pas le même
niveau de volume, par exemple lors de l'interruption d'un
programme par une publicité, la fonction de contrôle
automatique du volume (Volume automatique) atténue ce
problème en égalisant le son.
MARCHE : Réduit les écarts de volume entre différents
sources audio. Le résultat est ajusté automatiquement
conformément aux sources audio.
ARRÊT : Aucun réglage.
Réinitial.
Rétablit les paramètres audio prédéfinis. Pour réinitialiser,
sélectionnez «oui» puis appuyez sur ENTER.

>>
<<
Menu d'affichage sur l'écran
FRA 4-22
Exemple
Smart TV
Tableau de bord
Vous pouvez afficher une liste des paramètres Smart TV
généraux.
Configuration Internet
Configure les paramètres du réseau local et Internet.
Configuration de réseau
Vous pouvez connecter votre téléviseur à Internet à l'aide de
l'élément de réglage «Configuration de réseau».
(Voir pages 8-3 à 8-4.)
Service interactif
Si vous ne désirez pas que l'on puisse se connecter à
Internet en votre absence, procéder aux réglages qui
empêchent la connexion du téléviseur à Internet.

>>
<<
Menu d'affichage sur l'écran
FRA 4-23
Exemple
Smart TV (Suite)
Fond d'écran
Activer la fonction affichera des images fixes lorsque le
téléviseur sera en mode veille.
Mode papier peint
Configure les mode papier peint.
Arrêt : Aucune image n'est affiché.
Marche : Les images fixes sont affichées lorsque la
télévision est en veille.
Source de données
Pour le papier peint, vous pouvez choisir les images fixes
préinstallées dans le téléviseur ou vos images fixes favorites
stockées dans le périphérique mémoire USB.
Pré-installé : Les images préinstallées dans le téléviseur
sont affichées dans un diaporama.
USB : Vos images favorites enregistrées pour le papier
peint s'affichent. Si une seule image fixe est enregistrée
dans le périphérique mémoire USB, cette image s'affiche
comme papier peint. Lorsqu'il y a plusieurs images fixes
en mémoire, toutes les images s'affichent dans un
diaporama.
REMARQUE
Les images sont affichées sous forme de diaporama à
des intervalles 3 minutes.
Lorsque le téléviseur est en mode Papier peint, vous
pouvez l'éteindre en pressant et en maintenant enfoncé
POWER sur le téléviseur pendant 5 secondes.
- Juste avant que le téléviseur ne s'éteigne, la dernière
image affichée au moment de l'arrêt du téléviseur
apparaît brièvement.
- Vos réglages peuvent ne pas être mémorisés dans
certains cas.
Lorsque vous affichez des images à l'aide du
périphérique mémoire USB :
Créez un dossier nommé «WP» dans le répertoire racine
du périphérique mémoire USB (le premier répertoire
lorsque le périphérique mémoire USB est ouvert), et
stockez-le dans le dossier des images fixes que vous
voulez afficher pour le papier peint.
Vous devez insérer le périphérique mémoire USB dans le
téléviseur avant d’éteindre le téléviseur.
S'il y a des images sur le périphérique mémoire USB
mais qu'elles n'apparaissent pas à l'écran, passez en
mode USB et vérifiez que les fichiers images sur le
périphérique mémoire USB s'affichent correctement.
Réglage de minuteur
Vous pouvez configurer la durée pendant laquelle le
téléviseur demeure en mode papier peint.
3 heures/6 heures/12 heures/24 heures
REMARQUE
Aucun bouton sauf POWER ne fonctionne même lorsque
les images fixes sont affichées.
Si le périphérique mémoire USB prêt à l'emploi n'est pas
inséré, les images fixes préinstallées dans le téléviseur
seront affichées dans un diaporama même lorsque le
«Source de données» est configuré sur «USB».
Le périphérique mémoire USB ne pouvant être détecté
immédiatement après l'allumage du téléviseur depuis le
mode veille; il est possible que le papier peint préinstallé
dans le téléviseur soit affiché même lorsque le «Source
de données» est configuré sur «USB».
Les images fixes seront affichées jusqu'à ce que le
temps configuré se soit écoulé.
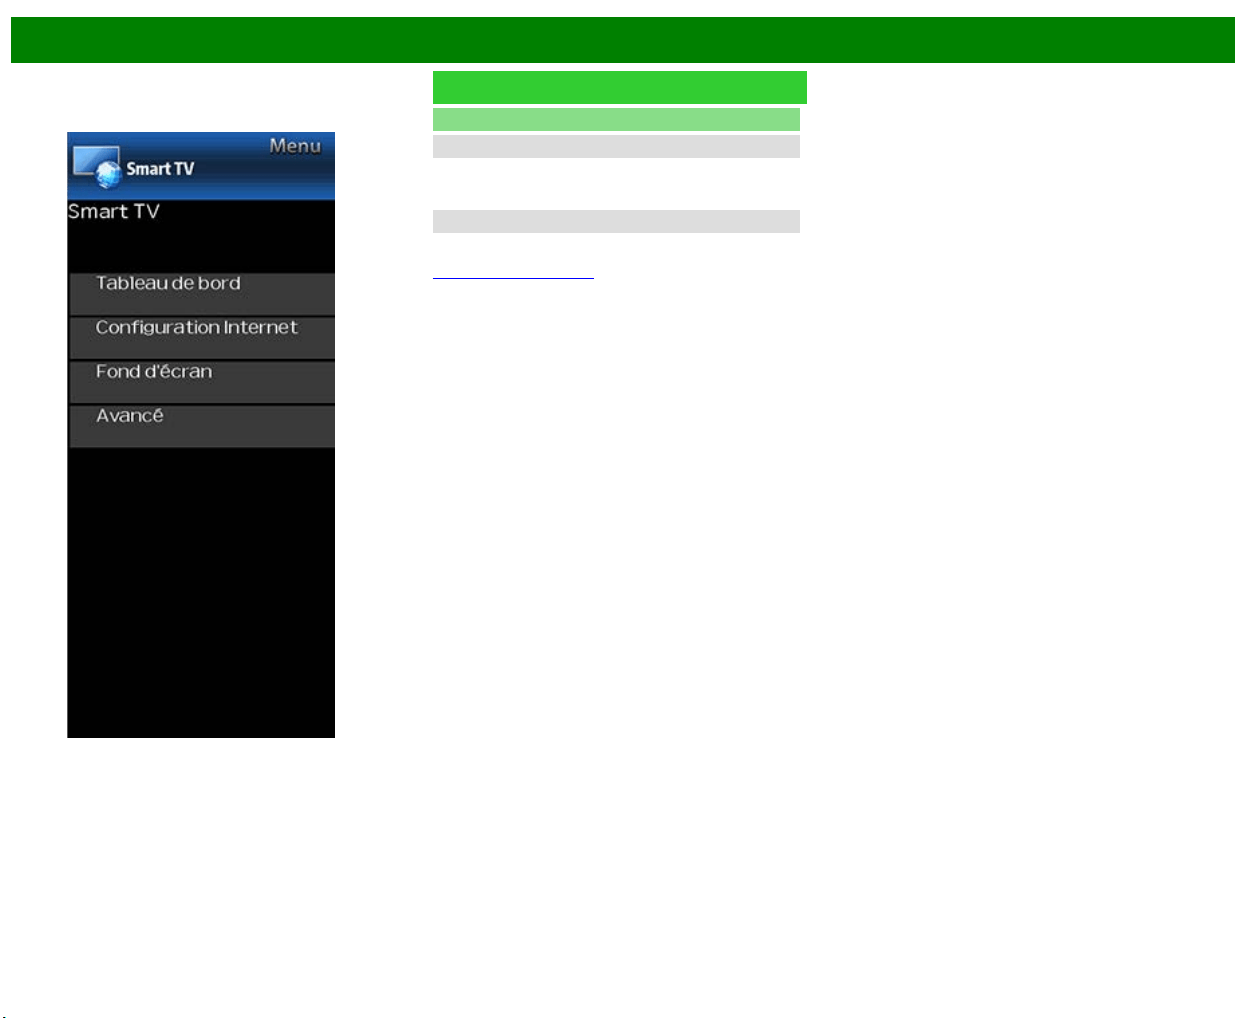
>>
<<
Menu d'affichage sur l'écran
FRA 4-24
Exemple
Smart TV (Suite)
Avancé
Aide Netflix
Vous pouvez désactiver la fonction Netflix. Consultez
«Smart TV» > «Avancé» > «Aide Netflix» et sélectionnez
«Désactiver».
Aide VUDU
Pour désactiver la fonction VUDU; consultez «Smart TV» >
«Avancé» > «Aide VUDU» et sélectionnez «oui».
(Voir pages 8-12 to 8-13.)
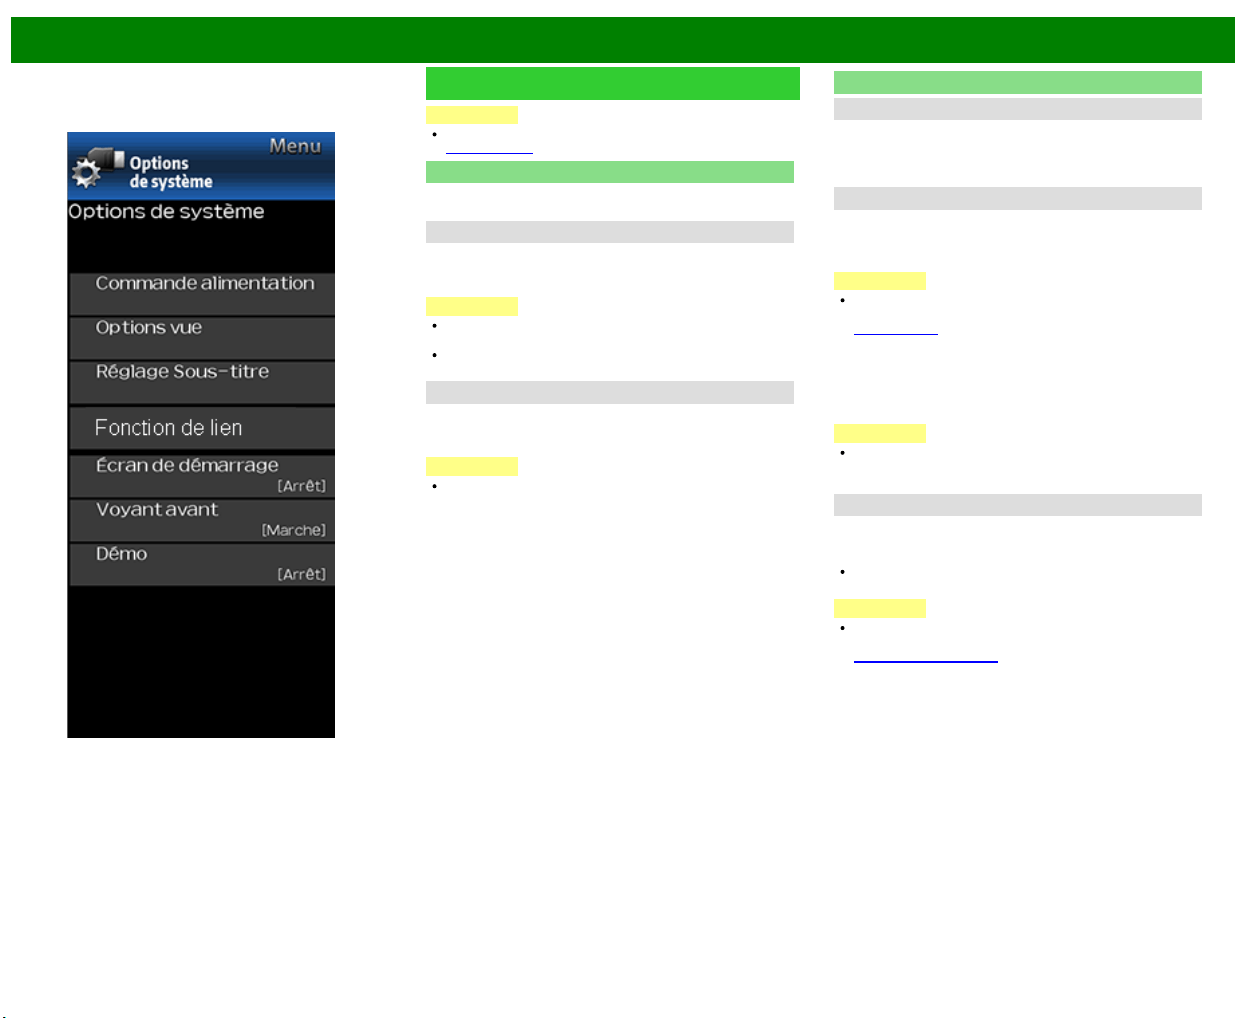
>>
<<
Menu d'affichage sur l'écran
FRA 4-25
Exemple
Options de système
REMARQUE
Pour utiliser le d'affichage sur l'écran,
voir page 4-3.
Commande alimentation
Le réglage de la commande d'alimentation vous permet
d'économiser de l'énergie.
Aucun sgn arrêt
Lorsque cette fonction est activée, le téléviseur s'éteint
automatiquement si aucun signal n'est reçu pendant plus de
15 minutes.
REMARQUE
5 minutes avant la mise hors tension, la durée restante
s'affiche toutes les minutes.
Cette fonction risque de ne pas être opérationnelle
lorsqu'un programme télévisé est terminé.
Pas d'opé. arrêt
Lorsque vous activez cette fonction, le téléviseur s'éteint
automatiquement si aucune opération n'est effectuée
pendant plus de 3 heures.
REMARQUE
5 minutes avant la mise hors tension, la durée restante
s'affiche toutes les minutes.
Options vue
Mode vue
Cette fonction permet de changer la taille de l'écran.
Sélectionnez «Options vue» dans le menu pour afficher
l'écran du menu Mode vue.
Le menu Mode vue varie en fonction de la source d'entrée.
Changer audio
MPX
Vous permet de modifier le son lorsque plusieurs sons sont
disponibles pour le programme que vous regardez.
REMARQUE
Vous pouvez changer Audio en appuyant sur AUDIO de
la télécommande.
Voir page 3-8 pour plus de détails sur la fonction
AUDIO.
Audio seul
Lorsque vous écoutez de la musique à partir d'un
programme musical, vous pouvez éteindre l'écran et ne
profitez que du son.
REMARQUE
L'image à l'écran redeviendra normale à la pression sur
une touche (à l'exception des touches de réglage audio,
comme VOL, MUTE).
Changer cc
Vous permet de changer l'affichage des sous-titres.
Sélectionnez «Changer cc» dans le menu pour afficher les
informations concernant les sous-titres.
Les informations affichées varient en fonction du
programme que vous regardez.
REMARQUE
Vous pouvez changer les sous-titres en appuyant sur CC
de la télécommande.
Voir pages 3-12 à 3-13 plus de détails sur la fonction
des sous-titres.

>>
<<
Menu d'affichage sur l'écran
FRA 4-26
Exemple
Options de système (Suite)
Réglage Sous-titre
Cette fonction vous permet d'ajuster l'apparence de l'écran
des sous-titres à votre guise.
Size/Edge Effect/Edge Color/Text Color/Coul. arrière-
plan/Text Opacity/Opac. arrière-plan
REMARQUE
La valeur par défaut dépend de la station émettrice.
Écran de démarrage
Lorsque cette fonction est activée; le logo SHARP
s'affichera lorsque vous allumerez votre téléviseur.
REMARQUE
Cette fonction n'est pas disponible lorsque le téléviseur
est configuré sur le «Mode de mise en marche rapide».
Voyant avant
En cas de réglage de cette fonction sur «Marche», le voyant
DEL situé à l'avant du téléviseur s'allume.
REMARQUE
«Marche» est la valeur d'usine prédéfinie par défaut. Si
vous souhaitez éteindre le voyant DEL, réglez la fonction
sur «Arrêt».
Démo
Vous pouvez sélectionner l'image à partir de plusieurs
modes de démonstration.
REMARQUE
Les types d'éléments de réglage disponibles varient en
fonction du modèle de votre téléviseur.
Cette fonction est annulée quand vous appuyez sur EXIT
de la télécommande.
«Démo» peut ne pas être sélectionné en fonction du type
de signal d'entrée ou de l'état de l'application.
«Démo» peut ne pas être annulé automatiquement en
fonction du type de signal d'entrée.
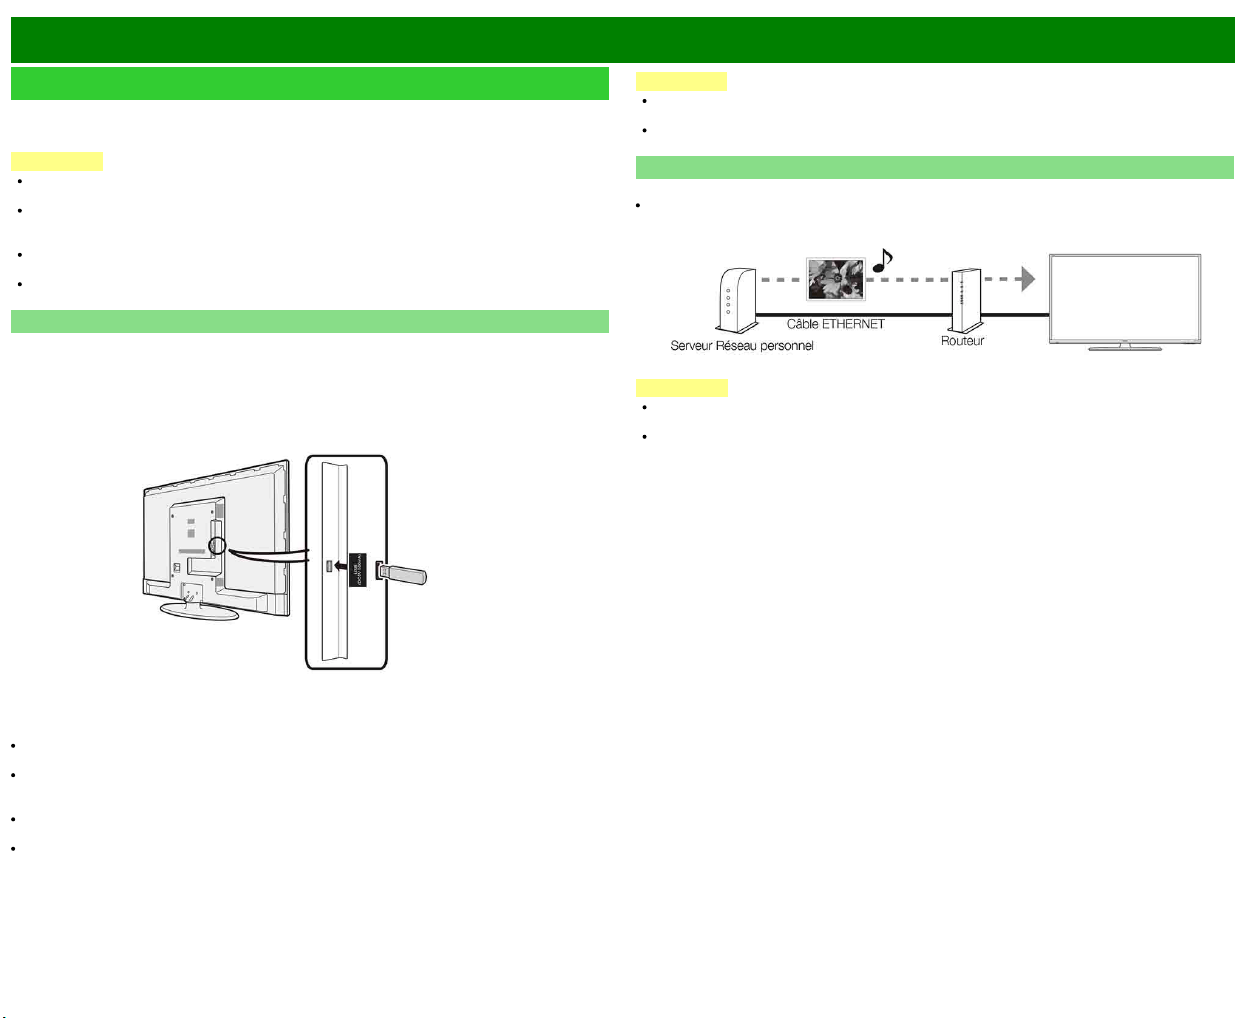
>>
<<
Lecture de morceaux de photos/musique/vidéo
FRA 5-1
Préparatifs
Vous pouvez raccorder le téléviseur à un périphérique mémoire USB, un disque dur USB ou un
serveur Réseau personnel afin de regarder des images, d'écouter de la musique et de regarder
des vidéos.
REMARQUE
En fonction du périphérique mémoire USB/disque dur USB/serveur Réseau personnel, le
téléviseur peut ne pas être capable de reconnaître les données enregistrées.
Un certain temps peut-être nécessaire à la lecture des données enregistrées si le périphérique
mémoire USB/disque dur USB/serveur Réseau personnel contient de nombreux fichiers ou
dossiers.
Utilisez uniquement des caractères alphanumériques lors de la définition des noms des
fichiers.
Les noms de fichier de plus de 80 caractères (cette option peut être différente en fonction du
réglage des caractères) peuvent ne pas être affichés.
Connexion d'un périphérique mémoire USB/un disque dur USB
Insérez le périphérique mémoire USB contenant des photos, des morceaux de musique ou des
vidéos enregistrés dans la prise USB du téléviseur.
Si vous connectez un disque dur USB, veillez à utiliser un disque dur avec un adaptateur
secteur.
Ne retirez pas un périphérique mémoire USB ou une carte mémoire du téléviseur lors des
opérations de transfert de fichiers, d'utilisation de la fonction Diaporama, de changement
d'écrans ou avant de quitter «USB» à partir de la Liste d'entrée.
N'insérez pas ou ne retirez pas de périphérique mémoire USB/disque dur USB du téléviseur
d'une manière répétitive.
Si vous utilisez un lecteur de cartes, veillez à insérer un périphérique mémoire USB en premier
lieu.
ATTENTION
N'utilisez pas le câble d'extension USB si vous raccordez un périphérique mémoire USB
sur la prise USB du téléviseur.
L'utilisation d'un câble d'extension USB avec un périphérique mémoire USB peut
empêcher le téléviseur de fonctionner correctement.
Connexion à un serveur réseau personnel
Raccordez le téléviseur au serveur Réseau personnel à l'aide d'un câble ETHERNET.
Vous pouvez également connecter un serveur pour Réseau personnel à l'aide d'un réseau LAN
sans fil.
REMARQUE
Ne débranchez pas le serveur Réseau personnel du téléviseur pendant le transfert de fichiers,
lorsque l'écran change ou avant de quitter «Réseau personnel(DLNA)» Liste d'entrée.
Ne branchez et ne débranchez pas un serveur Réseau personnel à plusieurs reprises du
téléviseur.
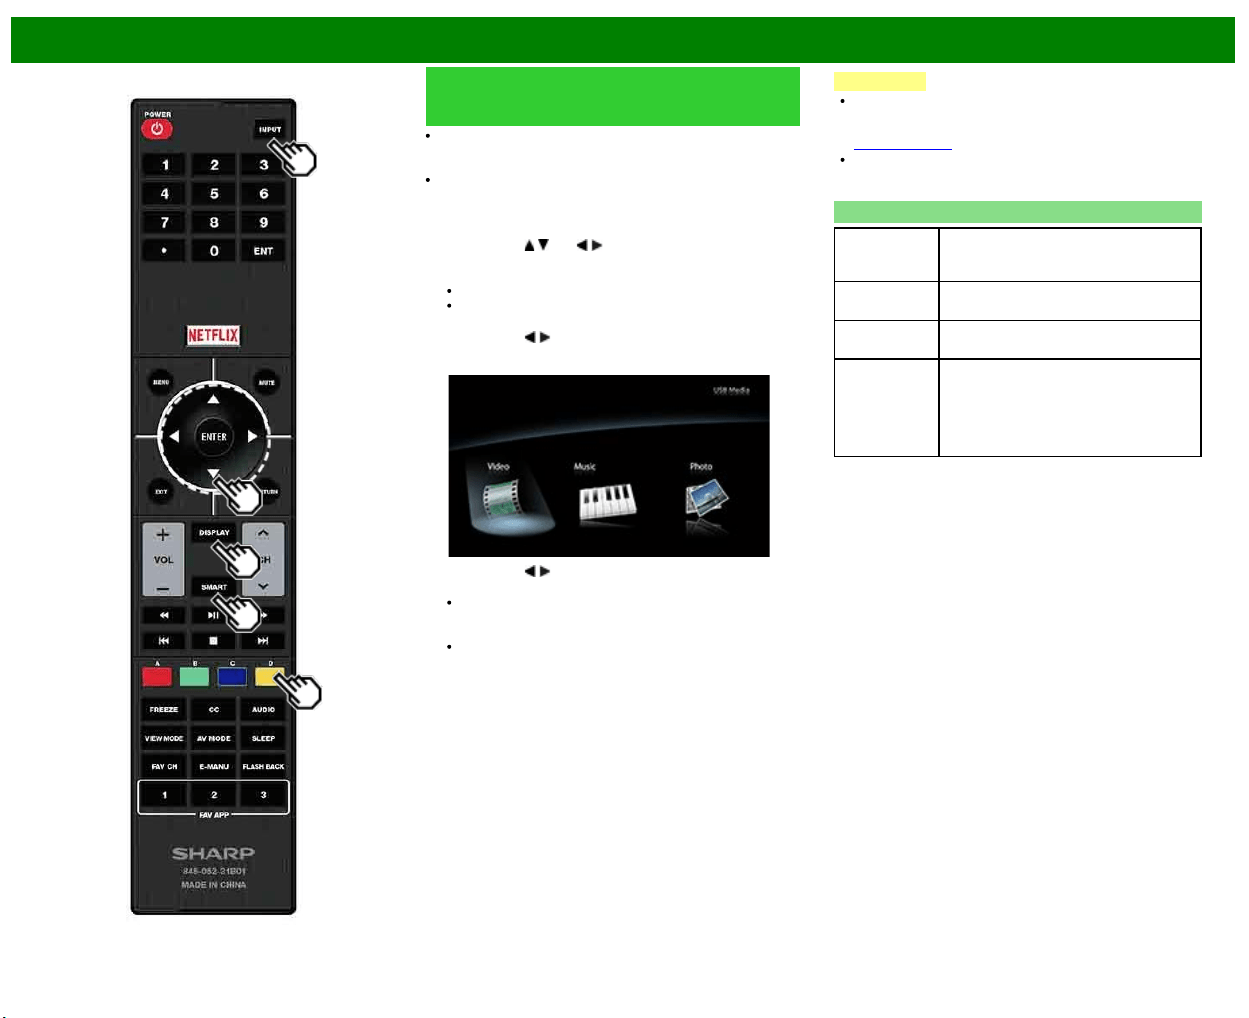
>>
<<
Lecture de morceaux de photos/musique/vidéo
FRA 5-2
Sélection des dossiers pour la
lecture
Pour lire les données sur un périphérique mémoire USB,
introduisez-la dans le téléviseur. Mode USB est
automatiquement sélectionné. (Passez à l'étape 2)
Utilisez la procédure suivante pour revenir au mode USB
après avoir commuté du mode USB vers un autre mode.
1 Sélectionnez «USB» ou «Réseau personnel(Home
Network)» sur l'écran de la Liste d'entrée.
2 Appuyez sur
/ (ou / ) pour sélectionner le
lecteur/serveur dans lequel se trouvent les fichiers
recherchés, et appuyez ensuite sur ENTER.
Pour mode USB, sélectionnez le lecteur.
Dans Mode Réseau personnel, vous devez
sélectionnez le serveur.
3 Appuyez sur
/ pour sélectionner «Photo», «Musique»
ou «Vidéo», et appuyez ensuite sur ENTER.
Exemple
4 Appuyez sur / pour sélectionner le dossier
de votre choix, et appuyez ensuite sur ENTER.
Le «Mode vue» est fixe en mode photo ou musique.
En mode vidéo, vous pouvez sélectionner «Auto»,
«Original» ou «Stretch».
Dans le «Mode vidéo», les vidéos qui sont plus petites
que le nombre de pixels sur l'écran sont affichées aux
dimensions originales. Dans ces cas, réglez le «Mode
vue » sur «Auto» pour afficher la vidéo en plein écran.
REMARQUE
L'écran Média peut être affiché même en utilisant la
fenêtre des applications. Pour afficher la fenêtre des
applications, appuyez sur SMART.
(Voir page 3-6.)
16 est le nombre maximum d'unités USB et 10 est le
nombre maximum de serveur de Réseau personnels qui
peuvent être affichés.
Compatibilité des périphériques USB
Périphérique
USB
Mémoire USB, Lecteur de carte USB
(Catégorie de stockage de masse),
Disque dur USB
Système de
fichiers
FAT/FAT32/NTFS (seul disque dur USB)
Format des
fichiers image
JPEG (.jpg) (conforme DCF2.0)
Format des
fichiers
musicaux
MP3 (.mp3)
Bitrate : 32k, 40k, 48k, 56k, 64k, 80k,
96k, 112k, 128k, 160k, 192k, 224k,
256k, 320kbps
Taux d'échantillonnage : 32k, 44,1k,
48kHz
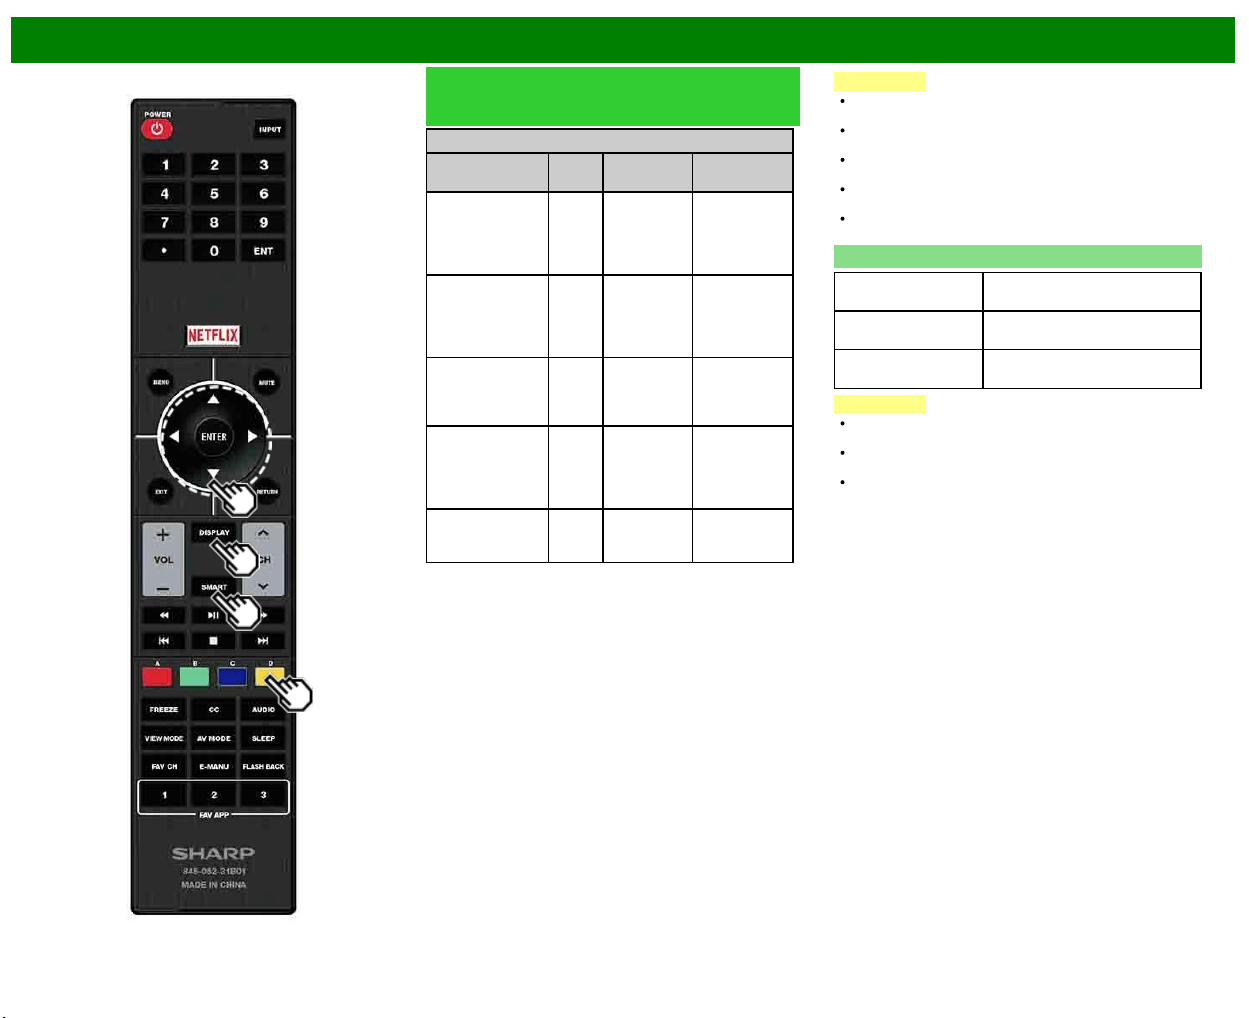
>>
<<
Lecture de morceaux de photos/musique/vidéo
FRA 5-3
Sélection des dossiers pour la
lecture (Suite)
Format des fichiers vidéo
Extension de
fichier
Conte-
nant
Vidéo Audio
.avi AVI
H.264
MPEG4
Motion Jpeg
MP3
Dolby Digital
LPCM
ADPCM
DTS
.mkv MKV
H.264
MPEG4
MP3
Dolby Digital
LPCM
ADPCM
DTS
.asf
.wmv
ASF
MPEG4
VC-1
Windows
Media
MP3
Dolby Digital
LPCM
WMA
.mp4
.mov
MP4
(SMP4)
H.264
MPEG4
Motion Jpeg
MP3
Dolby Digital
Dolby Digital
Plus
AAC
.mpg
.mpeg
PS
MPEG2
MPEG1
Dolby Digital
MPEG
LPCM
REMARQUE
Les fichiers jpeg de format progressif ne sont pas pris en
charge.
Périphériques USB 1.1 peuvent ne pas être lus
correctement.
Les opérations utilisant des noyaux USB ne sont pas
garanties.
Certains formats de fichiers vidéo peuvent ne pas être
lus en fonction du fichier.
Il est possible que certaines images ne s'affichent pas au
format approprié en fonction du format du fichier.
Compatibilité avec le serveur réseau personnel
Format des fichiers
image
JPEG
Format des fichiers
musicaux
LPCM, MP3
Format des fichiers
vidéo
MPEG2-PS, MPEG2-TS,
WMV, ASF, MP4, MOV, AVI
REMARQUE
Les fichiers au format progressif jpeg ne sont pas pris en
charge.
Certains formats de fichiers vidéo ne sont pas lus en
fonction du fichier ou le serveur.
WMV, ASF, MP4, MOV et AVI sont des contenus non
Réseau personnel.

>>
<<
Lecture de morceaux de photos/musique/vidéo
FRA 5-4
Lecture de fichiers sur un
périphérique mémoire USB/serveur
réseau personnel
REMARQUE
Les images à l'écran dans cette section sont pour le
mode USB. Cela peut être légèrement différent en mode
Réseau personnel.
Mode photo
Visionnage de vignettes
Exemple
Touches pour opérations sous forme de vignettes
Touches Description
/ / / Sélection de l'élément de son choix.
ENTER Lors de la sélection d'une icône
répertoire :
Entrée dans le répertoire sélectionné.
Lors de la sélection d'une vignette de
photo :
Commencez le diaporama.
RETURN Retourne au processus précédent.
A (rouge) Effacez la console de visualisation
d'informations sur le fichier.
B (vert)*
C (bleu)
D (jaune)
*Cette fonction est disponible uniquement pour le mode
USB.
REMARQUE
En cas de présence de fichiers image non valides, la
marque X sera affichée au niveau du fichier concerné
(mode USB uniquement).
Quelques instants après avoir positionné le curseur sur
une miniature, l'information sur le fichier apparaît sur le
côté droit, au centre de l'écran.
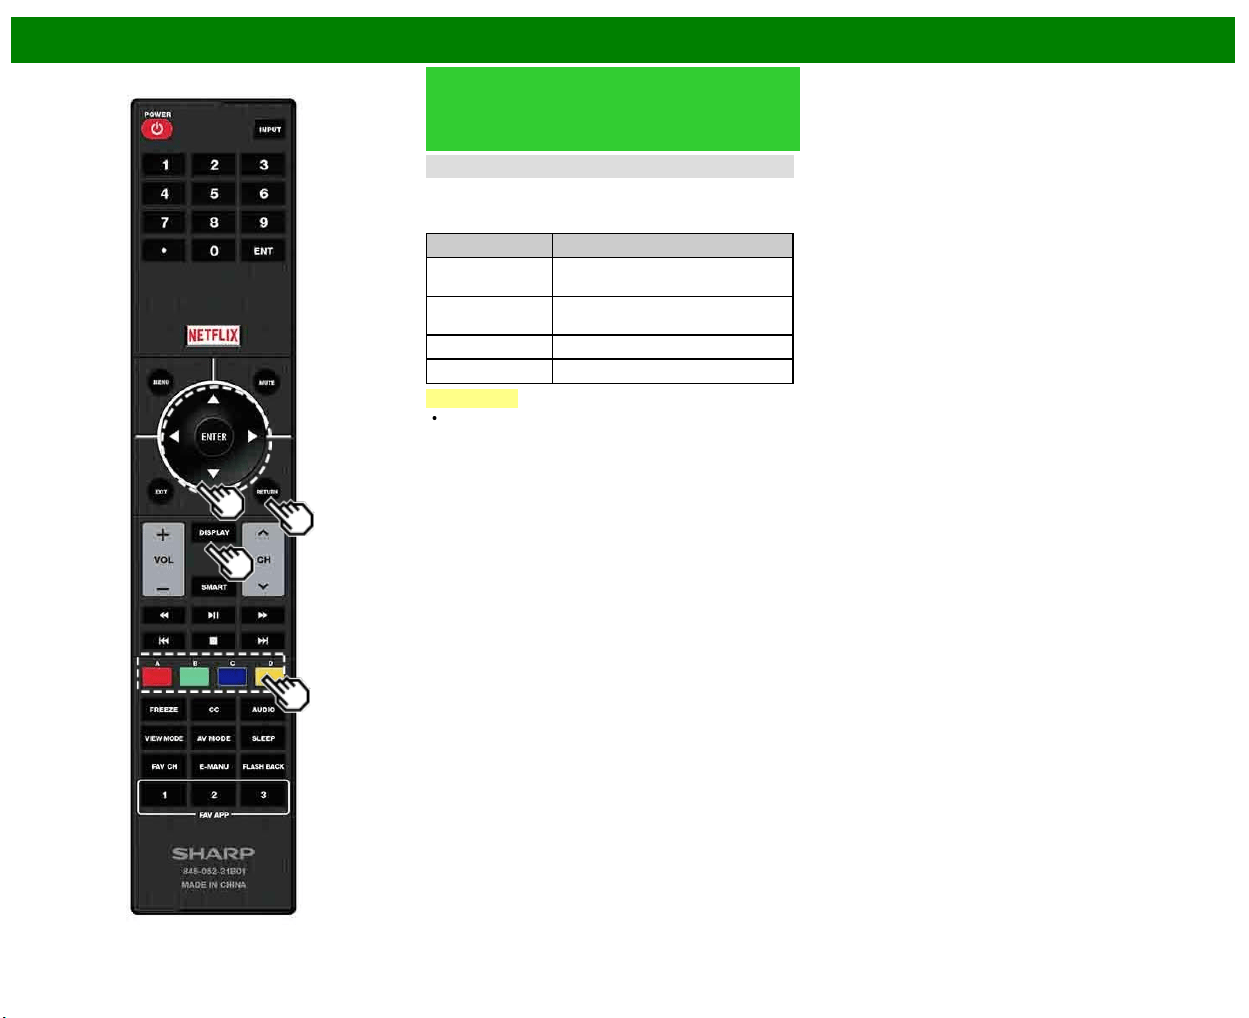
>>
<<
Lecture de morceaux de photos/musique/vidéo
FRA 5-5
Lecture de fichiers sur un
périphérique mémoire USB/serveur
réseau personnel (Suite)
Diaporama
Les images affichées dans l'écran de sélection des
vignettes sont présentées sous forme de diaporama.
Touches pour opération sous forme de diaporama
Touches Description
RETURN Retour dans l'écran de sélection des
vignettes.
B (vert) Afficher/masquer le guide sur les
opérations
C (bleu) Fichier précédent
D (jaune) Fichier suivant
REMARQUE
La rotation des images s'applique uniquement aux
éléments sélectionnés d'une manière temporaire et ce
réglage n'est pas enregistré.
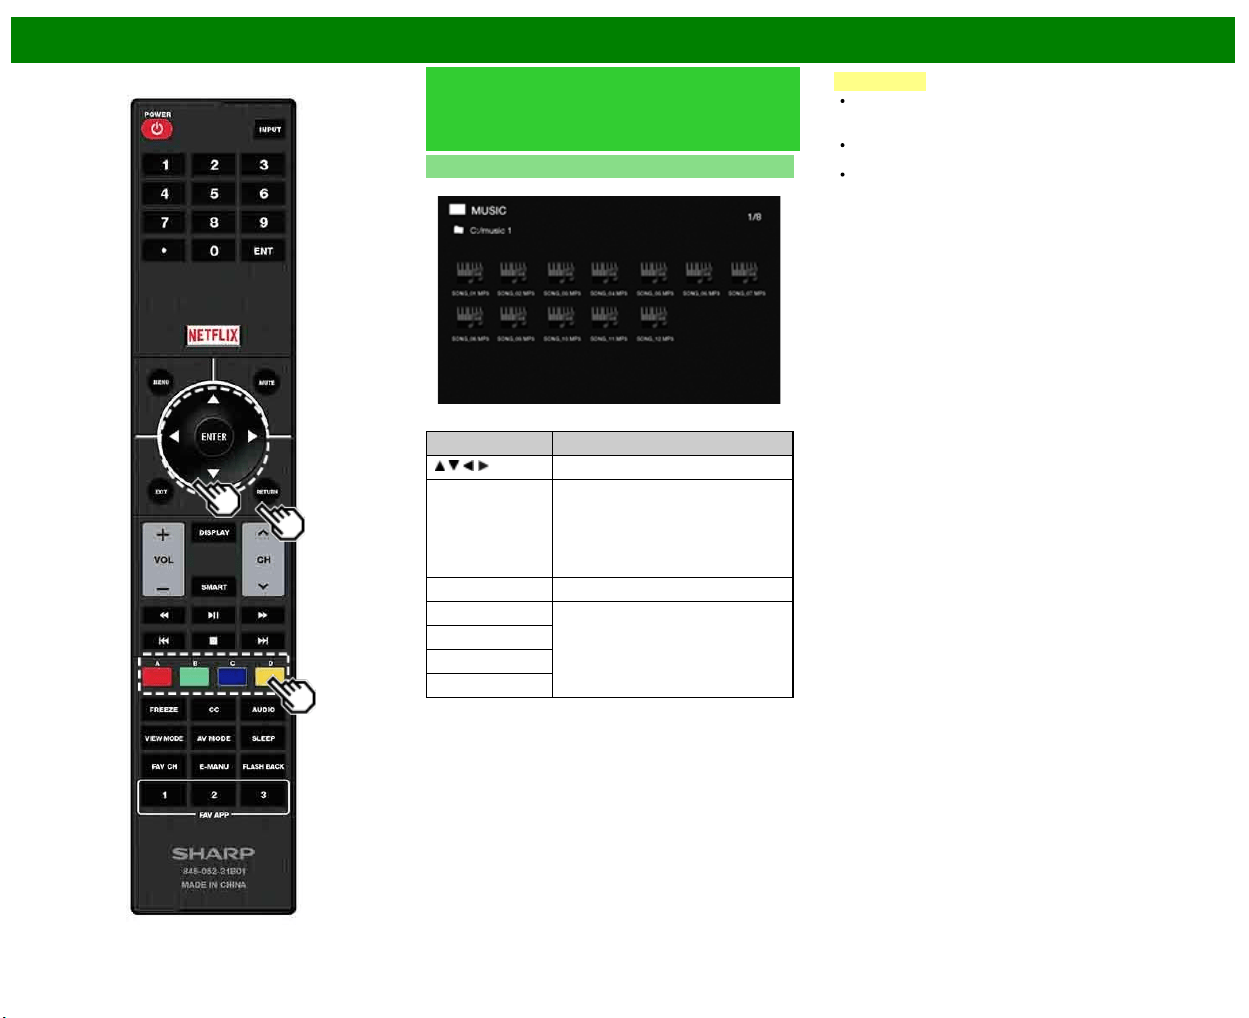
>>
<<
Lecture de morceaux de photos/musique/vidéo
FRA 5-6
Lecture de fichiers sur un
périphérique mémoire USB/serveur
réseau personnel (Suite)
Mode musique
Exemple
Touches pour le mode musique
Touches Description
/ / / Sélection de l'élément de son choix.
ENTER Lors de la sélection d'une icône
répertoire :
Entrée dans le répertoire sélectionné.
Lors de la sélection d'un fichier
musical :
Lecture du morceau.
RETURN Retourne au processus précédent.
A (rouge) Effacez la console de visualisation
d'informations sur le fichier.
B (vert)
C (bleu)
D (jaune)*
* Cette fonction est disponible uniquement pour le mode
USB.
REMARQUE
En cas de présence de fichiers musicaux non valides, la
marque X sera affichée au niveau du fichier concerné
(mode USB uniquement).
Le temps de lecture affiché peut légèrement différé du
temps de lecture réel d'un fichier à l'autre.
Quelques instants après avoir positionné le curseur sur
une miniature, l'information sur le fichier apparaît sur le
côté droit, au centre de l'écran.
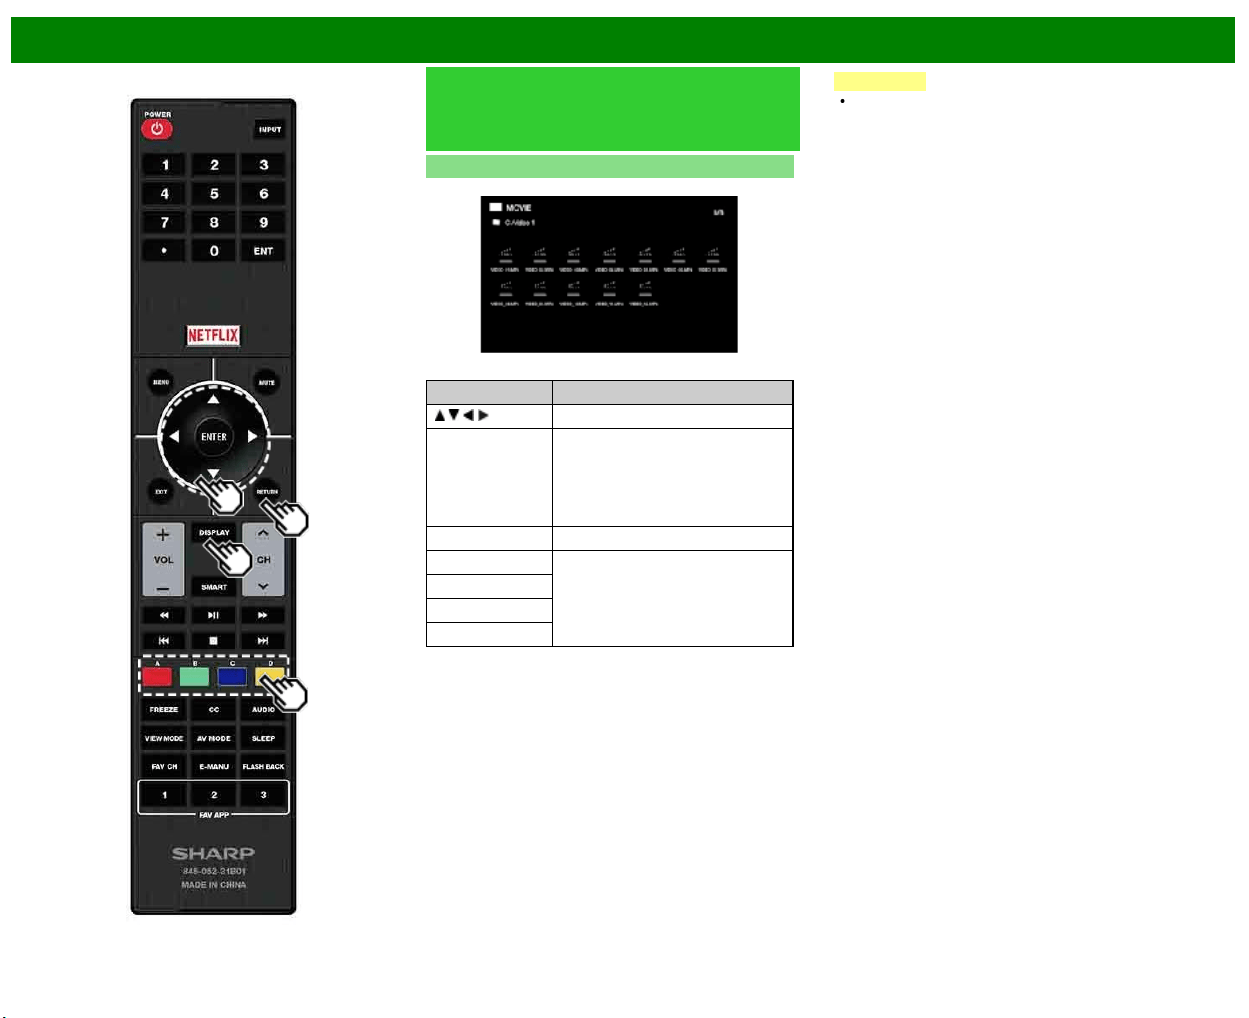
>>
<<
Lecture de morceaux de photos/musique/vidéo
FRA 5-7
Lecture de fichiers sur un
périphérique mémoire USB/serveur
réseau personnel (Suite)
Mode vidéo
Exemple
Touches pour opération de sélection de fichiers
Touches Description
/ / / Sélection de l'élément de son choix.
ENTER Lors de la sélection d'une icône
répertoire :
Entrée dans le répertoire sélectionné.
Lors de la sélection d'un fichier vidéo
:
Lisez la vidéo.
RETURN Retournez au processus précédent.
A (rouge) Effacez la console de visualisation
d'informations sur le fichier.
B (vert)
C (bleu)
D (jaune)*
*Cette fonction est disponible uniquement pour mode USB.
REMARQUE
Quelques instants après avoir positionné le curseur sur
une miniature, l'information sur le fichier apparaît sur le
côté droit, au centre de l'écran.
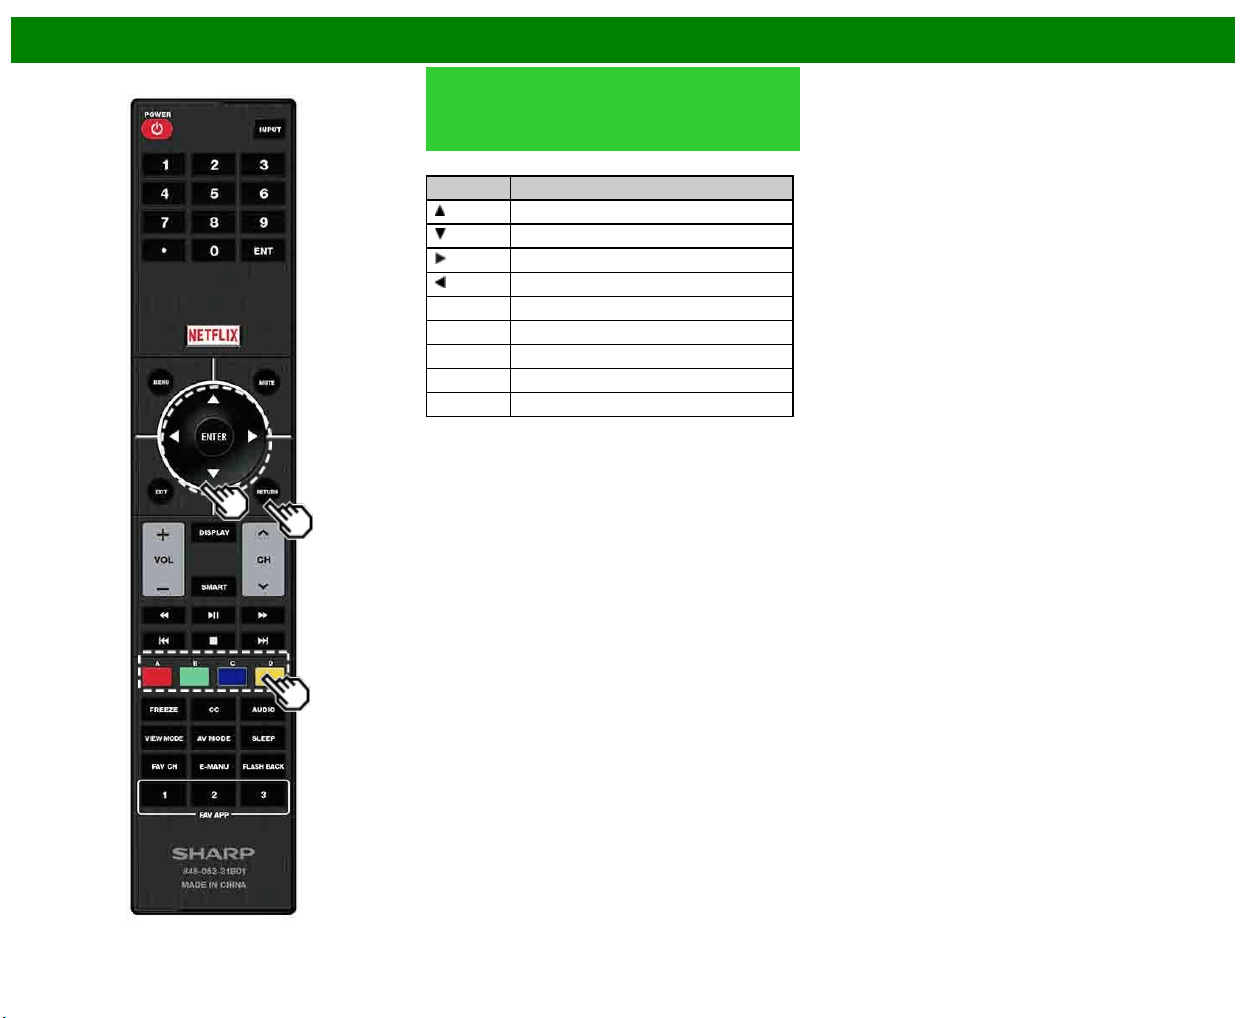
>>
<<
Lecture de morceaux de photos/musique/vidéo
FRA 5-8
Lecture de fichiers sur un
périphérique mémoire USB/serveur
réseau personnel (Suite)
Touches pour le mode lecture
Touches Description
Avance d'image
Arrêter la lecture
Avance rapide
Retour rapide
A (rouge) Effacer OSD
B (vert) Fichier précédent
C (bleu) Afficher/masquer guide de fonctionnement
D (jaune) Fichier suivant
RETURN Retour à l'écran de sélection du fichier.
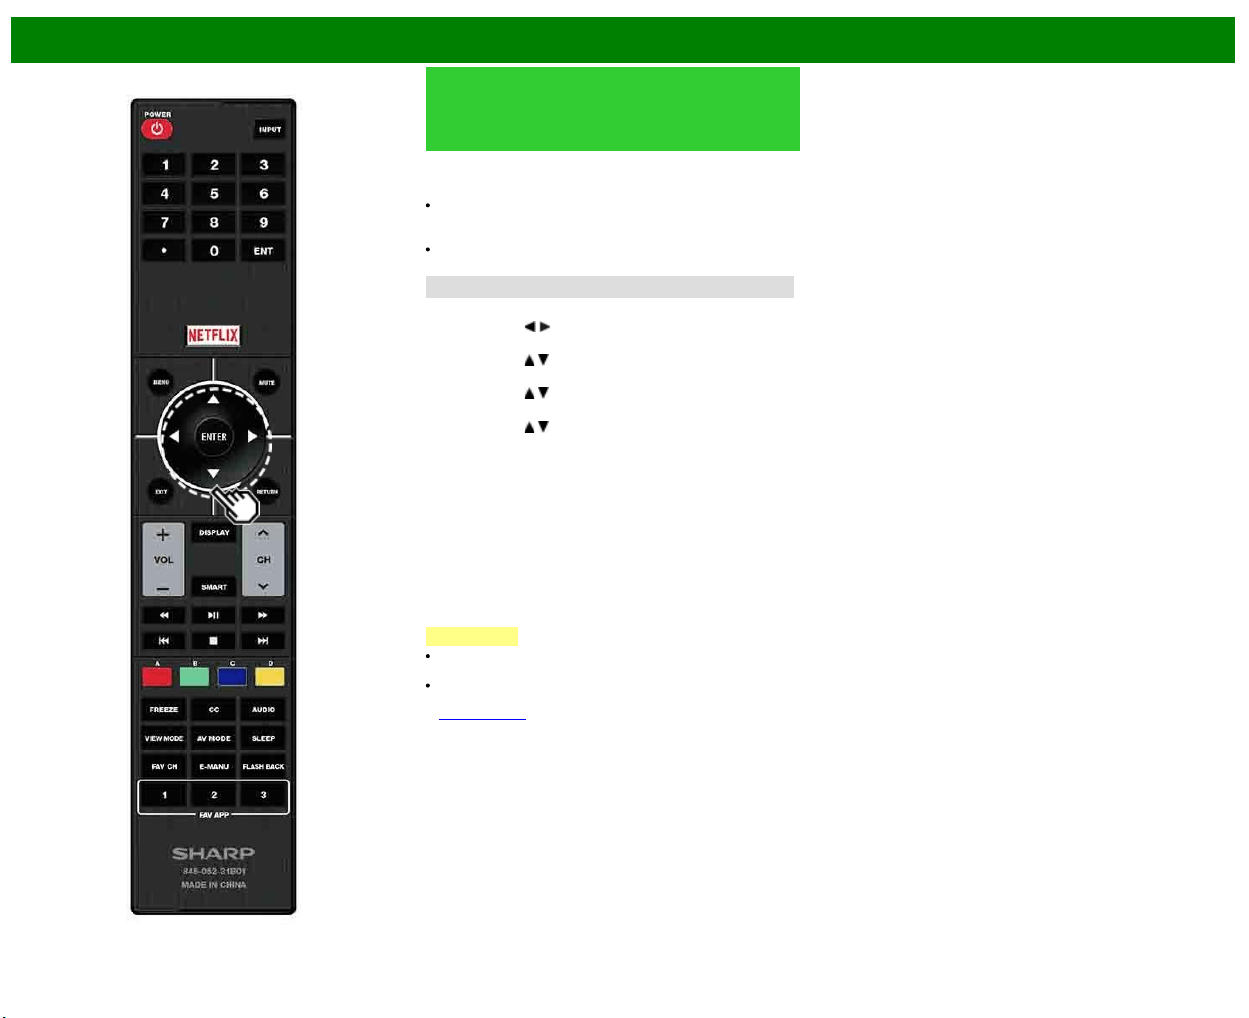
>>
<<
Lecture de morceaux de photos/musique/vidéo
FRA 5-9
Lecture de fichiers à partir d'un
périphérique portable ou d'un
ordinateur
Grâce à la fonction de lecture à distance, vous pouvez
utiliser votre périphérique portable pour lire les images,
vidéos et la musique sur le serveur Réseau personnel.
Pour utiliser la fonction de lecture à distance, votre
périphérique portable doit être un contrôleur de média
numérique certifié DLNA.
Un point d'accès sans fil est requis pour utiliser un
périphérique portable.
Régler le réseau familial
Effectuez les réglages pour la lecture à distance.
1 Appuyez sur
/ pour sélectionner «Smart TV», et
appuyez ensuite sur ENTER.
2 Appuyez sur
/ pour sélectionner «Configuration
Internet», et appuyez ensuite sur ENTER.
3 Appuyez sur
/ pour sélectionner «Régler le réseau
familial», et appuyez ensuite sur ENTER.
4 Appuyez sur / pour sélectionner une option
d'ajustement spécifique, et appuyez ensuite sur ENTER
pour régler chaque option.
Réglages de lecture de télécommande
Ce réglage permet au téléviseur d'effectuer une lecture à
distance.
Permis/Pas permis
Réglage de temporisation
Ce réglage permet de régler le délai de retour automatique
du téléviseur en mode TV une fois la lecture à distance
terminée.
10 sec./60 sec./non
REMARQUE
Cette fonction risque de ne pas fonctionner si une
application Internet est en cours d'utilisation.
Pour des informations sur les formats compatibles, voir
«Compatibilité avec le serveur réseau personnel» à la
voir page 6-3.
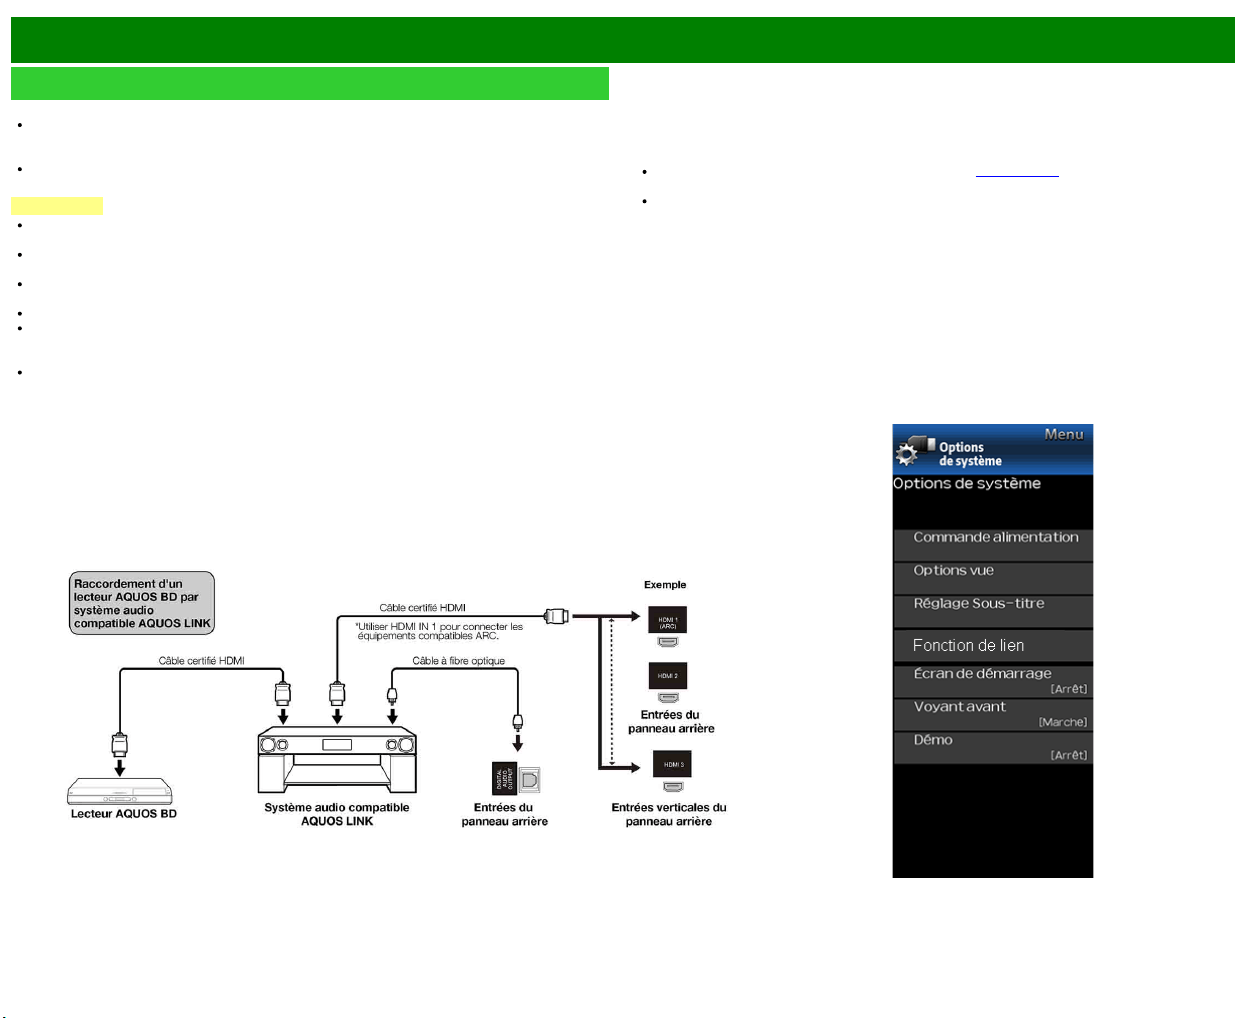
>>
<<
Utilisation d'Fonction de lien
FRA 6-1
Vérification de dispositifs HDMI à l'aide d'Fonction de lien
Quelle est la fonction de l'Fonction de lien?
L'Fonction de lien permet de faire fonctionner de façon interactive différents appareils (tels
qu'un lecteur de disques Blu-ray, amplificateur AV, DVD), à condition qu'ils soient tous
compatibles avec le protocole HDMI CEC (Consumer Electronics Control).
Fonction de lien vous permet de télécommander plusieurs dispositifs HDMI à l'aide d'une seule
télécommande.
REMARQUE
Pour connecter le téléviseur à un appareil compatible LINK, utilisez les câbles disponibles
commercialement.
Pointez toujours la télécommande en direction de la TV, et non sur l'appareil raccordé par câble
HDMI.
Des parasites vidéo risquent d'apparaître en fonction du type de câble HDMI utilisé. N'utilisez
que des câbles certifiés HDMI.
Ce système permet d'utiliser en parallèle jusqu'à 3 enregistreurs HDMI et un amplificateur AV.
Ces opérations peuvent affecter le fonctionnement de l'appareil HDMI sélectionné en tant que
source d'entrée. En cas de dysfonctionnement, allumez l'appareil en question puis sélectionnez
la source en entrée avec INPUT.
La fonction LINK peut ne pas fonctionner correctement lorsque un diviseur HDMI ou un
sélecteur AV est utilisé. Ces dispositifs peuvent causer des interruptions de l'image et/ou du
son.
Les appareils raccordés compatibles LINK peuvent être utilisés sans modifier les réglages de la
télécommande.
Commande du système audio compatible LINK
Permet de configurer le volume du système audio compatible LINK.
REMARQUE
Toutes les étapes de la procédure «Link Setup» à la voir page 6-2 devront être complétées
auparavant.
Reportez-vous si nécessaire au mode d'emploi du périphérique LINK utilisé avec cette TV.
>>
<<
Utilisation d'Fonction de lien
FRA 6-2
Vérification de dispositifs HDMI à
l'aide d'Fonction de lien (Suite)
Réglage LINK
Effectuez les réglages pour utiliser Fonction de lien.
Configurez les réglages avec «Configuration initiale» >
«Réglages d'entrée» > «Link Setup».
Link Operation
Sélectionnez la Commande Fonction de lien pour désactiver
la fonction LINK même quand un appareil HDMI compatible
LINK est connecté au téléviseur. Cette fonction empêche
l'appareil de fonctionner de façon inattendue.
Marche auto
La fonction de Lecture Une Touche est activée
conjointement avec cette fonction. La TV démarre
automatiquement à partir du mode de veille, puis affiche les
images de la source HDMI.
Canal audio
Cette fonction vous permet d'écouter le son du téléviseur via
un appareil audio sans utiliser de câble en fibre optique
généralement requis.
Conditions requises pour l'utilisation d'un amplificateur
AV compatible ARC :
Un amplificateur AV compatible ARC raccordé à la prise
HDMI IN compatible ARC (HDMI IN).
(Consultez le mode d'emploi de l'appareil compatible
ARC pour plus de détails.)
Utilisation d'un câble compatible ARC.
Auto : Vous pouvez écouter le son du téléviseur à l'aide
d'un appareil audio compatible ARC.
Arrêt : Cette fonction n'est pas opérationnelle.
REMARQUE
Si le son du téléviseur ne peut pas être reproduit depuis
l'amplificateur AV même après avoir procédé aux
réglages nécessaires, raccordez le téléviseur à
l'amplificateur AV à l'aide d'un câble en fibre optique
pour sélectionner «Arrêt».
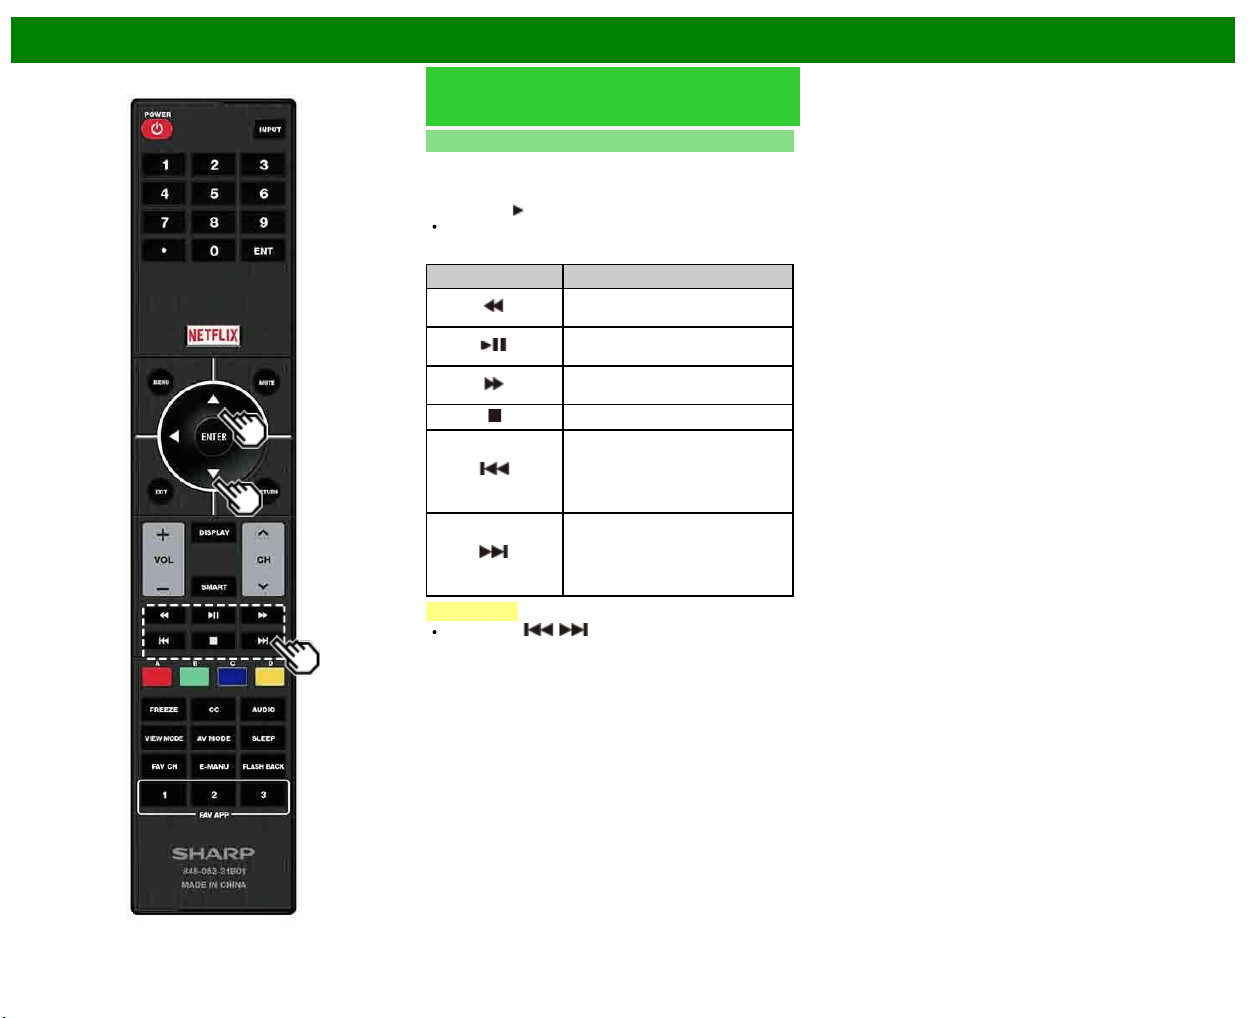
>>
<<
Utilisation d'Fonction de lien
FRA 6-3
Vérification de dispositifs HDMI à
l'aide d'Fonction de lien (Suite)
Lecture Une Touche
Fonction de lien vous permet de commander tous vos
appareils compatibles HDMI à l'aide d'une seule
télécommande.
Appuyez sur
pour lancer la lecture d'un titre.
Le dernier programme lu est alors reproduit. Les touches
suivantes peuvent être utilisées pendant la visualisation
de l'émission.
Touches Description
Maintenez enfoncée cette touche
pour revenir en arrière.
Lance la lecture.Pour régler les
pauses et les images fixes.
Maintenez enfoncée cette touche
pour l'avance rapide.
Arrête la lecture.
Appuyez rapidement une fois pour
aller au début du chapitre en
cours. A chaque pression sur la
touche, vous allez au début du
chapitre précédent.
Appuyez rapidement une fois pour
aller au début du chapitre suivant.
A chaque pression sur la touche,
vous allez au début du chapitre
suivant.
REMARQUE
Les touches / ne fonctionnent pas avec les
lecteurs de disque Blu-ray actuellement disponibles.
- BD-HP20U, BD-HP50U
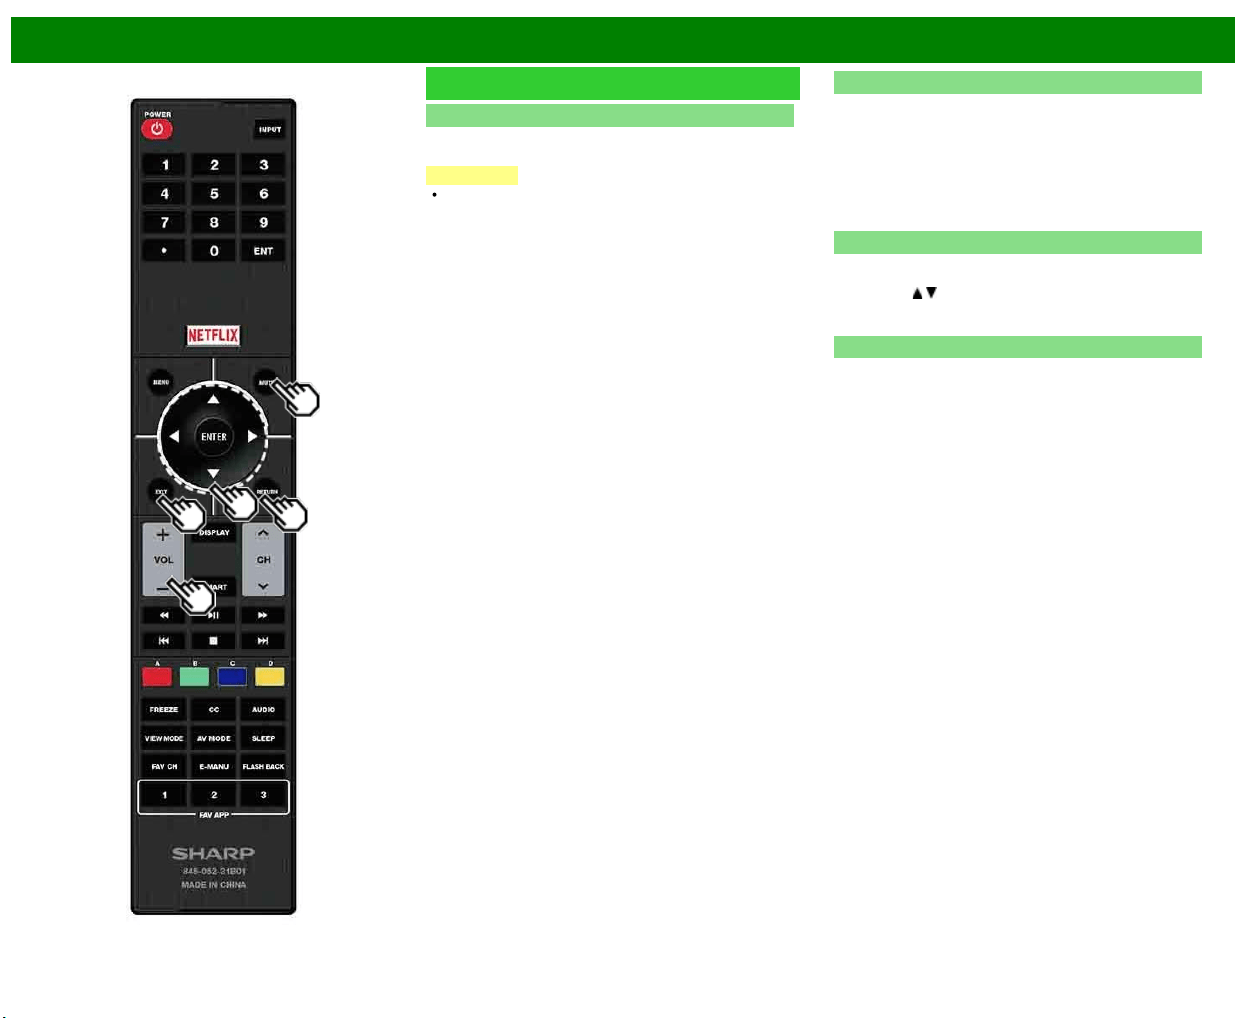
>>
<<
Utilisation d'Fonction de lien
FRA 6-4
Menu Fonction de lien
Afficher menu de départ
Vous pouvez afficher un menu de configuration depuis
l'appareil compatible LINK connecté.
REMARQUE
En fonction de l'état de l'équipement (mode
d'enregistrement, d'attente, etc.), il se peut que le menu
de configuration ne soit pas affiché.
Changer appareil de sortie audio
Vous pouvez choisir d'écouter le son de la TV uniquement
via le système audio compatible LINK.
Par audio AQUOS HP : Le son du haut-parleur de la TV
est coupé et seul le son du système audio compatible
LINK est audible.
• Vous pouvez utiliser les fonctions VOL+/- et MUTE.
Par AQUOS HP : Le son est émis via le haut-parleur de
la TV.
Sélection d'appareil HDMI
Si de multiples appareils HDMI sont connectés en chaîne,
vous pouvez spécifier quel est l'appareil à contrôler d'ici.
Appuyez sur
/ pour sélectionner l'appareil désiré à partir
d'une liste de l'appareil HDMI connectés, et appuyez ensuite
sur ENTER.
Réglage LINK
Vous pouvez également afficher l'écran de Réglage
Fonction de lien à partir du menu Fonction de lien.
>>
<<
Utilisation d'un ordinateur
FRA 7-1
Ajustement de l'image d'un ordinateur
Vous pouvez ajuster la position de l'entrée d'image à partir d'un PC et les réglages avec
«Configuration initiale» > «Réglages d'entrée» > «Réglage de Sync.fine».
Réglage de Sync.fine
En temps normal, vous pouvez régler facilement l'image s'il est nécessaire de changer la position
de l'image avec «Sync.Automat.». Dans certains cas, toutefois, un réglage manuel est nécessaire
pour optimaliser l'image.
Input Signal : Sélectionner le signal d'entrée
1024x768
1360x768
Réglage de Sync.Automat. : Pour régler automatiquement l'image de l'ordinateur.
oui : Sync. Automat. démarre et «Réglage de l'image.» s'affiche.
non : La fonction ne marche pas.
Pos.hori : Centre l'image en la déplaçant vers la gauche ou la droite.
Pos.vert : Centre l'image en la déplaçant de haut en bas.
Horloge : Ajustez lorsque l'image scintille avec des rayures verticales.
Phase : Ajustez lorsque les caractères ont de faibles contrastes ou que l'image scintille.
REMARQUE
Lorsque «Sync.Automat.» a réussi, «Auto Sync terminée avec succès» s'affiche. Sinon, «Sync.
Automat.» a échoué.
«Sync.Automat.» peut échouer même si «Auto Sync terminée avec succès.» est affiché.
«Sync.Automat.» risque d'échouer si l'image de l'ordinateur est de faible résolution, a des
bords indéfinis (noirs) ou bien est déplacée sans exécuter «Sync.Automat.».
Veillez à brancher l'ordinateur sur le téléviseur et à le mettre sous tension avant de démarrer
«Sync. Automat.».
Pour remettre toutes les rubriques de réglage «Sync. fine» aux valeurs préréglées d'usine,
appuyez sur
/ pour sélectionner «Réinitial.», et appuyez ensuite sur ENTER.
Il n'est pas nécessaire de régler «Horloge» ou «Phase» lorsqu'un signal numérique est reçu,
pour qu'il ne puisse pas être sélectionné.
Il est possible que le curseur ne soit pas positionné par défaut au centre de l'image, en raison
de l'asymétrie des gammes de positionnement disponibles.
Les plages de positionnement de l'image dépendent à la fois du Mode vue et du type de signal
visualisé. Il est possible de les consulter à l'écran de configuration de la position de l'image.

>>
<<
Utilisation d'un ordinateur
FRA 7-2
Réglage de l'entrée Audio
Sélection Audio
Cette fonction règle la prise pour qu'elle reproduise le son de l'ordinateur.
Les rubriques d'ajustement varient en fonction de la source d'entrée. Sélectionnez la source
d'entrées correspondant à la prise raccordée à l'ordinateur et ajustez la rubrique de votre choix.
Pour effectuer cette opération ; consultez «Configuration initiale» > «Réglages d'entrée» >
«Sélection Audio».
HDMI 2
HDMI (numérique) : Sélectionnez ceci lorsque le< téléviseur et l'ordinateur sont raccordés à
l'aide d'un câble certifié HDMI et que le son est entré via le même câble.
HDMI + analogique : Sélectionnez ceci lorsque le téléviseur et l'ordinateur sont raccordés à
l'aide d'un câble de conversion DVI-HDMI et que le son est entré via une mini-prise stéréo Ø
3.5 mm.
REMARQUE
Lorsque «Sélection Audio» est réglé sur «HDMI (numérique)», le son n'est pas émis si vous
utilisez uniquement un câble certifié HDMI pour raccorder un équipement compatible HDMI.
Pour que le son soit émis, vous devez établir une connexion audio analogique.
Si vous souhaitez raccorder à un équipement compatible HDMI uniquement à l'aide d'un câble
certifié HDMI, réglez «Sélection Audio» sur «HDMI (numérique)».
>>
<<
Utilisation d'un ordinateur
FRA 7-3
Commande du téléviseur
Le téléviseur peut être commandé depuis un ordinateur, des panneaux de commande et
d'autres périphériques à l'aide de IP.
Utilisez un câble croisé, ETHERNET (disponible dans le commerce) ou le réseau local sans-fil
pour les connexions.
REMARQUE
Le système d'exploitation doit être utilisé par une personne familiarisée avec l'utilisation des
ordinateurs.
Réglages en détail
Définissez les réglages de détails (nom d'ouverture de session, mot de passe, etc.).
Suivez les instructions à l'écran pour configurer les réglages.
Sél. nom appareils
Configurez le nom du téléviseur affiché sur les autres périphériques réseau.
Utilisez le clavier logiciel pour définir le nom.
Conditions de communication pour IP
Raccordez le téléviseur avec les réglages d'IP suivants pour l'ordinateur.
Protocole IP : TCP/IP
Adresse IP de l'hôte : Réglez l'adresse IP sur le menu du téléviseur
Service : Aucun (Ne sélectionnez ni Telnet ni SSH)
N° port TCP : Configurez un numéro de port sur le menu du
téléviseur (port de commande)
Lorsque vous réglez vos ID et mot de passe dans le menu du téléviseur, vous devez les saisir
dès que vous raccordez le téléviseur.
REMARQUE
Lorsque vous utilisez cette fonction, faites les réglages pour «Télécommande AQUOS».
La connexion est coupée s'il n'y a pas de communication pendant 3 minutes.
Procédure de communication
Envoyez les commandes de contrôle de l'ordinateur par IP.
Le téléviseur fonctionne conformément à la commande reçue et envoie un message de réponse à
l'ordinateur.
N'envoyez pas plusieurs commandes à la fois.
Attendez que l'ordinateur reçoive la bonne réponse avant d'envoyer la commande suivante.
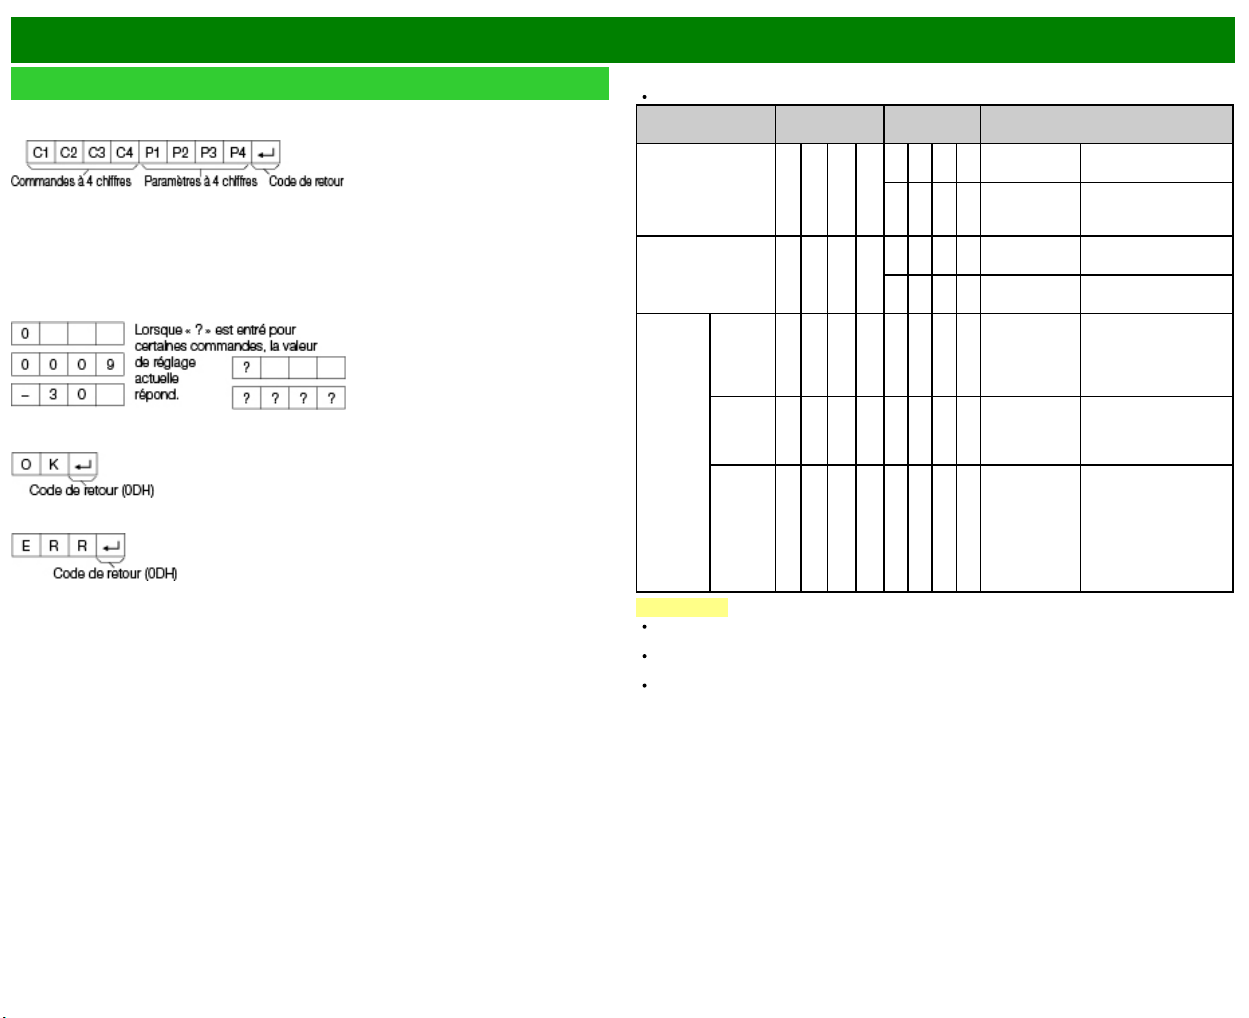
>>
<<
Utilisation d'un ordinateur
FRA 7-4
Commande du téléviseur (Suite)
Format de commande
Huit codes ASCII e CR
Commande à 4 chiffres : Commande un texte de quatre caractères.
Paramètre à 4 chiffres : Paramètre 0–9, x, espace,?
Paramètre
Entrez les valeurs des paramètres, en alignant sur la gauche et remplissez avec des espaces
pour le restant. (Veillez à entrer quatre valeurs pour le paramètre.)
Lorsque le paramètre d'entrée n'est pas dans une plage réglable, «ERR» réapparaît. (Reportez-
vous à «Format de code de réponse».)
Toute valeur numérique peut remplacer le «x» dans le tableau.
Format de code de réponse
Réponse normale
Réponse au problème
(erreur de communication ou commande incorrecte)
Table des commandes
Le fonctionnement des commandes qui ne sont pas indiquées ici n'est pas garanti.
Rubrique de
commande
Commande Paramètre Contenu de la commande
Réglage de la
commande de mise
en marche
R S P W 0 _ _ _ Arrêt La commande de mise
en marche est rejetée.
2 _ _ _ Marche [IP] La commande de mise
en marche est
acceptée.
Réglage
d'alimentation
P O W R 0 _ _ _ Mise hors
tension
Pour passer en
attente.
1 _ _ _ Mise sous
tension
Mise sous tension
Sélection
d'entrée
Commu-
tation
I T G D x _ _ _ (Commu-
tation)
Pour entrer-commuter
par bascule. (identique
à
une touche de
changement d’entrée)
TV I T V D 0 _ _ _ Pour entrer-commuter
sur TV. (Le canal reste
tel quel. (Dernière
mémorisation))
1-8 I A V D * _ _ _ 1 : HDMI IN 1,
2 : HDMI IN 2,
3 : HDMI IN 3,
5 : COMPO-
NENT IN,
6 : VIDEO IN
1,
8 : PC IN
REMARQUE
Lorsqu'un tiret de soulignement (_) est indiqué dans la colonne des paramètres, entrez un
espace.
Lorsqu'un astérisque (*) est indiqué, entrez une valeur dans la plage indiquée entre
parenthèses dans Contenu de la commande.
Tant que le paramètre (x) dans le tableau est une valeur numérique, tout peut être écrit.
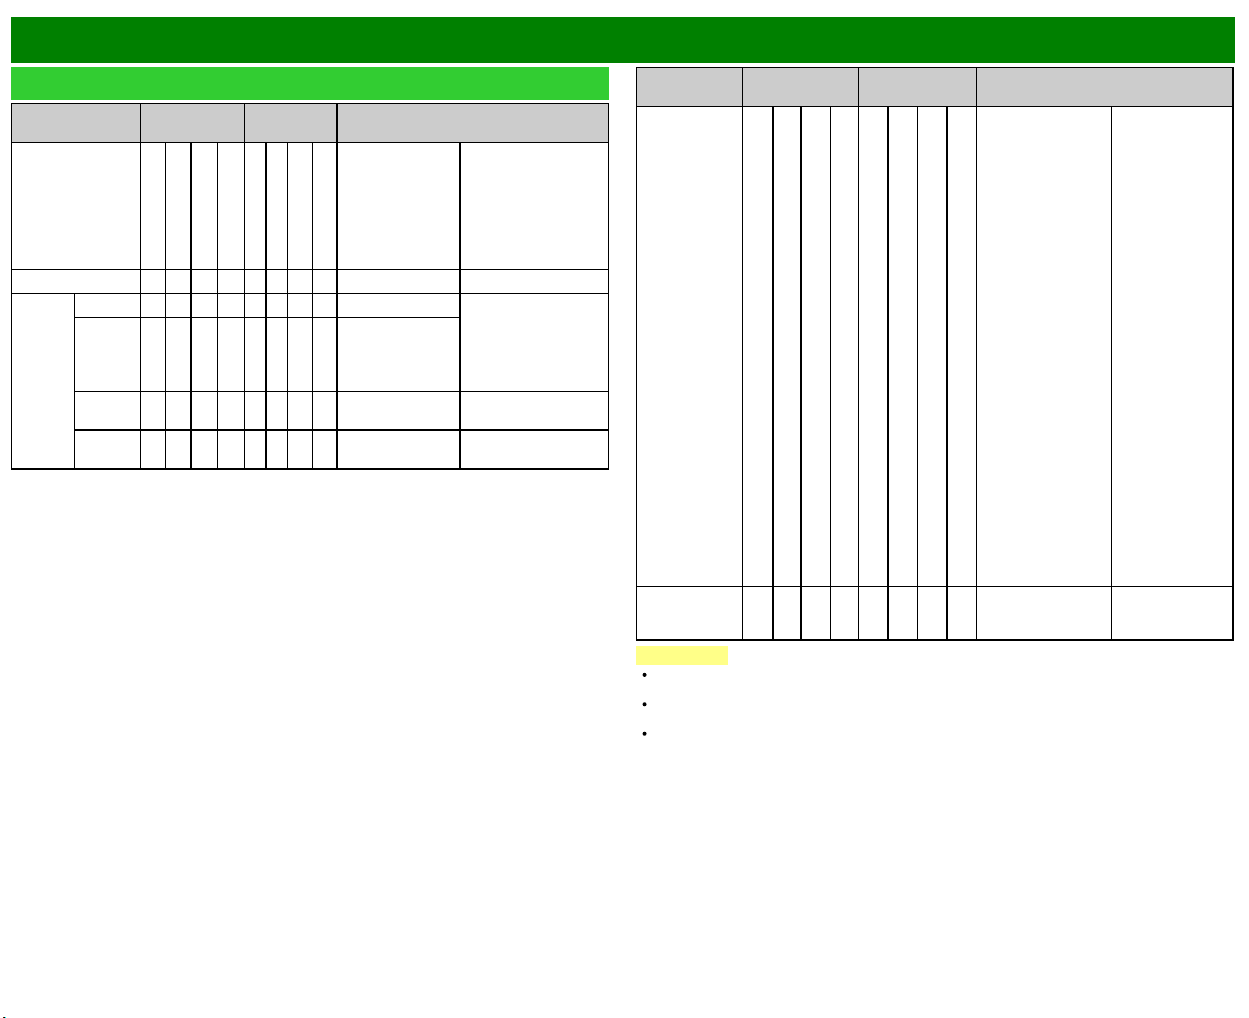
>>
<<
Utilisation d'un ordinateur
FRA 7-5
Commande du téléviseur (Suite)
Rubrique de
commande
Commande Paramètre Contenu de la commande
Sélection du mode
AV
A V M D * * * _ 0 : (Commutation),
1 : STANDARD
(ENERGY STAR),
2 : CINÉMA,
4 : UTILISATEUR,
5 : DYNAMIQUE
(Fixé),
6 : DYNAMIQUE
Bien que l’on puisse
sélectionner
immédiatement, le
fonctionnement avec
bascule est à
l’intérieur.
Volume V O L M * * *_ _ Volume (0-100)
Position Pos.hori H P O S * * * _ Les plages de
positionnement de
l’image dépendent à la
fois du Mode vue et
du type de signal
visualisé.
Pos.vert V P O S * * * _
Horloge C L C K * * * _ Uniquement mode
PC (0–180)
Phase P H S E * * _ _ Uniquement mode
PC (0–40)
Rubrique de
commande
Commande Paramètre Contenu de la commande
Mode vue W I D E * * _ _ 0 : (Commutation)
[AV],
1 : Barre Latérale
[AV],
2 : Allonge smart.
[AV],
3 : Zoom [AV],
4 : Allonge [AV,
USB-Vidéo, Réseau
personnel vidéo ou
Applications
Internet],
5 : Normal [PC],
6 : Zoom [PC],
7 : Allonge [PC],
8 : Pt par Pt [PC]
[AV],
9 : Plein Écran [AV],
10 : Auto [USB-
Vidéo, USB-Photo,
Réseau personnel
vidéo, Photo ou
Applications
Internet],
11 : Original [USB-
Vidéo, USB-Photo,
Réseau personnel
vidéo, Photo ou
Applications Internet]
0 : Bien que l’on
puisse
sélectionner
immédiatement, le
fonctionnement
avec bascule est
à l’intérieur.
1 : Uniquement
disponible lorsque
le signal 4 : 3 est
reçu.
8 : [PC]
Disponible sauf
lorsque le signal
UXGA est reçu.
[AV] Uniquement
disponible lorsque
le signal 1080i/p
est reçu.
9 : Uniquement
disponible lorsque
le signal 720p est
reçu.
10, 11 :
Disponible lors de
l'utilisation d'USB-
Vidéo, USB-
Photo, Réseau
personnel vidéo,
Photo ou
application
Internet.
Sourdine M U T E * _ _ _ 0 : (Commutation),
1 : Marche,
2 : Arrêt
REMARQUE
Lorsqu'un tiret de soulignement (_) est indiqué dans la colonne des paramètres, entrez un
espace.
Lorsqu'un astérisque (*) est indiqué, entrez une valeur dans la plage indiquée entre
parenthèses dans Contenu de la commande.
Tant que le paramètre (x) dans le tableau est une valeur numérique, tout peut être écrit.
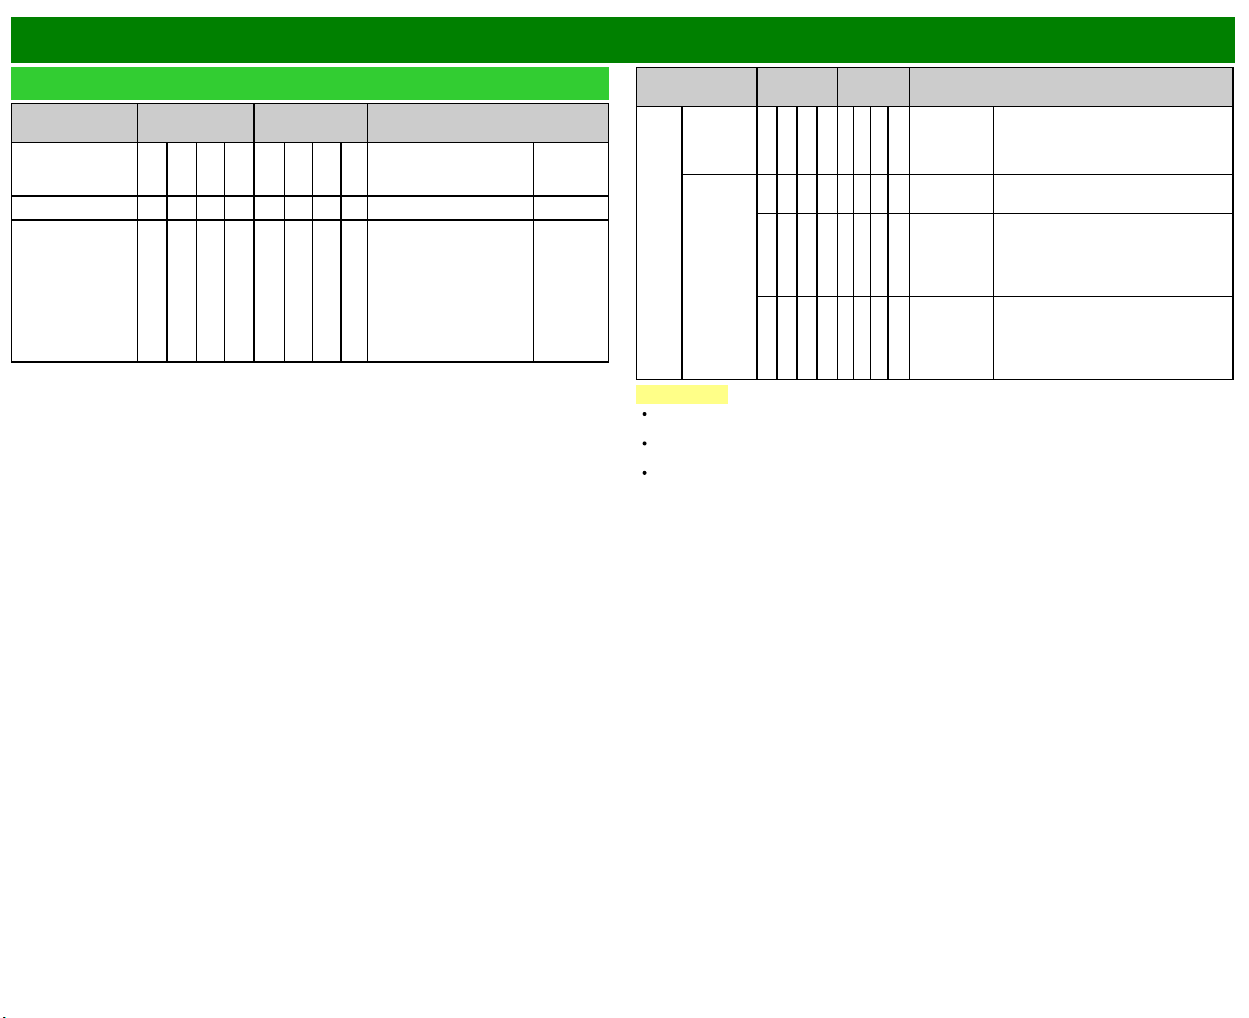
>>
<<
Utilisation d'un ordinateur
FRA 7-6
Commande du téléviseur (Suite)
Rubrique de
commande
Commande Paramètre Contenu de la commande
Ambiophonie A C S U * _ _ _ 0 : (Commutation),
1 : Marche,
2 : Arrêt
Sélection audio A C H A x _ _ _ (Commutation)
Minut. Extinction O F T M * _ _ _ 0 : Arrêt,
1 : Minut. Extinction - 30
min.,
2 : Minut. Extinction - 60
min.,
3 : Minut. Extinction - 90
min.,
4 : Minut. Extinction - 120
min.,
Rubrique de
commande
Commande Paramètre Contenu de la commande
Canal Canal
direct
(ANALOG)
D C C H * * * _ Le numéro
de canal du
téléviseur
(1-135)
Un changement d’entrée est inclus
s’il n’y a pas d’affichage TV. Pour
Ant., canal 2-69 est effectif.
Pour Câble, canal 1-135 est effectif.
Canal
direct
(DIGITAL)
D A 2 P * * * * (0100-9999) Ant. numérique (Numéros en 2
parties, 2 chiffres plus 2 chiffres)
D C 2 U * * * _ (1-999) Câble numérique (Numéros en 2
parties, 3 chiffres plus 3 chiffres)
Première partie du n canal câble
numérique (Désigner le canal
supérieur)
D C 2 L * * * _ (0-999) Câble numérique (Numéros en 2
parties, 3 chiffres plus 3 chiffres)
Deuxième partie du n canal câble
numérique (Désigner le canal
inférieur)
REMARQUE
Lorsqu'un tiret de soulignement (_) est indiqué dans la colonne des paramètres, entrez un
espace.
Lorsqu'un astérisque (*) est indiqué, entrez une valeur dans la plage indiquée entre
parenthèses dans Contenu de la commande.
Tant que le paramètre (x) dans le tableau est une valeur numérique, tout peut être écrit.
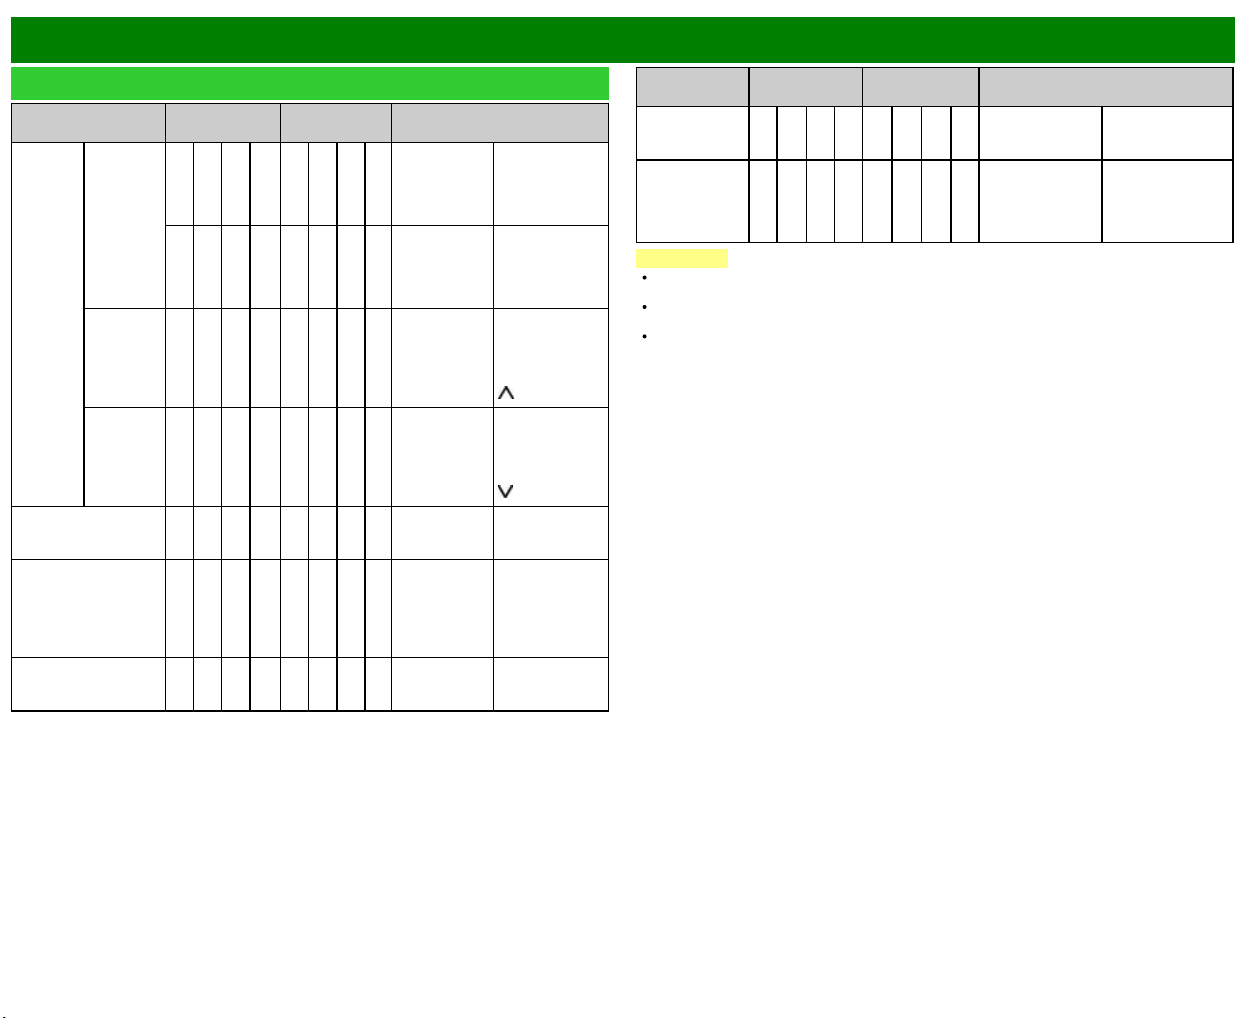
>>
<<
Utilisation d'un ordinateur
FRA 7-7
Commande du téléviseur (Suite)
Rubrique de
commande
Commande Paramètre Contenu de la commande
Canal Canal
direct
(DIGITAL)
D C 1 0 * * * * (0-9999) Câble numérique
(Numéros en 1
partie, 5 chiffres,
inférieur à 10
000)
D C 1 1 * * * * (0-6383) Câble numérique
(Numéros en 1
partie, 5 chiffres,
supérieur à 10
000)
Canal
supérieur
C H U P x _ _ _ Le numéro de
canal du
téléviseur +1
S’il n’y a pas
d’affichage TV,
entre-commute
sur TV. (même
fonction que CH
)
Canal
inférieur
C H D W x _ _ _ Le numéro de
canal du
téléviseur -1
S’il n’y a pas
d’affichage TV,
entre-commute
sur TV. (même
fonction que CH
)
CC C L C P x _ _ _ (Commutation) Fonctionnement
par bascule des
sous-titres
Nom d'appareil T V N M 1 _ _ _
Le
nom du
périphérique
configuré dans
«Sél. nom
appareils»
s'affiche.
Nom du modèle M N R D 1 _ _ _
Le
nom du
modèle du
téléviseur
Rubrique de
commande
Commande Paramètre Contenu de la commande
Version du
logiciel
S W V N 1 _ _ _
La
version actuelle
du logiciel du
téléviseur s'affiche.
Version du
protocole IP
I P P V 1 _ _ _
La
version
actuellement prise
en charge du
protocole IP
s'affiche.
REMARQUE
Lorsqu'un tiret de soulignement (_) est indiqué dans la colonne des paramètres, entrez un
espace.
Lorsqu'un astérisque (*) est indiqué, entrez une valeur dans la plage indiquée entre
parenthèses dans Contenu de la commande.
Tant que le paramètre (x) dans le tableau est une valeur numérique, tout peut être écrit.
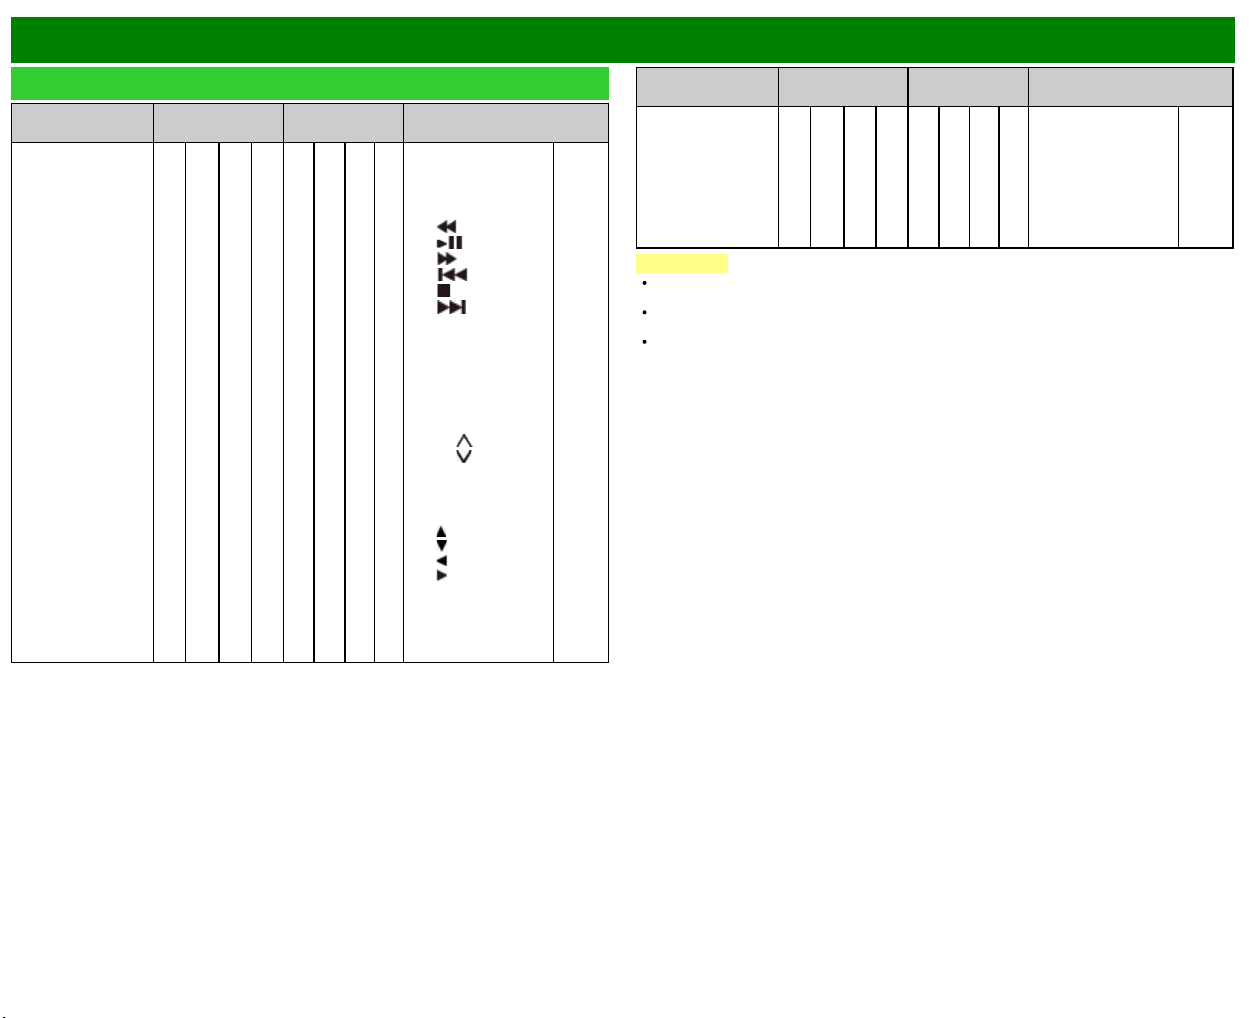
>>
<<
Utilisation d'un ordinateur
FRA 7-8
Commande du téléviseur (Suite)
Rubrique de
commande
Commande Paramètre Contenu de la commande
Touches de la
télécommande
R C K Y * * _ _ 0-10 : 0-9,
11 : POINT,
12 : ENT,
13 : POWER,
14 : DISPLAY,
15 :
,
16 :
,
17 :
,
18 :
,
19 :
,
20 :
,
21 : SLEEP,
22 : CC,
23 : AV MODE,
24 : VIEW MODE,
25 : FLASH BACK,
26 : MUTE,
27 : VOL -,
28 : VOL +,
29 : CH
,
30 : CH
,
31 : INPUT,
32 : MENU,
33 : SMART,
34 : ENTER,
35 :
,
36 :
,
37 :
,
38 :
,
39 : RETURN,
40 : EXIT,
41 : FAV CH,
42 : AUDIO,
43 : A (rouge),
Rubrique de
commande
Commande Paramètre Contenu de la commande
Touches de la
télécommande
R C K Y * * _ _ 44 : B (vert),
45 : C (bleu),
46 : D (jaune),
47 : FREEZE,
48 : FAV APP 1,
49 : FAV APP 2,
50 : FAV APP 3,
51 : NETFLIX,
52 : E-MANU
REMARQUE
Lorsqu'un tiret de soulignement (_) est indiqué dans la colonne des paramètres, entrez un
espace.
Lorsqu'un astérisque (*) est indiqué, entrez une valeur dans la plage indiquée entre
parenthèses dans Contenu de la commande.
Tant que le paramètre (x) dans le tableau est une valeur numérique, tout peut être écrit.
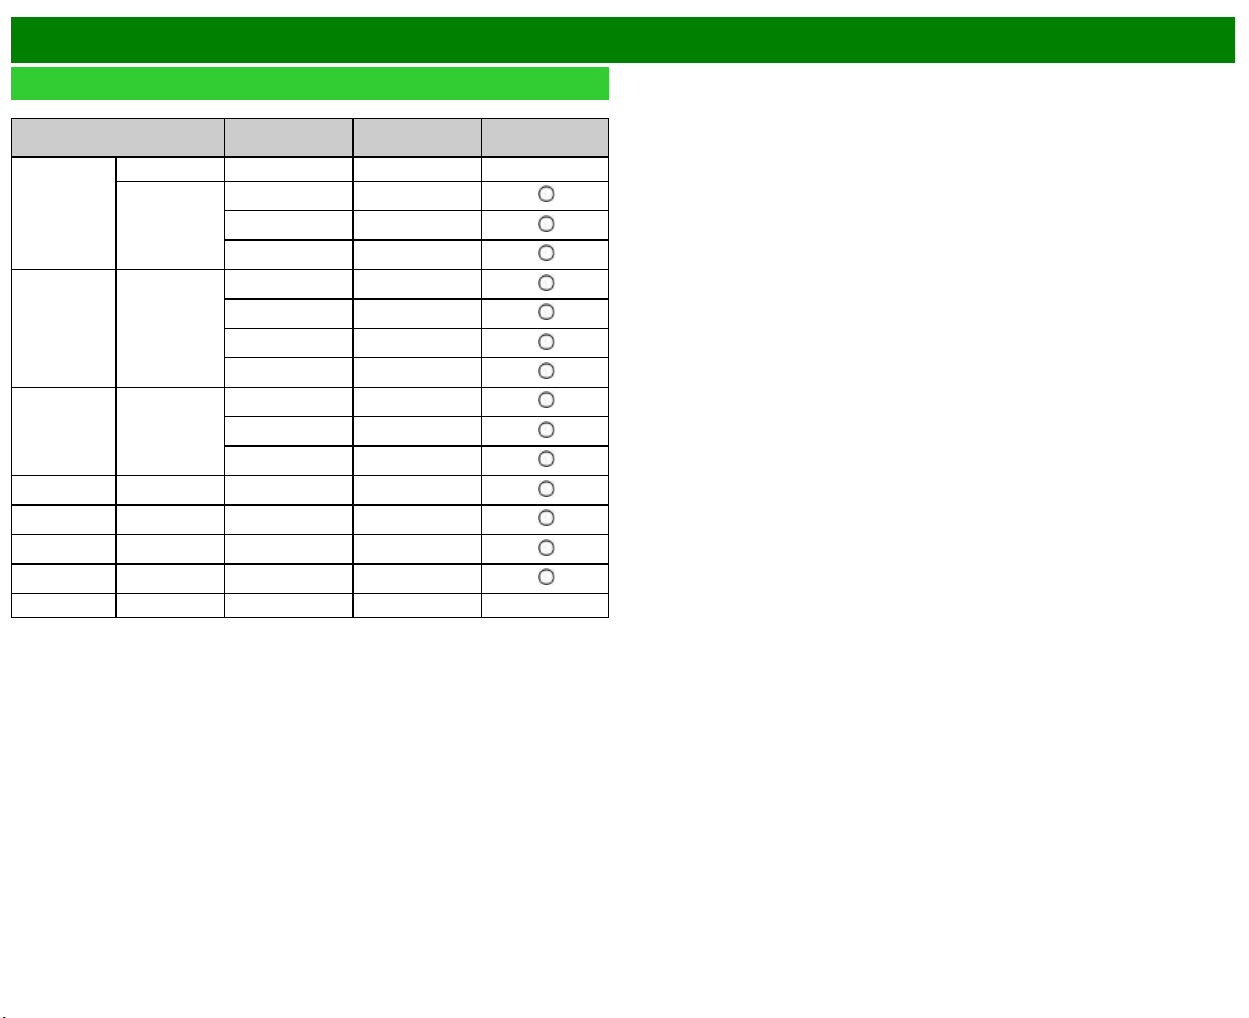
>>
<<
Utilisation d'un ordinateur
FRA 7-9
Tableau des ordinateurs compatibles
Il est nécessaire de régler correctement l'ordinateur pour afficher les signaux XGA et WXGA.
Résolution
Fréquence
horizontale
Fréquence
verticale
Norme VESA
VGA
720 x 400 31,5 kHz 70 Hz —
640 x 480
31,5 kHz 60 Hz
37,9 kHz 72 Hz
37,5 kHz 75 Hz
SVGA 800 x 600
35,1 kHz 56 Hz
37,9 kHz 60 Hz
48,1 kHz 72 Hz
46,9 kHz 75 Hz
XGA 1024 x 768
48,4 kHz 60 Hz
56,5 kHz 70 Hz
60,0 kHz 75 Hz
WXGA 1360 x 768 47,7 kHz 60 Hz
SXGA 1280 x 1024 64,0 kHz 60 Hz
SXGA+ 1400 x 1050 65,3 kHz 60 Hz
UXGA 1600 x 1200 75,0 kHz 60 Hz
1080p 1920 x 1080 67,5 kHz 60 Hz —
VGA et XGA sont des marques déposées d'International Business Machines Corp.
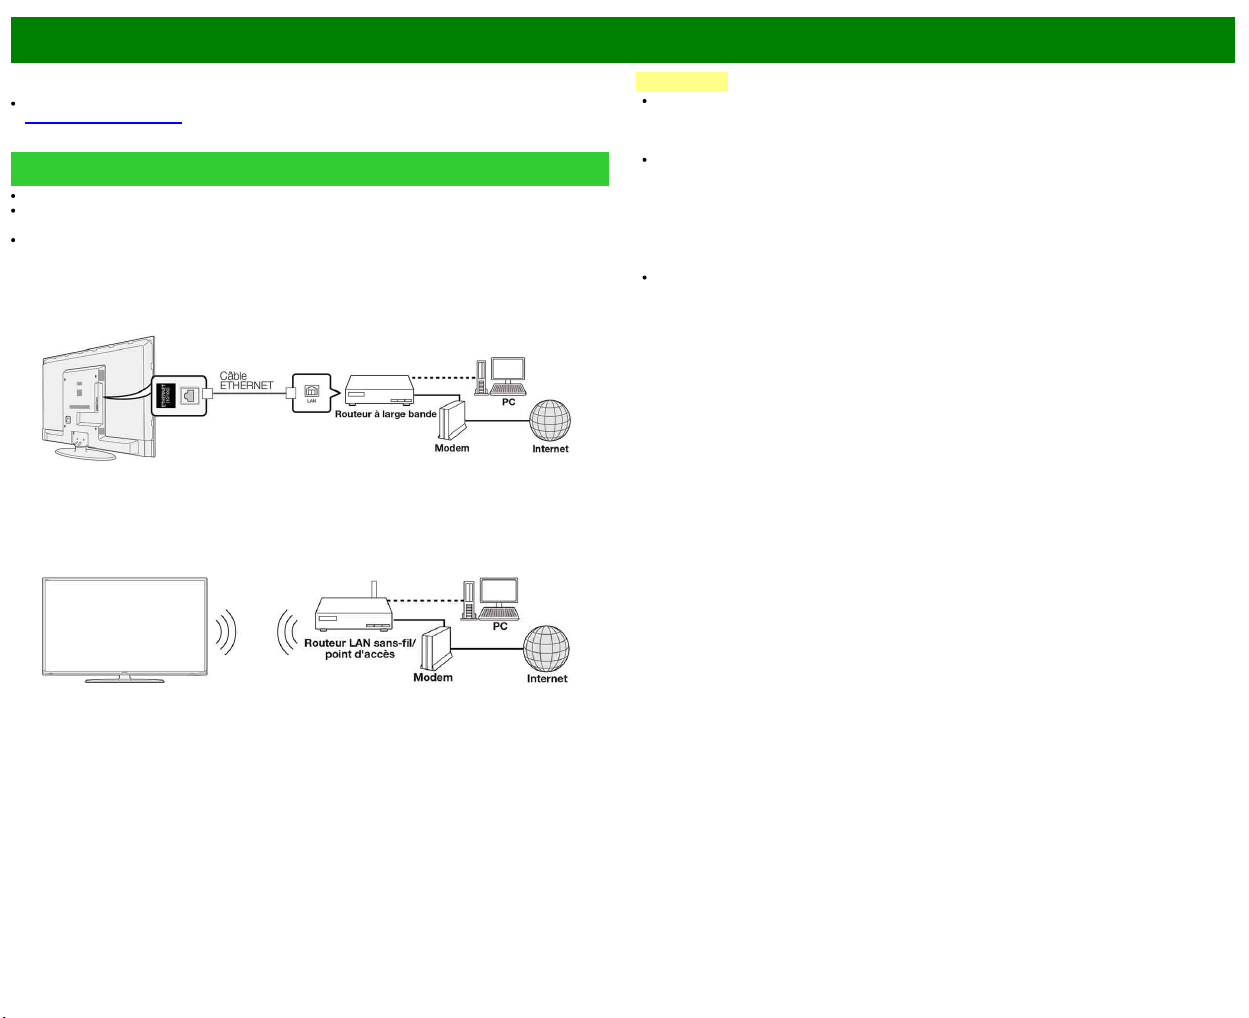
>>
<<
Utilisation d'Internet
FRA 8-1
En reliant le téléviseur à un système à large bande, vous pouvez accéder à Internet grâce au
téléviseur.
Vous pouvez profiter de toute une gamme de contenus en continu et d'applications Internet.
(Voir pages 8-12 à 8-13.)
Raccordement à Internet
Pour relier le téléviseur à Internet, vous devez disposer d'une connexion large bande.
Si vous ne disposez pas d'une connexion à large bande, consulter le magasin où vous avez
acheté le téléviseur ou un fournisseur d'accès à Internet, ou encore l'opérateur de téléphonie.
Lors de l'établissement d'une connexion Internet, il n'est pas possible d'utiliser une connexion
Ethernet et sans-fil en même temps. N'utilisez que l'un des types de connexion.
Utilisation d'un câble ETHERNET
Utilisez un câble ETHERNET (en vente dans le commerce) pour relier la prise ETHERNET du
téléviseur au routeur à large bande (en vente dans le commerce).
Utilisation du LAN sans fil
Ce téléviseur est équipé d'une fonction LAN sans fil.
Pour une connexion LAN sans fil, vous devez utiliser «Connexion sans fil» pour connecter le point
d'accès et le téléviseur.
REMARQUE
Ce téléviseur possède une fonction LAN sans fil intégrée. L'utilisation d'un adaptateur LAN USB
sans fil distinct peut faire en sorte que les communications radio ne soient plus conformes aux
réglementations sur les communications radio. Par conséquent, n'utilisez pas d'adaptateur LAN
sans fil distinct.
Il n'est pas possible de garantir une connexion LAN sans-fil et son fonctionnement pour tous
les locaux résidentiels. Dans les cas suivants, le signal LAN sans-fil peut être de mauvaise
qualité ou s'interrompre, ou la vitesse de connexion peut ralentir.
- En cas d'utilisation dans des édifices en béton, acier armé ou métal
- En cas de positionnement à proximité d'objets entravant le signal
- En cas d'utilisation avec d'autres dispositifs sans-fil émettant à la même fréquence
- En cas d'utilisation à proximité de fours à microondes et d'autres dispositifs émettant un
champ magnétique, une charge électrostatique ou une interférence électromagnétique
En présence d'une interférence significative dans la fréquence de 2,4 GHz (comme celle
provenant d'autres dispositifs LAN sans-fil, dispositifs Bluetooth®, téléphones sans-fil à 2,4
GHz et fours à microondes), nous vous recommandons d'utiliser un routeur LAN sans-fil/point
d'accès compatible avec la norme IEEE802.11a/n (5 GHz) et de régler l'émission du point
d'accès à 5 GHz. Consultez le guide de fonctionnement de votre point d'accès pour des
informations détaillées concernant le réglage.
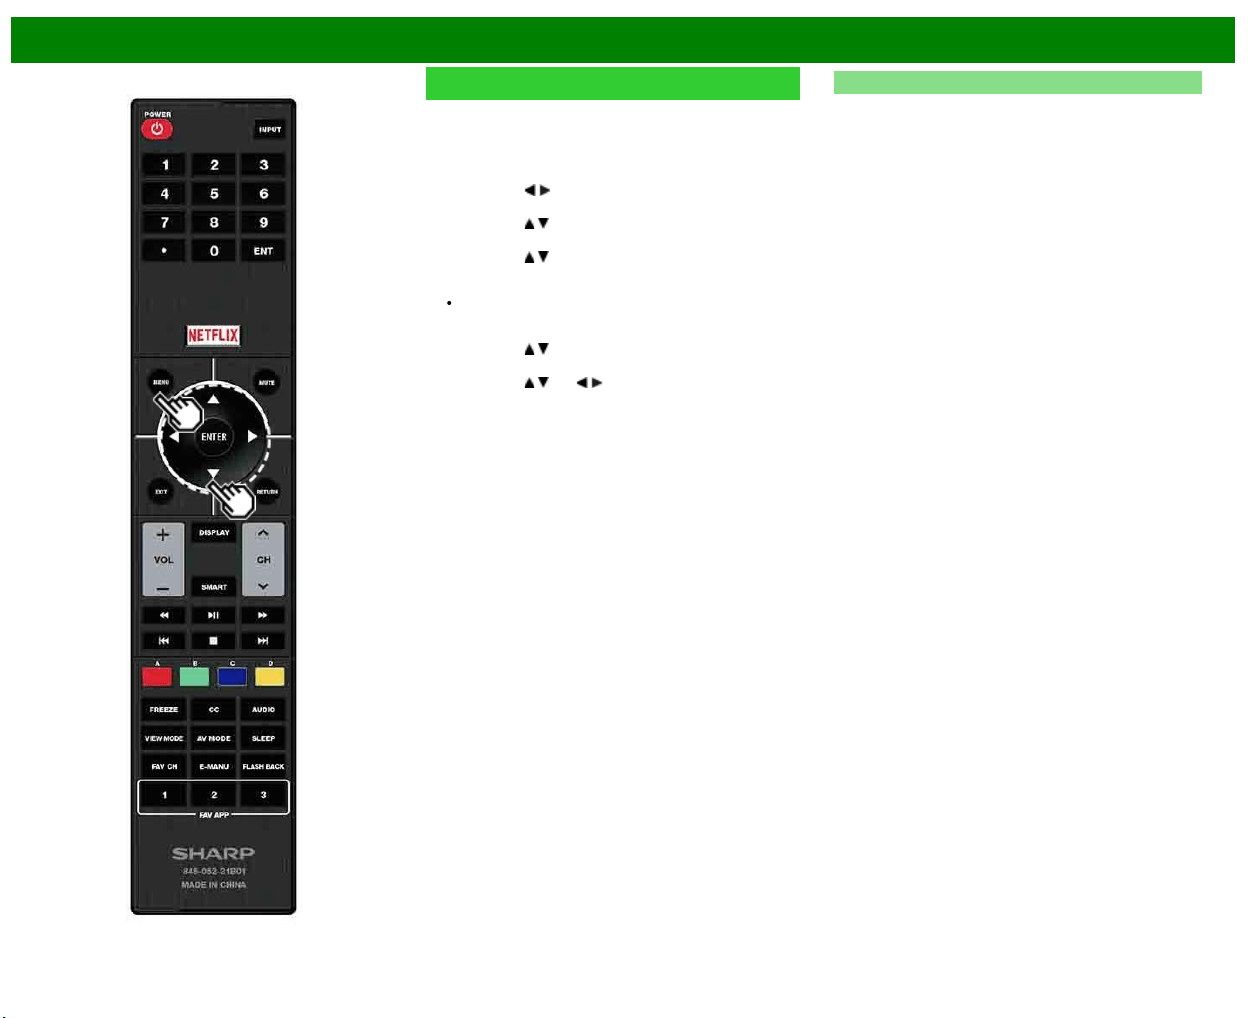
>>
<<
Utilisation d'Internet
FRA 8-2
Réglage Internet
Effectuez la procédure ci-dessous pour faire des
ajustements ou confirmer les réglages pour l'accès à
Internet.
1 Appuyez sur MENU pour afficher l'écran MENU, et
appuyez ensuite sur ENTER.
2 Appuyez sur
/ pour sélectionner «Smart TV», et
appuyez ensuite sur ENTER.
3 Appuyez sur / pour sélectionner «Configuration
Internet», et appuyez ensuite sur ENTER.
4 Appuyez sur
/ pour sélectionner «Connection Type»,
«Wired Setup» ou «Wireless Setup», et appuyez ensuite
sur ENTER.
Sélectionnez «Wired Setup» ou «Wireless Setup»
lorsque vous faites des ajustements généraux pour
vous connecter à Internet.
5 Appuyez sur
/ pour sélectionner une rubrique
spécifique, et appuyez ensuite sur ENTER.
6 Appuyez sur
/ (ou / ) pour sélectionner le réglage
désiré, et appuyez ensuite sur ENTER.
7 Appuyez sur MENU pour quitter.
Type de connexion
Sélectionnez le type de connexion.
À fil : Le signal est détecté et la configuration s'effectue
automatiquement. Utilisez «Configuration IP» pour
vérifier et modifier les réglages si nécessaire.
Sans fil : Configurez les réglages du point d'accès sur
«Connexion sans fil».
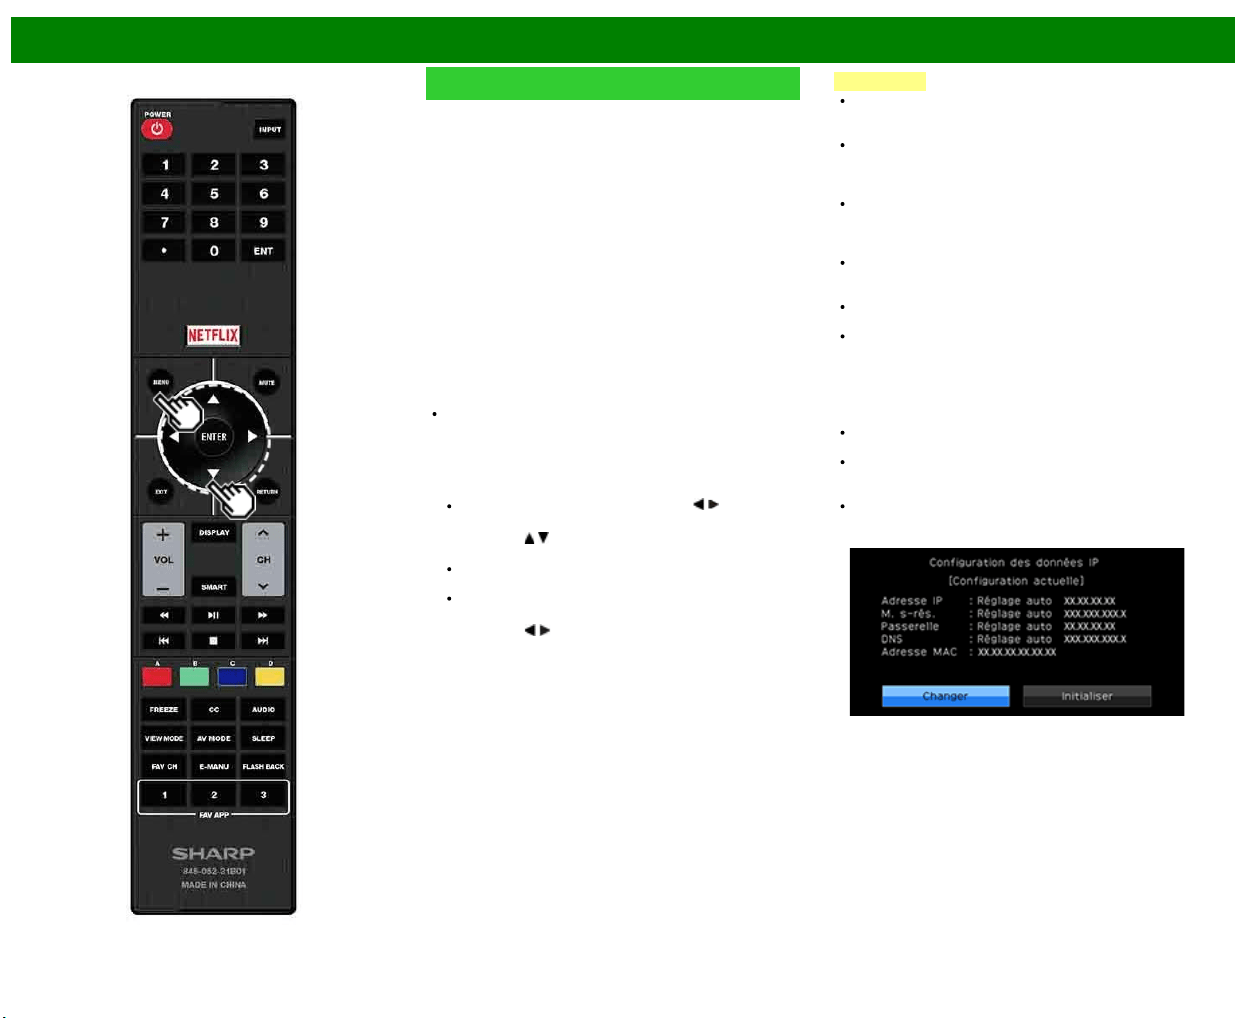
>>
<<
Utilisation d'Internet
FRA 8-3
Réglage Internet (Suite)
Connexion sans fil
Effectuez les ajustements et confirmez les réglages
nécessaires pour la connexion LAN sans fil (p. ex
recherchez le point d'accès et son enregistrement).
Pression de bouton WPS : Permet au téléviseur d'établir
automatiquement une connexion à l'aide d'un bouton sur
le point d'accès.
Code NIP WPS : Configure la connexion en enregistrant
un code PIN pour le point d'accès.
Sélection de réseau sans fil : Recherche et sélectionne
le point d'accès à connecter.
Enregistrement de réseau sans fil. : Vous permet de
vous connecter en saisissant un nom de réseau sans fil
pour le point d'accès.
Si votre point d'accès prend en charge le protocole Wi-Fi
Protected Setup (méthode bouton WPS), nous vous
recommandons d'utiliser cette fonction pour la connexion
sans-fil. Vous pouvez appuyer sur le bouton WPS sur le
point d'accès pour configurer automatiquement les réglages.
Le nom de la fonction du bouton WPS peut varier en
fonction du point d'accès. Consultez le guide de
fonctionnement du point d'accès pour des informations
détaillées.
1 Confirmez les réglages actuels dans «Type de
connexion».
Si «À fil» est sélectionné, appuyez sur / pour
sélectionner «Sans fil».
2 Appuyez sur
/ pour sélectionner «Connexion sans fil»,
et appuyez ensuite sur ENTER.
Confirmez les réglages. Si chaque élément de réglage
est correct, appuyez sur MENU pour sortir.
Si vous configurez le réglage sans-fil pour la première
fois ou modifiez les réglages, passez à l'étape 3.
3 Appuyez sur
/ pour sélectionner «Changer», et
appuyez ensuite sur ENTER.
4 Sélectionnez la méthode de connexion souhaitée et
suivez les instructions apparaissant à l'écran.
5 Lorsqu'une connexion est établie, les détails concernant
celle-ci s'affichent. Appuyez sur ENTER.
REMARQUE
Le fonctionnement ne peut pas être garanti en cas
d'utilisation avec des points d'accès n'étant pas au
bénéfice d'une certification Wi-Fi®.
Un routeur LAN sans-fil/point d'accès est requis pour
connecter le téléviseur à Internet en utilisant un réseau
LAN sans-fil. Consultez le guide de fonctionnement de
votre point d'accès pour le réglage.
Si votre point d'accès est réglé en mode furtif (qui
empêche la détection par d'autres dispositifs), vous ne
serez pas en mesure d'établir une connexion. Dans ce
cas, désactivez le mode furtif sur le point d'accès.
Une vitesse de connexion stable est requise pour lire du
contenu en continu. Utilisez une connexion Ethernet si la
vitesse LAN sans-fil est instable.
Avant tout transfert à une tierce personne ou élimination,
assurez-vous d'initialiser les réglages LAN sans-fil.
Veuillez vous conformer à la législation en vigueur dans
votre pays lors de l'utilisation du LAN sans-fil en
extérieur.
Configuration IP
Vous pouvez effectuer les ajustements manuellement pour
l'IP.
Assurez-vous que des nombres s'affichent pour chaque
réglage.
Si un réglage n'est pas accompagné d'un nombre,
précisez le nombre en suivant les instructions fournies
sur l'écran.
Entrez l'adresse IP à l'aide des boutons 0-9 de la
télécommande.
Exemple
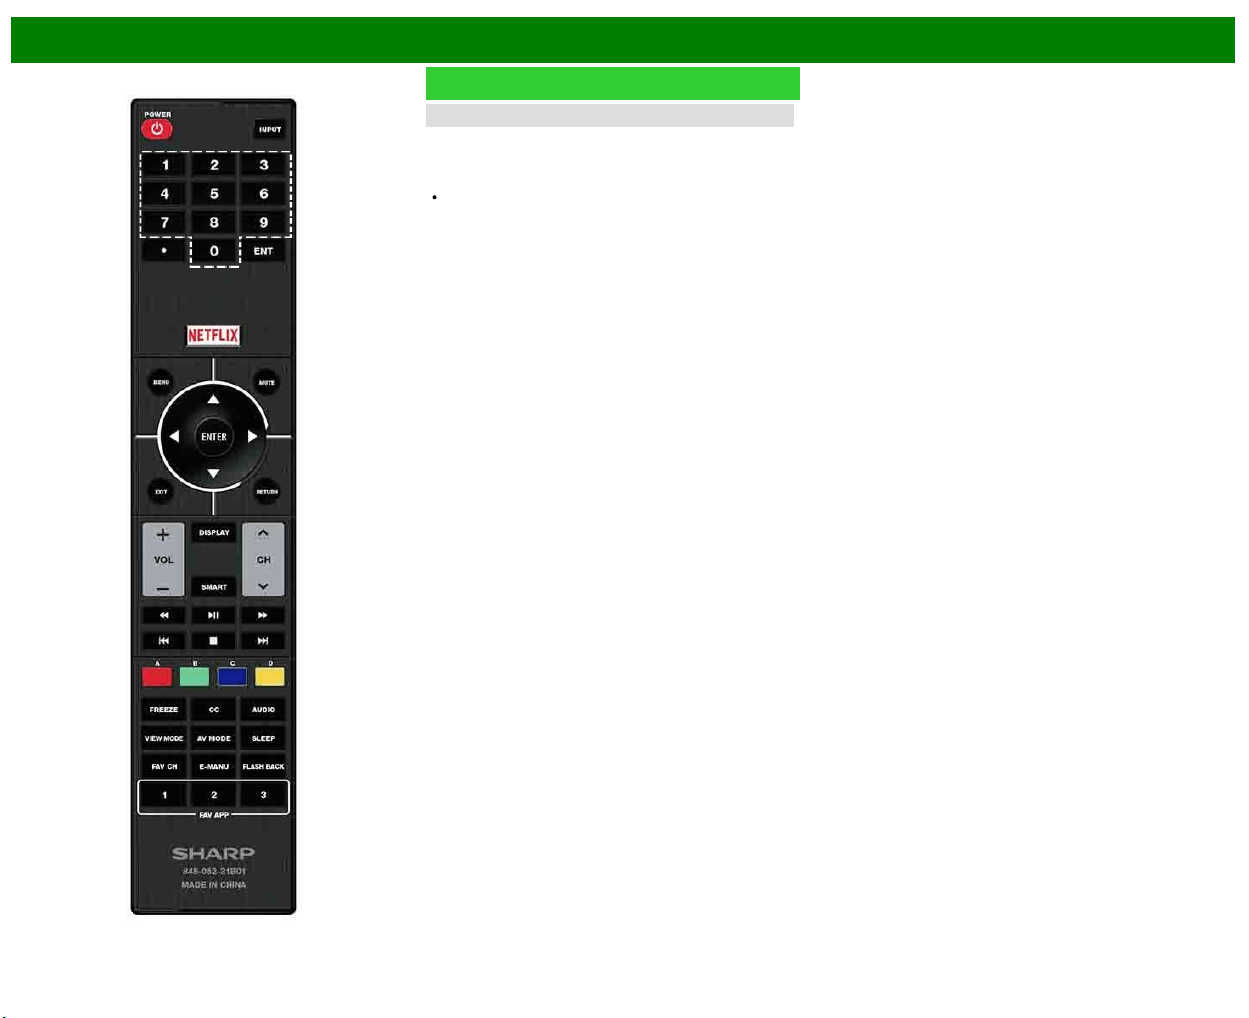
>>
<<
Utilisation d'Internet
FRA 8-4
Réglage Internet (Suite)
Test de connexion
Une fois les procédures de connexion et de réglage
terminées, vous pouvez vérifier que la préparation est
correcte. Appuyez sur «oui» pour lancer le «Test de
connexion».
Lorsque les résultats sont affichés; suivez les instructions
affichées à l'écran.
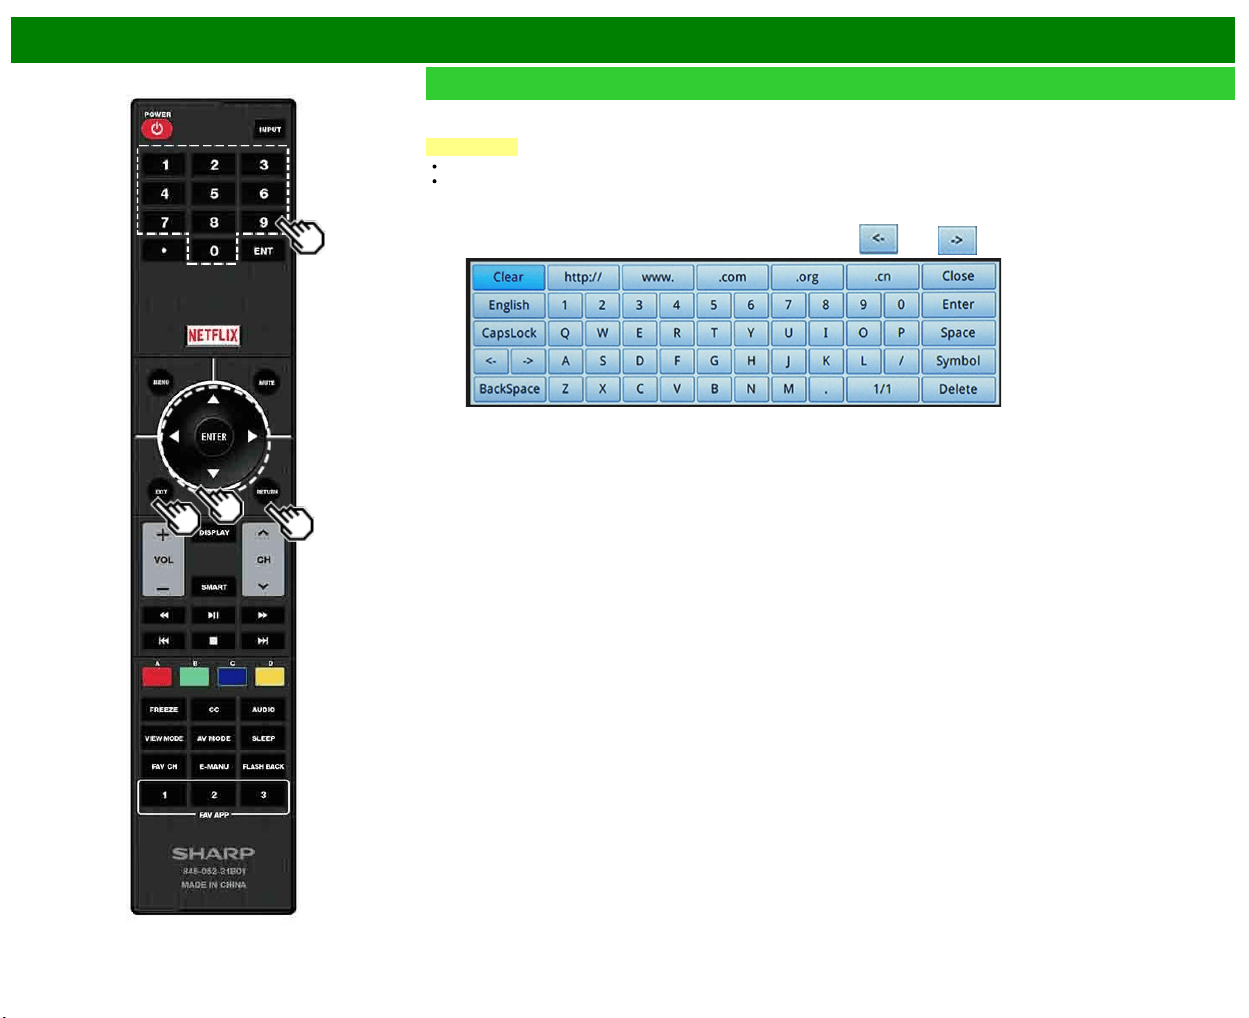
>>
<<
Utilisation d'Internet
FRA 8-5
Saisie d'un texte (Clavier logiciel)
Lorsque vous tapez sur une page de saisie ou définissez des réglages du réseau nécessaires pour l'accès à Internet, vous devez
utiliser le clavier logiciel.
REMARQUE
Vous pouvez taper un texte comportant jusqu'à 128 caractères.
Les signes diacritiques et les caractères spéciaux peuvent ne pas être utilisables en fonction de l'endroit où vous saisissez le
texte.
CapsLock
Si vous avez sélectionné «alphabet», cette touche fait passer
des majuscules au minuscules.
Chaque fois que vous appuyez sur ENTER, le type de
caractère change.
Symbol
Appuyez sur ENTER pour sélectionner le type de caractères
à frapper : alphabet ou symboles.
(Les types sélectionnables dépendent de la source d'entrée.)
BackSpace/Effacer
Touche
efface un caractère après l'autre.
Le texte que vous tapez s'affiche au fur et à mesure.
Pour déplacer le curseur (la position actuelle de saisie), utiliser «
» ou « » sur le clavier logiciel.
Tandis que vous tapez un texte, les possibilités de conversion s'affichent au fur et à mesure.
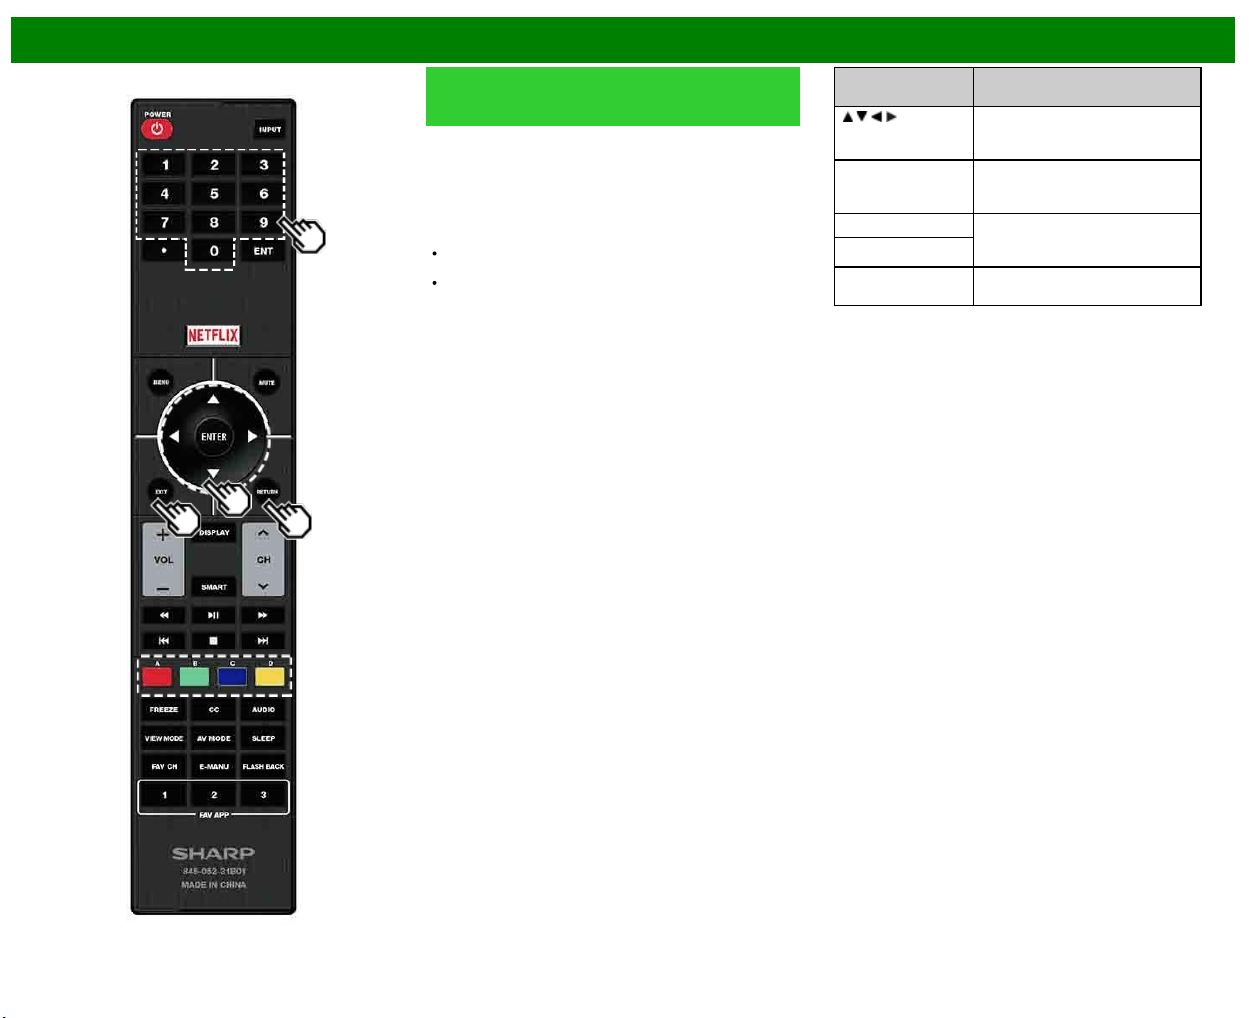
>>
<<
Utilisation d'Internet
FRA 8-6
Saisie d'un texte (Clavier logiciel)
(Suite)
Effectué
Valide les informations saisies et ferme le clavier logiciel.
Espace
Frappe
d'une espace
Supprimer
Efface
la chaîne de caractères.
Lorsque le caractère est quelque part sur la ligne : la
chaîne de caractères à droite du curseur est effacée.
Lorsque le curseur est à l'extrémité droite de la ligne :
toute la ligne est effacée.
Close
Ferme
le clavier logiciel sans valider les informations.
Touches de la
télécommande
Description
/ / / Déplace le point d'intérêt. Quand le
point d'intérêt est sur un bord, il
vient sur le bord opposé.
ENTER Exécute le traitement pour la
touche présentement dans le point
d'intérêt.
EXIT Ferme le clavier logiciel sans
valider la saisie des éléments de
texte tapé.
RETURN
0-9 Saisie directe d'un chiffre octet
correspondant à la touche.
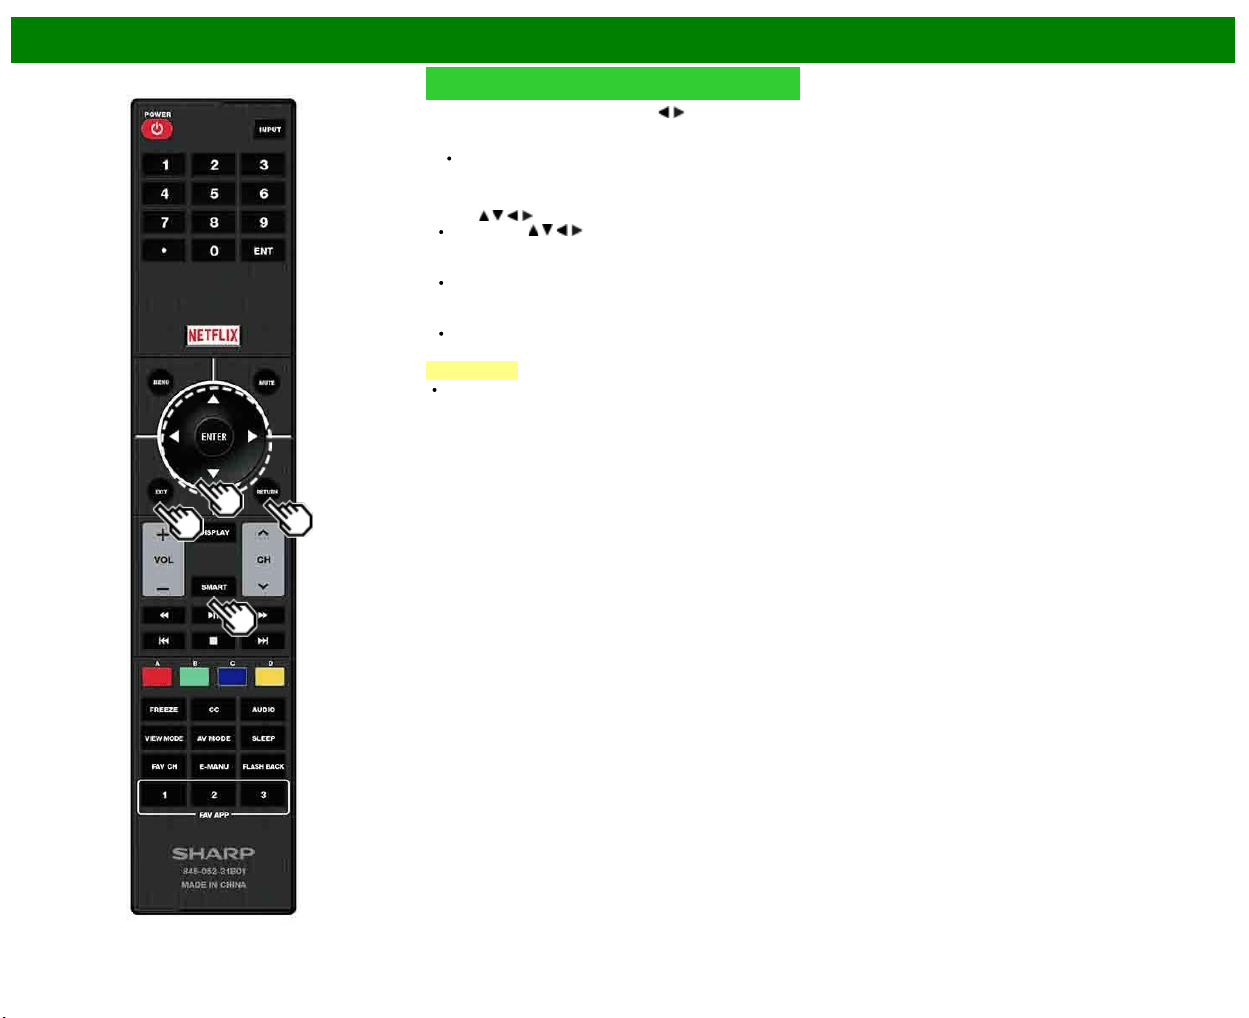
>>
<<
Utilisation d'Internet
FRA 8-7
Utilisation du navigateur
1 Appuyez sur SMART, appuyez sur / pour sélectionner
l'icône du navigateur depuis la fenêtre de l'application
puis appuyez sur ENTER.
Appuyez à nouveau sur SMART pour revenir au canal
actuellement syntonisé.
Touches pour l'utilisation du navigateur
ENTER,
/ / /
Appuyez sur / / / pour sélectionner un lien à
atteindre, et appuyez ensuite sur ENTER.
EXIT
Appuyez sur cette touche pour revenir à la page
normale de télévision.
RETURN
Appuyez sur cette touche pour revenir à la page
précédente.
REMARQUE
Les restrictions s'appliquent à l'affichage de la fenêtre.
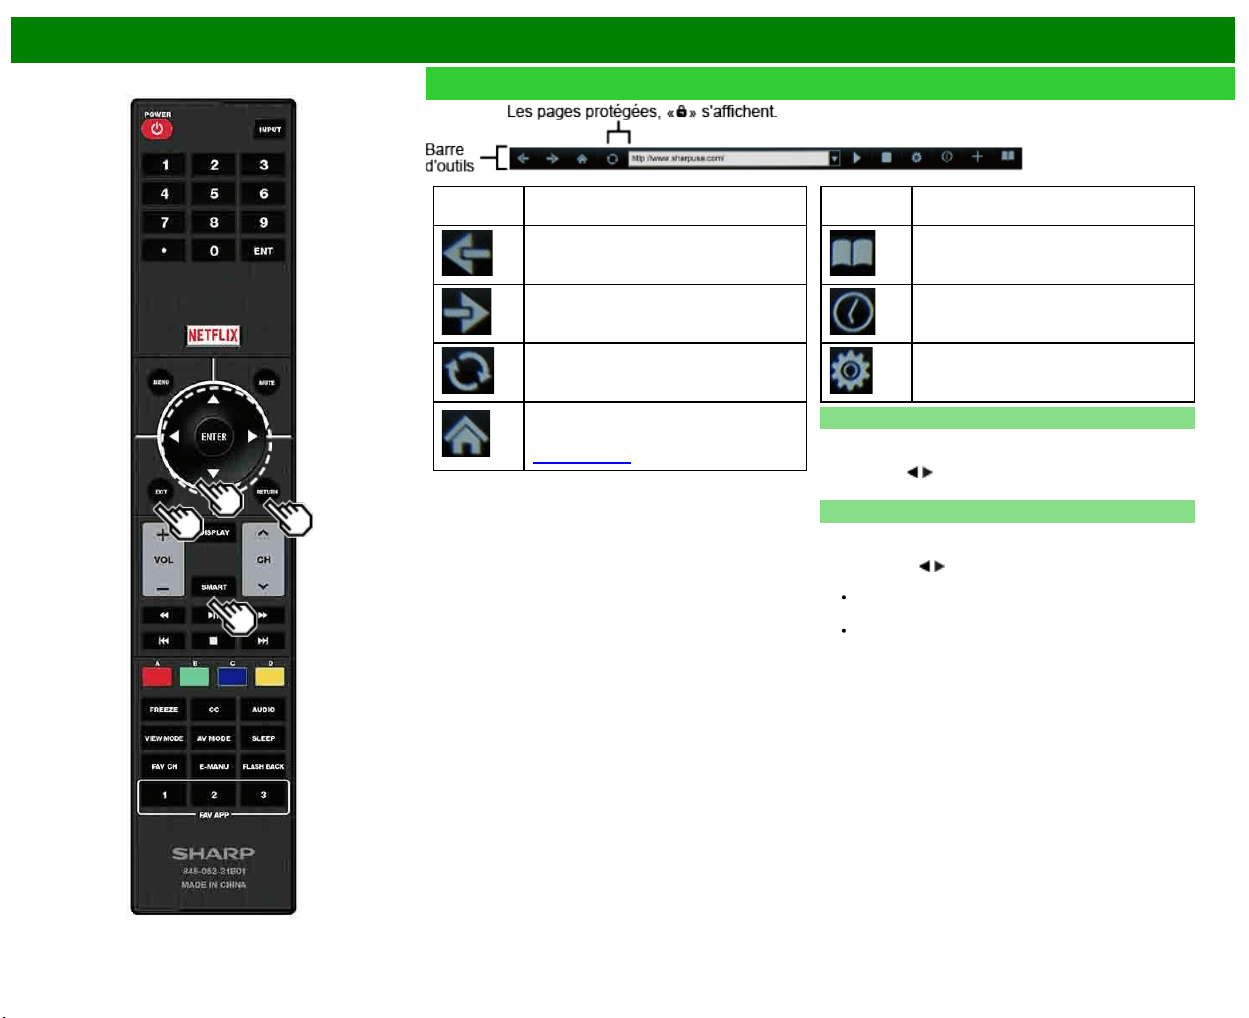
>>
<<
Utilisation d'Internet
FRA 8-8
Utilisation du navigateur (Suite)
Rubrique
sélectionnée
Description
Permit de retourner à la page précédente.
Permit d'aller à la page suivante.
Rafraîchit la page.
Interrompt le chargement d'une page.
Affiche la page d'accueil. Vous pouvez
configurer la page affichée comme votre
page d'accueil quand le navigateur démarre.
(Voir page 8-7.)
Rubrique
sélectionnée
Description
Affiche la liste des pages favorites.
Affiche votre historique de navigation.
Configure les réglages du navigateur
comme votre page d'accueil et la sécurité
de navigation.
Utilisation de la barre d'outils
Vous pouvez utiliser la barre d'outils pour commander le
navigateur et préciser certains réglages.
Appuyez sur
/ pour sélectionner une fonction, et appuyez
ensuite sur ENTER.
Navigation parmi des contenus Internet
Vous pouvez afficher le contenu web dont vous souhaitez
profiter.
1 Appuyez sur
/ pour aller dans la zone d'adresse de la
barre d'outils, et appuyez ensuite sur ENTER.
Le menu de Saisie d'adresse s'affiche.
2 Saisissez une adresse, et appuyez ensuite sur ENTER.
Le contenu web que vous souhaitez consulter s'affiche.
>>
<<
Utilisation d'Internet
FRA 8-9
Utilisation du navigateur (Suite)
ATTENTION
Si l'alimentation est coupée (panne ou interruption) tandis
que vous utilisez Internet, le favori ou le cookie ne sont
pas nécessairement bien sauvegardés.
REMARQUE
Lorsqu'une fenêtre de notification de sûreté s'affiche :
Appuyez sur ENTER pour fermer la fenêtre.
Cette fenêtre apparaît quand vous visitez un site protégé,
ou quand vous passez d'une page protégée à une page
non protégée.
Grâce à «Sécurité» vous pouvez indiquer si cette page
doit être affichée ou non.
À l'attention d'un utilisateur qui accède à Internet à l'aide
d'un PC
Lorsque vous utilisez ce téléviseur la procédure d'accès
peut être différente de celle employée
avec le navigateur du PC.
Sur certaines pages, il se peut que la vidéo et l'audio, le
texte ou les images ne s'affichent pas correctement.
À propos des liens
Une page Web d'Internet contient souvent des «liens»
donnant accès à d'autres pages (ou sites) Internet.
Un «lien» peut avoir diverses formes; ce peut être des
mots ou des images mais il agit toujours de la même
manière, c'est-à-dire vous permet d'accéder à une page
ou un site quand vous le sélectionner.
Les éléments choisis (tels que liens de champs de saisie
de texte) sont inscrits dans un cadre.
Vous pouvez passer d'un «lien» à la destination
correspondant à ce lien.
AVIS DE NON-RESPONSABILITÉ
La société SHARP n'assume aucune responsabilité quant
au contenu et à la qualité du contenu fourni par le
fournisseur du serveur de contenu.
>>
<<
Utilisation d'Internet
FRA 8-10
Utilisation du navigateur (Suite)
Réglages du navigateur
Vous pouvez vérifier et modifier les réglages du navigateur
à partir du menu de navigateur.
1 Appuyez sur
/ pour sélectionner « » sur la barre
d'outils, et appuyez ensuite sur ENTER.
2 Appuyez sur
/ pour sélectionner et valider le poste à
régler.
3Appuyez sur
/ / / pour sélectionner pour préciser la
valeur, et appuyez ensuite sur ENTER.
Page d'accueil : Vous pouvez configurer la page affichée
comme votre page d'accueil quand le navigateur
démarre.
Codage : Vous pouvez sélectionner le codage de la page,
à savoir :
Occidental (ISO-8859-1)/Unicode (UTF-8)
Infos sur page : Affiche des informations sur la page
affichée.
Sécurité :
Sites sûrs :
Une fois configuré sur «Désactivé», il est impossible
d'accéder aux sites HTTPS.
Avertissements de sécurité :
Une fois configuré sur «Activé», des messages
d'avertissement sont affichés lors du passage HTTP
HTTPS.
Certificats : Affichez la liste des certificats. Vous pouvoir
choisir d'activer ou de désactiver un certificat.
Les certificats désactivés sont affichés non cochés sur
l'écran de la liste des certificats.
Cookies :
Tout accepter : Sélectionnez cette option si vous désirez
accepter tous les cookies.
Tout rejeter : Sélectionnez cette option si vous ne désirez
accepter aucun cookie.
Effacer tous les cookies : Efface tous les cookies.
>>
<<
Utilisation d'Internet
FRA 8-11
Utilisation du clavier et de la souris
Vous pouvez utiliser un clavier ou une souris pour faire
fonctionner le téléviseur lors de l'utilisation d'un navigateur.
Lorsque vous utilisez des périphériques USB, connectez le
périphérique à la prise USB du téléviseur.
REMARQUE
Le clavier et la souris peuvent être utilisés uniquement
sur un écran de navigateur.
Le clavier ou la souris peuvent ne pas fonctionner
correctement en fonction de l'application utilisée.
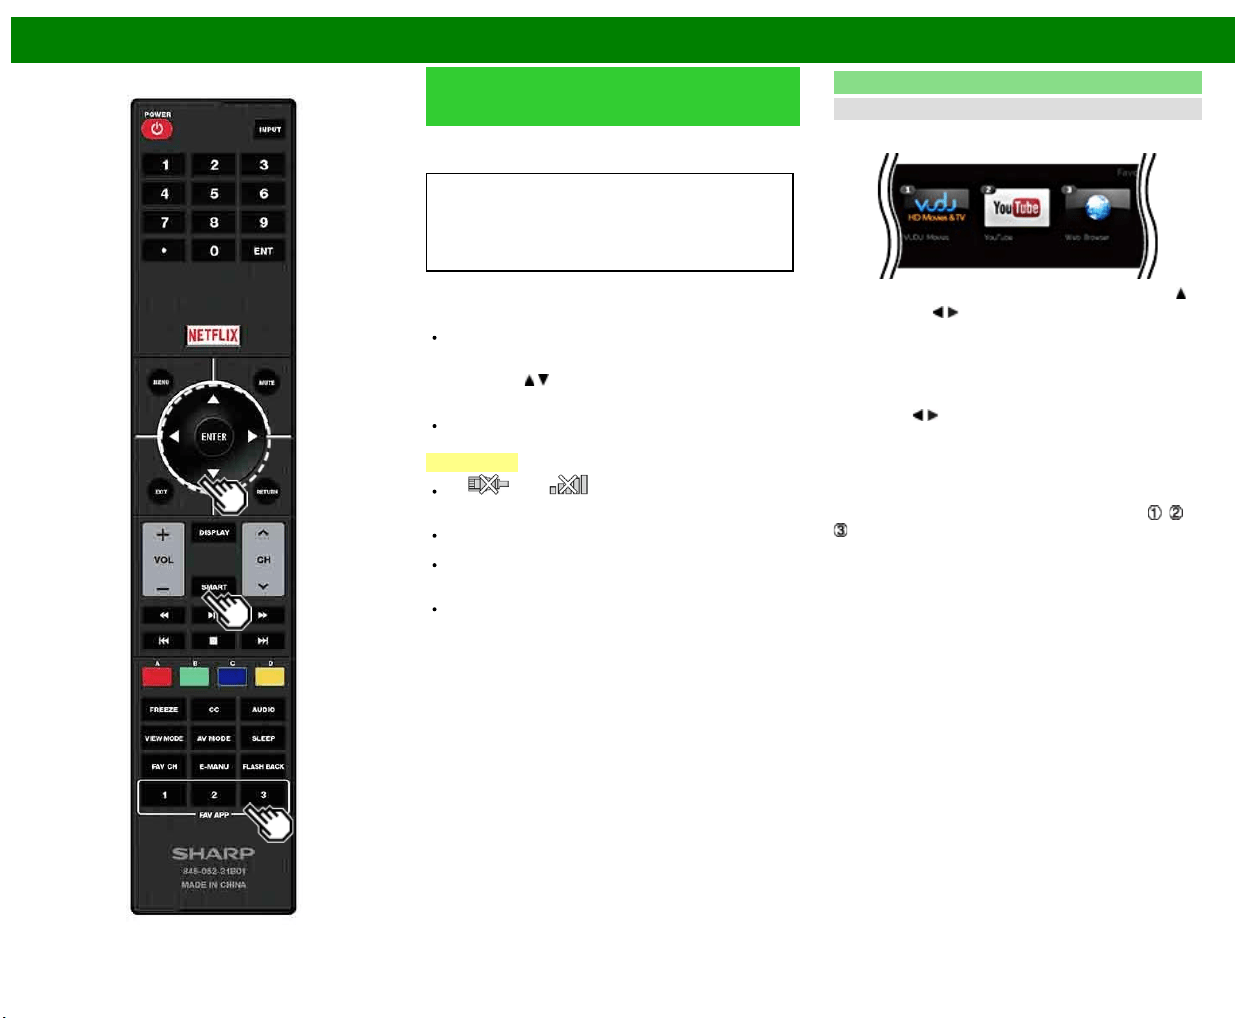
>>
<<
Utilisation d'Internet
FRA 8-12
Utilisation d'applications via
Internet
En raccordant le téléviseur Internet, vous pouvez profiter de
toute une gamme de contenu à large bande, y compris des
vidéos, de la musique et des photos.
Veuillez vérifier que le logiciel le plus récent est chargé sur
le téléviseur en sélectionnant «Mise à jour du logiciel sur
l'information»
http : //www.sharpusa.com/products/support/ pour
vérifier si vous pouvez télécharger la version la plus
récente du logiciel.
Utilisez la fenêtre des applications pour accéder à vos
applications Internet favorites. Appuyez sur SmartCentral
pour afficher la fenêtre des applications.
Suivez les instructions à l'écran pour chaque application.
Lorsque vous utilisez ce téléviseur pour accéder à une
application Internet pour la première fois, l'avis de non-
responsabilité s'affiche à l'écran.
Appuyez sur
/ pour sélectionner «Agree», et appuyez
ensuite sur ENTER. (Vous devez sélectionner «Agree»
pour utiliser l'application.)
Consultez le site Web du fournisseur pour plus de détails
sur la configuration et l'utilisation des fonctions.
REMARQUE
Si « » ou « » s'affiche après que vous vous
êtes connecté à Internet, vérifiez les réglages du réseau
et la connexion de votre téléviseur.
Des applications supplémentaires seront disponibles à
l'avenir.
Ces applications sont fournies par des fournisseurs de
contenu. Les applications disponibles varient en fonction
de votre pays ou de votre région.
La vitesse de fourniture des applications varie en
fonction de la vitesse du réseau. Consultez le site Web
du fournisseur pour plus de détails sur la configuration
de l'application et pour d'autres informations.
En utilisant la fenêtre des applications
Pendant l'affichage du dock
Vous pouvez déplacer les icônes d'application.
Exemple
1 Sélectionnez une application, et appuyez ensuite sur .
2 Appuyez sur
/ pour déplacer l'icône vers
l'emplacement souhaité.
Déplacer les icônes
Vous pouvez déplacer les icônes des applications les plus
couramment utilisées plus vers la gauche.
Appuyez sur
/ pour déplacer l'icône vers l'emplacement
souhaité.
Enregistrement des applications favorites
Vous pouvez régler vos applications favorites sur les
touches FAV APP1, 2, et 3 de la télécommande pour
faciliter le démarrage.
Les applications dont les icônes sont déplacées sur
, et
pendant l'affichage du dock seront respectivement
assignées aux touches FAV APP 1, 2 et 3 .

>>
<<
Utilisation d'Internet
FRA 8-13
Utilisation d'applications via
Internet (Suite)
Désactivation de la fonction Netflix
Vous pouvez désactiver la fonction Netflix. Consultez
«Smart TV» > «Avancé» > «Aide Netflix» et sélectionnez
«Désactiver».
Pour confirmer l'état de Netflix, vérifiez les informations
affichées à l'écran et cliquez sur «OK».
Désactiver la fonction VUDU
Pour désactiver la fonction VUDU; consultez «Smart TV» >
«Avancé» > «Aide VUDU» et sélectionnez «oui». Lorsque
vous accédez à l'application Internet pour la première fois,
ce qui suit apparaît.
Dans cette section, le texte original (anglais) est publié.
>>
<<
Utilisation d'Internet
Remarques
DISCLAIMERS
This SHARP device facilitates the access to content and services provided by third parties. The content and services accessible via this device belong to and may be proprietary to third parties.
Therefore, any use of such third party content and services must be in accordance with any authorization or terms of use provided by such content or service provider. SHARP shall not be liable
to you or any third party for your failure to abide by such authorization or terms of use. Unless otherwise specifically authorized by the applicable content or service provider, all third party content
and services provided are for personal and non-commercial use; you may not modify, copy, distribute, transmit, display, perform, reproduce, upload, publish, license, create derivative works from,
transfer or sell in any manner or medium any content or services available via this device.
SHARP is not responsible, nor liable, for customer service-related issues related to the third party content or services. Any questions, comments or service-related inquiries relating to the third
party content or service should be made directly to the applicable content or service provider.
You may not be able to access content or services from the device for a variety of reasons which may be unrelated to the device itself, including, but not limited to, power failure, other Internet
connection, or failure to configure your device properly. SHARP, its directors, officers, employees, agents, contractors and affiliates shall not be liable to you or any third party with respect to such
failures or maintenance outages, regardless of cause or whether or not it could have been avoided.
ALL THIRD PARTY CONTENT OR SERVICES ACCESSIBLE VIA THIS DEVICE IS PROVIDED TO YOU ON AN "AS-IS" AND "AS AVAILABLE" BASIS AND SHARP AND ITS AFFILIATES MAKE
NO WARRANTY OR REPRESENTATION OF ANY KIND TO YOU, EITHER EXPRESS OR IMPLIED, INCLUDING, WITHOUT LIMITATION, ANY WARRANTIES OF MERCHANTABILITY, NON-
INFRINGEMENT, FITNESS FOR A PARTICULAR PURPOSE OR ANY WARRANTIES OF SUITABILITY, AVAILABILITY, ACCURACY, COMPLETENESS, SECURITY, TITLE, USEFULNESS,
LACK OF NEGLIGENCE OR ERROR-FREE OR UNINTERRUPTED OPERATION OR USE OF THE CONTENT OR SERVICES PROVIDED TO YOU OR THAT THE CONTENT OR SERVICES
WILL MEET YOUR REQUIREMENTS OR EXPECTATIONS.
SHARP IS NOT AN AGENT OF AND ASSUMES NO RESPONSIBILITY FOR THE ACTS OR OMISSIONS OF THIRD PARTY CONTENT OR SERVICE PROVIDERS, NOR ANY ASPECT OF THE
CONTENT OR SERVICE RELATED TO SUCH THIRD PARTY PROVIDERS.
IN NO EVENT WILL SHARP AND/OR ITS AFFILIATES BE LIABLE TO YOU OR ANY THIRD PARTY FOR ANY DIRECT, INDIRECT, SPECIAL, INCIDENTAL, PUNITIVE, CONSEQUENTIAL OR
OTHER DAMAGES, WHETHER THE THEORY OF LIABILITY IS BASED ON CONTRACT, TORT, NEGLIGENCE, BREACH OF WARRANTY, STRICT LIABILITY OR OTHERWISE AND
WHETHER OR NOT SHARP AND/OR ITS AFFILIATES HAVE BEEN ADVISED OF THE POSSIBILITY OF SUCH DAMAGES.
Exemples de logos d'application
FRA 8-14

>>
<<
Annexe
FRA 9-1
Dépose du socle
Avant de poser (ou déposer) le socle, mettez le téléviseur hors tension et débranchez le cordon
secteur.
ATTENTION
Ne retirez pas le socle du téléviseur, sauf si vous utilisez l'applique pour montage mural
en option pour le monter.
Desserrez les six vis utilisées pour maintenir le socle en place.
exemple
REMARQUE
Veillez à toujours le transporter à deux personnes, en le tenant à deux mains.
Lors de l'installation, faites attention de ne pas vous coincer les doigts entre le téléviseur et le
sol.
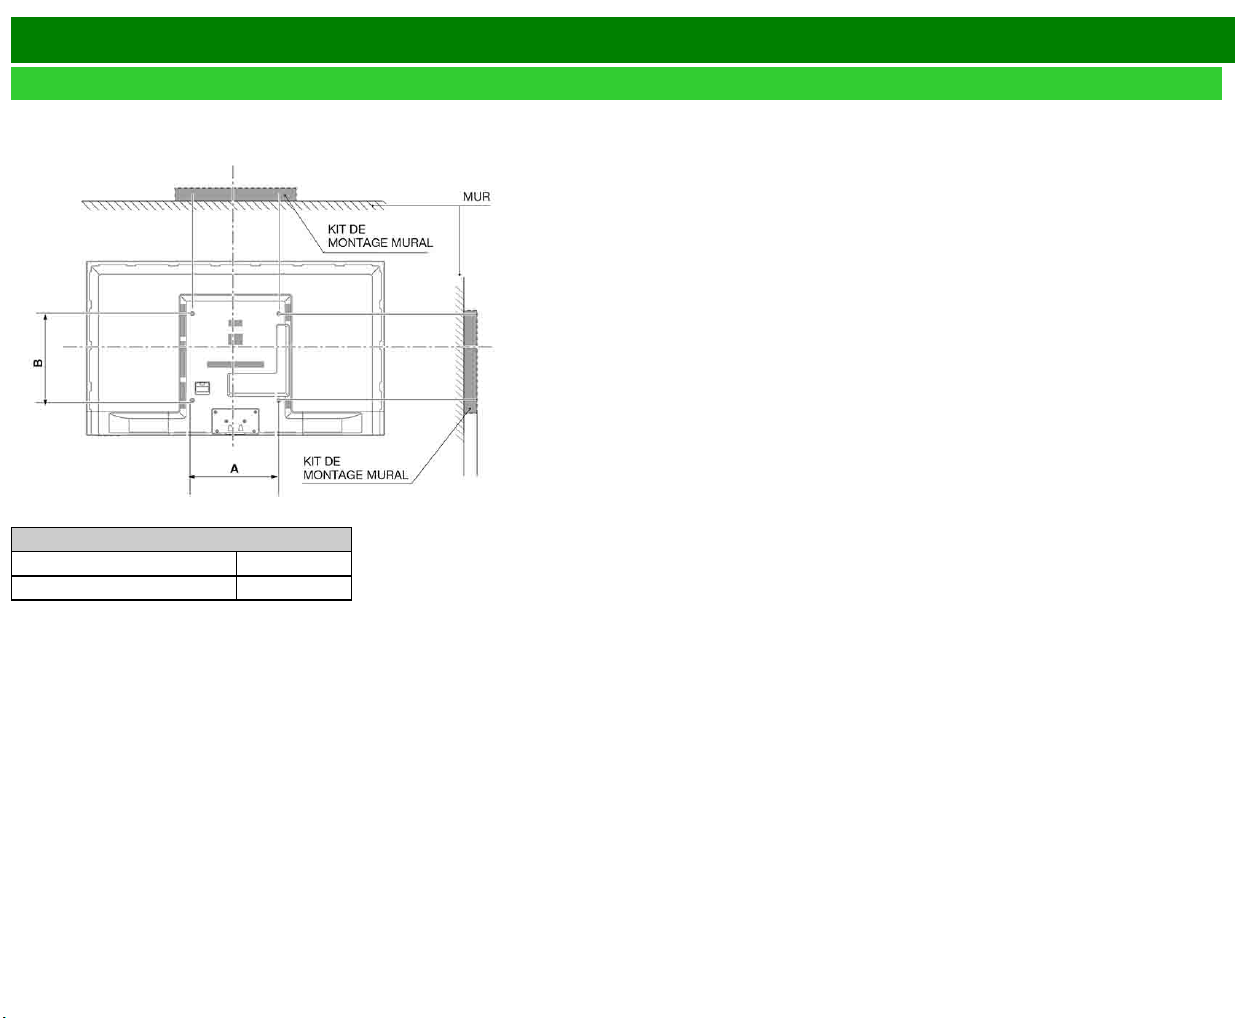
>>
<<
Annexe
FRA 9-2
Montage du téléviseur sur un mur
Spécifications du kit de montage mural
Les dimensions standard des kits de montage mural figurent ci-dessous.
• L'illustration est basée sur le modèle
LC-60LE644U à titre d'exemple.
Modèle
Élément LC-60LE644U
Empreinte du support mural (A x B) 400mm x 400mm
Le support de montage doit être suffisammen solide pour supporter le poids de l'écran.
Les fixation du support mural doivent avoir un agrément UL ou équivalent.

>>
<<
Annexe
FRA 9-3
Montage du téléviseur sur un mur (Suite)
Pour les vis, consultez le tableau ci-dessous.
Modèle
Élément LC-60LE644U
vis standard M6 (Utilisez 1.0mm pas d'hélice)
la longueur(Depth of mounting holes) 15/32 (12mm)
Quantité 4 unités
REMARQUE
Ne montez pas le téléviseur de manière angulaire.
N'utilisez pas des vis non conformes aux spécifications en matière de vis de la norme VESA.
N'utilisez pas de vis plus longues que la longueur standard. Les vis trop longues sont susceptibles d'endommager l'intérieur du téléviseur.
Ne serrez les vis ni trop fort, ni insuffisamment. Ceci pourrait endommager le produit ou entraîner la chute de l'appareil, et causer des blessures personnelles. SHARP n'assume aucune
responsabilité pour ce genre d'accidents.
SHARP ne pourra être tenu pour responsable en cas d'endommagement du produit ou de blessures personnelles si une applique murale non VESA ou non spécifiée est utilisée ou si le
consommateur ne suit pas les instructions d'installation.
N'installez pas le kit de montage mural si votre téléviseur est allumé. Il pourrait entraîner des blessures dues à une décharge électrique.
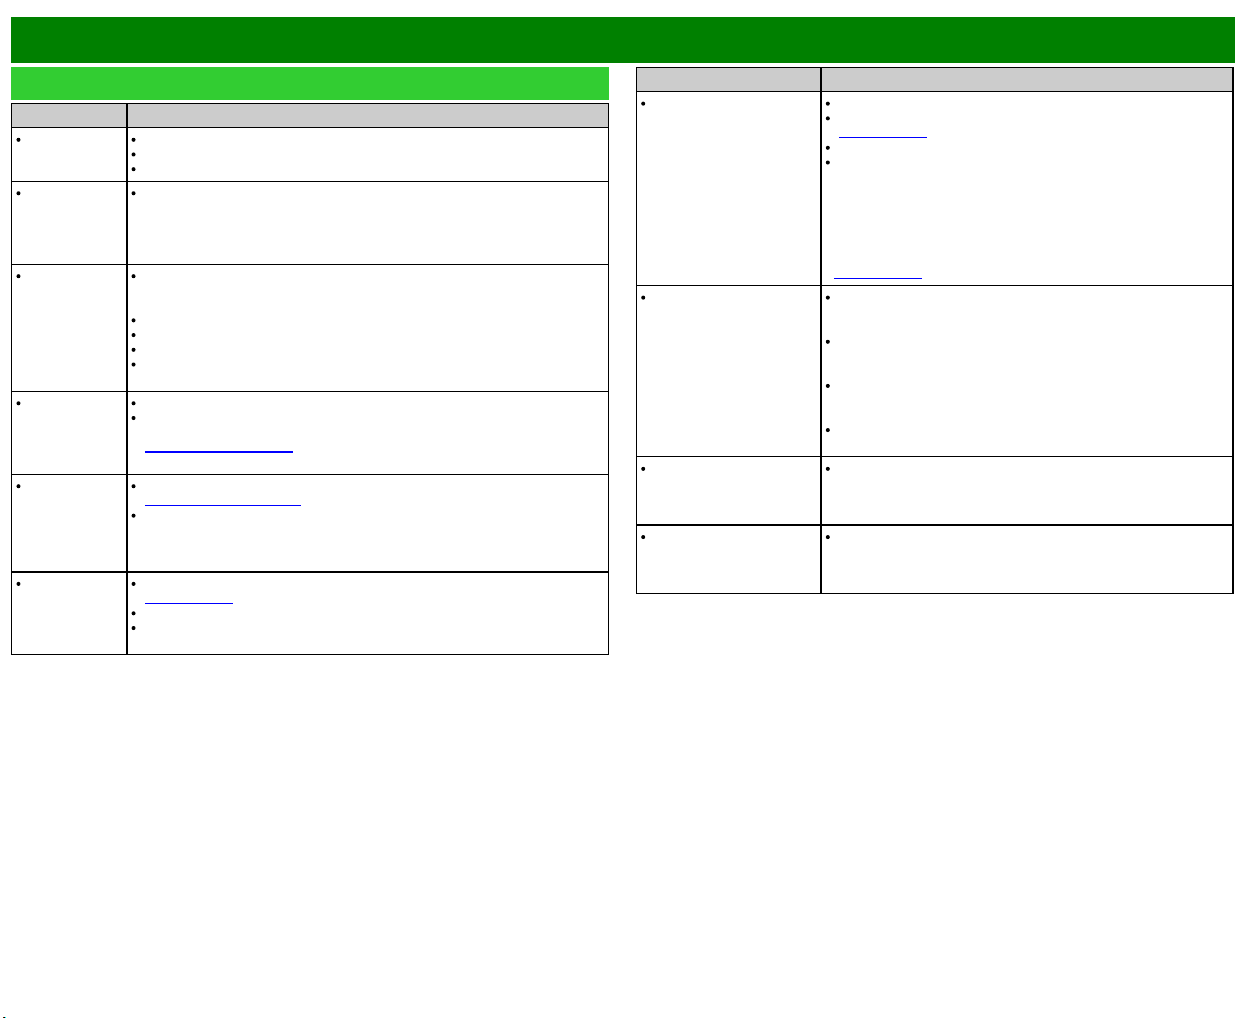
>>
<<
Annexe
FRA 9-4
Guide de dépannage
Problème Solution possible
Pas
d'alimentation
Vérifiez si vous avez appuyé sur POWER de la télécommande.
Le cordon secteur est-il débranché?
Le téléviseur est-il sous tension?
L'appareil ne
fonctionne pas.
Des influences externes comme des éclairs, de l'électricité statique, peuvent
provoquer des erreurs de fonctionnement. Dans ce cas, faites fonctionner
l'appareil après avoir mis tout d'abord le téléviseur hors tension, ou
débranchez le cordon secteur et rebranchez-le une ou deux minutes plus
tard.
La
télécommande
ne fonctionne
pas.
Est-ce que l'appareil est correctement actionné par la télécommande?
Appuyez sur TV pour régler la télécommande de manière à actionner le
téléviseur.
Les piles sont-elles en place avec leurs polarités (e, f) alignées?
Les piles sont-elles usées? (Remplacez par des piles neuves.)
Utilisez-vous l'appareil sous un éclairage violent ou fluorescent?
Un éclairage fluorescent est-il placé à proximité du capteur de
télécommande?
L'image est
coupée par un
écran avec
barres
latérales.
La position de l'image est-elle correcte?
Les réglages du mode de l'écran, comme la taille de l'image, sont-ils
corrects?
Voir pages 3-14 à 3-16
Couleur
étrange,
couleur claire,
ou mauvais
alignement des
couleurs.
Réglez la tonalité de l'image.
Voir pagess 4-17 à 4-20
La pièce est-elle trop claire? L'image peut paraître sombre dans une pièce
trop éclairée.
L'alimentation
se coupe
brusquement.
La minuterie d'extinction a-t-elle été réglée?
Voir page 3-9
Vérifiez les réglages de commande d'alimentation.
La température interne de l'appareil a augmenté. Retirez les objets bloquant
les évents ou nettoyez.
Problème Solution possible
Pas d'image. Le raccordement aux autres appareils est-il correct?
L'entrée correcte a-t-elle été sélectionnée?
Voir page 2-1
«Marche» a-t-il été sélectionné pour «Audio seul»?
Si l'image de l'ordinateur ne s'affiche pas, vérifiez les points
suivants;
- Lorsque vous connectez un ordinateur portable au téléviseur,
vérifiez que le mode de sortie de l'affichage de l'ordinateur est
configuré sur moniteur externe.
- Vérifiez le réglage de la résolution sur l'ordinateur. Avez-vous
entré un signal noncompatible?
Voir page 8-9
La qualité d'image des
programmes HD est
médiocre.
Pour profiter d'images HD à partir d'un appareil externe, vous
devez configurer une connexion HDMI ou une connexion
composante.
Si le contenu du programme n'est pas en qualité HD, les
images ne peuvent pas être affichées. Vérifiez que le
programme que vous regardez propose des images HD.
Il est peut-être nécessaire de configurer le boîtier décodeur de
réception par câble/satellite HD pour reproduire des images HD
via câble/satellite.
Il est possible que la diffusion par câble/satellite ne prenne pas
en charge une résolution de signal de 1080p.
Le téléviseur émet
quelquefois un bruit de
craquement.
Il ne s'agit pas d'un dysfonctionnement, mais de
l'expansion/contraction du coffret suite aux changements de
température. Ceci n'a aucune incidence sur les performances
du téléviseur.
Certaines fonctions
Internet disponibles sur le
PC ne le sont pas sur le
téléviseur.
Le téléviseur ne fournit qu'une partie des fonctions du
navigateur d'un PC.
>>
<<
Annexe
FRA 9-5
Guide de dépannage (Suite)
Problème Solution possible
Pas de son. Le raccordement aux autres appareils est-il correct?
Le volume est-il trop bas?
Voir page 3-2
«Variable» a-t-il été sélectionné pour «Sélect. sortie»?
Avez-vous appuyé sur MUTE sur la télécommande?
Voir page 3-3
Vérifiez la sortie audio de l'appareil externe connecté. Le volume
est-il trop faible ou coupé?
Lorsqu'un appareil externe est connecté via un câble HDMI, vous
pouvez être amené à configurer l'audio pour réaliser la sortie sur
le câble HDMI.
Lorsque la sortie audio ne provient pas de l'appareil connecté à
la prise PC IN ou HDMI IN 2, vérifiez le réglage de «Sélection
Audio».
Voir pages 3-8, 4-21
Même lorsqu'un appareil externe est connecté à l'aide d'un câble
certifié HDMI, il est possible qu'une connexion par câble audio
soit nécessaire en fonction du type d'appareil et du support en
cours de lecture. Dans ce cas, outre la connexion d'un câble
certifié HDMI sur la prise HDMI IN 2, connectez un câble avec
mini-prise stéréo ø 3,5 mm sur la prise AUDIO IN et réglez
«Sélection Audio» sur «HDMI + analogique».
Voir pages 3-8, 4-21
Si vous connectez un ordinateur via un câble certifié HDMI,
vérifiez les points suivants :
- Est-ce que la sortie audio de l'ordinateur est correctement
configurée? Vérifiez les réglages de la sortie audio et le format de
sortie audio des Propriétés sonores de l'ordinateur.
Les formats audio compatibles avec ce téléviseur sont les formats
PCM, Dolby Digital et DTS. Il est impossible de reproduire l'audio
avec d'autres formats.
- Selon la carte, il est possible que seuls des signaux vidéo
puissent être envoyés sur la sortie. Dans ce cas, outre la
connexion d'un câble certifié HDMI sur la prise HDMI IN 2,
connectez un câble avec mini-prise stéréo ø 3,5 mm sur la prise
AUDIO IN et réglez «Sélection Audio» sur «HDMI + analogique».
Voir pages 3-8, 4-21
>>
<<
Annexe
FRA 9-6
Guide de dépannage - Message d'erreur
Exemple d'un message
d'erreur affiché à l'écran
Code
d'erreur
Solution possible
Échec de réception de
l'émission.
E202 Vérifiez le câble d'antenne. Vérifiez que l'antenne
est correctement installée.
Pas d'émission pour
l'instant.
E203 Vérifiez l'heure de diffusion dans le guide des
programmes.
Un signal audio
incompatible a été reçu.
Vérifiez les réglages de
l'appareil de sortie.
— Ce message s'affiche lorsqu'un format audio
différent de PCM, Dolby Digital ou DTS est entré.
- Réglez le format de sortie audio de l'appareil
HDMI externe connecté sur PCM, Dolby Digital ou
DTS.
- Consultez le mode d'emploi de l'appareil externe
pour les détails des réglages.
>>
<<
Annexe
FRA 9-7
Informations sur la licence d'utilisation du logiciel pour ce
produit
Licence de logiciel
Vous pouvez lire les licences d'utilisation du logiciel dans le menu d'affichage sur l'écran.
Consultez «Renseignements» > «Licence de logiciel».
Composition du logiciel
Le logiciel accompagnant ce produit comprend différents composants logiciels dont chaque droit
d'auteur est détenu par SHARP ou par des tiers.
Précautions lors de l'utilisation dans des environnements ayant une haute ou basse
température
Lorsque l'appareil est utilisé dans un endroit (une pièce ou un bureau, par exemple) ayant
une basse température, l'image peut laisser des traces ou apparaître avec un léger délai.
Ceci n'est pas un défaut de fonctionnement et l'appareil fonctionne de nouveau normalement
lorsque la température redevient normale.
Ne laissez pas l'appareil dans un endroit chaud ou froid. Ne le laissez pas non plus dans un
endroit directement exposé au soleil ou à proximité d'un radiateur, ceci pouvant provoquer
des déformations du coffret et des problèmes de fonctionnement du panneau avant.
Température de stockage : -4°F à +140°F (-20°C à +60°C)
EFFACER LE NUMÉRO SECRET
Si vous avez oublié votre numéro secret, effacez-le en procédant comme suit.
1 Sélectionnez une rubrique dans la liste ci-dessous pour afficher l'écran de saisie du numéro
secret. (Pour utiliser le d'affichage sur l'écran,
voir page 4-3.)
«Système Couleur» ( «Réglages d'entrée» menu Configuration initiale)
«Configuration facile» ou «Réinitial.» ( menu Configuration initiale)
«Channel Setup» ( «Réglages des chaînes» menu Configuration initiale)
«Contrôle parental» ( menu Configuration initiale)
«Actualisation logiciel» ( menu Renseignements)
2 Maintenez enfoncées simultanément CH
et VOL+ sur le téléviseur jusqu'à ce que le
message apparaisse à l'écran.
>>
<<
Fiche technique
Téléviseur
Rubrique Modèle : LC-60LE644U
Panneau
ACL
Taille 60" Classe (60 3/32" Diagonal)
Résolution 2,073,600 pixels (1,920 x 1,080)
Fonction
Télévision
Standard TV (CCIR) Standard de télévision américain Système ATSC/NTSC
Canal de réception
VHF/UHF VHF 2-13 c, UHF 14-69 c
CATV 1-135 c (canal non brouillé uniquement)
Émission numérique terrestre (8VSB) 2-69 c
Câble numérique*1 (64/256 QAM) 1-135 c (canal non brouillé uniquement)
Multiplex audio Système BTSC
Sortie audio 8W x 2
Prises
Côté surface du panneau arrière
L-AUDIO-R L'entrée audio L / R
ANT/CABLE
75
non équilibré, Type F x 1 pour Analogue (VHF/UHF/CATV) et Numérique (ANT/CÂBLE)
ETHERNET(10/100) Connecteur réseau
USB(DC5V 500mA) Mode photo/musique/vidéo, Actualisation logiciel, Clavier/souris USB, Image papier peint
DIGITAL AUDIO OUT Sortie audio numérique optique x 1 (PCM/Dolby Digital/DTS)
Côté de la surface du panneau vers le
bas
HEADPHONE Connecteur de CASQUE
HDMI 3 Entrée HDMI avec HDCP
HDMI 2 Entrée HDMI avec HDCP, entrée Audio (prise stéréo de ø 3,5 mm)
HDMI 1(ARC) Entrée HDMI avec HDCP, ARC
PC IN ANALOG RGB
Entrée ANALOG RGB (PC) (connecteur femelle mini D-sub 15 broches),
entrée Audio (prise stéréo de ø 3,5 mm)
PC IN AUDIO entrée Audio (prise stéréo de ø 3,5 mm)
COMPONENT/VIDEO IN Entrée COMPONENT, Entrée AV
Langue OSD Anglais/Français/Espagnol
Alimentation électrique AC 120 V, 60 Hz
Consommation En Mode 98 W
Consommation d'énergie 150 W
Poids
Téléviseur + socle 50.7 lbs./23.0 kg
Téléviseur seul 43.0 lbs./19.5 kg
Dimensions
(L x H x P)
Téléviseur + socle 54 15/64" x 34 17/64" x 13"
Téléviseur seul 54 15/64" x 31 3/4" x 3 31/32"
Température de fonctionnement +32°F à +104°F (0°C à +40°C)
*1 Les messages d'alerte d'urgence via le câble ne peuvent pas être reçus.
SHARP se réserve le droit de procéder à des modifications de la conception et des spécifications sans préavis, dans le cadre de sa politique d'amélioration continue. Les chiffres des performances
indiqués dans les spécifications sont des valeurs nominales des unités de production. Les appareils peuvent présenter individuellement des déviations par rapport à ces valeurs.
La Consommation En Mode est mesurée selon les exigences du programme Energy Star pour les télévisions.
FRA 10-1
>>
<<
Fiche technique
FRA 10-2
LAN sans-fil
Spécifications
Norme IEEE 802.11b/g/n
Bande de fréquence 2412-2484 MHz
Sécurité
WEP statique (64/128 bits, index de clé 1 uniquement)
WPA-PSK (TKIP)
WPA2-PSK (AES)
Modulation
BPSK@6/9 Mbps
QPSK@12/18Mbps
16-QAM@24Mbps
64-QAM@48/54Mbps et supérieur, réception jusqu'à 300Mbps
>>
<<
Marques
FRA 11-1
SMART est une marque déposée de Sharp Corporation.
Fabriqué sous licence de Dolby Laboratories. Les termes Dolby et le sigle double D
sont des marques de commerce de Dolby Laboratories.
Les termes HDMI et HDMI High Definition Multimedia Interface sont des marques
commerciales ou déposées de HDMI Licensing LLC, aux États-Unis et/ou dans
d’autres pays.
Le logo Wi-Fi CERTIFIED est une marque de certification de Wi-Fi Alliance.
Le logo Wi-Fi Protected Setup Mark est une marque de Wi-Fi Alliance.
Wi-Fi CERTIFIED Miracast™ et Miracast™ sont des marques déposées de Wi-Fi
Alliance.
Ce produit inclut le logiciel de réseau personnel «DiXiM» développé par DigiOn, Inc.
et le logo LC sont des
marques déposées de SHARP Corporation.
Ce produit intègre la technologie LC Font, qui a été développée par SHARP
Corporation pour afficher de manière nette et facile à lire des caractères sur les
écrans LCD. Cependant, d'autres polices sont aussi utilisées pour certaines pages
d'écran.
Netflix et le logo Netflix sont des marques déposées de Netflix, Inc.
VUDU™ est une marque de commerce de VUDU, Inc.
ENERGY STAR® Information utilisateur
Veuillez vous reporter à energystar.gov pour plus d'informations sur le programme
ENERGY STAR.
La sortie du mode domestique d'ENERGY STAR ou l'activation des fonctionnalités
optionnelles augmente la consommation d'énergie.
Ce produit est conforme à ENERGY STAR lorsque vous sélectionnez «Maison»
pour «Emplacement TV». Régler «Emplacement TV» sur «Maison» permet de
mettre le téléviseur dans un état d'économie d'énergie pour une utilisation
domestique.
Les produits labellisés ENERGY STAR® sont conçus pour
protéger l'environnement par un rendement énergétique
supérieur.
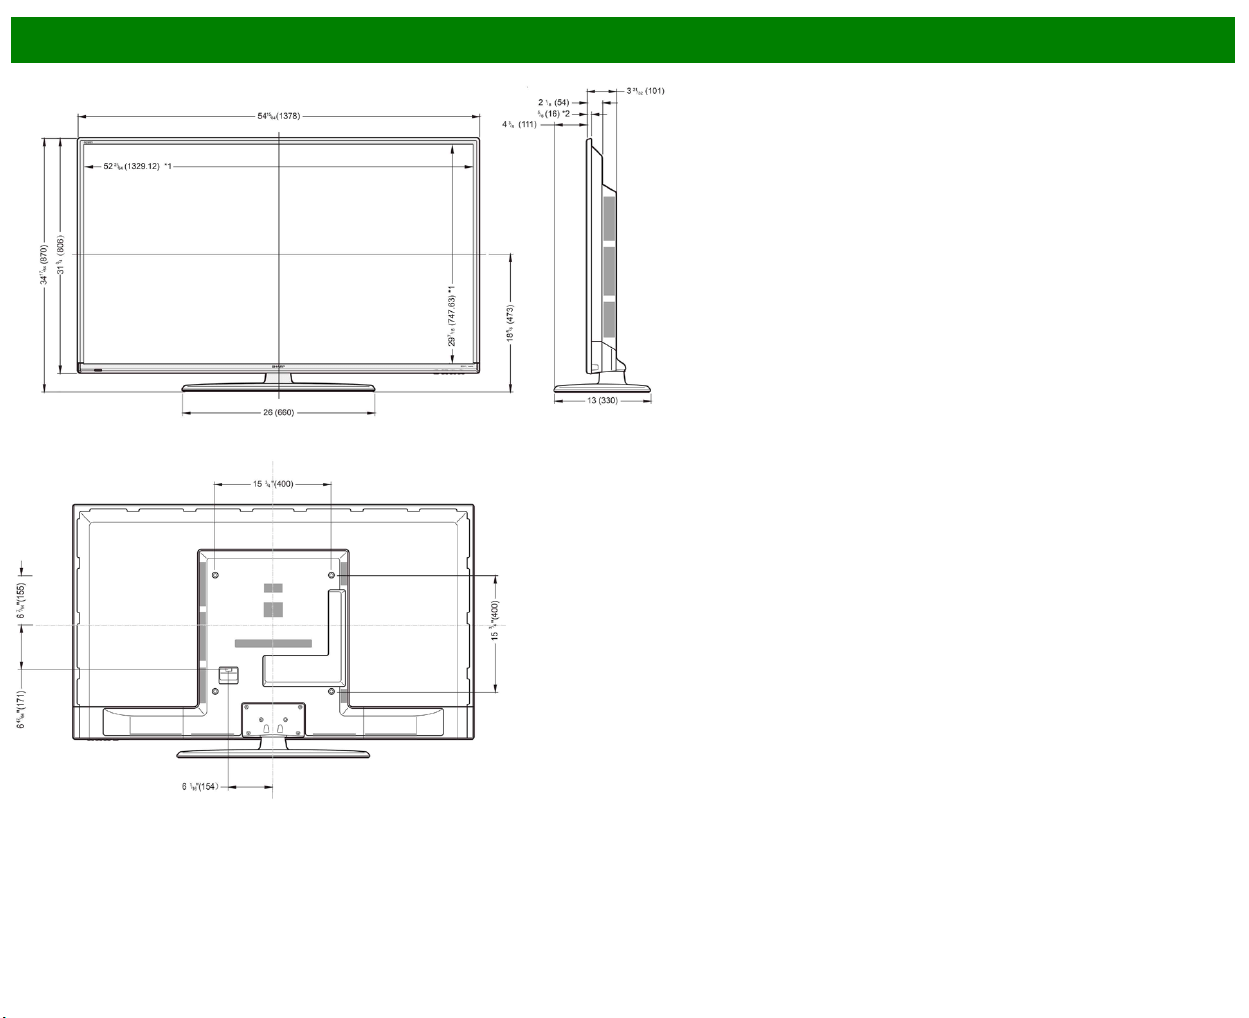

>>
<<
Licence de logiciel
FRA 13-1
Software composition
The software included in this product is comprised of various software components whose
individual copyrights are held by SHARP or by third parties.
Software developed by SHARP and open source software
The copyrights for the software components and various relevant documents included with this
product that were developed or written by SHARP are owned by SHARP and are protected by the
Copyright Act, international treaties, and other relevant laws. This product also makes use of freely
distributed software and software components whose copyrights are held by third parties. These
include software components covered by a GNU General Public License (hereafter GPL), a GNU
Lesser General Public License (hereafter LGPL) or other license agreement.
Obtaining source code
Some of the open source software licensors require the distributor to provide the source code with
the executable software components. GPL and LGPL include similar requirements. For information
on obtaining the source code for the open source software and for obtaining the GPL, LGPL, and
other license agreement information, visit the following website:
http://www.sharpusa.com/gpl We are unable to answer any questions about the source code for
the open source software. The source code for the software components whose copyrights are
held by SHARP is not distributed.
Acknowledgements
The following open source software components are included in this product:
linux
kernel/busybox/glibc/zlib/libpng/libjpeg/libiconv/DirectFB/OpenSSL/XMLRPC-EPI/
mtd-utils/Expat/Qt/U-Boot/PlayReady/AGG(ver2.3)/device-mapper/libfreetype/cURL/
libxml2/lua/lua-xmlreader/lua-slncrypto/Ffmpeg/SQLite/libzzip/c-ares/librt/libjanus/NTP/
webkit/cairo/fontconfig/icu/libxslt/gtk+/atk/pango/glib2/libpixman/gstreamr/liboil/libcheck/
Droid Sans/ca-bundle.crt/btusb/bthid/pthread/cJSON
Software copyrights
XMLRPC-EPI
Copyright 2000 (c) Epinions, Inc.
libjpeg
This software is copyright (c) 1991-2012, Thomas G. Lane, Guido Vollbeding. Portions of this
software are based in part on the work of the Independent JPEG Group.
SSLeay
Copyright (c) 1995-1998 Eric Young ([email protected])
This product includes cryptographic software written by Eric Young ([email protected]).
Expat
Copyright (c) 1998, 1999, 2000 Thai Open Source Software Center Ltd and Clark Cooper.
Copyright (c) 2001, 2002, 2003, 2004, 2005, 2006 Expat maintainers.
Contact: Nokia Corporation (qt-[email protected])
Qt
The Qt GUI Toolkit is Copyright (c) 2010 Nokia Corporation and/or its subsidiary(-ies).
PlayReady
This product contains technology subject to certain intellectual property rights of Microsoft. Use or
distribution of this technology outside of this product is prohibited without the appropriate lisense(s)
from Microsoft.
Content owners use Microsoft PlayReadyTM content access technology to protect their intellectual
property, including copyrighted content. This device uses PlayReady technology to access
PlayReady-protected content and/or WMDRM-protected content. If the device fails to properly
enforce restrictions on content usage, content owners may require Microsoft to revoke the devicefs
ability to consume PlayReady-protected content. Revocation should not affect unprotected content
or content protected by other content access technologies. Content owners may require you to
upgrade PlayReady to access their content. If you decline an upgrade, you will not be able to
access content that requires the upgrade.
libfreetype
Copyright (c) 2006, 2007, 2008, 2009, 2010 by David Turner, Robert Wilhelm, and Werner
Lemberg. The software is based in part of the work of the Free Type Team.
libxml2
Copyright (c) 1998-2003 Daniel Veillard. All Rights Reserved.
Lua
Copyright (c) 1994-2008 Lua.org, PUC-Rio
Lua-xmlreader
Copyright (c) 2008 A.S. Bradbury
Lua-slncrypto
Copyright (c) 2005 Malete Partner, Berlin, [email protected]
libzzip
Copyright (c) Guido Draheim [email protected]
c-ares
Copyright (c) 1998 by the Massachusetts Institute of Technology.

>>
<<
yLicence de logiciel(Suite)
FRA 13-2
Group 42
Portions copyright (c) 2000 Group 42, Inc. and the Contributing Authors.
zlib
Portions copyright (c) 1995-1996 Jean-loup Gailly and Mark Adler.
RSA Data Security
MD5.CPP - RSA Data Security, Inc., MD5 message-digest algorithm. Copyright (c) 1991-2, RSA
Data Security, Inc. Created 1991. All rights reserved.
Fraunhofer IIS and Thomson Multimedia
MPEG Layer-3 audio compression technology licensed by Fraunhofer IIS and Thomson
Multimedia.
You cannot use the MP3 compressed audio within the Software for real time or live broadcasts.
If you require an MP3 decoder for real time or live broadcasts, you are responsible for obtaining
this MP3 technology license.
Nellymoser, Inc
Speech compression and decompression technology licensed by Nellymoser, Inc.
Sorenson Media, Inc
SorensonTM SparkTM video compression and decompression technology licensed from Sorenson
Media, Inc.
Sun Microsystem, Inc
ADPCM speech compression algorithm is used with the permission of Sun Microsystems, Inc.
NTP
Copyright (c) University of Delaware 1992-2011
Permission to use, copy, modify, and distribute this software and its documentation for any
purpose with or without fee is hereby granted,provided that the above copyright notice appears in
all copies and that both the copyright notice and this permission notice appear in supporting
documentation, and that the name University of Delaware not be used in advertising or publicity
pertaining to distribution of the software without specific, written prior permission. The University of
Delaware makes no representations about the suitability this software for any purpose. It is
provided "as is" without express or implied warranty.
fontconfig
Copyright (c) 2001, 2003 Keith Packard
icu
Copyright (c) 1995-2011 International Business Machines Corporation and others All rights
reserved.
libxslt
Copyright (c) 2001-2002 Daniel Veillard. All Rights Reserved.
cURL
COPYRIGHT AND PERMISSION NOTICE Copyright (c) 1996 - 2009, Daniel Stenberg,
All rights reserved.
Permission to use, copy, modify, and distribute this software for any purpose with or without fee is
hereby granted, provided that the above copyright notice and this permission notice appear in all
copies.
THE SOFTWARE IS PROVIDED "AS IS", WITHOUT WARRANTY OF ANY KIND, EXPRESS OR
IMPLIED, INCLUDING BUT NOT LIMITED TO THE WARRANTIES OF MERCHANTABILITY,
FITNESS FOR A PARTICULAR PURPOSE AND NONINFRINGEMENT OF THIRD PARTY
RIGHTS. IN NO EVENT SHALL THE AUTHORS OR COPYRIGHT HOLDERS BE LIABLE FOR
ANY CLAIM, DAMAGES OR OTHER LIABILITY, WHETHER IN AN ACTION OF CONTRACT,
TORT OR OTHERWISE, ARISING FROM, OUT OF OR IN CONNECTION WITH THE
SOFTWARE OR THE USE OR OTHER DEALINGS IN THE SOFTWARE.
Except as contained in this notice, the name of a copyright holder shall not be used in advertising
or otherwise to promote the sale, use or other dealings in this Software without prior written
authorization of the copyright holder.
libpixman
Copyright (C) 2008 Free Software Foundation, Inc.
OpenSSL
LICENSE ISSUES
The OpenSSL toolkit stays under a dual license, i.e. both the conditions of the OpenSSL License
and the original SSLeay license apply to the toolkit. See below for the actual license texts. Actually
both licenses are BSD-style Open Source licenses. In case of any license issues related to
OpenSSL please contact openssl-[email protected].
OpenSSL License
Copyright (c) 1998-2008 The OpenSSL Project. All rights reserved.
Redistribution and use in source and binary forms, with or without modification, are permitted
provided that the following conditions are met:
1. Redistributions of source code must retain the above copyright notice, this list of conditions and
the following disclaimer.
2. Redistributions in binary form must reproduce the above copyright notice, this list of conditions
and the following disclaimer in the documentation and/or other materials provided with the
distribution.

>>
<<
Licence de logiciel(Suite)
FRA 13-3
3. All advertising materials mentioning features or use of this software must display the following
acknowledgment:
"This product includes software developed by the OpenSSL Project for use in the OpenSSL
Toolkit. (http://www.openssl.org/)"
4. The names "OpenSSL Toolkit" and "OpenSSL Project" must not be used to endorse or promote
products derived from this software without prior written permission. For written permission, please
contact openssl-[email protected].
5. Products derived from this software may not be called "OpenSSL" nor may "OpenSSL" appear
in their names without prior written permission of the OpenSSL Project.
6. Redistributions of any form whatsoever must retain the following acknowledgment:
"This product includes software developed by the OpenSSL Project for use in the OpenSSL Toolkit
(http://www.openssl.org/)"
THIS SOFTWARE IS PROVIDED BY THE OpenSSL PROJECT "AS IS" AND ANY EXPRESSED
OR IMPLIED WARRANTIES, INCLUDING, BUT NOT LIMITED TO, THE IMPLIED WARRANTIES
OF MERCHANTABILITY AND FITNESS FOR A PARTICULAR PURPOSE ARE DISCLAIMED. IN
NO EVENT SHALL THE OpenSSL PROJECT OR ITS CONTRIBUTORS BE LIABLE FOR ANY
DIRECT, INDIRECT, INCIDENTAL, SPECIAL, EXEMPLARY, OR CONSEQUENTIAL DAMAGES
(INCLUDING, BUT NOT LIMITED TO, PROCUREMENT OF SUBSTITUTE GOODS OR
SERVICES; LOSS OF USE, DATA, OR PROFITS; OR BUSINESS INTERRUPTION) HOWEVER
CAUSED AND ON ANY THEORY OF LIABILITY, WHETHER IN CONTRACT, STRICT LIABILITY,
OR TORT (INCLUDING NEGLIGENCE OR OTHERWISE) ARISING IN ANY WAY OUT OF THE
USE OF THIS SOFTWARE, EVEN IF ADVISED OF THE POSSIBILITY OF SUCH DAMAGE.
This product includes cryptographic software written by Eric Young ([email protected]). This
product includes software written by Tim Hudson ([email protected]).
Original SSLeay License
Copyright (C) 1995-1998 Eric Young ([email protected]) All rights reserved.
This package is an SSL implementation written by Eric Young ([email protected]).
The implementation was written so as to conform with Netscapes SSL.
This library is free for commercial and non-commercial use as long as the following conditions are
aheared to. The following conditions apply to all code found in this distribution, be it the RC4,
RSA, lhash, DES, etc., code; not just the SSL code. The SSL documentation included with this
distribution is covered by the same copyright terms except that the holder is Tim Hudson
Copyright remains Eric Young's, and as such any Copyright notices in the code are not to be
removed. If this package is used in a product, Eric Young should be given attribution as the author
of the parts of the library used. This can be in the form of a textual message at program startup or
in documentation (online or textual) provided with the package.
Redistribution and use in source and binary forms, with or without modification, are permitted
provided that the following conditions are met:
1. Redistributions of source code must retain the copyright notice, this list of conditions and the
following disclaimer.
2. Redistributions in binary form must reproduce the above copyright notice, this list of conditions
and the following disclaimer in the documentation and/or other materials provided with the
distribution.
3. All advertising materials mentioning features or use of this software must display the following
acknowledgement:
"This product includes cryptographic software written by Eric Young ([email protected])"
The word 'cryptographic' can be left out if the rouines from the library being used are not
cryptographic related :-).
4. If you include any Windows specific code (or a derivative thereof) from the apps directory
(application code) you must include an acknowledgement:
"This product includes software written by Tim Hudson ([email protected])"
THIS SOFTWARE IS PROVIDED BY ERIC YOUNG "AS IS" AND ANY EXPRESS OR IMPLIED
WARRANTIES, INCLUDING, BUT NOT LIMITED TO, THE IMPLIED WARRANTIES OF
MERCHANTABILITY AND FITNESS FOR A PARTICULAR PURPOSE ARE DISCLAIMED. IN NO
EVENT SHALL THE AUTHOR OR CONTRIBUTORS BE LIABLE FOR ANY DIRECT, INDIRECT,
INCIDENTAL, SPECIAL, EXEMPLARY, OR CONSEQUENTIAL DAMAGES (INCLUDING, BUT
NOT LIMITED TO, PROCUREMENT OF SUBSTITUTE GOODS OR SERVICES; LOSS OF USE,
DATA, OR PROFITS; OR BUSINESS INTERRUPTION) HOWEVER CAUSED AND ON ANY
THEORY OF LIABILITY, WHETHER IN CONTRACT, STRICT LIABILITY, OR TORT (INCLUDING
NEGLIGENCE OR OTHERWISE) ARISING IN ANY WAY OUT OF THE USE OF THIS
SOFTWARE, EVEN IF ADVISED OF THE POSSIBILITY OF SUCH DAMAGE.
The licence and distribution terms for any publically available version or derivative of this code
cannot be changed. i.e. this code cannot simply be copied and put under another distribution
licence [including the GNU Public Licence.]
Droid Sans
Copyright (C) 2008 The Android Open Source Project

>>
<<
Licence de logiciel(Suite)
FRA 13-4
UUID
Copyright (C) 1996, 1997, 1998 Theodore Ts'o.
Redistribution and use in source and binary forms, with or without modification, are permitted
provided that the following conditions are met:
1. Redistributions of source code must retain the above copyright notice, and the entire permission
notice in its entirety, including the disclaimer of warranties.
2. Redistributions in binary form must reproduce the above copyright notice, this list of conditions
and the following disclaimer in the documentation and/or other materials provided with the
distribution.
3. The name of the author may not be used to endorse or promote products derived from this
software without specific prior written permission.
THIS SOFTWARE IS PROVIDED "AS IS" AND ANY EXPRESS OR IMPLIED WARRANTIES,
INCLUDING, BUT NOT LIMITED TO, THE IMPLIED WARRANTIES OF MERCHANTABILITY AND
FITNESS FOR A PARTICULAR PURPOSE, ALL OF WHICH ARE HEREBY DISCLAIMED. IN NO
EVENT SHALL THE AUTHOR BE LIABLE FOR ANY DIRECT, INDIRECT, INCIDENTAL,
SPECIAL, EXEMPLARY, OR CONSEQUENTIAL DAMAGES (INCLUDING, BUT NOT LIMITED
TO, PROCUREMENT OF SUBSTITUTE GOODS OR SERVICES; LOSS OF USE, DATA, OR
PROFITS; OR BUSINESS INTERRUPTION) HOWEVER CAUSED AND ON ANY THEORY OF
LIABILITY, WHETHER IN CONTRACT, STRICT LIABILITY, OR TORT (INCLUDING
NEGLIGENCE OR OTHERWISE) ARISING IN ANY WAY OUT OF THE USE OF THIS
SOFTWARE, EVEN IF NOT ADVISED OF THE POSSIBILITY OF SUCH DAMAGE.
liboil
Copyright (c) 2006 David A. Schleef ‹[email protected] ›
All rights reserved.
THIS SOFTWARE IS PROVIDED BY THE AUTHOR "AS IS" AND ANY EXPRESS OR IMPLIED
WARRANTIES, INCLUDING, BUT NOT LIMITED TO, THE IMPLIED WARRANTIES OF
MERCHANTABILITY AND FITNESS FOR A PARTICULAR PURPOSE ARE DISCLAIMED. IN NO
EVENT SHALL THE AUTHOR BE LIABLE FOR ANY DIRECT, INDIRECT, INCIDENTAL,
SPECIAL, EXEMPLARY, OR CONSEQUENTIAL DAMAGES (INCLUDING, BUT NOT LIMITED
TO, PROCUREMENT OF SUBSTITUTE GOODS OR SERVICES; LOSS OF USE, DATA, OR
PROFITS; OR BUSINESS INTERRUPTION) HOWEVER CAUSED AND ON ANY THEORY OF
LIABILITY, WHETHER IN CONTRACT, STRICT LIABILITY, OR TORT (INCLUDING
NEGLIGENCE OR OTHERWISE) ARISING IN ANY WAY OUT OF THE USE OF THIS
SOFTWARE, EVEN IF ADVISED OF THE POSSIBILITY OF SUCH DAMAGE.
ca-bundle.crt
This is a bundle of X.509 certificates of public Certificate Authorities (CA), distributed at the
following URL:
http://curl.haxx.se/docs/caextract.html
These were automatically extracted from Mozilla's root certificates file (certdata.txt). This file can
be found in the mozilla source tree:
http://mxr.mozilla.org/mozilla/source/security/nss/lib/ckfw/builtins/certdata.txt?raw=1
The contents of this file are subject to the Mozilla Public License Version 1.1 (the "License"); you
may not use this file except in compliance with the License. You may obtain a copy of the License
at http://www.mozilla.org/MPL/
Software distributed under the License is distributed on an "AS IS" basis, WITHOUT WARRANTY
OF ANY KIND, either express or implied. See the License for the specific language governing
rights and limitations under the License.
The Original Code is the Netscape security libraries.
The Initial Developer of the Original Code is Netscape Communications Corporation.
Portions created by the Initial Developer are Copyright (C) 1994-2000 the Initial Developer. All
Rights Reserved.
cJSON
Copyright (c) 2009 Dave Gamble
Permission is hereby granted, free of charge, to any person obtaining a copy of this software and
associated documentation files (the "Software"), to deal in the Software without restriction,
including without limitation the rights to use, copy, modify, merge, publish, distribute, sublicense,
and/or sell copies of the Software, and to permit persons to whom the Software is furnished to do
so, subject to the following conditions:
The above copyright notice and this permission notice shall be included in all copies or substantial
portions of the Software.
THE SOFTWARE IS PROVIDED "AS IS", WITHOUT WARRANTY OF ANY KIND, EXPRESS OR
IMPLIED, INCLUDING BUT NOT LIMITED TO THE WARRANTIES OF MERCHANTABILITY,
FITNESS FOR A PARTICULAR PURPOSE AND NONINFRINGEMENT. IN NO EVENT SHALL
THE AUTHORS OR COPYRIGHT HOLDERS BE LIABLE FOR ANY CLAIM, DAMAGES OR
OTHER LIABILITY, WHETHER IN AN ACTION OF CONTRACT, TORT OR OTHERWISE,
ARISING FROM, OUT OF OR IN CONNECTION WITH THE SOFTWARE OR THE USE OR
OTHER DEALINGS IN THE SOFTWARE.

>>
<<
Licence de logiciel(Suite)
FRA 13-5
DIAL
Copyright (c) 2012 Netflix, Inc.
All rights reserved.
Redistribution and use in source and binary forms, with or without modification, are permitted
provided that the following conditions are met:
Redistributions of source code must retain the above copyright notice, this list of conditions and
the following disclaimer.
Redistributions in binary form must reproduce the above copyright notice, this list of conditions
and the following disclaimer in the documentation and/or other materials provided with the
distribution.
THIS SOFTWARE IS PROVIDED BY NETFLIX, INC. AND CONTRIBUTORS "AS IS" AND ANY
EXPRESS OR IMPLIED WARRANTIES, INCLUDING, BUT NOT LIMITED TO, THE IMPLIED
WARRANTIES OF MERCHANTABILITY AND FITNESS FOR A PARTICULAR PURPOSE ARE
DISCLAIMED. IN NO EVENT SHALL NETFLIX OR CONTRIBUTORS BE LIABLE FOR ANY
DIRECT, INDIRECT, INCIDENTAL, SPECIAL, EXEMPLARY, OR CONSEQUENTIAL DAMAGES
(INCLUDING, BUT NOT LIMITED TO, PROCUREMENT OF SUBSTITUTE GOODS OR
SERVICES; LOSS OF USE, DATA, OR PROFITS; OR BUSINESS INTERRUPTION) HOWEVER
CAUSED AND ON ANY THEORY OF LIABILITY, WHETHER IN CONTRACT, STRICT LIABILITY,
OR TORT (INCLUDING NEGLIGENCE OR OTHERWISE) ARISING IN ANY WAY OUT OF THE
USE OF THIS SOFTWARE, EVEN IF ADVISED OF THE POSSIBILITY OF SUCH DAMAGE.
GNU GENERAL PUBLIC LICENSE
Version 2, June 1991
Copyright (C) 1989, 1991 Free Software Foundation, Inc.,
51 Franklin Street, Fifth Floor, Boston, MA 02110-1301 USA
Everyone is permitted to copy and distribute verbatim copies of this license document, but
changing it is not allowed.
Preamble
The licenses for most software are designed to take away your freedom to share and change it.
By contrast, the GNU General Public License is intended to guarantee your freedom to share and
change free software--to make sure the software is free for all its users. This General Public
License applies to most of the Free Software Foundation's software and to any other program
whose authors commit to using it. (Some other Free Software Foundation software is covered by
the GNU Lesser General Public License instead.) You can apply it to your programs, too.
When we speak of free software, we are referring to freedom, not price. Our General Public
Licenses are designed to make sure that you have the freedom to distribute copies of free
software (and charge for this service if you wish), that you receive source code or can get it if you
want it, that you can change the software or use pieces of it in new free programs; and that you
know you can do these things.
To protect your rights, we need to make restrictions that forbid anyone to deny you these rights or
to ask you to surrender the rights. These restrictions translate to certain responsibilities for you if
you distribute copies of the software, or if you modify it.
For example, if you distribute copies of such a program, whether gratis or for a fee, you must give
the recipients all the rights that you have. You must make sure that they, too, receive or can get
the source code. And you must show them these terms so they know their rights.
We protect your rights with two steps:(1) copyright the software, and (2) offer you this license
which gives you legal permission to copy,
distribute and/or modify the software.
Also, for each author's protection and ours, we want to make certain that everyone understands
that there is no warranty for this free software. If the software is modified by someone else and
passed on, we want its recipients to know that what they have is not the original, so that any
problems introduced by others will not reflect on the original authors' reputations.
Finally, any free program is threatened constantly by software patents. We wish to avoid the
danger that redistributors of a free program will individually obtain patent licenses, in effect making
the program proprietary. To prevent this, we have made it clear that any patent must be licensed
for everyone's free use or not licensed at all.
The precise terms and conditions for copying, distribution and modification follow.
GNU GENERAL PUBLIC LICENSE
TERMS AND CONDITIONS FOR COPYING, DISTRIBUTION AND MODIFICATION
0. This License applies to any program or other work which contains a notice placed by the
copyright holder saying it may be distributed under the terms of this General Public License. The
"Program", below, refers to any such program or work, and a "work based on the Program" means
either the Program or any derivative work under copyright law: that is to say, a work containing the
Program or a portion of it, either verbatim or with modifications and/or translated into another
language. (Hereinafter, translation is included without limitation in the term "modification".) Each
licensee is addressed as "you".
Activities other than copying, distribution and modification are not covered by this License; they are
outside its scope. The act of running the Program is not restricted, and the output from the
Program is covered only if its contents constitute a work based on the Program (independent of
having been made by running the Program). Whether that is true depends on what the Program
does.

>>
<<
Licence de logiciel(Suite)
FRA 13-6
1. You may copy and distribute verbatim copies of the Program's source code as you receive it, in
any medium, provided that you conspicuously and appropriately publish on each copy an
appropriate copyright notice and disclaimer of warranty; keep intact all the notices that refer to this
License and to the absence of any warranty; and give any other recipients of the Program a copy
of this License along with the Program.
You may charge a fee for the physical act of transferring a copy, and you may at your option offer
warranty protection in exchange for a fee.
2. You may modify your copy or copies of the Program or any portion of it, thus forming a work
based on the Program, and copy and distribute such modifications or work under the terms of
Section 1 above, provided that you also meet all of these conditions:
a) You must cause the modified files to carry prominent notices stating that you changed the files
and the date of any change.
b) You must cause any work that you distribute or publish, that in whole or in part contains or is
derived from the Program or any part thereof, to be licensed as a whole at no charge to all third
parties under the terms of this License.
c) If the modified program normally reads commands interactively when run, you must cause it,
when started running for such interactive use in the most ordinary way, to print or display an
announcement including an appropriate copyright notice and a notice that there is no warranty (or
else, saying that you provide a warranty) and that users may redistribute the program under these
conditions, and telling the user how to view a copy of this License. (Exception: if the Program itself
is interactive but does not normally print such an announcement, your work based on the Program
is not required to print an announcement.)
These requirements apply to the modified work as a whole. If identifiable sections of that work are
not derived from the Program, and can be reasonably considered independent and separate works
in themselves, then this License, and its terms, do not apply to those sections when you distribute
them as separate works. But when you distribute the same sections as part of a whole which is a
work based on the Program, the distribution of the whole must be on the terms of this License,
whose permissions for other licensees extend to the entire whole, and thus to each and every part
regardless of who wrote it.
Thus, it is not the intent of this section to claim rights or contest your rights to work written entirely
by you; rather, the intent is to exercise the right to control the distribution of derivative or collective
works based on the Program.
In addition, mere aggregation of another work not based on the Program with the Program (or with
a work based on the Program) on a volume of a storage or distribution medium does not bring the
other work under the scope of this License.
3. You may copy and distribute the Program (or a work based on it, under Section 2) in object
code or executable form under the terms of Sections 1 and 2 above provided that you also do one
of the following:
a) Accompany it with the complete corresponding machine-readable source code, which must be
distributed under the terms of Sections 1 and 2 above on a medium customarily used for software
interchange; or,
b) Accompany it with a written offer, valid for at least three years, to give any third party, for a
charge no more than your cost of physically performing source distribution, a complete machine-
readable copy of the corresponding source code, to be distributed under the terms of Sections 1
and 2 above on a medium customarily used for software interchange; or,
c) Accompany it with the information you received as to the offer to distribute corresponding
source code. (This alternative is allowed only for noncommercial distribution and only if you
received the program in object code or executable form with such an offer, in accord with
Subsection b above.)
The source code for a work means the preferred form of the work for making modifications to it.
For an executable work, complete source code means all the source code for all modules it
contains, plus any associated interface definition files, plus the scripts used to control compilation
and installation of the executable. However, as a special exception, the source code distributed
need not include anything that is normally distributed (in either source or binary form) with the
major components (compiler, kernel, and so on) of the operating system on which the executable
runs, unless that component itself accompanies the executable.
If distribution of executable or object code is made by offering access to copy from a designated
place, then offering equivalent access to copy the source code from the same place counts as
distribution of the source code, even though third parties are not compelled to copy the source
along with the object code.
4. You may not copy, modify, sublicense, or distribute the Program except as expressly provided
under this License. Any attempt otherwise to copy, modify, sublicense or distribute the Program is
void, and will automatically terminate your rights under this License. However, parties who have
received copies, or rights, from you under this License will not have their licenses terminated so
long as such parties remain in full compliance.

>>
<<
Licence de logiciel(Suite)
FRA 13-7
5. You are not required to accept this License, since you have not signed it. However, nothing else
grants you permission to modify or distribute the Program or its derivative works. These actions are
prohibited by law if you do not accept this License. Therefore, by modifying or distributing the
Program (or any work based on the Program), you indicate your acceptance of this License to do
so, and all its terms and conditions for copying, distributing or modifying the Program or works
based on it.
6. Each time you redistribute the Program (or any work based on the Program), the recipient
automatically receives a license from the original licensor to copy, distribute or modify the Program
subject to these terms and conditions. You may not impose any further restrictions on the
recipients' exercise of the rights granted herein. You are not responsible for enforcing compliance
by third parties to this License.
7. If, as a consequence of a court judgment or allegation of patent infringement or for any other
reason (not limited to patent issues), conditions are imposed on you (whether by court order,
agreement or otherwise) that contradict the conditions of this License, they do not excuse you from
the conditions of this License. If you cannot distribute so as to satisfy simultaneously your
obligations under this License and any other pertinent obligations, then as a consequence you may
not distribute the Program at all. For example, if a patent license would not permit royalty-free
redistribution of the Program by all those who receive copies directly or indirectly through you, then
the only way you could satisfy both it and this License would be to refrain entirely from distribution
of the Program.
If any portion of this section is held invalid or unenforceable under any particular circumstance, the
balance of the section is intended to apply and the section as a whole is intended to apply in other
circumstances.
It is not the purpose of this section to induce you to infringe any patents or other property right
claims or to contest validity of any such claims; this section has the sole purpose of protecting the
integrity of the free software distribution system, which is implemented by public license practices.
Many people have made generous contributions to the wide range of software distributed through
that system in reliance on consistent application of that system; it is up to the author/donor to
decide if he or she is willing to distribute software through any other system and a licensee cannot
impose that choice.
This section is intended to make thoroughly clear what is believed to be a consequence of the rest
of this License.
8. If the distribution and/or use of the Program is restricted in certain countries either by patents or
by copyrighted interfaces, the original copyright holder who places the Program under this License
may add an explicit geographical distribution limitation excluding those countries, so that
distribution is permitted only in or among countries not thus excluded. In such case, this License
incorporates the limitation as if written in the body of this License.
9. The Free Software Foundation may publish revised and/or new versions of the General Public
License from time to time. Such new versions will be similar in spirit to the present version, but
may differ in detail to address new problems or concerns.
Each version is given a distinguishing version number. If the Program specifies a version number
of this License which applies to it and "any later version", you have the option of following the
terms and conditions either of that version or of any later version published by the Free Software
Foundation. If the Program does not specify a version number of this License, you may choose
any version ever published by the Free Software Foundation.
10. If you wish to incorporate parts of the Program into other free programs whose distribution
conditions are different, write to the author to ask for permission. For software which is copyrighted
by the Free Software Foundation, write to the Free Software Foundation; we sometimes make
exceptions for this. Our decision will be guided by the two goals of preserving the free status of all
derivatives of our free software and of promoting the sharing and reuse of software generally.
NO WARRANTY
11. BECAUSE THE PROGRAM IS LICENSED FREE OF CHARGE, THERE IS NO WARRANTY
FOR THE PROGRAM, TO THE EXTENT PERMITTED BY APPLICABLE LAW. EXCEPT WHEN
OTHERWISE STATED IN WRITING THE COPYRIGHT HOLDERS AND/OR OTHER PARTIES
PROVIDE THE PROGRAM "AS IS" WITHOUT WARRANTY OF ANY KIND, EITHER EXPRESSED
OR IMPLIED, INCLUDING, BUT NOT LIMITED TO, THE IMPLIED WARRANTIES OF
MERCHANTABILITY AND FITNESS FOR A PARTICULAR PURPOSE. THE ENTIRE RISK AS TO
THE QUALITY AND PERFORMANCE OF THE PROGRAM IS WITH YOU. SHOULD THE
PROGRAM PROVE DEFECTIVE, YOU ASSUME THE COST OF ALL NECESSARY SERVICING,
REPAIR OR CORRECTION.
12. IN NO EVENT UNLESS REQUIRED BY APPLICABLE LAW OR AGREED TO IN WRITING
WILL ANY COPYRIGHT HOLDER, OR ANY OTHER PARTY WHO MAY MODIFY AND/OR
REDISTRIBUTE THE PROGRAM AS PERMITTED ABOVE, BE LIABLE TO YOU FOR
DAMAGES, INCLUDING ANY GENERAL, SPECIAL, INCIDENTAL OR CONSEQUENTIAL
DAMAGES ARISING OUT OF THE USE OR INABILITY TO USE THE PROGRAM (INCLUDING
BUT NOT LIMITED TO LOSS OF DATA OR DATA BEING RENDERED INACCURATE OR
LOSSES SUSTAINED BY YOU OR THIRD PARTIES OR A FAILURE OF THE PROGRAM TO
OPERATE WITH ANY OTHER PROGRAMS), EVEN IF SUCH HOLDER OR OTHER PARTY HAS
BEEN ADVISED OF THE POSSIBILITY OF SUCH DAMAGES.

>>
<<
Licence de logiciel(Suite)
FRA 13-8
END OF TERMS AND CONDITIONS
How to Apply These Terms to Your New Programs
If you develop a new program, and you want it to be of the greatest possible use to the public, the
best way to achieve this is to make it free software which everyone can redistribute and change
under these terms.
To do so, attach the following notices to the program. It is safest to attach them to the start of
each source file to most effectively convey the exclusion of warranty; and each file should have at
least the "copyright" line and a pointer to where the full notice is found.
‹one line to give the program's name and a brief idea of what it does.› Copyright (C) ‹year› ‹name
of author›
This program is free software; you can redistribute it and/or modify it under the terms of the GNU
General Public License as published by the Free Software Foundation; either version 2 of the
License, or (at your option) any later version.
This program is distributed in the hope that it will be useful, but WITHOUT ANY WARRANTY;
without even the implied warranty of MERCHANTABILITY or FITNESS FOR A PARTICULAR
PURPOSE. See the GNU General Public License for more details.
You should have received a copy of the GNU General Public License along with this program; if
not, write to the Free Software Foundation, Inc., 51 Franklin Street, Fifth Floor, Boston, MA 02110-
1301 USA.
Also add information on how to contact you by electronic and paper mail.
If the program is interactive, make it output a short notice like this when it starts in an interactive
mode:
Gnomovision version 69, Copyright (C) year name of author Gnomovision comes with
ABSOLUTELY NO WARRANTY; for details type 'show w'.
This is free software, and you are welcome to redistribute it under certain conditions; type 'show c'
for details.
The hypothetical commands 'show w' and 'show c' should show the appropriate parts of the
General Public License. Of course, the commands you use may be called something other than
'show w' and 'show c'; they could even be mouse-clicks or menu items--whatever suits your
program.
You should also get your employer (if you work as a programmer) or your school, if any, to sign a
"copyright disclaimer" for the program, if necessary. Here is a sample; alter the names:
Yoyodyne, Inc., hereby disclaims all copyright interest in the program 'Gnomovision' (which makes
passes at compilers) written by James Hacker.
‹signature of Ty Coon›, 1 April 1989 Ty Coon, President of Vice
This General Public License does not permit incorporating your program into proprietary programs.
If your program is a subroutine library, you may consider it more useful to permit linking proprietary
applications with the library. If this is what you want to do, use the GNU Lesser General Public
License instead of this License.
GNU LESSER GENERAL PUBLIC LICENSE
Version 2.1, February 1999
Copyright (C) 1991, 1999 Free Software Foundation, Inc.
51 Franklin Street, Fifth Floor, Boston, MA 02110-1301 USA
Everyone is permitted to copy and distribute verbatim copies of this license document, but
changing it is not allowed.
[This is the first released version of the Lesser GPL. It also counts as the successor of the GNU
Library Public License, version 2, hence the version number 2.1.]
Preamble
The licenses for most software are designed to take away your freedom to share and change it.
By contrast, the GNU General Public Licenses are intended to guarantee your freedom to share
and change free software--to make sure the software is free for all its users.
This license, the Lesser General Public License, applies to some specially designated software
packages--typically libraries--of the Free Software Foundation and other authors who decide to
use it. You can use it too, but we suggest you first think carefully about whether this license or the
ordinary General Public License is the better strategy to use in any particular case, based on the
explanations below.
When we speak of free software, we are referring to freedom of use, not price. Our General Public
Licenses are designed to make sure that you have the freedom to distribute copies of free
software (and charge for this service if you wish); that you receive source code or can get it if you
want it; that you can change the software and use pieces of it in new free programs; and that you
are informed that you can do these things.

>>
<<
Licence de logiciel(Suite)
FRA 13-9
To protect your rights, we need to make restrictions that forbid distributors to deny you these
rights or to ask you to surrender these rights. These restrictions translate to certain responsibilities
for you if you distribute copies of the library or if you modify it.
For example, if you distribute copies of the library, whether gratis or for a fee, you must give the
recipients all the rights that we gaveyou. You must make sure that they, too, receive or can get the
source code. If you link other code with the library, you must provide complete object files to the
recipients, so that they can relink them with the library after making changes to the library and
recompiling it. And you must show them these terms so they know their rights.
We protect your rights with a two-step method: (1) we copyright the library, and (2) we offer you
this license, which gives you legal permission to copy, distribute and/or modify the library.
To protect each distributor, we want to make it very clear that there is no warranty for the free
library. Also, if the library is modified by someone else and passed on, the recipients should know
that what they have is not the original version, so that the original author's reputation will not be
affected by problems that might be introduced by others.
Finally, software patents pose a constant threat to the existence of any free program. We wish to
make sure that a company cannot effectively restrict the users of a free program by obtaining a
restrictive license from a patent holder. Therefore, we insist that any patent license obtained for a
version of the library must be consistent with the full freedom of use specified in this license.
Most GNU software, including some libraries, is covered by the ordinary GNU General Public
License. This license, the GNU Lesser General Public License, applies to certain designated
libraries, and is quite different from the ordinary General Public License. We use this license for
certain libraries in order to permit linking those libraries into non-free programs.
When a program is linked with a library, whether statically or using a shared library, the
combination of the two is legally speaking a combined work, a derivative of the original library. The
ordinary General Public License therefore permits such linking only if the entire combination fits its
criteria of freedom. The Lesser General Public License permits more lax criteria for linking other
code with the library.
We call this license the "Lesser" General Public License because it does Less to protect the user's
freedom than the ordinary General Public License. It also provides other free software developers
Less of an advantage over competing non-free programs. These disadvantages are the reason we
use the ordinary General Public License for many libraries. However, the Lesser license provides
advantages in certain special circumstances.
For example, on rare occasions, there may be a special need to encourage the widest possible
use of a certain library, so that it becomes a de-facto standard. To achieve this, non-free
programs must be allowed to use the library. A more frequent case is that a free library does the
same job as widely used non-free libraries. In this case, there is little to gain by limiting the free
library to free software only, so we use the Lesser General Public License.
In other cases, permission to use a particular library in non-free programs enables a greater
number of people to use a large body of free software. For example, permission to use the GNU
C Library in non-free programs enables many more people to use the whole GNU operating
system, as well as its variant, the GNU/Linux operating system.
Although the Lesser General Public License is Less protective of the users' freedom, it does
ensure that the user of a program that is linked with the Library has the freedom and the
wherewithal to run that program using a modified version of the Library.
The precise terms and conditions for copying, distribution and modification follow. Pay close
attention to the difference between a "work based on the library" and a "work that uses the library".
The former contains code derived from the library, whereas the latter must be combined with the
library in order to run.
GNU LESSER GENERAL PUBLIC LICENSE
TERMS AND CONDITIONS FOR COPYING, DISTRIBUTION AND MODIFICATION
0. This License Agreement applies to any software library or other program which contains a
notice placed by the copyright holder or other authorized party saying it may be distributed under
the terms of this Lesser General Public License (also called "this License"). Each licensee is
addressed as "you".
A "library" means a collection of software functions and/or data prepared so as to be conveniently
linked with application programs (which use some of those functions and data) to form
executables.
The "Library", below, refers to any such software library or work which has been distributed under
these terms. A "work based on the Library" means either the Library or any derivative work under
copyright law: that is to say, a work containing the Library or a portion of it, either verbatim or with
modifications and/or translated straightforwardly into another language. (Hereinafter, translation is
included without limitation in the term "modification".)
"Source code" for a work means the preferred form of the work for making modifications to it. For
a library, complete source code means all the source code for all modules it contains, plus any
associated interface definition files, plus the scripts used to control compilation and installation of
the library.

>>
<<
Licence de logiciel(Suite)
FRA 13-10
Activities other than copying, distribution and modification are not covered by this License; they are
outside its scope. The act of running a program using the Library is not restricted, and output from
such a program is covered only if its contents constitute a work based on the Library (independent
of the use of the Library in a tool for writing it). Whether that is true depends on what the Library
does and what the program that uses the Library does.
1. You may copy and distribute verbatim copies of the Library's complete source code as you
receive it, in any medium, provided that you conspicuously and appropriately publish on each copy
an appropriate copyright notice and disclaimer of warranty; keep intact all the notices that refer to
this License and to the absence of any warranty; and distribute a copy of this License along with
the Library.
You may charge a fee for the physical act of transferring a copy, and you may at your option offer
warranty protection in exchange for a fee.
2. You may modify your copy or copies of the Library or any portion of it, thus forming a work
based on the Library, and copy and distribute such modifications or work under the terms of
Section 1 above, provided that you also meet all of these conditions:
a) The modified work must itself be a software library.
b) You must cause the files modified to carry prominent notices stating that you changed the files
and the date of any change.
c) You must cause the whole of the work to be licensed at no charge to all third parties under the
terms of this License.
d) If a facility in the modified Library refers to a function or a table of data to be supplied by an
application program that uses the facility, other than as an argument passed when the facility is
invoked, then you must make a good faith effort to ensure that, in the event an application does
not supply such function or table, the facility still operates, and performs whatever part of its
purpose remains meaningful.
(For example, a function in a library to compute square roots has a purpose that is entirely well-
defined independent of the application. Therefore, Subsection 2d requires that any application-
supplied function or table used by this function must be optional: if the application does not supply
it, the square root function must still compute square roots.)
These requirements apply to the modified work as a whole. If identifiable sections of that work are
not derived from the Library, and can be reasonably considered independent and separate works
in themselves, then this License, and its terms, do not apply to those sections when you distribute
them as separate works. But when you distribute the same sections as part of a whole which is a
work based on the Library, the distribution of the whole must be on the terms of this License,
whose permissions for other licensees extend to the entire whole, and thus to each and every part
regardless of who wrote it.
Thus, it is not the intent of this section to claim rights or contest your rights to work written entirely
by you; rather, the intent is to exercise the right to control the distribution of derivative or collective
works based on the Library.
In addition, mere aggregation of another work not based on the Library with the Library (or with a
work based on the Library) on a volume of a storage or distribution medium does not bring the
other work under the scope of this License.
3. You may opt to apply the terms of the ordinary GNU General Public License instead of this
License to a given copy of the Library. To do this, you must alter all the notices that refer to this
License, so that they refer to the ordinary GNU General Public License, version 2, instead of to
this License. (If a newer version than version 2 of the ordinary GNU General Public License has
appeared, then you can specify that version instead if you wish.) Do not make any other change
in these notices.
Once this change is made in a given copy, it is irreversible for that copy, so the ordinary GNU
General Public License applies to all subsequent copies and derivative works made from that
copy.
This option is useful when you wish to copy part of the code of the Library into a program that is
not a library.
4. You may copy and distribute the Library (or a portion or derivative of it, under Section 2) in
object code or executable form under the terms of Sections 1 and 2 above provided that you
accompany it with the complete corresponding machine-readable source code, which must be
distributed under the terms of Sections 1 and 2 above on a medium customarily used for software
interchange.
If distribution of object code is made by offering access to copy from a designated place, then
offering equivalent access to copy the source code from the same place satisfies the requirement
to distribute the source code, even though third parties are not compelled to copy the source
along with the object code.

>>
<<
Licence de logiciel(Suite)
FRA 13-11
5. A program that contains no derivative of any portion of the Library, but is designed to work with
the Library by being compiled or linked with it, is called a "work that uses the Library". Such a
work, in isolation, is not a derivative work of the Library, and therefore falls outside the scope of
this License.
However, linking a "work that uses the Library" with the Library creates an executable that is a
derivative of the Library (because it contains portions of the Library), rather than a "work that uses
the library". The executable is therefore covered by this License. Section 6 states terms for
distribution of such executables.
When a "work that uses the Library" uses material from a header file that is part of the Library, the
object code for the work may be a derivative work of the Library even though the source code is
not. Whether this is true is especially significant if the work can be linked without the Library, or if
the work is itself a library. The threshold for this to be true is not precisely defined by law.
If such an object file uses only numerical parameters, data structure layouts and accessors, and
small macros and small inline functions (ten lines or less in length), then the use of the object file
is unrestricted, regardless of whether it is legally a derivative work. (Executables containing this
object code plus portions of the Library will still fall under Section 6.)
Otherwise, if the work is a derivative of the Library, you may distribute the object code for the work
under the terms of Section 6. Any executables containing that work also fall under Section 6,
whether or not they are linked directly with the Library itself.
6. As an exception to the Sections above, you may also combine or link a "work that uses the
Library" with the Library to produce a work containing portions of the Library, and distribute that
work under terms of your choice, provided that the terms permit modification of the work for the
customer's own use and reverse engineering for debugging such modifications.
You must give prominent notice with each copy of the work that the Library is used in it and that
the Library and its use are covered by this License. You must supply a copy of this License. If the
work during execution displays copyright notices, you must include the copyright notice for the
Library among them, as well as a reference directing the user to the copy of this License. Also,
you must do one of these things:
a) Accompany the work with the complete corresponding machine-readable source code for the
Library including whatever changes were used in the work (which must be distributed under
Sections 1 and 2 above); and, if the work is an executable linked with the Library, with the
complete machine-readable "work that uses the Library", as object code and/or source code, so
that the user can modify the Library and then relink to produce a modified executable containing
the modified Library. (It is understood that the user who changes the contents of definitions files in
the Library will not necessarily be able to recompile the application to use the modified definitions.)
b) Use a suitable shared library mechanism for linking with the Library. A suitable mechanism is
one that (1) uses at run time a copy of the library already present on the user's computer system,
rather than copying library functions into the executable, and (2) will operate properly with a
modified version of the library, if the user installs one, as long as the modified version is interface-
compatible with the version that the work was made with.
c) Accompany the work with a written offer, valid for at least three years, to give the same user
the materials specified in Subsection 6a, above, for a charge no more than the cost of performing
this distribution.
d) If distribution of the work is made by offering access to copy from a designated place, offer
equivalent access to copy the above specified materials from the same place.
e) Verify that the user has already received a copy of these materials or that you have already
sent this user a copy.
For an executable, the required form of the "work that uses the Library" must include any data and
utility programs needed for reproducing the executable from it. However, as a special exception,
the materials to be distributed need not include anything that is normally distributed (in either
source or binary form) with the major components (compiler, kernel, and so on) of the operating
system on which the executable runs, unless that component itself accompanies the executable.
It may happen that this requirement contradicts the license restrictions of other proprietary libraries
that do not normally accompany the operating system. Such a contradiction means you cannot
use both them and the Library together in an executable that you distribute.
7. You may place library facilities that are a work based on the Library side-by-side in a single
library together with other library facilities not covered by this License, and distribute such a
combined library, provided that the separate distribution of the work based on the Library and of
the other library facilities is otherwise permitted, and provided that you do these two things:
a) Accompany the combined library with a copy of the same work based on the Library,
uncombined with any other library facilities. This must be distributed under the terms of the
Sections above.
b) Give prominent notice with the combined library of the fact that part of it is a work based on the
Library, and explaining where to find the accompanying uncombined form of the same work.

>>
<<
Licence de logiciel(Suite)
FRA 13-12
8. You may not copy, modify, sublicense, link with, or distribute the Library except as expressly
provided under this License. Any attempt otherwise to copy, modify, sublicense, link with, or
distribute the Library is void, and will automatically terminate your rights under this License.
However, parties who have received copies, or rights, from you under this License will not have
their licenses terminated so long as such parties remain in full compliance.
9. You are not required to accept this License, since you have not signed it. However, nothing else
grants you permission to modify or distribute the Library or its derivative works. These actions are
prohibited by law if you do not accept this License. Therefore, by modifying or distributing the
Library (or any work based on the Library), you indicate your acceptance of this License to do so,
and all its terms and conditions for copying, distributing or modifying the Library or works based on
it.
10. Each time you redistribute the Library (or any work based on the Library), the recipient
automatically receives a license from the original licensor to copy, distribute, link with or modify the
Library subject to these terms and conditions. You may not impose any further restrictions on the
recipients' exercise of the rights granted herein. You are not responsible for enforcing compliance
by third parties with this License.
11. If, as a consequence of a court judgment or allegation of patent infringement or for any other
reason (not limited to patent issues), conditions are imposed on you (whether by court order,
agreement or otherwise) that contradict the conditions of this License, they do not excuse you from
the conditions of this License. If you cannot distribute so as to satisfy simultaneously your
obligations under this License and any other pertinent obligations, then as a consequence you may
not distribute the Library at all. For example, if a patent license would not permit royalty-free
redistribution of the Library by all those who receive copies directly or indirectly through you, then
the only way you could satisfy both it and this License would be to refrain entirely from distribution
of the Library.
If any portion of this section is held invalid or unenforceable under any particular circumstance, the
balance of the section is intended to apply, and the section as a whole is intended to apply in
other circumstances.
It is not the purpose of this section to induce you to infringe any patents or other property right
claims or to contest validity of any such claims; this section has the sole purpose of protecting the
integrity of the free software distribution system which is implemented by public license practices.
Many people have made generous contributions to the wide range of software distributed through
that system in reliance on consistent application of that system; it is up to the author/donor to
decide if he or she is willing to distribute software through any other system and a licensee cannot
impose that choice.
This section is intended to make thoroughly clear what is believed to be a consequence of the rest
of this License.
12. If the distribution and/or use of the Library is restricted in certain countries either by patents or
by copyrighted interfaces, the original copyright holder who places the Library under this License
may add an explicit geographical distribution limitation excluding those countries, so that
distribution is permitted only in or among countries not thus excluded. In such case, this License
incorporates the limitation as if written in the body of this License.
13. The Free Software Foundation may publish revised and/or new versions of the Lesser General
Public License from time to time. Such new versions will be similar in spirit to the present version,
but may differ in detail to address new problems or concerns.
Each version is given a distinguishing version number. If the Library specifies a version number of
this License which applies to it and "any later version", you have the option of following the terms
and conditions either of that version or of any later version published by the Free Software
Foundation. If the Library does not specify a license version number, you may choose any version
ever published by the Free Software Foundation.
14. If you wish to incorporate parts of the Library into other free programs whose distribution
conditions are incompatible with these, write to the author to ask for permission. For software
which is copyrighted by the Free Software Foundation, write to the Free Software Foundation; we
sometimes make exceptions for this. Our decision will be guided by the two goals of preserving the
free status of all derivatives of our free software and of promoting the sharing and reuse of
software generally.
NO WARRANTY
15. BECAUSE THE LIBRARY IS LICENSED FREE OF CHARGE, THERE IS NO WARRANTY
FOR THE LIBRARY, TO THE EXTENT PERMITTED BY APPLICABLE LAW. EXCEPT WHEN
OTHERWISE STATED IN WRITING THE COPYRIGHT HOLDERS AND/OR OTHER PARTIES
PROVIDE THE LIBRARY "AS IS" WITHOUT WARRANTY OF ANY KIND, EITHER EXPRESSED
OR IMPLIED, INCLUDING, BUT NOT LIMITED TO, THE IMPLIED WARRANTIES OF
MERCHANTABILITY AND FITNESS FOR A PARTICULAR PURPOSE. THE ENTIRE RISK AS TO
THE QUALITY AND PERFORMANCE OF THE LIBRARY IS WITH YOU. SHOULD THE LIBRARY
PROVE DEFECTIVE, YOU ASSUME THE COST OF ALL NECESSARY SERVICING, REPAIR OR
CORRECTION.

>>
<<
Licence de logiciel(Suite)
FRA 13-13
16. IN NO EVENT UNLESS REQUIRED BY APPLICABLE LAW OR AGREED TO IN WRITING
WILL ANY COPYRIGHT HOLDER, OR ANY OTHER PARTY WHO MAY MODIFY AND/OR
REDISTRIBUTE THE LIBRARY AS PERMITTED ABOVE, BE LIABLE TO YOU FOR DAMAGES,
INCLUDING ANY GENERAL, SPECIAL, INCIDENTAL OR CONSEQUENTIAL DAMAGES
ARISING OUT OF THE USE OR INABILITY TO USE THE LIBRARY (INCLUDING BUT NOT
LIMITED TO LOSS OF DATA OR DATA BEING RENDERED INACCURATE OR LOSSES
SUSTAINED BY YOU OR THIRD PARTIES OR A FAILURE OF THE LIBRARY TO OPERATE
WITH ANY OTHER SOFTWARE), EVEN IF SUCH HOLDER OR OTHER PARTY HAS BEEN
ADVISED OF THE POSSIBILITY OF SUCH DAMAGES.
END OF TERMS AND CONDITIONS
How to Apply These Terms to Your New Libraries
If you develop a new library, and you want it to be of the greatest possible use to the public, we
recommend making it free software that everyone can redistribute and change. You can do so by
permitting redistribution under these terms (or, alternatively, under the terms of the ordinary
General Public License).
To apply these terms, attach the following notices to the library. It is safest to attach them to the
start of each source file to most effectively convey the exclusion of warranty; and each file should
have at least the "copyright" line and a pointer to where the full notice is found.
‹one line to give the library's name and a brief idea of what it does.›
Copyright (C) ‹year› ‹name of author›
This library is free software; you can redistribute it and/or modify it under the terms of the GNU
Lesser General Public License as published by the Free Software Foundation; either version 2.1 of
the License, or (at your option) any later version.
This library is distributed in the hope that it will be useful, but WITHOUT ANY WARRANTY; without
even the implied warranty of MERCHANTABILITY or FITNESS FOR A PARTICULAR PURPOSE.
See the GNU Lesser General Public License for more details.
You should have received a copy of the GNU Lesser General Public License along with this
library; if not, write to the Free Software Foundation, Inc., 51 Franklin Street, Fifth Floor, Boston,
MA 02110-1301 USA
Also add information on how to contact you by electronic and paper mail.
You should also get your employer (if you work as a programmer) or your school, if any, to sign a
"copyright disclaimer" for the library, if necessary. Here is a sample; alter the names:
Yoyodyne, Inc., hereby disclaims all copyright interest in the library 'Frob' (a library for tweaking
knobs) written by James Random Hacker.
‹signature of Ty Coon›, 1 April 1990
Ty Coon, President of Vice
That's all there is to it!
Apache License
Version 2.0, January 2004
http://www.apache.org/licenses/
TERMS AND CONDITIONS FOR USE, REPRODUCTION, AND DISTRIBUTION
1. Definitions.
"License" shall mean the terms and conditions for use, reproduction, and distribution as defined by
Sections 1 through 9 of this document.
"Licensor" shall mean the copyright owner or entity authorized by the copyright owner that is
granting the License.
"Legal Entity" shall mean the union of the acting entity and all other entities that control, are
controlled by, or are under common control with that entity. For the purposes of this definition,
"control" means (i) the power, direct or indirect, to cause the direction or management of such
entity, whether by contract or otherwise, or (ii) ownership of fifty percent (50%) or more of the
outstanding shares, or (iii) beneficial ownership of such entity.
"You" (or "Your") shall mean an individual or Legal Entity exercising permissions granted by this
License.
"Source" form shall mean the preferred form for making modifications, including but not limited to
software source code, documentation source, and configuration files.
"Object" form shall mean any form resulting from mechanical transformation or translation of a
Source form, including but not limited to compiled object code, generated documentation, and
conversions to other media types.

>>
<<
Licence de logiciel(Suite)
FRA 13-14
"Work" shall mean the work of authorship, whether in Source or Object form, made available under
the License, as indicated by a copyright notice that is included in or attached to the work (an
example is provided in the Appendix below).
"Derivative Works" shall mean any work, whether in Source or Object form, that is based on (or
derived from) the Work and for which the editorial revisions, annotations, elaborations, or other
modifications represent, as a whole, an original work of authorship. For the purposes of this
License, Derivative Works shall not include works that remain separable from, or merely link (or
bind by name) to the interfaces of, the Work and Derivative Works thereof.
"Contribution" shall mean any work of authorship, including the original version of the Work and
any modifications or additions to that Work or Derivative Works thereof, that is intentionally
submitted to Licensor for inclusion in the Work by the copyright owner or by an individual or Legal
Entity authorized to submit on behalf of the copyright owner. For the purposes of this definition,
"submitted" means any form of electronic, verbal, or written communication sent to the Licensor or
its representatives, including but not limited to communication on electronic mailing lists, source
code control systems, and issue tracking systems that are managed by, or on behalf of, the
Licensor for the purpose of discussing and improving the Work, but excluding communication that
is conspicuously marked or otherwise designated in writing by the copyright owner as "Not a
Contribution."
"Contributor" shall mean Licensor and any individual or Legal Entity on behalf of whom a
Contribution has been received by Licensor and subsequently incorporated within the Work.
2. Grant of Copyright License. Subject to the terms and conditions of this License, each
Contributor hereby grants to You a perpetual, worldwide, non-exclusive, no-charge, royalty-free,
irrevocable copyright license to reproduce, prepare Derivative Works of, publicly display, publicly
perform, sublicense, and distribute the Work and such Derivative Works in Source or Object form.
3. Grant of Patent License. Subject to the terms and conditions of this License, each Contributor
hereby grants to You a perpetual, worldwide, non-exclusive, no-charge, royalty-free, irrevocable
(except as stated in this section) patent license to make, have made, use, offer to sell, sell, import,
and otherwise transfer the Work, where such license applies only to those patent claims licensable
by such Contributor that are necessarily infringed by their Contribution(s) alone or by combination
of their Contribution(s) with the Work to which such Contribution(s) was submitted. If You institute
patent litigation against any entity (including a cross-claim or counterclaim in a lawsuit) alleging
that the Work or a Contribution incorporated within the Work constitutes direct or contributory
patent infringement, then any patent licenses granted to You under this License for that Work shall
terminate as of the date such litigation is filed.
4. Redistribution. You may reproduce and distribute copies of the Work or Derivative Works thereof
in any medium, with or without modifications, and in Source or Object form, provided that You
meet the following conditions:
You must give any other recipients of the Work or Derivative Works a copy of this License; and
You must cause any modified files to carry prominent notices stating that You changed the files;
and
You must retain, in the Source form of any Derivative Works that You distribute, all copyright,
patent, trademark, and attribution notices from the Source form of the Work, excluding those
notices that do not pertain to any part of the Derivative Works; and
If the Work includes a "NOTICE" text file as part of its distribution, then any Derivative Works that
You distribute must include a readable copy of the attribution notices contained within such
NOTICE file, excluding those notices that do not pertain to any part of the Derivative Works, in at
least one of the following places: within a NOTICE text file distributed as part of the Derivative
Works; within the Source form or documentation, if provided along with the Derivative Works; or,
within a display generated by the Derivative Works, if and wherever such third-party notices
normally appear. The contents of the NOTICE file are for informational purposes only and do not
modify the License. You may add Your own attribution notices within Derivative Works that You
distribute, alongside or as an addendum to the NOTICE text from the Work, provided that such
additional attribution notices cannot be construed as modifying the License. You may add Your
own copyright statement to Your modifications and may provide additional or different license
terms and conditions for use, reproduction, or distribution of Your modifications, or for any such
Derivative Works as a whole, provided Your use, reproduction, and distribution of the Work
otherwise complies with the conditions stated in this License.
5. Submission of Contributions. Unless You explicitly state otherwise, any Contribution intentionally
submitted for inclusion in the Work by You to the Licensor shall be under the terms and conditions
of this License, without any additional terms or conditions. Notwithstanding the above, nothing
herein shall supersede or modify the terms of any separate license agreement you may have
executed with Licensor regarding such Contributions.

>>
<<
Licence de logiciel(Suite)
FRA 13-15
6. Trademarks. This License does not grant permission to use the trade names, trademarks,
service marks, or product names of the Licensor, except as required for reasonable and customary
use in describing the origin of the Work and reproducing the content of the NOTICE file.
7. Disclaimer of Warranty. Unless required by applicable law or agreed to in writing, Licensor
provides the Work (and each Contributor provides its Contributions) on an "AS IS" BASIS,
WITHOUT WARRANTIES OR CONDITIONS OF ANY KIND, either express or implied, including,
without limitation, any warranties or conditions of TITLE, NON-INFRINGEMENT,
MERCHANTABILITY, or FITNESS FOR A PARTICULAR PURPOSE. You are solely responsible
for determining the appropriateness of using or redistributing the Work and assume any risks
associated with Your exercise of permissions under this License.
8. Limitation of Liability. In no event and under no legal theory, whether in tort (including
negligence), contract, or otherwise, unless required by applicable law (such as deliberate and
grossly negligent acts) or agreed to in writing, shall any Contributor be liable to You for damages,
including any direct, indirect, special, incidental, or consequential damages of any character
arising as a result of this License or out of the use or inability to use the Work (including but not
limited to damages for loss of goodwill, work stoppage, computer failure or malfunction, or any and
all other commercial damages or losses), even if such Contributor has been advised of the
possibility of such damages.
9. Accepting Warranty or Additional Liability. While redistributing the Work or Derivative Works
thereof, You may choose to offer, and charge a fee for, acceptance of support, warranty,
indemnity, or other liability obligations and/or rights consistent with this License. However, in
accepting such obligations, You may act only on Your own behalf and on Your sole responsibility,
not on behalf of any other Contributor, and only if You agree to indemnify, defend, and hold each
Contributor harmless for any liability incurred by, or claims asserted against, such Contributor by
reason of your accepting any such warranty or additional liability.
END OF TERMS AND CONDITIONS
APPENDIX: How to apply the Apache License to your work
To apply the Apache License to your work, attach the following boilerplate notice, with the fields
enclosed by brackets "[]" replaced with your own identifying information. (Don't include the
brackets!) The text should be enclosed in the appropriate comment syntax for the file format. We
also recommend that a file or class name and description of purpose be included on the same
"printed page" as the copyright notice for easier identification within third-party archives.
Copyright [yyyy] [name of copyright owner]
Licensed under the Apache License, Version 2.0 (the "License"); you may not use this file except
in compliance with the License. You may obtain a copy of the License at
http://www.apache.org/licenses/LICENSE-2.0
Unless required by applicable law or agreed to in writing, software distributed under the License is
distributed on an "AS IS" BASIS, WITHOUT WARRANTIES OR CONDITIONS OF ANY KIND,
either express or implied. See the License for the specific language governing permissions and
limitations under the License.
Fonts are (c) Bitstream (see below). DejaVu changes are in public domain. Glyphs imported from
Arev fonts are (c) Tavmjong Bah (see below)
Bitstream Vera Fonts Copyright
------------------------------
Copyright (c) 2003 by Bitstream, Inc. All Rights Reserved. Bitstream Vera is a trademark of
Bitstream, Inc. Permission is hereby granted, free of charge, to any person obtaining a copy of the
fonts accompanying this license ("Fonts") and associated documentation files (the "Font
Software"), to reproduce and distribute the Font Software, including without limitation the rights to
use, copy, merge, publish, distribute, and/or sell copies of the Font Software, and to permit
persons to whom the Font Software is furnished to do so, subject to the following conditions:
The above copyright and trademark notices and this permission notice shall be included in all
copies of one or more of the Font Software typefaces.
The Font Software may be modified, altered, or added to, and in particular the designs of glyphs
or characters in the Fonts may be modified and additional glyphs or characters may be added to
the Fonts, only if the fonts are renamed to names not containing either the words "Bitstream" or
the word
"Vera".
This License becomes null and void to the extent applicable to Fonts or Font Software that has
been modified and is distributed under the "Bitstream Vera" names.
The Font Software may be sold as part of a larger software package but no copy of one or more
of the Font Software typefaces may be sold by itself.

>>
<<
Licence de logiciel(Suite)
FRA 13-16
THE FONT SOFTWARE IS PROVIDED "AS IS", WITHOUT WARRANTY OF ANY KIND,
EXPRESS
OR IMPLIED, INCLUDING BUT NOT LIMITED TO ANY WARRANTIES OF MERCHANTABILITY,
FITNESS FOR A PARTICULAR PURPOSE AND NONINFRINGEMENT OF COPYRIGHT,
PATENT, TRADEMARK, OR OTHER RIGHT. IN NO EVENT SHALL BITSTREAM OR THE
GNOME FOUNDATION BE LIABLE FOR ANY CLAIM, DAMAGES OR OTHER LIABILITY,
INCLUDING ANY GENERAL, SPECIAL, INDIRECT, INCIDENTAL, OR CONSEQUENTIAL
DAMAGES, WHETHER IN AN ACTION OF CONTRACT, TORT OR OTHERWISE, ARISING
FROM, OUT OF THE USE OR INABILITY TO USE THE FONT SOFTWARE OR FROM OTHER
DEALINGS IN THE FONT SOFTWARE.
Except as contained in this notice, the names of Gnome, the Gnome Foundation, and Bitstream
Inc., shall not be used in advertising or otherwise to promote the sale, use or other dealings in this
Font Software without prior written authorization from the Gnome Foundation or Bitstream Inc.,
respectively. For further information, contact: fonts at gnome dot org.
Arev Fonts Copyright
------------------------------
Copyright (c) 2006 by Tavmjong Bah. All Rights Reserved.
Permission is hereby granted, free of charge, to any person obtaining a copy of the fonts
accompanying this license ("Fonts") and associated documentation files (the "Font Software"), to
reproduce and distribute the modifications to the Bitstream Vera Font Software, including without
limitation the rights to use, copy, merge, publish, distribute, and/or sell copies of the Font
Software, and to permit persons to whom the Font Software is furnished to do so, subject to the
following conditions:
The above copyright and trademark notices and this permission notice shall be included in all
copies of one or more of the Font Software typefaces.
The Font Software may be modified, altered, or added to, and in particular the designs of glyphs
or characters in the Fonts may be modified and additional glyphs or characters may be added to
the Fonts, only if the fonts are renamed to names not containing either the words "Tavmjong Bah"
or the word "Arev".
This License becomes null and void to the extent applicable to Fonts or Font Software that has
been modified and is distributed under the "Tavmjong Bah Arev" names.
The Font Software may be sold as part of a larger software package but no copy of one or more
of the Font Software typefaces may be sold by itself.
THE FONT SOFTWARE IS PROVIDED "AS IS", WITHOUT WARRANTY OF ANY KIND,
EXPRESS OR IMPLIED, INCLUDING BUT NOT LIMITED TO ANY WARRANTIES OF
MERCHANTABILITY, FITNESS FOR A PARTICULAR PURPOSE AND NONINFRINGEMENT OF
COPYRIGHT, PATENT, TRADEMARK, OR OTHER RIGHT. IN NO EVENT SHALL TAVMJONG
BAH BE LIABLE FOR ANY CLAIM, DAMAGES OR OTHER LIABILITY, INCLUDING ANY
GENERAL, SPECIAL, INDIRECT, INCIDENTAL, OR CONSEQUENTIAL DAMAGES, WHETHER
IN AN ACTION OF CONTRACT, TORT OR OTHERWISE, ARISING FROM, OUT OF THE USE
OR INABILITY TO USE THE FONT SOFTWARE OR FROM OTHER DEALINGS IN THE FONT
SOFTWARE.
Except as contained in this notice, the name of Tavmjong Bah shall not be used in advertising or
otherwise to promote the sale, use or other dealings in this Font Software without prior written
authorization from Tavmjong Bah. For further information, contact: tavmjong @ free. fr.


>>
<<
Índice
ESP Índice
1. Nombres de los componentes
1-1. Televisor
1-2. Control remoto
2. Para ver TV
2-1. Visualización de una imagen de equipo externo
2-2. Preparación inicial
3. Funcionamiento directo mediante botón
3-1. Cambio de los canales
3-2. Cambio del volumen
3-3. MUTE
3-4. FREEZE
3-5. FLASH BACK
3-6. SMART
3-7. NETFLIX
3-8. AUDIO
3-9. Temporizador de apagado
3-10. AV MODE
3-12. Subtítulos ocultos y subtítulos ocultos digitales
3-14. VIEW MODE
4. Menú en pantalla
4-1. Introducción
4-3. Funcionamiento del menú en pantalla
4-4. Botones de operación del menú
4-5. Initial Setup
4-14. Información
4-17. Ajustes de Imagen
4-21. Ajustes de audio
4-22. Smart TV
4-25. Opciones de Sistema
5. Disfrute con la reproducción de fotos/música/video
5-1. Preparación
5-2. Seleccionar las carpetas para reproducir
5-4. Reproducir archivos de un dispositivo de memoria
USB/servidor de la red casera
5-9. Reproducción de archivos desde un dispositivo
portátil o un PC
6. Usando Operación de link
6-1. Control de los equipos HDMI usando Operación de
link
6-4. Menú Operación de link
7. Uso de un PC
7-1. Ajuste de la imagen de PC
7-2. Ajuste de la entrada de audio
7-3. Control del televisor
7-9. Tabla de compatibilidad con PC
8. Para utilizar Internet
8-1. Conexión a Internet
8-2. Configuración de Internet
8-5. Para introducir texto (Teclado virtual en pantalla)
8-7. Uso del navegador
8-11. Uso del teclado y el ratón
8-12. Utilizar aplicaciones a través de Internet
8-14. Notas
9. Apéndice
9-1. Extracción del soporte
9-2. Instalación del televisor en una pared
9-4. Solución de problemas
9-6. Solución de problemas relacionados con el
mensaje de error
9-7. Información sobre la licencia de software para este
producto
10. Especificaciones
10-1. Televisor
10-2. LAN inalámbrico
11
-1. Marcas comerciales
12. Dibujos acotados
Los "Dibujos acotados" del televisor LCD se muestran en
la cubierta trasera interior.
13. Licencia de software
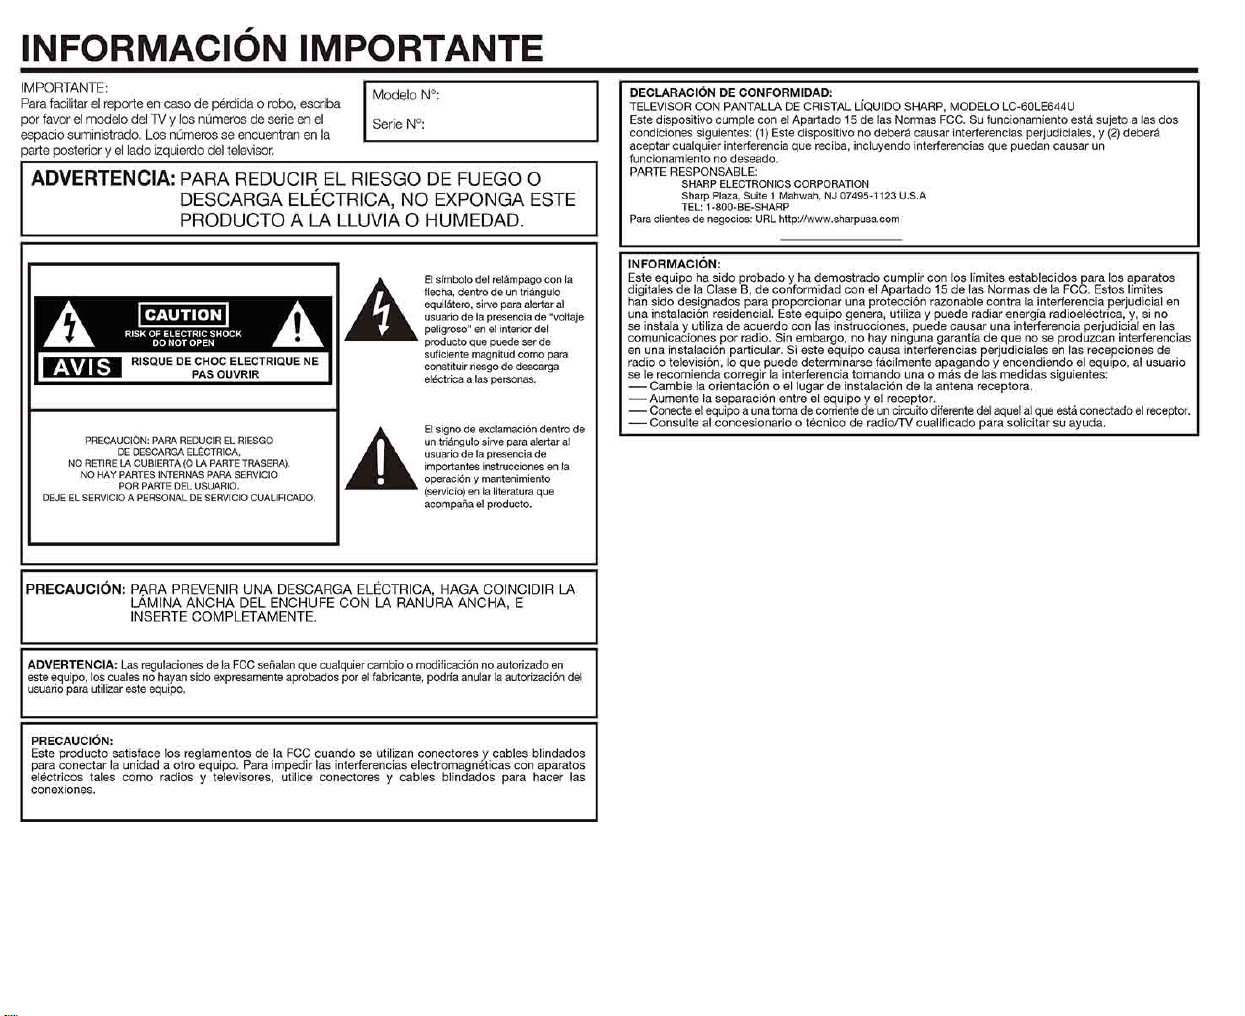
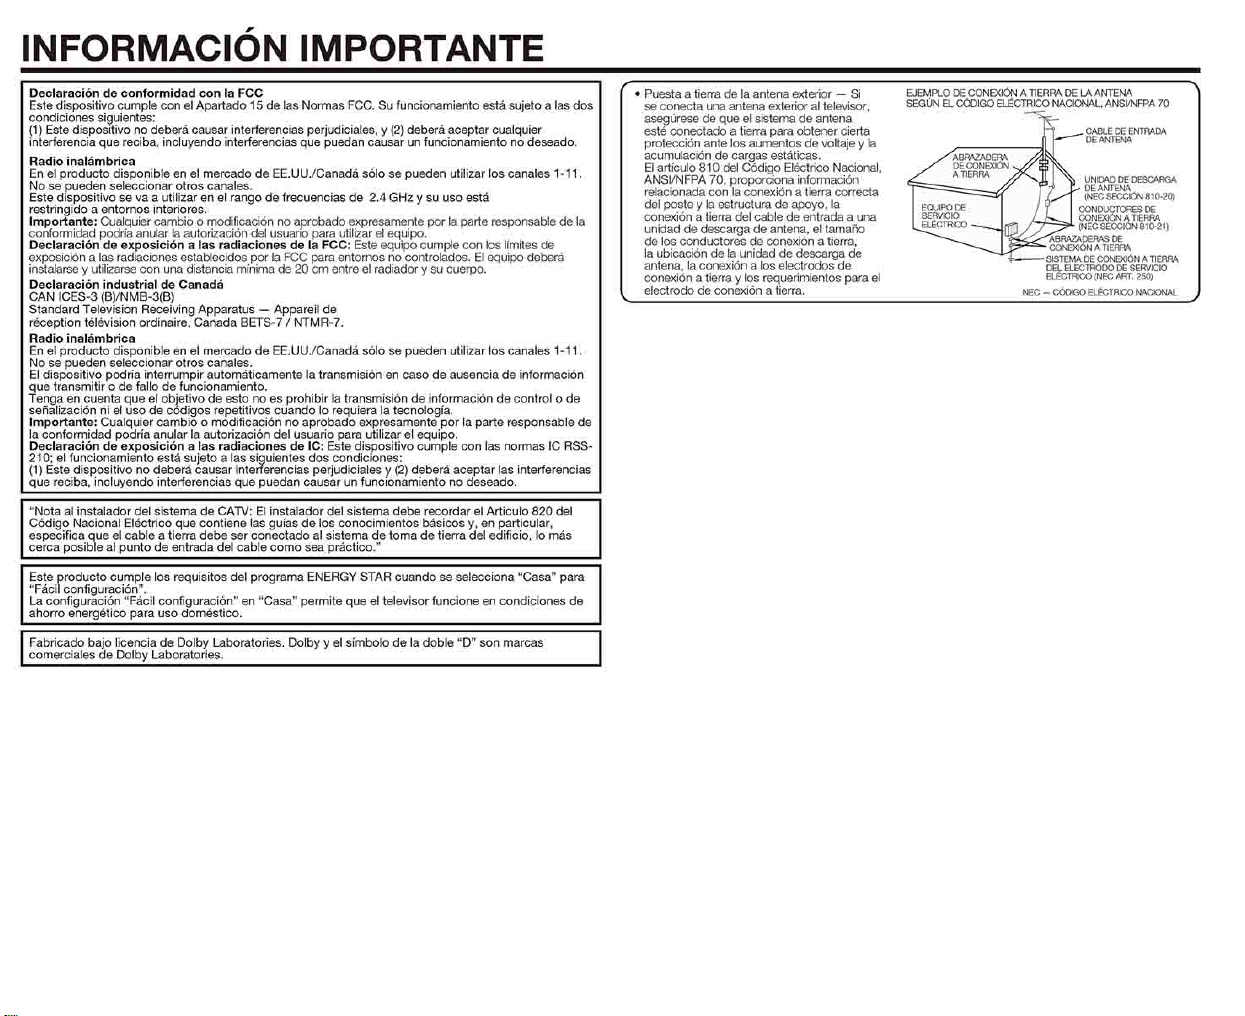
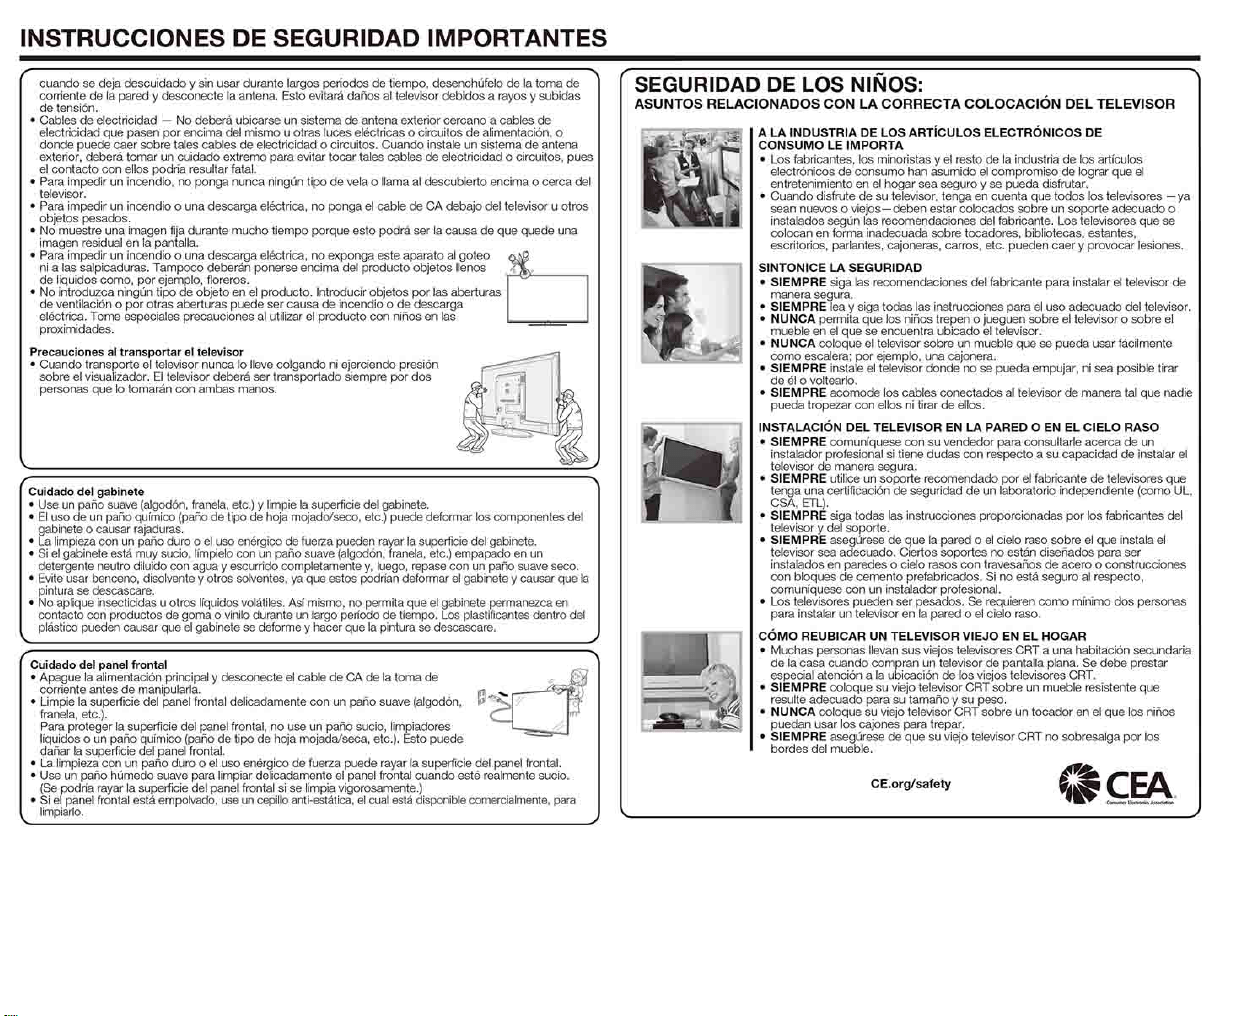

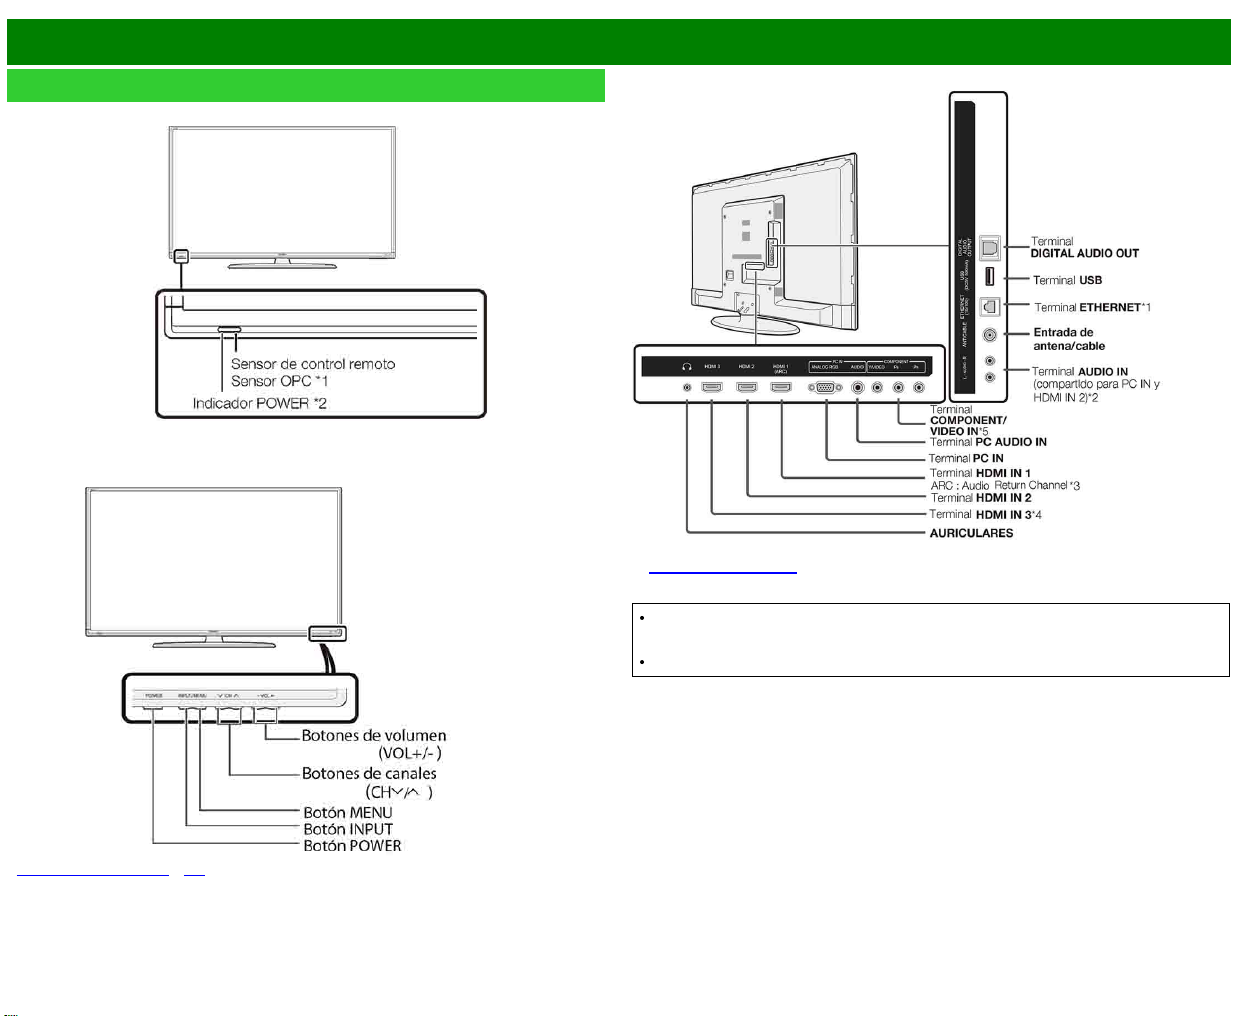
>>
<<
Nombres de los componentes
ESP 1-1
Televisor
(delantera)
(delantera)
*
Consulte las páginas 2-1 y 4-4 para aprender las funciones de los botones.
(trasera)
*1 Consulte la Guía de Instalación.
*5
Consulte la página 4-12 para conocer detalles sobre la function Selección de entrada.
Las ilustraciones y visualizaciones en pantalla de este manual de operación se ofrecen con
fines explicativos, y pueden ser un poco diferentes de las que aparecen al hacer operaciones
reales.
Los ejemplos utilizados en todo este manual se basan en el modelo LC-60LE644U.
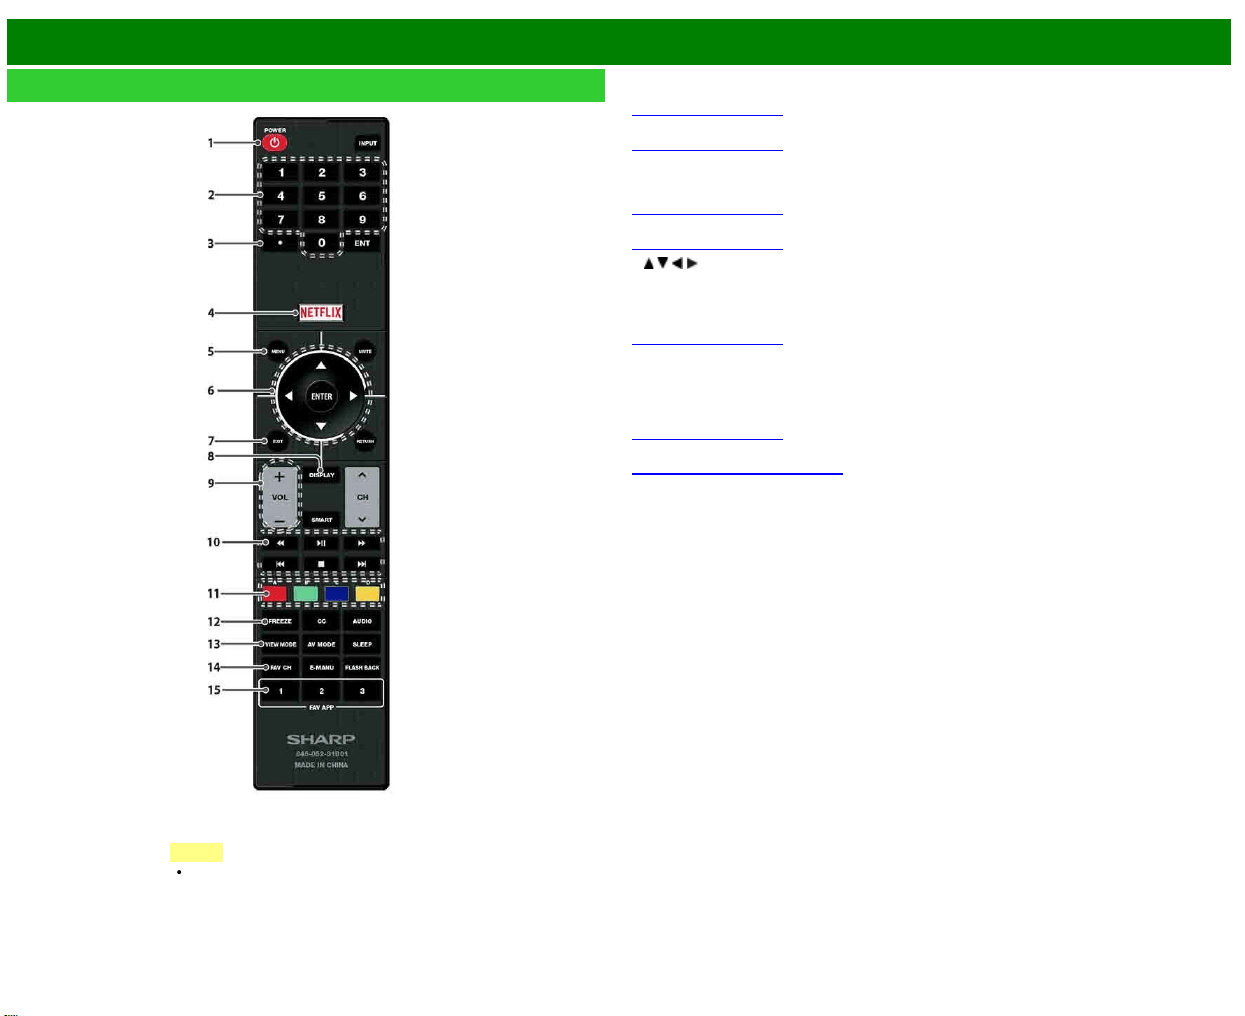
>>
<<
Nombres de los componentes
ESP 1-2
Control remoto
1
POWER:
Conecta o pone en espera la alimentación del televisor.
2
0–9: Establece el canal.
(Consulte la página 3-1.)
3
• (PUNTO): Establece el canal.
(Consulte la página 3-1.)
4
NETFLIX: Visualiza la pantalla de Netflix.
Si pulsa el botón NETFLIX cuando el televisor está apagado, el televisor se enciende y se
muestra la pantalla NETFLIX.
(Consulte la página 3-7.)
5
MENU: Visualiza la pantalla de menú.
(Consulte la página 4-1.)
6
/ / / , ENTER: Selecciona un elemento deseado en la pantalla.
7
EXIT: Para salir de la pantalla de menú.
8
DISPLAY: Visualiza la información de los canales.
9
VOL+/-: Ajusta el volumen.
(Consulte la página 3-2.)
10
Botones de operación de un equipo externo: Controlan el equipo externo.
11
A, B, C, D: Selecciona 4 canales favoritos preajustados en 4 categorías diferentes.
Mientras ve un canal podrá cambiar canales pulsando
A, B, C y D.
12
FREEZE: Establece el modo de imagen fija. Púlselo de nuevo para volver a la pantalla normal.
(Consulte la página 3-4.)
13
VIEW MODE: Selecciona el tamaño de la pantalla.
(Consulte la páginas 3-14 a 3-16.)
14
FAV CH: Ajusta los canales favoritos.
15 FAV APP 1, 2, 3: Usted puede asignar sus aplicaciones favoritas a estos botones.
NOTA
Al utilizar el control remoto, apúntelo
al televisor.
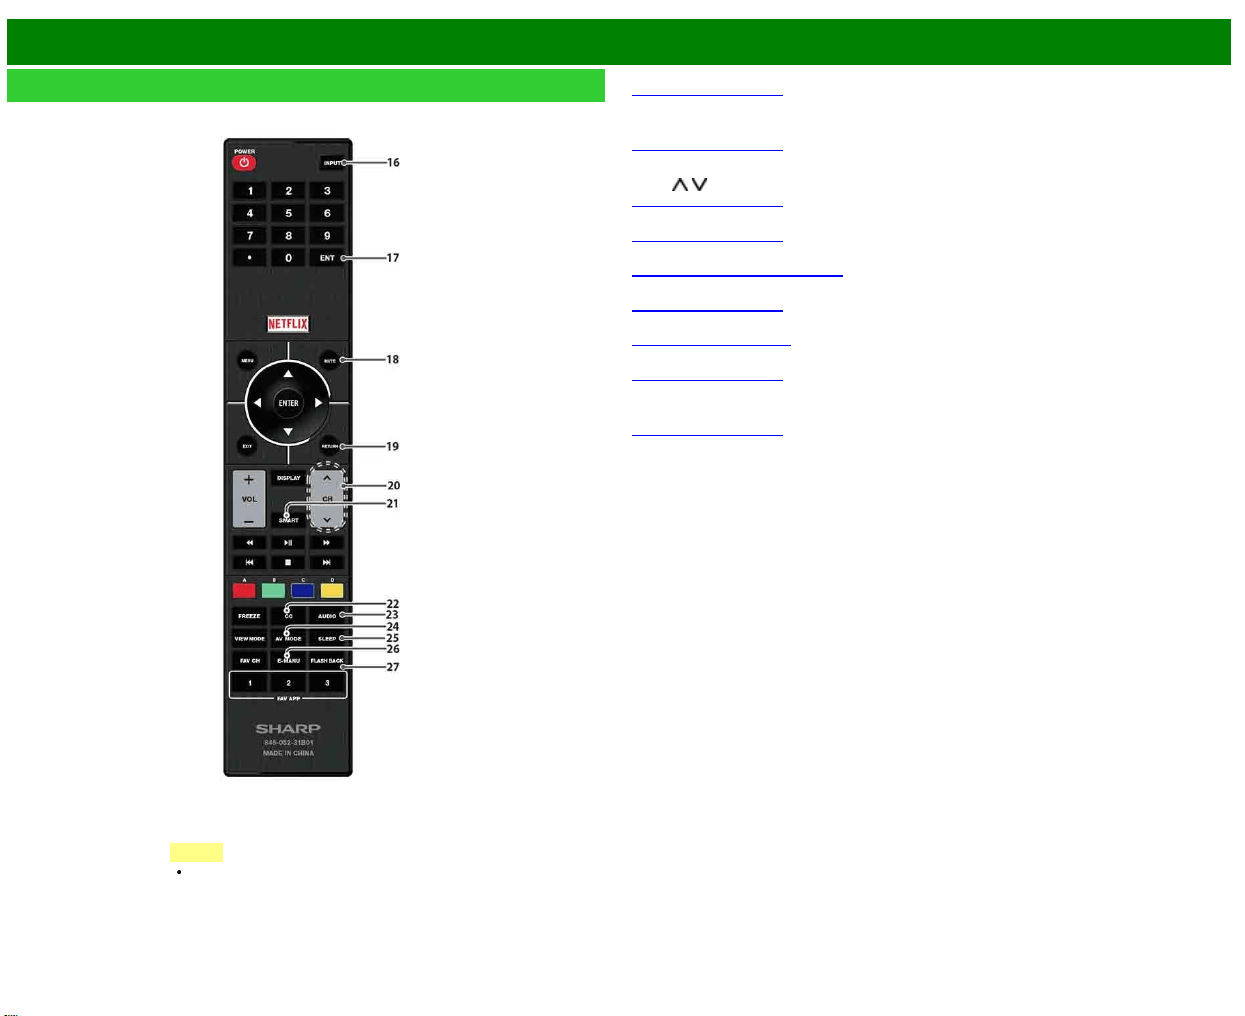
>>
<<
Nombres de los componentes
ESP 1-3
Control remoto (Continúa)
16
INPUT:
Selecciona una fuente de entrada de televisor.
(Consulte la página 2-1.)
17
ENT: Salta a un canal después de seleccionarlo con los botones 0–9.
18
MUTE: Silencia el sonido.
(Consulte la página 3-3.)
19
RETURN: Retorna a la pantalla de menú anterior.
20
CH / : Selecciona el canal.
(Consulte la página 3-1.)
21
SMART: Visualiza la ventana de aplicaciones.
(Consulte la página 3-6.)
22
CC: Visualización de subtítulos durante la recepción de fuentes con subtítulos ocultos.
(Consulte la páginas 3-12 a 3-13.)
23
AUDIO: Selecciona MTS/SAP o el modo de audio durante las emisiones de audio múltiple.
(Consulte la página 3-8.)
24
AV MODE: Selecciona un ajuste de audio o vídeo.
(Consulte la página 3-10.)
25
SLEEP: Ajusta el temporizador de apagado.
(Consulte la página 3-9.)
26
E-MANU: Visualice el manual de instrucciones.
27
FLASH BACK: Para volver al canal anterior o al modo de entrada externa.
(Consulte la página 3-5.)
NOTA
Al utilizar el control remoto, apúntelo
al televisor.
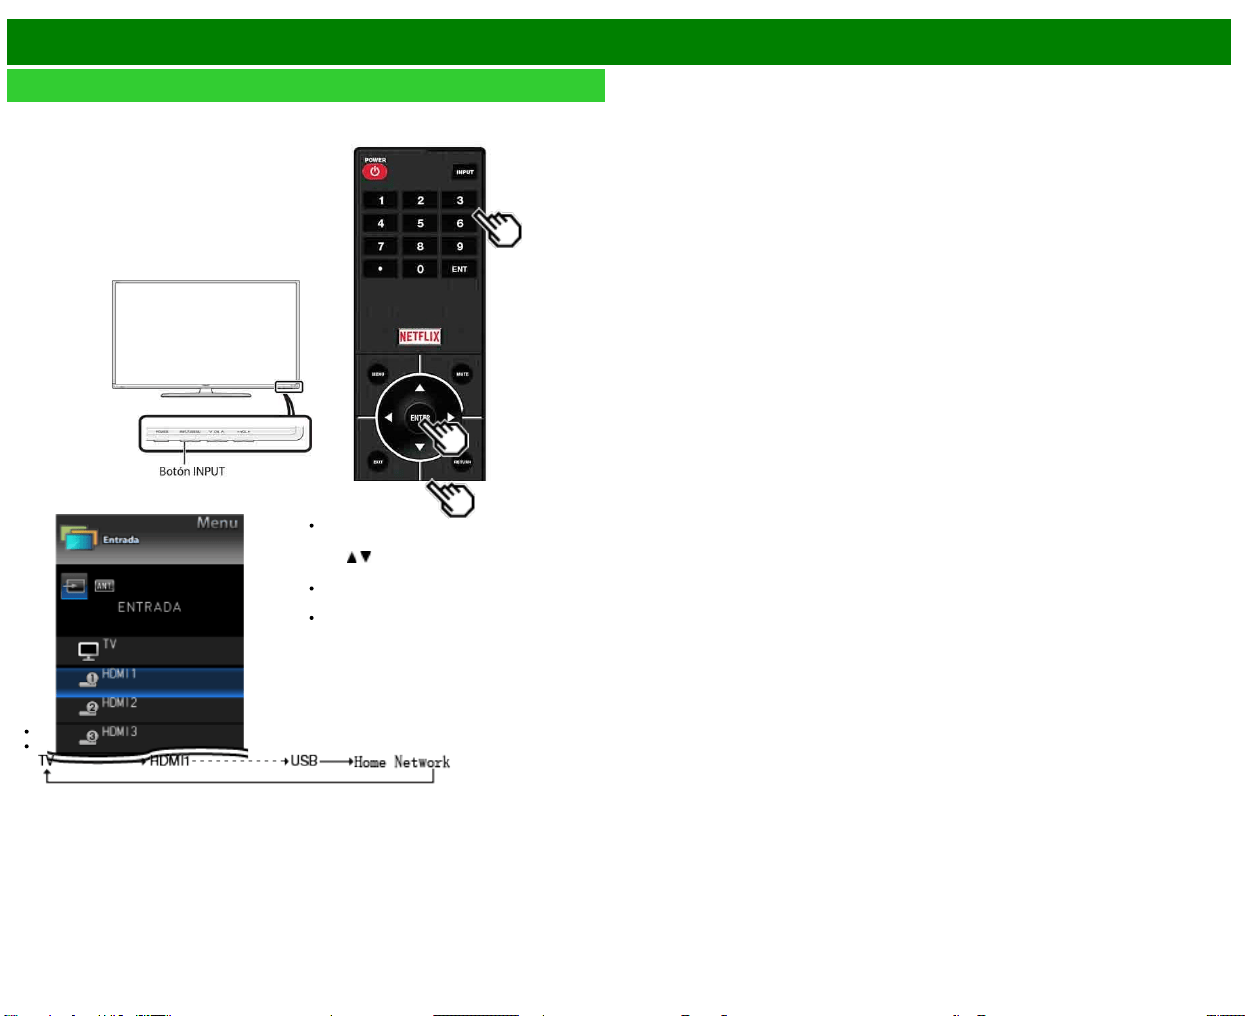
>>
<<
Para ver TV
ESP 2-1
Visualización de una imagen de equipo externo
Para ver imágenes de fuentes externas, seleccione la fuente de entrada pulsando
INPUT en el
control remoto o en el televisor.
Ejemplo
1 Pulse INPUT.
Se visualiza la pantalla de Lista de
entradas.
2 Pulse
/ para seleccionar la fuente de
entrada.
Se visualiza automáticamente una
imagen de la fuente seleccionada.
Si la fuente de entrada correspondiente
no está conectada, no podrá cambiar la
entrada. Asegúrese de conectar de
antemano el equipo.
También puede seleccionar la fuente de entrada pulsando INPUT.
Cada vez que pulse INPUT, la fuente de entrada cambiará.
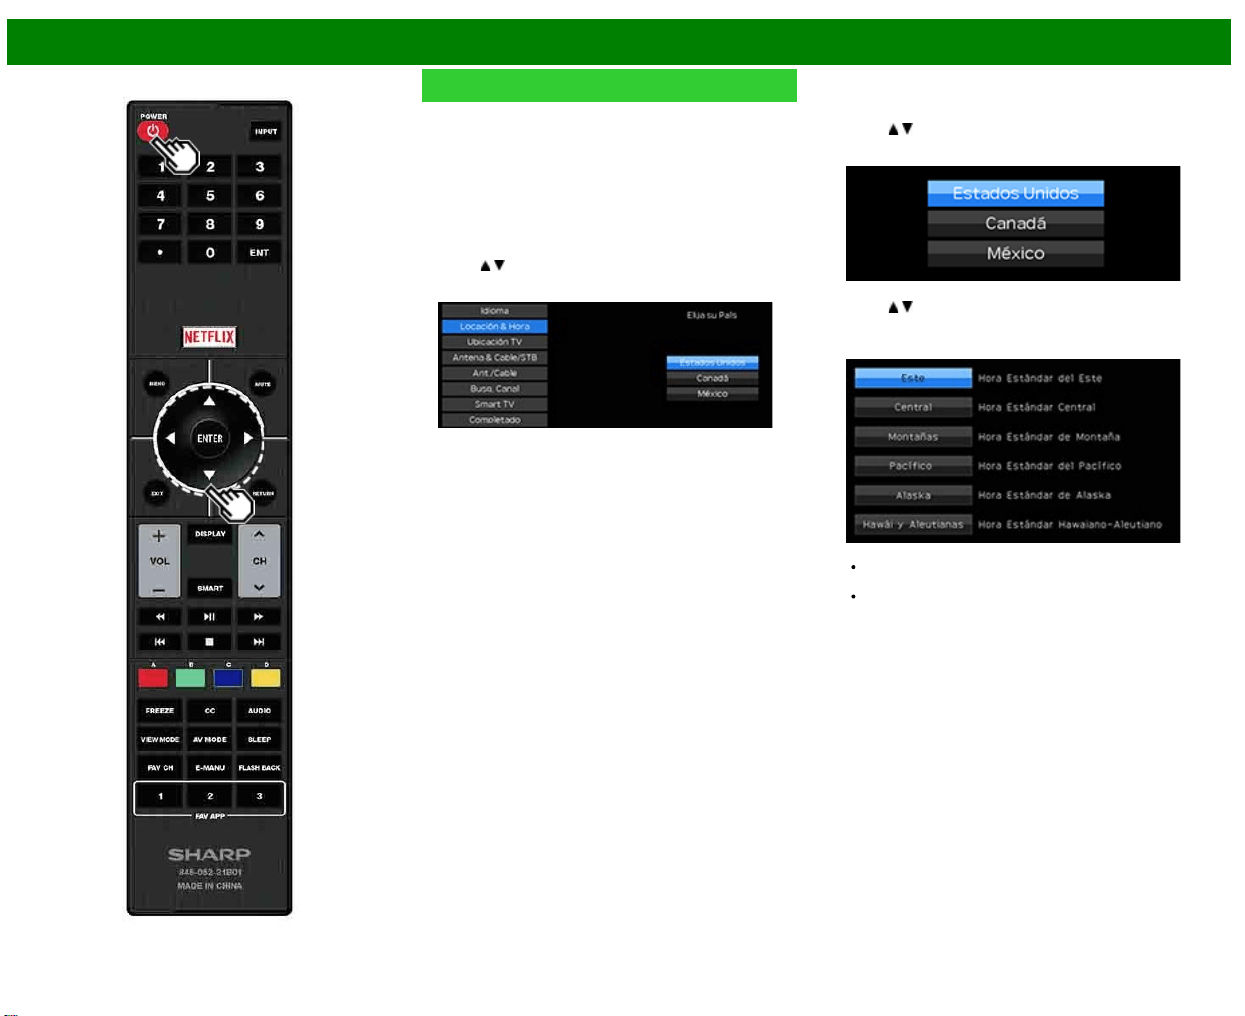
>>
<<
Para ver TV
ESP 2-2
Preparación inicial
Cuando encienda el televisor por primera vez, éste
memorizará automáticamente los canales de emisión de la
zona donde usted vive. Ejecute los pasos siguientes antes
de pulsar POWER en el control remoto.
1. Inserte las pilas en el control remoto.
2. Conecte el cable de la antena al televisor.
3. Enchufe el cable de CA en la toma de CA.
Idioma (Ajuste de idioma)
Seleccione entre 3 idiomas: Inglés, Francés y Español.
1 Pulse
/ para seleccionar el idioma deseado listado en
la pantalla, y luego pulse ENTER.
Locación & Hora
Realice los ajustes de acuerdo con el país, área y zona
horaria en la que utiliza el televisor.
2 Pulse
/ para seleccionar "Estados Unidos", "Canadá"
o "México", y luego pulse ENTER.
3 Pulse / para seleccionar la zona horaria en la que
utiliza el televisor, y luego pulse ENTER.
Ejemplo
La zona horaria es distinta en función del país
seleccionado.
Los valores predeterminados en fábrica son para
la zona horaria de la capital del país seleccionado.
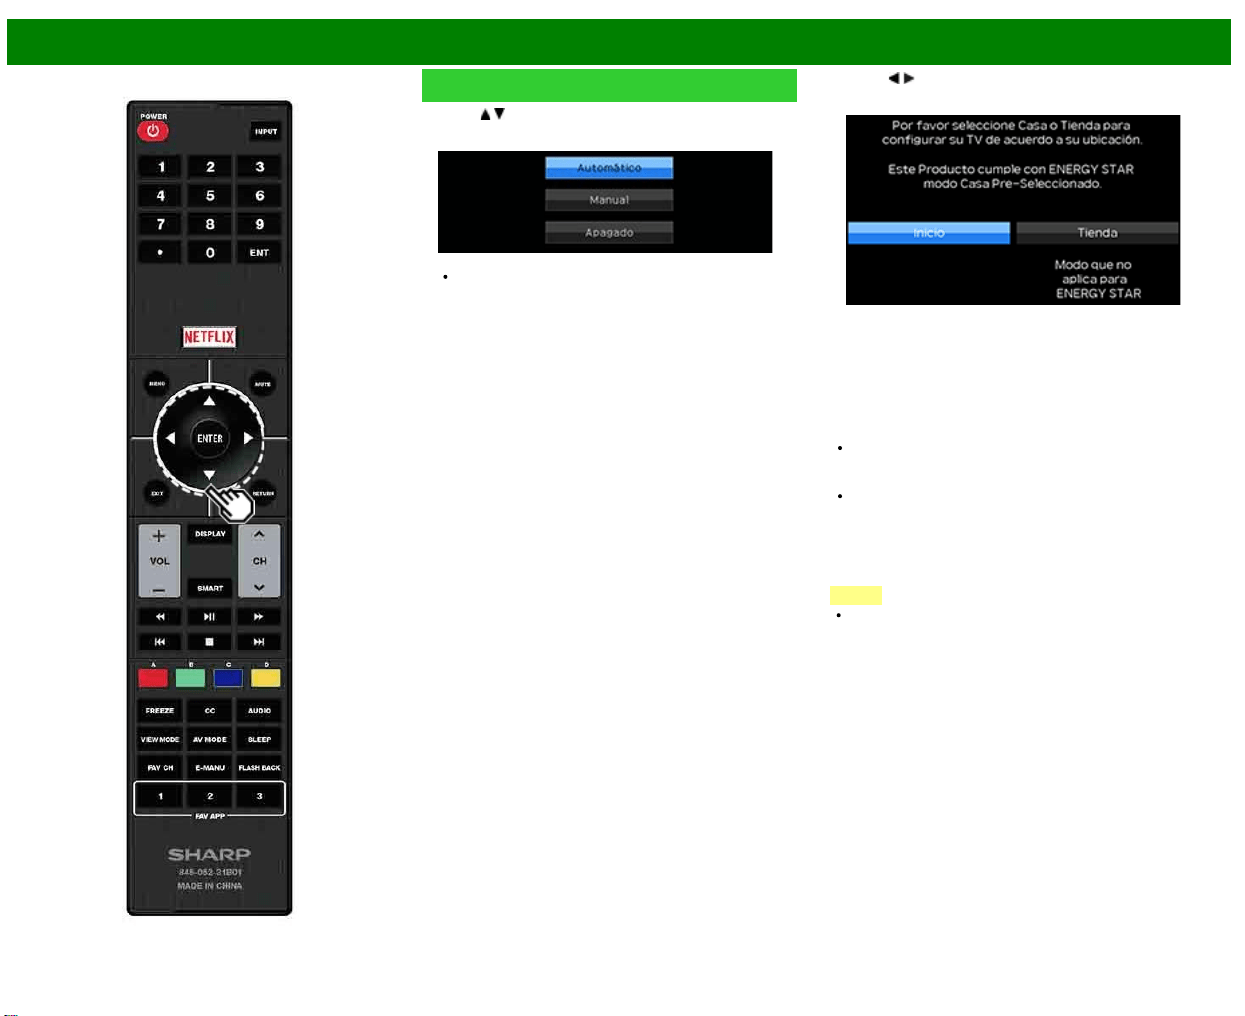
>>
<<
Para ver TV
ESP 2-3
Preparación inicial (Continúa)
4 Pulse / para seleccionar Horario de Verano, y luego
pulse ENTER.
"Automático" es la selección por defecto.
Ubicación TV
Seleccione "Casa" o "Tienda" según el lugar en el que va a
instalar el televisor. Este producto cumple con ENERGY
STAR en modo predeterminado de ajuste para Casa.
5 Pulse / para seleccionar "Casa" o "Tienda".
Pulse ENTER para introducir el ajuste.
Casa: MODO AV se establece en "ESTÁNDAR (ENERGY
STAR)".
Tienda: MODO AV se establece en "DINÁMICO(Fijo)". Se
puede establecer Reiniciar Imagen y Demo.
Reiniciar imagen: MODO AV se ajustará en
"DINÁMICO(Fijo)" independientemente de si el Reiniciar
imagen está "Encendido" o "Apagado".
Si selecciona "Encendido" y el dispositivo está inactivo
durante 30 minutos:
- MODO AV se reajustará en "DINÁMICO(Fijo)".
Cuando se selecciona "Apagado":
- MODO AV se ajustará en "DINÁMICO(Fijo)".
Demo: Cuando se selecciona "Encendido", una vez
completados todos los ajustes, la pantalla de Demo de
función se visualiza si no se realiza ninguna operación
durante varios minutos.
NOTA
La calificación ENERGY STAR está basada en el MODO
AV "ESTÁNDAR (ENERGY STAR)".
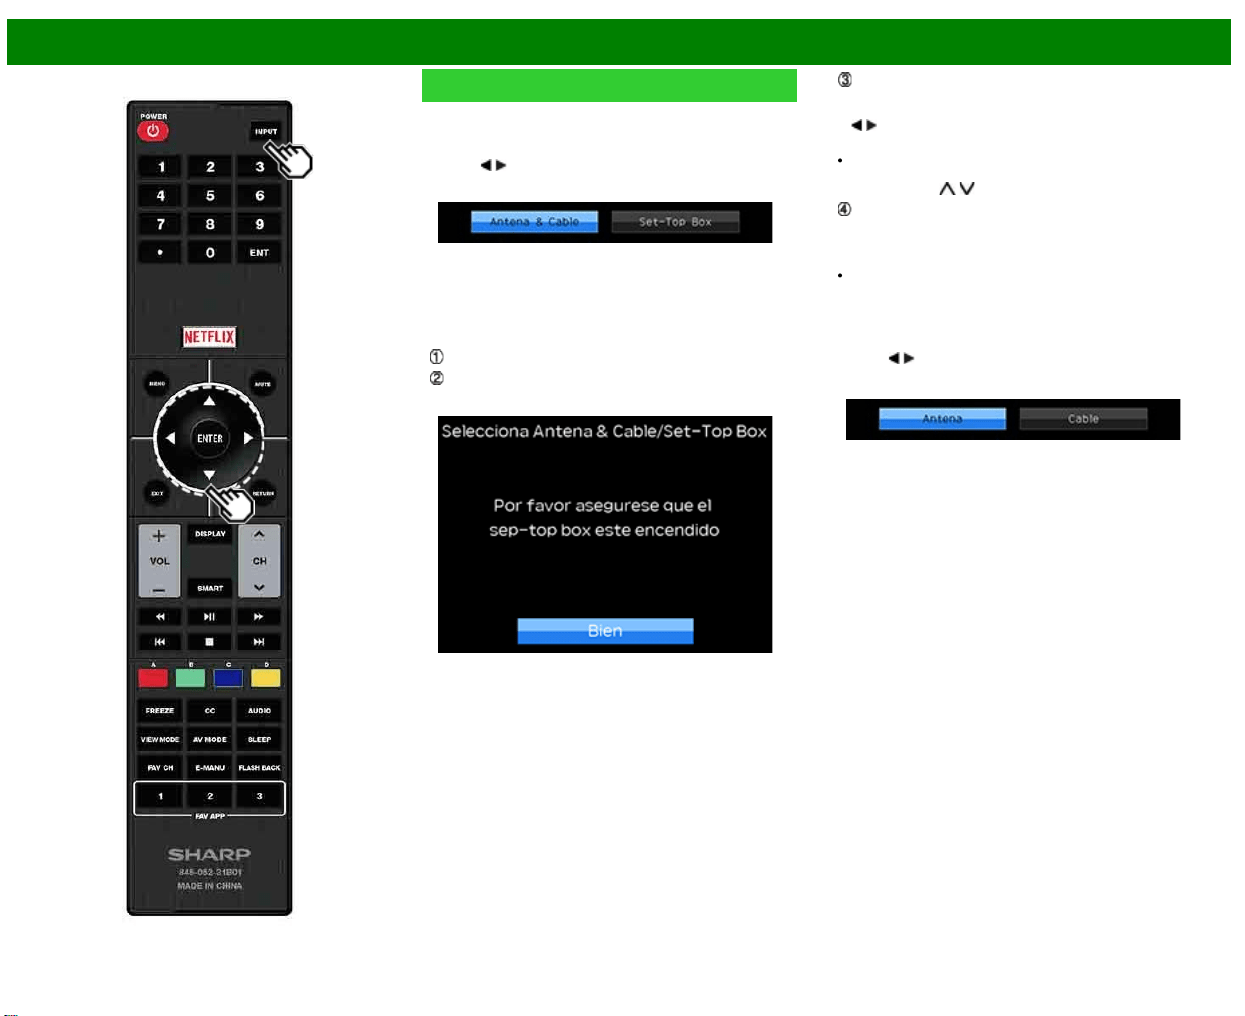
>>
<<
Para ver TV
ESP 2-4
Preparación inicial (Continúa)
Antena & Cable/STB
Seleccione el tipo de conexión que utilizará para ver la
televisión.
6 Pulse
/ para seleccionar "Antena & Cable" o "Set-
Top Box", y luego pulse ENTER.
Para ver la televisión a través de una antena o una
conexión por cable (sin utilizar un descodificador):
Seleccione "Antena & Cable" y después vaya al paso
7.
Para ver la televisión a través de un descodificador:
Seleccione "Set-Top Box", y luego pulse ENTER.
Compruebe que el decodificador de cable/satélite
conectado al televisor esté encendido.
Para ver la televisión, seleccione la fuente de entrada
correspondiente al terminal conectado al descodificador.
Al hacerlo, debe configurarla para que salte "TV". Pulse
/ para seleccionar "Encendido", y luego pulse
ENTER.
Cuando se ajusta en "Encendido", no es posible cambiar
el canal del televisor utilizando el control remoto o el
menú. (ej. CH
/ , Canal favorito, etc.)
Pulse INPUT para seleccionar la fuente de entrada
correspondiente al terminal conectado al descodificador.
Realice los ajustes necesarios en el equipo externo
conectado.
Consulte el manual de operación del equipo conectado
para conocer la configuración del equipo.
Ant./Cable (Ajuste de antena)
Asegúrese de la clase de conexión que se hace con su
televisor cuando se selecciona "Antena" o "Cable".
7 Pulse
/ para seleccionar "Antena" o "Cable".
Pulse ENTER para introducir el ajuste.
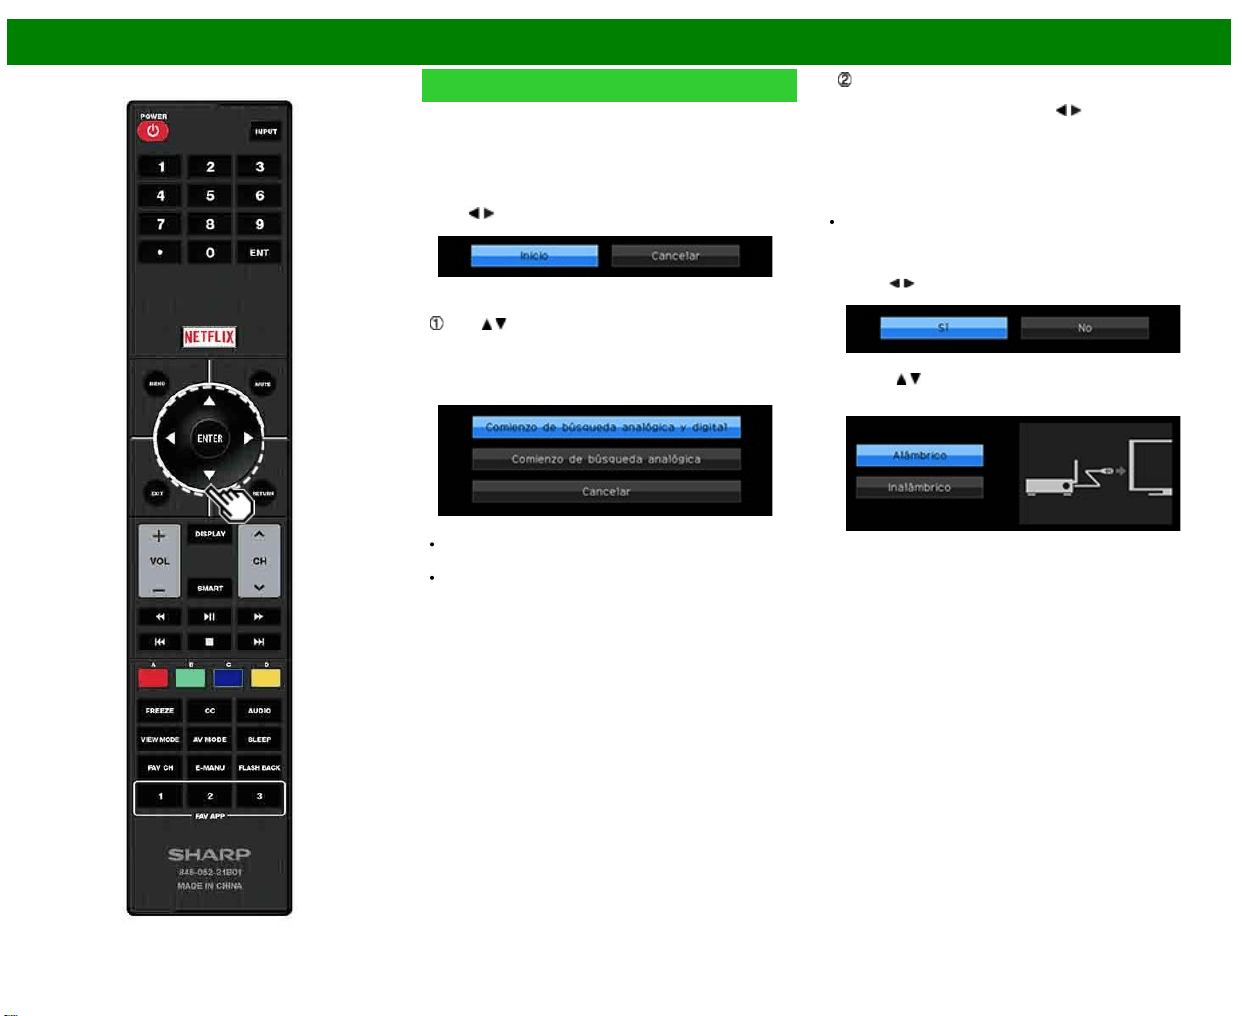
>>
<<
Para ver TV
ESP 2-5
Preparación inicial (Continúa)
Busq. Canal (Búsqueda de canales)
La búsqueda automática de canales hace que el televisor
busque todos los canales que puedan verse en la zona
establecida.
8 Cuando "Antena" está seleccionado en el ajuste
Antena:
Pulse
/ para seleccionar "Inicio", y luego pulse ENTER.
Cuando "Cable" está seleccionado en el ajuste Antena:
Pulse / para seleccionar "Comienzo de búsqueda
analógica y digital" para buscar emisiones analógicas y
digitales, o para seleccionar "Comienzo de búsqueda
analógica" para buscar solamente emisiones analógicas,
y luego pulse ENTER.
La búsqueda de canal comenzará
automáticamente.
Para salir de la pantalla de búsqueda de canal,
seleccione "Cancelar", y luego pulse ENTER.
Los resultados de la búsqueda de canales pueden
incluir canales codificados o canales que no es posible
ver en el área establecida. Pulse
/ para seleccionar
"Sí", y luego pulse ENTER para eliminar los canales
codificados.
Smart TV
Cuando se conecte a Internet en el televisor, seleccione el
método de conexión deseado y siga las instrucciones que
aparecen en la pantalla.
La conexión LAN inalámbrica solo es posible cuando se
utiliza el método WPS (pulsador). Si se utiliza cualquier
otro método, haga los ajustes en Smart TV >
Configuración de Internet > Ajuste de Red.
9 Pulse
/ para seleccionar "Sí", y luego pulse ENTER.
10 Pulse / para seleccionar "Alámbrico" o "Inalámbrico",
y luego pulse ENTER.
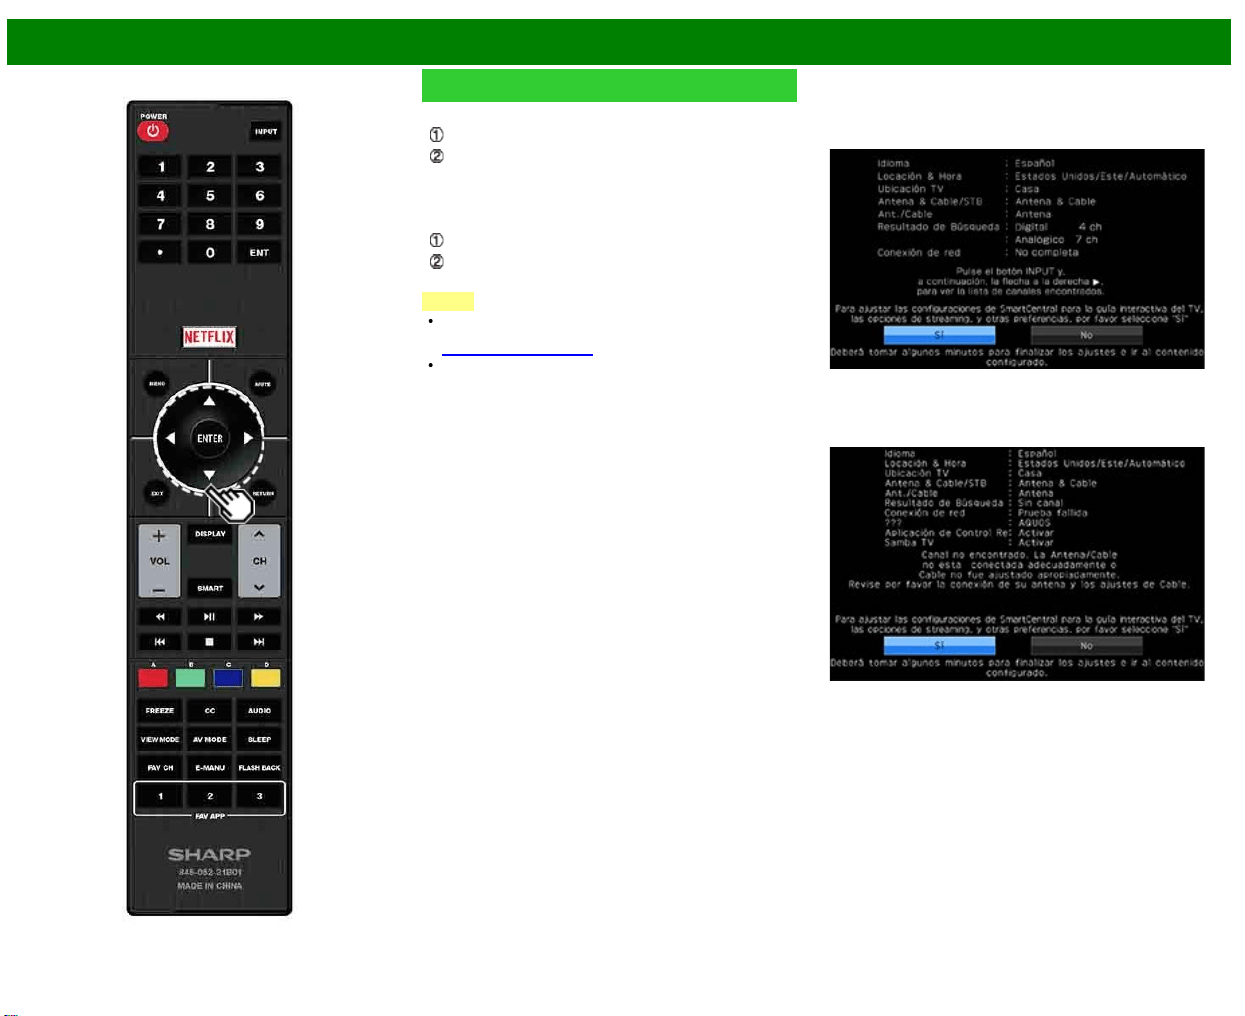
>>
<<
Para ver TV
ESP 2-6
Preparación inicial (Continúa)
Conexión utilizando un cable ETHERNET:
Seleccione "Alámbrico" y pulse ENTER.
Confirme que el televisor está conectado correctamente
al router y a continuación pulse "Siguiente". Siga las
instrucciones en pantalla para realizar la prueba de
conexión.
Conexión LAN inalámbrica mediante el método WPS:
Seleccione "Inalámbrico" y pulse ENTER.
Siga las instrucciones en pantalla y finalice la conexión
después de probar su viabilidad.
NOTA
Cuando haya terminado de realizar la configuración de
red, configure los parámetros "Selecc. nom. de disp."
(Consulte la página 8-3.)
Cuando cambie los ajustes de red, vaya a Smart TV >
Configuración de Internet > Ajuste de Red.
Completado
11 Se visualiza la pantalla de confirmación de los ajustes.
Confirme la información que se muestra en la pantalla y
después pulse ENTER.
Ejemplos de la pantalla de confirmación de ajustes
Cuando se reciben uno o más canales después de
seleccionar "Antena & Cable" en el paso 6 y realizar
una búsqueda.
Cuando no se recibe ningún canal después de
seleccionar "Antena & Cable" en el paso 6 y realizar
una búsqueda.
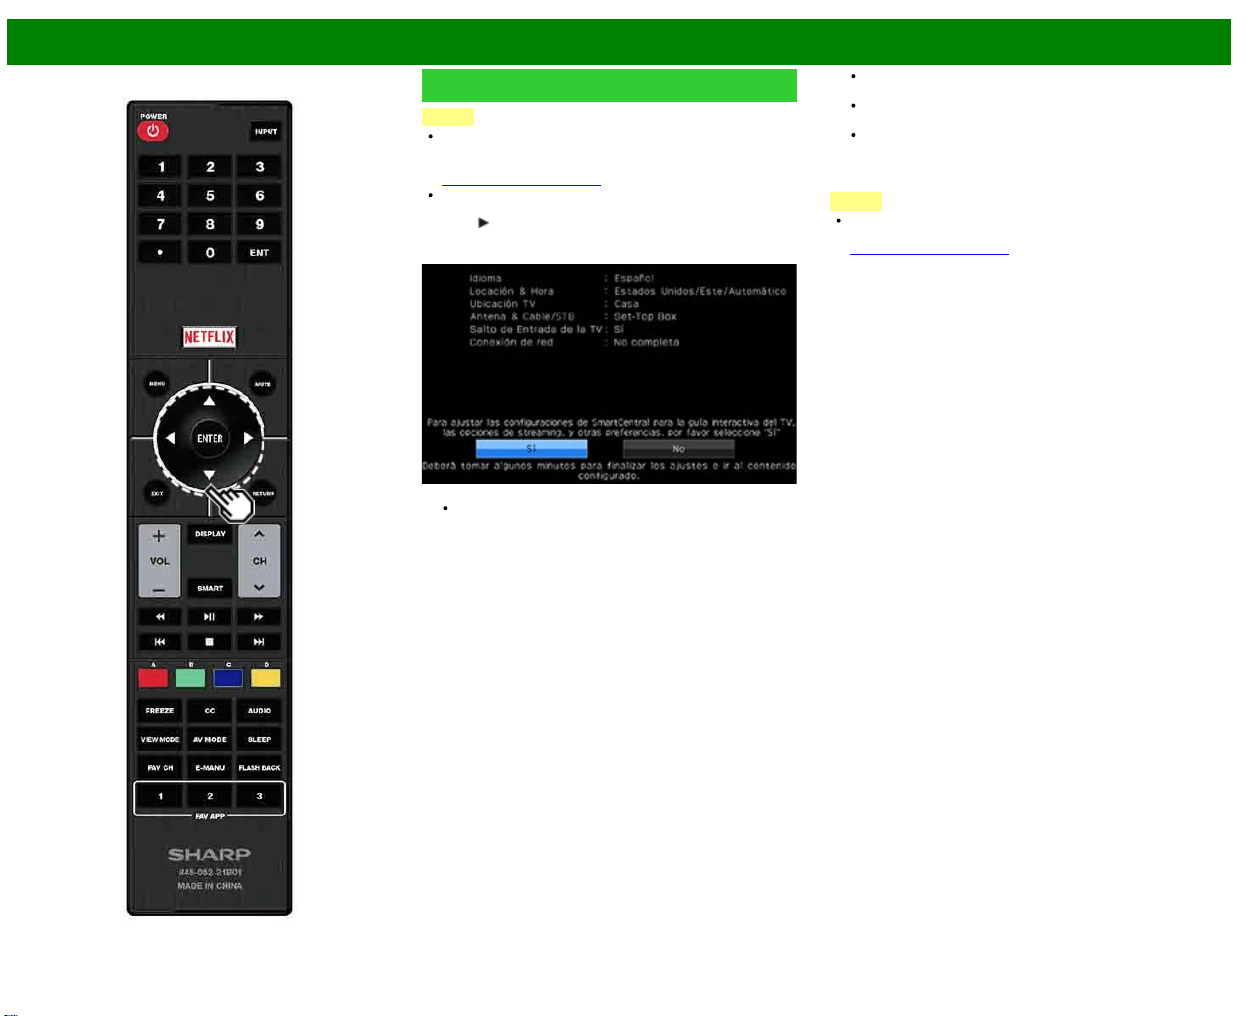
>>
<<
Para ver TV
ESP 2-7
Preparación inicial (Continúa)
NOTA
Si no se encuentra ningún canal, asegúrese de la clase
de conexión que se ha hecho con su televisor e intente
de nuevo "Configuración".
(Consulte la página 4-13.)
Para ver la lista de canales encontrados durante la
búsqueda de canales, pulse INPUT y a continuación
pulse
.
Cuando se seleccionó "Set-Top Box" en el paso 6.
Haga clic en "Bien" para mostrar la pantalla de
confirmación del cambio de fuente de entrada.
Mostrar lista de entr: Puede comprobar el estado de
conexión actual del equipo externo. Confirme qué
terminal de entrada está conectado al descodificador.
Bien: Al hacer clic en "Bien" se completará el proceso de
Autoinstalación.
Es posible que no se muestre correctamente en
función del equipo conectado.
No se muestra correctamente cuando el equipo
conectado está apagado.
Para ver la televisión utilizando un descodificador,
pulse INPUT después de finalizar los ajustes iniciales y
seleccione la entrada a la que está conectado el
descodificador.
NOTA
Para cambiar los ajustes de la preparación inicial, intente
"Configuración" en el menú Configuración Inicial en la
(Consulte la página 4-13.)
>>
<<
Funcionamiento directo mediante botón
ESP 3-1
Cambio de los canales
Puede cambiar canales de varias formas.
Método 1
Utilizando CH
/ en el control remoto o en el televisor.
Método 2
Utilizando los botones del control remoto 0-9, • (PUNTO).
Ejemplos:
Para seleccionar un número de canal de 1 ó 2 dígitos
(ej.: el canal 5):
Pulse 5
ENTER
Para seleccionar un número de canal de 3 dígitos (ej.:
el canal 115):
Pulse 1
1 5 ENTER
Para seleccionar un número de canal de 4 dígitos (ej.:
el canal 22.1):
Pulse 2
2 • (PUNTO) 1 ENTER
Método 3
Selección del programa de Lista de canales.
1 Pulse INPUT en el control remoto.
Aparecerá la lista de entradas.
2 Pulse
/ para seleccionar "Antena" o "Cable".
Aparecerá la lista de canales.
3 Pulse
/ para seleccionar el canal deseado, y
luego pulse ENTER.
NOTA
Cuando seleccione un número de canal de 1 dígito, no
será necesario pulsar 0 antes del número.
Cuando introduzca 0-9 solamente, la selección de
canales se hará si no se hace ninguna operación dentro
de unos pocos segundos.
Si sólo pulsa "0" no pasará nada.
Complete los pasos de arriba dentro de unos pocos
segundos.
Cuando introduzca 0-9 y • (PUNTO), la selección de
canales se hará si no se hace ninguna operación dentro
de unos pocos segundos.
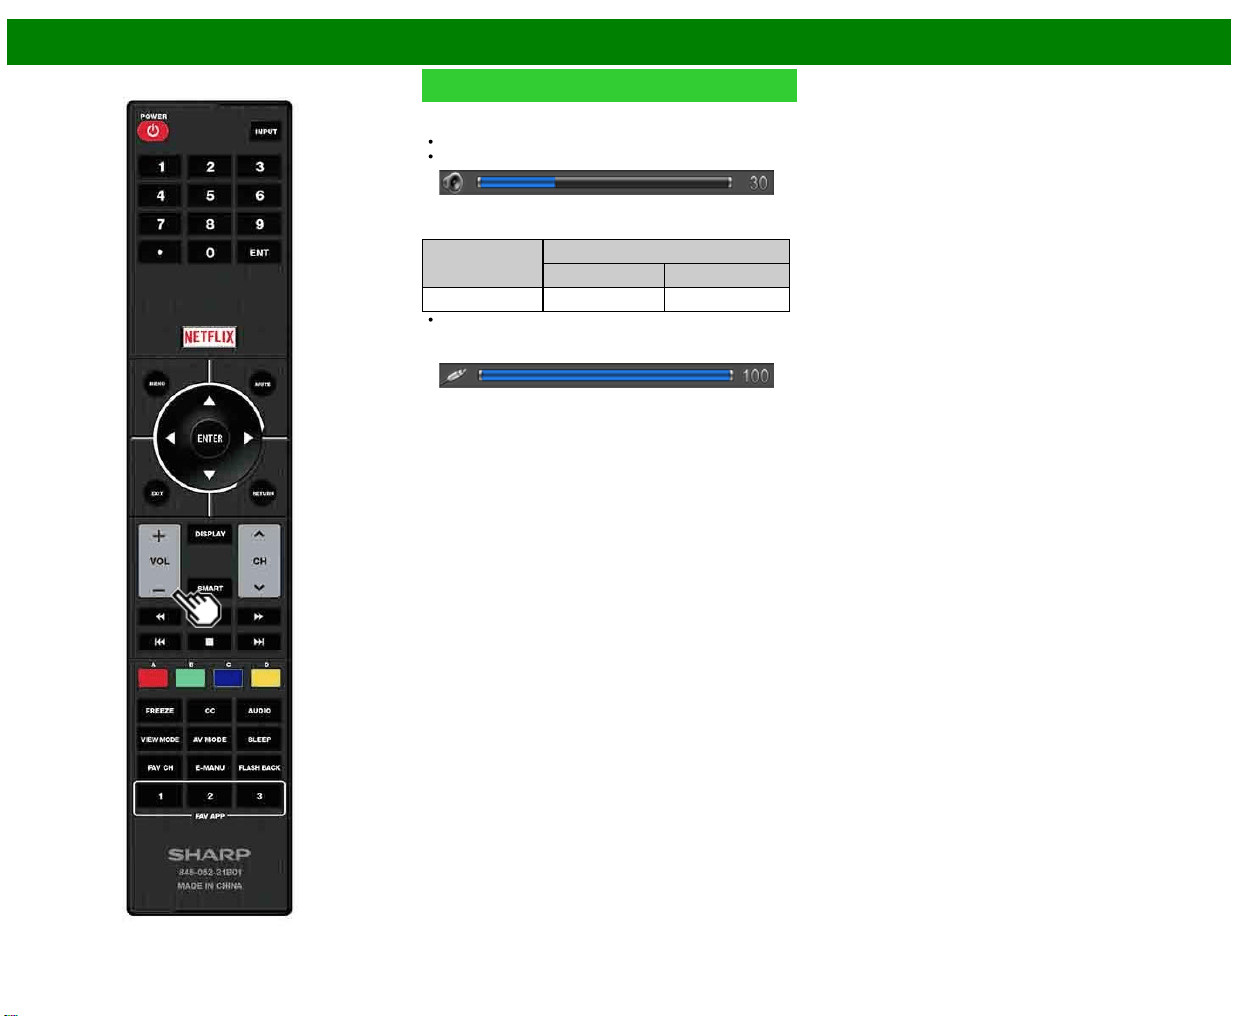
>>
<<
Funcionamiento directo mediante botón
ESP 3-2
Cambio del volumen
Puede cambiar el volumen pulsando VOL+/-en el televisor o
en el control remoto.
Para aumentar el volumen, pulse VOL +.
Para disminuir el volumen, pulse VOL -.
Estado de audio
Dispositivo de
salida
Selección salida
Fija Variable
Altavoz Sonido variable Silenciamiento
Cuando "Selección salida" se ponga en "Variable", el
indicador de la pantalla cambiará como se muestra a
continuación.
>>
<<
Funcionamiento directo mediante botón
ESP 3-3
MUTE
Silencia la salida de sonido actual.
Pulse MUTE.
" " se visualiza en la pantalla durante 30 minutos y el
sonido se silencia.
NOTA
Durante los 30 minutos de pulsar MUTE, este puede ser
cancelado pulsando VOL+/- o MUTE.
El silenciamiento se cancelará después de que hayan
pasado 30 minutos. Sin embargo, el televisor no dará
una salida repentina a un sonido alto porque el volumen
se ajustará automáticamente a 0.
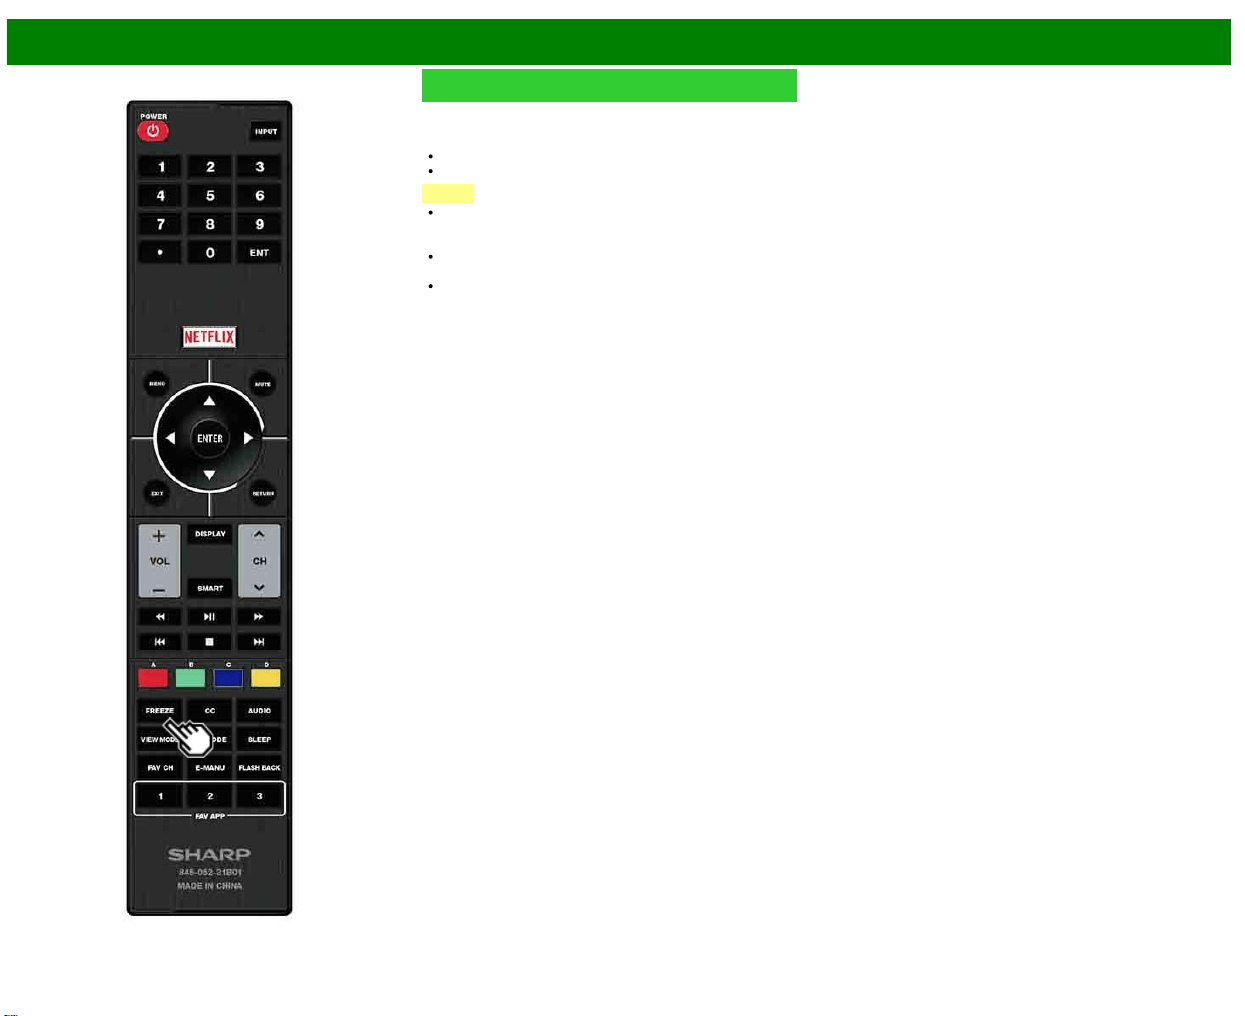
>>
<<
Funcionamiento directo mediante botón
ESP 3-4
FREEZE
Le permite capturar y congelar una imagen en movimiento
que está viendo.
Pulse FREEZE.
Se captura una imagen en movimiento.
Pulse FREEZE para cancelar la función.
NOTA
Cuando esta función no se encuentre disponible, se
visualizará "No hay visualización de imagen fija
disponible".
La imagen fija desaparece automáticamente después de
transcurridos 30 minutos.
Si está utilizando la función de congelación y
una emisión activa V-CHIP BLOCK, la función de
congelación se cancelará y aparecerá el mensaje V-
CHIP BLOCK.
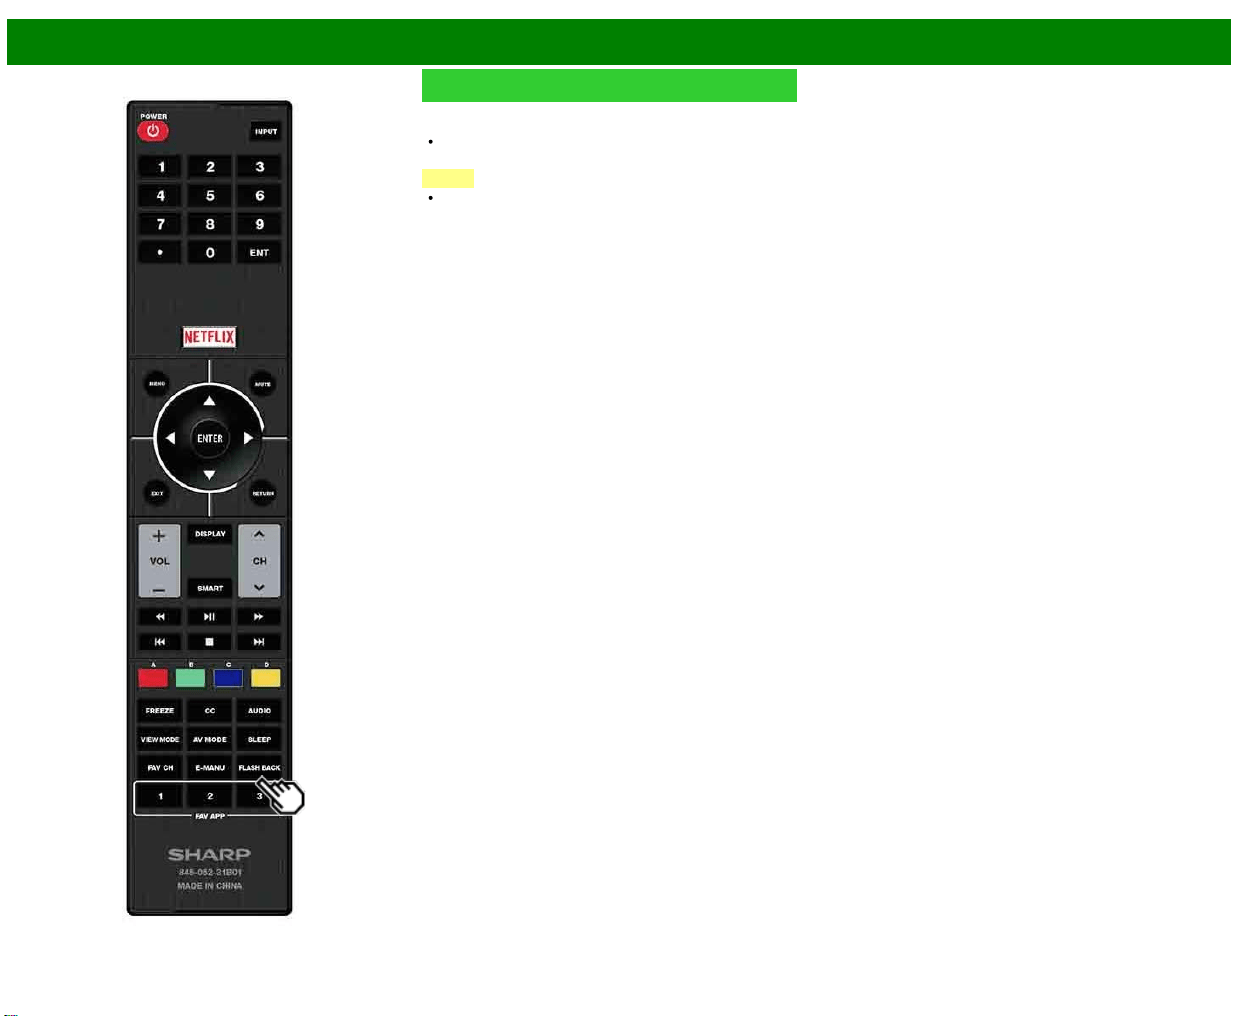
>>
<<
Funcionamiento directo mediante botón
ESP 3-5
FLASH BACK
Pulse FLASHBACK para cambiar al canal sintonizado
anteriormente o al modo de entrada anterior.
Pulse de nuevo FLASHBACK para cambiar al canal que
está actualmente sintonizado.
NOTA
FLASH BACK no funcionará si no se ha cambiado
ningún canal después de encender el televisor.
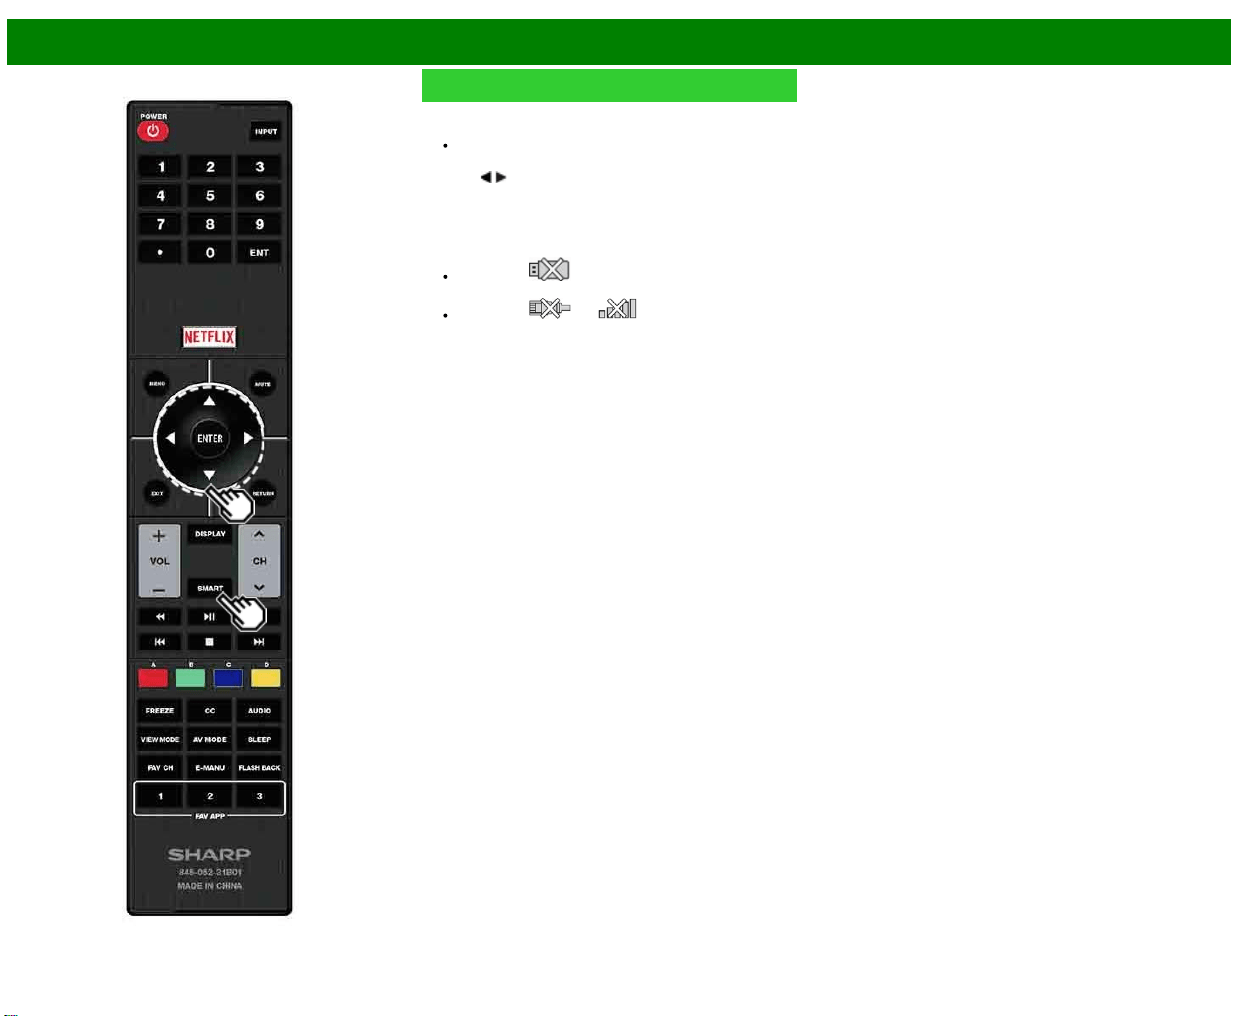
>>
<<
Funcionamiento directo mediante botón
ESP 3-6
SMART
Le permite activar varios tipos de aplicaciones directamente.
1 Pulse SMART para visualizar la ventana de aplicaciones.
Pulse de nuevo SMART para cambiar al canal que
está actualmente sintonizado.
2 Pulse
/ para seleccionar la aplicación deseada, y
luego pulse ENTER.
Si ha cambiado la pantalla de la lista de aplicaciones
en
el
paso
1,
seleccione
una
categoría
y luego
una
aplicación.
Si aparece " " tras haber cambiado a modo
USB, verifique la conexión USB.
Si aparece " " o " " tras haber cambiado al
modo Red Casera o tras conectarse a Internet,
verifique los ajustes y la conexión de red de su
televisor.

>>
<<
Funcionamiento directo mediante botón
ESP 3-7
NETFLIX
Visualiza la pantalla de Netflix.
Pulse NETFLIX.
NOTA
Si pulsa el botón NETFLIX cuando el televisor está
apagado, el televisor se enciende y se muestra la pantalla
NETFLIX.
Para disfrutar de Netflix, es necesario:
—disponer de conexión de banda ancha a Internet
—realizar ajustes en la Configuración de Internet
—realizar ajustes para Netflix
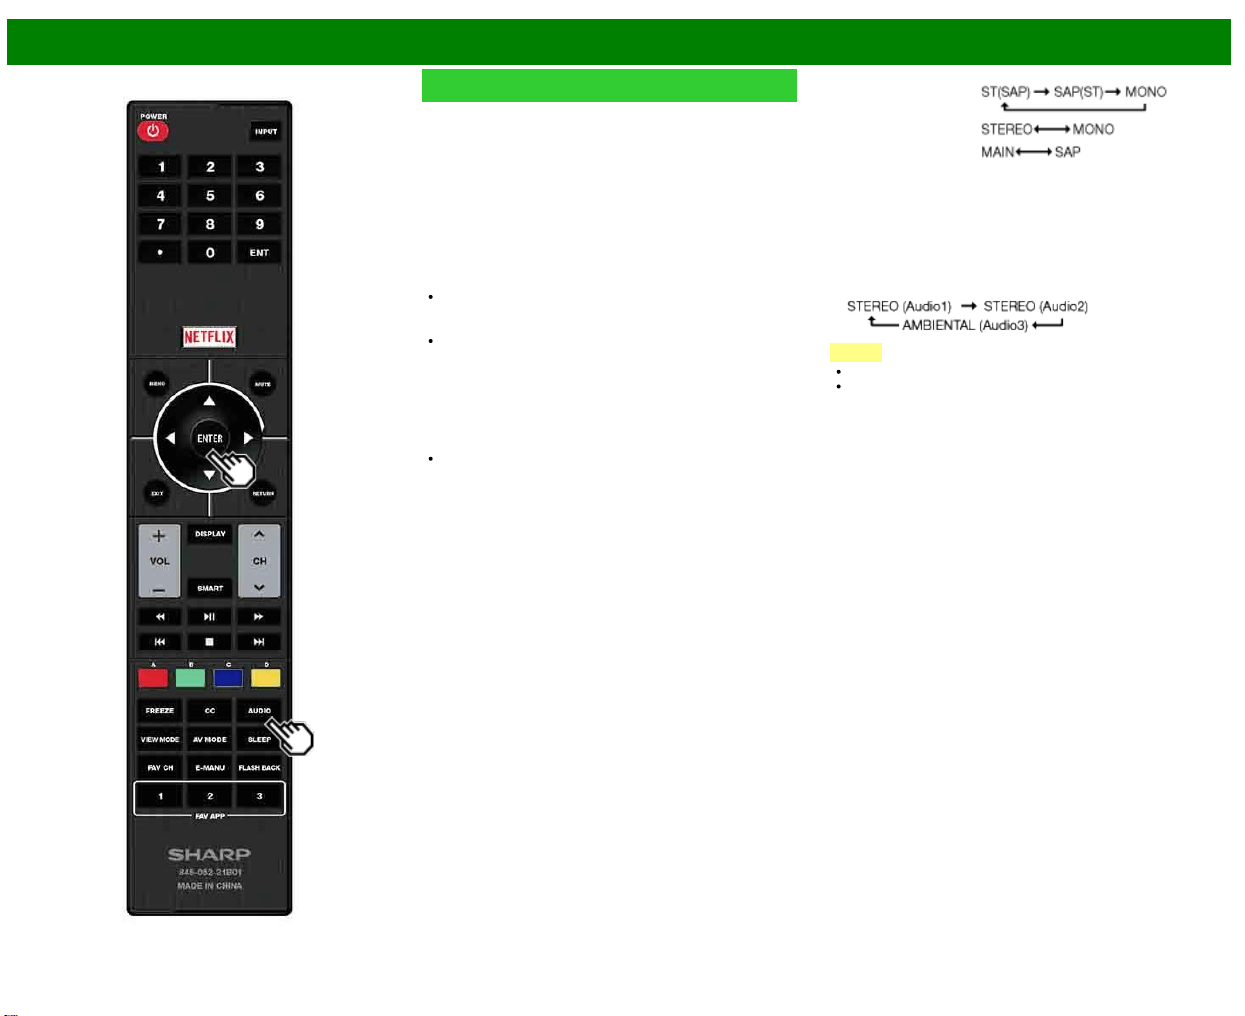
>>
<<
Funcionamiento directo mediante botón
ESP 3-8
AUDIO
Modo estéreo MTS/SAP
El televisor tiene una función que permite recibir sonido
diferente del audio principal para el programa. A esta
función se le llama sonido de televisión multicanal (MTS). El
televisor con MTS puede recibir sonido mono, sonido
estéreo y programas de audio secundarios (SAP). La
función SAP permite que una emisora de TV pueda emitir
otra información, que bien puede ser audio en otro idioma o
algo completamente diferente como, por ejemplo,
información relacionada con el tiempo meteorológico.
Podrá disfrutar de sonido estéreo de Hi-Fi o de
emisiones SAP donde se encuentren disponibles.
Emisiones estéreo: Vea programas como
acontecimientos deportivos, espectáculos y conciertos
con un sonido estéreo dinámico.
Emisiones SAP: Reciba emisiones de TV con sonido
MAIN o SAP.
Sonido MAIN: Pista de sonido de programa normal
(mono o estéreo).
Sonido SAP: Escuche un segundo idioma, un
comentario suplementario y otra información. (SAP es
sonido mono.)
Si el sonido estéreo se oye con dificultad.
Obtenga un sonido más claro cambiando manualmente al
modo de sonido mono fijo.
Puede cambiar MTS como se muestra abajo para que
concuerde con la señal de emisión de televisión.
Pulse AUDIO para cambiar entre los modos de audio.
Ejemplos: cuando se reciben MTS y SAP
Modo STEREO:
Modo STEREO + SAP:
Modo MAIN + SAP:
Modo MONO: MONO
Modo de audio de emisión digital
Los tipos de audio transmitidos en una emisión digital
incluyen AMBIENTAL, MONO y STEREO. Además, es
posible que múltiples pistas de audio acompañen a una sola
pista de vídeo.
Pulse ENTER para cambiar entre los modos de audio.
Ejemplo: cuando se recibe una emisión digital
NOTA
MTS sólo funciona en el modo TV.
Puede tener los mismos ajustes eligiendo "Cambiar
Audio" en los elementos del menú.
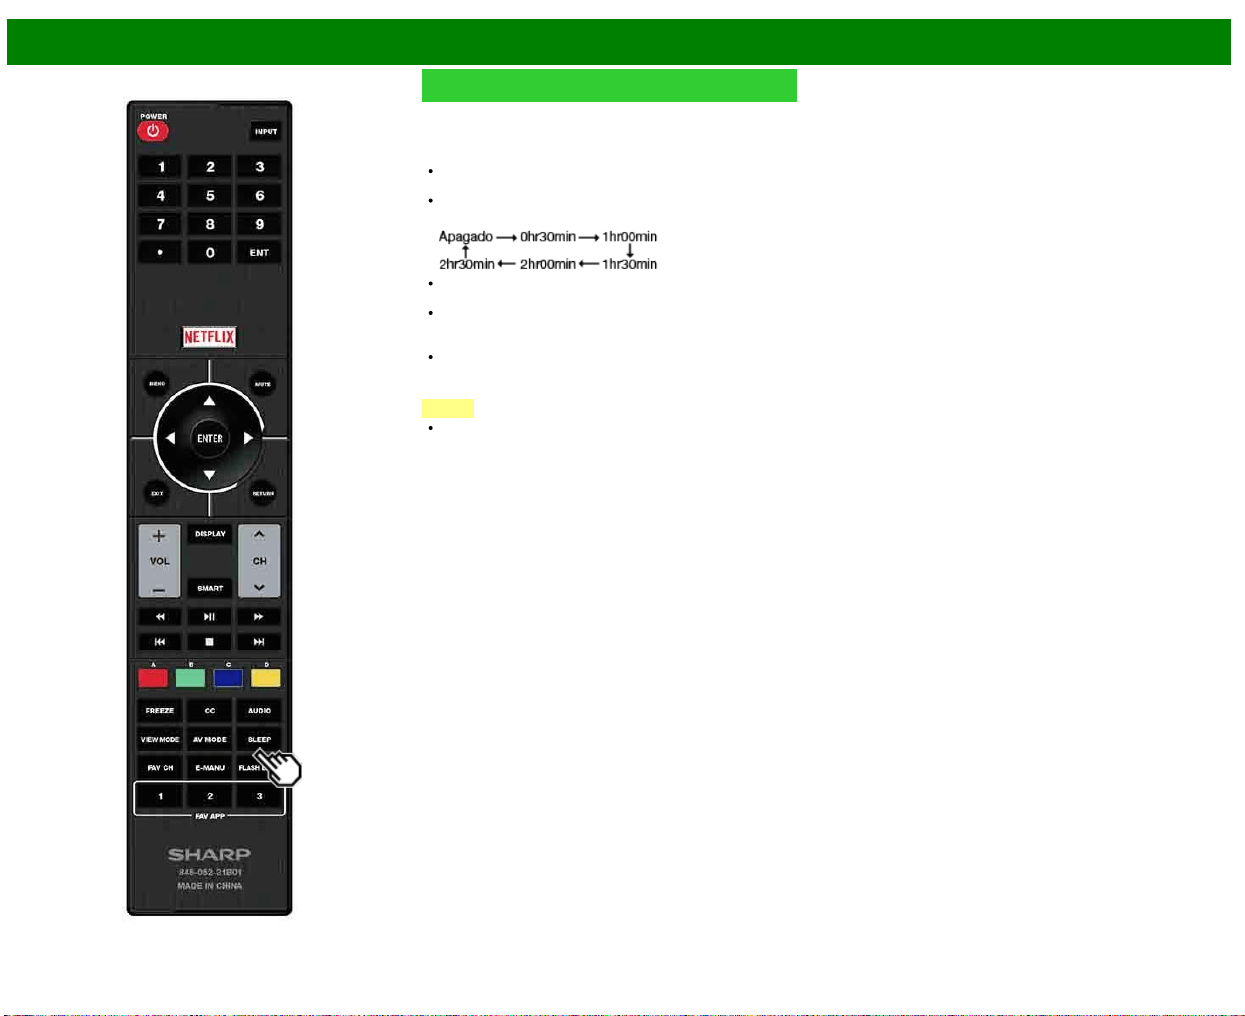
>>
<<
Funcionamiento directo mediante botón
ESP 3-9
Temporizador de apagado
Le permite poner un tiempo tras el cual el televisor se
pondrá automáticamente en el modo de alimentación en
espera.
Pulse SLEEP.
Cuando está ajustado el temporizador de apagado se
visualiza el tiempo restante.
Cada vez que pulse SLEEP, el tiempo restante cambiará
como se muestra más abajo.
Cuando establezca el tiempo, la cuenta descendente
empezará automáticamente.
Si desea ajustar el temporizador de apagado, podrá
pulsar dos veces SLEEP y luego cambiar el ajuste del
tiempo.
5 minutos antes de que se agote el tiempo, el tiempo
restante comenzará a aparecer continuamente a cada
minuto.
NOTA
El televisor entrará en espera cuando el tiempo restante
llegue a 0.
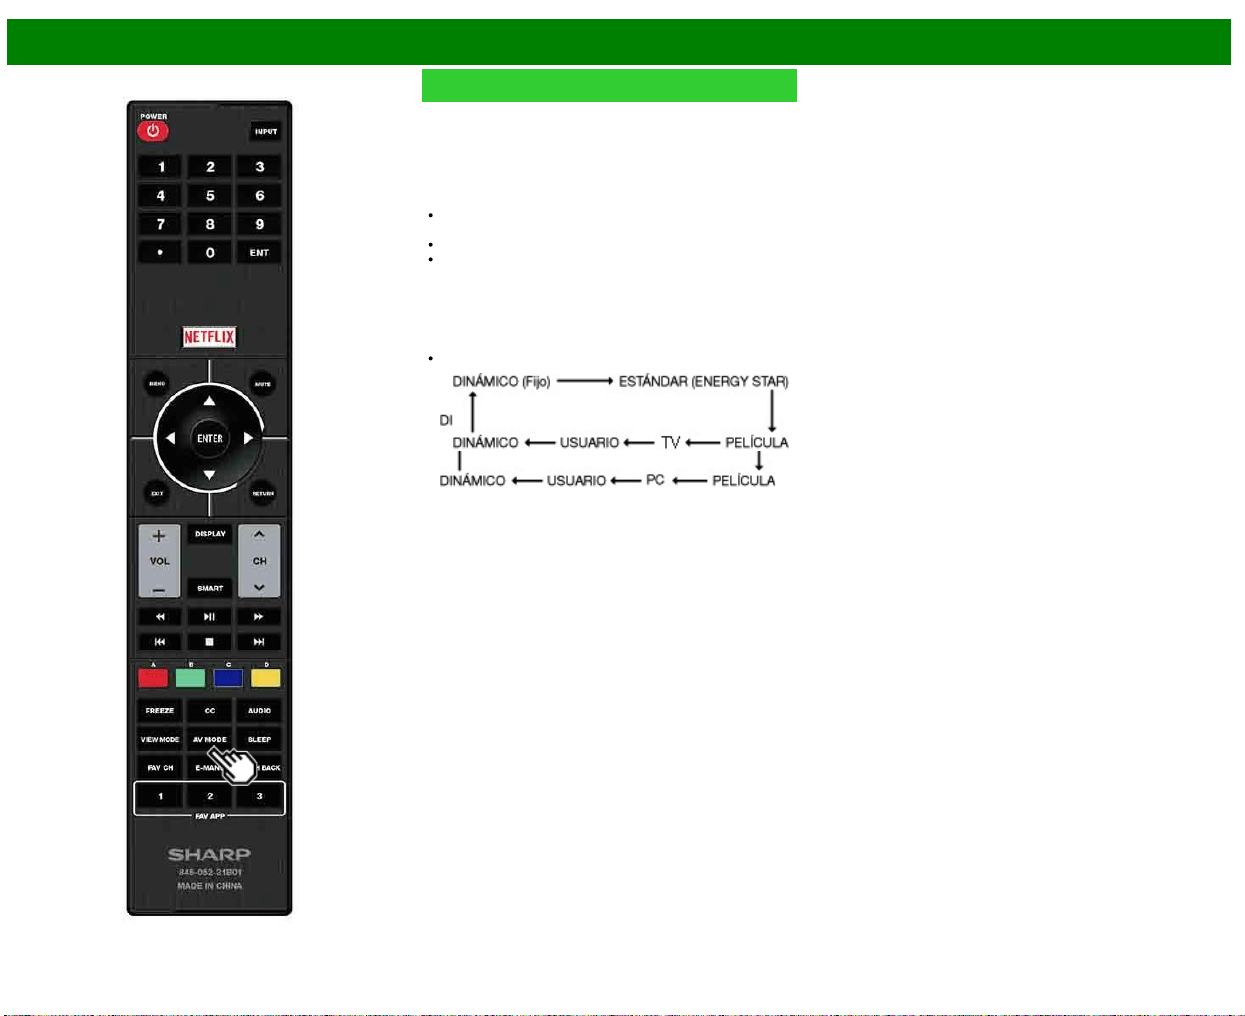
>>
<<
Funcionamiento directo mediante botón
ESP 3-10
AV MODE
MODO AV le permite elegir entre varias opciones de visión
para emplear aquella que mejor se adapte al ambiente que
rodea al TV, el cual puede cambiar debido a factores tales
como el brillo de la habitación, el tipo de programa que se
vea o el tipo de entrada de imagen procedente del equipo
externo.
Pulse AV MODE. Se visualiza el MODO AV actual.
Pulse de nuevo AV MODE antes de que desaparezca el
modo visualizado en la pantalla.
El modo cambia como se muestra abajo:
Ejemplo:
Al
usar
los
terminales
COMPONENT /
VIDEO
o
VIDEO
Ejemplo:
Cuando
se
utiliza
el
PC
IN o
HDMI
IN 1
a
3
terminales
>>
<<
Funcionamiento directo mediante botón
ESP 3-11
AV MODE (Continúa)
ESTÁNDAR (ENERGY STAR): Para una imagen
altamente definida en una iluminación normal.
PELÍCULA: Para una película.
PC: Para PC.
USUARIO: Permite al usuario personalizar los ajustes que
desee. Puede ajustar el modo para cada una de las
fuentes de entrada.
DINÁMICO: Para una imagen nítida que realza el
contraste, útil para ver programas deportivos.
DINÁMICO(Fijo): Cambia las opciones de imagen y sonido
a los valores preajustados en la fábrica. No se permite
hacer ajustes.
NOTA
Puede seleccionar un elemento de MODO AV diferente
para cada modo de entrada. (Por ejemplo, seleccione
ESTÁNDAR (ENERGY STAR) para entrada de TV y
DINÁMICO para COMPONENTES.)
No puede establecer "PC" cuando el televisor está
conectado a Internet.
No puede establecer "PC" cuando la fuente de entrada es
"Red Casera(Home Network)" o "USB".
Puede tener los mismos ajustes eligiendo "MODO AV" en
los elementos del menú.
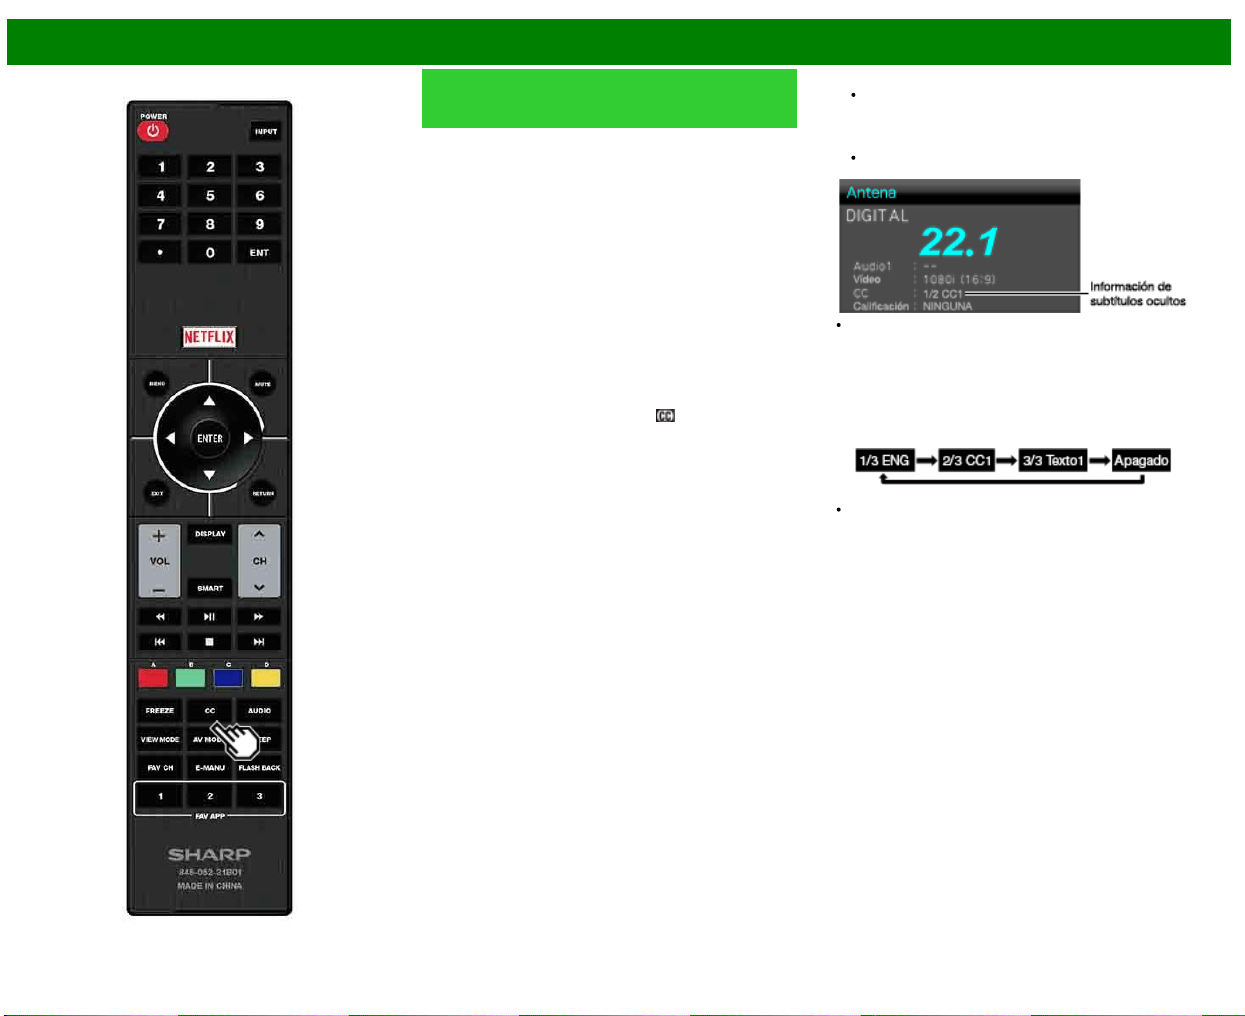
>>
<<
Funcionamiento directo mediante botón
ESP 3-12
Subtítulos ocultos y subtítulos
ocultos digitales
Su televisor está equipado con un decodificador interno de
subtítulos ocultos. Esto le permite ver en su televisor, a
modo de subtítulos, conversaciones, narraciones y efectos
de sonido. Los subtítulos ocultos se encuentran disponibles
en algunos programas de TV y en algunas cintas de vídeo
VHS de uso en casa, dependiendo del proveedor de los
programas.
El servicio de subtítulos ocultos digitales es un nuevo
servicio de subtítulos solamente disponible en programas de
TV digital (dependiendo también del proveedor de los
programas). Éste es un sistema más flexible que el sistema
de subtítulos ocultos original, ya que permite disponer de
una variedad de tamaños de subtítulos y estilos de las
letras. Cuando se utiliza el servicio de subtítulos ocultos
digitales, esto se indicará mediante la aparición de una
abreviatura de 3 letras que también indicará el idioma de
los subtítulos ocultos digitales: ENG (inglés), SPA (español)
o FRA (francés), u otros códigos de idiomas.
No todos los programas y videocintas VHS ofrecen
subtítulos ocultos. Busque el símbolo "
" para asegurarse
de que se mostrarán subtítulos.
En el sistema de subtítulos ocultos se puede proveer más
de un servicio de subtítulos. Cada uno de ellos se
identificará mediante su propio número. Los servicios "CC1"
y "CC2" muestran subtítulos de programas de TV
superpuestos sobre las imágenes de los programas.
En el sistema de subtítulos ocultos, los servicios "Texto1" o
"Texto2" muestran texto que no está relacionado con el
programa que se está viendo (ej. el tiempo meteorológico o
noticias). El texto de estos servicios también se superpone
sobre el programa que está viéndose.
1 Pulse CC.
Esto presentará la visualización de la información de
los subtítulos ocultos.
2 Pulse CC mientras la información de subtítulos ocultos
está aún en la pantalla.
Pulse repetidamente hasta que seleccione el servicio
de subtítulos ocultos deseado.
Dependiendo del número de servicios de subtítulos
disponible en la señal que esté siendo recibida, usted
verá información tal como 1/2 ó 1/4. 1/2 significa "el
primero de dos servicios".
Ejemplo:
Si un programa tiene tres servicios (Digital CC(ENG),
CC1 y Texto1), la visualización de los subtítulos ocultos
cambiará en este orden:
El botón CC mantiene un registro del último servicio
seleccionado en su memoria.
Si el último modo de subtítulos ocultos (ej. 1/3 ENG) que
usted seleccionó no está disponible para el siguiente
programa o en otro canal, el servicio de subtítulos
ocultos que se encuentre disponible se seleccionará
automáticamente, y este servicio aparecerá entre
paréntesis, por ejemplo "1/3(CC1)". Los servicios de
subtítulos ocultos que aparezcan entre paréntesis no se
grabarán en la memoria del botón CC como el último
servicio seleccionado. Sólo se grabarán los servicios que
usted haya seleccionado con el botón CC.
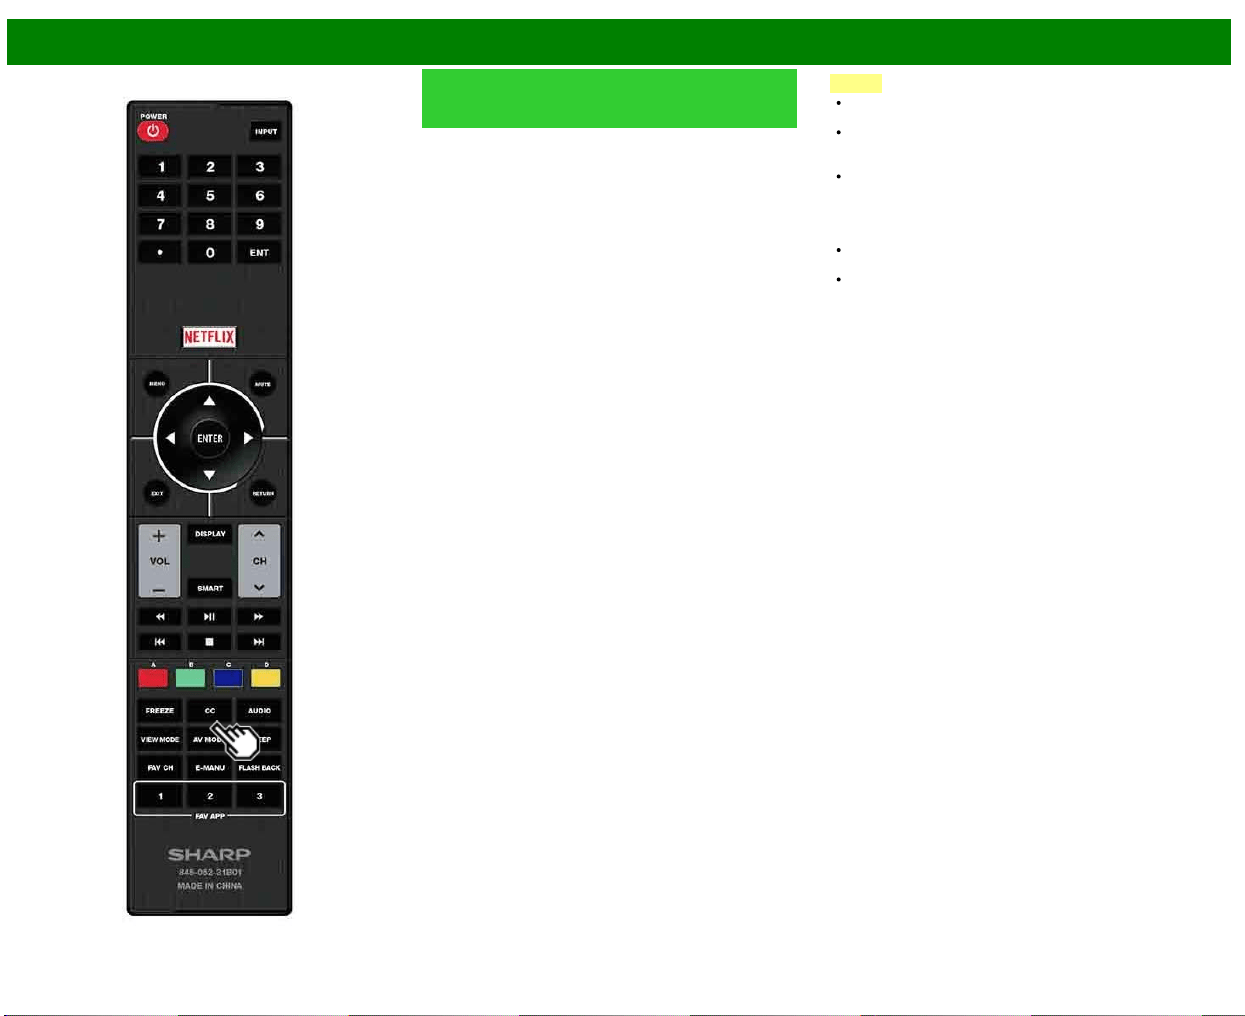
>>
<<
Funcionamiento directo mediante botón
ESP 3-13
Subtítulos ocultos y subtítulos
ocultos digitales (Continúa)
Ejemplos:
En un caso en que se suministren dos servicios de
subtítulos ocultos, (Digital CC(ENG) y CC1 por ejemplo), y
Digital CC(ENG) se visualice porque es lo que usted tiene
seleccionado actualmente, si Digital CC(ENG) no se emite
para el siguiente programa, el otro servicio de subtítulos
ocultos, CC1, se visualizará entre paréntesis.
Un servicio de subtítulos ocultos aparece entre paréntesis
porque el servicio que usted seleccionó no se encuentra
disponible y se visualiza un servicio diferente en su pantalla.
"1/1(CC1)" se visualiza en lugar de "1/2/ENG".
NOTA
Cuando el programa no tenga subtítulos ocultos, "--" se
visualizará en la información de subtítulos ocultos.
Si el código de idioma, "ENG" por ejemplo, no se
encuentra en los programas de televisión digital se
mostrará "--".
Hay potencialmente disponibles cuatro tipos de servicios
de subtítulos ocultos (CC1, CC2, Texto1, Texto2), pero a
elección del proveedor de programas, una emisión
puede no tener ninguno, o sólo algunos de esos
servicios.
Cuando se muestra una página Web, los subtítulos
ocultos no están disponibles.
Puede tener los mismos ajustes eligiendo "Cambiar CC"
en los elementos del menú.
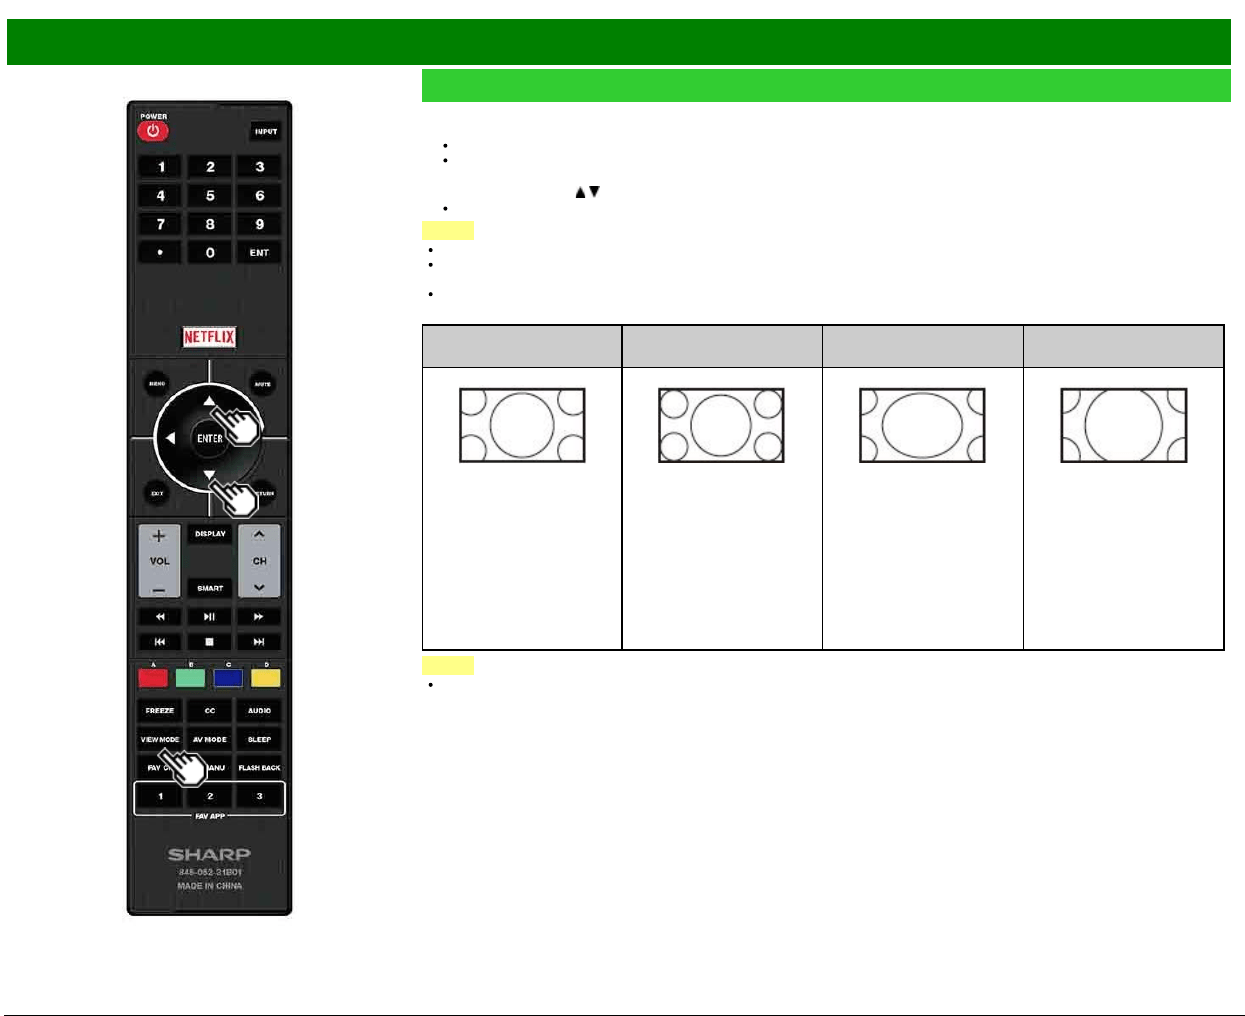
>>
<<
Funcionamiento directo mediante botón
ESP 3-14
VIEW MODE
Puede seleccionar el tamaño de la pantalla.
1 Pulse VIEW MODE.
El menú Modo de Vista se visualiza.
El menú lista las opciones del Modo de Vista que pueden seleccionarse para el tipo de señal de vídeo que está siendo
recibida actualmente.
2 Pulse VIEW MODE o
/ mientras está visualizado el menú Modo de Vista para seleccionar un elemento deseado en el menú.
Puede seleccionar consecutivamente un Modo de Vista que tenga su propia relación de aspecto.
NOTA
Puede tener los mismos ajustes eligiendo "Modo de Vista" en los elementos del menú.
Cada vez que pulse VIEW MODE cuando se muestre una pantalla del navegador, el patrón de visualización alterna entre una
pantalla solo de sitio web y una pantalla de televisor+web.
Use esta función durante la entrada de otros tipos de señales (como Full HD).
Para programas HD
Alarga.
Punto × punto
(Pantalla Completa)
Alarga. S
(Ampliación inteligente)
Zoom
Adecuado para ver
programas con una
relación de aspecto de
1,78:1 de pantalla
panorámica. El modo de
ampliación todavía
mostrará franjas negras
muy finas en la parte
superior e inferior de la
pantalla.
"Punto × punto" cuando el
número de píxeles en la
pantalla y la resolución de
la señal son la misma.
"Pantalla Completa" cuando
el número de píxeles en la
pantalla y la resolución de
la señal son diferentes. En
ambos casos, la imagen
abarca por completo la
pantalla.
Sirve para ampliar programas
4:3 de forma que llenen la
pantalla.
Adecuado para ver
programas con una relación
de aspecto de 2,35:1 de
pantalla panorámica en
toda la pantalla.
NOTA
Cuando utilice la función Punto g punto o Pantalla Completa es posible que se vean barras o ruido alrededor de partes
exteriores diferentes de la pantalla. Cambie el modo de vista para corregir esto.
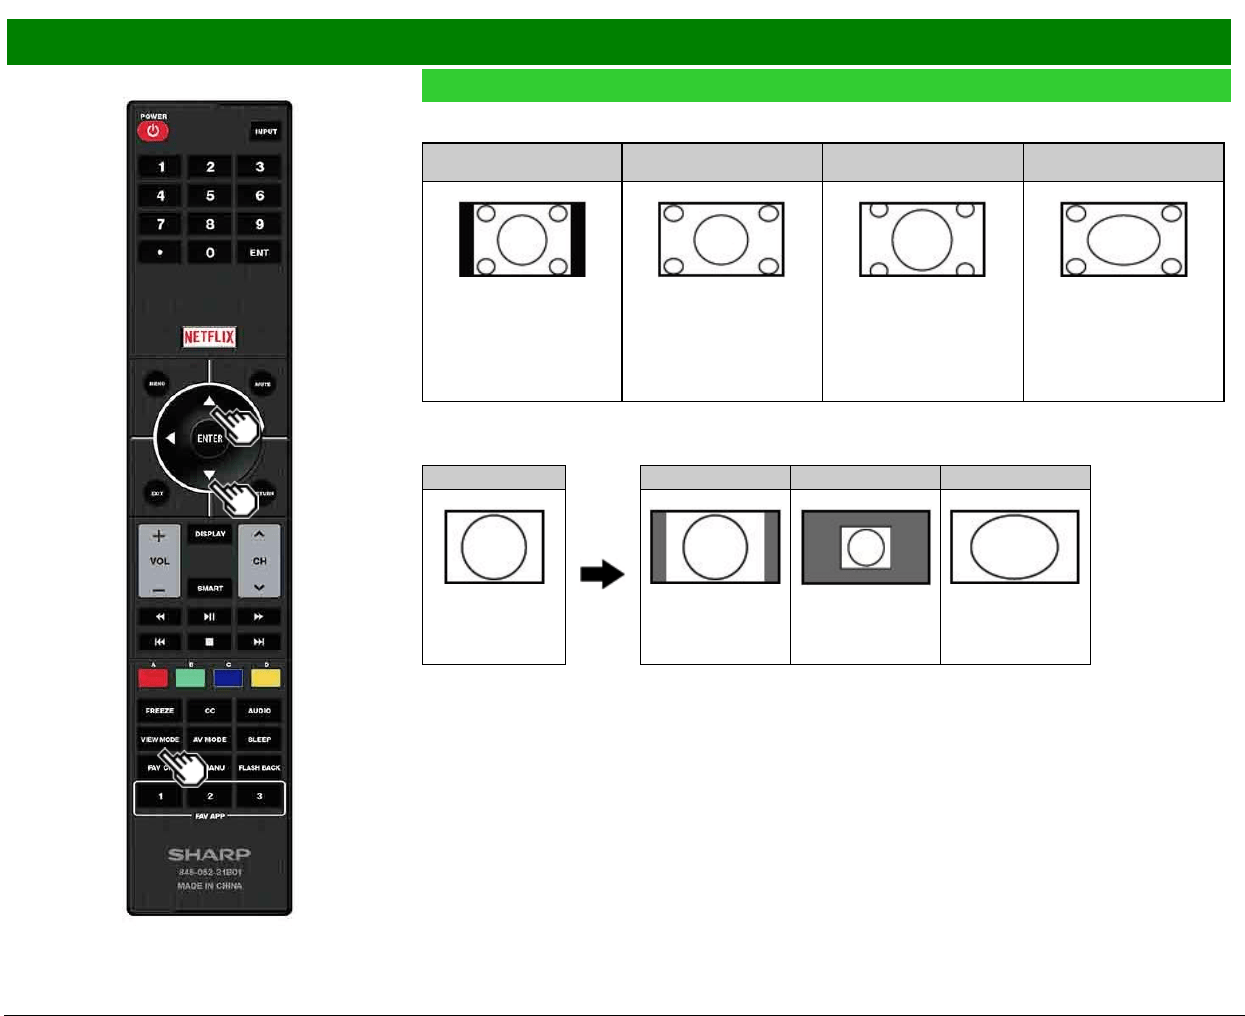
>>
<<
Funcionamiento directo mediante botón
ESP 3-15
VIEW MODE (Continúa)
Para programas 4:3
Ejemplo: Imágenes de tamaños de pantallas
Barra Lateral
Alarga. S
(Ampliación inteligente)
Zoom Alarga.
Sirve para ver programas 4:3
convencionales en su formato
normal.
Sirve para ampliar programas
4:3 de forma que llenen la
pantalla.
Sirve para ver DVDs
anamórficos 2,35:1 de pantalla
panorámica en toda la
pantalla.
Este modo sirve para los
DVDs 1,78:1. Cuando vea
DVDs 1,85:1, el modo de
ampliación todavía mostrará
franjas negras muy finas en la
parte superior e inferior de la
pantalla.
Para USB-Vídeo, Vídeo de red casera o aplicaciones de Internet
Ejemplo: Imágenes de tamaños de pantallas
Señal de entrada Auto Original Alarga.
Mantiene la relación
de aspecto original en
una pantalla
completa.
Visualiza una imagen
por un tamaño origina
Una imagen llena
completamente la
pantalla.

>>
<<
Funcionamiento directo mediante botón
ESP 3-16
VIEW MODE (Continúa)
Para PC
Ejemplo: Imágenes de tamaños de pantallas
Señal de entrada Normal Zoom Alarga. Punto × punto
4:3 Mantiene la relación
de aspecto original en
una pantalla
completa.
Para ver programas
en pantalla
panorámica. Las
partes superior e
inferior de la imagen
están recortadas.
Una imagen llena
completamente la
pantalla.
Detecta la resolución
de la señal y visualiza
una imagen con el
mismo número de
píxeles en la pantalla.
Señal de entrada Alarga. Punto × punto
16:9 Una imagen llena
completamente la
pantalla.
Detecta la resolución
de la señal y visualiza
una imagen con el
mismo número de
píxeles en la pantalla.
NOTA
Conecte el PC antes de hacer ajustes. Consulte la Guía de Instalación.
El tamaño de la pantalla seleccionable puede variar según el tipo de la señal de entrada.
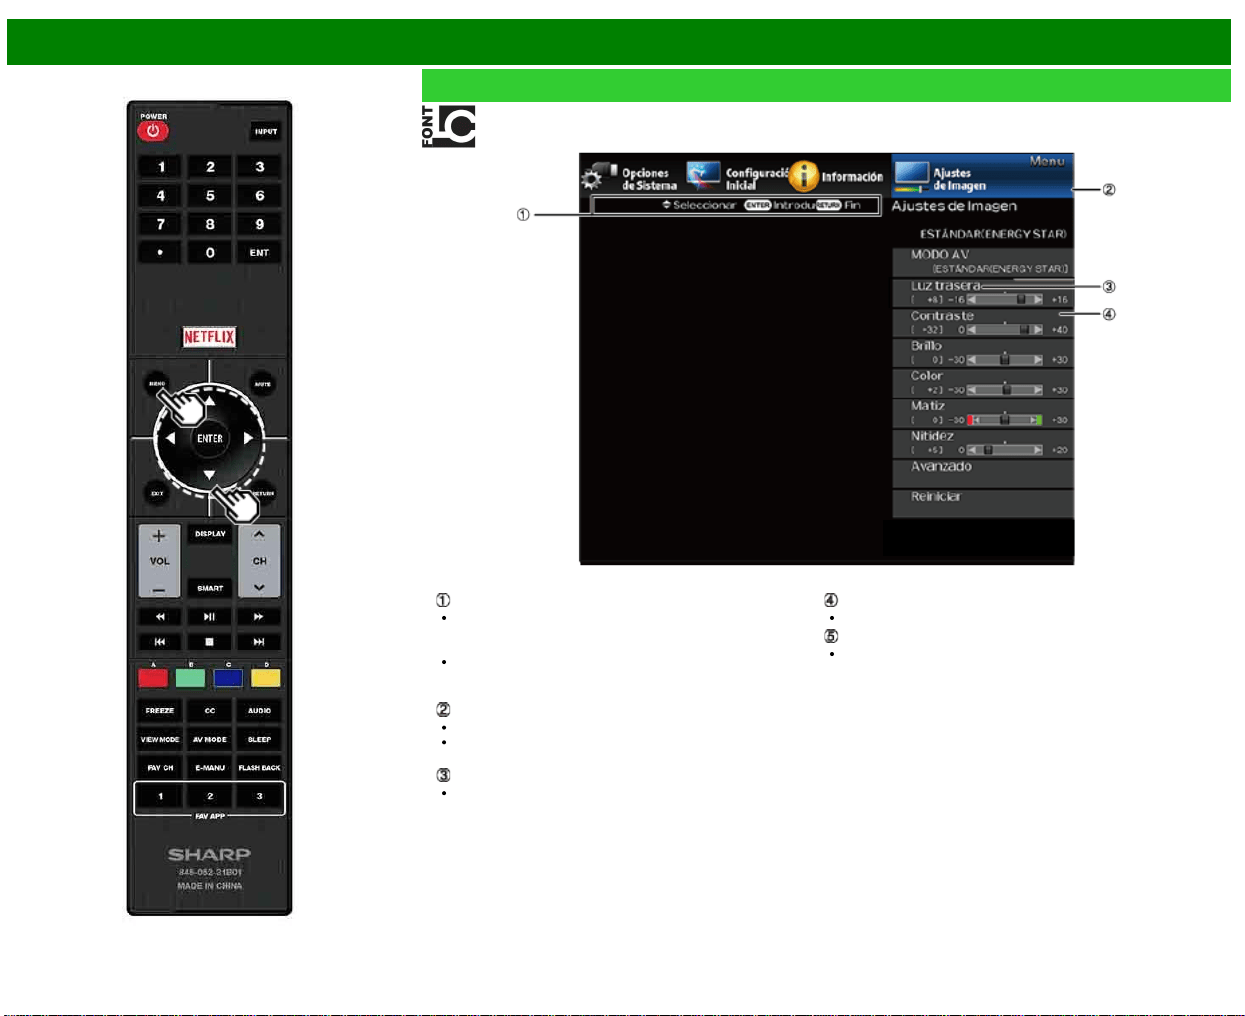
>>
<<
Menú en pantalla
ESP 4-1
Introducción
LCFONT contenida
Pantalla guía
Esto indica los botones que se pueden operar en la
pantalla exhibida. La pantalla guía varía según la
pantalla de ajuste de menú.
Las operaciones para algunos elementos seleccionados
se pueden presentar en la barra de guía de operación
de la parte inferior de la pantalla.
Elemento visualizado en azul
Esto indica el elemento actualmente seleccionado.
Pulse ENTER para pasar a la pantalla de ajuste para
este elemento.
Elemento entre corchetes
Esto indica el ajuste actual para el elemento.
Elemento visualizado en blanco
Esto indica que el elemento puede ser seleccionado.
Elemento visualizado en gris
Esto indica que el elemento no puede ser seleccionado.
Hay varias razones por las cuales los elementos no
pueden ser seleccionados, pero las razones principales
son las siguientes:
— No hay nada conectado al terminal de entrada
seleccionado.
— La función no es compatible con la señal de entrada
actual.
— Si se produce un conflicto con otras funciones, debe
cambiar los parámetros de las otras funciones.
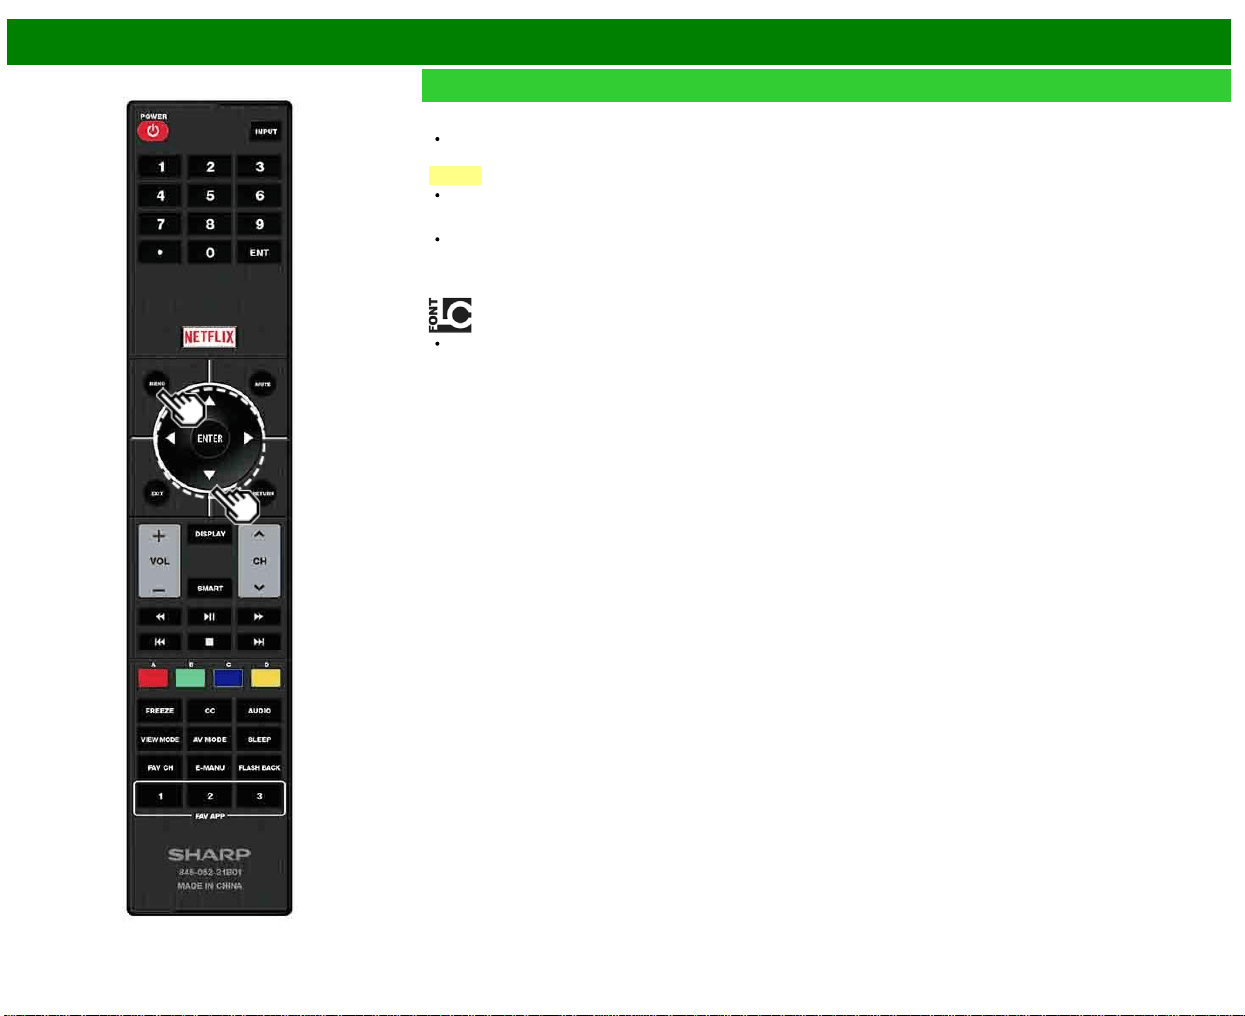
>>
<<
Menú en pantalla
ESP 4-2
Introducción (Continúa)
Sobre los elementos del menú
Dependiendo de la fuente de entrada seleccionada puede
ser que no se visualicen algunos elementos de menú.
NOTA
Las pantallas en el manual de operación se ofrecen con
fines explicativos (algunas ampliadas, otras recortadas) y
pueden ser un poco diferentes de las pantallas reales.
El orden de las explicaciones para cada elemento del
menú en las siguientes páginas no necesariamente está
de acuerdo con la alineación de los elementos en
pantalla.
LCFONT:
Este producto contiene la tecnología LC Font, que ha sido
desarrollada por SHARP Corporation para exhibir
claramente caracteres fáciles de leer en las pantallas
LCD.
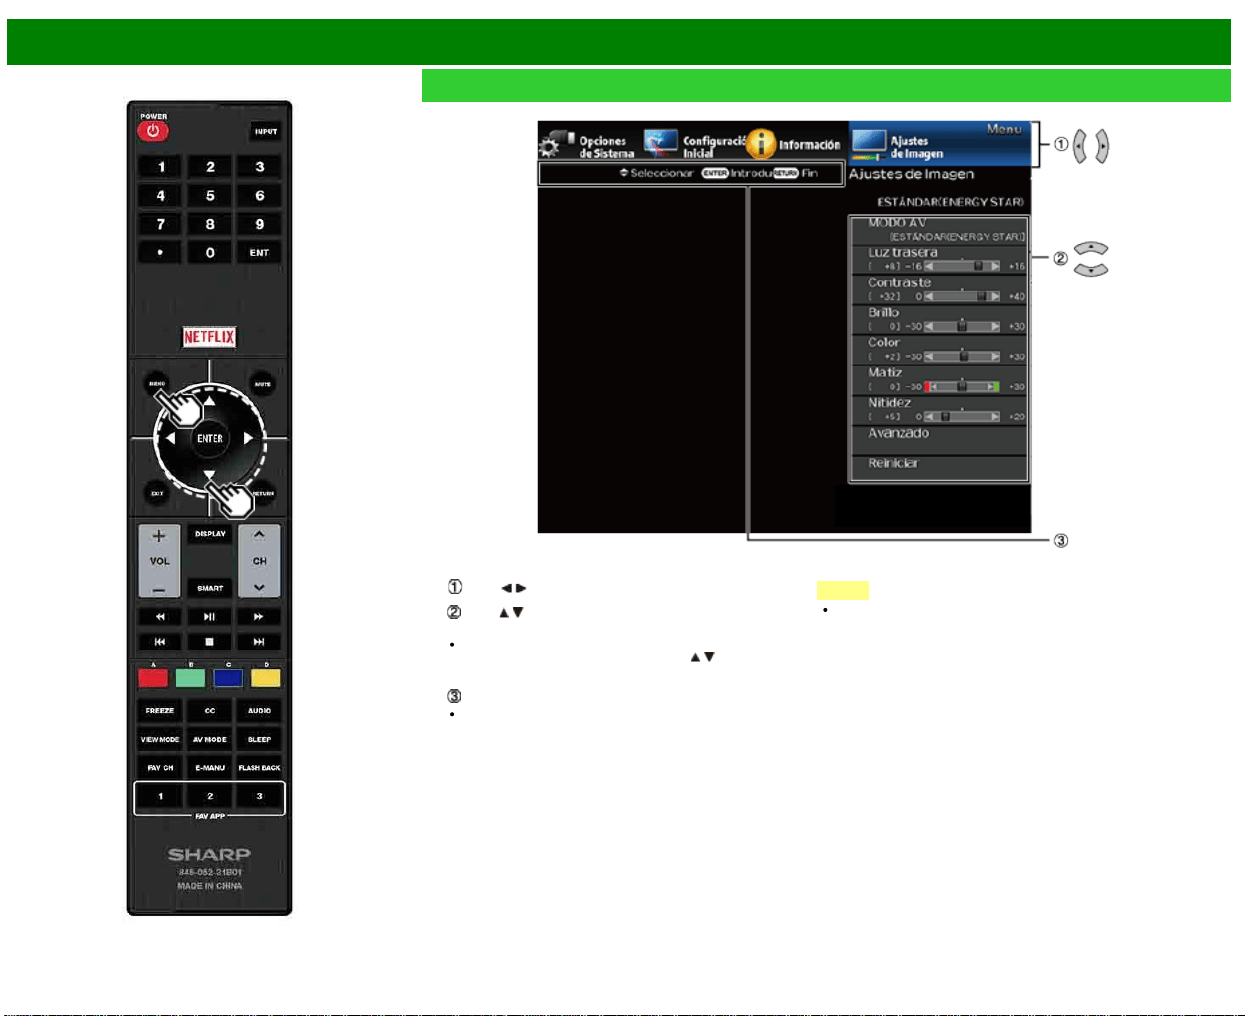
>>
<<
Menú en pantalla
ESP 4-3
Funcionamiento del menú en pantalla
Ejemplo
1 Pulse MENU para visualizar la pantalla MENÚ.
2
Pulse / para seleccionar el menú deseado.
Pulse / para seleccionar un elemento de ajuste
específico, y luego pulse ENTER.
Es posible que se presenten elementos adicionales de
ajuste que estén relacionados. Pulse
/ para
seleccionar el elemento deseado.
Ajuste el elemento al consultar la pantalla guía.
Las operaciones varían según la función o elemento.
Consulte la pantalla guía correspondiente a la pantalla
de ajuste del menú para operaciones con botones.
3 Pulse MENU para salir.
NOTA
Las opciones del menú difieren en los modos de entrada
seleccionados, pero los procedimientos de operación son
los mismos.
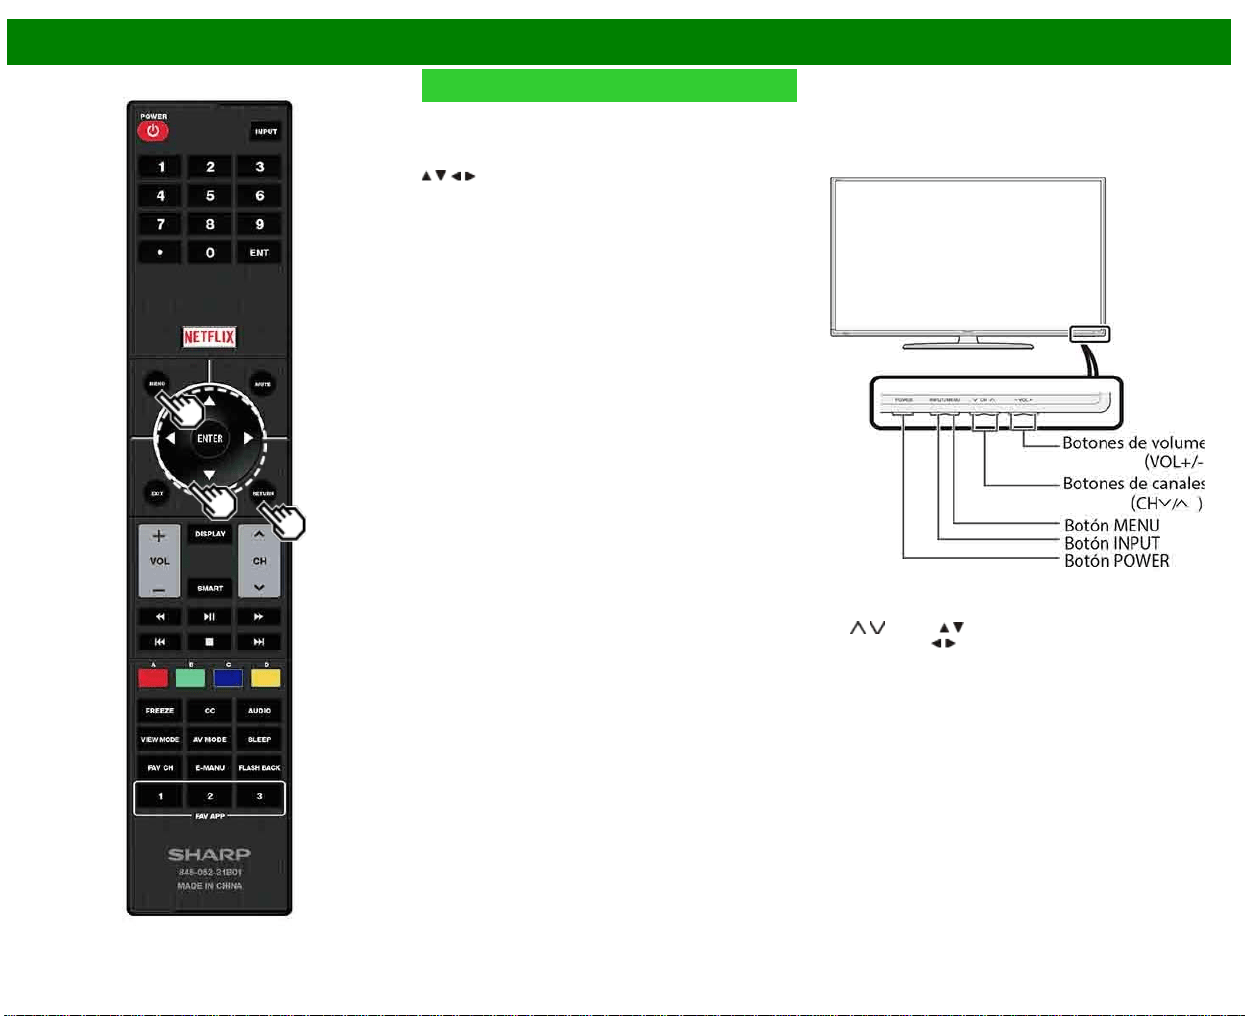
>>
<<
Menú en pantalla
ESP 4-4
Botones de operación del menú
Usando el control remoto
Utilice los siguientes botones en el control remoto para
controlar el menú.
MENU: Pulse para abrir o cerrar la pantalla de menú.
/ / / : Pulse para desplazar un elemento deseado en la
pantalla o ajustar un elemento seleccionado.
ENTER: Pulse para pasar al paso siguiente o completar el
ajuste.
RETURN: Pulse para volver al paso anterior.
Usando el panel de control del televisor
También puede operar el menú con el panel de control del
televisor.
Las operaciones con botones en el panel de control
corresponden a las del control remoto como se indica
abajo.
MENU: MENU en el control remoto.
INPUT: ENTER en el control remoto.
CH
/ : Cursor / en el control remoto.
VOL+/-: Cursor
/ en el control remoto.

>>
<<
Menú en pantalla
ESP 4-5
Ejemplo
Configuración Inicial
NOTA
Para operar el menú en pantalla,
Consulte la página 4-3.
Al seleccionar “Configuración”, “Ajuste de Canal”,
“Control Paterno” o “Reiniciar”, puede introducir aquí el
número secreto de 4 dígitos.
Autoinstalación
Puede ejecutar Autoinstalación de nuevo, incluso después
de haber configurado los canales preajustados.
Idioma: Seleccione entre 3 idiomas (Inglés, Francés y
Español).
Locación & Hora: Realice los ajustes de acuerdo con el
país, área y zona horaria en la que utiliza el televisor.
Seleccione su País: Seleccione "Estados Unidos",
"Canadá" o "México".
Seleccione su zona horaria: Seleccione su zona horaria.
Los ajustes disponibles difieren en función del país
seleccionado.
Seleccione Horario de Verano: Seleccione "Automático",
"Manual" o "Apagado".
Ubicación TV: Seleccione "Casa" o "Tienda" según el
lugar en el que va a instalar el televisor. Este producto
cumple con ENERGY STAR en modo predeterminado
de ajuste para Casa.
Casa: MODO AV se establece en "ESTÁNDAR (ENERGY
STAR)".
Tienda: MODO AV se establece en "DINÁMICO(Fijo)". Se
puede establecer Reiniciar Imagen y Demo.
Reiniciar Imagen: MODO AV se establece en
"DINÁMICO(Fijo)" independientemente de si Reiniciar
Imagen se encuentra en "Encendido" o en "Apagado". Si
se selecciona "Encendido", MODO AV se restablecerá en
"DINÁMICO(Fijo)" si no se realiza ninguna operación
durante 30 minutos. Cuando se selecciona "Apagado",
MODO AV se establecerá en "DINÁMICO(Fijo)".
Demo: Cuando se selecciona "Encendido", una vez
completados todos los ajustes, la pantalla de Demo se
visualiza si no se realiza ninguna operación durante varios
minutos.
La calificación ENERGY STAR está basada en el
MODO AV "ESTÁNDAR (ENERGY STAR)".
Antena & Cable/STB: Seleccione el tipo de conexión que
utilizará para ver la televisión.
Ant./Cable: Asegúrese de la clase de conexión que se
hace con su televisor cuando se selecciona "Antena" o
"Cable".
Busq. Canal: La búsqueda automática de canales hace
que el televisor busque todos los canales que puedan
verse en la zona establecida.
Si seleccione "Cable" para la configuración de la
antena, los canales codificados se eliminarán una vez
que se haya completado la búsqueda de canales.
Smart TV: Cuando se conecte a Internet en el televisor,
confirme el método de conexión y haga ajustes.
La conexión LAN inalámbrica solo es posible cuando
se utiliza el método WPS (pulsador). Si se utiliza
cualquier otro método, haga los ajustes en Smart TV >
Configuración de Internet > Ajuste de Red.
Completado: Se visualiza la pantalla de confirmación de
los ajustes. Confirme la información que se visualiza en
la pantalla.
NOTA
Consulte la Preparación inicial en las
Consulte la páginas 2-2 a 2-7 para ajustar cada
elemento.
Si no se encuentra ningún canal, asegúrese de la clase
de conexión que se ha hecho con su televisor e intente
de nuevo "Configuración".
Si selecciona "Comienzo de búsqueda analógica" e inicia
la búsqueda de canal, se borrará Mem. Canal para
Cable Digital.

>>
<<
Menú en pantalla
ESP 4-6
Ejemplo
Configuración Inicial (Continúa)
Idioma
También puede seleccionar un idioma desde el menú
Configuración Inicial. Seleccione entre 3 idiomas: Inglés,
Francés y Español.
NOTA
Para cambiar el idioma del manual, seleccione "Menu" >
"Configuración Inicial" > "Idioma" y cambie el idioma. A
continuación,
Ajustes de Canal
Channel Setup
Si la preparación inicial no memoriza todos los canales de
su región, siga las instrucciones de abajo para memorizar
manualmente los canales.
Ant./Cable: Asegúrese de la clase de conexión que se
hace con su televisor cuando se selecciona "Antena" o
"Cable".
Busq. Canal: La búsqueda automática de canales hace
que el televisor busque todos los canales que puedan
verse en la zona establecida.
Mem. Canal: Puede seleccionar los canales que quiere
omitir para cada uno de los tipos de señal,< ANALOG
(Ant.), ANALOG(Cable), DIGITAL(Ant.) y DIGITAL
(Cable).
Encendido: Se omiten canales. (Selección de canales
desactivada utilizando CH
/ .)
Apagado: No se omiten canales. (Selección de canales
activada utilizando CH
/ .)
Elim. canal codif.: Esta función hace que el televisor
busque y elimine los canales digitales por cable que
están codificados y por lo tanto no están disponibles en
el área establecida. El proceso puede durar más de 20
minutos.
Sí: Comienza a eliminar canales codificados.
No: No se realiza esta función.
NOTA
Consulte la Preparación inicial en las
Consulte la páginas 2-2 a 2-7 para ajustar cada
elemento.
Si no se encuentra ningún canal, asegúrese de la clase
de conexión que se ha hecho con su televisor e intente
de nuevo la búsqueda de canal.
Si selecciona "Comienzo de búsqueda analógica" e inicia
la búsqueda de canal, se borrará Mem. Canal para
Cable Digital.
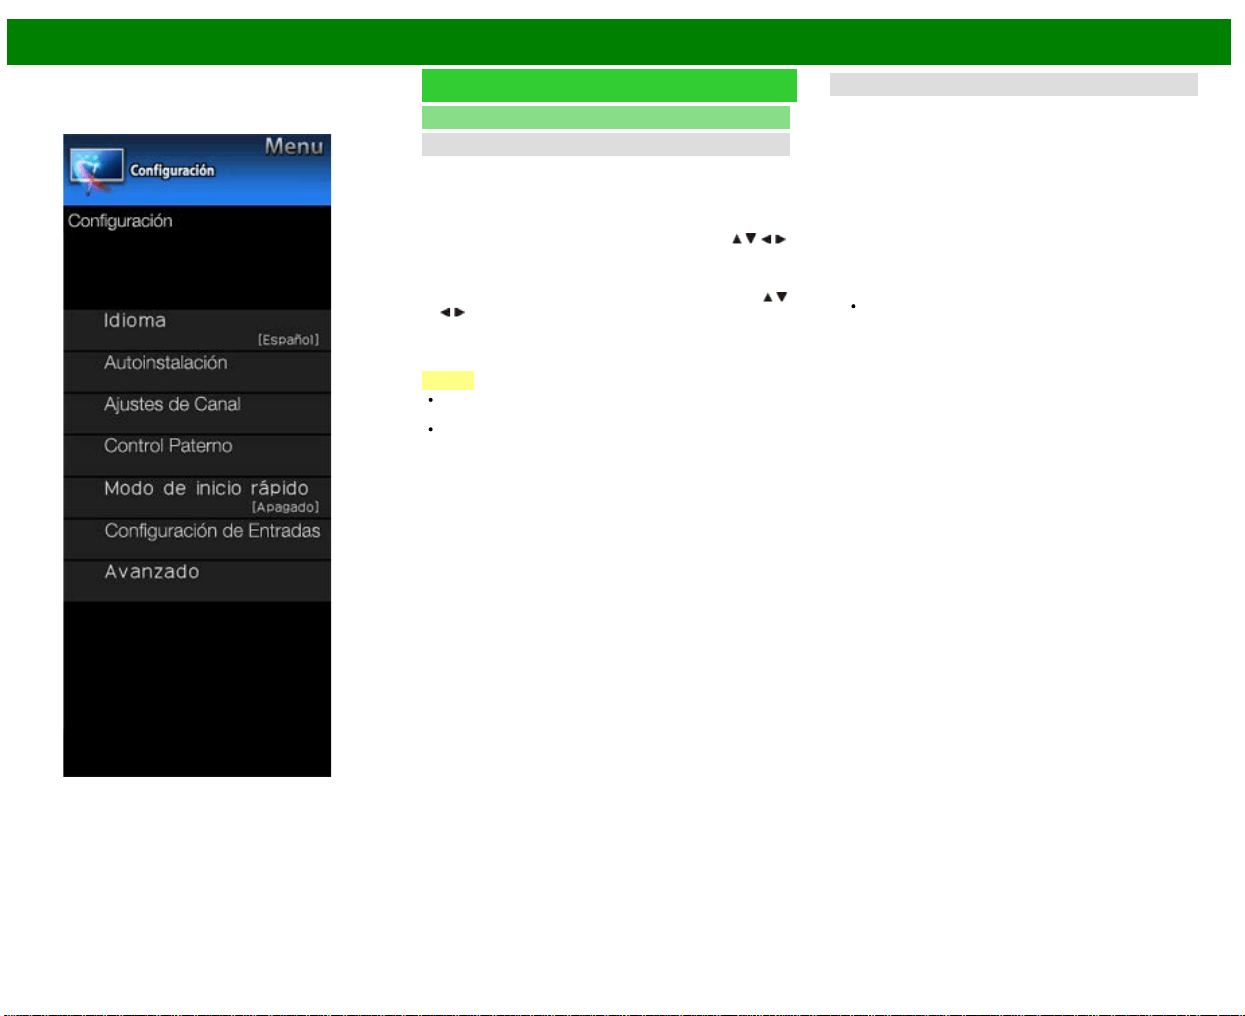
>>
<<
Menú en pantalla
ESP 4-7
Ejemplo
Configuración Inicial (Continúa)
Ajustes de Canal
Canal favorito (Ajuste de los canales favoritos)
Esta función le permite programar 4 canales favoritos en 4
categorías diferentes. Estableciendo de antemano los
canales favoritos, usted podrá seleccionarlos luego
fácilmente.
Para almacenar su canal favorito:
Seleccione "Registro" y luego pulse ENTER. Pulse
/ / /
para seleccionar la posición en la categoría, y luego pulse
ENTER para registrar.
Para borrar su canal favorito:
Seleccione "Borrar 1 dato" y luego pulse ENTER. Pulse
/
/ / para seleccionar el canal que quiera borrar, y luego
pulse ENTER. Seleccione "Sí" y luego pulse ENTER.
Para borrar todos los canales favoritos, seleccione "Borrar
todos los datos".
NOTA
Antes de ajustar el canal, seleccione el canal que quiera
registrar como canal favorito.
Puede visualizar la pantalla "Canal favorito" pulsando
FAVORITE CH en el control remoto.
Aj. de antena-DIGITAL
Para recibir las emisiones del aire digitales se necesita una
antena para emisiones digitales. Puede confirmar la
configuración de la antena mediante la pantalla "Aj. de
antena-DIGITAL". En caso de ser necesario, ajuste el
sentido de la antena para obtener la máxima intensidad de
la señal.
Intensidad señal: Se visualiza la intensidad de la señal
del canal DIGITAL. La información de la señal se basa
en el canal actual.
Intensidad canal: Introduzca el número del canal de 2
dígitos para comprobar la intensidad de la señal del
canal seleccionado. Asegúrese de que la señal tenga la
intensidad suficiente para cada canal.
Esta función sólo está disponible para DIGITAL (Ant.).
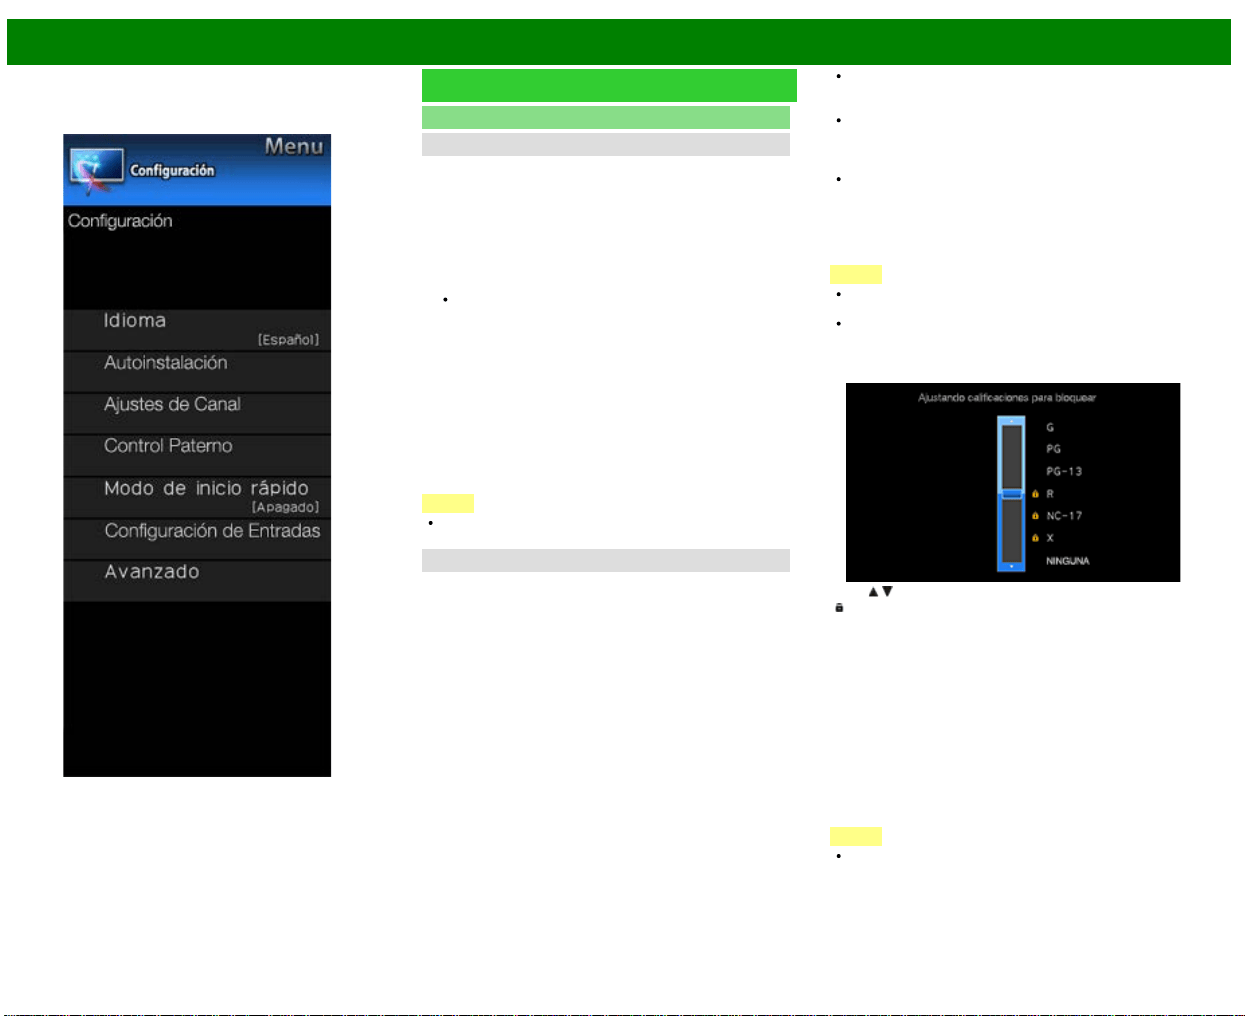
>>
<<
Menú en pantalla
ESP 4-8
Ejemplo
Configuración Inicial (Continúa)
Ajuste Individual
No. secreto
Le permite utilizar un número secreto para proteger ciertos
ajustes y evitar que sean cambiados por accidente.
IMPORTANTE:
Para activar el V-Chip se deben cumplir tres
condiciones
1. El número secreto debe estar registrado.
2. Los ajustes V-Chip/V-Chip (Sólo DTV) deben estar
hechos.
El "V-Chip (Sólo DTV)" sólo podrá seleccionarse
cuando pueda descargarse un nuevo sistema de
calificación vía emisión digital en Estados Unidos.
3. "Estado" debe estar en "Encendido".
Nuevo No. secreto
Puede establecer y cambiar el número secreto utilizando las
teclas 0-9.
Sí: Cambia o pone el número secreto.
No: La pantalla para borrar el número secreto aparece
cuando se ha establecido el número secreto. Si el
número secreto no se ha establecido, se exhibirá la
pantalla anterior.
NOTA
Como medida de precaución, anote su número secreto y
guárdelo en un lugar donde no lo pierda.
Control Paterno
V-Chip
V-CHIP es un dispositivo electrónico de filtración
incorporado en su televisor. Esta herramienta permite que
los padres controlen considerablemente las emisiones a las
que puedan acceder sus hijos. Los padres pueden elegir
programas que consideren adecuados para sus hijos y
bloquear aquellos que no juzguen adecuados. Lo hace
automáticamente una vez que usted activa la función V-
CHIP en su televisor. "V-Chip" y "Estado" no se
seleccionarán desde el menú si usted no configura primero
su número secreto.
En los EE.UU. hay dos sistemas de calificación para ver
imágenes reproducidas: consejos de TV para los padres
y calificaciones de películas.
Los consejos de TV para los padres funcionan en
combinación con el V-CHIP para que los padres puedan
evitar que sus hijos vean programas de televisión
inapropiados para ellos.
Las calificaciones de películas se utilizan para las
películas originales calificadas por la Asociación
Cinematográfica de América (MPAA) para ser vistas por
TV por cable y que no han sido editadas para ver por
televisión. El V-CHIP también se puede ajustar para
bloquear las películas calificadas por la MPAA.
NOTA
El ajuste entra automáticamente en "Bloqueo" para
cualquier calificación inferior a la que usted ha elegido.
Si Estado no se pone en "HABILITAR", los ajustes de
configuración no se activarán.
MPAA (Sistema de calificación voluntaria para películas)
Ejemplo
Pulse / para ajustar el elemento en su posición deseada.
"
" indica que el elemento está bloqueado. Pulse MENU
para salir.
G: Público en general. Todas las edades admitidas.
PG: Se sugiere la presencia de los padres. Puede que algo
del material no sea adecuado para los niños.
PG-13: Se recomienda la presencia de los padres. Puede
que algo del material no sea adecuado para niños de
menos de 13 años.
R: Restringido. Los menores de 17 años deben ir
acompañados por los padres o un adulto encargado de
ellos (la edad cambia en algunas jurisdicciones).
NC-17: No se admite a nadie menor de 17 años.
X: La clasificación X es una categoría antigua que se
encuentra unificada con NC-17, pero todavía puede
encontrarse codificada en los datos de películas antiguas.
NOTA
El sistema de calificación voluntaria para películas sólo
utiliza una calificación basada en la edad.

>>
<<
Menú en pantalla
ESP 4-9
Ejemplo
Configuración Inicial (Continúa)
Ajuste Individual
Control Paterno
Consejos de TV para los padres
Ejemplo
Edad sugerida
TV-Y: Todos los niños
TV-Y7: Dirigida a los niños mayores
TV-G: Público en general
TV-PG: Se sugiere la presencia de los padres
TV-14: Se recomienda la presencia de los padres
TV-MA: Para público adulto solamente
Cuando ajuste un elemento individual de
calificación basado en el contenido:
1 Pulse
para acceder a los elementos del contenido
bloqueado desde el elemento de calificación basado en
la edad actualmente seleccionado.
2 Pulse
/ para seleccionar un elemento individual, y
luego pulse ENTER para desbloquearlo (desaparece "
"
). Repita los mismos pasos para los otros elementos.
3 Pulse
para registrar una vez establecidos todos los
elementos individuales de la calificación basada en el
contenido.
Contenido
FV: Violencia fantástica
V: Violencia.
S: Actos sexuales
L: Lenguaje de adultos
D: Diálogo con sugerencias sexuales
Calificación
Contenido
FV V S L D
Edad
sugerida
TV-Y
TV-Y7
TV-G
TV-PG
TV-14
TV-MA
: Se puede establecer la calificación del contenido, pero
normalmente los canales de televisión no la emiten.
: Se puede establecer la calificación del contenido.
Sistemas de calificación canadienses (calificaciones
para el inglés canadiense y para el francés canadiense)
Los sistemas de calificación de TV en Canadá se basan
en la política de la Comisión Canadiense de
Radiotelevisión y Telecomunicaciones (CRTC)
relacionada con la violencia en los programas de
televisión.
Aunque la violencia es el elemento más importante que
debe calificarse, la estructura desarrollada tiene en
consideración otros contenidos de los programas como,
por ejemplo, el lenguaje, los desnudos, la sexualidad y
los temas de madurez.
Cuando se ajuste el V-CHIP en el sistema canadiense
usted podrá elegir entre las calificaciones para el inglés
canadiense o las calificaciones para el francés
canadiense.
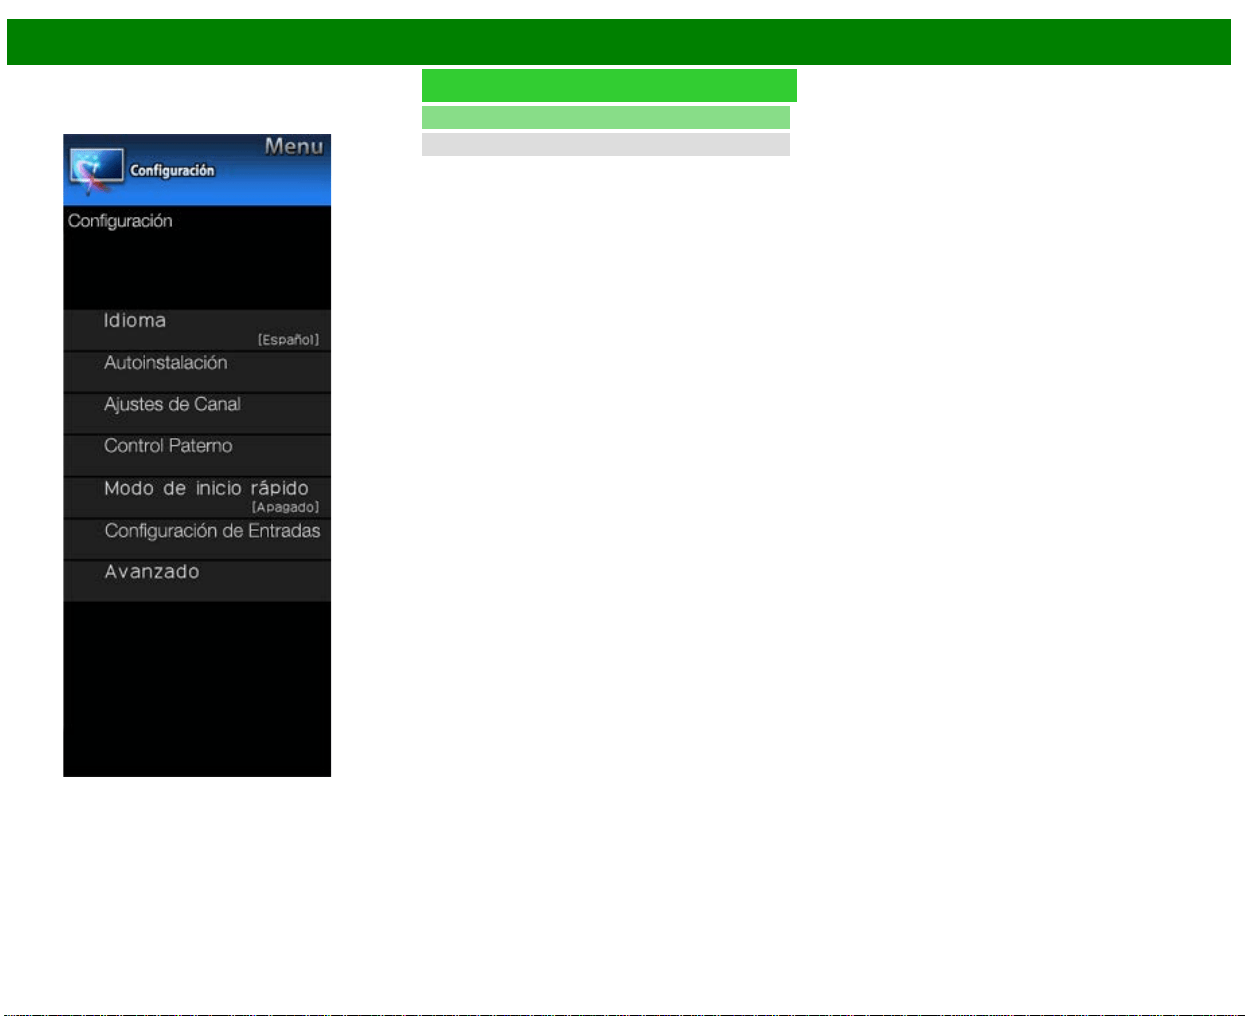
>>
<<
Menú en pantalla
ESP 4-10
Ejemplo
Configuración Inicial (Continúa)
Ajuste Individual
Control Paterno
Calificaciones para el inglés canadiense
E: Exento: Incluye programas de noticias, deportes,
documentales y otros programas de información;
programas de entrevistas, videos musicales y programas
de variedades.
C: Niños: Para los niños pequeños de menos de 8 años.
Pone mucho cuidado con los temas que puedan
amenazar su sentido de seguridad y bienestar.
C8+: Niños de más de 8 años: Programas que no
contienen violencia como forma preferida, aceptable o
única para resolver conflictos; tampoco incita a los niños
a imitar actos peligrosos que éstos puedan ver en la
pantalla.
G: General: Considerado como aceptable para todos los
públicos. Apropiado para verlo toda la familia; contiene
muy poca violencia física, verbal o emocional.
PG: Acompañamiento de los padres: Para el público en
general, pero tal vez no sea adecuado para los niños
más pequeños (menos de 8 años) porque puede
contener temas controvertidos.
14+: Más de 14 años: Puede contener temas en los que la
violencia es uno de los elementos dominantes de la
historia, pero ésta debe ser esencial para el desarrollo
de la trama o el carácter. El lenguaje puede ser profano
y haber desnudos en el tema.
18+: Adultos: Para espectadores de 18 años en adelante.
Puede contener escenas violentas que, aunque estén
relacionadas con el desarrollo de la trama, los caracteres
o los temas, han sido filmadas para que las vean los
adultos. Pueden tener un lenguaje soez y escenas de
sexo y desnudos.
Calificaciones para el francés canadiense
E: Programación exenta.
G: General: Para todos los públicos, contiene el mínimo de
violencia directa, pero puede estar integrada en la trama
de una manera humorosa o poco realista.
8ans+: General pero no recomendado para los niños
pequeños: Lo puede ver la mayoría del público, pero
puede tener escenas que molesten a los niños de
menos de 8 años incapaces de distinguir entre las
situaciones reales e imaginarias.
Recomendado para ser visto en compañía de los padres.
13ans+: Más de 13 años: Puede contener escenas de
violencia frecuente y, por lo tanto, se recomienda verlo
en compañía de los padres.
16ans+: Más de 16 años: Puede contener escenas de
violencia frecuente y de intensa violencia.
18ans+: Más de 18 años: Sólo para adultos. Puede
contener escenas de violencia frecuente y de intensa
violencia.
Cancelación temporal del V-CHIP BLOCK
El V-CHIP BLOCK funciona para censurar una emisión, y en
ese caso se visualiza "V-CHIP HA SIDO ACTIVADO".
1 Pulse ENTER mientras está activada la función V-CHIP
y luego se visualizará el menú de ajuste del número
secreto.
2 Introduzca el número secreto de 4 dígitos utilizando 0–9 .
Ahora se cancela temporalmente V-CHIP BLOCK.
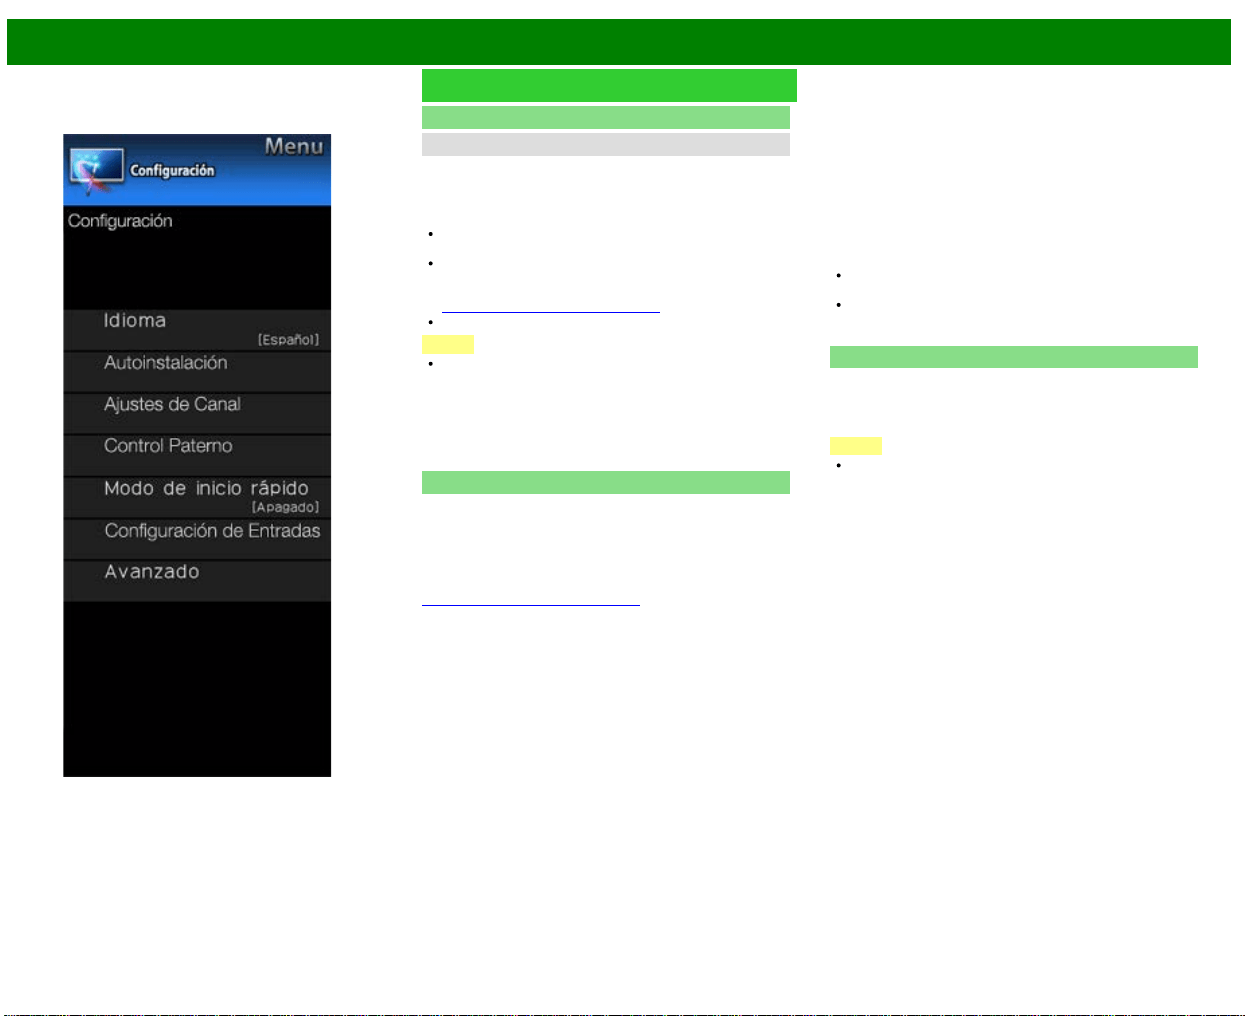
>>
<<
Menú en pantalla
ESP 4-11
Ejemplo
Configuración Inicial (Continúa)
Ajuste Individual
Control Paterno
Reactivación del V-CHIP BLOCK cancelado
temporalmente
Puede reactivar el V-CHIP BLOCK cancelado
temporalmente como se muestra a continuación.
Seleccione el ajuste de "Estado" desde el menú Control
Paterno para reactivar BLOCK.
Seleccione el ajuste "V-Chip" ("MPAA", "TV Guidelines",
"Califi. Ing. Canadá" o "Califi. Fra. Canadá") desde
Control Paterno para reactivar BLOCK.
(Consulte las páginas 3-12 a 3-13.)
Desconecte la alimentación del televisor.
NOTA
El V-CHIP BLOCK se activará al ejecutar uno cualquiera
de los tres métodos de arriba.
Estado
Se utiliza para activar o desactivar la función de control
parental. No se puede seleccionar esta función en el menú
a menos que se configure primero el número secreto.
No.Secreto
Le
permite utilizar un número secreto para proteger ciertos
ajustes que se modifiquen accidentalmente.
IMPORTANTE:
Tres condiciones deben cumplirse para que el V-Chip
(Consulte las páginas 3-12 a 3-13.)
1. No. Secreto se ha registrado.
2. V-Chip / V-Chip (DTV solamente) se han hecho ajustes.
El "V-Chip (DTV solamente)" sólo se podrá seleccionar
cuando un nuevo sistema de clasificación se puede
descargar a través de la radiodifusión digital en los EE.UU.
3."Estado" se ajusta en "Activar".
Configuración de número secreto
Puede configurar y cambiar el número secreto mediante el
uso de 0-9.
Sí: los cambios o establece el número secreto.
No: "Eliminar Secreto No." menú aparecerá cuando el
número secreto se ha establecido. Cuando el número
secreto no se ha establecido, se mostrará la pantalla
anterior.
NOTA
Como medida de precaución, haga una nota de su
número secreto y guárdelo en un lugar familiar.
Si el número secreto se borra, el ajuste automáticamente
Estado establece en "Off". "V-Chip" y "Estado" no se
podrá seleccionar en el menú.
Modo de inicio rápido
Cuando esta función esta activada, puede reducir el tiempo
de encendido del televisor o incluso dejar que el televisor
en el modo de espera empiece a mostrar imágenes a través
del equipo conectado a la red.
NOTA
Al ajustar el “Modo de inicio rápido” en “Ajustes” se
consume más energía.
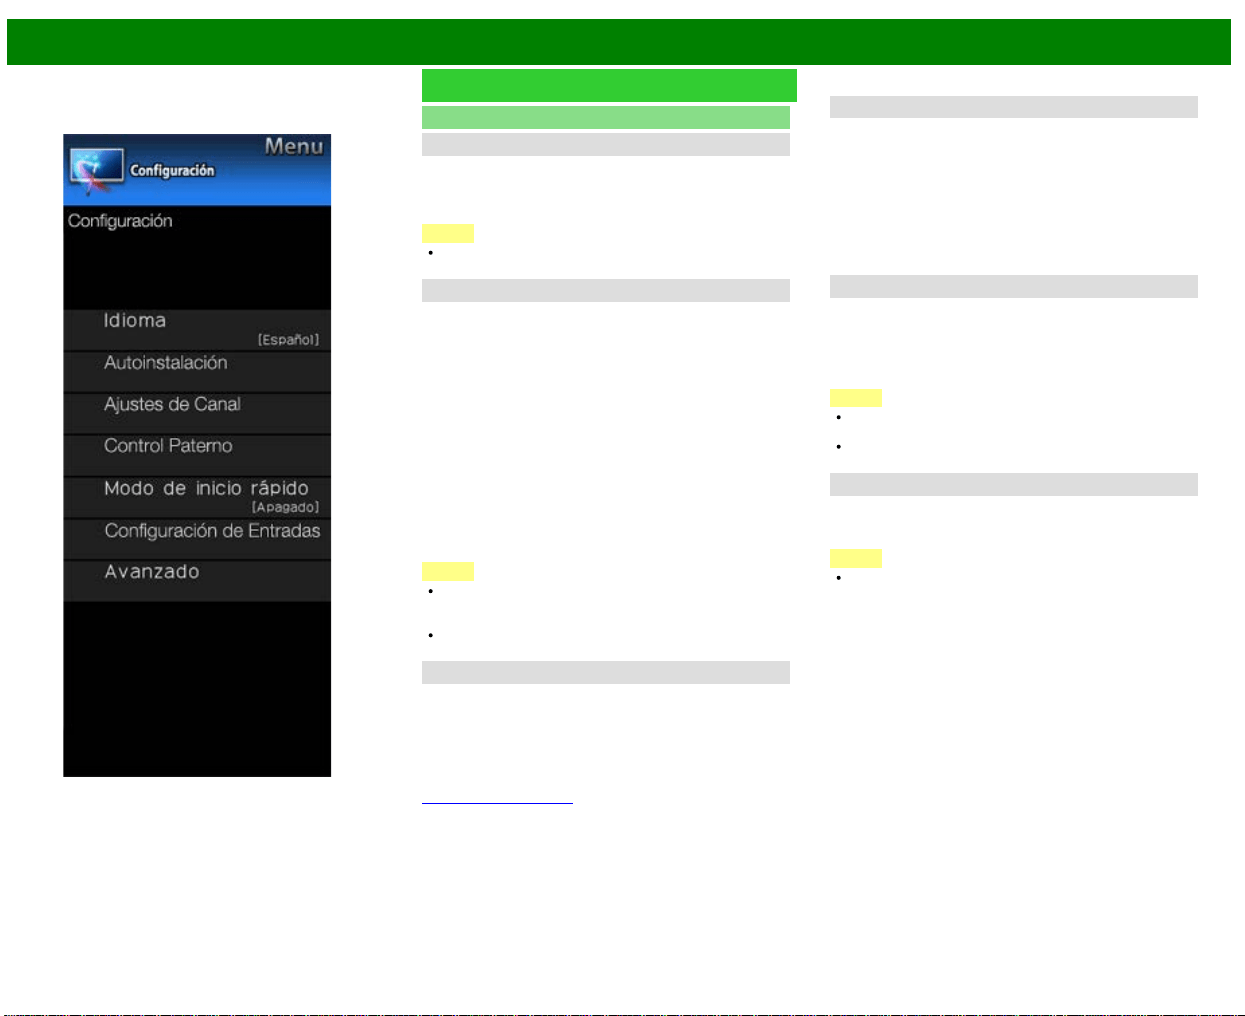
>>
<<
Menú en pantalla
ESP 4-12
Ejemplo
Configuración Inicial (Continúa)
Configuración de Entrada
Ajuste HDMI - Vista automática
Cuando ve imágenes enviadas desde equipos externos en
una conexión HDMI, esta función permite que el tamaño de
imagen del televisor cambie automáticamente a un tamaño
adecuado.
NOTA
Consulte el manual del equipo externo para conocer el
tipo de señal.
DIGITAL AUDIO
Puede dar salida a audio digital a un amplificador AV u otro
dispositivo similar cuyo terminal DIGITAL AUDIO INPUT esté
conectado al terminal DIGITAL AUDIO OUT del televisor.
Seleccione un formato de salida de audio compatible con el
formato de audio del programa que usted está viendo y con
el equipo conectado.
Apagado: Cierre la función de salida de audio digital.
PCM: Para conectar a equipos que no son compatibles
con Dolby Digital y DTS. Se emitirá el mismo audio
(main, sub o main/sub) que el audio del programa que
se está viendo.
Se emite audio de 2 canales con una frecuencia de
muestreo de 48 kHz o menos como audio PCM lineal.
Flujo de bits: Para conectar a un sistema de audio
compatible con Dolby Digital y DTS. El audio se emite a
través de los canales main y sub.
NOTA
El audio del canal analógico y el audio de la entrada de
vídeo se emiten en el modo PCM aunque esté
seleccionado "Flujo de bits".
Las señales de la entrada digital PCM se emiten en el
modo PCM aunque esté seleccionado "Flujo de bits".
Selección Audio
Esta función establece el terminal que va dar salida al audio
del computador.
Los elementos de ajuste varían según la fuente de entrada.
Seleccione la fuente de entrada correspondiente al terminal
conectado al PC y luego ajuste el elemento deseado. Para
realizar la operación, consulte "Configuración Inicial" >
"Configuración de Entrada" > "Selección Audio".
(Consulte la página 3-8.)
Selección de salida
Le permite seleccionar qué va a controlar la salida de audio.
Fija: El sonido del altavoz se ajusta con VOL+/- en el
control remoto o en el televisor.
El sonido procedente del terminal AUDIO OUT no se
puede ajustar y sale a un nivel consistente.
Variable: El sonido procedente del terminal AUDIO OUT
se ajusta con VOL+/- en el control remoto o en el
televisor.
El sonido del altavoz se silencia.
Input Select
Para ver la entrada de imagen aplicada al terminal
COMPONENT IN o VIDEO IN, cambie a “COMPONENTES”
o “AV-Y/C”, respectivamente.
COMPONENTES: Seleccione video por componentes.
AV-Y/C: Seleccione video compuesto.
NOTA
Si no se visualiza imagen (color), intente cambiar a otro
tipo de señal.
Compruebe el manual del usuario del equipo externo
para conocer el tipo de señal.
Saltar entrada
Este ajuste le permite omitir la Entrada TV, HDMI o PC IN
("PC IN, COMPONENT, HDMI 1, HDMI 2, HDMI 3 y
VIDEO") al utilizar la selección de entrada.
NOTA
Si conecta un equipo externo al terminal HDMI IN que
que ha ajustado para ser omitido, aparece un mensaje
de notificación en la pantalla cuando se recibe una señal
desde el equipo externo conectado. Pulse “Sí” para
restablecer el ajuste de omisión correspondiente para
que el terminal de entrada esté disponible.
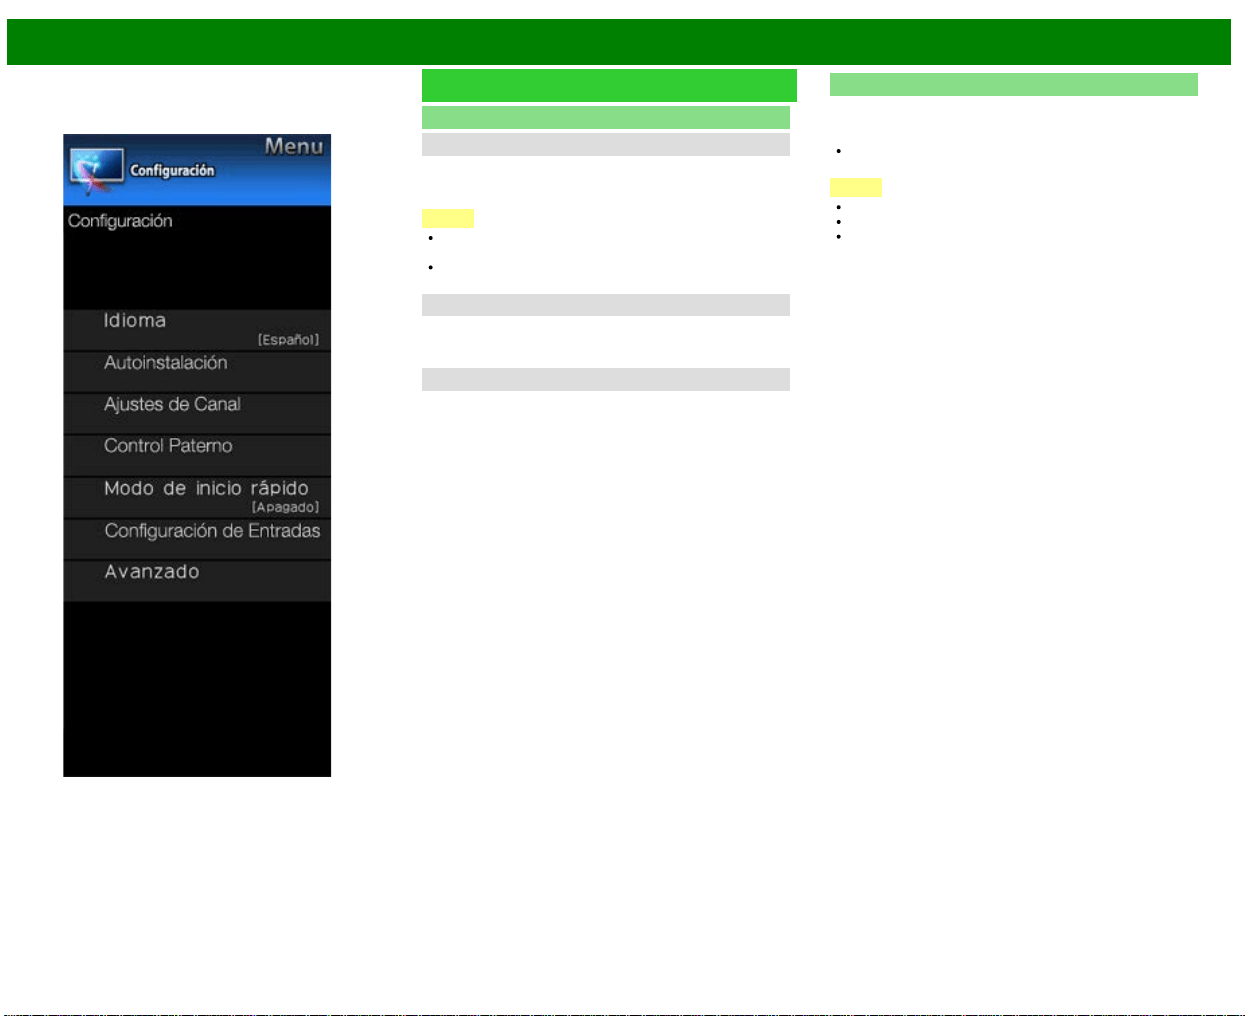
>>
<<
Menú en pantalla
ESP 4-13
Ejemplo
Configuración Inicial (Continúa)
Configuración de Entrada
Sistema de color
Seleccione en la lista siguiente el sistema de señal de vídeo
compatible con su equipo:
Auto/NTSC/PAL-M/PAL-N
NOTA
"Sistema de color" solamente puede ajustarse para
VIDEO IN 1 o COMPONENT/VIDEO IN.
Si ya ha puesto el número secreto, introduzca aquí el
número secreto de 4 dígitos.
Ajustes LINK
Haga los ajustes para utilizar AQUOS LINK.
Establezca los ajustes con "Configuración Inicial" >
"Configuración de Entrada" > "Ajustes LINK".
Sinc. fino
Puede ajustar la posición de la entrada de imagen desde un
PC con "Configuración Inicial" > "Configuración de Entrada"
> "Sinc. fino".
Reiniciar
Si se hacen ajustes complejos y no es posible restaurar los
elementos de ajuste a los valores normales, puede reponer
todos los elementos de ajuste a los valores de fábrica.
Si ya ha puesto el número secreto, introduzca aquí el
número secreto de 4 dígitos.
NOTA
Los elementos de ajuste de canales no cambiarán.
Los elementos de ajuste de idioma no cambiarán.
Los elementos de ajuste de la ubicación del televisor no
cambiarán.
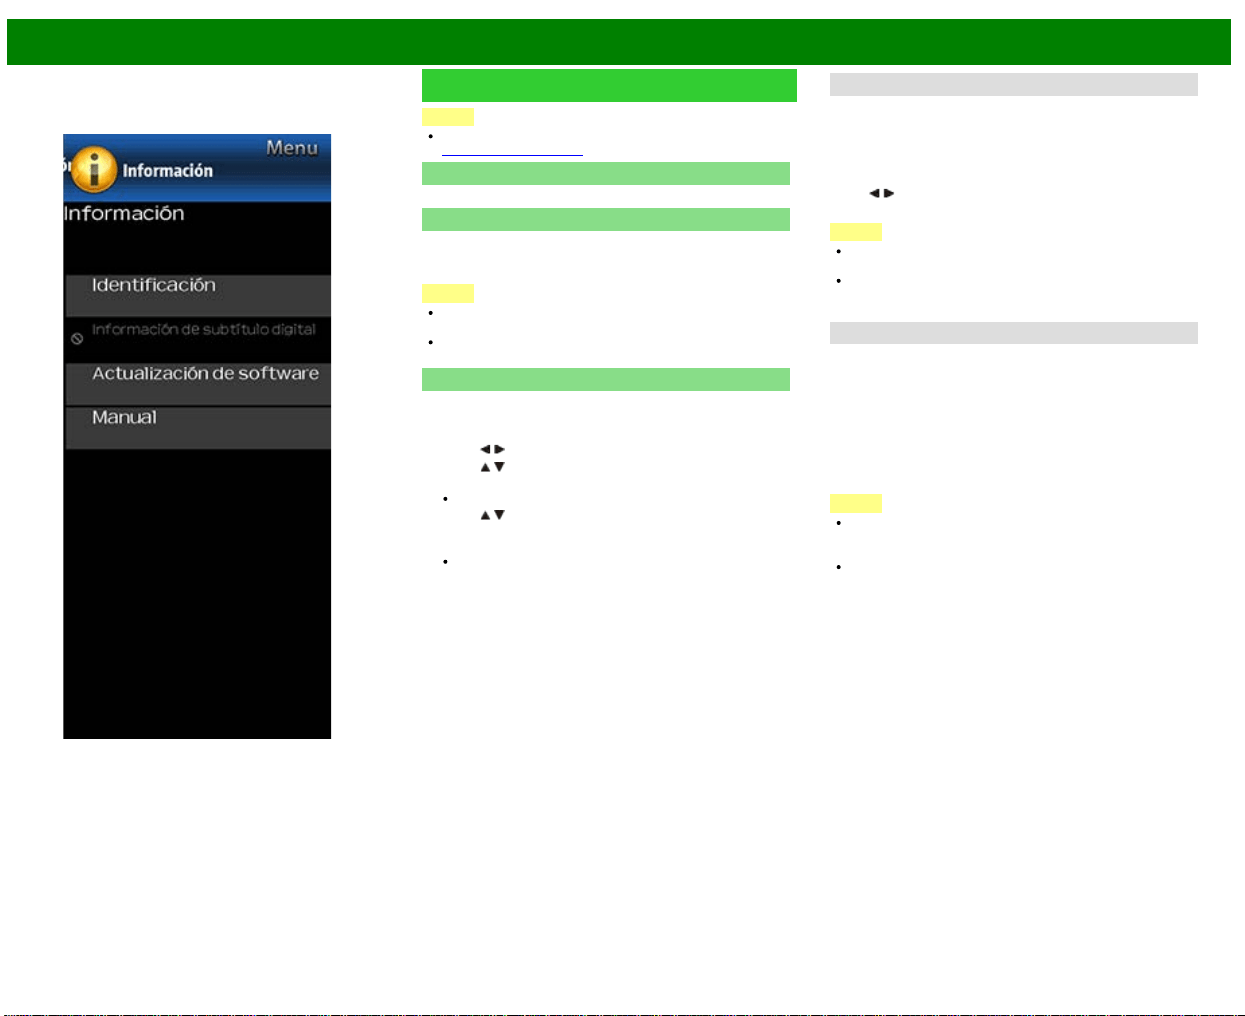
>>
<<
Menú en pantalla
ESP 4-14
Ejemplo
Información
NOTA
Para operar el menú en pantalla,
consulte la página 4-3.
Identificación
Se muestra la versión actual del software del televisor.
Información de subtítulo digital
Esta función permite ver la información digital de los
subtítulos para el programa de emisión digital que se está
viendo.
NOTA
Esta lista no se muestra para emisiones analógicas o
para entrada externa de audio/vídeo.
Esta información no está incluida en CC1, CC2, Texto1 o
Texto2 y no se muestra en una lista.
Actualización de software
Se usa para actualizar el software del sistema para mejorar
las funciones del TV.
1 Pulse MENU para visualizar la pantalla MENÚ, y luego
pulse
/ para seleccionar "Información".
2 Pulse
/ para seleccionar "Actualización de software",
y luego pulse ENTER.
Si ya ha puesto el número secreto, vaya al paso 3.
3 Pulse
/ para seleccionar "Actualización Manual" o
"Ajuste de Actualización Automática", y luego pulse
ENTER.
Las operaciones de allí en adelante varían según el
ajuste.
Ajuste de Actualización Automática
Cuando el televisor está encendido, o cuando se accede a
una aplicación de Internet, esta función permite que el
televisor se conecte a la red y busque actualizaciones
automáticamente.
Cuando hay una actualización disponible, se exhibe un
mensaje.
Pulse
/ para seleccionar "Sí", y luego pulse ENTER para
visualizar la pantalla de descarga.
NOTA
No funciona cuando no se dispone de una conexión de
banda ancha o la Configuración de Internet.
Cuando se está ejecutando una aplicación, puede
aparecer un mensaje.
El mensaje varía según la aplicación.
Actualización Manual
Seleccione el método para actualizar manualmente el
software.
Actualización USB: Actualiza el software utilizando un
dispositivo de memoria USB que contiene el archivo de
actualización. (Consulte "Actualización del software con
un dispositivo de memoria USB".)
Actualización de Red: Descarga el archivo de
actualización por medio de la red y luego actualiza el
software.
NOTA
Se requieren una conexión de banda ancha y la
Configuración de Internet para actualizar el software
utilizando la red.
Es posible que tome tiempo acceder y descargar la
actualización dependiendo de la conexión a Internet y
otros factores.
Actualización del software con un dispositivo de
memoria USB
Para controlar la disponibilidad de una actualización de
software visite
http://www.sharpusa.com/products/support/.
Si tiene alguna inquietud por favor,
llame 1-800-BESHARP (800-237-4277).
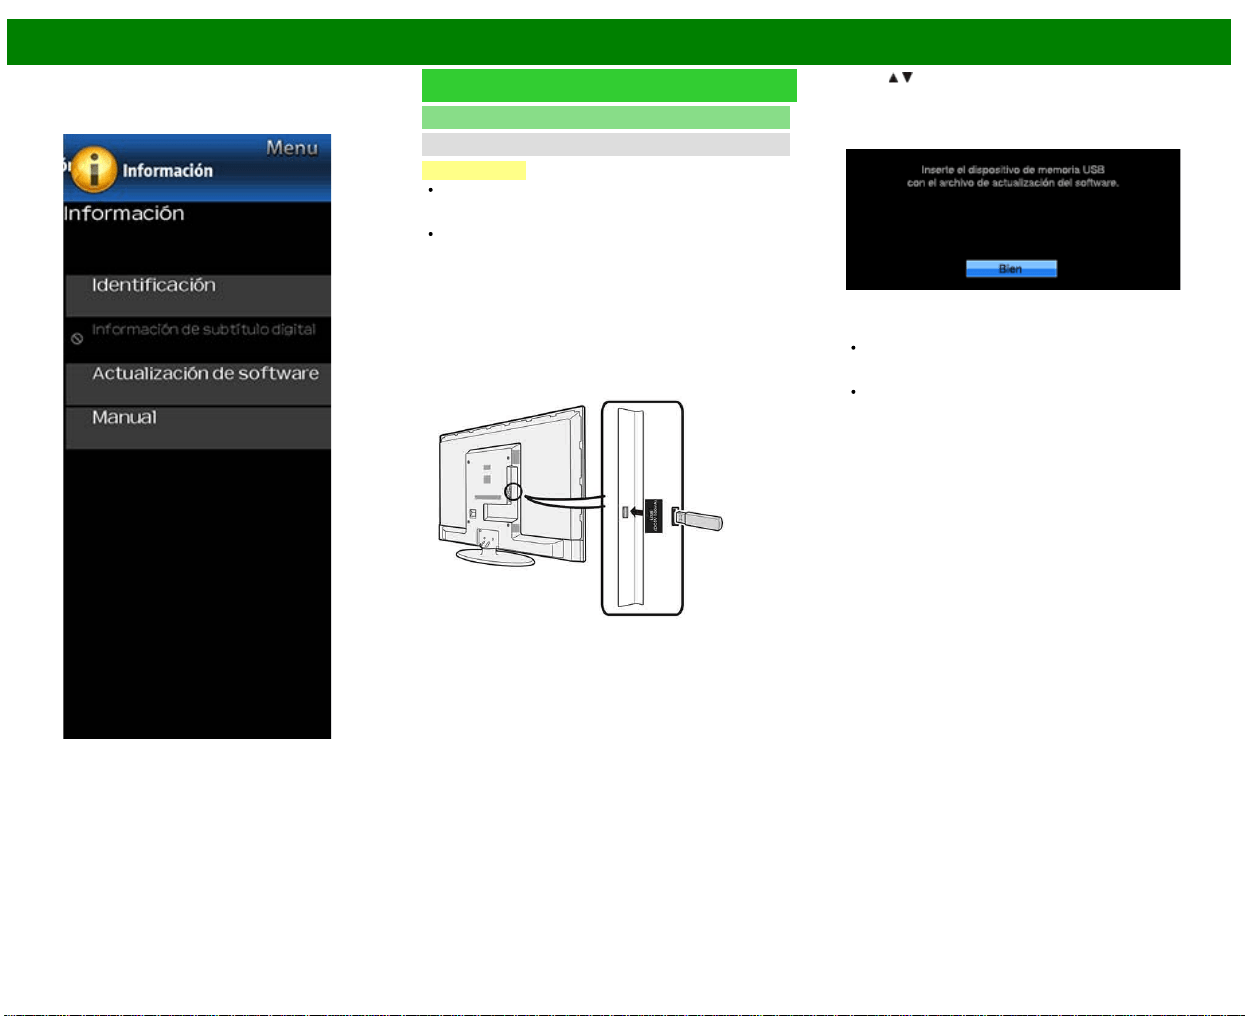
>>
<<
Menú en pantalla
ESP 4-15
Ejemplo
Información (Continúa)
Actualización de software
Actualización Manual
PRECAUCIÓN
No intente quitar el dispositivo de memoria USB ni
desenchufar el cable de CA mientras se está
actualizando el software.
Asegúrese de seguir apropiadamente, paso a paso,
todo el procedimiento descrito a continuación. De lo
contrario, el televisor no podrá, por ejemplo, leer los
datos del dispositivo de memoria USB ni actualizar el
software.
1 Inserte el dispositivo de memoria USB con el archivo de
actualización en el terminal USB del TV.
2 Pulse / en la pantalla de Actualización Manual para
seleccionar "Actualización USB", y luego pulse ENTER.
3 Pulse ENTER para iniciar la comprobación de datos en
el dispositivo de memoria USB.
4 Durante la comprobación de datos, "Comprobando"
parpadea.
Se muestran la versión actual del software del televisor
y la versión del archivo de actualización en el
dispositivo de memoria USB.
Si el dispositivo de memoria USB no se instala
correctamente o no puede encontrarse el archivo de
actualización correcto en el dispositivo de memoria
USB, se mostrará un mensaje de error. Compruebe el
archivo en el dispositivo de memoria USB y a
continuación, vuelva a insertar el dispositivo de
memoria USB correctamente.
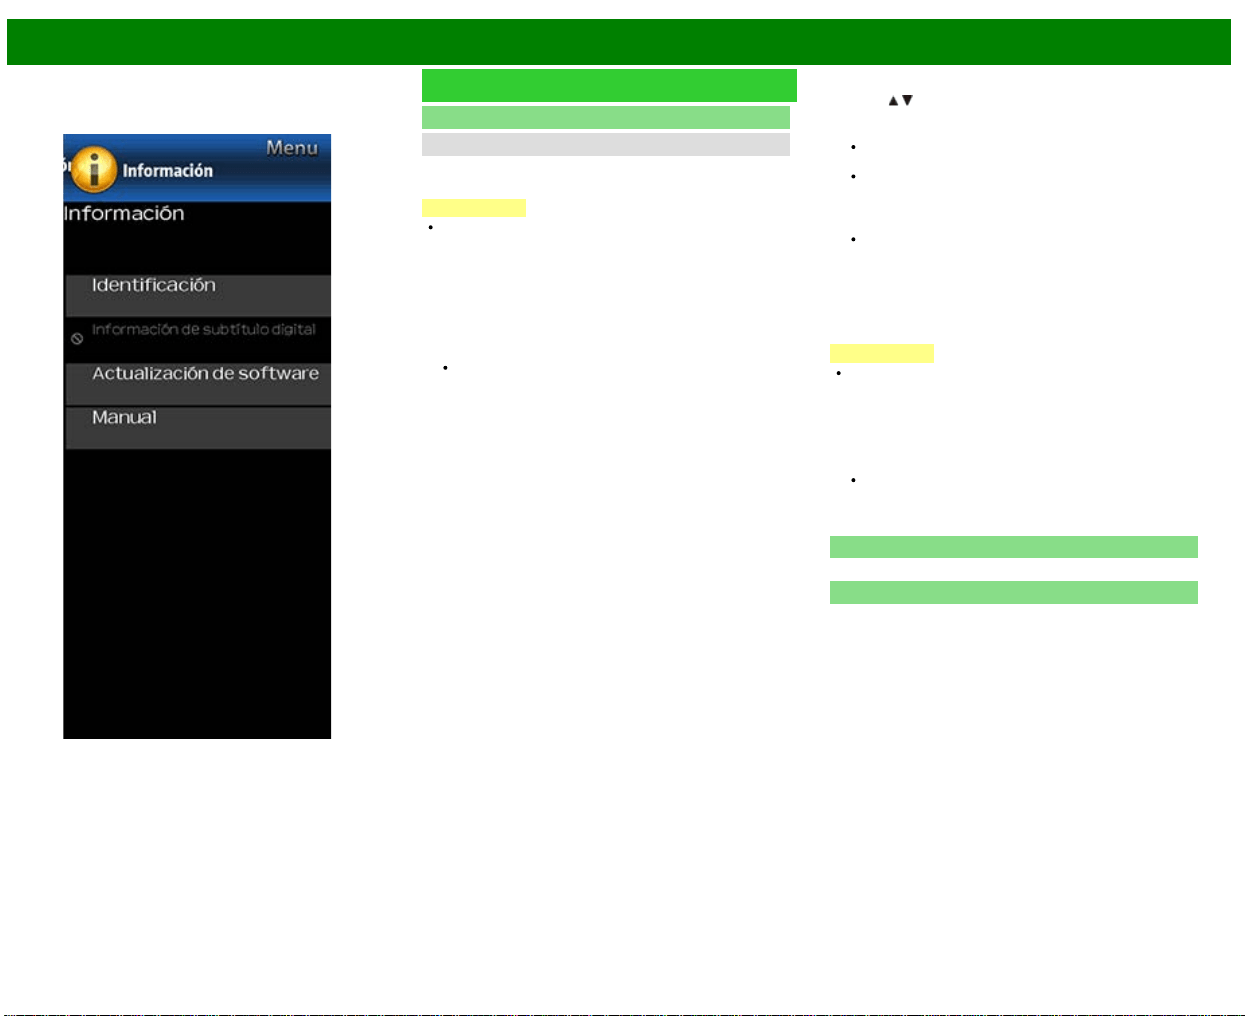
>>
<<
Menú en pantalla
ESP 4-16
Ejemplo
Información (Continúa)
Actualización de software
Actualización Manual
5 Para actualizar el software del televisor con el archivo de
actualización, seleccione "Sí", y pulse ENTER.
PRECAUCIÓN
No intente quitar el dispositivo de memoria USB ni
desenchufar el cable de CA mientras se está
actualizando el software.
6 Cuando el software se actualice con éxito, aparecerá
una pantalla indicando que el proceso de actualización
ha terminado.
Después de que se muestre esta pantalla, el televisor se
apagará automáticamente y después, volverá a
encenderse.
Si falla la actualización, compruebe el archivo en el
dispositivo de memoria USB e intente de nuevo
actualizar el software.
7 Quite el dispositivo de memoria USB.
Actualización del software por medio de la red
1 Pulse
/ en la pantalla de Actualización Manual para
seleccionar "Actualización de Red", y luego pulse
ENTER.
El TV se conecta a la red y verifica que haya
actualizaciones.
Para cancelar, pulse ENTER.
2 Se visualizan la versión actual del TV y la última versión
del software. Para actualizar el software del TV,
seleccione "Sí", y luego pulse ENTER.
Si no se puede establecer una conexión con el
servidor o no hay una actualización disponible, se
exhibe un mensaje. Si no se puede establecer una
conexión al servidor, verifique la conexión a banda
ancha y la Configuración de Internet.
3 Después de descargar el archivo de actualización,
comienza el proceso de actualización del software.
PRECAUCIÓN
No desenchufe el cable de CA mientras se está
actualizando el software.
4 Si el software se actualiza exitosamente, se visualiza una
pantalla donde se indica que se ha Aparece una
pantalla que indica que se completó la actualización.
Transcurridos 4 segundos, el televisor se reinicia
automáticamente.
Si el software no se actualizó exitosamente, verifique la
conexión a banda ancha y la Configuración de
Internet, y luego intente actualizar el software
nuevamente.
Licencia de software
Muestra información de la versión de software.
Manual
Muestra el Manual de instrucciones integrado en pantalla.
Puede leer información sobre el uso de este dispositivo.
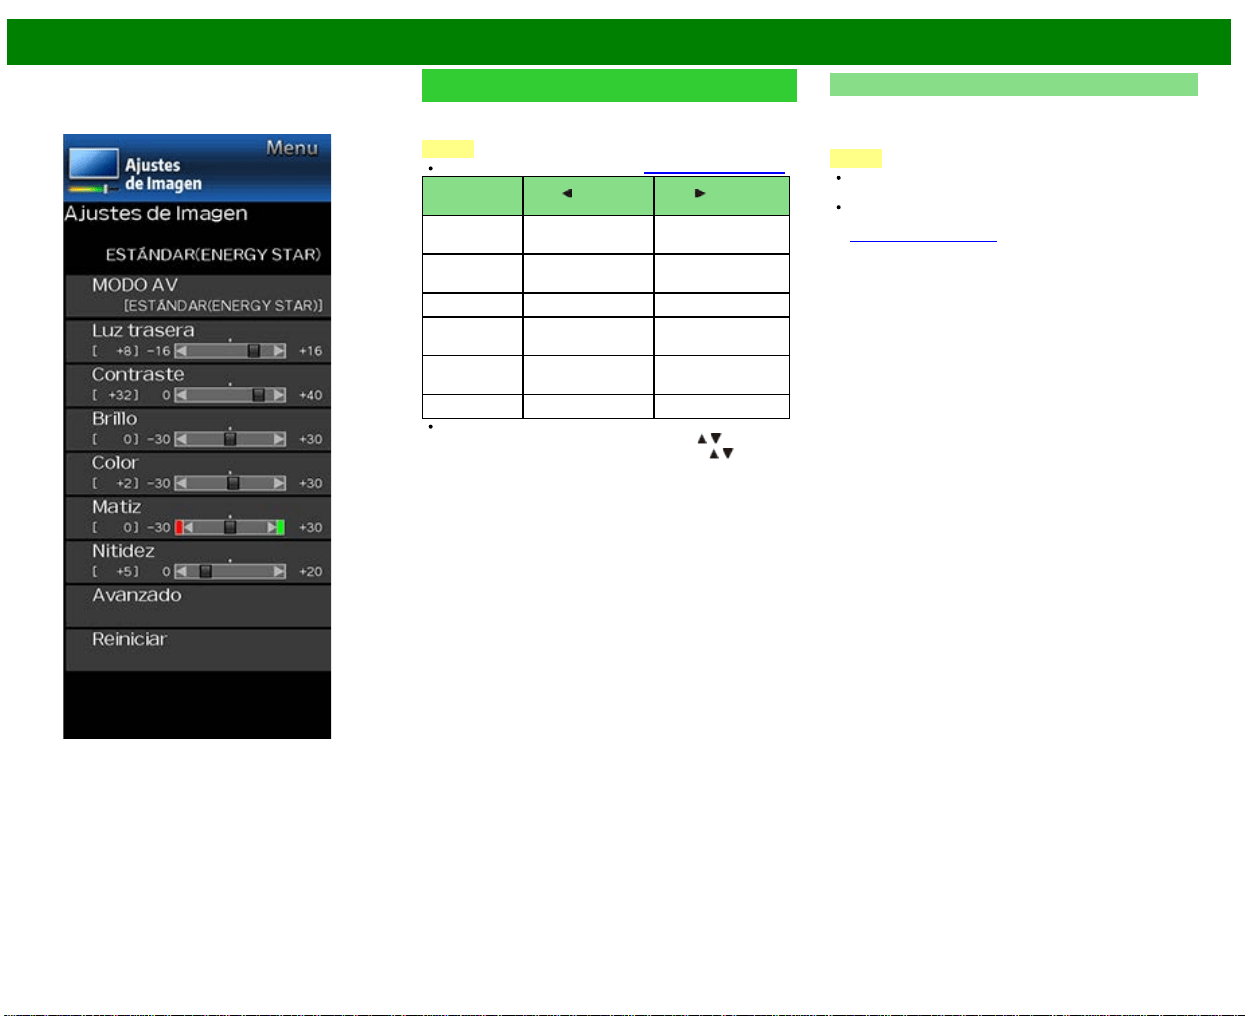
>>
<<
Menú en pantalla
ESP 4-17
Ejemplo
Ajustes de Imagen
Ajuste la imagen según sus preferencias empleando los
ajustes de imagen siguientes.
NOTA
Para operar el menú en pantalla, consulte la página 4-3.
Elemento
seleccionado
Botón Botón
Luz trasera La pantalla se
obscurece
La pantalla se
ilumina
Contraste Para menos
contraste
Para más contraste
Brillo Para menos brillo Para más brillo
Color Para menos
intensidad del color
Para más
intensidad del color
Matiz Los tonos de la
piel tiran a rojo
Los tonos de la piel
tiran a verde
Nitidez Para menos nitidez Para más nitidez
Para reponer todos los elementos de ajuste de imagen a
los valores preajustados en fabrica, pulse
/ para
seleccionar "Reiniciar", pulse ENTER, pulse
/ para
seleccionar "Sí", y luego pulse ENTER.
MODO AV
Se pueden cambiar los ajustes de audio y vídeo para
adecuarse al programa o contenido de entrada que se está
mirando.
NOTA
Los elementos seleccionables varían en función de la
fuente de entrada y del modelo de televisor.
Puede seleccionar MODO AV pulsando AV MODE en el
control remoto.
Consulte la página 3-10 para detalles de los ajustes de
MODO AV.
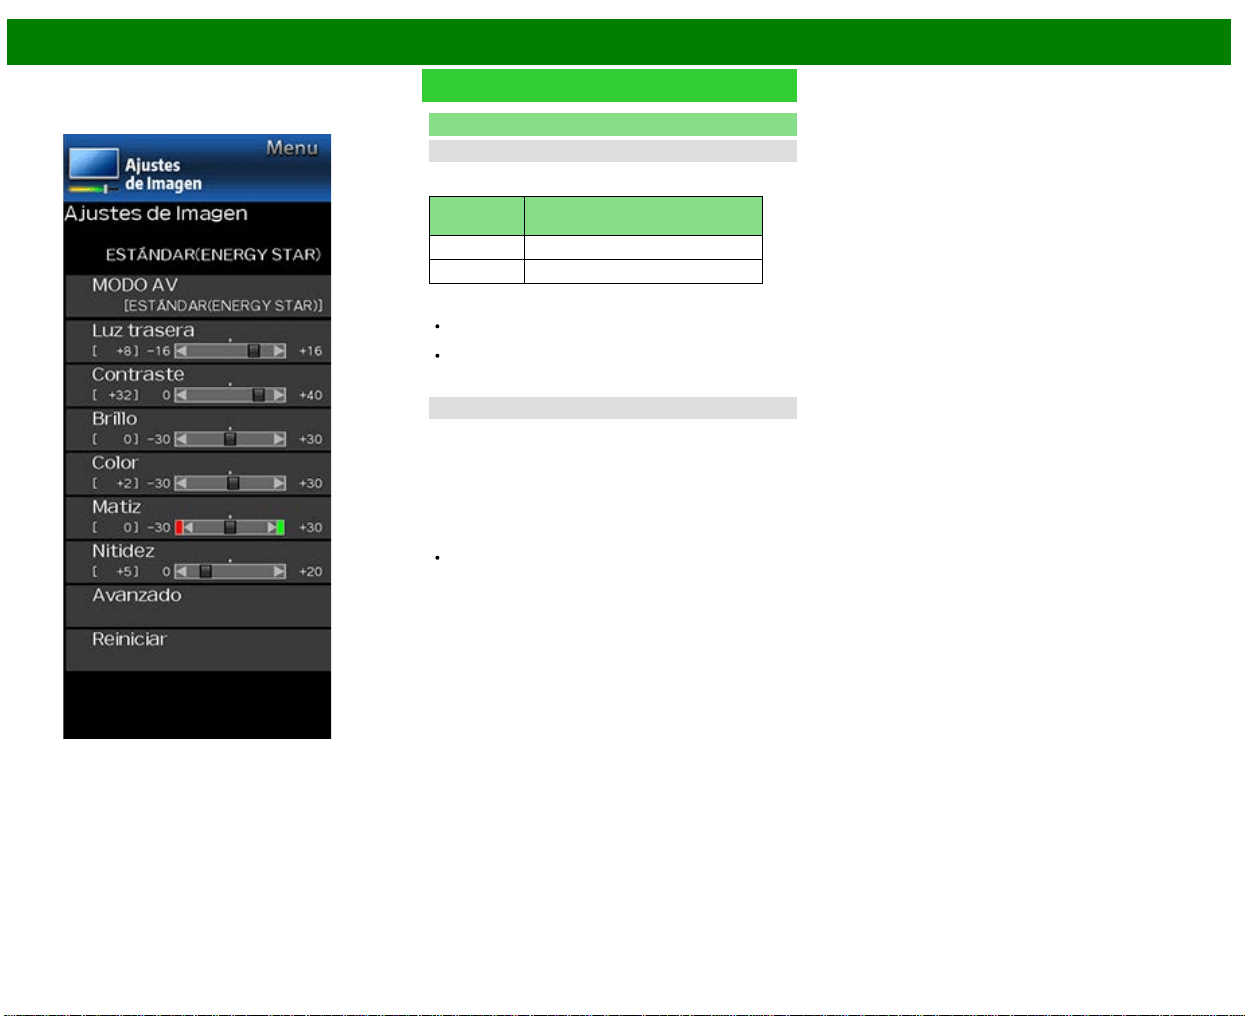
>>
<<
Menú en pantalla
ESP 4-18
Ejemplo
Ajustes de Imagen (Continúa)
Avanzado
Mejora de Movimiento
Utilice Mejora de Movimiento para ver con mayor
nitidez vídeo con acción rápida.
Elemento
seleccionado
Descripción
120Hz Para obtener una imagen más nítida.
Apagado Imagen original.
NOTA
"Mejora de Movimiento" puede causar ruido de
imagen. Si esto ocurre, desactive la función.
Si el MODO AV se establece en modo "PC", o se está
recibiendo formato de PC, "Mejora de Movimiento" no
está disponible.
Reducción ruido
Produce una imagen más clara.
Auto: Ajusta automáticamente el nivel de reducción de
ruido.
Alta/Medio/Baja: Usted puede seleccionar un nivel
deseado para ver una imagen de vídeo más clara.
Apagado: Sin ajuste
NOTA
"Reducción ruido" no está disponible cuando se ajusta
MODO AV en "PC" o la entrada es en formato PC.
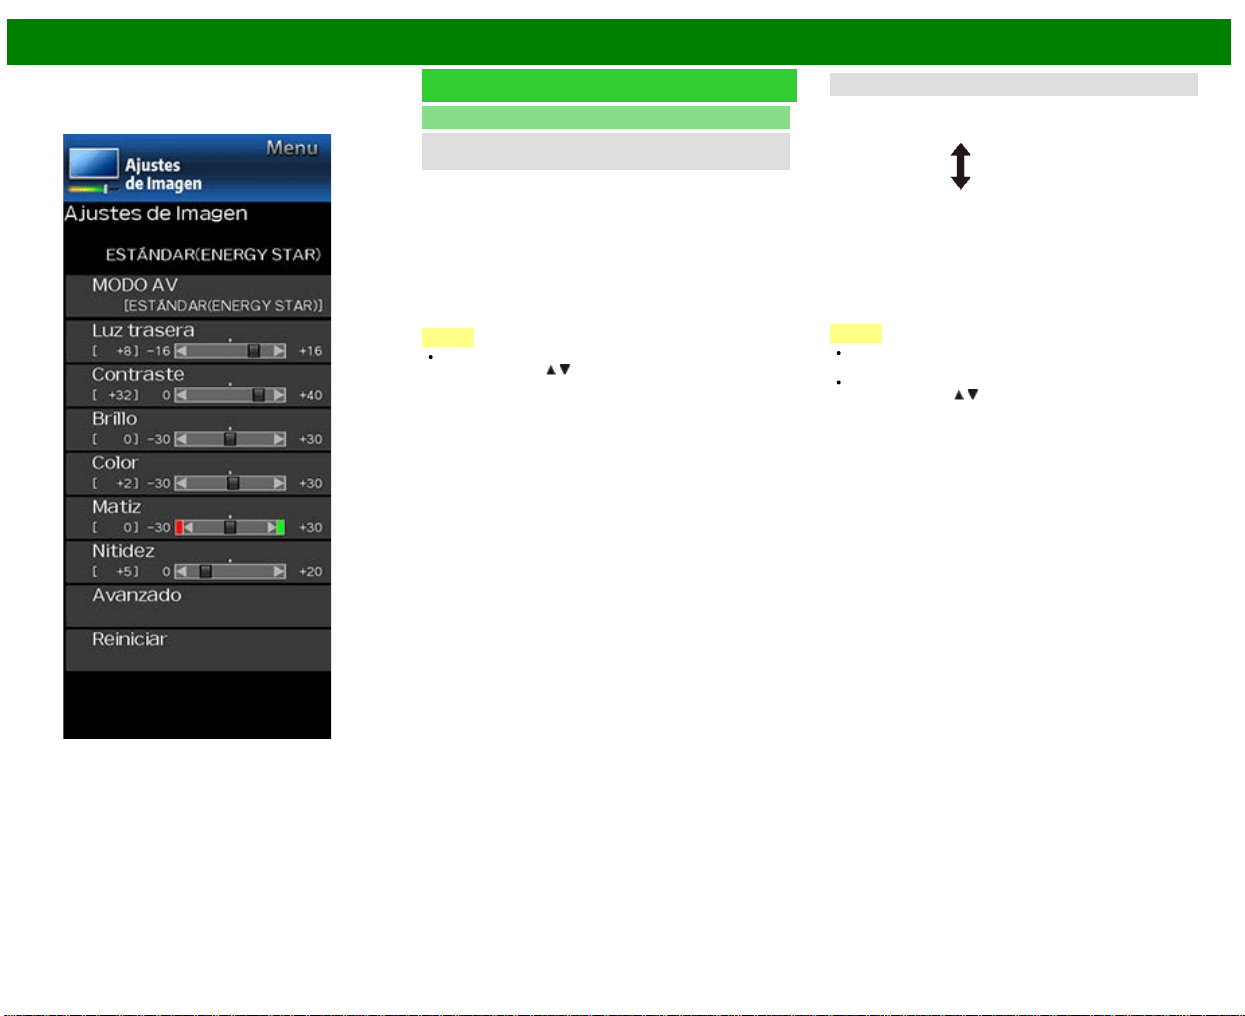
>>
<<
Menú en pantalla
ESP 4-19
Ejemplo
Ajustes de Imagen (Continúa)
Avanzado
C.M.S.
(sistema de control del color)
El tono del color se controla empleando el ajuste de sistema
de seis colores.
C.M.S.-Tono: Ésta es una norma para ajustar el color con
un tono más rojizo o más azulado.
C.M.S.-Saturación: Aumenta o disminuye la saturación de
un color seleccionado.
C.M.S.-Valor: Un valor más alto hace que la imagen sea
más brillante.
Un valor más bajo hace que la imagen sea más oscura.
NOTA
Para reponer todos los elementos de ajuste a los valores
de fábrica, pulse
/ para seleccionar "Reiniciar", y
luego pulse ENTER.
Temp. color
Para obtener un mejor balance del blanco, utilice la
corrección de temperatura del color.
Baja: Blanco
con tonos azulados
Medio:
Alta: Blanco
con tonos rojizos
Ajustar la temperatura del color
Para ajustar la temperatura del color, establezca "10 Punto
de Ajuste" en "Encendido".
Podrá ajustar la configuración de "Posición". Ajuste la
temperatura del color entre +1 y +10.
El equilibrio de blancos puede ajustarse entre un máximo
de +30 y un mínimo de -30 por cada temperatura de color.
NOTA
Cuando "Posición" se pone en "10", puede ajustar el
balance blanco entre -30 y 0.
Para reponer todos los elementos de ajuste a los valores
de fábrica, pulse
/ para seleccionar "Reiniciar", y luego
pulse ENTER.

>>
<<
Menú en pantalla
ESP 4-20
Ejemplo
Ajustes de Imagen (Continúa)
Avanzado
Contraste activo
Automáticamente ajusta el contraste de la imagen de
acuerdo a la escena.
Encendido: Produce una imagen de alto contraste.
Apagado: Sin ajuste.
Modo cine (disminución a 3:2)
Esta función ofrece reproducción de alta calidad de
imágenes codificadas originalmente a 24
fotogramas/segundo, como las películas.
Estándar: Ajustar efecto para reducir la desalineación del
contenido de la película.
Apagado: Modo de vista normal.
NOTA
"Modo cine" no funciona dependiendo del tipo de señal
de entrada.
"Modo cine" no funciona cuando se ajusta MODO AV en
MODO de "PC".
"Estándar" no funciona dependiendo del tipo de señal de
entrada.
Blanco y negro
Para ver video en blanco y negro.
Reiniciar
Repone los ajustes de imagen a sus valores preajustados
de fábrica. Para reponerlos, seleccione "Sí" y luego pulse
ENTER.
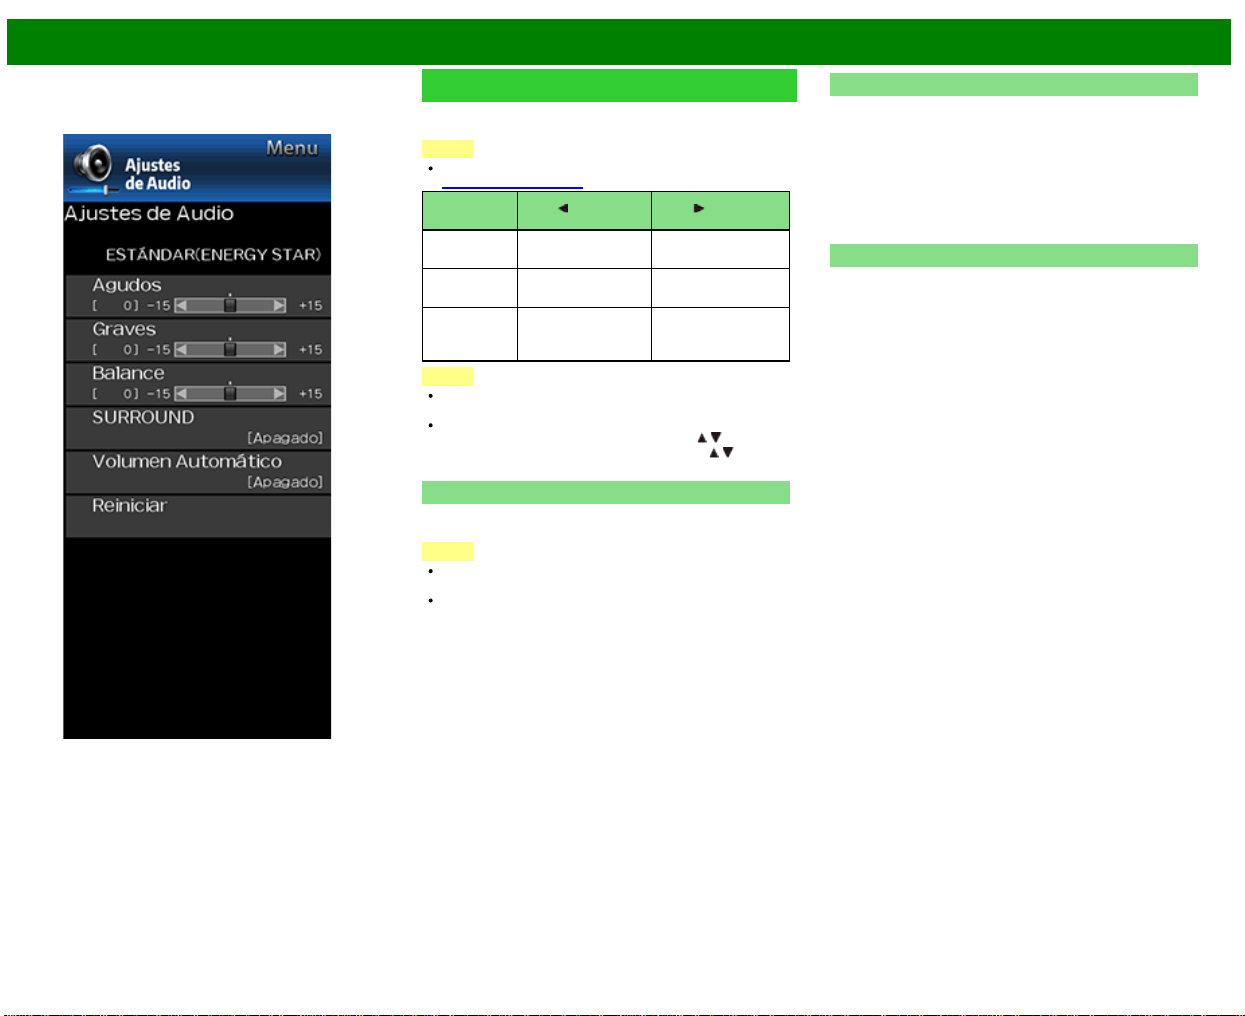
>>
<<
Menú en pantalla
ESP 4-21
Ejemplo
Ajustes de Audio
Puede ajustar la calidad del sonido según sus preferencias
empleando los ajustes siguientes.
NOTA
Para operar el menú en pantalla,
consulte la página 4-3.
Elemento
seleccionado
Botón Botón
Agudos Para agudos
débiles
Para agudos más
fuertes
Graves Para graves
débiles
Para graves más
fuertes
Balance Disminuye el
sonido del altavoz
derecho
Disminuye el sonido
del altavoz izquierdo
NOTA
El menú Audio se pone gris cuando "Selección salida"
se pone en "Variable".
Para reponer los elementos de ajustes de audio a
los valores preajustados de fábrica, pulse
/ para
seleccionar "Reiniciar", pulse ENTER, pulse
/ para
seleccionar "Sí", y luego pulse ENTER.
SURROUND
La función Sonido ambiental produce un efecto de
sonido envolvente en los altavoces.
NOTA
El menú Ajustes de audio se pone gris cuando
"Selección salida" se pone en "Variable".
Para algunos discos tal vez sea necesario hacer la
preparación en su reproductor BD/DVD. En este caso,
consulte el manual de operación de su reproductor
BD/DVD.
Volumen Automático
Las distintas fuentes de sonidos suelen tener distintos
niveles de volumen, como sucede con un programa y sus
pausas publicitarias. El Control de Volumen Automático
(Volumen Automático) reduce esta molestia mediante
ecualización.
ACTIVADO: Reduce las diferencias de volumen entre
distintas fuentes de sonido. El resultado se ajusta
automáticamente según la fuente de sonido.
DESACTIVADO: Sin ajuste
Reiniciar
Repone los ajustes de audio a sus valores preajustados de
fábrica. Para reponerlos, seleccione "Sí" y luego pulse
ENTER.

>>
<<
Menú en pantalla
ESP 4-22
Ejemplo
Smart TV
Tablero
Puede visualizar una lista de los ajustes principales de
Smart TV.
Configuración de Internet
Configura los ajustes LAN e Internet.
Ajuste de Red
Puede conectar su televisor a Internet utilizando el elemento
de ajuste "Ajuste de Red".
(Consulte la página 8-3 a 8-4.)
Servicio interactivo
Si no quiere que otras personas se conecten a Internet en
su ausencia, puede configurar el televisor para que no
pueda conectarse a Internet sin su autorización.
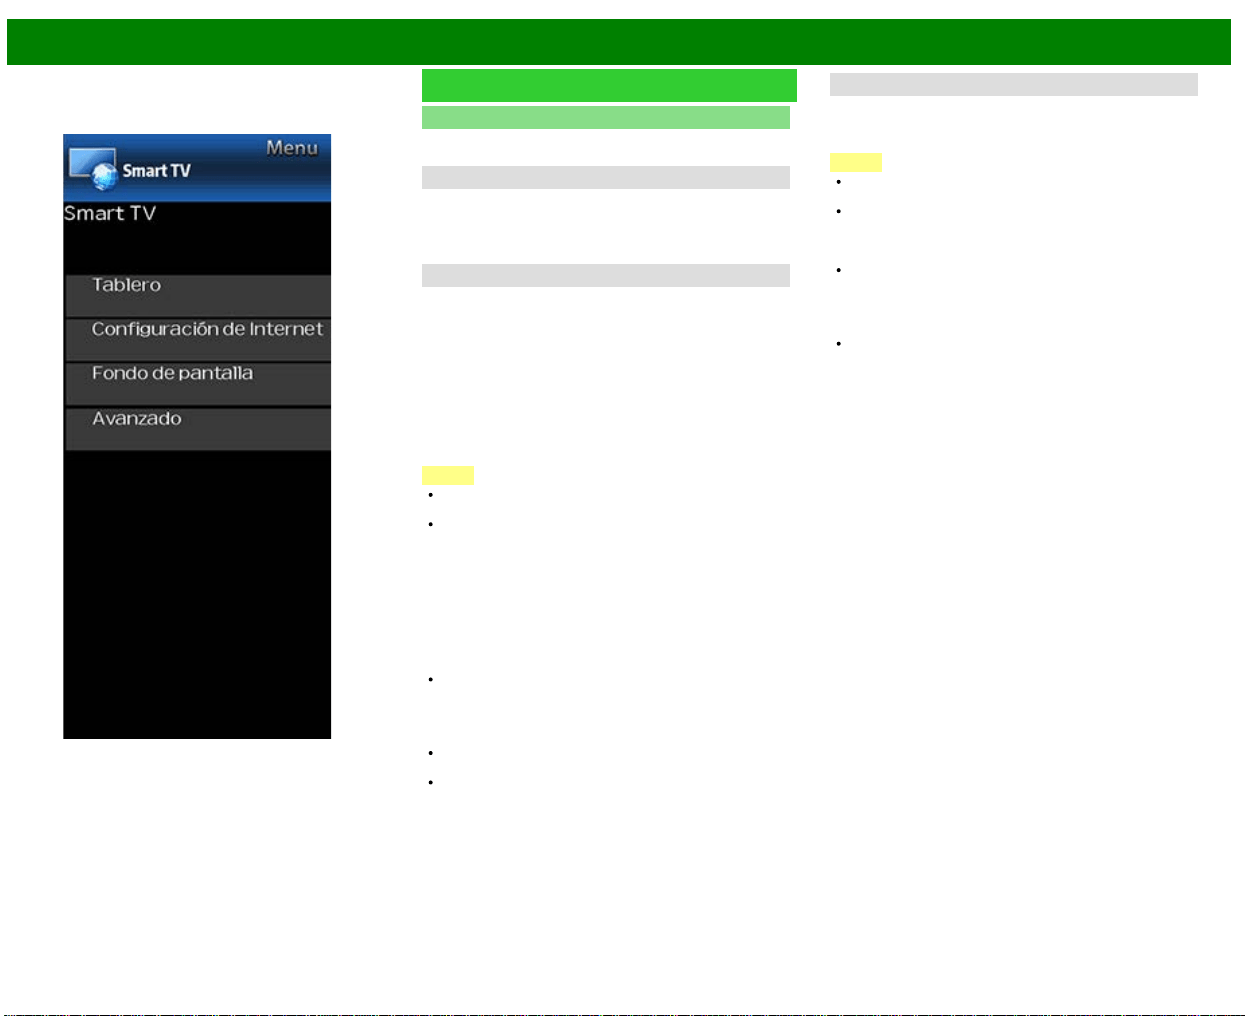
>>
<<
Menú en pantalla
ESP 4-23
Ejemplo
Smart TV (Continúa)
Fondo de pantalla
Al activar la función se mostrarán imágenes fijas cuando el
televisor esté en el modo en espera.
Modo fondo de pantalla
Configuración de modo de fondo de pantalla.
Desactivado: No aparecerá nada.
Encendido: Se mostrarán imágenes fijas cuando el
televisor se encuentre en modo de espera.
Fuente de datos
Para el fondo de pantalla, puede seleccionar las imágenes
fijas preinstaladas en el televisor o sus imágenes fijas
favoritas almacenadas en el dispositivo de memoria USB.
Pre-instalado: Las imágenes preinstaladas en el televisor
aparecerán en una presentación de diapositivas.
USB: Aparecerán sus imágenes favoritas almacenadas
para el fondo de pantalla. Si solo hay una imagen fija
almacenada en el dispositivo de memoria USB, esa
imagen aparecerá como fondo de pantalla. Cuando hay
múltiples imágenes fijas en la memoria, se mostrarán
todas las imágenes en una presentación de diapositivas.
NOTA
Las imágenes se muestran en intervalos de 3 minutos
como una presentación de diapositivas.
Cuando el televisor esté en el modo de fondo de
pantalla, puede apagarlo manteniendo pulsado POWER
en el televisor durante 5 segundos.
- Justo antes de que se apague el televisor, aparecerá
brevemente la última imagen que se mostró antes de
apagar el televisor.
- Es posible que sus ajustes no se hayan guardado en
algunos casos.
Cuando muestre imágenes utilizando el dispositivo de
memoria USB:
Cree una carpeta con el nombre "WP" en el directorio
raíz del dispositivo de memoria USB (el primer directorio
que aparece al abrir el dispositivo de memoria USB), y
guarde en esa carpeta las imágenes fijas que desee
mostrar como fondo de pantalla.
Debe insertar el dispositivo de memoria USB en el
televisor antes de apagar el televisor.
Si hay imágenes en el dispositivo de memoria USB pero
no aparecen en la pantalla, cambie al modo USB y
compruebe si los archivos de imagen del dispositivo de
memoria USB se muestran correctamente.
Ajuste del temporizador
Puede ajustar el tiempo que el televisor seguirá en el modo
fondo de pantalla.
3 Horas/6 Horas/12 Horas/24 Horas
NOTA
No funcionará ningún botón excepto el botón POWER
aunque todavía se estén mostrando las imágenes fijas.
Si no se inserta el dispositivo de memoria USB listo para
usar, las imágenes fijas preinstaladas en el televisor se
mostrarán en una presentación de diapositivas aunque
el "Fuente de datos" esté ajustado en "USB".
Como el dispositivo de memoria USB no se puede
detectar inmediatamente después de encender el
televisor desde el modo en espera, puede mostrarse el
fondo de pantalla preinstalado en el televisor aunque el
"Fuente de datos" esté ajustado en "USB".
Las imágenes fijas se mostrarán hasta que haya
transcurrido el tiempo ajustado.
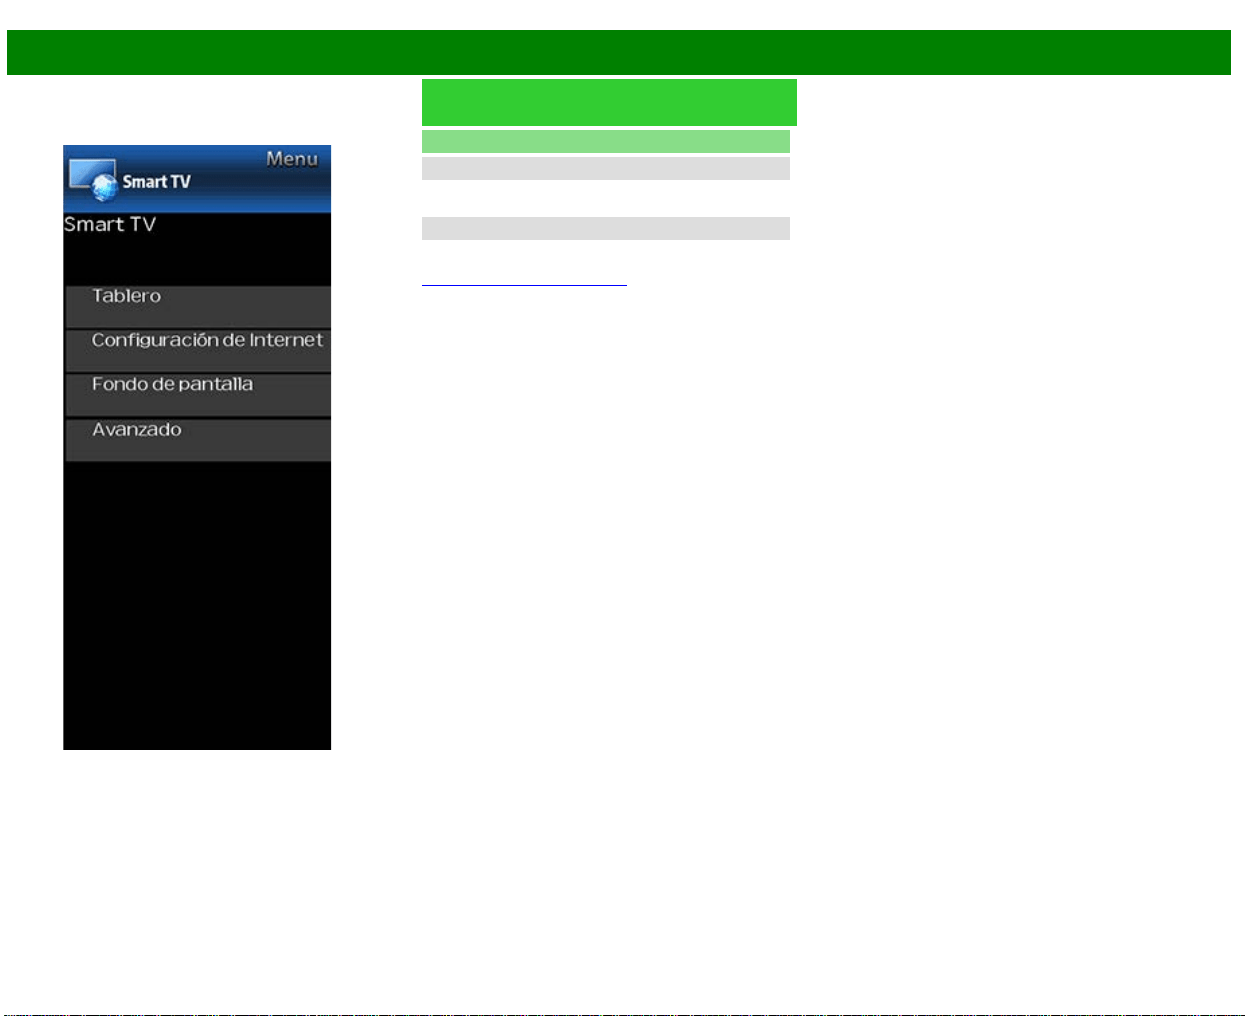
>>
<<
Menú en pantalla
ESP 4-24
Ejemplo
Smart TV (Continúa)
Avanzado
Ayuda Netflix
Puede desactivar la función Netflix. Consulte "Smart TV" >
"Avanzado" > "Ayuda Netflix" y seleccione "Desactivar".
Ayuda VUDU
Para desactivar la función VUDU consulte "Smart TV" >
"Avanzado" > "Ayuda VUDU" y seleccione "Si".
(Consulte la página 8-12 a 8-13.)
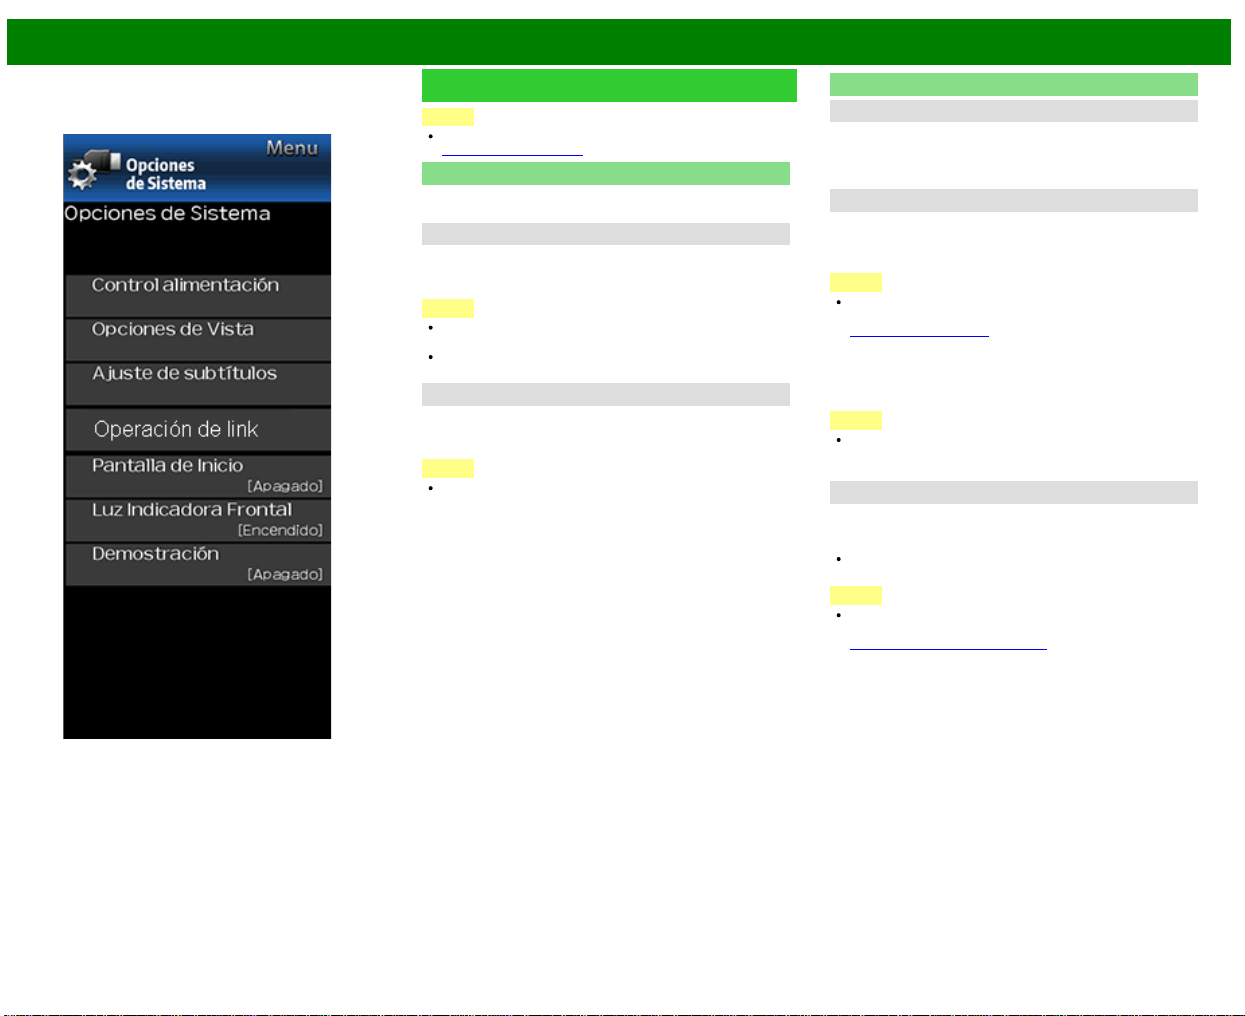
>>
<<
Menú en pantalla
ESP 4-25
Ejemplo
Opciones de Sistema
NOTA
Para operar el menú en pantalla,
consulte la página 4-3.
Control alimentación
El ajuste de control de la alimentación le permite ahorrar
energía.
Apagado sin señal
Cuando esta función está activada, el televisor se apaga
automáticamente si no recibe ninguna señal durante más de
15 minutos.
NOTA
5 minutos antes de apagar, el tiempo restante
comenzará a aparecer a cada minuto.
Cuando termine un programa de TV, esta función tal vez
no funcione.
Apagado sin operación
Cuando activa esta función, el televisor se apaga
automáticamente si no se realiza ninguna operación durante
más de tres horas.
NOTA
5 minutos antes de apagar, el tiempo restante
comenzará a aparecer a cada minuto.
Opciones de Vista
Modo de Vista
Esta función cambia el tamaño de la pantalla.
Seleccione "Opciones de Vista" en el menú para visualizar
la pantalla de menú Modo de Vista.
El menú Modo de Vista varía según la fuente de entrada.
Cambiar Audio
MPX
Le permite cambiar el audio cuando se dispone de múltiple
audio para el programa que está mirando.
NOTA
Puede seleccionar Audio pulsando AUDIO en el control
remoto.
Consulte la página 3-8 para detalles de la función
AUDIO.
Audio solamente
Cuando se escuche un programa de música, podrá apagar
la pantalla y disfrutar del sonido solamente.
NOTA
La imagen en la pantalla regresará a normal cuando se
pulse un botón (excepto aquellos para ajuste del audio,
como VOL, MUTE).
Cambiar CC
Le permite cambiar la visualización de los subtítulos ocultos.
Seleccione "Cambiar CC" en el menú para visualizar la
información de los subtítulos ocultos.
La información exhibida varía según el programa que
está mirando.
NOTA
Puede seleccionar los subtítulos ocultos pulsando CC en
el control remoto.
Consulte la página 3-12 a 3-13 para detalles de la
función de los subtítulos ocultos.
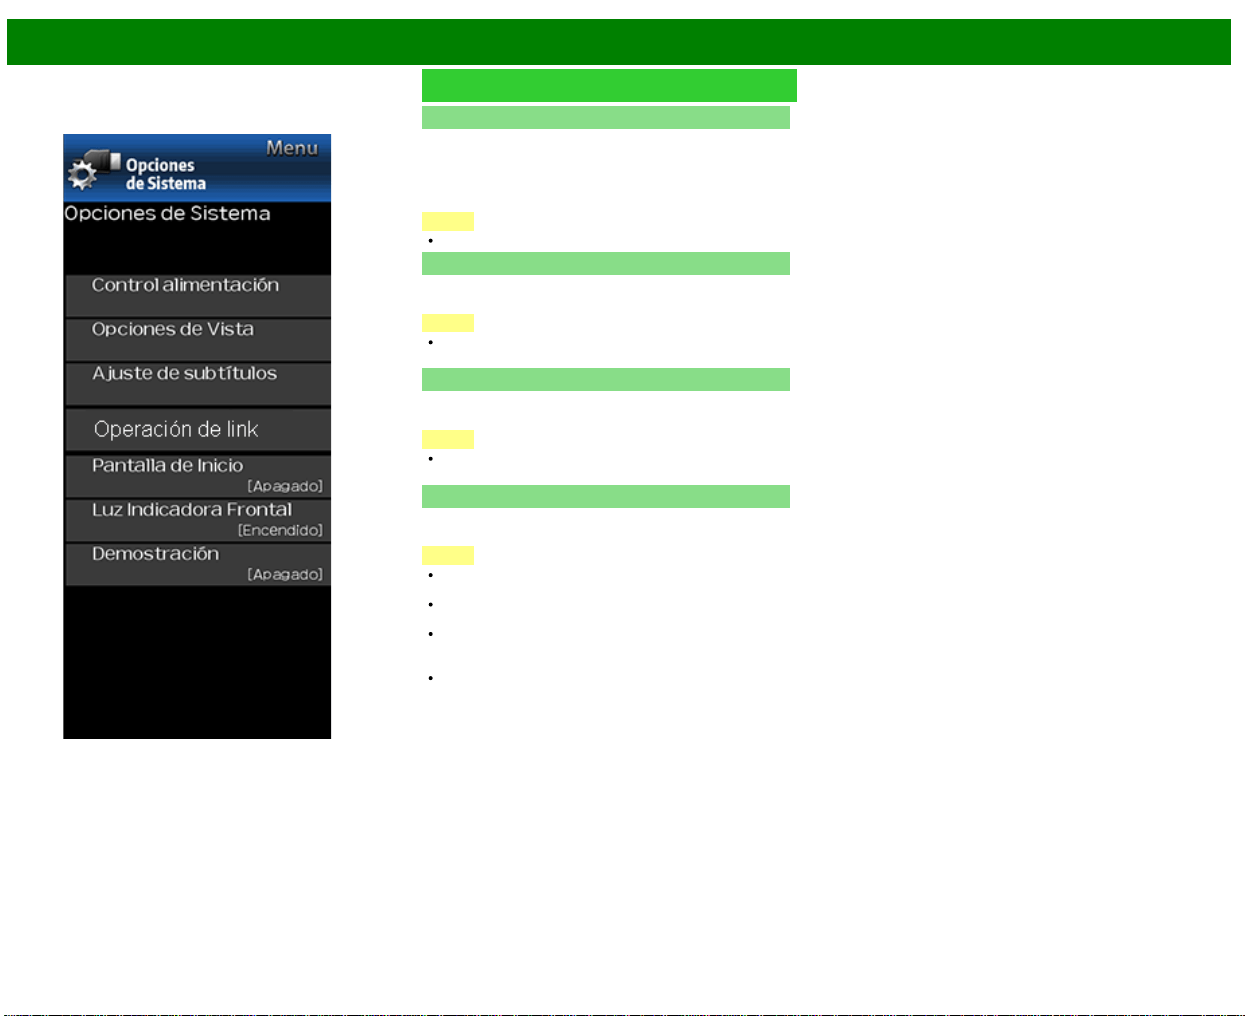
>>
<<
Menú en pantalla
ESP 4-26
Ejemplo
Opciones de Sistema (Continúa)
Ajuste de subtítulos
Esta función le permite ajustar la apariencia en la pantalla
de los subtítulos ocultos de forma que se ajusten a su
preferencia.
Size/Edge Effect/Edge Color/Text Color/Color de
fondo/Text Opacity/Opacidad de fondo
NOTA
El valor predeterminado depende de la emisora.
Pantalla de Inicio
Con esta función activada, aparecerá el logotipo de SHARP
al encender el televisor.
NOTA
Esta función no está disponible cuando el televisor está
ajustado en el "Modo de inicio rápido".
Luz Indicadora Frontal
Cuando esta función está ajustada a "Encendido", el LED
en la parte frontal del televisor se prende.
NOTA
"Encendido" es el valor de fábrica por defecto. Si se
desea apagar el LED, ajustar la función a "Apagado".
Demostración
Puede seleccionar la imagen para varios tipos de Modo
Demostración.
NOTA
Los tipos de elementos de ajuste disponibles dependen
de su modelo de televisor.
Esta función se cancelará cuando pulse EXIT en el
control remoto
"Demostración" no podrá ser seleccionado dependiendo
del tipo de señal de entrada o del estado de la
aplicación.
"Demostración" podrá ser cancelado automáticamente
dependiendo del tipo de señal de entrada.
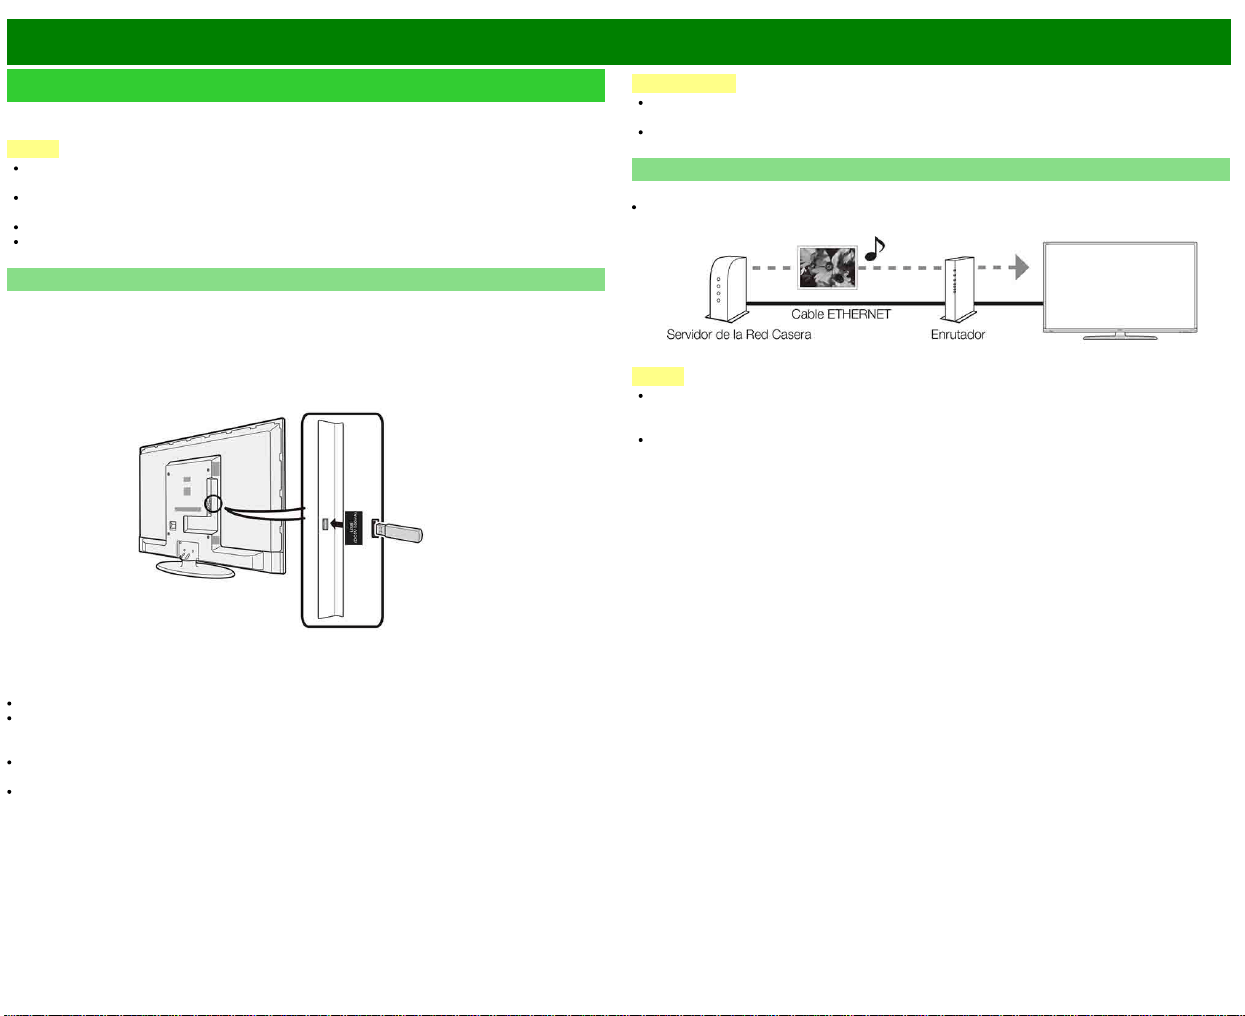
>>
<<
Disfrute con la reproducción de fotos/música/video
ESP 5-1
Preparación
Puede conectar el televisor a un dispositivo de memoria USB, un disco duro USB o un servidor
de la Red Casera, para disfrutar viendo imágenes y vídeos y escuchando música.
NOTA
Dependiendo del dispositivo de memoria USB/disco duro USB/servidor de la Red Casera, el
televisor podría no tener la capacidad de reconocer los datos grabados.
Si su dispositivo de memoria USB/disco duro USB/servidor de la Red Casera contiene
demasiados archivos o carpetas, la grabación de datos puede requerir cierto tiempo.
Use solamente caracteres alfanuméricos para poner nombre a sus archivos.
Los nombres de archivos de más de 80 caracteres (esto podría variar dependiendo del
conjunto de caracteres) podrían no ser desplegados.
Conectar al dispositivo de memoria USB/disco duro USB
Inserte el dispositivo de memoria USB con fotos, música o vídeos grabados dentro del terminal
USB en el televisor.
Al conectar un disco duro USB, asegúrese de utilizar un adaptador CA.
No remueva un dispositivo de memoria USB o tarjeta de memoria del televisor mientras se
estén transfiriendo archivos, usando la función de exhibición de diapositivas o cambiando de
pantallas o antes de salir de "USB" desde la Lista de entradas.
No inserte y remueva un dispositivo de memoria USB/disco duro USB al o del televisor
repetidamente.
Cuando use un lector de tarjetas, asegúrese de insertar un dispositivo de memoria USB
primero.
PRECAUCIÓN
No utilice un cable USB alargador cuando conecte un dispositivo de memoria USB al
terminal USB del televisor.
El utilizar un alargador USB con el dispositivo de memoria USB puede provocar que el
televisor no funcione correctamente.
Conectar al servidor de la red casera
Conecte el televisor al servidor de la Red Casera utilizando un cable ETHERNET.
También es posible conectar un servidor de Red Casera utilizando LAN inalámbrico.
NOTA
No desconecte el servidor de la Red Casera del televisor mientras se están transfiriendo
archivos, cuando la pantalla está cambiando a otra o antes de salir de "Red Casera(DLNA)"
desde la Lista de entradas.
No conecte o desconecte un servidor de la Red Casera desde/al televisor repetidamente.
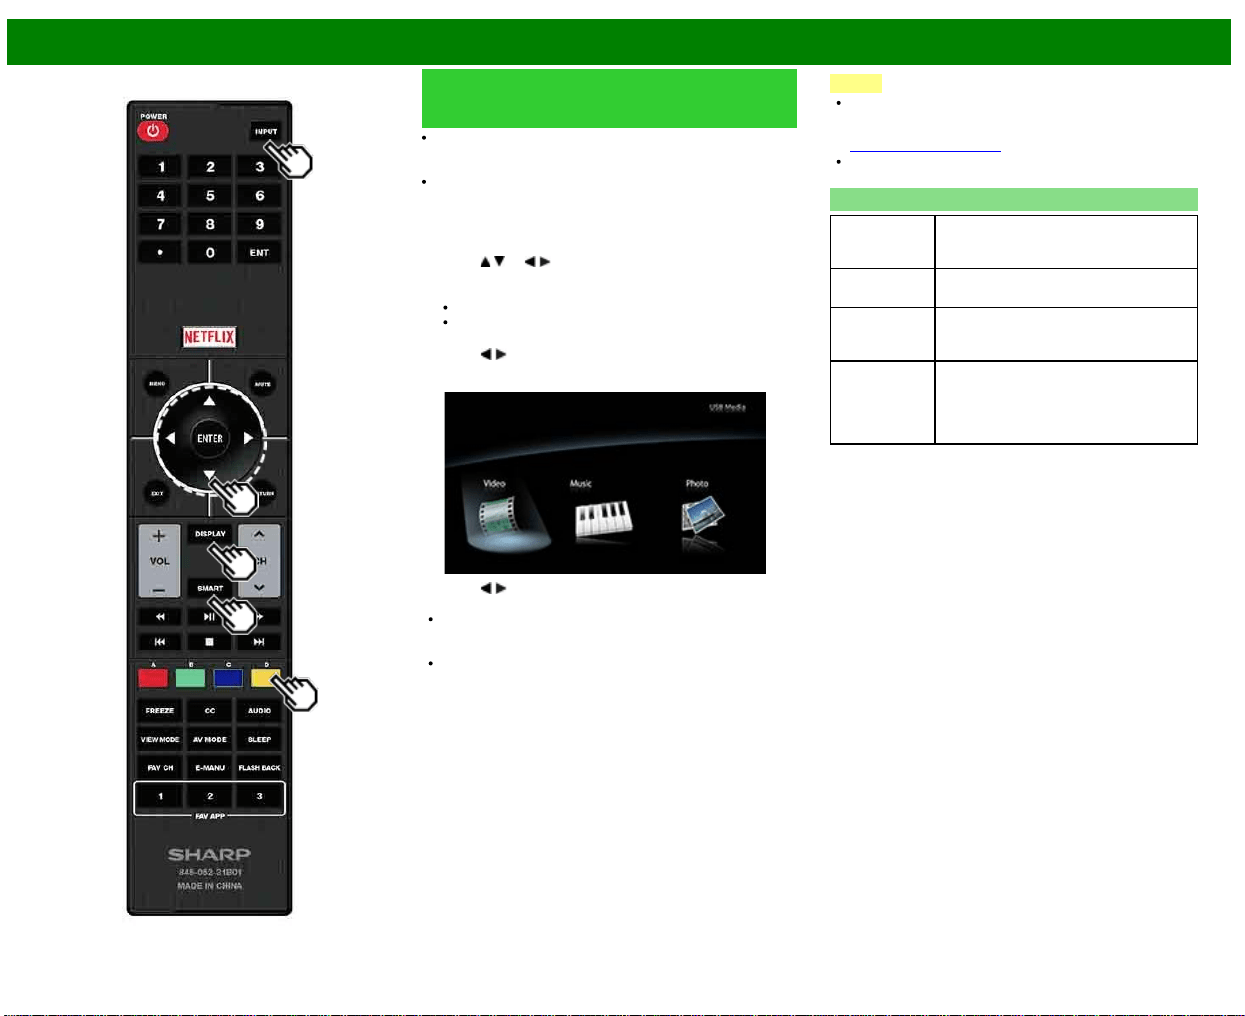
>>
<<
Disfrute con la reproducción de fotos/música/video
ESP 5-2
Seleccionar las carpetas para
reproducir
Para reproducir los datos de un dispositivo de memoria
USB, introdúzcalo en el televisor. El modo USB se
seleccionará automáticamente. (Vaya al paso 2)
Siga el siguiente procedimiento para regresar al modo
USB después de haber pasado del modo USB a un modo
distinto.
1 Seleccione "USB" o "Red Casera(Home Network)" en la
pantalla de Lista de entradas.
2 Pulse
/ (o / ) para seleccionar la unidad o el
servidor donde desea buscar sus archivos, y luego pulse
ENTER.
Para el modo USB, seleccione la unidad.
Si está en el Modo de red casera, seleccione el
servidor.
3 Pulse
/ para seleccionar "Foto", "Música" o "Video", y
luego pulse ENTER.
Ejemplo
4 Pulse / para seleccionar la carpeta deseada,
y luego pulse ENTER.
"Modo de Vista" se fija durante el modo de fotos o
música. Durante el modo de "Video", puede seleccionar
"Auto", "Original" u "Stretch".
Durante el "Modo de vídeo" los vídeos que sean menores
que el número de píxeles de la pantalla se mostrarán a
su tamaño original. En dichos casos, cambie el "Modo
de Vista" a "Auto" para que el vídeo llene la pantalla.
NOTA
Se puede ver la pantalla de medios incluso utilizando la
ventana de aplicaciones. Para ver la ventana de
aplicaciones, pulse SMART.
(Consulte la página 3-6.)
El número máximo de unidades de USB que es posible
mostrar es de 16, y el de servidores de Red Casera, 10.
Compatibilidad del dispositivo USB
Dispositivo
USB
Memoria USB, lector de tarjetas USB
(Clase de Almacenamiento Masivo),
disco duro USB
Sistema de
archivos
FAT/FAT32/NTFS (sólo disco duro USB)
Formato de
archivo de
fotos
JPEG (.jpg) (Cumple con DCF2.0)
Formato de
archivo de
música
MP3 (.mp3)
Velocidad binaria: 32k, 40k, 48k, 56k,
64k, 80k, 96k, 112k, 128k, 160k, 192k,
224k, 256k, 320kbps Frecuencia de
muestreo: 32k, 44,1k, 48kHz
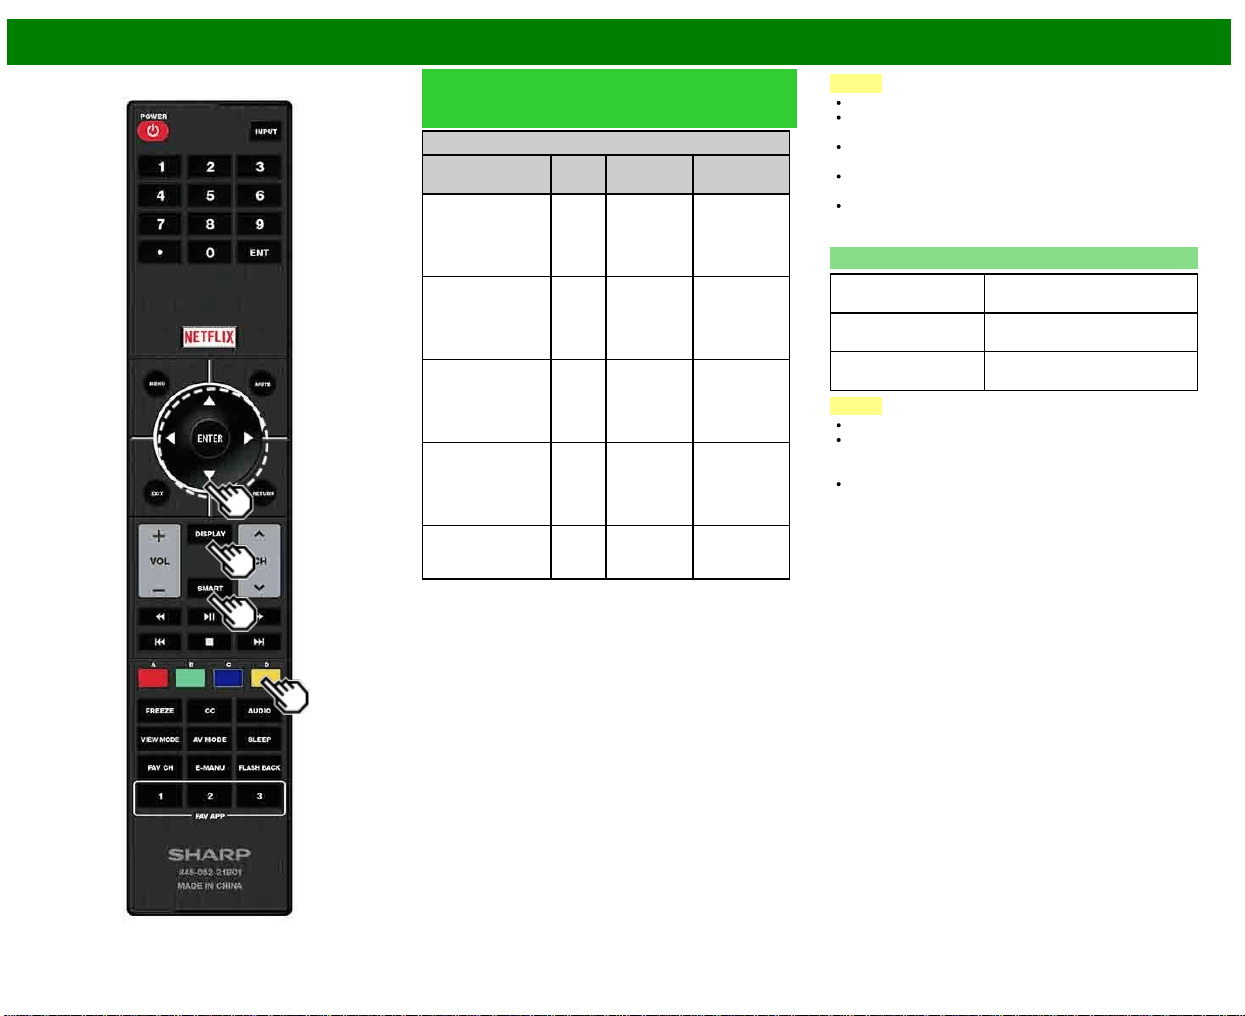
>>
<<
Disfrute con la reproducción de fotos/música/video
ESP 5-3
Seleccionar las carpetas para
reproducir (Continúa)
Formato de archivo de vídeo
Extensión del
archivo
Conte-
nedor
Vídeo Audio
.avi AVI
H.264
MPEG4
Motion Jpeg
MP3
Dolby Digital
LPCM
ADPCM
DTS
.mkv MKV
H.264
MPEG4
MP3
Dolby Digital
LPCM
ADPCM
DTS
.asf
.wmv
ASF
MPEG4
VC
-1
Windows
Media
MP3
Dolby Digital
LPCM
WMA
.mp4
.mov
MP4
(SMP4)
H.264
MPEG4
Motion Jpeg
MP3
Dolby Digital
Dolby Digital
Plus
AAC
.mpg
.mpeg
PS
MPEG2
MPEG1
Dolby Digital
MPEG
LPCM
NOTA
No se soportan los archivos jpeg de formato progresivo.
Dispositivos USB 1.1 podrían no ser reproducidos
apropiadamente.
No se garantiza la operación cuando se usan
concentradores USB.
Es posible que algunos formatos de archivo de vídeo
no puedan reproducirse.
Es posible que algunas imágenes no se muestren con la
proporción dimensional adecuada dependiendo del
formato del archivo.
Compatibilidad del servidor de red casera
Formato de archivo
de fotos
JPEG
Formato de archivo
de música
LPCM, MP3
Formato de archivo
de vídeo
MPEG2-PS, MPEG2-TS,
WMV, ASF, MP4, MOV, AVI
NOTA
No se soportan los archivos jpeg de formato progresivo.
Es posible que algunos formatos de archivo de vídeo no
puedan reproducirse dependiendo del archivo o del
servidor.
WMV, ASF, MP4, MOV y AVI son contenidos no Red
casera.
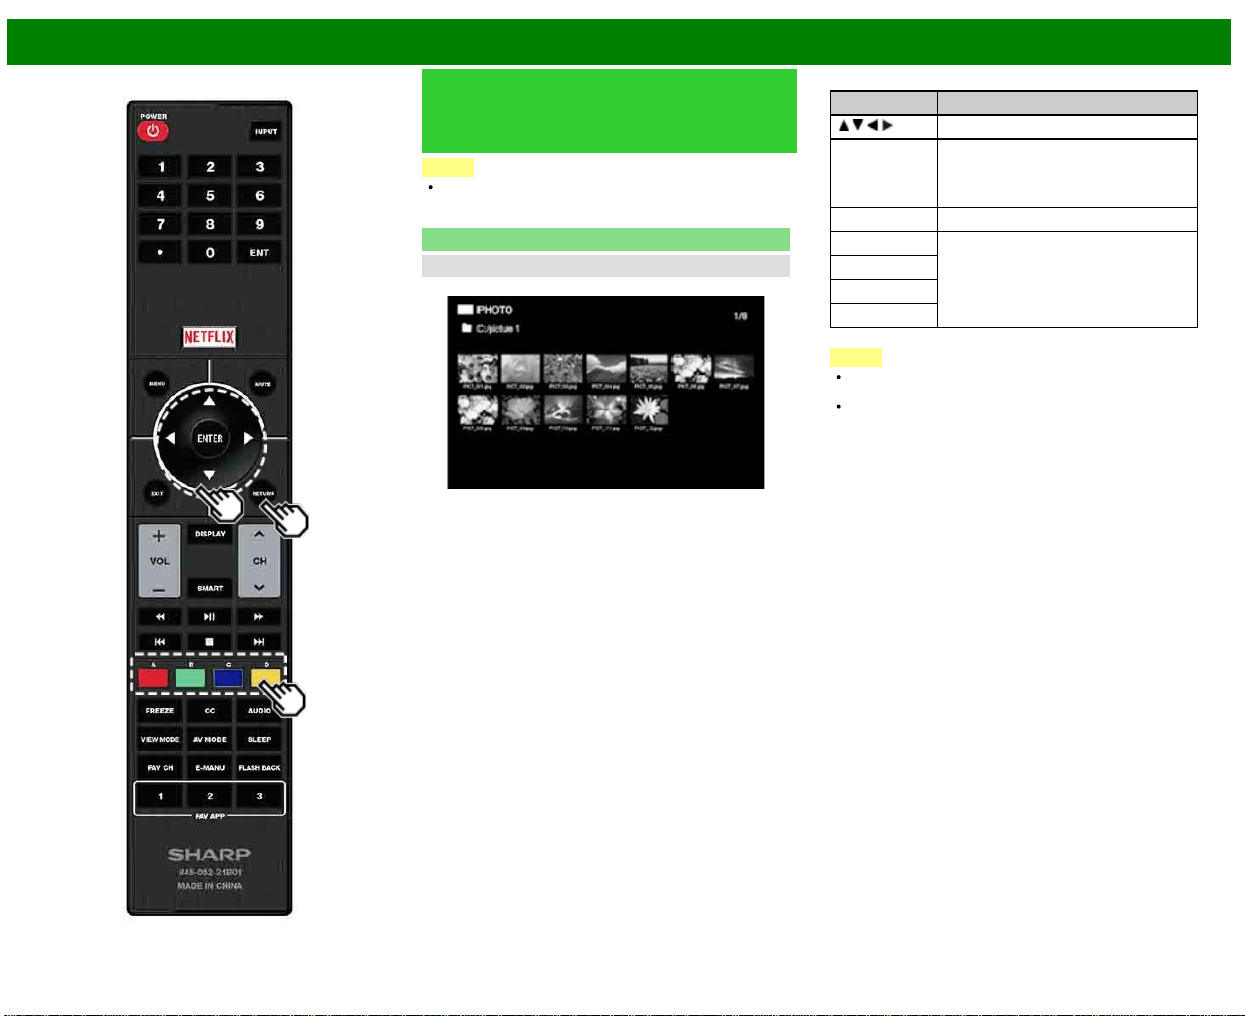
>>
<<
Disfrute con la reproducción de fotos/música/video
ESP 5-4
Reproducir archivos de un
dispositivo de memoria
USB/servidor de la red casera
NOTA
Las imágenes de pantallas de esta sección son para el
modo USB. Puede ser ligeramente diferente en el modo
de Red Casera.
Modo de fotos
Visualización de vistas miniaturizadas
Ejemplo
Botones para visualización de vistas miniaturizadas
Botones Descripción
/ / / Seleccionar el elemento deseado.
ENTER Al seleccionar un icono de carpeta:
Ingresar a este directorio.
Al seleccionar una vista miniaturizada
de foto: Archivo siguiente
RETURN Retornar al proceso anterior.
A (rojo) Borre la pantalla de información de
archivos.
B (verde)*
C (azul)
D (amarillo)
*Esta función solo está disponible para el modo USB.
NOTA
Cuando haya archivos de fotos inválidos, la marca X se
visualizará para el archivo (modo USB solamente).
Segundos después de que el cursor se soloque sobre
una miniatura, la información del archivo se visualiza a la
derecha del centro de la pantalla.
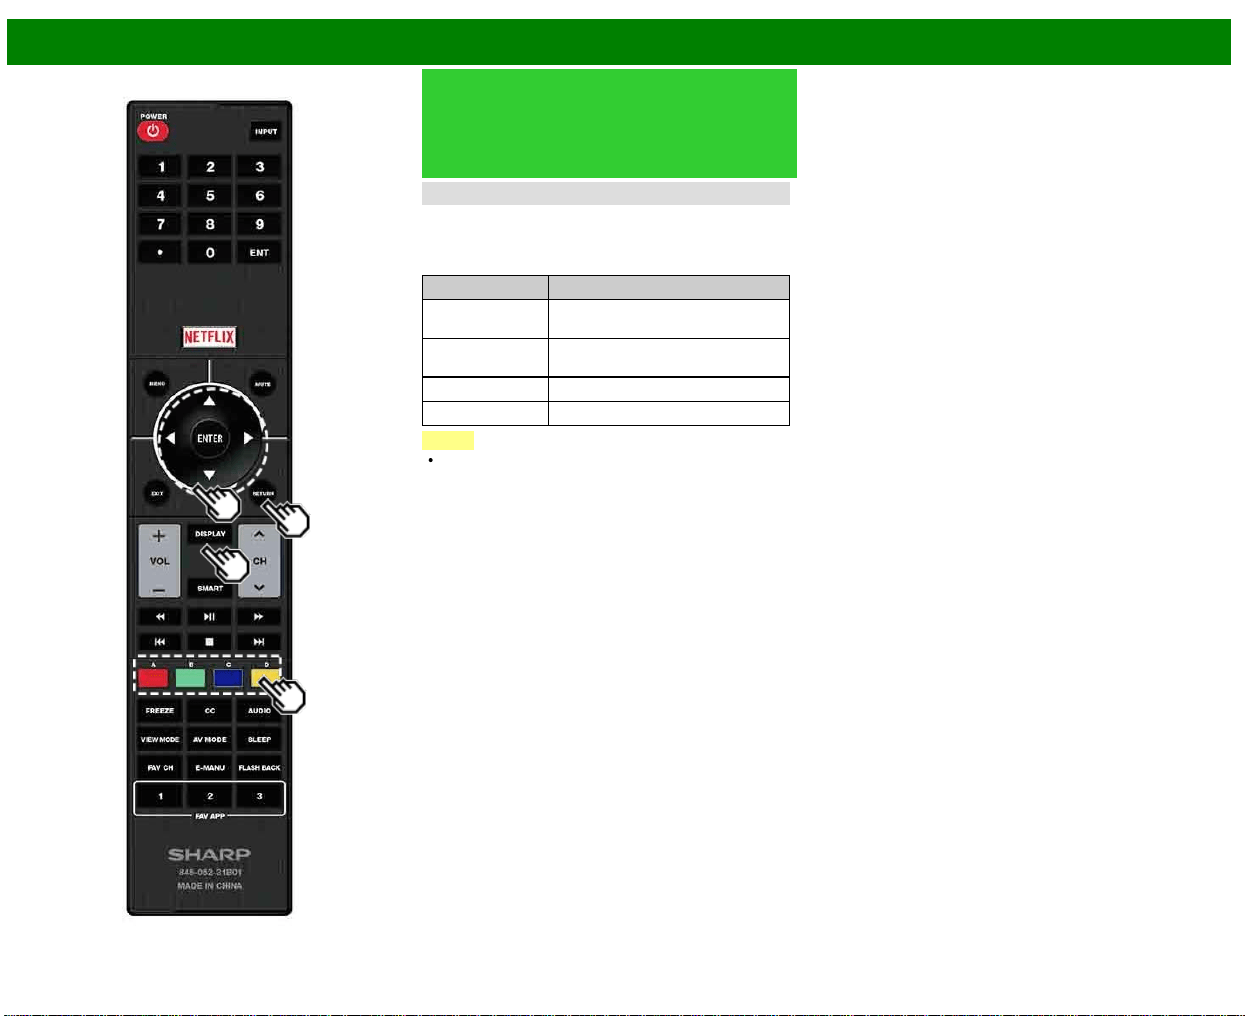
>>
<<
Disfrute con la reproducción de fotos/música/video
ESP 5-5
Reproducir archivos de un
dispositivo de memoria
USB/servidor de la red casera
(Continúa)
Presentación de diapositivas
Las fotos exhibidas en la pantalla de selección de vistas
miniaturizadas son exhibidas como una presentación de
diapositivas.
Botones para presentación de diapositivas
Botones Descripción
RETURN Retornar a la pantalla de selección
de vistas miniaturizadas.
B (verde) Mostrando/ocultando la guía de
funcionamiento
C (azul) Archivo anterior
D (amarillo) Archivo siguiente
NOTA
La rotación de fotos solo se aplica al elemento
seleccionado temporalmente y esta configuración no es
guardada.
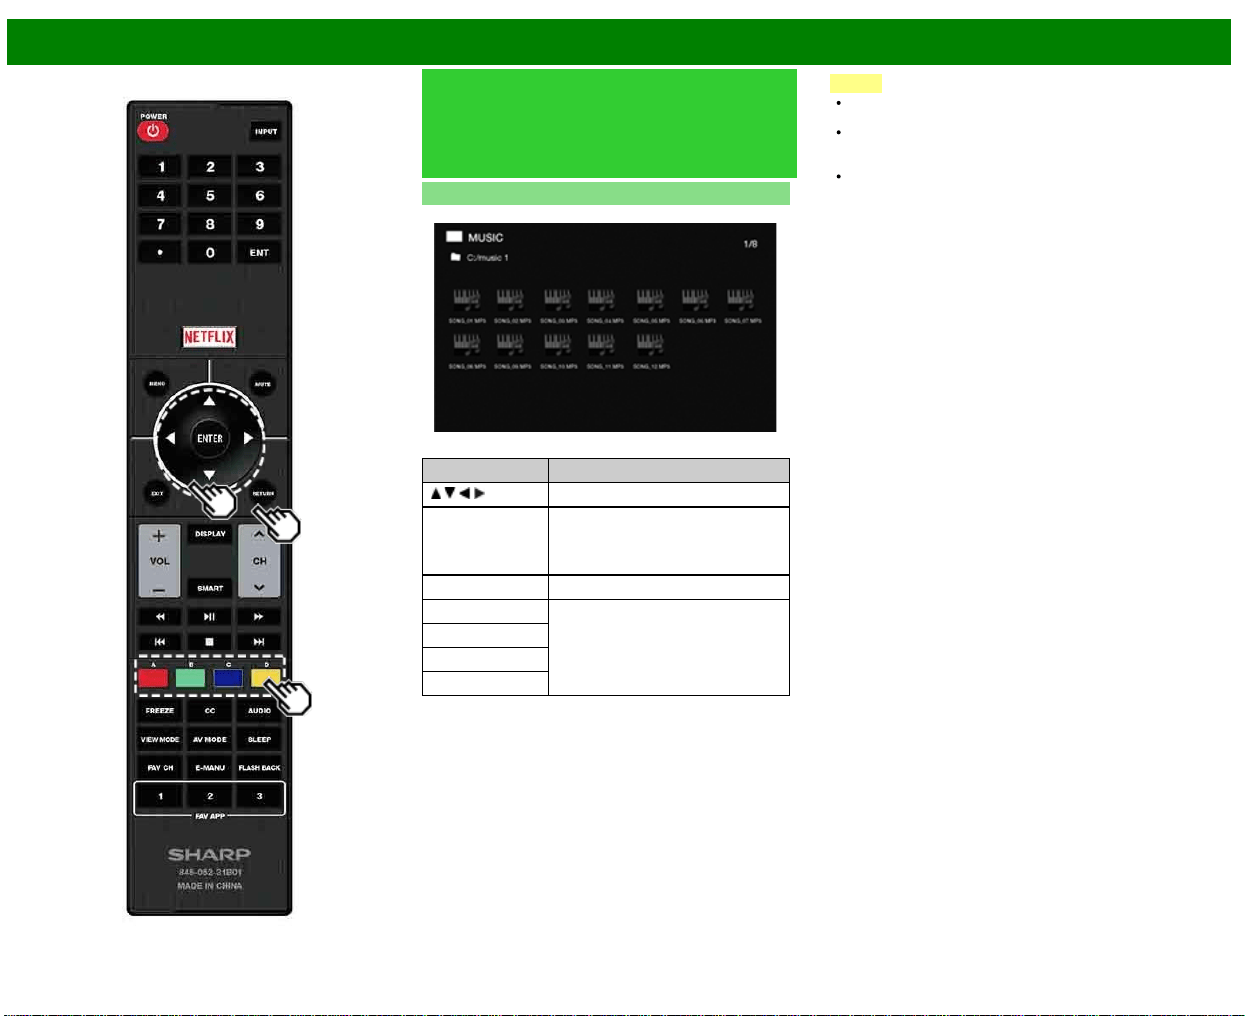
>>
<<
Disfrute con la reproducción de fotos/música/video
ESP 5-6
Reproducir archivos de un
dispositivo de memoria
USB/servidor de la red casera
(Continúa)
Modo de música
Ejemplo
Botones para el modo de música
Botones Descripción
/ / / Seleccionar el elemento deseado.
ENTER Al seleccionar un icono de carpeta:
Ingresar a este directorio.
Al seleccionar un archivo de música:
Reproducir música.
RETURN Retornar al proceso anterior.
A (rojo) Borre la pantalla de información de
archivos.
B (verde)
C (azul)
D (amarillo)*
* Esta función solo está disponible para el modo USB.
NOTA
Cuando haya archivos de música inválidos, la marca X
será exhibida para el archivo (modo USB solamente).
El tiempo de reproducción desplegado puede diferir
levemente del tiempo de reproducción real dependiendo
de los archivos.
Segundos después de que el cursor se soloque sobre
una miniatura, la información del archivo se visualiza a la
derecha del centro de la pantalla.
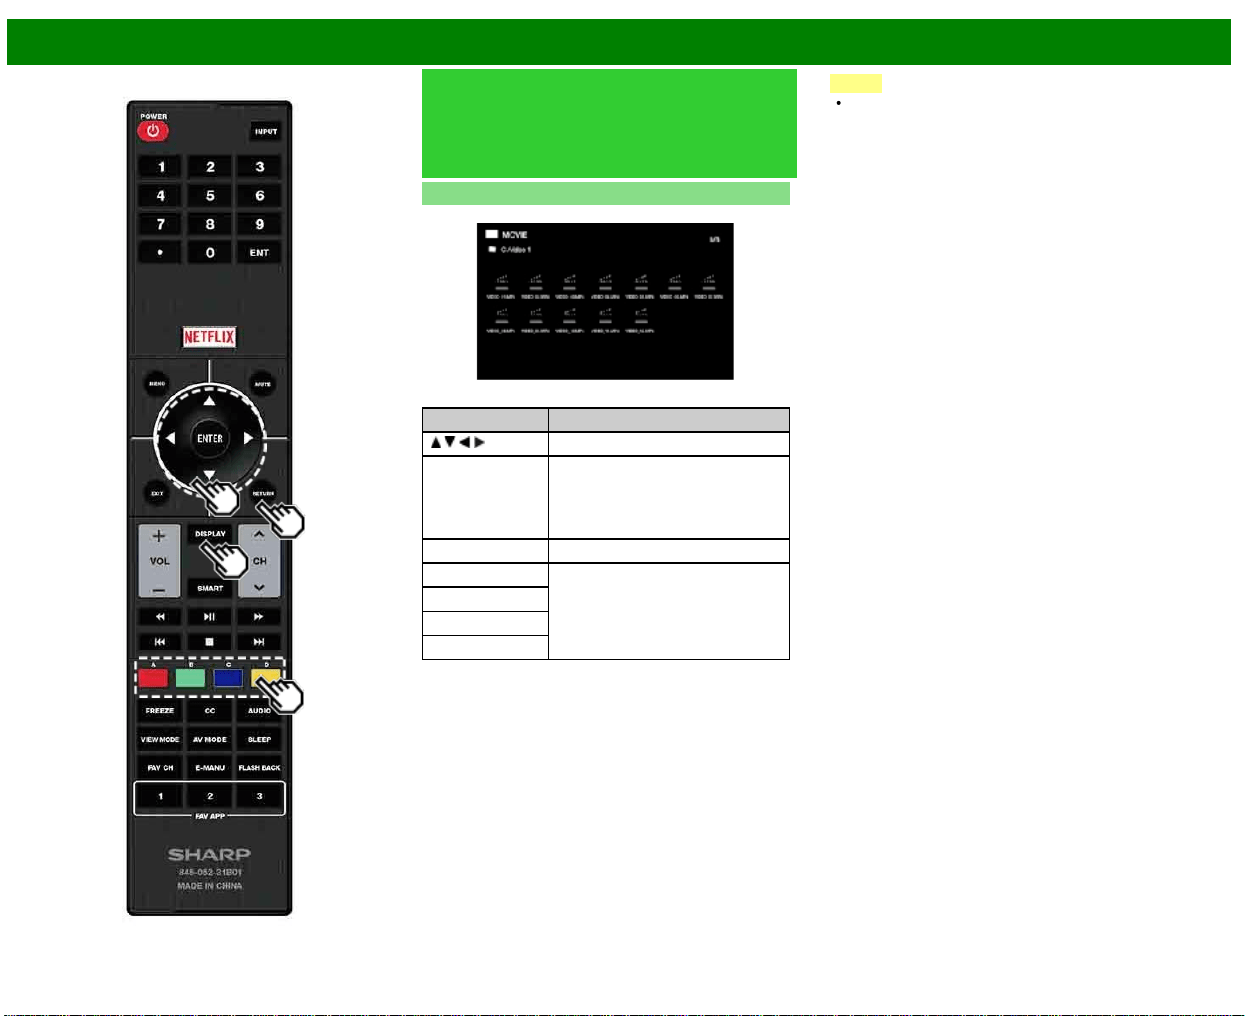
>>
<<
Disfrute con la reproducción de fotos/música/video
ESP 5-7
Reproducir archivos de un
dispositivo de memoria
USB/servidor de la red casera
(Continúa)
Modo de vídeo
Ejemplo
Botones para operaciones de selección de archivos
Botones Descripción
/ / / Seleccionar el elemento deseado.
ENTER Al seleccionar un icono de carpeta:
Ingresar a este directorio.
Cuando se selecciona un archivo de
vídeo:
Reproducir el vídeo.
RETURN Reproducir el vídeo.
A (rojo) Borre la pantalla de información de
archivos.
B (verde)
C (azul)
D (amarillo)*
* Esta función solo está disponible para el modo USB.
NOTA
Segundos después de que el cursor se soloque sobre
una miniatura, la información del archivo se visualiza a la
derecha del centro de la pantalla.
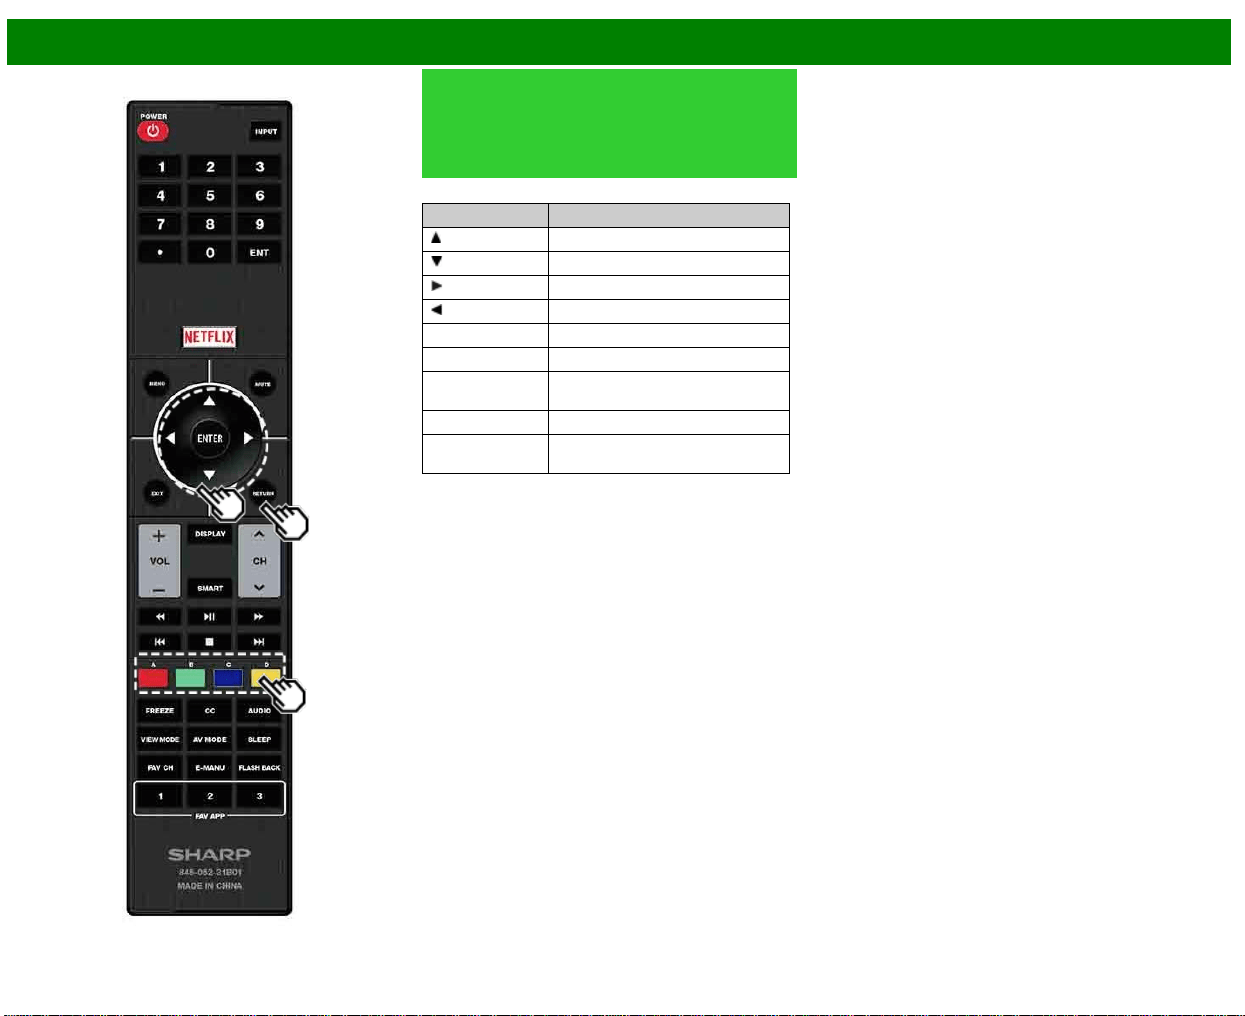
>>
<<
Disfrute con la reproducción de fotos/música/video
ESP 5-8
Reproducir archivos de un
dispositivo de memoria
USB/servidor de la red casera
(Continúa)
Botones para el modo de reproducción
Botones Descripción
Avance de marco
Detener reproducción
Avance rápido
Retroceso rápido
A (rojo) Borrar OSD
B (verde) Archivo anterior
C (azul) Mostrar/ocultar guía de
funcionamiento
D (amarillo) Archivo siguiente
RETURN Volver a la pantalla de selección de
archivos.
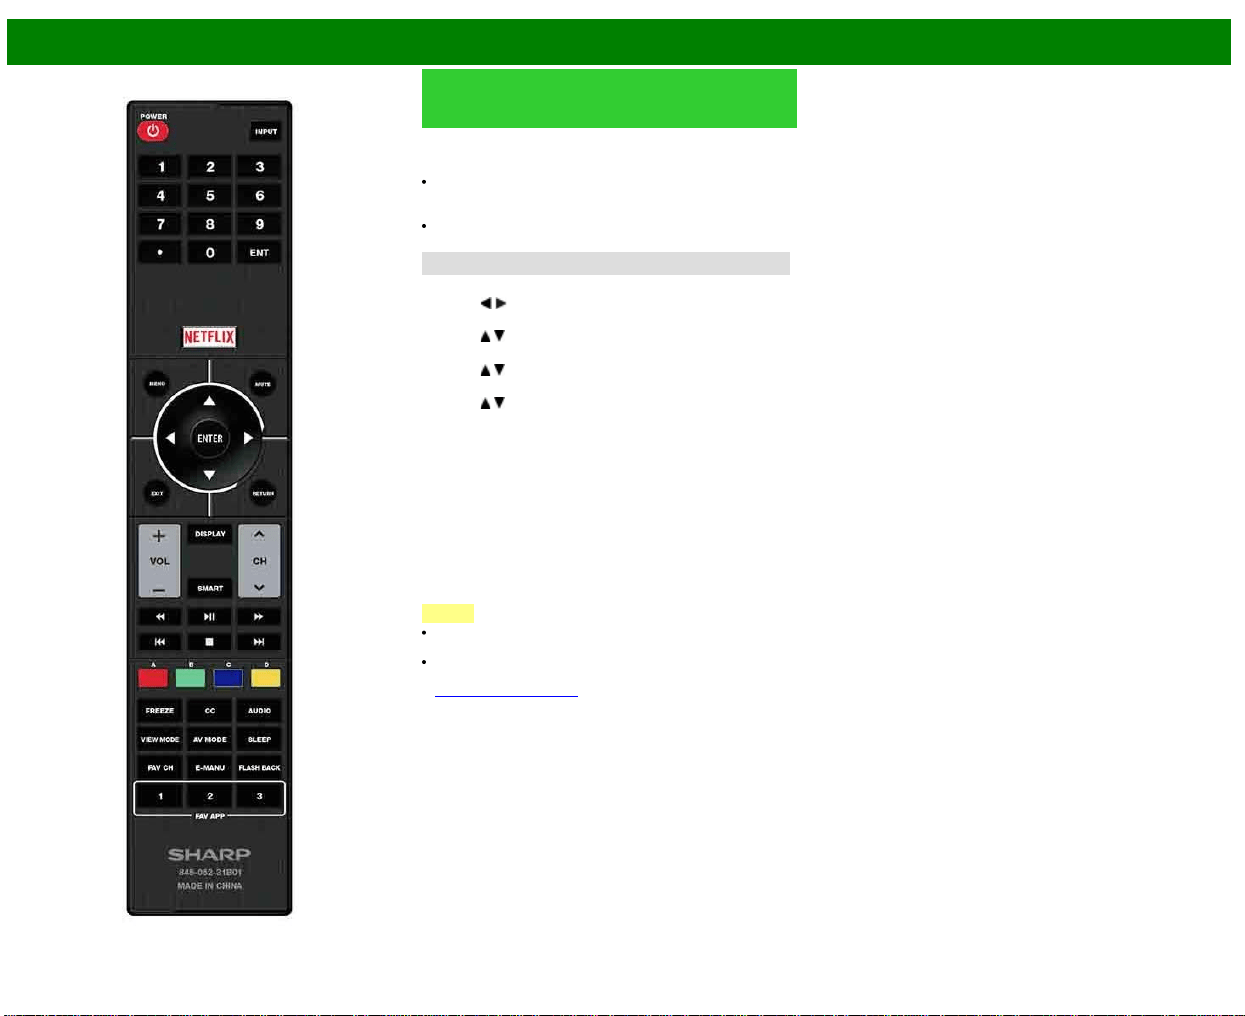
>>
<<
Disfrute con la reproducción de fotos/música/video
ESP 5-9
Reproducción de archivos desde
un dispositivo portátil o un PC
Con la función de reproducción remota, puede utilizar su
dispositivo portátil para reproducir fotos, vídeo y música en
el servidor de la Red Casera.
(DMR) Para utilizar la función de reproducción remota, su
dispositivo portátil debe ser un controlador multimedia
digital con certificado DLNA.
Se requiere un punto de acceso inalámbrico para utilizar
un dispositivo portátil.
Configurar red casera
Haga los ajustes para la reproducción remota.
1 Pulse
/ para seleccionar "Smart TV", y luego pulse
ENTER.
2 Pulse
/ para seleccionar "Configuración de Internet",
y luego pulse ENTER.
3 Pulse
/ para seleccionar "Configurar Red Casera", y
luego pulse ENTER.
4 Pulse
/ para seleccionar el elemento de ajuste
específico, y luego pulse ENTER para ajustar cada
elemento.
Configuración de reproducción de control remoto
Este ajuste permite al televisor realizar la reproducción
remota.
Permitido/No permitido
Ajuste de tiempo de espera
Este ajuste establece el tiempo hasta que el televisor vuelve
automáticamente al modo de televisión al finalizar la
reproducción remota.
10 seg./60 seg./No
NOTA
Es posible que no se pueda utilizar esta función mientras
se esté usando una aplicación de Internet.
Si desea información sobre los formatos compatibles,
consulte "Compatibilidad del servidor de red casera" en la
Consulte la página 6-3.
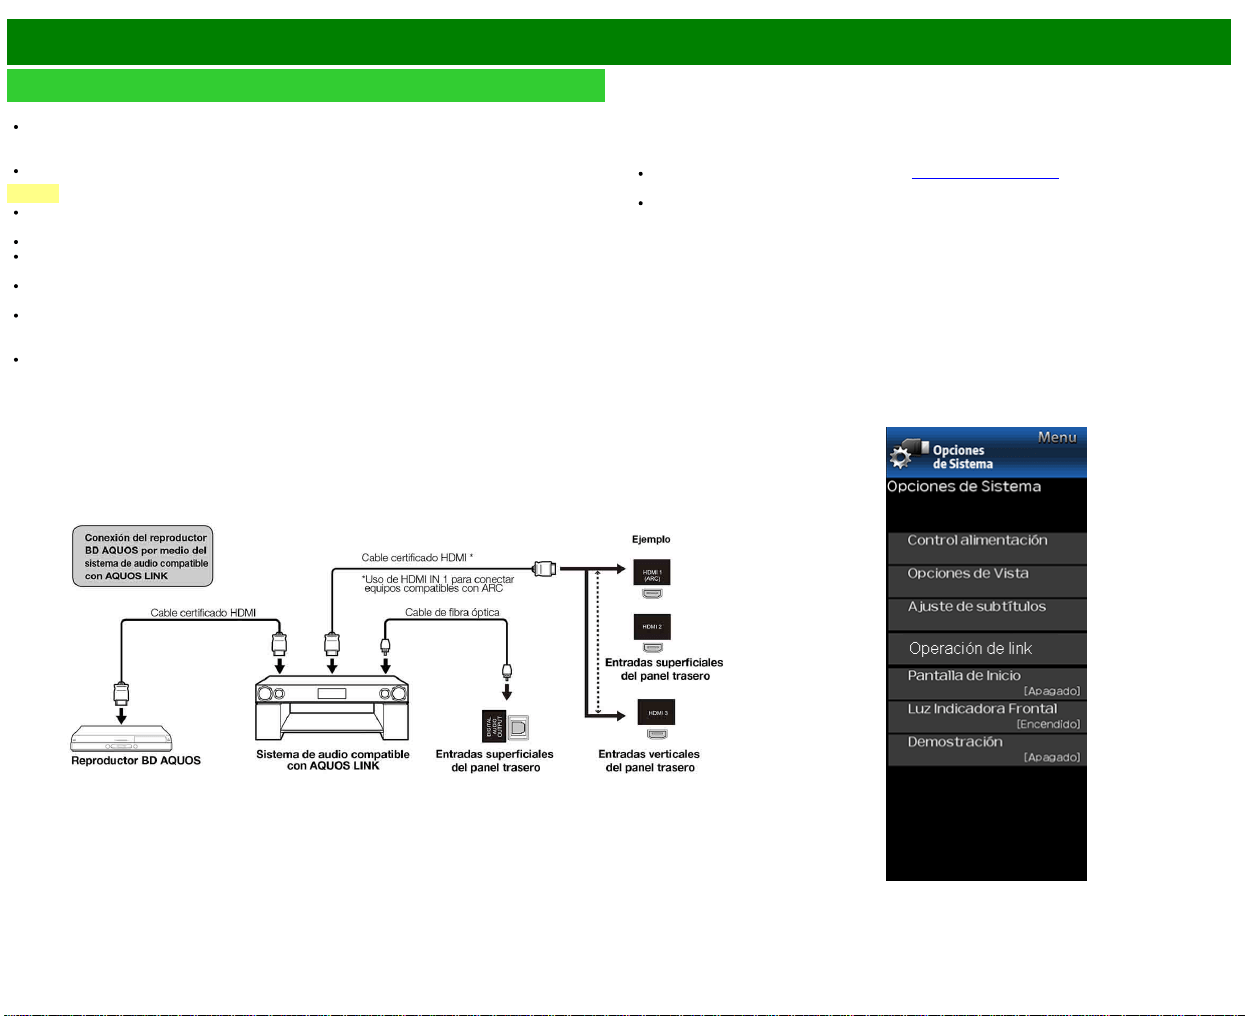
>>
<<
Usando Operación de link
ESP 6-1
Control de los equipos HDMI usando Operación de link
¿Qué es Operación de link?
Al usar el protocolo HDMI CEC (Control electrónico de consumidores), con Operación de link
usted puede interactivamente operar equipos de sistema compatible (equipo de disco Blu-ray,
amplificador AV, DVD).
Operación de link le permite operar el equipo HDMI conectado con un control remoto.
NOTA
Para la conexión del televisor a un equipo compatible con LINK, use cables disponibles
comercialmente.
Apunte con el control remoto hacia el TV, no al equipo HDMI conectado.
Podría presentarse ruido proveniente del vídeo dependiendo del tipo de cable HDMI utilizado.
Asegúrese de usar un cable certificado HDMI.
Se pueden conectar hasta 3 equipos de grabación HDMI y un amplificador AV usando este
sistema.
Estas funciones afectan los equipos HDMI seleccionados como la fuente de entrada actual. Si
el equipo no funciona, encienda el equipo y seleccione la fuente de entrada apropiada usando
INPUT.
La función LINK tal vez no funcione correctamente cuando un filtro HDMI o un selector AV se
usa. Estos dispositivos pueden interrumpir la imagen y/o el sonido.
Se pueden operar los dispositivos conectados compatibles con LINK sin cambiar los ajustes del
control remoto.
Control de sistema de audio compatible con LINK
Ajusta el volumen del sistema de audio compatible con LINK.
NOTA
Los pasos descritos en "LINK setup" en la (Consulte la página 6-2) necesitan llevarse a cabo
de antemano.
Consulte este manual de operación y el manual del dispositivo LINK que se va a utilizar con
este televisor.
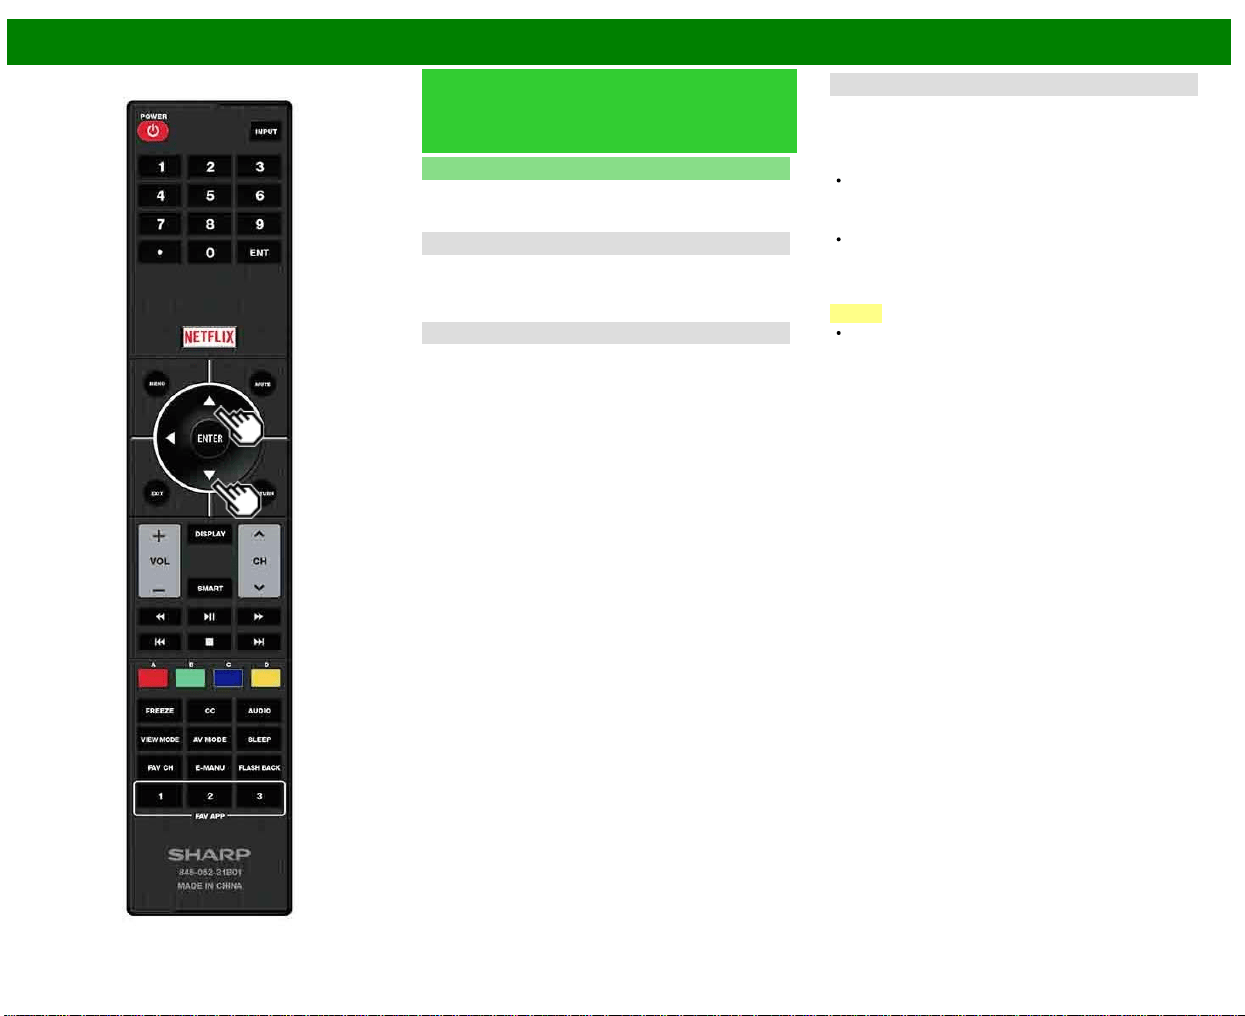
>>
<<
Usando Operación de link
ESP 6-2
Control de los equipos HDMI
usando Operación de link
(Continúa)
Ajustes LINK
Haga los ajustes para utilizar Operación de link. Establezca
los ajustes con "Configuración Inicial" > "Configuración de
Entrada" > "Ajustes LINK".
Link Operation
Seleccione el Control Operación de link para deshabilitar la
función LINK aun cuando un dispositivo HDMI compatible
con LINK esté conectado al televisor. Esta función evita que
el dispositivo comience a operar repentinamente.
Encendido autom.
Si esto se activa, la función de Reproducción con un
solo toque se habilitará. Cuando el TV se encuentre
en espera, automáticamente se enciende y se
reproduce la imagen proveniente de la fuente HDMI.
Canal de Retorno de Audio
Esta función le permite escuchar el audio del TV por medio
del equipo de audio sin usar un cable de fibra óptica, el
cual se requiere convencionalmente.
Requerimientos para usar un amplificador AV
compatible con ARC:
Amplificador AV compatible con ARC conectado con el
terminal HDMI IN compatible con ARC. (HDMI IN)
(Consulte los detalles en el manual de operación del
equipo compatible con ARC.)
Uso de un cable compatible con ARC.
Auto: Puede escuchar el audio del TV con un equipo de
audio compatible con ARC.
Apagado: No funciona.
NOTA
Si el audio del TV no se puede obtener desde el
amplificador de AV aún después de realizar los ajustes
necesarios, conecte el TV al amplificador de AV con un
cable de fibra óptica y seleccione "Apagado".
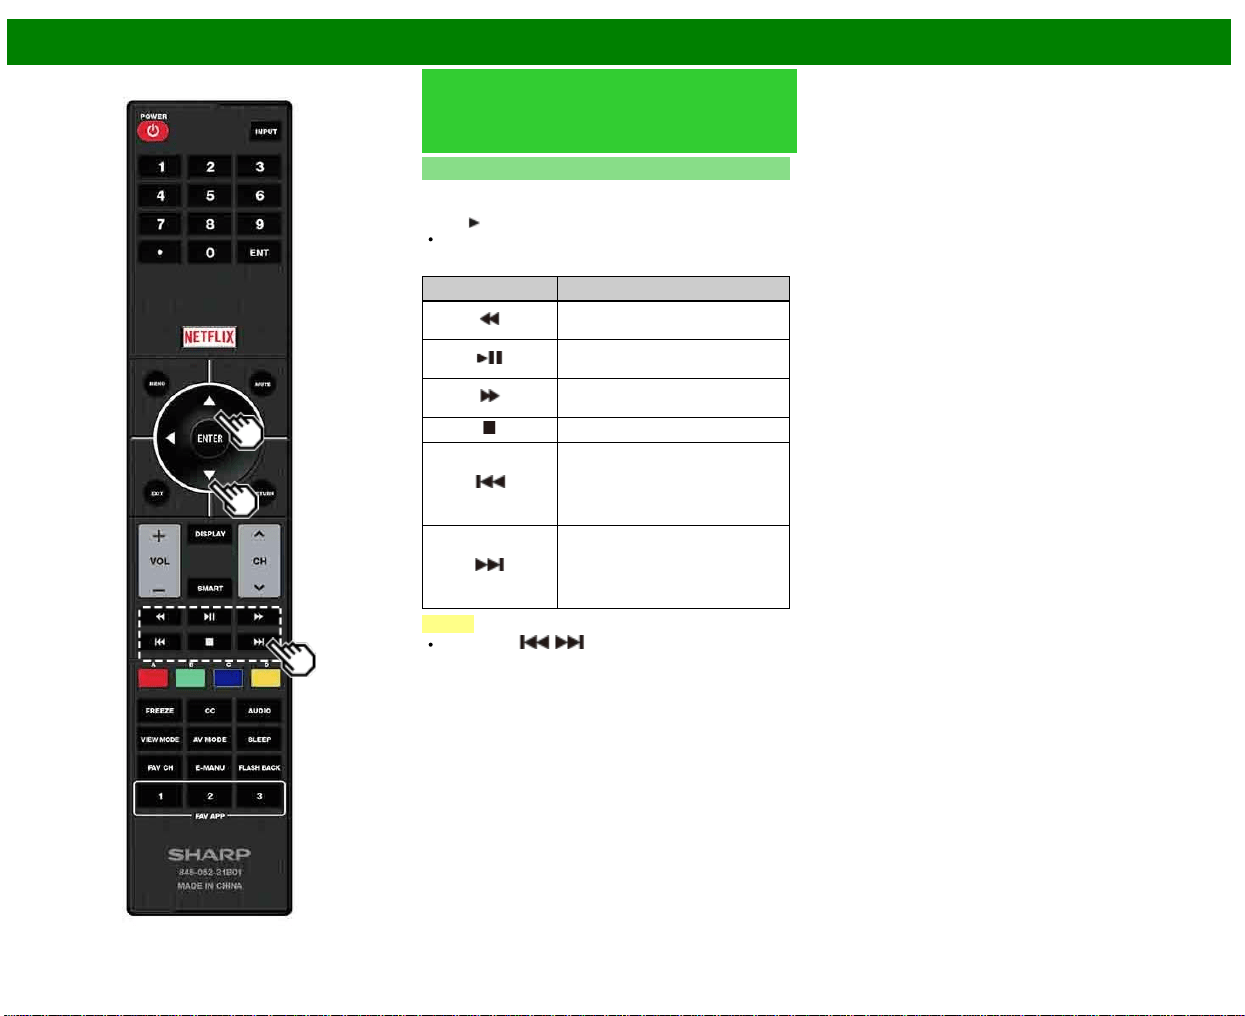
>>
<<
Usando Operación de link
ESP 6-3
Control de los equipos HDMI
usando Operación de link
(Continúa)
Reproducción con un solo toque
Operación de link le permite operar el equipo HDMI
conectado con un control remoto.
Pulse
para iniciar la reproducción de un título.
Se reproduce el último programa reproducido. Puede
usar los siguientes botones cuando se encuentra viendo
una emisión.
Botones Descripción
Mantenga pulsado este botón para
ir en sentido contrario.
Iniciar la reproducción.Establecer
pausas e imágenes fijas.
Mantenga pulsado este botón para
avanzar rápidamente.
Detener la reproducción.
Al pulsarlo rápidamente una vez se
va al principio del capítulo que está
siendo reproducido. Cada vez que
lo pulse, retrocederá al comienzo
del capítulo anterior.
Al pulsarlo rápidamente una vez se
va al principio del siguiente
capítulo. Cada vez que lo pulse,
avanzará al comienzo del siguiente
capítulo.
NOTA
Los botones / no funcionan con los siguientes
reproductores de disco Blu-ray disponibles actualmente.
- BD-HP20U, BD-HP50U
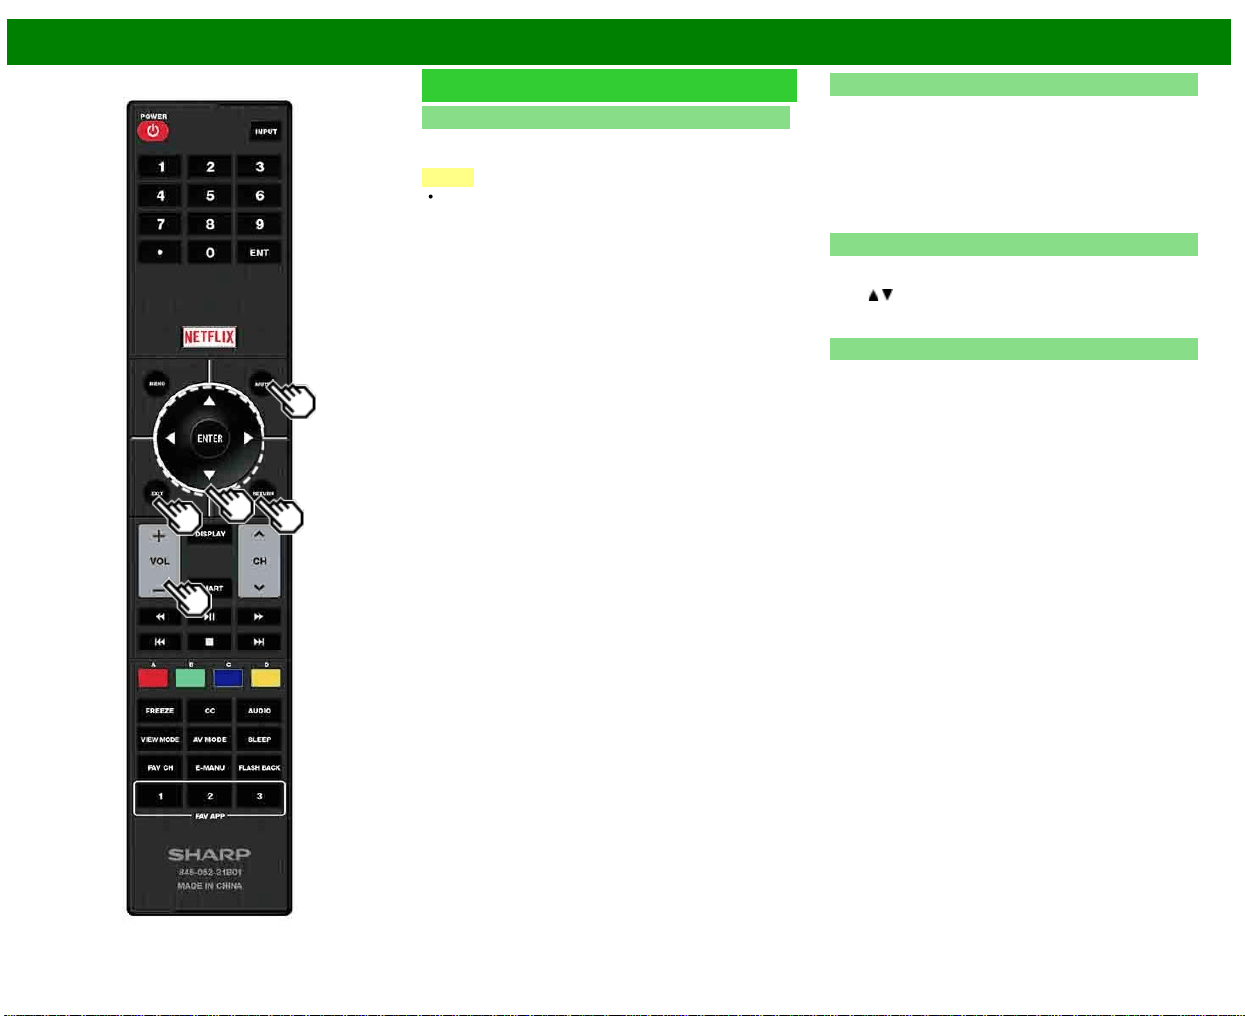
>>
<<
Usando Operación de link
ESP 6-4
Menú Operación de link
Mostrar Menú de Inicio
Puede abrir un menú de ajustes desde el equipo compatible
con LINK conectado.
NOTA
En función del estado del equipo (en grabación o en
modo de espera, etc.), no se mostrará el menú de
ajustes.
Salida de Audio del dispositivo
Puede seleccionar para escuchar el sonido de la televisión
solo desde el sistema de audio compatible con LINK.
A través de AQUOS Audio SP: El sonido del altavoz de
la televisión es silenciado, y solo será audible el sonido
proveniente del sistema de audio compatible con LINK.
• Puede utilizar VOL+/- y MUTE.
A través de AQUOS SP: El sonido se transmite desde el
altavoz de la televisión.
Selección del dispositivo HDMI
Si hay varios dispositivos HDMI conectados en cadena,
puede especificar qué dispositivo quiere controlar aquí.
Pulse
/ para seleccionar el dispositivo deseado de una
lista de dispositivos HDMI conectados, y luego pulse
ENTER.
Ajustes LINK
También puede ver la pantalla de ajustes LINK desde el
menú Operación de link.
>>
<<
Uso de un PC
ESP 7-1
Ajuste de la imagen de PC
Puede ajustar la posición de la entrada de imagen desde un PC con "Configuración Inicial" >
"Configuración de Entrada" > "Sinc. fino".
Sinc. fino
Normalmente, utilizando "Sinc. auto.", usted puede ajustar fácilmente la imagen según sea
necesario para cambiar su posición. Sin embargo, en algunos casos, para optimizar la imagen
será necesario hacer el ajuste manual.
Input Signal: Seleccione la señal de entrada.
1024x768
1360x768
Sinc. auto.: Para ajustar automáticamente la imagen de PC.
Sí: La sincronización automática empieza y se visualiza "Ajuste de la imagen".
No: No se realiza esta función.
Pos. H.: Centra la imagen moviéndola hacia la derecha o hacia la izquierda.
Pos. V.: Centra la imagen moviéndola hacia arriba o hacia abajo.
Reloj: Ajuste cuando la imagen parpadea con franjas verticales.
Fase: Ajuste cuando los caracteres tienen un contraste bajo o cuando la imagen parpadea.
NOTA
Cuando "Sinc. auto." se realiza con éxito, se visualiza "Sincronización automática terminada
con éxito.". Si no, "Sinc. auto." habrá fallado.
"Sinc. auto." puede fallar aunque se visualiza "Sincronización automática terminada con éxito.".
"Sinc. auto." puede fallar si la imagen del PC tiene una resolución baja, tiene bordes poco
claros (negros) o se mueve mientras "Sinc. auto." se ejecuta.
Asegúrese de conectar el PC al televisor y encenderlo antes de iniciar "Sinc. auto.".
Para reponer todos los elementos de ajuste "Sinc. fino" a los valores preajustados en fabrica,
pulse
/ para seleccionar "Reiniciar", y luego pulse ENTER.
No es necesario ajustar el "Reloj" o la "Fase" cuando se introduce una señal digital, por tanto
no puede seleccionarse.
La posición predeterminada del cursor podría no ser en el centro debido a que la gama
variable de la posición de la pantalla podría ser asimétrica.
Los rangos variables de posición de la pantalla dependen del Modo de Vista o del tipo de
señal. Los rangos pueden visualizarse en la pantalla de ajuste de posición.

>>
<<
Uso de un PC
ESP 7-2
Ajuste de la entrada de audio
Selección Audio
Esta función establece el terminal que va dar salida al audio del computador.
Los elementos de ajuste varían según la fuente de entrada. Seleccione la fuente de entrada
correspondiente al terminal conectado al PC y luego ajuste el elemento deseado.
Para realizar la operación, consulte "Configuración Inicial" > "Configuración de Entrada" >
"Selección Audio".
HDMI 2
HDMI(Digital): Seleccione esto cuando el TV y el PC están conectados usando un cable
certificado HDMI y la entrada de audio se realiza por medio del mismo cable.
HDMI+Análogo: Seleccione esto cuando el TV y el PC están conectados usando un cable de
conversión de DVI-HDMI y la entrada de audio se realiza por medio de un miniconector
estéreo de 3,5 mm ø.
NOTA
Cuando "Selección Audio" se establece en "HDMI(Digital)", no se obtendrá sonido si solo utiliza
un cable certificado HDMI para conectar con el equipo compatible con HDMI. Para obtener
sonido debe realizar una conexión analógica de audio.
Si desea conectar un equipo compatible con HDMI utilizando solo un cable certificado HDMI,
establezca "Selección Audio" en "HDMI(Digital)".
>>
<<
Uso de un PC
ESP 7-3
Control del televisor
El televisor puede controlarse desde un PC, los paneles de control y otros dispositivos utilizando
el IP.
Utilice un cable ETHERNET de tipo cruzado (de venta en el comercio) o una LAN inalámbrica
para las conexiones.
NOTA
Este sistema de operación deberá ser utilizado por una persona acostumbrada a utilizar PCs.
Ajustes detallados
Ajuste los datos (nombre de usuario, contraseña de acceso, etc.).
Siga las instrucciones en pantalla para configurar los ajustes.
Selecc. nom. de disp.
Ajuste el nombre del televisor que se muestra en otros dispositivos de la red.
Utilice el teclado de software para ajustar el nombre.
Condiciones de comunicación para IP
Conéctese al televisor después de hacer los siguientes ajustes de IP en el PC.
Protocolo IP: TCP/IP
Dirección IP de host: Ajuste la dirección IP en el menú del televisor
Servicio: Ninguno (No seleccione Telnet ni SSH)
N.º de puerto TCP: Ajuste un número de puerto en el menú del
televisor (puerto de control)
Cuando establezca su nombre de usuario y contraseña en el menú del televisor, deberá
escribirlos en cuanto se conecte al televisor.
NOTA
Cuando utilice esta función, haga los ajustes de "Control Remoto AQUOS".
La conexión se cortará cuando no haya habido comunicación durante 3 minutos.
Procedimiento de comunicación
Envíe los comandos de control desde el PC vía IP. El televisor funciona según el comando
recibido y envía un mensaje de respuesta al PC.
No envíe múltiples comandos al mismo tiempo.
Espere a que el PC reciba la respuesta de que todo está bien antes de enviar el siguiente
comando.
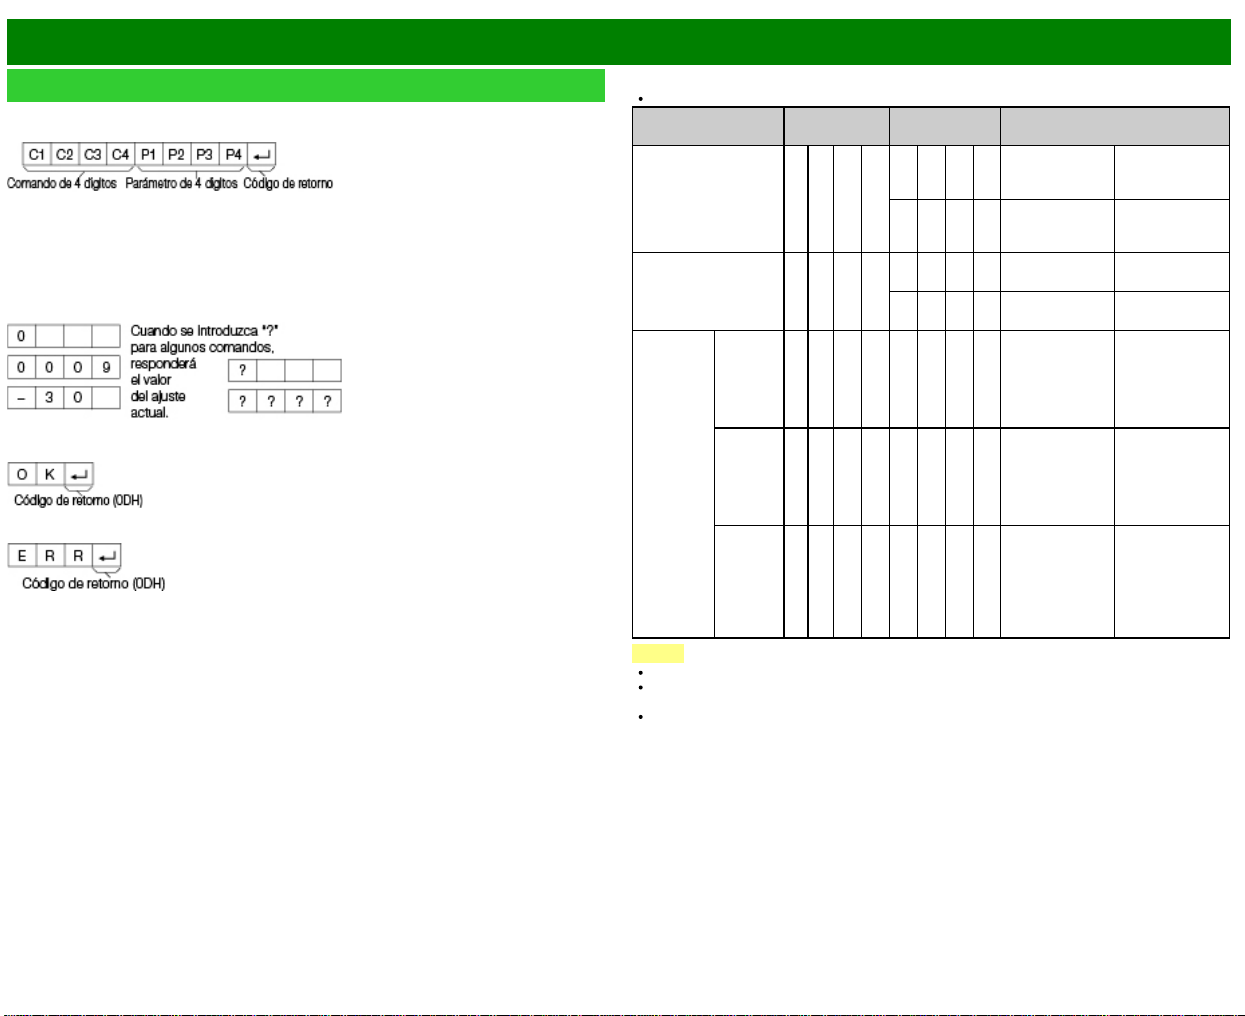
>>
<<
Uso de un PC
ESP 7-4
Control del televisor (Continúa)
Formato de comando
Ocho códigos ASCII + CR
Comando de 4 dígitos: Comando. El texto de cuatro caracteres.
Parámetro de 4 dígitos: Parámetro 0–9, x, en blanco, ?
Parámetro
Introduzca los valores de los parámetros, alineando a la izquierda, y rellene el resto con espacios
en blanco. (Asegúrese de introducir cuatro valores para el parámetro.)
Cuando el parámetro de entrada no se encuentre dentro de la gama ajustable retornará "ERR".
(Consulte "Formato de código de respuesta".)
Cualquier valor numérico puede ser reemplazado por una "x" en la tabla.
Formato de código de respuesta
Respuesta normal
Respuesta al problema
(error de comunicación o comando incorrecto)
Tabla de comandos
Los comandos que no se indican aquí no garantizan la operación.
ELEMENTO DE
CONTROL
COMANDO PARÁMETRO CONTENIDO DE CONTROL
AJUSTE DE LA
ORDEN
DE ENCENDIDO
R S P W 0 _ _ _ Apagado La orden de
encendido ha
sido rechazada.
2 _ _ _ Encendido [IP] La orden de
encendido ha
sido aceptada.
AJUSTE DE LA
ALIMENTACIÓN
P O W R 0 _ _ _ Alimentación
desactivada
Cambia a
espera.
1 _ _ _ Alimentación
activada
Alimentación
activada
SELECC-
IÓN
DE
ENTRADA
CONMU-
TACIÓN
I T G D x _ _ _ (CONMU-
TACIÓN)
Introduce-cambia
mediante
conmutación. (Lo
mismo que una
tecla de cambio
de entrada.)
TELEVI-
SOR
I T V D 0 _ _ _ Introduce-cambia
a televisor. [Un
canal permanece
como está.
(Memoria del
último canal)]
1-8 I A V D * _ _ _ 1: HDMI IN 1,
2: HDMI IN 2,
3: HDMI IN 3,
5: COMPO-
NENT IN,
6: VIDEO IN 1,
8: PC IN>
NOTA
Si aparece un subrayado (_) en la columna de los parámetros, introduzca un espacio.
Si aparece un asterisco (*), introduzca un valor dentro de la gama indicada entre paréntesis
bajo CONTENIDO DE CONTROL.
Siempre que el parámetro (x) de la tabla sea un valor numérico, éste puede escribir cualquier
cosa.
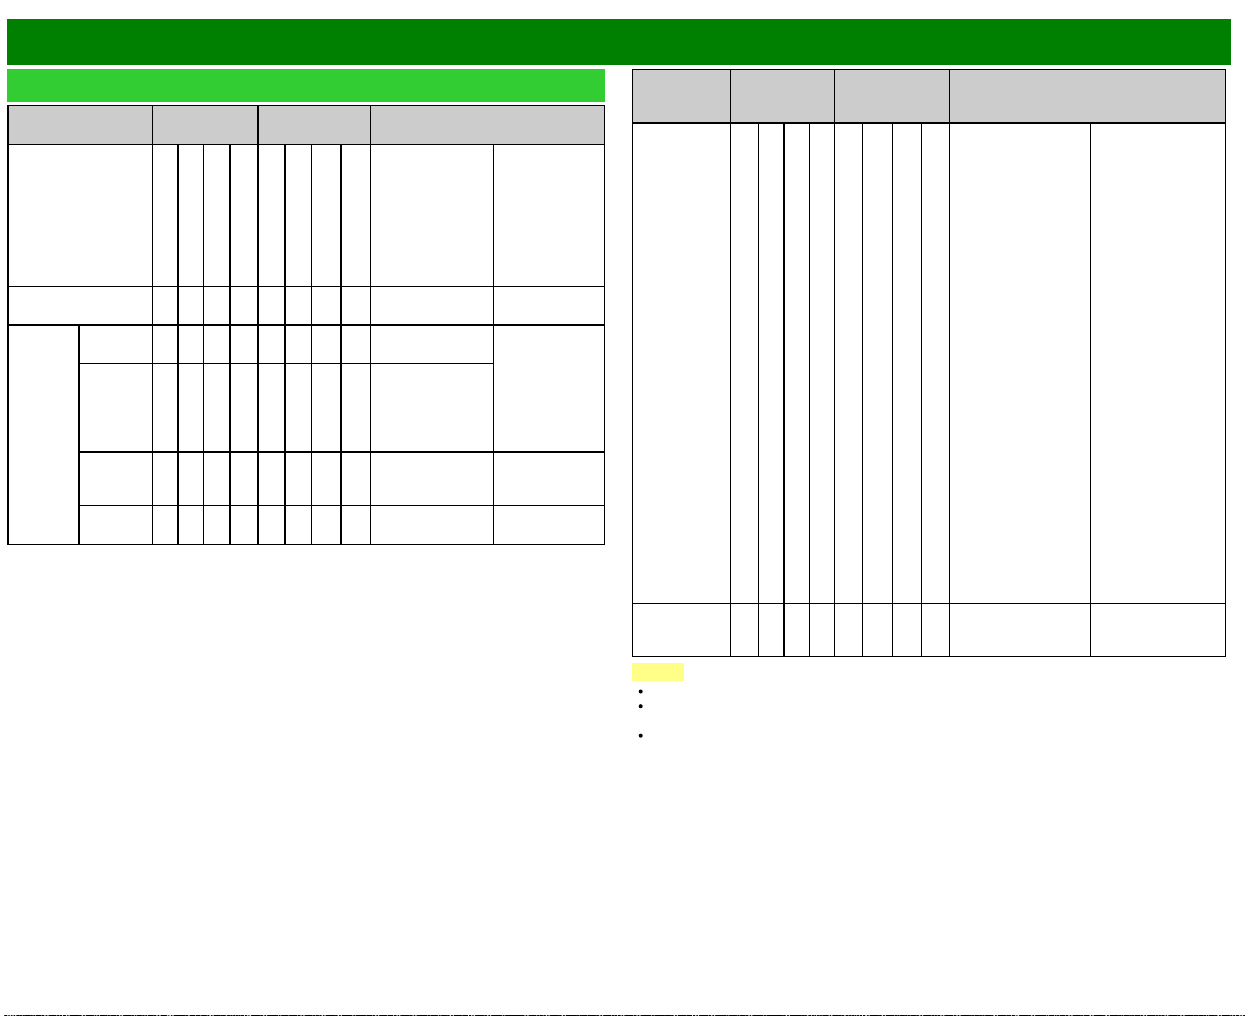
>>
<<
Uso de un PC
ESP 7-5
Control del televisor (Continúa)
ELEMENTO DE
CONTROL
COMANDO PARÁMETRO CONTENIDO DE CONTROL
SELECCIÓN DE
MODO AV
A V M D * * * _ 0:
(CONMUTACIÓN),
1: ESTÁNDAR
(ENERGY STAR),
2: PELÍCULA,
4: USUARIO,
5:
DINÁMICO(Fijo),
6: DINÁMICO
Aunque se
puede elegir
ahora, es una
operación de
conmutación en
el interior.
VOLUMEN V O L M * * *_ _ VOLUMEN (0–
100)
POSI-
CIÓN
POSI-
CIÓN H
H P O S * * * _ Los rangos
variables de
posición de la
pantalla
dependen del
Modo de Vista o
del tipo de
señal.
POSI-
CIÓN V
V P O S * * * _
RELOJ C L C K * * * _ Modo PC
solamente (0–
180)
FASE P H S E * * _ _ Modo PC
solamente (0–40)
ELEMENTO
DE
CONTROL
COMANDO PARÁMETRO CONTENIDO DE CONTROL
MODO DE
VISTA
W I D E * * _ _ 0: (CONMUTACIÓN)
[AV],
1: Barra Lateral [AV],
2: Alarga.S [AV],
3: Zoom [AV],
4: Alarga. [AV, USB-
Vídeo, Vídeo de red
casera o
Aplicaciones de
Internet],
5: Normal [PC],
6: Zoom [PC],
7: Alarga. [PC],
8: Punto × punto
[PC] [AV],
9: Pantalla Completa
[AV],
10: Auto [USB-Vídeo,
USB-foto, Vídeo de
red casera, foto o
Aplicaciones de
Internet],
11: Original [USB-
Vídeo, USB-foto,
Vídeo de red casera,
foto o Aplicaciones
de Internet]
0: Aunque se puede
elegir ahora, es una
operación de
conmutación en el
interior.
1: Disponible
solamente cuando
está introduciéndose
señal 4:3.
5, 6: Disponible
solamente cuando
está introduciéndose
señal 4:3.
8: [PC] Disponible
excepto cuando está
introduciéndose
UXGA. [AV]
Disponible
solamente cuando
está introduciéndose
1080i/p.
9: Disponible
solamente cuando
está introduciéndose
720p.
10, 11: Disponible
cuando se utiliza
USB-Vídeo, USB-
foto, Vídeo de red
casera, foto o
aplicación de
Internet.
SILENCI-
AMIENTO
M U T E * _ _ _ 0: (CONMUTACIÓN),
1: Encendido,
2: Apagado
NOTA
Si aparece un subrayado (_) en la columna de los parámetros, introduzca un espacio.
Si aparece un asterisco (*), introduzca un valor dentro de la gama indicada entre paréntesis
bajo CONTENIDO DE CONTROL.
Siempre que el parámetro (x) de la tabla sea un valor numérico, éste puede escribir cualquier
cosa.
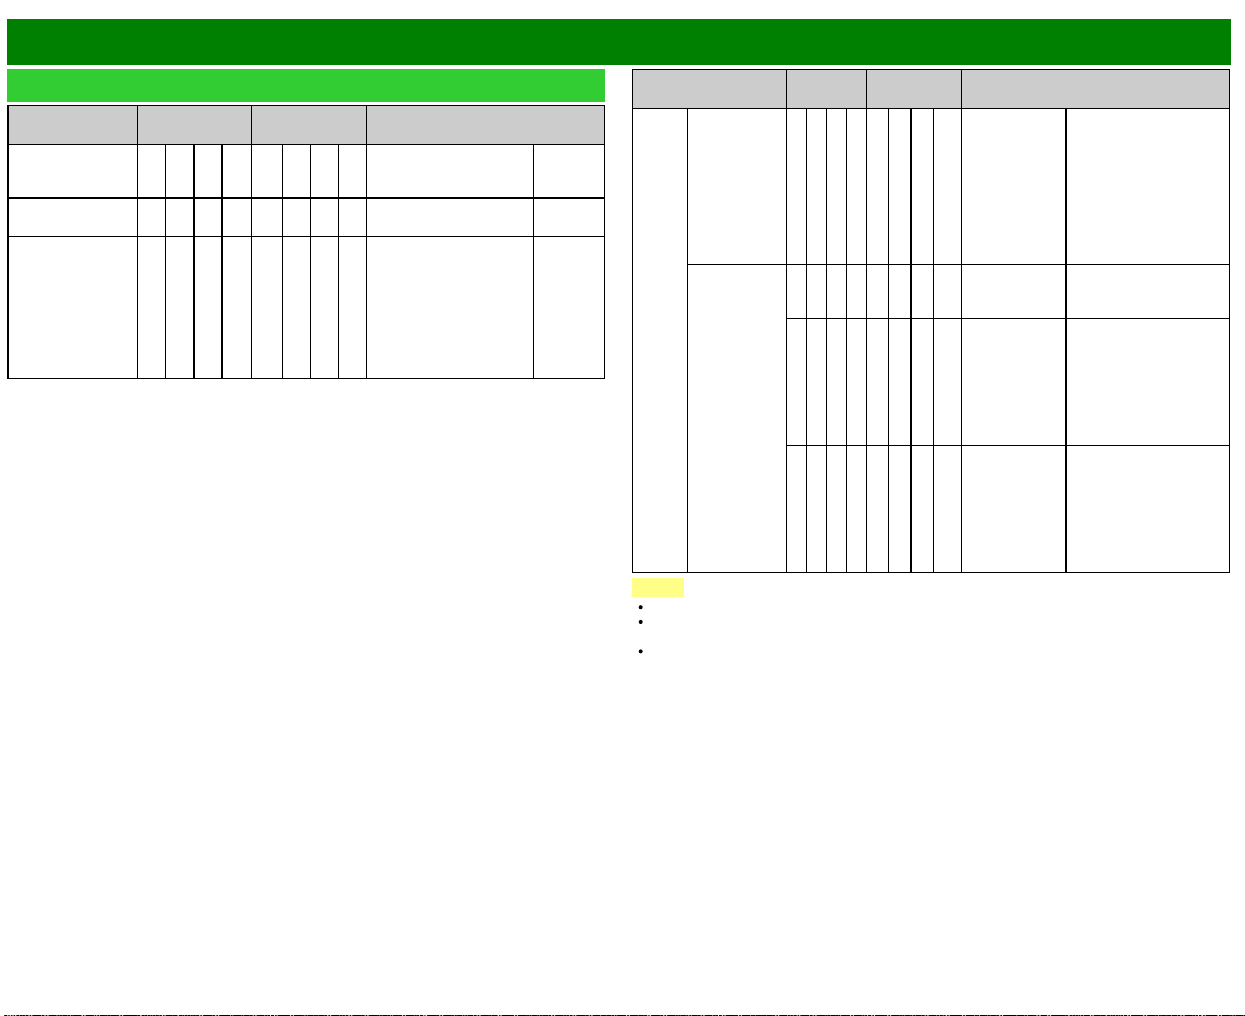
>>
<<
Uso de un PC
ESP 7-6
Control del televisor (Continúa)
ELEMENTO DE
CONTROL
COMANDO PARÁMETRO CONTENIDO DE CONTROL
SONIDO
AMBIENTAL
A C S U * _ _ _ 0: (CONMUTACIÓN),
1: Encendido,
2: Apagado
SELECCIÓN DE
AUDIO
A C H A x _ _ _ (CONMUTACIÓN)
TEMPORIZADOR
DE
APAGADO
O F T M * _ _ _ 0: Apagado,
1: TEMPORIZADOR DE
APAGADO – 30 m,
2: TEMPORIZADOR DE
APAGADO – 60 m,
3: TEMPORIZADOR DE
APAGADO – 90 m,
4: TEMPORIZADOR DE
APAGADO – 120 m
ELEMENTO DE
CONTROL
COMANDO PARÁMETRO CONTENIDO DE CONTROL
CANAL CANAL
DIRECTO
(ANALÓGICO)
D C C H * * * _ El número del
canal del
televisor
(1–135)
Se incluye un cambio de
entrada si no es
visualización del
televisor.
Emisión del aire, son
efectivos los canales 2-
69.
Emisión por cable, son
efectivos los canales 1-
135.
CANAL
DIRECTO
(DIGITAL)
D A 2 P * * * * (0100-9999) DIGITAL Ant. (números
de dos partes, 2 dígitos
más 2 dígitos)
D C 2 U * * * _ (1-999) DIGITAL Cable (números
de dos partes, 3 dígitos
más 3 dígitos)
Mitad delantera de
DIGITAL CABLE
CHANNEL
NO. (Designación de
canal principal)
D C 2 L * * * _ (0-999) DIGITAL Cable (números
de dos partes, 3 dígitos
más 3 dígitos)
Mitad trasera de
DIGITAL CABLE
CHANNEL NO.
(Designación de canal
secundario)
NOTA
Si aparece un subrayado (_) en la columna de los parámetros, introduzca un espacio.
Si aparece un asterisco (*), introduzca un valor dentro de la gama indicada entre paréntesis
bajo CONTENIDO DE CONTROL.
Siempre que el parámetro (x) de la tabla sea un valor numérico, éste puede escribir cualquier
cosa.
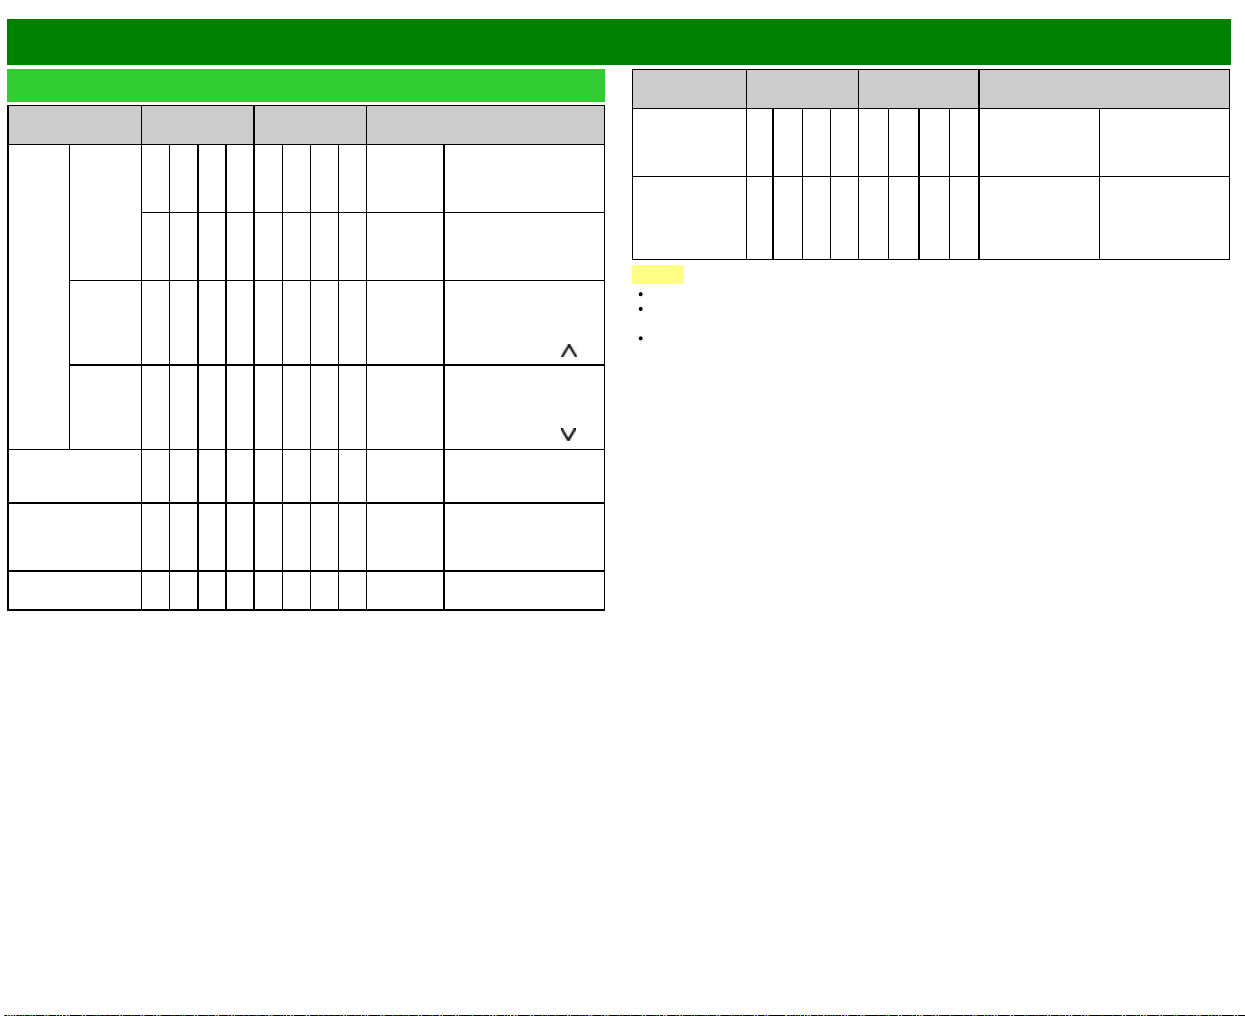
>>
<<
Uso de un PC
ESP 7-7
Control del televisor (Continúa)
ELEMENTO DE
CONTROL
COMANDO PARÁMETRO CONTENIDO DE CONTROL
CANAL CANAL
DIRECTO
(DIGITAL)
D C 1 0 * * * * (0-9999) DIGITAL Cable
(números de una parte,
5 dígitos, menos de
10.000)
D C 1 1 * * * * (0-6383) DIGITAL Cable
(números de una parte,
5 dígitos, más de
10.000)
CANAL
SUPE-
RIOR
C H U P x _ _ _ El número
del canal
del
televisor
+1
Si no es visualización
del televisor, se
introducirá-cambiará a
televisor. (las mismas
funciones que CH
)
CANAL
INFE-
RIOR
C H D W x _ _ _ El número
del canal
del
televisor -1
Si no es visualización
del televisor, se
introducirá-cambiará a
televisor. (las mismas
funciones que CH
)
CC C L C P x _ _ _ (CONMU-
TACIÓN)
Operación de
conmutación de un
subtítulo oculto.
NOMBRE DEL
DISPOSITIVO
T V N M 1 _ _ _
Se
muestra el nombre
del dispositivo
establecido en "Selecc.
nom. de disp".
NOMBRE DEL
MODELO
M N R D 1 _ _ _
El
nombre del modelo
del televisor
ELEMENTO DE
CONTROL
COMANDO PARÁMETRO CONTENIDO DE CONTROL
VERSIÓN DE
SOFTWARE
S W V N 1 _ _ _ Se muestra la
versión actual del
software del
televisor.
VERSIÓN DEL
PROTOCOLO IP
I P P V 1 _ _ _ Se muestra la
versión del
protocolo IP
compatible
actualmente.
NOTA
Si aparece un subrayado (_) en la columna de los parámetros, introduzca un espacio.
Si aparece un asterisco (*), introduzca un valor dentro de la gama indicada entre paréntesis
bajo CONTENIDO DE CONTROL.
Siempre que el parámetro (x) de la tabla sea un valor numérico, éste puede escribir cualquier
cosa.
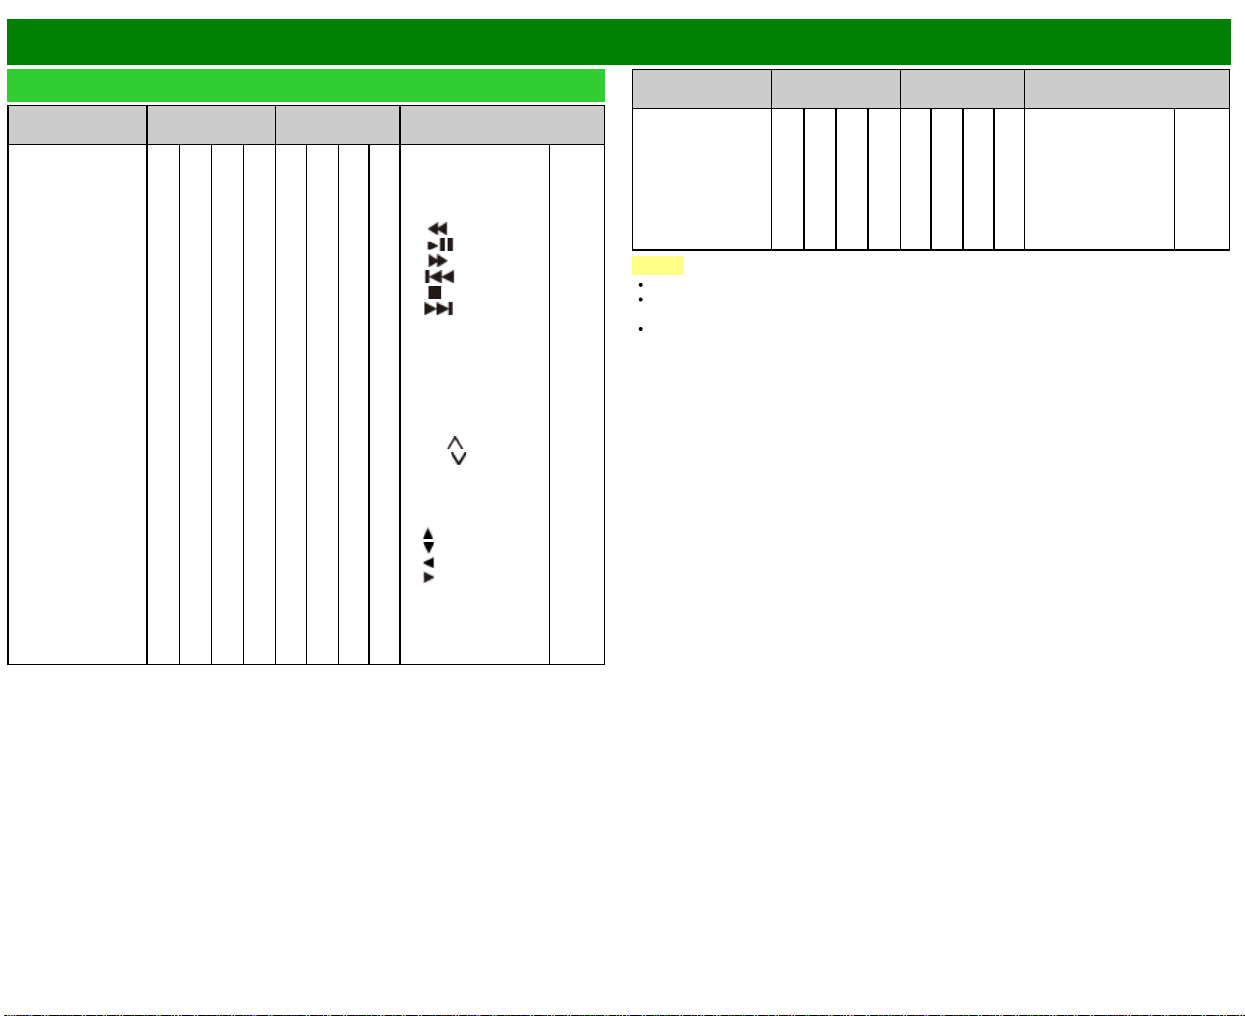
>>
<<
Uso de un PC
ESP 7-8
Control del televisor (Continúa)
ELEMENTO DE
CONTROL
COMANDO PARÁMETRO CONTENIDO DE CONTROL
BOTONES DEL
CONTROL REMOTO
R C K Y * * _ _ 0-10: 0-9,
11: DOT,
12: ENT,
13: POWER,
14: DISPLAY,
15:
,
16:
,
17:
,
18:
,
19:
,
20:
,
21: SLEEP,
22: CC,
23: AV MODE,
24: VIEW MODE,
25: FLASH BACK,
26: MUTE,
27: VOL -,
28: VOL +,
29: CH
,
30: CH
,
31: INPUT,
32: MENU,
33: SMART,
34: ENTER,
35:
,
36:
,
37:
,
38:
,
39: RETURN,
40: EXIT,
41: FAV CH,
42: AUDIO,
43: A (rojo)
ELEMENTO DE
CONTROL
COMANDO PARÁMETRO CONTENIDO DE CONTROL
BOTONES DEL
CONTROL REMOTO
R C K Y * * _ _ 44: B (verde),
45: C (azul),
46: D (amarillo),
47: FREEZE,
48: FAV APP 1,
49: FAV APP 2,
50: FAV APP 3,
51: NETFLIX,
52: E-MANU
NOTA
Si aparece un subrayado (_) en la columna de los parámetros, introduzca un espacio.
Si aparece un asterisco (*), introduzca un valor dentro de la gama indicada entre paréntesis
bajo CONTENIDO DE CONTROL.
Siempre que el parámetro (x) de la tabla sea un valor numérico, éste puede escribir cualquier
cosa.
>>
<<
Uso de un PC
ESP 7-9
Tabla de compatibilidad con PC
Es necesario ajustar correctamente el PC para visualizar señal XGA y WXGA.
Resolución
Frecuencia
horizontal
Frecuencia
vertical
Estándar VESA
VGA
720 x 400 31.5 kHz 70 Hz —
640 x 480
31.5 kHz 60 Hz
37.9 kHz 72 Hz
37.5 kHz 75 Hz
SVGA 800 x 600
35.1 kHz 56 Hz
37.9 kHz 60 Hz
48.1 kHz 72 Hz
46.9 kHz 75 Hz
XGA 1024 x 768
48.4 kHz 60 Hz
56.5 kHz 70 Hz
60.0 kHz 75 Hz
WXGA 1360 x 768 47.7 kHz 60 Hz
SXGA 1280 x 1024 64.0 kHz 60 Hz
SXGA+ 1400 x 1050 65.3 kHz 60 Hz
UXGA 1600 x 1200 75.0 kHz 60 Hz
1080p 1920 x 1080 67.5 kHz 60 Hz —
VGA y XGA son marcas registradas de International Business Machines Corp.

>>
<<
Para utilizar Internet
ESP 8-1
Conectando su televisor a un sistema de banda ancha puede acceder a Internet a través del
televisor.
Puede disfrutar de una gran variedad de contenido y aplicaciones de Internet.
(Consulte la páginas 8-12 a 8-13.)
Conexión a Internet
Para conectar su televisor con Internet debe contar con una conexión de banda ancha a
Internet.
Si no tiene una conexión de banda ancha a Internet, consulte con el comercio en el que ha
adquirido su televisor o pregunte a su proveedor de servicios de telefonía.
Cuando se establece una conexión de Internet, no se pueden utilizar una conexión Ethernet y
una inalámbrica al mismo tiempo. Utilice sólo uno de los tipos de conexión.
Uso de un cable ETHERNET
Utilice un cable ETHERNET (de venta en el comercio) para conectar el terminal ETHERNET del
televisor a su enrutador de banda ancha (de venta en el comercio).
Utilizar el LAN inalámbrico
Este televisor está equipado con una función LAN inalámbrica.
Para efectuar una conexión LAN inalámbrica, debe utilizar "Ajustes Inalámbricos" para conectar el
punto de acceso y el televisor.
NOTA
Este televisor tiene una función LAN inalámbrica incorporada. La utilización de un adaptador
LAN USB inalámbrico distinto puede ocasionar que las comunicaciones de radio no cumplan
con las normas establecidas. Por lo tanto, no utilice un adaptador LAN inalámbrico distinto.
No se puede garantizar la conexión LAN inalámbrica ni su rendimiento en todos los entornos
residenciales. En los siguientes casos, es posible que la señal LAN inalámbrica sea débil o no
haya señal, o puede reducirse la velocidad de conexión.
- Cuando se utiliza en edificios de hormigón, acero reforzado o metal
- Cuando se coloca cerca de objetos que obstruyen la señal
- Cuando se utiliza con otros dispositivos inalámbricos que emiten la misma frecuencia
- Cuando se utiliza en las proximidades de hornos microondas y otros dispositivos que emiten
un campo magnético, carga electrostática o interferencias electromagnéticas
Cuando hay interferencias significativas en la frecuencia de 2,4 GHz (como por ejemplo otros
dispositivos LAN inalámbricos, dispositivos Bluetooth®, teléfonos inalámbricos de 2,4 GHz y
hornos microondas), se recomienda utilizar un router LAN inalámbrico/punto de acceso que
sea compatible con IEEE802.11a/n (5 GHz) y ajustar el punto de acceso para transmitir a 5
GHz. Consulte el manual de operación de su punto de acceso para obtener información
detallada sobre la configuración.
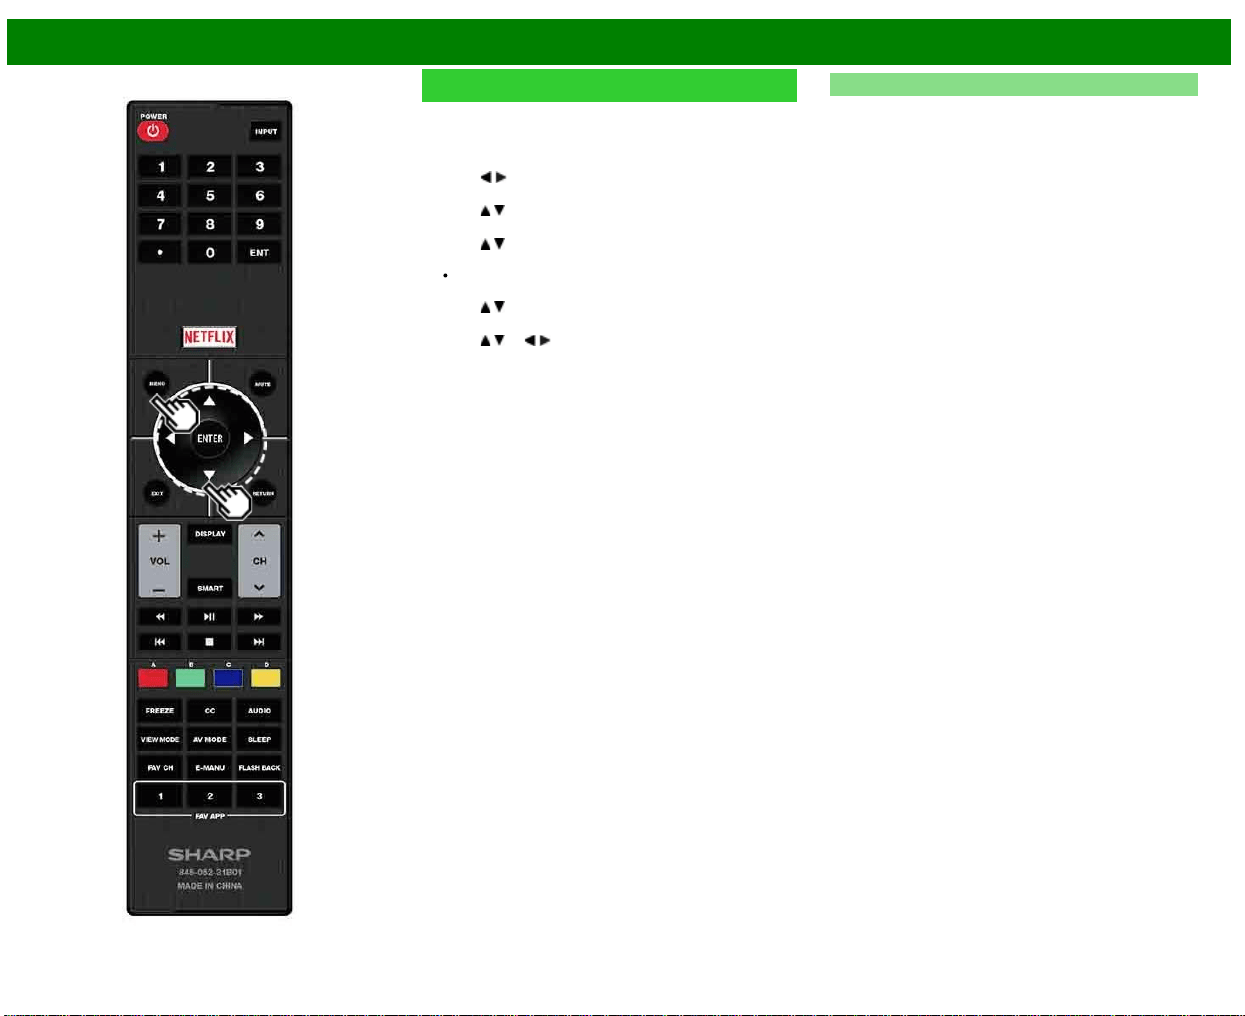
>>
<<
Para utilizar Internet
ESP 8-2
Configuración de Internet
Siga el procedimiento siguiente para hacer ajustes o para
confirmar los ajustes para acceder a Internet.
1 Pulse MENU para visualizar la pantalla MENU, y luego
pulse ENTER.
2 Pulse
/ para seleccionar "Smart TV", y luego pulse
ENTER.
3 Pulse
/ para seleccionar "Configuración de Internet",
y luego pulse ENTER.
4 Pulse
/ para seleccionar "Tipo de conexión", "Wired
Setup" o "Wireless Setup", y luego pulse ENTER.
Seleccione "Wired Setup" o "Wireless Setup" cuando
haga ajustes generales para conectarse a Internet.
5 Pulse / para seleccionar un elemento de ajuste
específico, y luego pulse ENTER.
6 Pulse
/ (o / ) para seleccionar el ajuste deseado, y
luego pulse ENTER.
7 Pulse MENU para salir.
Tipo de conexión
Seleccione el tipo de conexión.
Alámbrico: Se detecta la señal y la configuración se
realiza automáticamente. Utilice "Ajustes IP" para
comprobar y cambiar los ajustes si es necesario.
Inalámbrico: Configure los ajustes del punto de
acceso en "Ajustes Inalámbricos".
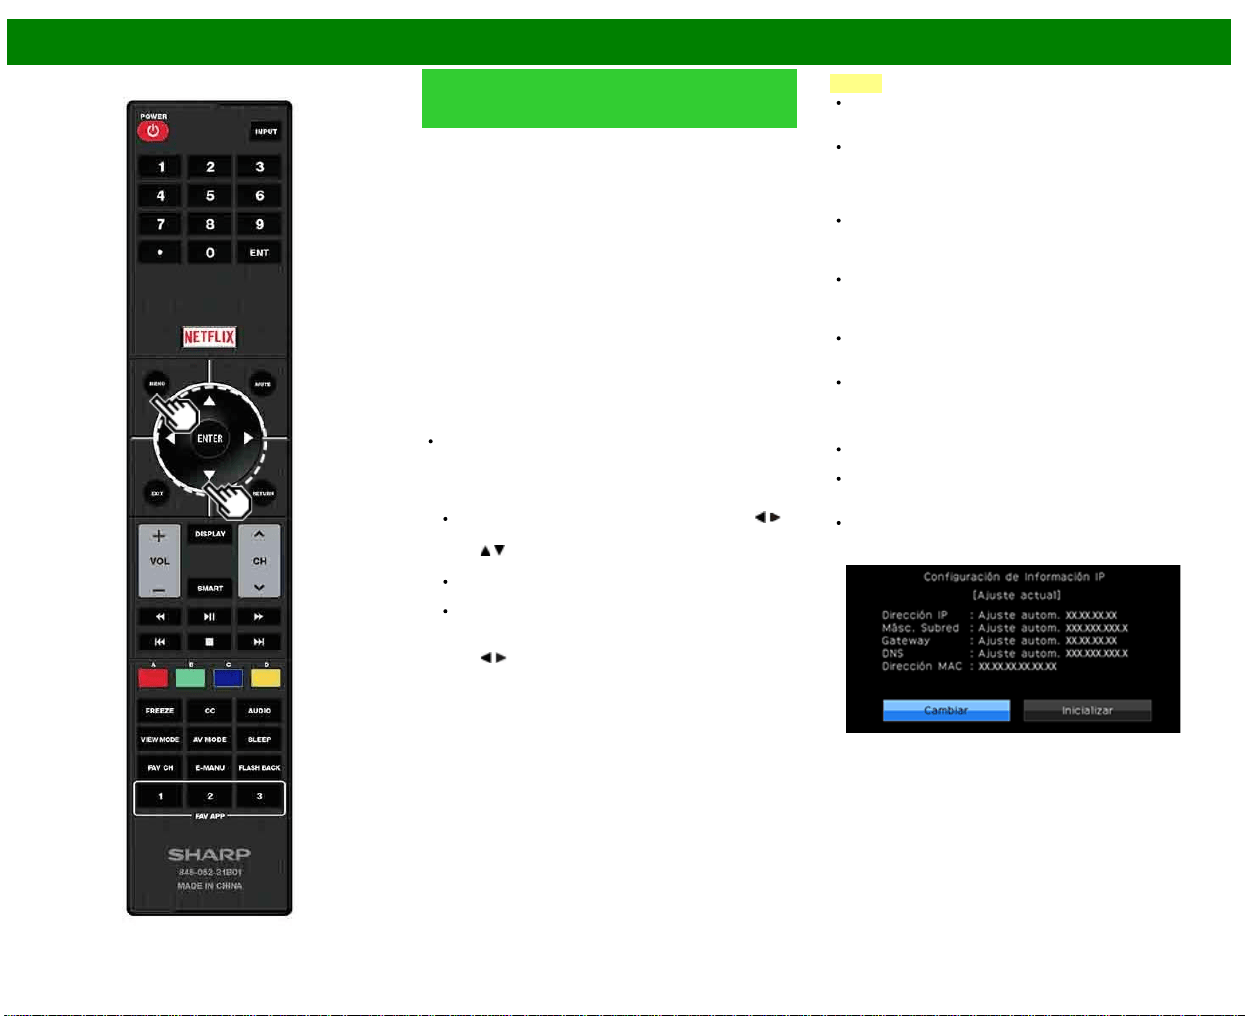
>>
<<
Para utilizar Internet
ESP 8-3
Configuración de Internet
(Continúa)
Ajustes Inalámbricos
Haga ajustes y confirme los ajustes necesarios para la
conexión a la LAN inalámbrica (por ejemplo, búsqueda del
punto de acceso y registro del mismo).
Presione el botón WPS: Permite al televisor establecer
automáticamente la conexión utilizando un botón en el
punto de acceso.
Código NIP WPS: Configura la conexión para registrar un
código PIN para el punto de acceso.
Seleccionando red inalámbrica: Busca y selecciona el
punto de acceso que se va a conectar.
Registrando red inalámbrica: Le permite hacer la
conexión introduciendo una SSID para el punto de
acceso.
Si su punto de acceso es compatible con la configuración
protegida Wi-Fi (método WPS pulsador), se recomienda el
uso de esta función para la conexión inalámbrica. Puede
pulsar el botón WPS en el punto de acceso para configurar
los ajustes automáticamente.
El nombre de la función del botón WPS puede variar
según el punto de acceso. Consulte el manual de
operación del punto de acceso para obtener información
detallada.
1 Confirme los ajustes actuales en "Tipo de Conexión".
Si está seleccionada la opción "Alámbrico", pulse /
para seleccionar "Inalámbrico".
2 Pulse
/ para seleccionar "Ajustes Inalámbricos", y
luego pulse ENTER.
Confirme los ajustes. Si cada uno de los ajustes es
correcto, pulse MENU para salir.
Si está realizando la configuración inalámbrica por
primera vez o está cambiando los ajustes, vaya al
paso 3.
3 Pulse
/ para seleccionar "Cambiar", y luego pulsea
ENTER.
4 Seleccione el método de conexión deseado y siga las
instrucciones que aparecen en la pantalla.
5 Cuando se establece una conexión, se muestran los
detalles de la conexión. Pulse ENTER.
NOTA
No se puede garantizar el funcionamiento correcto
cuando se utiliza con puntos de acceso que no tienen
certificación Wi-Fi ®.
Es necesario un router LAN inalámbrico/punto de acceso
para conectar el televisor a Internet mediante una LAN
inalámbrica. Consulte el manual de operación de su
punto de acceso para obtener información sobre la
configuración.
Si su punto de acceso está en un modo invisible (que
impide la detección por parte de otros dispositivos), es
posible que no pueda establecer una conexión. En este
caso, desactive el modo invisible en el punto de acceso.
Es necesaria una velocidad de conexión estable para
reproducir contenido en streaming. Utilice una conexión
Ethernet si la velocidad de la LAN inalámbrica es
inestable.
Antes de transferir el adaptador a terceros o desecharlo,
asegúrese restablecer los valores iniciales de la LAN
inalámbrica.
Respete la legislación de su país cuando utilice la LAN
inalámbrica en exteriores.
Ajustes IP
Puede hacer ajustes manualmente para la IP.
Compruebe que para cada ajuste se muestran los
correspondientes números.
Si hay algún ajuste sin números, especifique los números
siguiendo las instrucciones que se le muestran en
pantalla.
Introduzca la dirección IP utilizando los botones del
control remoto 0-9.
Ejemplo
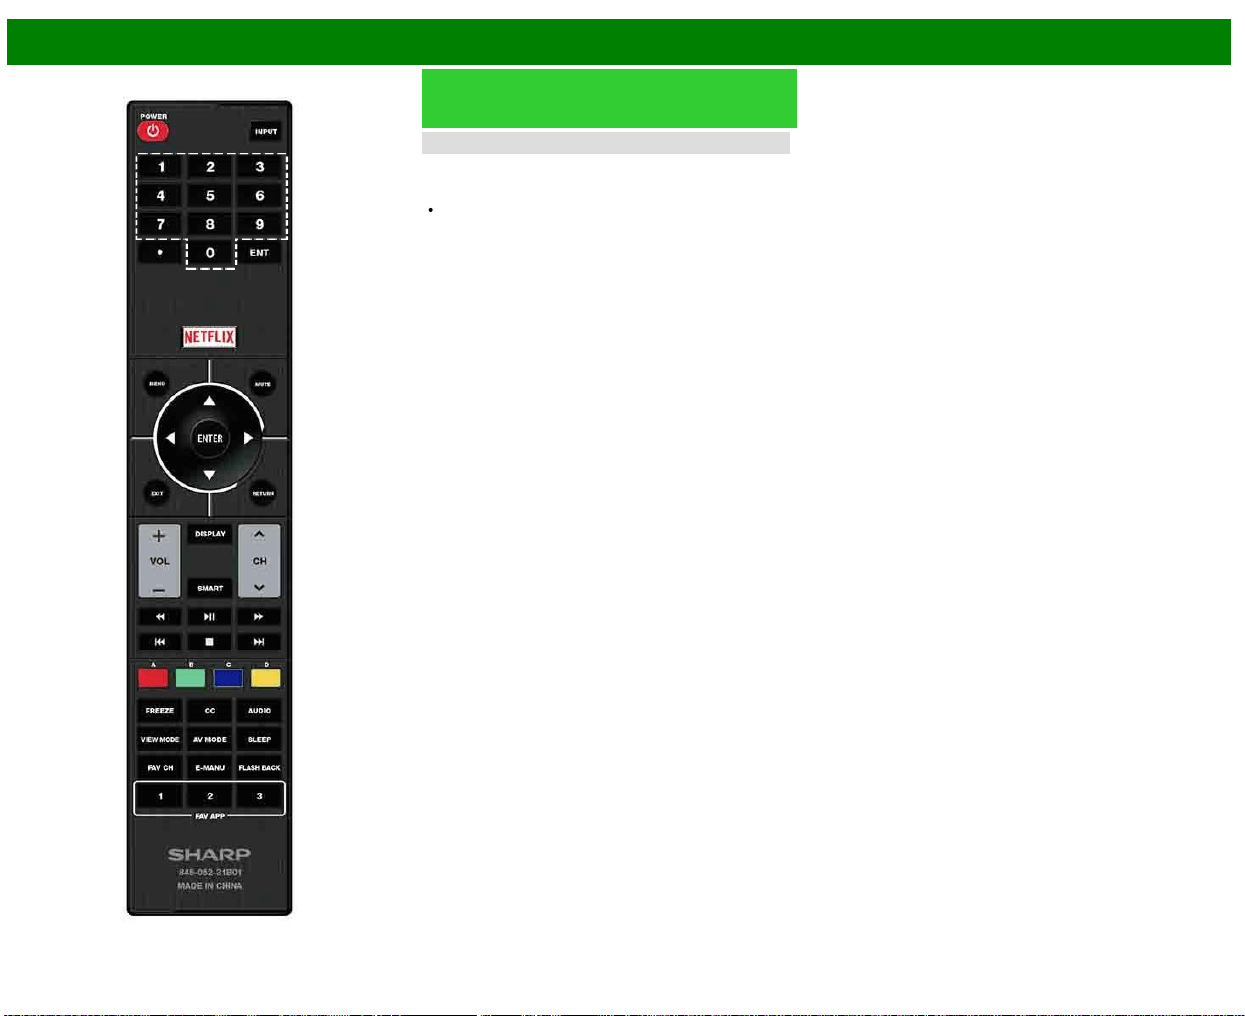
>>
<<
Para utilizar Internet
ESP 8-4
Configuración de Internet
(Continúa)
Prueba de conexión
Al finalizar los procedimientos de conexión y ajuste, puede
comprobar que la preparación es correcta. Pulse "Sí" para
iniciar la "Prueba de conexión".
Cuando aparezcan los resultados de la prueba, siga las
instrucciones que aparecen en pantalla.
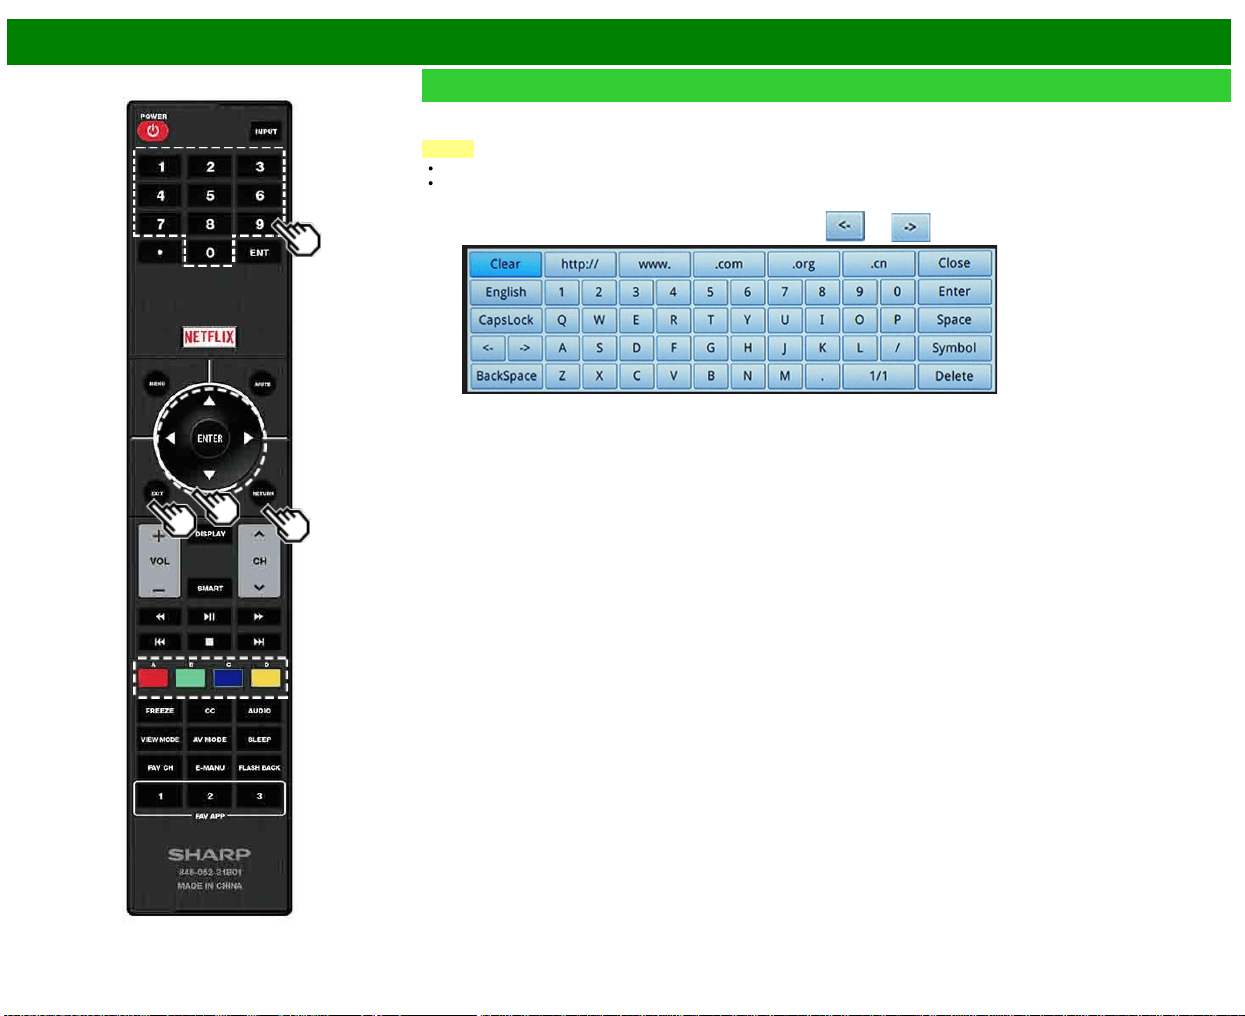
>>
<<
Para utilizar Internet
ESP 8-5
Para introducir texto (Teclado virtual en pantalla)
Cuando está rellenando una pantalla de entrada o especificando los ajustes de red utilizados para acceder a Internet, introduzca
texto utilizando el teclado virtual de la pantalla.
NOTA
Puede introducir hasta 128 caracteres para el texto.
Dependiendo de dónde se introduzca el texto, los signos de puntuación y caracteres especiales no estarán disponibles.
CapsLock
Si "alfabeto" está seleccionado, esta tecla cambia de
mayúsculas a minúsculas y viceversa.
Cada vez que pulsa ENTER, el tipo de caracteres cambia.
Symbol
Pulse ENTER para seleccionar el tipo de caracteres que se
introducen: alfabeto o signo.
BackSpace/Borrar
Borra
texto, un carácter cada vez que se pulsa.
El texto que introduce se visualiza conforme lo teclea.
Para mover el cursor (la posición actual de entrada) utilice "
" o " " en el teclado virtual.
Mientras introduce texto se muestran candidatos similares a lo que está tecleando.
>>
<<
Para utilizar Internet
ESP 8-6
Para introducir texto (Teclado
virtual en pantalla) (Continúa)
Terminado
Aplica la información introducida y cierra el teclado virtual.
Espacio
Introduce
un espacio.
Eliminar
Borra
la cadena de caracteres.
Cuando el cursor está en algún punto de una línea: se
borra la cadena de caracteres a la derecha del cursor.
Cuando el cursor está en el extremo derecho de una
línea: se borrará la línea entera.
Close
Cierra
el teclado virtual sin aplicar los datos introducidos.
Botones en el
control remoto
Descripción
/ / / Mueve el enfoque. Cuando se
mueve a un extremo, el enfoque
se mueve la extremo opuesto.
ENTER Realiza la acción correspondiente
al botón que está seleccionado
actualmente.
EXIT Cierra el teclado virtual sin aplicar
los datos de entrada.
RETURN
0-9 Introduce directamente el número,
como un único byte,
correspondiente a ese botón.

>>
<<
Para utilizar Internet
ESP 8-7
Uso del navegador
1 Pulse SMART, pulse / para seleccionar el icono de
navegador en la ventana de aplicaciones y luego pulse
ENTER.
Pulse de nuevo SMART para cambiar al canal que
está actualmente sintonizado.
Botones para la Uso del navegador
ENTER,
/ / /
Pulse / / / para seleccionar un enlace al que quiere
saltar, y luego pulse ENTER.
EXIT
Pulse este botón para volver a la pantalla de televista.
RETURN
Pulse este botón para volver a la página anterior.
NOTA
Se aplican las restricciones de visualización de ventanas.
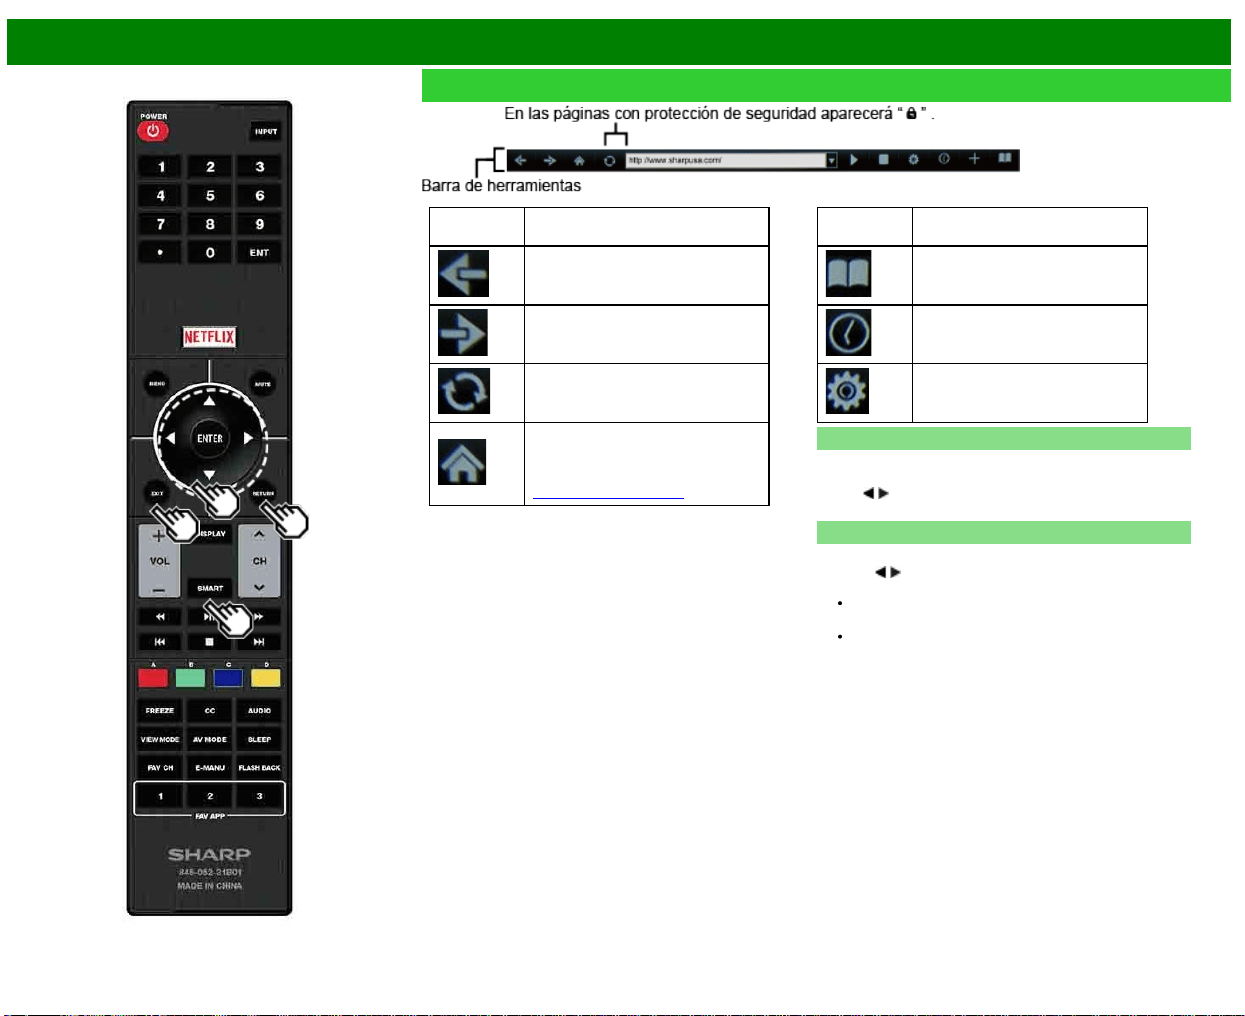
>>
<<
Para utilizar Internet
ESP 8-8
Uso del navegador (Continúa)
Elemento
seleccionado
Descripción
La permite volver a la página anterior.
La permite ir a la página siguiente.
Recarga la página. Interrumpe la
recepción de una página.
Muestra la página de inicio. Puede
establecer la página que se muestra
como su página de inicio cuando
arranca el navegador.
(Consulte la página 8-7.)
Elemento
seleccionado
Descripción
Muestra la lista de marcadores.
Muestra su historial de navegación.
Configura los ajustes del navegador,
como por ejemplo su página de
inicio y la seguridad de navegación.
Uso de la barra de herramientas
Puede utilizar la barra de herramientas para controlar el
navegador y para especificar ajustes.
Pulse
/ para seleccionar una función, y luego pulse
ENTER.
Navegación por los contenidos web
Puede visualizar el contenido web que desee disfrutar.
1 Pulse
/ para ir a la zona de dirección de la
barra de herramientas, y luego pulse ENTER.
Aparecerá el menú Introducir dirección.
2 Introduzca una dirección, y luego pulse ENTER.
Se mostrará el contenido web que desee visualizar.
>>
<<
Para utilizar Internet
ESP 8-9
Uso del navegador (Continúa)
PRECAUCIÓN
Si se produce una caída de tensión o el televisor se
desenchufa cuando usted está utilizando Internet, puede
que alguna información, como marcas o cookies, no se
almacene correctamente.
NOTA
Cuando se muestre una ventana de aviso de seguridad:
Pulse ENTER para cerrar la ventana.
Esta ventana aparece cuando visita una página Web que
tiene una protección de seguridad, o cuando pasa de
una página protegida a otra no protegida.
En "Seguridad" puede establecer si desea que se
muestre esta ventana o no.
Para usuarios que acceden a Internet desde un PC
Cuando accede a Internet a través de este televisor, los
procedimientos pueden no ser los mismos que se
siguen en un navegador normal de PC.
Es posible que en algunas páginas no se muestren el
video, el audio, el texto o las imágenes correctamente.
Sobre los enlaces
Las páginas Web de Internet incluyen con frecuencia
"enlaces" que le permiten saltar a otras páginas Web (o
sitios Web).
Los enlaces pueden tomar distintas formas, incluyendo
palabras o imágenes, pero funcionan siempre de la
misma manera, permitiéndole saltar al destino del enlace
cuando los selecciona.
Algunos elementos seleccionados (como los cuadros de
entrada de datos) se encierran en un marco.
Puede saltar de un enlace a su destino correspondiente.
DESCARGO DE RESPONSABILIDAD
SHARP Corporation no admite ninguna responsabilidad
con respecto a los contenidos y la calidad de los
contenidos suministrados por el proveedor del servidor de
contenidos.

>>
<<
Para utilizar Internet
ESP 8-10
Uso del navegador (Continúa)
Configuración del navegador
Puede comprobar o modificar la configuración del navegador
desde el menú del navegador.
1 Pulse
/ para seleccionar " "n la barra de
herramientas, y luego pulse ENTER.
2 Pulse
/ para seleccionar y confirmar el elemento que
quiere modificar.
3 Pulse
/ / / para especificar el valor que desee para
ese elemento, y luego pulse ENTER.
Página de inicio: Puede establecer la página que se
muestra como su página de inicio cuando arranca el
navegador.
Codificación: Puede seleccionar la codificación de
caracteres deseada entre las opciones siguientes:
Occidental (ISO-8859-1)/Unicode (UTF-8)
Inform. página: Muestra información sobre la página que
se está mostrando actualmente.
Seguridad:
Sitios seguros:
Cuando el ajuste es "Desactivado", no es posible
acceder a los sitios HTTPS.
Advertencias de seguridad:
Cuando el ajuste es "Activado", aparecerán diálogos de
advertencia cuando se pasa de HTTP
HTTPS.
Certificados: Muestra la lista de certificados. Puede elegir
activar/desactivar un certificado.
Los certificados desactivados se muestran sin marca
de verificación en la pantalla de la lista de
certificados.
Cookies:
Aceptar todo: Seleccione esta opción para aceptar todas
las cookies.
Rechazar todo: Seleccione esta opción cuando no desea
aceptar cookies.
Borrar todas las cookies: Borra todas las cookies
almacenadas.
>>
<<
Para utilizar Internet
ESP 8-11
Uso del teclado y el ratón
Puede utilizar un teclado o un ratón para manejar el
televisor mientras utiliza el navegador.
Cuando utilice dispositivos USB, conecte el dispositivo al
terminal USB del televisor.
NOTA
El teclado y el ratón solo se pueden utilizar en una
pantalla de navegador.
Es posible que el teclado o el ratón no funcionen
correctamente según la aplicación que se esté utilizando.
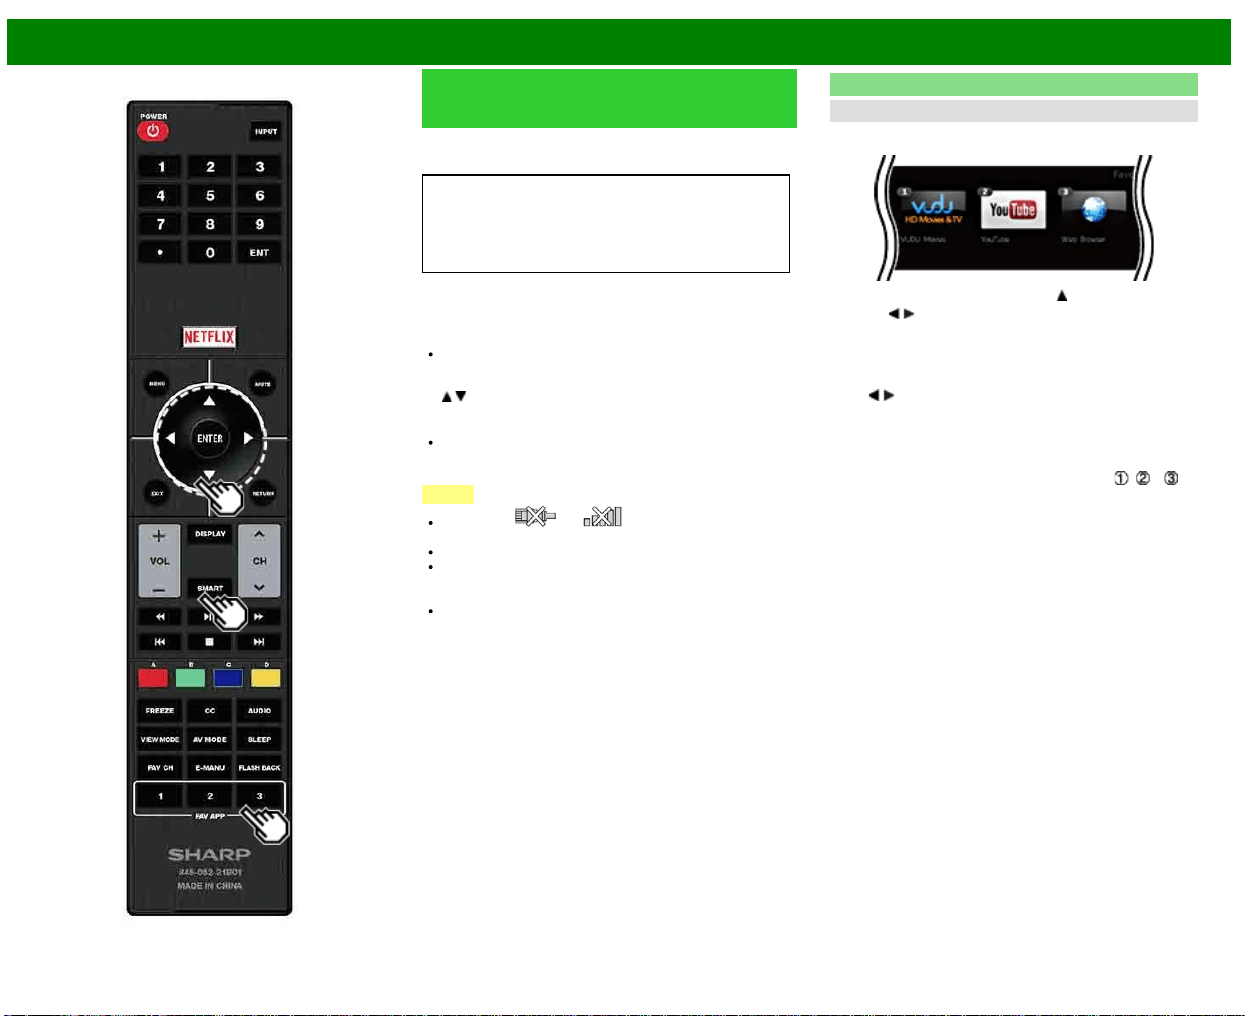
>>
<<
Para utilizar Internet
ESP 8-12
Utilizar aplicaciones a través de
Internet
Conectando el televisor a Internet puede disfrutar de una
gran variedad de contenido de banda ancha, incluyendo
vídeos, música y fotografías.
Verifique que se haya cargado el software más actual en
el TV seleccionando "Actualización de software En
Información"
http://www.sharpusa.com/products/support/
para verificar si hay una descarga de la versión de
software más nueva.
Utilice la ventana de aplicaciones para acceder a sus
aplicaciones de Internet favoritas. Pulse SmartCentral para
mostrar la ventana de aplicaciones.
Siga las instrucciones que aparecen en pantalla para cada
aplicación.
Cuando utilice este televisor para acceder a una
aplicación de Internet por primera vez, aparecerá en
pantalla el aviso de exención de responsabilidad. Pulse
/ para seleccionar "Agree", y luego pulse
ENTER.(Debe seleccionar "Agree" para utilizar la
aplicación.)
Consulte el sitio Web del proveedor para obtener
información detallada acerca de la configuración y la
utilización de funciones.
NOTA
Si aparece " " o " " tras conectarse a Internet,
verifique los ajustes y la conexión de red de su televisor.
En el futuro, habrá disponibles aplicaciones adicionales.
Estas aplicaciones las proporcionan proveedores de
contenido. Las aplicaciones disponibles varían en
función del país o región.
La velocidad de suministro de las aplicaciones varía en
función de la velocidad de la red. Consulte el sitio Web
del proveedor para obtener información acerca de la
configuración de la aplicación y otros datos.
Uso de la ventana de aplicaciones
Durante la visualización del Dock
Puede mover los iconos de aplicaciones.
Ejemplo
1 Seleccione una aplicación y pulse .
2 Pulse
/ para desplazar el icono a la posición
deseada.
Desplazar de los iconos
Puede desplazar los iconos de las aplicaciones más usadas
más cerca del lado izquierdo.
Pulse
/ para desplazar el icono a la posición deseada.
Guardar las aplicaciones favoritas
Puede asignar sus aplicaciones favoritas a los botones FAV
APP1, 2, y 3 del control remoto para iniciarlas más
fácilmente.
Las aplicaciones cuyos iconos se desplazan a
, y
durante la visualización del Dock serán asignadas a los
botones FAV APP 1, 2 y 3 respectivamente.
>>
<<
Para utilizar Internet
ESP 8-13
Utilizar aplicaciones a través de
Internet (Continúa)
Desactivación de la función Netflix
Puede desactivar la función Netflix. Consulte "Smart TV" >
"Avanzado" > "Ayuda Netflix" y seleccione "Desactivar".
Para confirmar el estado de Netflix, verifique la
información exhibida en la pantalla y haga clic en "OK".
Desactivación de la función VUDU
Para desactivar la función VUDU consulte "Smart TV" >
"Avanzado" > "Ayuda VUDU" y seleccione "Sí". Al acceder a
la aplicación de Internet por primera vez, aparecerá lo
siguiente.
El texto en esta sección aparece en el idioma original
(inglés).
>>
<<
Para utilizar Internet
Notas
DISCLAIMERS
This SHARP device facilitates the access to content and services provided by third parties. The content and services accessible via this device belong to and may be proprietary to third parties.
Therefore, any use of such third party content and services must be in accordance with any authorization or terms of use provided by such content or service provider. SHARP shall not be liable
to you or any third party for your failure to abide by such authorization or terms of use. Unless otherwise specifically authorized by the applicable content or service provider, all third party content
and services provided are for personal and non-commercial use; you may not modify, copy, distribute, transmit, display, perform, reproduce, upload, publish, license, create derivative works from,
transfer or sell in any manner or medium any content or services available via this device.
SHARP is not responsible, nor liable, for customer service-related issues related to the third party content or services. Any questions, comments or service-related inquiries relating to the third
party content or service should be made directly to the applicable content or service provider.
You may not be able to access content or services from the device for a variety of reasons which may be unrelated to the device itself, including, but not limited to, power failure, other Internet
connection, or failure to configure your device properly. SHARP, its directors, officers, employees, agents, contractors and affiliates shall not be liable to you or any third party with respect to such
failures or maintenance outages, regardless of cause or whether or not it could have been avoided.
ALL THIRD PARTY CONTENT OR SERVICES ACCESSIBLE VIA THIS DEVICE IS PROVIDED TO YOU ON AN "AS-IS" AND "AS AVAILABLE" BASIS AND SHARP AND ITS AFFILIATES MAKE
NO WARRANTY OR REPRESENTATION OF ANY KIND TO YOU, EITHER EXPRESS OR IMPLIED, INCLUDING, WITHOUT LIMITATION, ANY WARRANTIES OF MERCHANTABILITY, NON-
INFRINGEMENT, FITNESS FOR A PARTICULAR PURPOSE OR ANY WARRANTIES OF SUITABILITY, AVAILABILITY, ACCURACY, COMPLETENESS, SECURITY, TITLE, USEFULNESS,
LACK OF NEGLIGENCE OR ERROR-FREE OR UNINTERRUPTED OPERATION OR USE OF THE CONTENT OR SERVICES PROVIDED TO YOU OR THAT THE CONTENT OR SERVICES
WILL MEET YOUR REQUIREMENTS OR EXPECTATIONS.
SHARP IS NOT AN AGENT OF AND ASSUMES NO RESPONSIBILITY FOR THE ACTS OR OMISSIONS OF THIRD PARTY CONTENT OR SERVICE PROVIDERS, NOR ANY ASPECT OF THE
CONTENT OR SERVICE RELATED TO SUCH THIRD PARTY PROVIDERS.
IN NO EVENT WILL SHARP AND/OR ITS AFFILIATES BE LIABLE TO YOU OR ANY THIRD PARTY FOR ANY DIRECT, INDIRECT, SPECIAL, INCIDENTAL, PUNITIVE, CONSEQUENTIAL OR
OTHER DAMAGES, WHETHER THE THEORY OF LIABILITY IS BASED ON CONTRACT, TORT, NEGLIGENCE, BREACH OF WARRANTY, STRICT LIABILITY OR OTHERWISE AND
WHETHER OR NOT SHARP AND/OR ITS AFFILIATES HAVE BEEN ADVISED OF THE POSSIBILITY OF SUCH DAMAGES.
Ejemplos de logotipos de aplicaciones
ESP 8-14
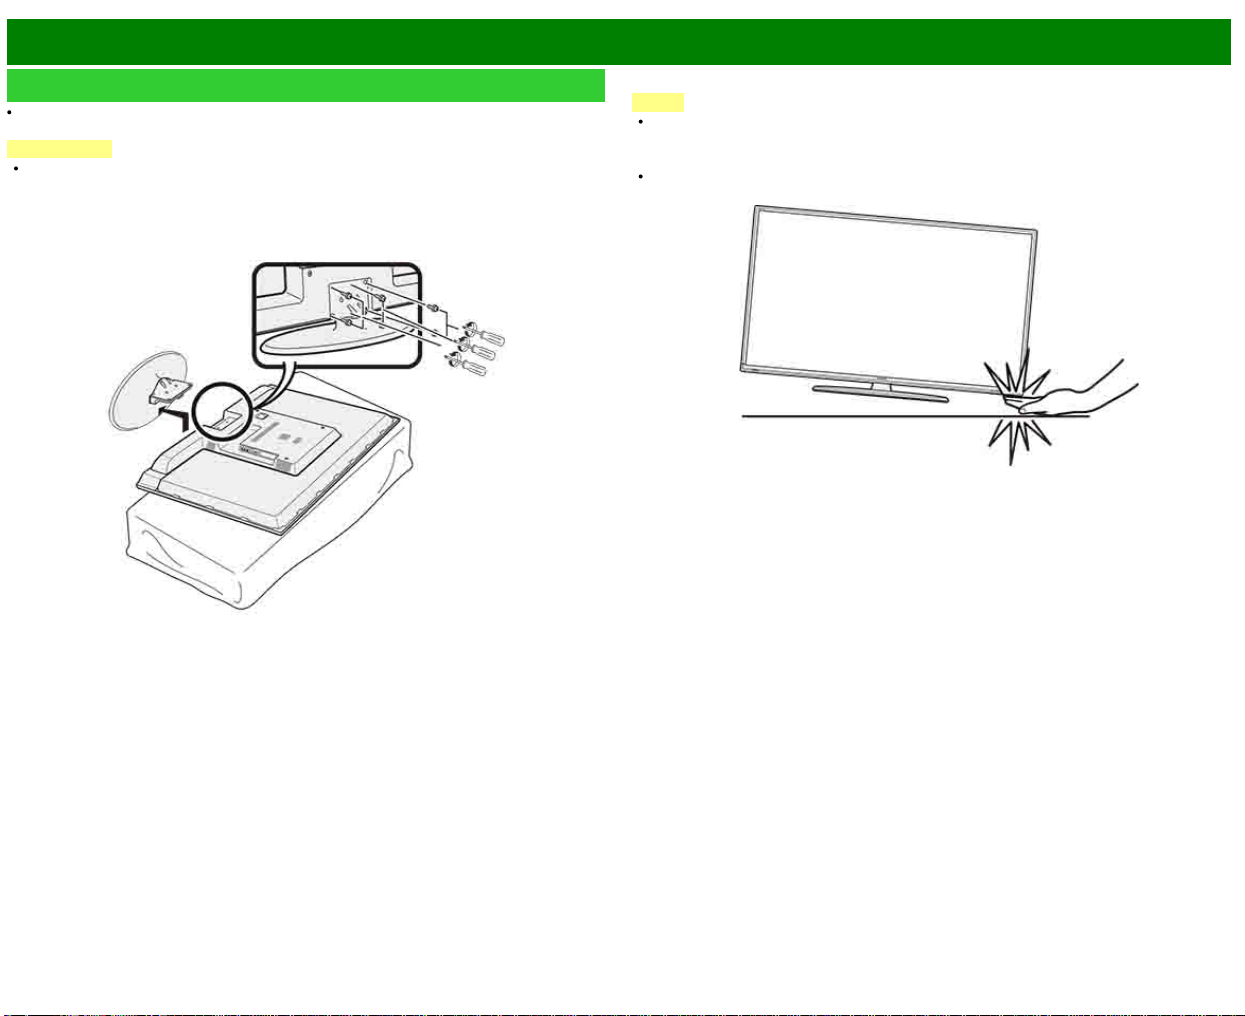
>>
<<
Apéndice
ESP 9-1
Extracción del soporte
Antes de poner (o quitar) el soporte, asegúrese de apagar el televisor y desenchufe el cable de
CA.
PRECAUCIÓN
No quite el soporte del televisor a menos que utilice una ménsula de montaje en pared
opcional para montarlo.
Quite los seis tornillos utilizados para asegurar el soporte.
Ejemplo
NOTA
El televisor deberá ser transportado siempre por dos personas que lo tomarán con ambas
manos.
Durante el procedimiento de instalación, asegúrese de que sus dedos no queden atrapados
entre el televisor y el suelo.
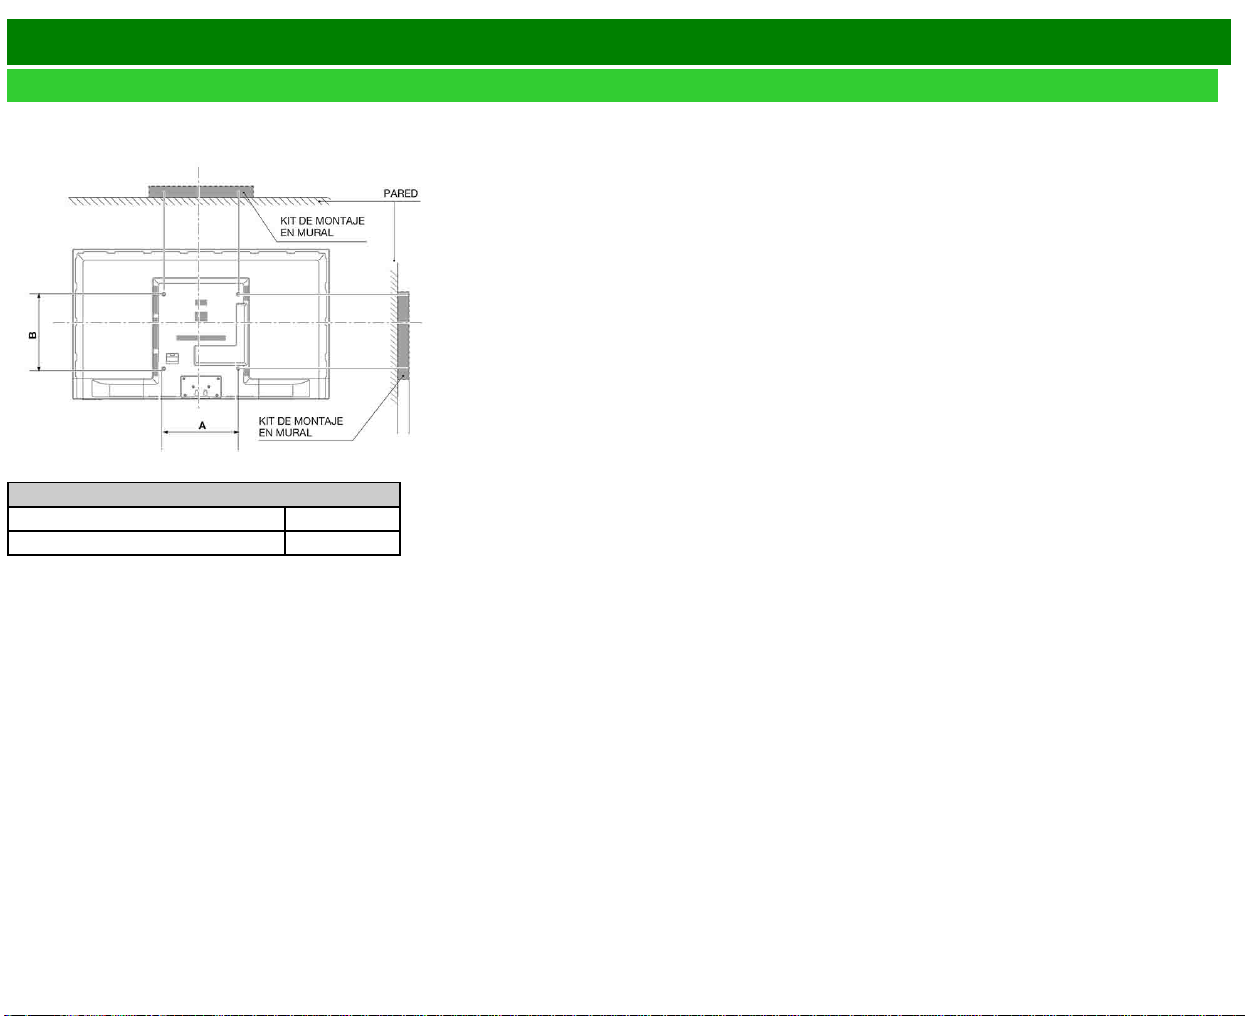
>>
<<
Apéndice
ESP 9-2
Instalación del televisor en una pared
Especificaciones del kit de montaje mural
A continuación se muestran las dimensiones estándar para kits de montaje mural.
La ilustración utiliza el modelo
LC-60LE644U como ejemplo.
Modelo
Elemento LC-60LE644U
Espacio para la instalación en pared (A x B) 400mm x 400mm
Los medios de montaje deben ser lo suficientement resistentes como para soportar el peso de la
pantalla.
El soporte para instalación en pared debe contar con la homologación UL o similar.
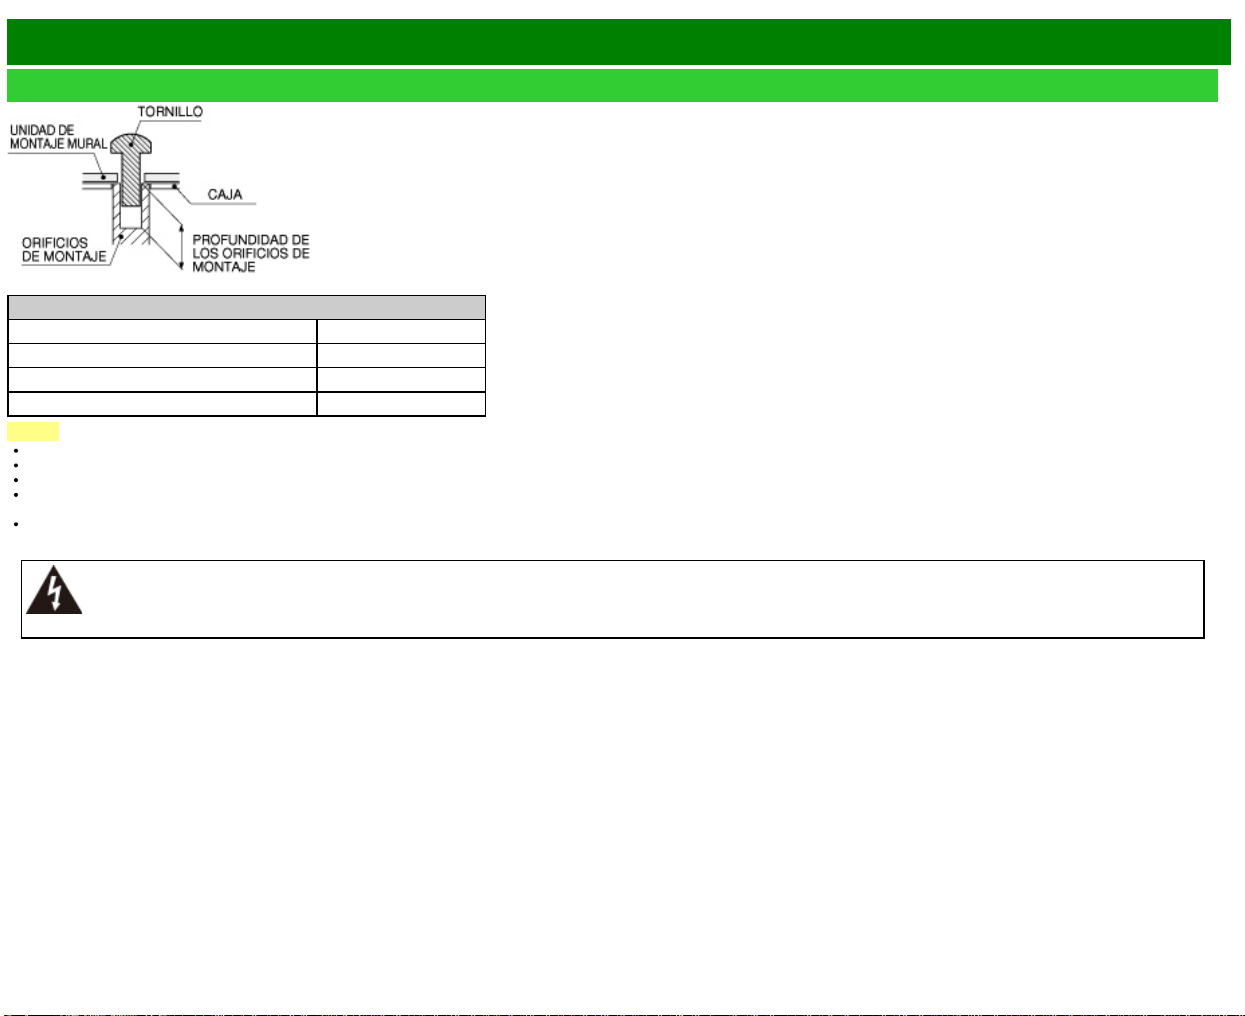
>>
<<
Apéndice
ESP 9-3
Instalación del televisor en una pared (Continúa)
Si desea información sobre los tornillos, consulte la tabla que se muestra a continuación.
Modelo
Elemento LC-60LE644U
tornillo estándar M6 (Use 1.0 pitch screws)
la longitud(Profundidad de los orificio de montaje) 15/32 (12mm)
Cantidad 4pcs
NOTA
No monte el televisor en un lugar inclinado.
No utilice tornillos que no cumplan las especificaciones de tornillos estándar VESA.
No utilice tornillos con una longitud superior a la medida estándar. Los tornillos demasiado largos pueden causar daños en el interior del televisor.
No apriete excesivamente los tornillos ni los deje demasiado flojos. Podría dañar el producto o provocar la caída de éste, con riesgo de ocasionar lesiones personales. SHARP no se hace
responsable de este tipo de accidentes.
SHARP no será responsable de los daños sufridos por el producto o las lesiones personales ocasionadas por el uso de un montaje mural que no cumpla las especificaciones VESA o cuando el
usuario incumpla las instrucciones de instalación del producto.
No instale el kit de montaje mural mientras el televisor está encendido. Podría sufrir lesions personales debidas a una descarga eléctrica.
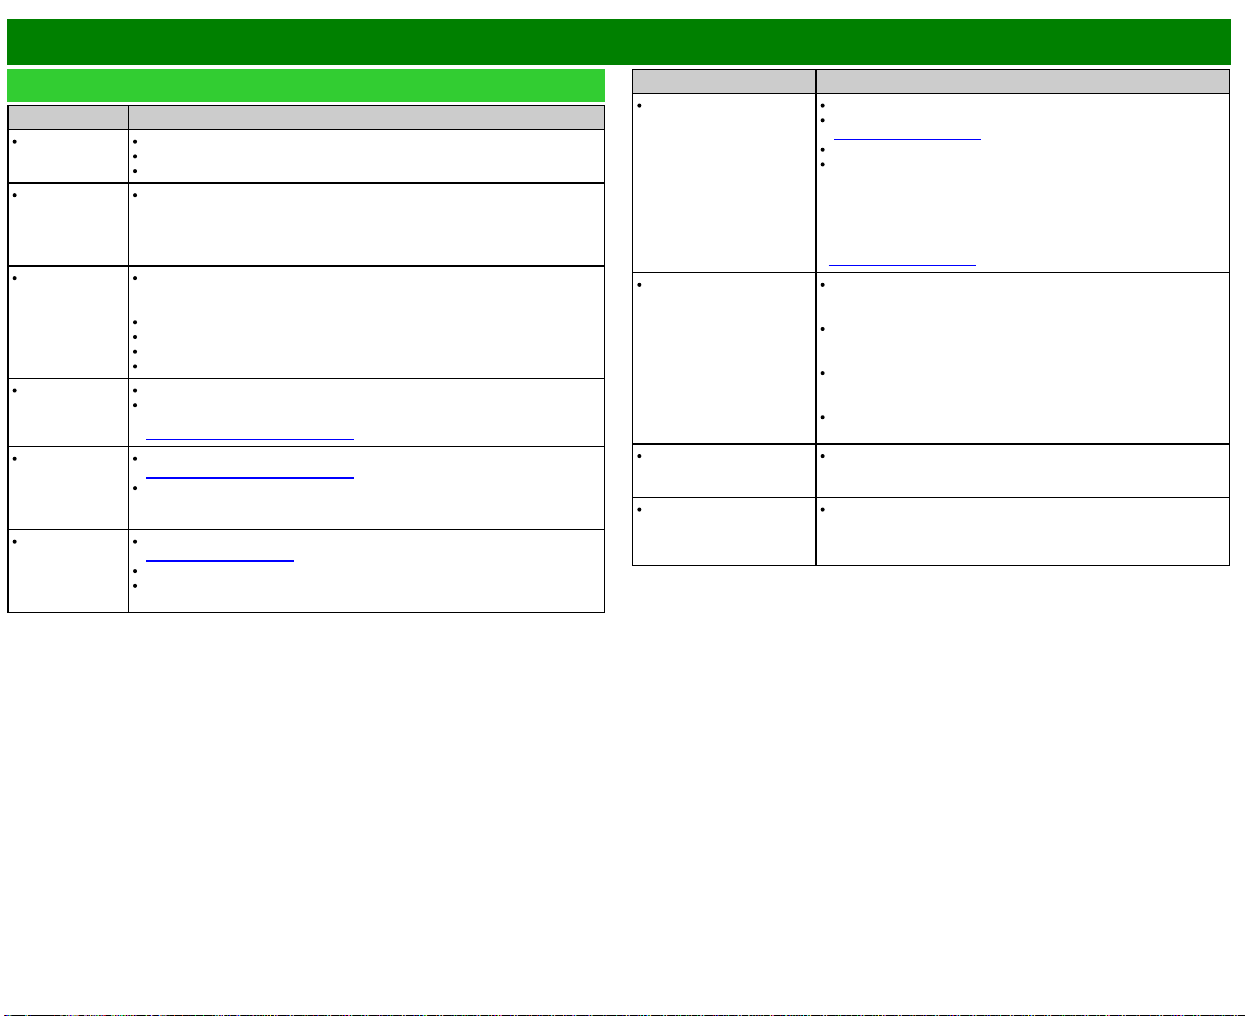
>>
<<
Apéndice
ESP 9-4
Solución de problemas
Problema Problema Posible solución
No enciende Compruebe si ha pulsado POWER en el control remoto.
¿Está desconectado el cable de CA?
¿Está encendida la alimentación?
La unidad no
funciona.
Existen influencias externas como, por ejemplo, los rayos, la electricidad
estática, que pueden causar un funcionamiento incorrecto. En este caso,
utilice la unidad después de desconectar primero la alimentación del
televisor o desenchufe el cable de CA y vuelva a enchufarlo después de
transcurrir 1 ó 2 minutos.
El control
remoto no
funciona.
¿Está el equipo que va a ser operado por el control remoto configurado
correctamente? Pulse TV para configurar el control remoto en el ajuste
para operar el TV.
¿Están las pilas insertadas con la polaridades (e, f) bien alineadas?
¿Están agotadas las pilas? (Cámbielas por pilas nuevas.)
¿Lo está utilizando bajo una luz intensa o fluorescente?
¿Hay una luz fluorescente encendida cerca del sensor del control remoto?
La imagen se
corta con
franjas a los
lados.
¿Es correcta la posición de la imagen?
¿Están hechos correctamente los ajustes de modo de la pantalla como,
por ejemplo, el del tamaño de la imagen?
Consulte la páginas 3-14 a 3-16
Colores
extraños,
colores claros o
colores mal
alineados.
Ajuste el tono de la imagen.
Consulte la páginas 4-17 a 4-20
¿Está demasiado brillante la habitación? La imagen puede aparecer
oscura en una habitación que está demasiado brillante.
La alimentación
se desconecta
repentinamente.
¿Está ajustado el temporizador de apagado?
Consulte la página 3-9
Compruebe el ajuste del control de la alimentación.
La temperatura interna de la unidad ha aumentado. Retire cualquier objeto
que bloquee la ventilación o limpie.
Problema Problema Posible solución
No hay imagen. ¿Es correcta la conexión a otros componentes?
¿Se ha seleccionado la entrada correcta?
Consulte la página 2-1
¿Se ha seleccionado "Encendido" en "Audio solamente"?
Si la imagen del PC no se visualiza, compruebe lo siguiente:
- Cuando conecte un PC portátil al TV, compruebe que el modo
de salida de visualización del PC esté ajustado al monitor
externo.
- Compruebe la posición de resolución en el PC. ¿Se está
ingresando una señal no compatible?
Consulte la página 8-9
La calidad de la
imagen en programas
de HD es pobre.
Para disfrutar imágenes de HD provenientes de equipos
externos, es necesario que usted instale una conexión HDMI o
una conexión de componentes.
Si el contenido del programa no es de calidad HD, las imágenes
en HD no pueden ser exhibidas. Asegúrese que el programa
que está viendo proporcione imágenes de HD.
El decodificador de cable/satélite de HD podría necesitar ser
configurado para emitir imágenes de HD a través de
cable/satélite.
La emisión de cable/satélite podría no soportar una resolución
de señal de 1080p.
El televisor en ocasiones
hace un sonido crujiente.
Esto no es un mal funcionamiento. Esto ocurre cuando la caja
se expande y contrae ligeramente de acuerdo a los cambios de
temperatura. Esto no afecta el funcionamiento del televisor.
Algunas funciones de
Internet usadas en PC no
están disponibles en el
televisor.
El televisor tiene funciones limitadas, comparado con los
navegadores normales de PC.
>>
<<
Apéndice
ESP 9-5
Solución de problemas (Continúa)
Problema Posible solución
No hay sonido. ¿Es correcta la conexión a otros componentes?
¿Está el volumen demasiado bajo?
Consulte la página 3-2
¿Se ha seleccionado "Variable" en "Selección salida"?
¿Pulsó MUTE en el control remoto?
Consulte la página 3-3
Compruebe la salida de audio del equipo externo conectado.
¿Está el volumen demasiado bajo o mudo?
Cuando conecte equipo externo a través de un cable HDMI,
podría necesitar configurar el audio para que éste salga a través
del cable HDMI.
Cuando el audio no es sacado desde el equipo externo
conectado al terminal PC IN o el terminal HDMI IN 2, compruebe
el ajuste "Selección Audio".
Consulte la páginas3-8, 4-21
Incluso cuando se conecta equipo externo usando un cable de
HDMI certificado, se podría requerir una conexión de cable de
audio dependiendo del tipo de equipo y los medios que se estén
reproduciendo. En este caso, en adición a la conexión de un
cable certificado HDMI al terminal HDMI IN 2, conecte un cable
con miniconector estéreo de 3,5 mm ø al terminal AUDIO IN y
ajuste "Selección Audio" a
"HDMI+Análogo".
Consulte la páginas3-8, 4-21
Al conectar un PC por medio de un cable certificado HDMI,
compruebe lo siguiente:
- ¿Está la salida de audio del PC configurada correctamente?
Compruebe los ajustes de salida de audio y el formato de audio
de salida en Propiedades de Sonido en el PC.
Los formatos de audio compatibles con este televisor son PCM,
Dolby Digital y DTS. Con otros formatos no se puede emitir audio.
- Dependiendo de la tarjeta, solamente se podrán sacar señales
de vídeo. En este caso, en adición a conectar un cable certificado
HDMI al terminal HDMI IN 2, conecte un cable con miniconector
estéreo de 3,5 mm ø al terminal AUDIO IN y ajuste "Selección
Audio" a "HDMI+Análogo".
Consulte la páginas3-8, 4-21
>>
<<
Apéndice
ESP 9-6
Solución de problemas relacionados con el mensaje de
error
El ejemplo de un
mensaje
de error visualizado en
una pantalla
Código
de error
Posible solución
No se recibió la emisión. E202 Compruebe el cable de antena. Compruebe que
la antena esté correctamente instalada.
No hay emisión ahora. E203 Compruebe la hora de emisión en la guía de
programas.
Señal no compatible ha
sido recibida. Verifique la
configuración de salida
del dispositivo.
— Este mensaje se exhibe cuando se ingresa un
formato de audio diferente a PCM, DTS o Dolby
Digital.
- Configure el formato de salida de audio del
equipo HDMI externo conectado a PCM, DTS o
Dolby Digital.
- Consulte el manual de operación del equipo
externo para ver los detalles de configuración.
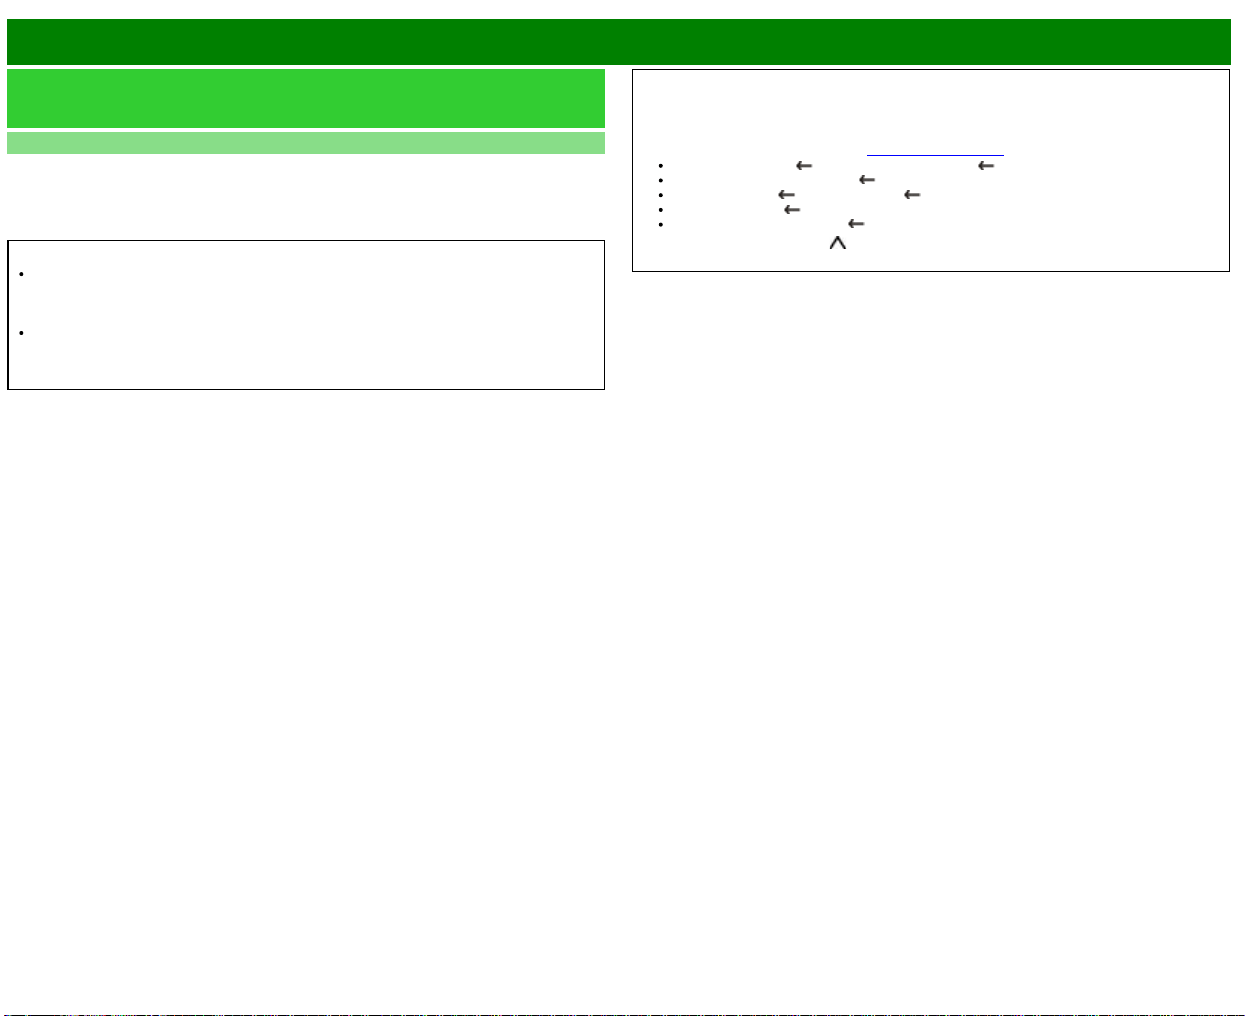
>>
<<
Apéndice
ESP 9-7
Información sobre la licencia de software para este
producto
Licencia de software
Puede leer las licencias de software en el menú en pantalla. Consulte "Información" > "Licencia
de software".
Composición del software
El software incluido en este producto está compuesto por varios componentes de software cuyos
derechos de propiedad intelectual individuales pertenecen a SHARP o a terceros.
Precauciones relacionadas con la utilización en ambientes de alta y baja temperatura
Cuando se utilice la unidad en un lugar donde la temperatura esté baja (una habitación o una
oficina por ejemplo), la imagen podrá dejar trazos persistentes o aparecer un poco retrasada.
Esto no es un fallo del funcionamiento, y la unidad se recuperará cuando la temperatura
vuelva a ser normal.
No deje la unidad en un lugar caliente o frío. Además, no deje la unidad en un lugar
expuesto a la luz solar directa ni cerca de una calefacción, porque la caja podrá deformarse
y el panel frontal podrá funcionar mal.
Temperatura para guardar la unidad: -4°F a +140°F (-20°C a +60°C)
BORRADO DEL NÚMERO SECRETO
Si olvida el número secreto, borre el número secreto usando el siguiente procedimiento.
1 Seleccione un elemento en la lista siguiente para visualizar la pantalla de introducción del
número secreto.
(Para operar el menú en pantalla,
consulte la página 4-3.)
"Sistema de color" ( "Configuración de Entrada" menú Configuración Inicial).
"Autoinstalación" o "Reiniciar" ( menú Configuración Inicial).
"Channel Setup" ( Ajustes de Canal menú Configuración Inicial).
"Control Paterno" ( menú Configuración Inicial).
"Actualización de software" ( menú Información).
2 Pulse y mantenga pulsados
y VOL+ simultáneamente en el televisor hasta que en la
pantalla aparezca el mensaje.
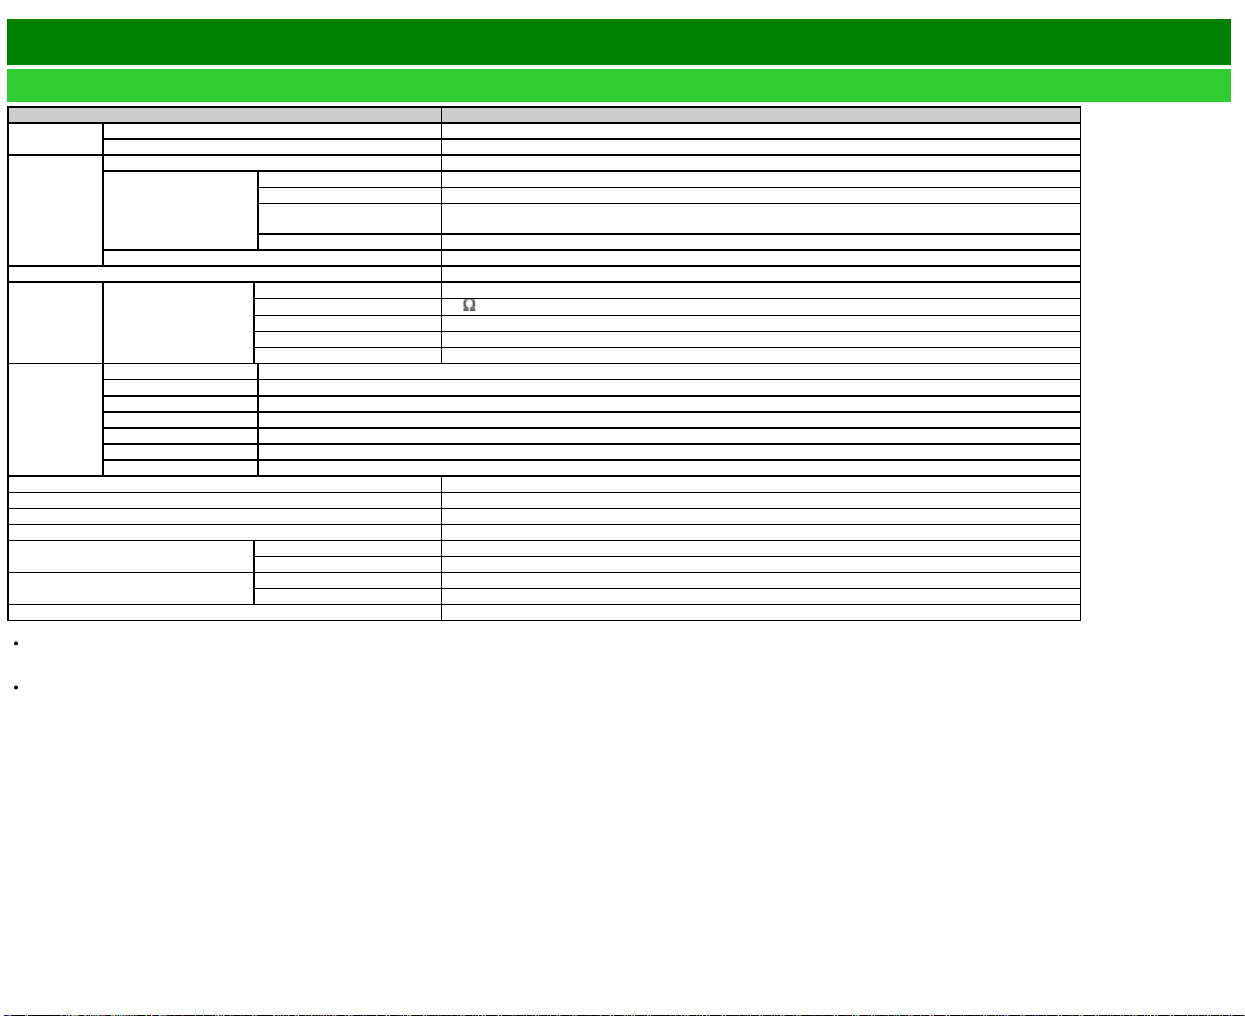
>>
<<
Especificaciones
Televisor
Elemento Modelo: LC-60LE644U
Panel
LCD
Tamaño 60" Clase (60 3/32" Diagonal)
Resolución 2,073,600 píxeles (1,920 x 1,080)
Función de TV
TV estándar (CCIR) Sistema ATSC/NTSC, estándar de la TV norteamericana
Canal de
recepción
VHF/UHF Canales de VHF 2-13, canales de UHF 14-69
CATV Canales 1-135 (solamente canal no codificado)
Emisión terrestre
digital (8VSB)
Canales 2-69
Cable digital*1 (64/256 QAM) Canales 1-135 (solamente canal no codificado)
Audio múltiplex Sistema BTSC
Salida de audio 8W x 2
Terminales
Lado
superficie
del panel
trasero
L-AUDIO-R L-AUDIO-R
ANT/CABLE
75
desequilibrada, tipo F x 1 para Analógica (VHF/UHF/CATV) y Digital (ANTENA/CABLE)
ETHERNET(10/100) Conector de red
USB(DC5V 500mA) Modo de fotos/música/vídeo, Actualización de software, teclado/ratón USB, imagen de fondo de pantalla
DIGITAL AUDIO OUT Salida audio digital óptica x 1 (PCM/Dolby Digital/DTS)
Lado
de la
superficie
del panel
abajo
HEADPHONE AURICULARES
HDMI 3 Entrada HDMI con HDCP
HDMI 2 Entrada HDMI con HDCP, entrada de audio (conector estéreo de 3,5 mm ø)
HDMI 1(ARC) Entrada HDMI con HDCP, ARC
PC IN ANALOG RGB Entrada ANALOG RGB (PC) (conector hembra mini D-sub de 15 contactos), entrada de audio (conector estéreo de 3,5 mm ø)
PC IN AUDIO entrada de audio (conector estéreo de 3,5 mm ø)
COMPONENT/VIDEO IN Entrada COMPONENT, Entrada AV
Idioma OSD Inglés/francés/español
Alimentación AC 120 V, 60 Hz
On Mode Power 98 W
Consumo 150 W
Peso
Televisor + soporte 50.7 lbs./23.0 kg
Televisor solamente 43.0 lbs./19.5 kg
Dimensiones
(An x Al x Pr)
Televisor + soporte 54 15/64" x 34 17/64" x 13"
Televisor solamente 54 15/64" x 31 3/4" x 3 31/32"
Temperatura de funcionamiento +32°F a +104°F (0°C a +40°C)
*1 No pueden recibirse mensajes de alerta de emergencia vía cable.
SHARP sigue una política de mejoras continuas, por eso se reserva el derecho de hacer cambios en el diseño y en las especificaciones, para mejorar el producto, sin previo aviso. Las cifras de
las especificaciones del rendimiento indicadas son valores nominales de las unidades de producción. Es posible que los valores de algunas unidades individuales sean algo diferentes de los
valores indicados en esta tabla.
El consumo de On Mode Power se mide de acuerdo con los requisitos del programa Energy Star para televisores.
ESP 10-1
>>
<<
Marcas comerciales
ESP 11-1
SMART es una marca comercial registrada de Sharp Corporation.
Fabricado bajo licencia de Dolby Laboratories. Dolby y el símbolo de la doble D son
marcas comerciales de Dolby Laboratories.
Los términos HDMI y HDMI High-Definition Multimedia Interface y el logotipo de
HDMI son marcas registradas de HDMI Licensing LLC en EE.UU. y otros países.
El logotipo Wi-Fi CERTIFIED Logo es una marca de certificación de la Alianza Wi-Fi.
La Wi-Fi Protected Setup Mark es una marca de la Alianza Wi-Fi.
Wi-Fi CERTIFIED Miracast™ y Miracast™ son marcas comerciales de Wi-Fi
Alliance.
Este producto incluye el software de red casera 'DiXiM', desarrollado por DigiOn,
Inc.
y el logotipo LC son marcas
registradas de SHARP Corporation.
Este producto contiene la tecnología LC Font, que ha sido desarrollada por SHARP
Corporation para exhibir claramente caracteres fáciles de leer en las pantallas LCD.
Sin embargo, también se utilizan otras fuentes
para algunas páginas de pantallas.
Netflix y el logo Netflix son marcas registradas de Netflix, Inc.
VUDU™ es una marca comercial de VUDU, Inc.
Información del usuario de ENERGY STAR®
Para obtener más información acerca del programa ENERGY STAR, puede consultar
la página de Internet energystar.gov.
Si deja el modo de hogar de ENERGY STAR o si habilita funcionalidades opcionales
se producirá un aumento del consumo de energía.
Este producto cumple los requisitos del programa ENERGY STAR cuando se
selecciona "Casa" para "Ubicación TV". La configuración "Ubicación TV" en "Casa"
permite que el televisor funcione en condiciones de ahorro energético para uso
doméstico.
Los Productos que han conseguido el ENERGY STAR® están
diseñados para proteger el medio ambiente a través de una
mejor eficiencia en el consumo de energía.
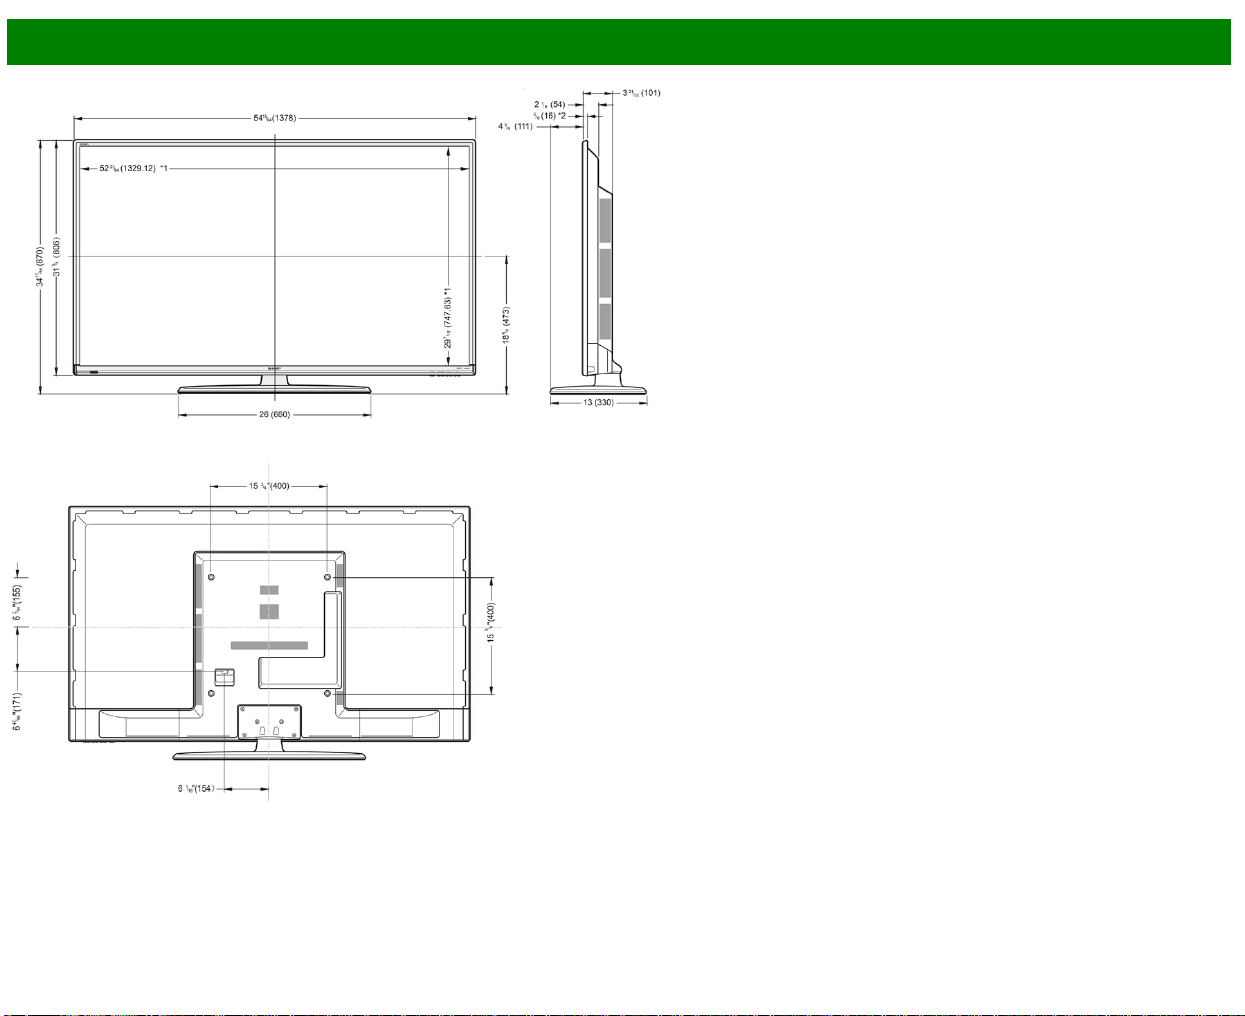

>>
<<
Licencia de software
ESP 13-1
Software composition
The software included in this product is comprised of various software components whose
individual copyrights are held by SHARP or by third parties.
Software developed by SHARP and open source software
The copyrights for the software components and various relevant documents included with this
product that were developed or written by SHARP are owned by SHARP and are protected by the
Copyright Act, international treaties, and other relevant laws. This product also makes use of freely
distributed software and software components whose copyrights are held by third parties. These
include software components covered by a GNU General Public License (hereafter GPL), a GNU
Lesser General Public License (hereafter LGPL) or other license agreement.
Obtaining source code
Some of the open source software licensors require the distributor to provide the source code with
the executable software components. GPL and LGPL include similar requirements. For information
on obtaining the source code for the open source software and for obtaining the GPL, LGPL, and
other license agreement information, visit the following website:
http://www.sharpusa.com/gpl We are unable to answer any questions about the source code for
the open source software. The source code for the software components whose copyrights are
held by SHARP is not distributed.
Acknowledgements
The following open source software components are included in this product:
linux
kernel/busybox/glibc/zlib/libpng/libjpeg/libiconv/DirectFB/OpenSSL/XMLRPC-EPI/
mtd-utils/Expat/Qt/U-Boot/PlayReady/AGG(ver2.3)/device-mapper/libfreetype/cURL/
libxml2/lua/lua-xmlreader/lua-slncrypto/Ffmpeg/SQLite/libzzip/c-ares/librt/libjanus/NTP/
webkit/cairo/fontconfig/icu/libxslt/gtk+/atk/pango/glib2/libpixman/gstreamr/liboil/libcheck/
Droid Sans/ca-bundle.crt/btusb/bthid/pthread/cJSON
Software copyrights
XMLRPC-EPI
Copyright 2000 (c) Epinions, Inc.
libjpeg
This software is copyright (c) 1991-2012, Thomas G. Lane, Guido Vollbeding. Portions of this
software are based in part on the work of the Independent JPEG Group.
SSLeay
Copyright (c) 1995-1998 Eric Young ([email protected])
This product includes cryptographic software written by Eric Young ([email protected]).
Expat
Copyright (c) 1998, 1999, 2000 Thai Open Source Software Center Ltd and Clark Cooper.
Copyright (c) 2001, 2002, 2003, 2004, 2005, 2006 Expat maintainers.
Contact: Nokia Corporation (qt-[email protected])
Qt
The Qt GUI Toolkit is Copyright (c) 2010 Nokia Corporation and/or its subsidiary(-ies).
PlayReady
This product contains technology subject to certain intellectual property rights of Microsoft. Use or
distribution of this technology outside of this product is prohibited without the appropriate lisense(s)
from Microsoft.
Content owners use Microsoft PlayReadyTM content access technology to protect their intellectual
property, including copyrighted content. This device uses PlayReady technology to access
PlayReady-protected content and/or WMDRM-protected content. If the device fails to properly
enforce restrictions on content usage, content owners may require Microsoft to revoke the devicefs
ability to consume PlayReady-protected content. Revocation should not affect unprotected content
or content protected by other content access technologies. Content owners may require you to
upgrade PlayReady to access their content. If you decline an upgrade, you will not be able to
access content that requires the upgrade.
libfreetype
Copyright (c) 2006, 2007, 2008, 2009, 2010 by David Turner, Robert Wilhelm, and Werner
Lemberg. The software is based in part of the work of the Free Type Team.
libxml2
Copyright (c) 1998-2003 Daniel Veillard. All Rights Reserved.
Lua
Copyright (c) 1994-2008 Lua.org, PUC-Rio
Lua-xmlreader
Copyright (c) 2008 A.S. Bradbury
Lua-slncrypto
Copyright (c) 2005 Malete Partner, Berlin, [email protected]
libzzip
Copyright (c) Guido Draheim [email protected]
c-ares
Copyright (c) 1998 by the Massachusetts Institute of Technology.

>>
<<
Licencia de software(Continúa)
ESP 13-2
Group 42
Portions copyright (c) 2000 Group 42, Inc. and the Contributing Authors.
zlib
Portions copyright (c) 1995-1996 Jean-loup Gailly and Mark Adler.
RSA Data Security
MD5.CPP - RSA Data Security, Inc., MD5 message-digest algorithm. Copyright (c) 1991-2, RSA
Data Security, Inc. Created 1991. All rights reserved.
Fraunhofer IIS and Thomson Multimedia
MPEG Layer-3 audio compression technology licensed by Fraunhofer IIS and Thomson
Multimedia.
You cannot use the MP3 compressed audio within the Software for real time or live broadcasts.
If you require an MP3 decoder for real time or live broadcasts, you are responsible for obtaining
this MP3 technology license.
Nellymoser, Inc
Speech compression and decompression technology licensed by Nellymoser, Inc.
Sorenson Media, Inc
SorensonTM SparkTM video compression and decompression technology licensed from Sorenson
Media, Inc.
Sun Microsystem, Inc
ADPCM speech compression algorithm is used with the permission of Sun Microsystems, Inc.
NTP
Copyright (c) University of Delaware 1992-2011
Permission to use, copy, modify, and distribute this software and its documentation for any
purpose with or without fee is hereby granted,provided that the above copyright notice appears in
all copies and that both the copyright notice and this permission notice appear in supporting
documentation, and that the name University of Delaware not be used in advertising or publicity
pertaining to distribution of the software without specific, written prior permission. The University of
Delaware makes no representations about the suitability this software for any purpose. It is
provided "as is" without express or implied warranty.
fontconfig
Copyright (c) 2001, 2003 Keith Packard
icu
Copyright (c) 1995-2011 International Business Machines Corporation and others All rights
reserved.
libxslt
Copyright (c) 2001-2002 Daniel Veillard. All Rights Reserved.
cURL
COPYRIGHT AND PERMISSION NOTICE Copyright (c) 1996 - 2009, Daniel Stenberg,
All rights reserved.
Permission to use, copy, modify, and distribute this software for any purpose with or without fee is
hereby granted, provided that the above copyright notice and this permission notice appear in all
copies.
THE SOFTWARE IS PROVIDED "AS IS", WITHOUT WARRANTY OF ANY KIND, EXPRESS OR
IMPLIED, INCLUDING BUT NOT LIMITED TO THE WARRANTIES OF MERCHANTABILITY,
FITNESS FOR A PARTICULAR PURPOSE AND NONINFRINGEMENT OF THIRD PARTY
RIGHTS. IN NO EVENT SHALL THE AUTHORS OR COPYRIGHT HOLDERS BE LIABLE FOR
ANY CLAIM, DAMAGES OR OTHER LIABILITY, WHETHER IN AN ACTION OF CONTRACT,
TORT OR OTHERWISE, ARISING FROM, OUT OF OR IN CONNECTION WITH THE
SOFTWARE OR THE USE OR OTHER DEALINGS IN THE SOFTWARE.
Except as contained in this notice, the name of a copyright holder shall not be used in advertising
or otherwise to promote the sale, use or other dealings in this Software without prior written
authorization of the copyright holder.
libpixman
Copyright (C) 2008 Free Software Foundation, Inc.
OpenSSL
LICENSE ISSUES
The OpenSSL toolkit stays under a dual license, i.e. both the conditions of the OpenSSL License
and the original SSLeay license apply to the toolkit. See below for the actual license texts. Actually
both licenses are BSD-style Open Source licenses. In case of any license issues related to
OpenSSL please contact openssl-[email protected].
OpenSSL License
Copyright (c) 1998-2008 The OpenSSL Project. All rights reserved.
Redistribution and use in source and binary forms, with or without modification, are permitted
provided that the following conditions are met:
1. Redistributions of source code must retain the above copyright notice, this list of conditions and
the following disclaimer.
2. Redistributions in binary form must reproduce the above copyright notice, this list of conditions
and the following disclaimer in the documentation and/or other materials provided with the
distribution.

>>
<<
Licencia de software(Continúa)
ESP 13-3
3. All advertising materials mentioning features or use of this software must display the following
acknowledgment:
"This product includes software developed by the OpenSSL Project for use in the OpenSSL
Toolkit. (http://www.openssl.org/)"
4. The names "OpenSSL Toolkit" and "OpenSSL Project" must not be used to endorse or promote
products derived from this software without prior written permission. For written permission, please
contact openssl-[email protected].
5. Products derived from this software may not be called "OpenSSL" nor may "OpenSSL" appear
in their names without prior written permission of the OpenSSL Project.
6. Redistributions of any form whatsoever must retain the following acknowledgment:
"This product includes software developed by the OpenSSL Project for use in the OpenSSL Toolkit
(http://www.openssl.org/)"
THIS SOFTWARE IS PROVIDED BY THE OpenSSL PROJECT "AS IS" AND ANY EXPRESSED
OR IMPLIED WARRANTIES, INCLUDING, BUT NOT LIMITED TO, THE IMPLIED WARRANTIES
OF MERCHANTABILITY AND FITNESS FOR A PARTICULAR PURPOSE ARE DISCLAIMED. IN
NO EVENT SHALL THE OpenSSL PROJECT OR ITS CONTRIBUTORS BE LIABLE FOR ANY
DIRECT, INDIRECT, INCIDENTAL, SPECIAL, EXEMPLARY, OR CONSEQUENTIAL DAMAGES
(INCLUDING, BUT NOT LIMITED TO, PROCUREMENT OF SUBSTITUTE GOODS OR
SERVICES; LOSS OF USE, DATA, OR PROFITS; OR BUSINESS INTERRUPTION) HOWEVER
CAUSED AND ON ANY THEORY OF LIABILITY, WHETHER IN CONTRACT, STRICT LIABILITY,
OR TORT (INCLUDING NEGLIGENCE OR OTHERWISE) ARISING IN ANY WAY OUT OF THE
USE OF THIS SOFTWARE, EVEN IF ADVISED OF THE POSSIBILITY OF SUCH DAMAGE.
This product includes cryptographic software written by Eric Young ([email protected]). This
product includes software written by Tim Hudson ([email protected]).
Original SSLeay License
Copyright (C) 1995-1998 Eric Young ([email protected]) All rights reserved.
This package is an SSL implementation written by Eric Young ([email protected]).
The implementation was written so as to conform with Netscapes SSL.
This library is free for commercial and non-commercial use as long as the following conditions are
aheared to. The following conditions apply to all code found in this distribution, be it the RC4,
RSA, lhash, DES, etc., code; not just the SSL code. The SSL documentation included with this
distribution is covered by the same copyright terms except that the holder is Tim Hudson
Copyright remains Eric Young's, and as such any Copyright notices in the code are not to be
removed. If this package is used in a product, Eric Young should be given attribution as the author
of the parts of the library used. This can be in the form of a textual message at program startup or
in documentation (online or textual) provided with the package.
Redistribution and use in source and binary forms, with or without modification, are permitted
provided that the following conditions are met:
1. Redistributions of source code must retain the copyright notice, this list of conditions and the
following disclaimer.
2. Redistributions in binary form must reproduce the above copyright notice, this list of conditions
and the following disclaimer in the documentation and/or other materials provided with the
distribution.
3. All advertising materials mentioning features or use of this software must display the following
acknowledgement:
"This product includes cryptographic software written by Eric Young ([email protected])"
The word 'cryptographic' can be left out if the rouines from the library being used are not
cryptographic related :-).
4. If you include any Windows specific code (or a derivative thereof) from the apps directory
(application code) you must include an acknowledgement:
"This product includes software written by Tim Hudson ([email protected])"
THIS SOFTWARE IS PROVIDED BY ERIC YOUNG "AS IS" AND ANY EXPRESS OR IMPLIED
WARRANTIES, INCLUDING, BUT NOT LIMITED TO, THE IMPLIED WARRANTIES OF
MERCHANTABILITY AND FITNESS FOR A PARTICULAR PURPOSE ARE DISCLAIMED. IN NO
EVENT SHALL THE AUTHOR OR CONTRIBUTORS BE LIABLE FOR ANY DIRECT, INDIRECT,
INCIDENTAL, SPECIAL, EXEMPLARY, OR CONSEQUENTIAL DAMAGES (INCLUDING, BUT
NOT LIMITED TO, PROCUREMENT OF SUBSTITUTE GOODS OR SERVICES; LOSS OF USE,
DATA, OR PROFITS; OR BUSINESS INTERRUPTION) HOWEVER CAUSED AND ON ANY
THEORY OF LIABILITY, WHETHER IN CONTRACT, STRICT LIABILITY, OR TORT (INCLUDING
NEGLIGENCE OR OTHERWISE) ARISING IN ANY WAY OUT OF THE USE OF THIS
SOFTWARE, EVEN IF ADVISED OF THE POSSIBILITY OF SUCH DAMAGE.
The licence and distribution terms for any publically available version or derivative of this code
cannot be changed. i.e. this code cannot simply be copied and put under another distribution
licence [including the GNU Public Licence.]
Droid Sans
Copyright (C) 2008 The Android Open Source Project

>>
<<
Licencia de software(Continúa)
ESP 13-4
UUID
Copyright (C) 1996, 1997, 1998 Theodore Ts'o.
Redistribution and use in source and binary forms, with or without modification, are permitted
provided that the following conditions are met:
1. Redistributions of source code must retain the above copyright notice, and the entire permission
notice in its entirety, including the disclaimer of warranties.
2. Redistributions in binary form must reproduce the above copyright notice, this list of conditions
and the following disclaimer in the documentation and/or other materials provided with the
distribution.
3. The name of the author may not be used to endorse or promote products derived from this
software without specific prior written permission.
THIS SOFTWARE IS PROVIDED "AS IS" AND ANY EXPRESS OR IMPLIED WARRANTIES,
INCLUDING, BUT NOT LIMITED TO, THE IMPLIED WARRANTIES OF MERCHANTABILITY AND
FITNESS FOR A PARTICULAR PURPOSE, ALL OF WHICH ARE HEREBY DISCLAIMED. IN NO
EVENT SHALL THE AUTHOR BE LIABLE FOR ANY DIRECT, INDIRECT, INCIDENTAL,
SPECIAL, EXEMPLARY, OR CONSEQUENTIAL DAMAGES (INCLUDING, BUT NOT LIMITED
TO, PROCUREMENT OF SUBSTITUTE GOODS OR SERVICES; LOSS OF USE, DATA, OR
PROFITS; OR BUSINESS INTERRUPTION) HOWEVER CAUSED AND ON ANY THEORY OF
LIABILITY, WHETHER IN CONTRACT, STRICT LIABILITY, OR TORT (INCLUDING
NEGLIGENCE OR OTHERWISE) ARISING IN ANY WAY OUT OF THE USE OF THIS
SOFTWARE, EVEN IF NOT ADVISED OF THE POSSIBILITY OF SUCH DAMAGE.
liboil
Copyright (c) 2006 David A. Schleef ‹[email protected] ›
All rights reserved.
THIS SOFTWARE IS PROVIDED BY THE AUTHOR "AS IS" AND ANY EXPRESS OR IMPLIED
WARRANTIES, INCLUDING, BUT NOT LIMITED TO, THE IMPLIED WARRANTIES OF
MERCHANTABILITY AND FITNESS FOR A PARTICULAR PURPOSE ARE DISCLAIMED. IN NO
EVENT SHALL THE AUTHOR BE LIABLE FOR ANY DIRECT, INDIRECT, INCIDENTAL,
SPECIAL, EXEMPLARY, OR CONSEQUENTIAL DAMAGES (INCLUDING, BUT NOT LIMITED
TO, PROCUREMENT OF SUBSTITUTE GOODS OR SERVICES; LOSS OF USE, DATA, OR
PROFITS; OR BUSINESS INTERRUPTION) HOWEVER CAUSED AND ON ANY THEORY OF
LIABILITY, WHETHER IN CONTRACT, STRICT LIABILITY, OR TORT (INCLUDING
NEGLIGENCE OR OTHERWISE) ARISING IN ANY WAY OUT OF THE USE OF THIS
SOFTWARE, EVEN IF ADVISED OF THE POSSIBILITY OF SUCH DAMAGE.
ca-bundle.crt
This is a bundle of X.509 certificates of public Certificate Authorities (CA), distributed at the
following URL:
http://curl.haxx.se/docs/caextract.html
These were automatically extracted from Mozilla's root certificates file (certdata.txt). This file can
be found in the mozilla source tree:
http://mxr.mozilla.org/mozilla/source/security/nss/lib/ckfw/builtins/certdata.txt?raw=1
The contents of this file are subject to the Mozilla Public License Version 1.1 (the "License"); you
may not use this file except in compliance with the License. You may obtain a copy of the License
at http://www.mozilla.org/MPL/
Software distributed under the License is distributed on an "AS IS" basis, WITHOUT WARRANTY
OF ANY KIND, either express or implied. See the License for the specific language governing
rights and limitations under the License.
The Original Code is the Netscape security libraries.
The Initial Developer of the Original Code is Netscape Communications Corporation.
Portions created by the Initial Developer are Copyright (C) 1994-2000 the Initial Developer. All
Rights Reserved.
cJSON
Copyright (c) 2009 Dave Gamble
Permission is hereby granted, free of charge, to any person obtaining a copy of this software and
associated documentation files (the "Software"), to deal in the Software without restriction,
including without limitation the rights to use, copy, modify, merge, publish, distribute, sublicense,
and/or sell copies of the Software, and to permit persons to whom the Software is furnished to do
so, subject to the following conditions:
The above copyright notice and this permission notice shall be included in all copies or substantial
portions of the Software.
THE SOFTWARE IS PROVIDED "AS IS", WITHOUT WARRANTY OF ANY KIND, EXPRESS OR
IMPLIED, INCLUDING BUT NOT LIMITED TO THE WARRANTIES OF MERCHANTABILITY,
FITNESS FOR A PARTICULAR PURPOSE AND NONINFRINGEMENT. IN NO EVENT SHALL
THE AUTHORS OR COPYRIGHT HOLDERS BE LIABLE FOR ANY CLAIM, DAMAGES OR
OTHER LIABILITY, WHETHER IN AN ACTION OF CONTRACT, TORT OR OTHERWISE,
ARISING FROM, OUT OF OR IN CONNECTION WITH THE SOFTWARE OR THE USE OR
OTHER DEALINGS IN THE SOFTWARE.

>>
<<
Licencia de software(Continúa)
ESP 13-5
DIAL
Copyright (c) 2012 Netflix, Inc.
All rights reserved.
Redistribution and use in source and binary forms, with or without modification, are permitted
provided that the following conditions are met:
Redistributions of source code must retain the above copyright notice, this list of conditions and
the following disclaimer.
Redistributions in binary form must reproduce the above copyright notice, this list of conditions
and the following disclaimer in the documentation and/or other materials provided with the
distribution.
THIS SOFTWARE IS PROVIDED BY NETFLIX, INC. AND CONTRIBUTORS "AS IS" AND ANY
EXPRESS OR IMPLIED WARRANTIES, INCLUDING, BUT NOT LIMITED TO, THE IMPLIED
WARRANTIES OF MERCHANTABILITY AND FITNESS FOR A PARTICULAR PURPOSE ARE
DISCLAIMED. IN NO EVENT SHALL NETFLIX OR CONTRIBUTORS BE LIABLE FOR ANY
DIRECT, INDIRECT, INCIDENTAL, SPECIAL, EXEMPLARY, OR CONSEQUENTIAL DAMAGES
(INCLUDING, BUT NOT LIMITED TO, PROCUREMENT OF SUBSTITUTE GOODS OR
SERVICES; LOSS OF USE, DATA, OR PROFITS; OR BUSINESS INTERRUPTION) HOWEVER
CAUSED AND ON ANY THEORY OF LIABILITY, WHETHER IN CONTRACT, STRICT LIABILITY,
OR TORT (INCLUDING NEGLIGENCE OR OTHERWISE) ARISING IN ANY WAY OUT OF THE
USE OF THIS SOFTWARE, EVEN IF ADVISED OF THE POSSIBILITY OF SUCH DAMAGE.
GNU GENERAL PUBLIC LICENSE
Version 2, June 1991
Copyright (C) 1989, 1991 Free Software Foundation, Inc.,
51 Franklin Street, Fifth Floor, Boston, MA 02110-1301 USA
Everyone is permitted to copy and distribute verbatim copies of this license document, but
changing it is not allowed.
Preamble
The licenses for most software are designed to take away your freedom to share and change it.
By contrast, the GNU General Public License is intended to guarantee your freedom to share and
change free software--to make sure the software is free for all its users. This General Public
License applies to most of the Free Software Foundation's software and to any other program
whose authors commit to using it. (Some other Free Software Foundation software is covered by
the GNU Lesser General Public License instead.) You can apply it to your programs, too.
When we speak of free software, we are referring to freedom, not price. Our General Public
Licenses are designed to make sure that you have the freedom to distribute copies of free
software (and charge for this service if you wish), that you receive source code or can get it if you
want it, that you can change the software or use pieces of it in new free programs; and that you
know you can do these things.
To protect your rights, we need to make restrictions that forbid anyone to deny you these rights or
to ask you to surrender the rights. These restrictions translate to certain responsibilities for you if
you distribute copies of the software, or if you modify it.
For example, if you distribute copies of such a program, whether gratis or for a fee, you must give
the recipients all the rights that you have. You must make sure that they, too, receive or can get
the source code. And you must show them these terms so they know their rights.
We protect your rights with two steps:(1) copyright the software, and (2) offer you this license
which gives you legal permission to copy,
distribute and/or modify the software.
Also, for each author's protection and ours, we want to make certain that everyone understands
that there is no warranty for this free software. If the software is modified by someone else and
passed on, we want its recipients to know that what they have is not the original, so that any
problems introduced by others will not reflect on the original authors' reputations.
Finally, any free program is threatened constantly by software patents. We wish to avoid the
danger that redistributors of a free program will individually obtain patent licenses, in effect making
the program proprietary. To prevent this, we have made it clear that any patent must be licensed
for everyone's free use or not licensed at all.
The precise terms and conditions for copying, distribution and modification follow.
GNU GENERAL PUBLIC LICENSE
TERMS AND CONDITIONS FOR COPYING, DISTRIBUTION AND MODIFICATION
0. This License applies to any program or other work which contains a notice placed by the
copyright holder saying it may be distributed under the terms of this General Public License. The
"Program", below, refers to any such program or work, and a "work based on the Program" means
either the Program or any derivative work under copyright law: that is to say, a work containing the
Program or a portion of it, either verbatim or with modifications and/or translated into another
language. (Hereinafter, translation is included without limitation in the term "modification".) Each
licensee is addressed as "you".
Activities other than copying, distribution and modification are not covered by this License; they are
outside its scope. The act of running the Program is not restricted, and the output from the
Program is covered only if its contents constitute a work based on the Program (independent of
having been made by running the Program). Whether that is true depends on what the Program
does.

>>
<<
Licencia de software(Continúa)
ESP 13-6
1. You may copy and distribute verbatim copies of the Program's source code as you receive it, in
any medium, provided that you conspicuously and appropriately publish on each copy an
appropriate copyright notice and disclaimer of warranty; keep intact all the notices that refer to this
License and to the absence of any warranty; and give any other recipients of the Program a copy
of this License along with the Program.
You may charge a fee for the physical act of transferring a copy, and you may at your option offer
warranty protection in exchange for a fee.
2. You may modify your copy or copies of the Program or any portion of it, thus forming a work
based on the Program, and copy and distribute such modifications or work under the terms of
Section 1 above, provided that you also meet all of these conditions:
a) You must cause the modified files to carry prominent notices stating that you changed the files
and the date of any change.
b) You must cause any work that you distribute or publish, that in whole or in part contains or is
derived from the Program or any part thereof, to be licensed as a whole at no charge to all third
parties under the terms of this License.
c) If the modified program normally reads commands interactively when run, you must cause it,
when started running for such interactive use in the most ordinary way, to print or display an
announcement including an appropriate copyright notice and a notice that there is no warranty (or
else, saying that you provide a warranty) and that users may redistribute the program under these
conditions, and telling the user how to view a copy of this License. (Exception: if the Program itself
is interactive but does not normally print such an announcement, your work based on the Program
is not required to print an announcement.)
These requirements apply to the modified work as a whole. If identifiable sections of that work are
not derived from the Program, and can be reasonably considered independent and separate works
in themselves, then this License, and its terms, do not apply to those sections when you distribute
them as separate works. But when you distribute the same sections as part of a whole which is a
work based on the Program, the distribution of the whole must be on the terms of this License,
whose permissions for other licensees extend to the entire whole, and thus to each and every part
regardless of who wrote it.
Thus, it is not the intent of this section to claim rights or contest your rights to work written entirely
by you; rather, the intent is to exercise the right to control the distribution of derivative or collective
works based on the Program.
In addition, mere aggregation of another work not based on the Program with the Program (or with
a work based on the Program) on a volume of a storage or distribution medium does not bring the
other work under the scope of this License.
3. You may copy and distribute the Program (or a work based on it, under Section 2) in object
code or executable form under the terms of Sections 1 and 2 above provided that you also do one
of the following:
a) Accompany it with the complete corresponding machine-readable source code, which must be
distributed under the terms of Sections 1 and 2 above on a medium customarily used for software
interchange; or,
b) Accompany it with a written offer, valid for at least three years, to give any third party, for a
charge no more than your cost of physically performing source distribution, a complete machine-
readable copy of the corresponding source code, to be distributed under the terms of Sections 1
and 2 above on a medium customarily used for software interchange; or,
c) Accompany it with the information you received as to the offer to distribute corresponding
source code. (This alternative is allowed only for noncommercial distribution and only if you
received the program in object code or executable form with such an offer, in accord with
Subsection b above.)
The source code for a work means the preferred form of the work for making modifications to it.
For an executable work, complete source code means all the source code for all modules it
contains, plus any associated interface definition files, plus the scripts used to control compilation
and installation of the executable. However, as a special exception, the source code distributed
need not include anything that is normally distributed (in either source or binary form) with the
major components (compiler, kernel, and so on) of the operating system on which the executable
runs, unless that component itself accompanies the executable.
If distribution of executable or object code is made by offering access to copy from a designated
place, then offering equivalent access to copy the source code from the same place counts as
distribution of the source code, even though third parties are not compelled to copy the source
along with the object code.
4. You may not copy, modify, sublicense, or distribute the Program except as expressly provided
under this License. Any attempt otherwise to copy, modify, sublicense or distribute the Program is
void, and will automatically terminate your rights under this License. However, parties who have
received copies, or rights, from you under this License will not have their licenses terminated so
long as such parties remain in full compliance.

>>
<<
Licencia de software(Continúa)
ESP 13-7
5. You are not required to accept this License, since you have not signed it. However, nothing else
grants you permission to modify or distribute the Program or its derivative works. These actions are
prohibited by law if you do not accept this License. Therefore, by modifying or distributing the
Program (or any work based on the Program), you indicate your acceptance of this License to do
so, and all its terms and conditions for copying, distributing or modifying the Program or works
based on it.
6. Each time you redistribute the Program (or any work based on the Program), the recipient
automatically receives a license from the original licensor to copy, distribute or modify the Program
subject to these terms and conditions. You may not impose any further restrictions on the
recipients' exercise of the rights granted herein. You are not responsible for enforcing compliance
by third parties to this License.
7. If, as a consequence of a court judgment or allegation of patent infringement or for any other
reason (not limited to patent issues), conditions are imposed on you (whether by court order,
agreement or otherwise) that contradict the conditions of this License, they do not excuse you from
the conditions of this License. If you cannot distribute so as to satisfy simultaneously your
obligations under this License and any other pertinent obligations, then as a consequence you may
not distribute the Program at all. For example, if a patent license would not permit royalty-free
redistribution of the Program by all those who receive copies directly or indirectly through you, then
the only way you could satisfy both it and this License would be to refrain entirely from distribution
of the Program.
If any portion of this section is held invalid or unenforceable under any particular circumstance, the
balance of the section is intended to apply and the section as a whole is intended to apply in other
circumstances.
It is not the purpose of this section to induce you to infringe any patents or other property right
claims or to contest validity of any such claims; this section has the sole purpose of protecting the
integrity of the free software distribution system, which is implemented by public license practices.
Many people have made generous contributions to the wide range of software distributed through
that system in reliance on consistent application of that system; it is up to the author/donor to
decide if he or she is willing to distribute software through any other system and a licensee cannot
impose that choice.
This section is intended to make thoroughly clear what is believed to be a consequence of the rest
of this License.
8. If the distribution and/or use of the Program is restricted in certain countries either by patents or
by copyrighted interfaces, the original copyright holder who places the Program under this License
may add an explicit geographical distribution limitation excluding those countries, so that
distribution is permitted only in or among countries not thus excluded. In such case, this License
incorporates the limitation as if written in the body of this License.
9. The Free Software Foundation may publish revised and/or new versions of the General Public
License from time to time. Such new versions will be similar in spirit to the present version, but
may differ in detail to address new problems or concerns.
Each version is given a distinguishing version number. If the Program specifies a version number
of this License which applies to it and "any later version", you have the option of following the
terms and conditions either of that version or of any later version published by the Free Software
Foundation. If the Program does not specify a version number of this License, you may choose
any version ever published by the Free Software Foundation.
10. If you wish to incorporate parts of the Program into other free programs whose distribution
conditions are different, write to the author to ask for permission. For software which is copyrighted
by the Free Software Foundation, write to the Free Software Foundation; we sometimes make
exceptions for this. Our decision will be guided by the two goals of preserving the free status of all
derivatives of our free software and of promoting the sharing and reuse of software generally.
NO WARRANTY
11. BECAUSE THE PROGRAM IS LICENSED FREE OF CHARGE, THERE IS NO WARRANTY
FOR THE PROGRAM, TO THE EXTENT PERMITTED BY APPLICABLE LAW. EXCEPT WHEN
OTHERWISE STATED IN WRITING THE COPYRIGHT HOLDERS AND/OR OTHER PARTIES
PROVIDE THE PROGRAM "AS IS" WITHOUT WARRANTY OF ANY KIND, EITHER EXPRESSED
OR IMPLIED, INCLUDING, BUT NOT LIMITED TO, THE IMPLIED WARRANTIES OF
MERCHANTABILITY AND FITNESS FOR A PARTICULAR PURPOSE. THE ENTIRE RISK AS TO
THE QUALITY AND PERFORMANCE OF THE PROGRAM IS WITH YOU. SHOULD THE
PROGRAM PROVE DEFECTIVE, YOU ASSUME THE COST OF ALL NECESSARY SERVICING,
REPAIR OR CORRECTION.
12. IN NO EVENT UNLESS REQUIRED BY APPLICABLE LAW OR AGREED TO IN WRITING
WILL ANY COPYRIGHT HOLDER, OR ANY OTHER PARTY WHO MAY MODIFY AND/OR
REDISTRIBUTE THE PROGRAM AS PERMITTED ABOVE, BE LIABLE TO YOU FOR
DAMAGES, INCLUDING ANY GENERAL, SPECIAL, INCIDENTAL OR CONSEQUENTIAL
DAMAGES ARISING OUT OF THE USE OR INABILITY TO USE THE PROGRAM (INCLUDING
BUT NOT LIMITED TO LOSS OF DATA OR DATA BEING RENDERED INACCURATE OR
LOSSES SUSTAINED BY YOU OR THIRD PARTIES OR A FAILURE OF THE PROGRAM TO
OPERATE WITH ANY OTHER PROGRAMS), EVEN IF SUCH HOLDER OR OTHER PARTY HAS
BEEN ADVISED OF THE POSSIBILITY OF SUCH DAMAGES.

>>
<<
Licencia de software(Continúa)
ESP 13-8
END OF TERMS AND CONDITIONS
How to Apply These Terms to Your New Programs
If you develop a new program, and you want it to be of the greatest possible use to the public, the
best way to achieve this is to make it free software which everyone can redistribute and change
under these terms.
To do so, attach the following notices to the program. It is safest to attach them to the start of
each source file to most effectively convey the exclusion of warranty; and each file should have at
least the "copyright" line and a pointer to where the full notice is found.
‹one line to give the program's name and a brief idea of what it does.› Copyright (C) ‹year› ‹name
of author›
This program is free software; you can redistribute it and/or modify it under the terms of the GNU
General Public License as published by the Free Software Foundation; either version 2 of the
License, or (at your option) any later version.
This program is distributed in the hope that it will be useful, but WITHOUT ANY WARRANTY;
without even the implied warranty of MERCHANTABILITY or FITNESS FOR A PARTICULAR
PURPOSE. See the GNU General Public License for more details.
You should have received a copy of the GNU General Public License along with this program; if
not, write to the Free Software Foundation, Inc., 51 Franklin Street, Fifth Floor, Boston, MA 02110-
1301 USA.
Also add information on how to contact you by electronic and paper mail.
If the program is interactive, make it output a short notice like this when it starts in an interactive
mode:
Gnomovision version 69, Copyright (C) year name of author Gnomovision comes with
ABSOLUTELY NO WARRANTY; for details type 'show w'.
This is free software, and you are welcome to redistribute it under certain conditions; type 'show c'
for details.
The hypothetical commands 'show w' and 'show c' should show the appropriate parts of the
General Public License. Of course, the commands you use may be called something other than
'show w' and 'show c'; they could even be mouse-clicks or menu items--whatever suits your
program.
You should also get your employer (if you work as a programmer) or your school, if any, to sign a
"copyright disclaimer" for the program, if necessary. Here is a sample; alter the names:
Yoyodyne, Inc., hereby disclaims all copyright interest in the program 'Gnomovision' (which makes
passes at compilers) written by James Hacker.
‹signature of Ty Coon›, 1 April 1989 Ty Coon, President of Vice
This General Public License does not permit incorporating your program into proprietary programs.
If your program is a subroutine library, you may consider it more useful to permit linking proprietary
applications with the library. If this is what you want to do, use the GNU Lesser General Public
License instead of this License.
GNU LESSER GENERAL PUBLIC LICENSE
Version 2.1, February 1999
Copyright (C) 1991, 1999 Free Software Foundation, Inc.
51 Franklin Street, Fifth Floor, Boston, MA 02110-1301 USA
Everyone is permitted to copy and distribute verbatim copies of this license document, but
changing it is not allowed.
[This is the first released version of the Lesser GPL. It also counts as the successor of the GNU
Library Public License, version 2, hence the version number 2.1.]
Preamble
The licenses for most software are designed to take away your freedom to share and change it.
By contrast, the GNU General Public Licenses are intended to guarantee your freedom to share
and change free software--to make sure the software is free for all its users.
This license, the Lesser General Public License, applies to some specially designated software
packages--typically libraries--of the Free Software Foundation and other authors who decide to
use it. You can use it too, but we suggest you first think carefully about whether this license or the
ordinary General Public License is the better strategy to use in any particular case, based on the
explanations below.
When we speak of free software, we are referring to freedom of use, not price. Our General Public
Licenses are designed to make sure that you have the freedom to distribute copies of free
software (and charge for this service if you wish); that you receive source code or can get it if you
want it; that you can change the software and use pieces of it in new free programs; and that you
are informed that you can do these things.

>>
<<
Licencia de software(Continúa)
ESP 13-9
To protect your rights, we need to make restrictions that forbid distributors to deny you these
rights or to ask you to surrender these rights. These restrictions translate to certain responsibilities
for you if you distribute copies of the library or if you modify it.
For example, if you distribute copies of the library, whether gratis or for a fee, you must give the
recipients all the rights that we gaveyou. You must make sure that they, too, receive or can get the
source code. If you link other code with the library, you must provide complete object files to the
recipients, so that they can relink them with the library after making changes to the library and
recompiling it. And you must show them these terms so they know their rights.
We protect your rights with a two-step method: (1) we copyright the library, and (2) we offer you
this license, which gives you legal permission to copy, distribute and/or modify the library.
To protect each distributor, we want to make it very clear that there is no warranty for the free
library. Also, if the library is modified by someone else and passed on, the recipients should know
that what they have is not the original version, so that the original author's reputation will not be
affected by problems that might be introduced by others.
Finally, software patents pose a constant threat to the existence of any free program. We wish to
make sure that a company cannot effectively restrict the users of a free program by obtaining a
restrictive license from a patent holder. Therefore, we insist that any patent license obtained for a
version of the library must be consistent with the full freedom of use specified in this license.
Most GNU software, including some libraries, is covered by the ordinary GNU General Public
License. This license, the GNU Lesser General Public License, applies to certain designated
libraries, and is quite different from the ordinary General Public License. We use this license for
certain libraries in order to permit linking those libraries into non-free programs.
When a program is linked with a library, whether statically or using a shared library, the
combination of the two is legally speaking a combined work, a derivative of the original library. The
ordinary General Public License therefore permits such linking only if the entire combination fits its
criteria of freedom. The Lesser General Public License permits more lax criteria for linking other
code with the library.
We call this license the "Lesser" General Public License because it does Less to protect the user's
freedom than the ordinary General Public License. It also provides other free software developers
Less of an advantage over competing non-free programs. These disadvantages are the reason we
use the ordinary General Public License for many libraries. However, the Lesser license provides
advantages in certain special circumstances.
For example, on rare occasions, there may be a special need to encourage the widest possible
use of a certain library, so that it becomes a de-facto standard. To achieve this, non-free
programs must be allowed to use the library. A more frequent case is that a free library does the
same job as widely used non-free libraries. In this case, there is little to gain by limiting the free
library to free software only, so we use the Lesser General Public License.
In other cases, permission to use a particular library in non-free programs enables a greater
number of people to use a large body of free software. For example, permission to use the GNU
C Library in non-free programs enables many more people to use the whole GNU operating
system, as well as its variant, the GNU/Linux operating system.
Although the Lesser General Public License is Less protective of the users' freedom, it does
ensure that the user of a program that is linked with the Library has the freedom and the
wherewithal to run that program using a modified version of the Library.
The precise terms and conditions for copying, distribution and modification follow. Pay close
attention to the difference between a "work based on the library" and a "work that uses the library".
The former contains code derived from the library, whereas the latter must be combined with the
library in order to run.
GNU LESSER GENERAL PUBLIC LICENSE
TERMS AND CONDITIONS FOR COPYING, DISTRIBUTION AND MODIFICATION
0. This License Agreement applies to any software library or other program which contains a
notice placed by the copyright holder or other authorized party saying it may be distributed under
the terms of this Lesser General Public License (also called "this License"). Each licensee is
addressed as "you".
A "library" means a collection of software functions and/or data prepared so as to be conveniently
linked with application programs (which use some of those functions and data) to form
executables.
The "Library", below, refers to any such software library or work which has been distributed under
these terms. A "work based on the Library" means either the Library or any derivative work under
copyright law: that is to say, a work containing the Library or a portion of it, either verbatim or with
modifications and/or translated straightforwardly into another language. (Hereinafter, translation is
included without limitation in the term "modification".)
"Source code" for a work means the preferred form of the work for making modifications to it. For
a library, complete source code means all the source code for all modules it contains, plus any
associated interface definition files, plus the scripts used to control compilation and installation of
the library.

>>
<<
Licencia de software(Continúa)
ESP 13-10
Activities other than copying, distribution and modification are not covered by this License; they are
outside its scope. The act of running a program using the Library is not restricted, and output from
such a program is covered only if its contents constitute a work based on the Library (independent
of the use of the Library in a tool for writing it). Whether that is true depends on what the Library
does and what the program that uses the Library does.
1. You may copy and distribute verbatim copies of the Library's complete source code as you
receive it, in any medium, provided that you conspicuously and appropriately publish on each copy
an appropriate copyright notice and disclaimer of warranty; keep intact all the notices that refer to
this License and to the absence of any warranty; and distribute a copy of this License along with
the Library.
You may charge a fee for the physical act of transferring a copy, and you may at your option offer
warranty protection in exchange for a fee.
2. You may modify your copy or copies of the Library or any portion of it, thus forming a work
based on the Library, and copy and distribute such modifications or work under the terms of
Section 1 above, provided that you also meet all of these conditions:
a) The modified work must itself be a software library.
b) You must cause the files modified to carry prominent notices stating that you changed the files
and the date of any change.
c) You must cause the whole of the work to be licensed at no charge to all third parties under the
terms of this License.
d) If a facility in the modified Library refers to a function or a table of data to be supplied by an
application program that uses the facility, other than as an argument passed when the facility is
invoked, then you must make a good faith effort to ensure that, in the event an application does
not supply such function or table, the facility still operates, and performs whatever part of its
purpose remains meaningful.
(For example, a function in a library to compute square roots has a purpose that is entirely well-
defined independent of the application. Therefore, Subsection 2d requires that any application-
supplied function or table used by this function must be optional: if the application does not supply
it, the square root function must still compute square roots.)
These requirements apply to the modified work as a whole. If identifiable sections of that work are
not derived from the Library, and can be reasonably considered independent and separate works
in themselves, then this License, and its terms, do not apply to those sections when you distribute
them as separate works. But when you distribute the same sections as part of a whole which is a
work based on the Library, the distribution of the whole must be on the terms of this License,
whose permissions for other licensees extend to the entire whole, and thus to each and every part
regardless of who wrote it.
Thus, it is not the intent of this section to claim rights or contest your rights to work written entirely
by you; rather, the intent is to exercise the right to control the distribution of derivative or collective
works based on the Library.
In addition, mere aggregation of another work not based on the Library with the Library (or with a
work based on the Library) on a volume of a storage or distribution medium does not bring the
other work under the scope of this License.
3. You may opt to apply the terms of the ordinary GNU General Public License instead of this
License to a given copy of the Library. To do this, you must alter all the notices that refer to this
License, so that they refer to the ordinary GNU General Public License, version 2, instead of to
this License. (If a newer version than version 2 of the ordinary GNU General Public License has
appeared, then you can specify that version instead if you wish.) Do not make any other change
in these notices.
Once this change is made in a given copy, it is irreversible for that copy, so the ordinary GNU
General Public License applies to all subsequent copies and derivative works made from that
copy.
This option is useful when you wish to copy part of the code of the Library into a program that is
not a library.
4. You may copy and distribute the Library (or a portion or derivative of it, under Section 2) in
object code or executable form under the terms of Sections 1 and 2 above provided that you
accompany it with the complete corresponding machine-readable source code, which must be
distributed under the terms of Sections 1 and 2 above on a medium customarily used for software
interchange.
If distribution of object code is made by offering access to copy from a designated place, then
offering equivalent access to copy the source code from the same place satisfies the requirement
to distribute the source code, even though third parties are not compelled to copy the source
along with the object code.

>>
<<
Licencia de software(Continúa)
ESP 13-11
5. A program that contains no derivative of any portion of the Library, but is designed to work with
the Library by being compiled or linked with it, is called a "work that uses the Library". Such a
work, in isolation, is not a derivative work of the Library, and therefore falls outside the scope of
this License.
However, linking a "work that uses the Library" with the Library creates an executable that is a
derivative of the Library (because it contains portions of the Library), rather than a "work that uses
the library". The executable is therefore covered by this License. Section 6 states terms for
distribution of such executables.
When a "work that uses the Library" uses material from a header file that is part of the Library, the
object code for the work may be a derivative work of the Library even though the source code is
not. Whether this is true is especially significant if the work can be linked without the Library, or if
the work is itself a library. The threshold for this to be true is not precisely defined by law.
If such an object file uses only numerical parameters, data structure layouts and accessors, and
small macros and small inline functions (ten lines or less in length), then the use of the object file
is unrestricted, regardless of whether it is legally a derivative work. (Executables containing this
object code plus portions of the Library will still fall under Section 6.)
Otherwise, if the work is a derivative of the Library, you may distribute the object code for the work
under the terms of Section 6. Any executables containing that work also fall under Section 6,
whether or not they are linked directly with the Library itself.
6. As an exception to the Sections above, you may also combine or link a "work that uses the
Library" with the Library to produce a work containing portions of the Library, and distribute that
work under terms of your choice, provided that the terms permit modification of the work for the
customer's own use and reverse engineering for debugging such modifications.
You must give prominent notice with each copy of the work that the Library is used in it and that
the Library and its use are covered by this License. You must supply a copy of this License. If the
work during execution displays copyright notices, you must include the copyright notice for the
Library among them, as well as a reference directing the user to the copy of this License. Also,
you must do one of these things:
a) Accompany the work with the complete corresponding machine-readable source code for the
Library including whatever changes were used in the work (which must be distributed under
Sections 1 and 2 above); and, if the work is an executable linked with the Library, with the
complete machine-readable "work that uses the Library", as object code and/or source code, so
that the user can modify the Library and then relink to produce a modified executable containing
the modified Library. (It is understood that the user who changes the contents of definitions files in
the Library will not necessarily be able to recompile the application to use the modified definitions.)
b) Use a suitable shared library mechanism for linking with the Library. A suitable mechanism is
one that (1) uses at run time a copy of the library already present on the user's computer system,
rather than copying library functions into the executable, and (2) will operate properly with a
modified version of the library, if the user installs one, as long as the modified version is interface-
compatible with the version that the work was made with.
c) Accompany the work with a written offer, valid for at least three years, to give the same user
the materials specified in Subsection 6a, above, for a charge no more than the cost of performing
this distribution.
d) If distribution of the work is made by offering access to copy from a designated place, offer
equivalent access to copy the above specified materials from the same place.
e) Verify that the user has already received a copy of these materials or that you have already
sent this user a copy.
For an executable, the required form of the "work that uses the Library" must include any data and
utility programs needed for reproducing the executable from it. However, as a special exception,
the materials to be distributed need not include anything that is normally distributed (in either
source or binary form) with the major components (compiler, kernel, and so on) of the operating
system on which the executable runs, unless that component itself accompanies the executable.
It may happen that this requirement contradicts the license restrictions of other proprietary libraries
that do not normally accompany the operating system. Such a contradiction means you cannot
use both them and the Library together in an executable that you distribute.
7. You may place library facilities that are a work based on the Library side-by-side in a single
library together with other library facilities not covered by this License, and distribute such a
combined library, provided that the separate distribution of the work based on the Library and of
the other library facilities is otherwise permitted, and provided that you do these two things:
a) Accompany the combined library with a copy of the same work based on the Library,
uncombined with any other library facilities. This must be distributed under the terms of the
Sections above.
b) Give prominent notice with the combined library of the fact that part of it is a work based on the
Library, and explaining where to find the accompanying uncombined form of the same work.

>>
<<
Licencia de software(Continúa)
ESP 13-12
8. You may not copy, modify, sublicense, link with, or distribute the Library except as expressly
provided under this License. Any attempt otherwise to copy, modify, sublicense, link with, or
distribute the Library is void, and will automatically terminate your rights under this License.
However, parties who have received copies, or rights, from you under this License will not have
their licenses terminated so long as such parties remain in full compliance.
9. You are not required to accept this License, since you have not signed it. However, nothing else
grants you permission to modify or distribute the Library or its derivative works. These actions are
prohibited by law if you do not accept this License. Therefore, by modifying or distributing the
Library (or any work based on the Library), you indicate your acceptance of this License to do so,
and all its terms and conditions for copying, distributing or modifying the Library or works based on
it.
10. Each time you redistribute the Library (or any work based on the Library), the recipient
automatically receives a license from the original licensor to copy, distribute, link with or modify the
Library subject to these terms and conditions. You may not impose any further restrictions on the
recipients' exercise of the rights granted herein. You are not responsible for enforcing compliance
by third parties with this License.
11. If, as a consequence of a court judgment or allegation of patent infringement or for any other
reason (not limited to patent issues), conditions are imposed on you (whether by court order,
agreement or otherwise) that contradict the conditions of this License, they do not excuse you from
the conditions of this License. If you cannot distribute so as to satisfy simultaneously your
obligations under this License and any other pertinent obligations, then as a consequence you may
not distribute the Library at all. For example, if a patent license would not permit royalty-free
redistribution of the Library by all those who receive copies directly or indirectly through you, then
the only way you could satisfy both it and this License would be to refrain entirely from distribution
of the Library.
If any portion of this section is held invalid or unenforceable under any particular circumstance, the
balance of the section is intended to apply, and the section as a whole is intended to apply in
other circumstances.
It is not the purpose of this section to induce you to infringe any patents or other property right
claims or to contest validity of any such claims; this section has the sole purpose of protecting the
integrity of the free software distribution system which is implemented by public license practices.
Many people have made generous contributions to the wide range of software distributed through
that system in reliance on consistent application of that system; it is up to the author/donor to
decide if he or she is willing to distribute software through any other system and a licensee cannot
impose that choice.
This section is intended to make thoroughly clear what is believed to be a consequence of the rest
of this License.
12. If the distribution and/or use of the Library is restricted in certain countries either by patents or
by copyrighted interfaces, the original copyright holder who places the Library under this License
may add an explicit geographical distribution limitation excluding those countries, so that
distribution is permitted only in or among countries not thus excluded. In such case, this License
incorporates the limitation as if written in the body of this License.
13. The Free Software Foundation may publish revised and/or new versions of the Lesser General
Public License from time to time. Such new versions will be similar in spirit to the present version,
but may differ in detail to address new problems or concerns.
Each version is given a distinguishing version number. If the Library specifies a version number of
this License which applies to it and "any later version", you have the option of following the terms
and conditions either of that version or of any later version published by the Free Software
Foundation. If the Library does not specify a license version number, you may choose any version
ever published by the Free Software Foundation.
14. If you wish to incorporate parts of the Library into other free programs whose distribution
conditions are incompatible with these, write to the author to ask for permission. For software
which is copyrighted by the Free Software Foundation, write to the Free Software Foundation; we
sometimes make exceptions for this. Our decision will be guided by the two goals of preserving the
free status of all derivatives of our free software and of promoting the sharing and reuse of
software generally.
NO WARRANTY
15. BECAUSE THE LIBRARY IS LICENSED FREE OF CHARGE, THERE IS NO WARRANTY
FOR THE LIBRARY, TO THE EXTENT PERMITTED BY APPLICABLE LAW. EXCEPT WHEN
OTHERWISE STATED IN WRITING THE COPYRIGHT HOLDERS AND/OR OTHER PARTIES
PROVIDE THE LIBRARY "AS IS" WITHOUT WARRANTY OF ANY KIND, EITHER EXPRESSED
OR IMPLIED, INCLUDING, BUT NOT LIMITED TO, THE IMPLIED WARRANTIES OF
MERCHANTABILITY AND FITNESS FOR A PARTICULAR PURPOSE. THE ENTIRE RISK AS TO
THE QUALITY AND PERFORMANCE OF THE LIBRARY IS WITH YOU. SHOULD THE LIBRARY
PROVE DEFECTIVE, YOU ASSUME THE COST OF ALL NECESSARY SERVICING, REPAIR OR
CORRECTION.

>>
<<
Licencia de software(Continúa)
ESP 13-13
16. IN NO EVENT UNLESS REQUIRED BY APPLICABLE LAW OR AGREED TO IN WRITING
WILL ANY COPYRIGHT HOLDER, OR ANY OTHER PARTY WHO MAY MODIFY AND/OR
REDISTRIBUTE THE LIBRARY AS PERMITTED ABOVE, BE LIABLE TO YOU FOR DAMAGES,
INCLUDING ANY GENERAL, SPECIAL, INCIDENTAL OR CONSEQUENTIAL DAMAGES
ARISING OUT OF THE USE OR INABILITY TO USE THE LIBRARY (INCLUDING BUT NOT
LIMITED TO LOSS OF DATA OR DATA BEING RENDERED INACCURATE OR LOSSES
SUSTAINED BY YOU OR THIRD PARTIES OR A FAILURE OF THE LIBRARY TO OPERATE
WITH ANY OTHER SOFTWARE), EVEN IF SUCH HOLDER OR OTHER PARTY HAS BEEN
ADVISED OF THE POSSIBILITY OF SUCH DAMAGES.
END OF TERMS AND CONDITIONS
How to Apply These Terms to Your New Libraries
If you develop a new library, and you want it to be of the greatest possible use to the public, we
recommend making it free software that everyone can redistribute and change. You can do so by
permitting redistribution under these terms (or, alternatively, under the terms of the ordinary
General Public License).
To apply these terms, attach the following notices to the library. It is safest to attach them to the
start of each source file to most effectively convey the exclusion of warranty; and each file should
have at least the "copyright" line and a pointer to where the full notice is found.
‹one line to give the library's name and a brief idea of what it does.›
Copyright (C) ‹year› ‹name of author›
This library is free software; you can redistribute it and/or modify it under the terms of the GNU
Lesser General Public License as published by the Free Software Foundation; either version 2.1 of
the License, or (at your option) any later version.
This library is distributed in the hope that it will be useful, but WITHOUT ANY WARRANTY; without
even the implied warranty of MERCHANTABILITY or FITNESS FOR A PARTICULAR PURPOSE.
See the GNU Lesser General Public License for more details.
You should have received a copy of the GNU Lesser General Public License along with this
library; if not, write to the Free Software Foundation, Inc., 51 Franklin Street, Fifth Floor, Boston,
MA 02110-1301 USA
Also add information on how to contact you by electronic and paper mail.
You should also get your employer (if you work as a programmer) or your school, if any, to sign a
"copyright disclaimer" for the library, if necessary. Here is a sample; alter the names:
Yoyodyne, Inc., hereby disclaims all copyright interest in the library 'Frob' (a library for tweaking
knobs) written by James Random Hacker.
‹signature of Ty Coon›, 1 April 1990
Ty Coon, President of Vice
That's all there is to it!
Apache License
Version 2.0, January 2004
http://www.apache.org/licenses/
TERMS AND CONDITIONS FOR USE, REPRODUCTION, AND DISTRIBUTION
1. Definitions.
"License" shall mean the terms and conditions for use, reproduction, and distribution as defined by
Sections 1 through 9 of this document.
"Licensor" shall mean the copyright owner or entity authorized by the copyright owner that is
granting the License.
"Legal Entity" shall mean the union of the acting entity and all other entities that control, are
controlled by, or are under common control with that entity. For the purposes of this definition,
"control" means (i) the power, direct or indirect, to cause the direction or management of such
entity, whether by contract or otherwise, or (ii) ownership of fifty percent (50%) or more of the
outstanding shares, or (iii) beneficial ownership of such entity.
"You" (or "Your") shall mean an individual or Legal Entity exercising permissions granted by this
License.
"Source" form shall mean the preferred form for making modifications, including but not limited to
software source code, documentation source, and configuration files.
"Object" form shall mean any form resulting from mechanical transformation or translation of a
Source form, including but not limited to compiled object code, generated documentation, and
conversions to other media types.

>>
<<
Licencia de software(Continúa)
ESP 13-14
"Work" shall mean the work of authorship, whether in Source or Object form, made available under
the License, as indicated by a copyright notice that is included in or attached to the work (an
example is provided in the Appendix below).
"Derivative Works" shall mean any work, whether in Source or Object form, that is based on (or
derived from) the Work and for which the editorial revisions, annotations, elaborations, or other
modifications represent, as a whole, an original work of authorship. For the purposes of this
License, Derivative Works shall not include works that remain separable from, or merely link (or
bind by name) to the interfaces of, the Work and Derivative Works thereof.
"Contribution" shall mean any work of authorship, including the original version of the Work and
any modifications or additions to that Work or Derivative Works thereof, that is intentionally
submitted to Licensor for inclusion in the Work by the copyright owner or by an individual or Legal
Entity authorized to submit on behalf of the copyright owner. For the purposes of this definition,
"submitted" means any form of electronic, verbal, or written communication sent to the Licensor or
its representatives, including but not limited to communication on electronic mailing lists, source
code control systems, and issue tracking systems that are managed by, or on behalf of, the
Licensor for the purpose of discussing and improving the Work, but excluding communication that
is conspicuously marked or otherwise designated in writing by the copyright owner as "Not a
Contribution."
"Contributor" shall mean Licensor and any individual or Legal Entity on behalf of whom a
Contribution has been received by Licensor and subsequently incorporated within the Work.
2. Grant of Copyright License. Subject to the terms and conditions of this License, each
Contributor hereby grants to You a perpetual, worldwide, non-exclusive, no-charge, royalty-free,
irrevocable copyright license to reproduce, prepare Derivative Works of, publicly display, publicly
perform, sublicense, and distribute the Work and such Derivative Works in Source or Object form.
3. Grant of Patent License. Subject to the terms and conditions of this License, each Contributor
hereby grants to You a perpetual, worldwide, non-exclusive, no-charge, royalty-free, irrevocable
(except as stated in this section) patent license to make, have made, use, offer to sell, sell, import,
and otherwise transfer the Work, where such license applies only to those patent claims licensable
by such Contributor that are necessarily infringed by their Contribution(s) alone or by combination
of their Contribution(s) with the Work to which such Contribution(s) was submitted. If You institute
patent litigation against any entity (including a cross-claim or counterclaim in a lawsuit) alleging
that the Work or a Contribution incorporated within the Work constitutes direct or contributory
patent infringement, then any patent licenses granted to You under this License for that Work shall
terminate as of the date such litigation is filed.
4. Redistribution. You may reproduce and distribute copies of the Work or Derivative Works thereof
in any medium, with or without modifications, and in Source or Object form, provided that You
meet the following conditions:
You must give any other recipients of the Work or Derivative Works a copy of this License; and
You must cause any modified files to carry prominent notices stating that You changed the files;
and
You must retain, in the Source form of any Derivative Works that You distribute, all copyright,
patent, trademark, and attribution notices from the Source form of the Work, excluding those
notices that do not pertain to any part of the Derivative Works; and
If the Work includes a "NOTICE" text file as part of its distribution, then any Derivative Works that
You distribute must include a readable copy of the attribution notices contained within such
NOTICE file, excluding those notices that do not pertain to any part of the Derivative Works, in at
least one of the following places: within a NOTICE text file distributed as part of the Derivative
Works; within the Source form or documentation, if provided along with the Derivative Works; or,
within a display generated by the Derivative Works, if and wherever such third-party notices
normally appear. The contents of the NOTICE file are for informational purposes only and do not
modify the License. You may add Your own attribution notices within Derivative Works that You
distribute, alongside or as an addendum to the NOTICE text from the Work, provided that such
additional attribution notices cannot be construed as modifying the License. You may add Your
own copyright statement to Your modifications and may provide additional or different license
terms and conditions for use, reproduction, or distribution of Your modifications, or for any such
Derivative Works as a whole, provided Your use, reproduction, and distribution of the Work
otherwise complies with the conditions stated in this License.
5. Submission of Contributions. Unless You explicitly state otherwise, any Contribution intentionally
submitted for inclusion in the Work by You to the Licensor shall be under the terms and conditions
of this License, without any additional terms or conditions. Notwithstanding the above, nothing
herein shall supersede or modify the terms of any separate license agreement you may have
executed with Licensor regarding such Contributions.

>>
<<
Licencia de software(Continúa)
ESP 13-15
6. Trademarks. This License does not grant permission to use the trade names, trademarks,
service marks, or product names of the Licensor, except as required for reasonable and customary
use in describing the origin of the Work and reproducing the content of the NOTICE file.
7. Disclaimer of Warranty. Unless required by applicable law or agreed to in writing, Licensor
provides the Work (and each Contributor provides its Contributions) on an "AS IS" BASIS,
WITHOUT WARRANTIES OR CONDITIONS OF ANY KIND, either express or implied, including,
without limitation, any warranties or conditions of TITLE, NON-INFRINGEMENT,
MERCHANTABILITY, or FITNESS FOR A PARTICULAR PURPOSE. You are solely responsible
for determining the appropriateness of using or redistributing the Work and assume any risks
associated with Your exercise of permissions under this License.
8. Limitation of Liability. In no event and under no legal theory, whether in tort (including
negligence), contract, or otherwise, unless required by applicable law (such as deliberate and
grossly negligent acts) or agreed to in writing, shall any Contributor be liable to You for damages,
including any direct, indirect, special, incidental, or consequential damages of any character
arising as a result of this License or out of the use or inability to use the Work (including but not
limited to damages for loss of goodwill, work stoppage, computer failure or malfunction, or any and
all other commercial damages or losses), even if such Contributor has been advised of the
possibility of such damages.
9. Accepting Warranty or Additional Liability. While redistributing the Work or Derivative Works
thereof, You may choose to offer, and charge a fee for, acceptance of support, warranty,
indemnity, or other liability obligations and/or rights consistent with this License. However, in
accepting such obligations, You may act only on Your own behalf and on Your sole responsibility,
not on behalf of any other Contributor, and only if You agree to indemnify, defend, and hold each
Contributor harmless for any liability incurred by, or claims asserted against, such Contributor by
reason of your accepting any such warranty or additional liability.
END OF TERMS AND CONDITIONS
APPENDIX: How to apply the Apache License to your work
To apply the Apache License to your work, attach the following boilerplate notice, with the fields
enclosed by brackets "[]" replaced with your own identifying information. (Don't include the
brackets!) The text should be enclosed in the appropriate comment syntax for the file format. We
also recommend that a file or class name and description of purpose be included on the same
"printed page" as the copyright notice for easier identification within third-party archives.
Copyright [yyyy] [name of copyright owner]
Licensed under the Apache License, Version 2.0 (the "License"); you may not use this file except
in compliance with the License. You may obtain a copy of the License at
http://www.apache.org/licenses/LICENSE-2.0
Unless required by applicable law or agreed to in writing, software distributed under the License is
distributed on an "AS IS" BASIS, WITHOUT WARRANTIES OR CONDITIONS OF ANY KIND,
either express or implied. See the License for the specific language governing permissions and
limitations under the License.
Fonts are (c) Bitstream (see below). DejaVu changes are in public domain. Glyphs imported from
Arev fonts are (c) Tavmjong Bah (see below)
Bitstream Vera Fonts Copyright
------------------------------
Copyright (c) 2003 by Bitstream, Inc. All Rights Reserved. Bitstream Vera is a trademark of
Bitstream, Inc. Permission is hereby granted, free of charge, to any person obtaining a copy of the
fonts accompanying this license ("Fonts") and associated documentation files (the "Font
Software"), to reproduce and distribute the Font Software, including without limitation the rights to
use, copy, merge, publish, distribute, and/or sell copies of the Font Software, and to permit
persons to whom the Font Software is furnished to do so, subject to the following conditions:
The above copyright and trademark notices and this permission notice shall be included in all
copies of one or more of the Font Software typefaces.
The Font Software may be modified, altered, or added to, and in particular the designs of glyphs
or characters in the Fonts may be modified and additional glyphs or characters may be added to
the Fonts, only if the fonts are renamed to names not containing either the words "Bitstream" or
the word
"Vera".
This License becomes null and void to the extent applicable to Fonts or Font Software that has
been modified and is distributed under the "Bitstream Vera" names.
The Font Software may be sold as part of a larger software package but no copy of one or more
of the Font Software typefaces may be sold by itself.

>>
<<
Licencia de software(Continúa)
ESP 13-16
THE FONT SOFTWARE IS PROVIDED "AS IS", WITHOUT WARRANTY OF ANY KIND,
EXPRESS
OR IMPLIED, INCLUDING BUT NOT LIMITED TO ANY WARRANTIES OF MERCHANTABILITY,
FITNESS FOR A PARTICULAR PURPOSE AND NONINFRINGEMENT OF COPYRIGHT,
PATENT, TRADEMARK, OR OTHER RIGHT. IN NO EVENT SHALL BITSTREAM OR THE
GNOME FOUNDATION BE LIABLE FOR ANY CLAIM, DAMAGES OR OTHER LIABILITY,
INCLUDING ANY GENERAL, SPECIAL, INDIRECT, INCIDENTAL, OR CONSEQUENTIAL
DAMAGES, WHETHER IN AN ACTION OF CONTRACT, TORT OR OTHERWISE, ARISING
FROM, OUT OF THE USE OR INABILITY TO USE THE FONT SOFTWARE OR FROM OTHER
DEALINGS IN THE FONT SOFTWARE.
Except as contained in this notice, the names of Gnome, the Gnome Foundation, and Bitstream
Inc., shall not be used in advertising or otherwise to promote the sale, use or other dealings in this
Font Software without prior written authorization from the Gnome Foundation or Bitstream Inc.,
respectively. For further information, contact: fonts at gnome dot org.
Arev Fonts Copyright
------------------------------
Copyright (c) 2006 by Tavmjong Bah. All Rights Reserved.
Permission is hereby granted, free of charge, to any person obtaining a copy of the fonts
accompanying this license ("Fonts") and associated documentation files (the "Font Software"), to
reproduce and distribute the modifications to the Bitstream Vera Font Software, including without
limitation the rights to use, copy, merge, publish, distribute, and/or sell copies of the Font
Software, and to permit persons to whom the Font Software is furnished to do so, subject to the
following conditions:
The above copyright and trademark notices and this permission notice shall be included in all
copies of one or more of the Font Software typefaces.
The Font Software may be modified, altered, or added to, and in particular the designs of glyphs
or characters in the Fonts may be modified and additional glyphs or characters may be added to
the Fonts, only if the fonts are renamed to names not containing either the words "Tavmjong Bah"
or the word "Arev".
This License becomes null and void to the extent applicable to Fonts or Font Software that has
been modified and is distributed under the "Tavmjong Bah Arev" names.
The Font Software may be sold as part of a larger software package but no copy of one or more
of the Font Software typefaces may be sold by itself.
THE FONT SOFTWARE IS PROVIDED "AS IS", WITHOUT WARRANTY OF ANY KIND,
EXPRESS OR IMPLIED, INCLUDING BUT NOT LIMITED TO ANY WARRANTIES OF
MERCHANTABILITY, FITNESS FOR A PARTICULAR PURPOSE AND NONINFRINGEMENT OF
COPYRIGHT, PATENT, TRADEMARK, OR OTHER RIGHT. IN NO EVENT SHALL TAVMJONG
BAH BE LIABLE FOR ANY CLAIM, DAMAGES OR OTHER LIABILITY, INCLUDING ANY
GENERAL, SPECIAL, INDIRECT, INCIDENTAL, OR CONSEQUENTIAL DAMAGES, WHETHER
IN AN ACTION OF CONTRACT, TORT OR OTHERWISE, ARISING FROM, OUT OF THE USE
OR INABILITY TO USE THE FONT SOFTWARE OR FROM OTHER DEALINGS IN THE FONT
SOFTWARE.
Except as contained in this notice, the name of Tavmjong Bah shall not be used in advertising or
otherwise to promote the sale, use or other dealings in this Font Software without prior written
authorization from Tavmjong Bah. For further information, contact: tavmjong @ free. fr.