Loading ...
Loading ...
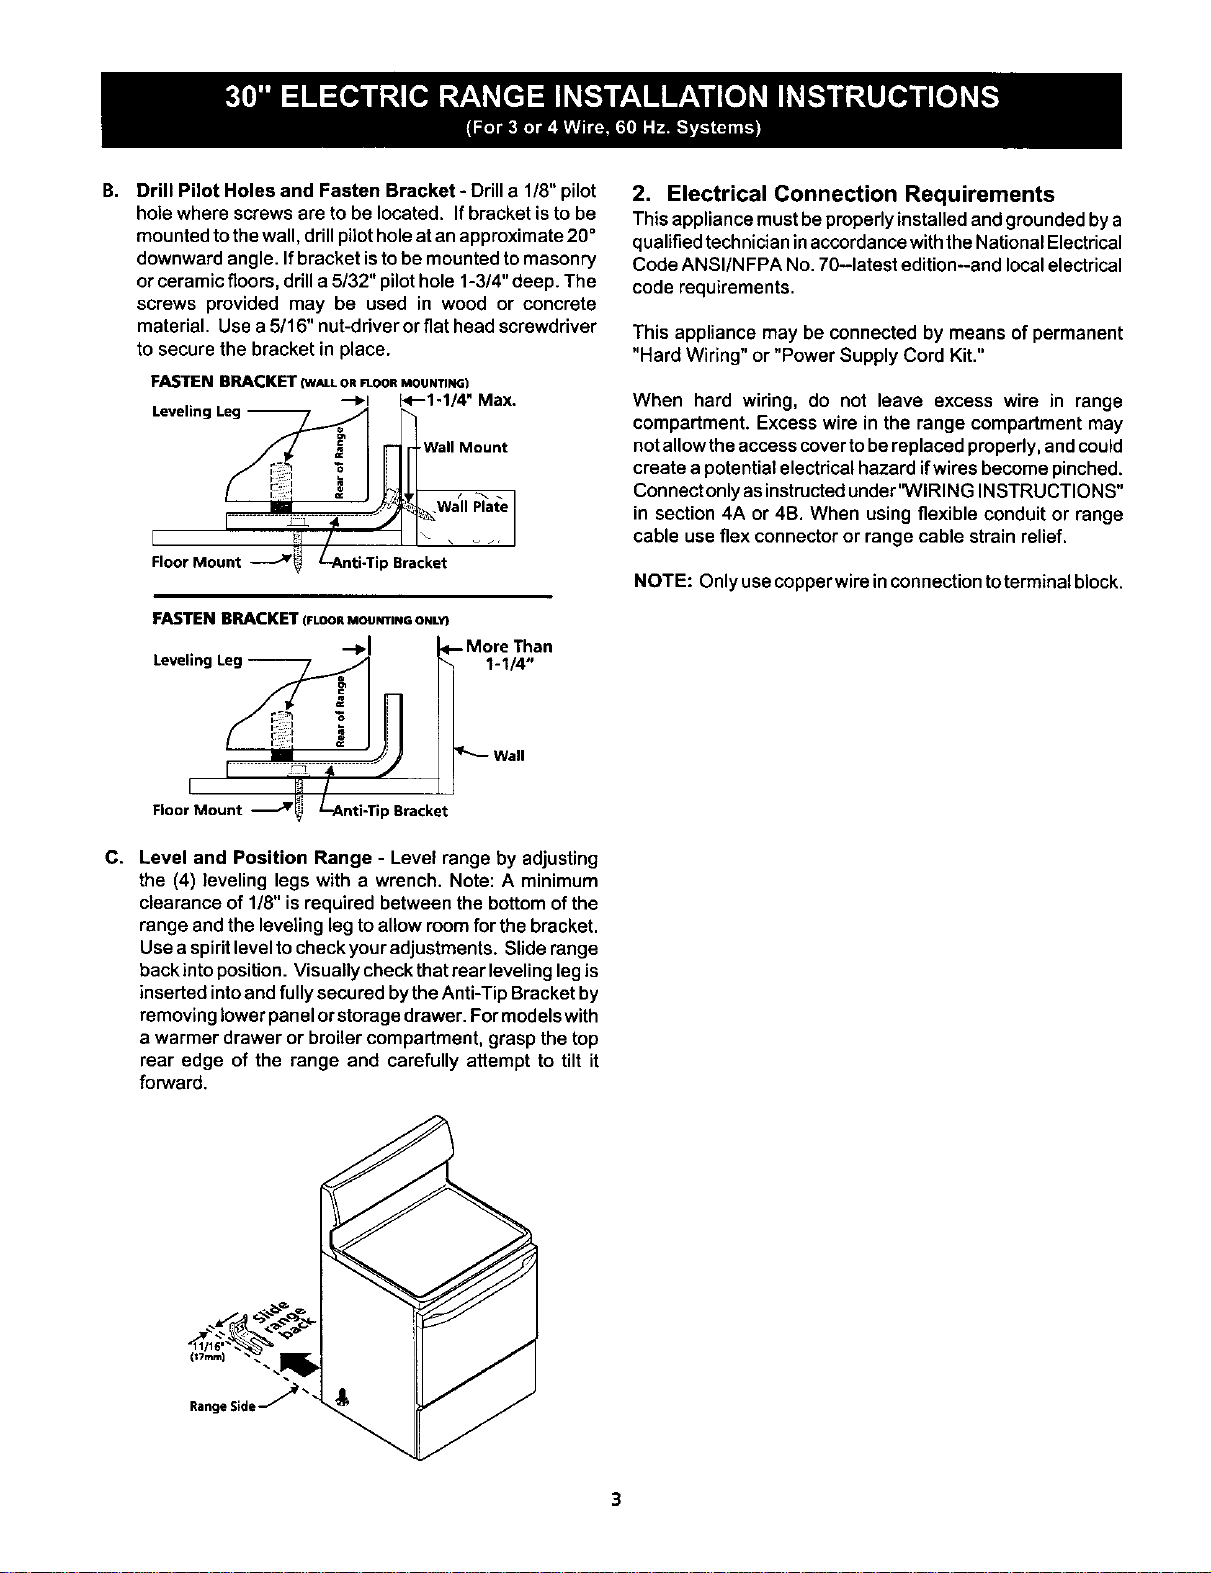
B. Drill Pilot Holes and Fasten Bracket- Drilla 1/8"pilot
holewhere screwsereto be located, Ifbracketisto be
mountedtothewall,drillpilotholeat anapproximate20°
downwardangle, Ifbracket istobe mountedtomasonry
orceramicfloors,drilla 5/32" pilothole 1-3/4"deep. The
screws provided may be used in wood or concrete
material, Usea 5/16" nut-driverorflathead screwdriver
to securethe bracketin place.
FASTEN BRACKET (W_LLORF1-OORMOUNTING)
"--_1 E<'--1-1/4" Max.
Wall Mount
, '................ lr.... I
Floor Mount .___Jr_ L-Anti-Tip Bracket
FASTEN BRACKET (FLOORMOUNTINGONLY}
-+1
Leveling Leg --
1-1/4"
2. Electrical Connection Requirements
Thisappliancemustbeproperlyinstalledandgroundedbya
qualifiedtechnicianinaccordancewiththeNationalElectrical
CodeANSI/NFPA No,70-latest edition--andlocalelectrical
code requirements.
This appliance may be connected by means of permanent
"Hard Wiring" or "Power Supply Cord Kit."
When hard wiring, do not leave excess wire in range
compartment. Excess wire in the range compartment may
not allow the access cover tobereplaced properly, andcould
create a potential electrical hazard ifwires become pinched.
Connect only asinstructed under'WIRING INSTRUCTIONS"
in section 4A or 4B. When using flexible conduit or range
cable use flex connector or range cable strain relief.
NOTE: Only usecopperwireinconnectiontoterminal block.
Floor Mount J _Bracket
C. Level and Position Range - Level range by adjusting
the (4) leveling legs with a wrench. Note: A minimum
clearance of 1/8"is required between the bottomofthe
range andthe levelinglegto allowroomfor the bracket.
Usea spiritleveltocheckyouradjustments. Sliderange
backinto position.Visuallycheckthatrear levelinglegis
insertedintoandfully securedbytheAnti-TipBracketby
removinglowerpanelorstoragedrawer. Formodelswith
a warmer drawer or broilercompartment,graspthetop
rear edge of the range and carefully attempt to tilt it
forward.
Loading ...
Loading ...
Loading ...