Owner's Guide Stand Mixers
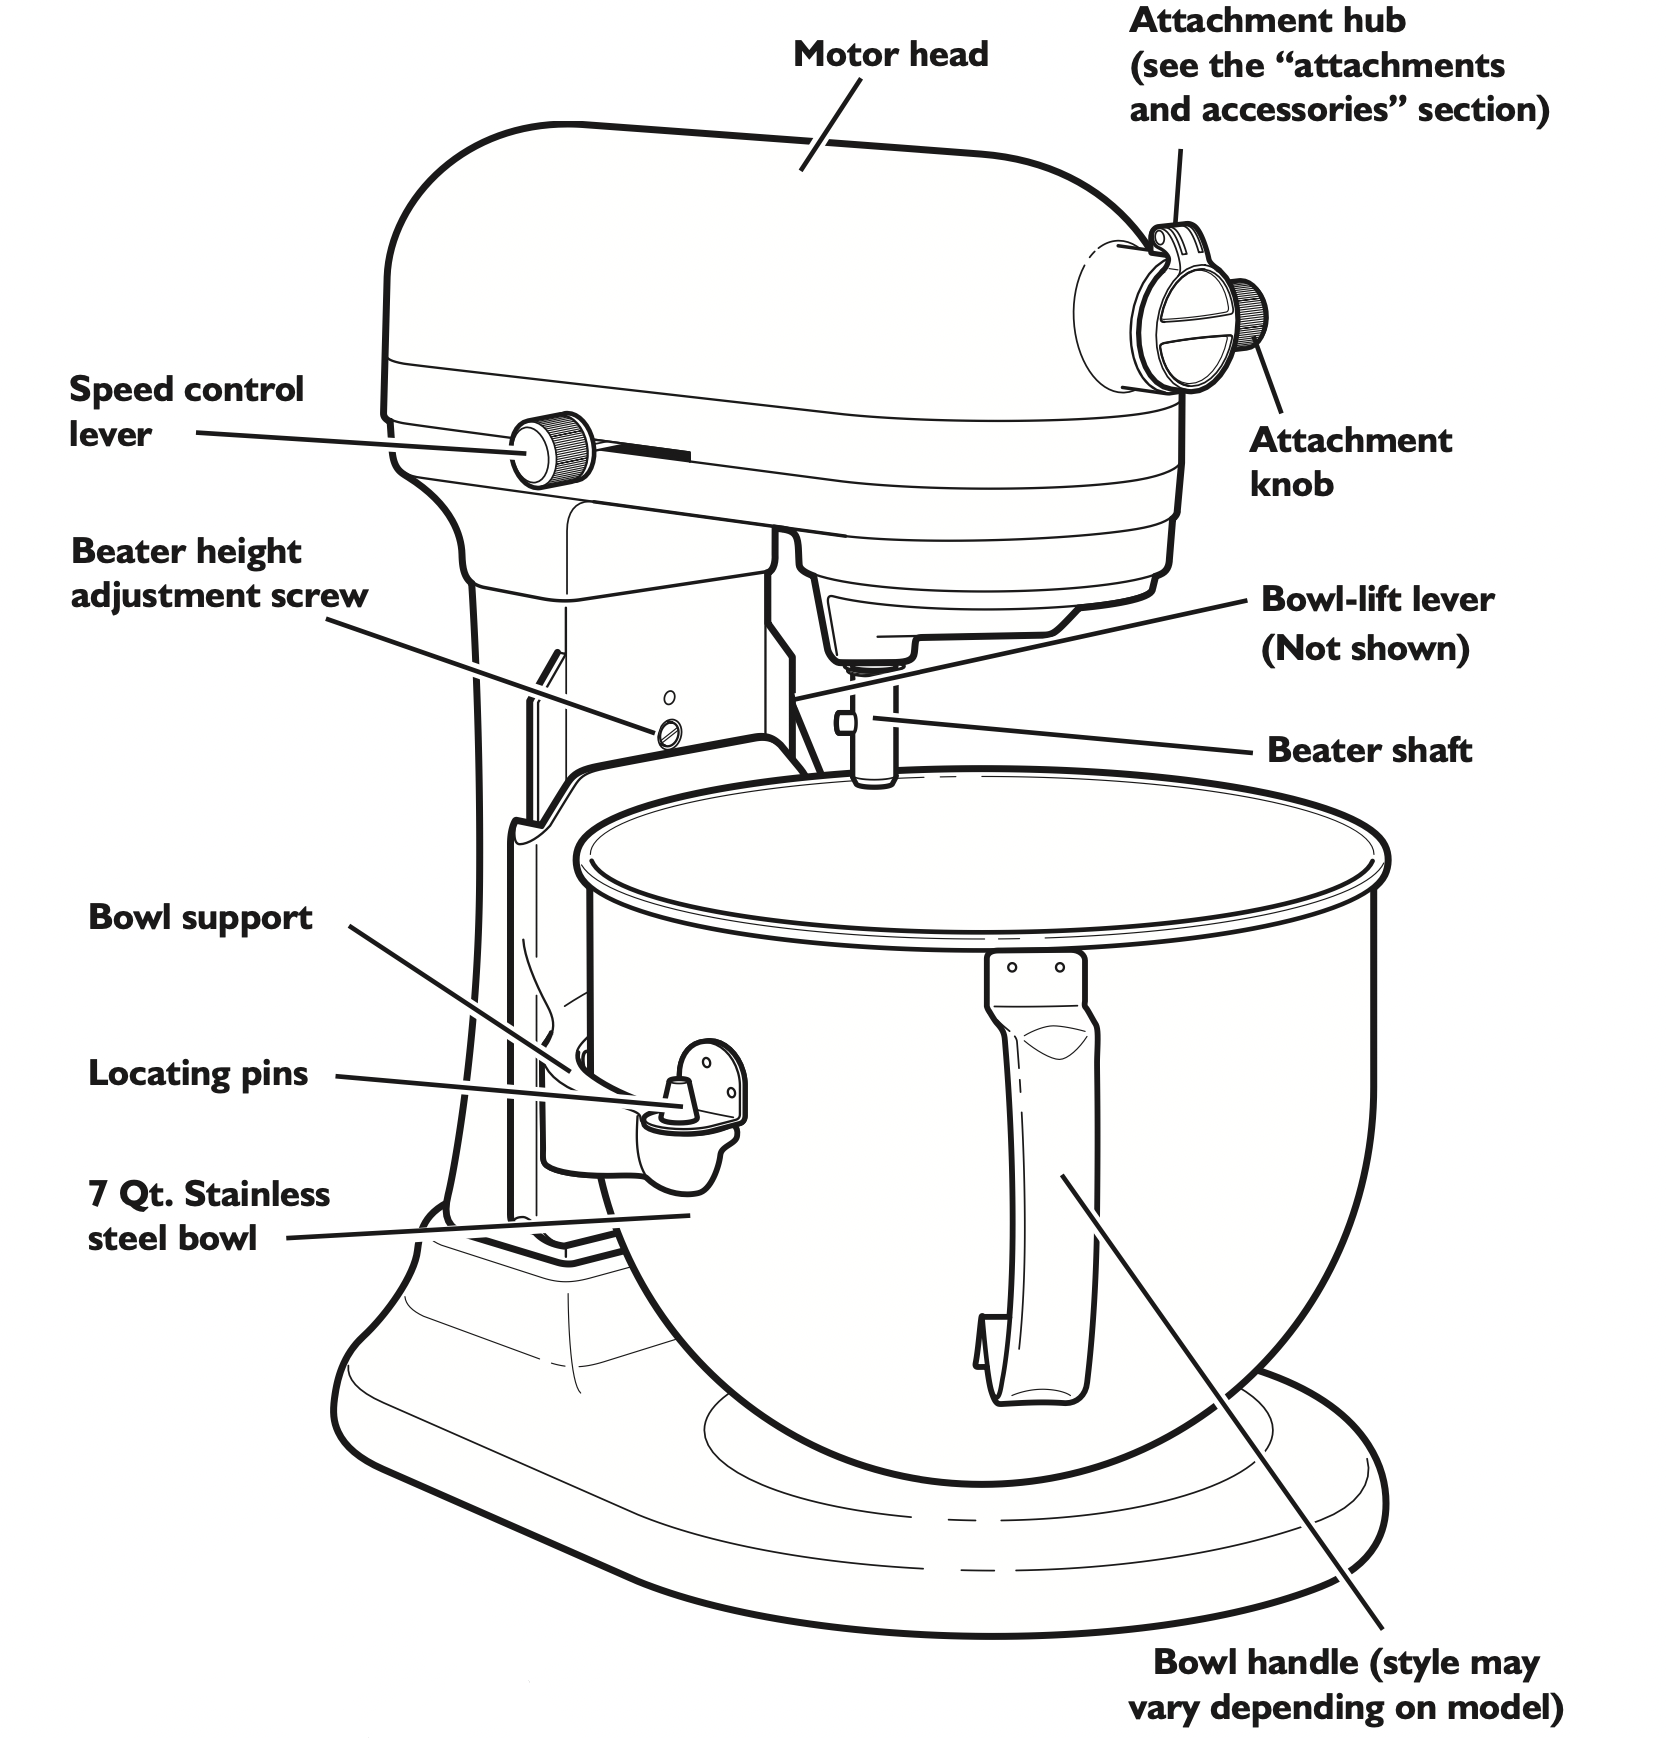
PARTS AND FEATURES
Parts and accessories
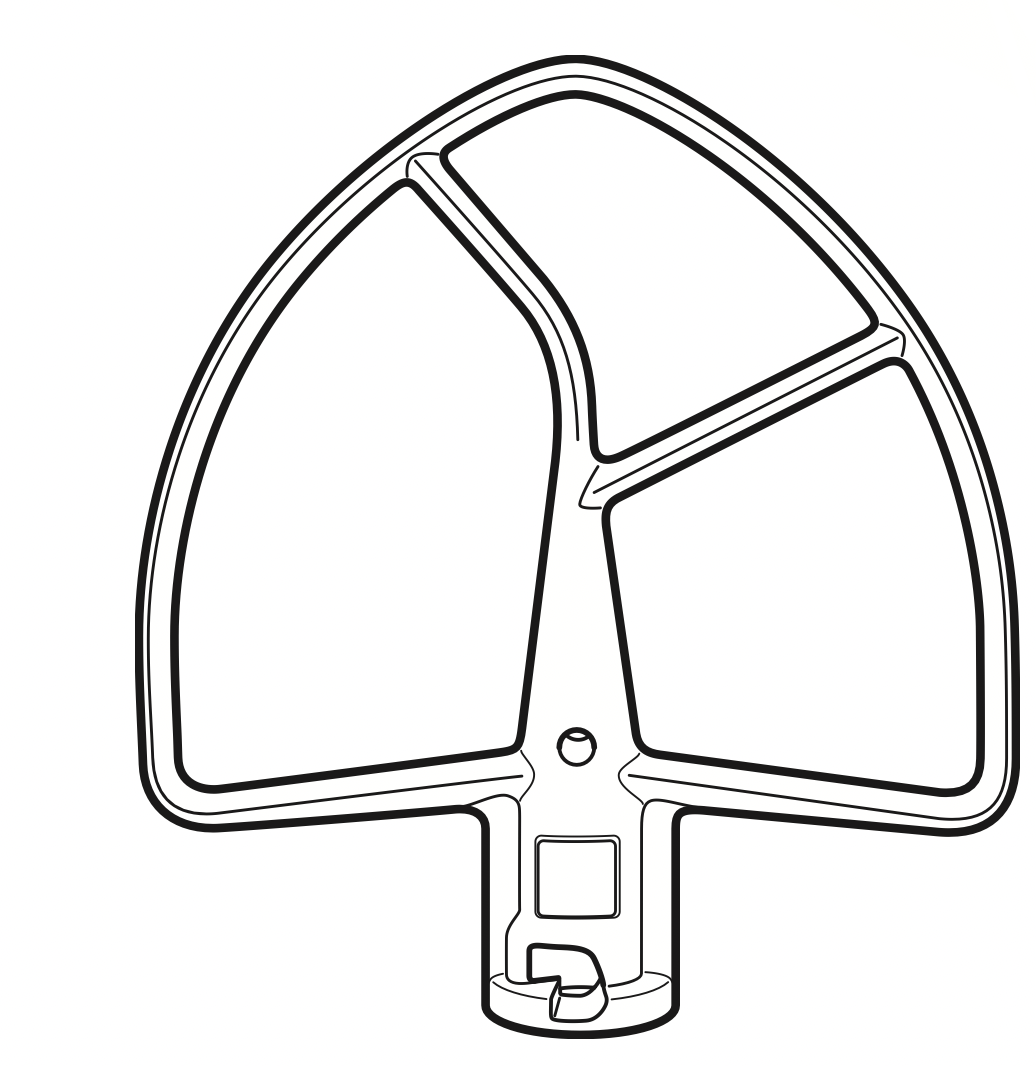
Flat beater
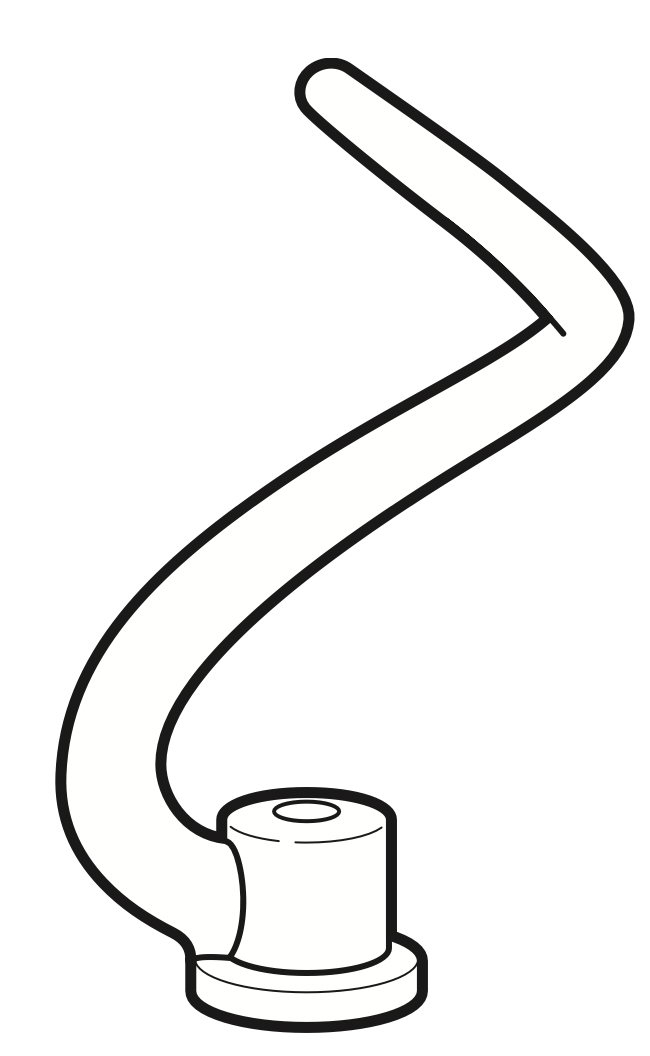
Spiral dough hook
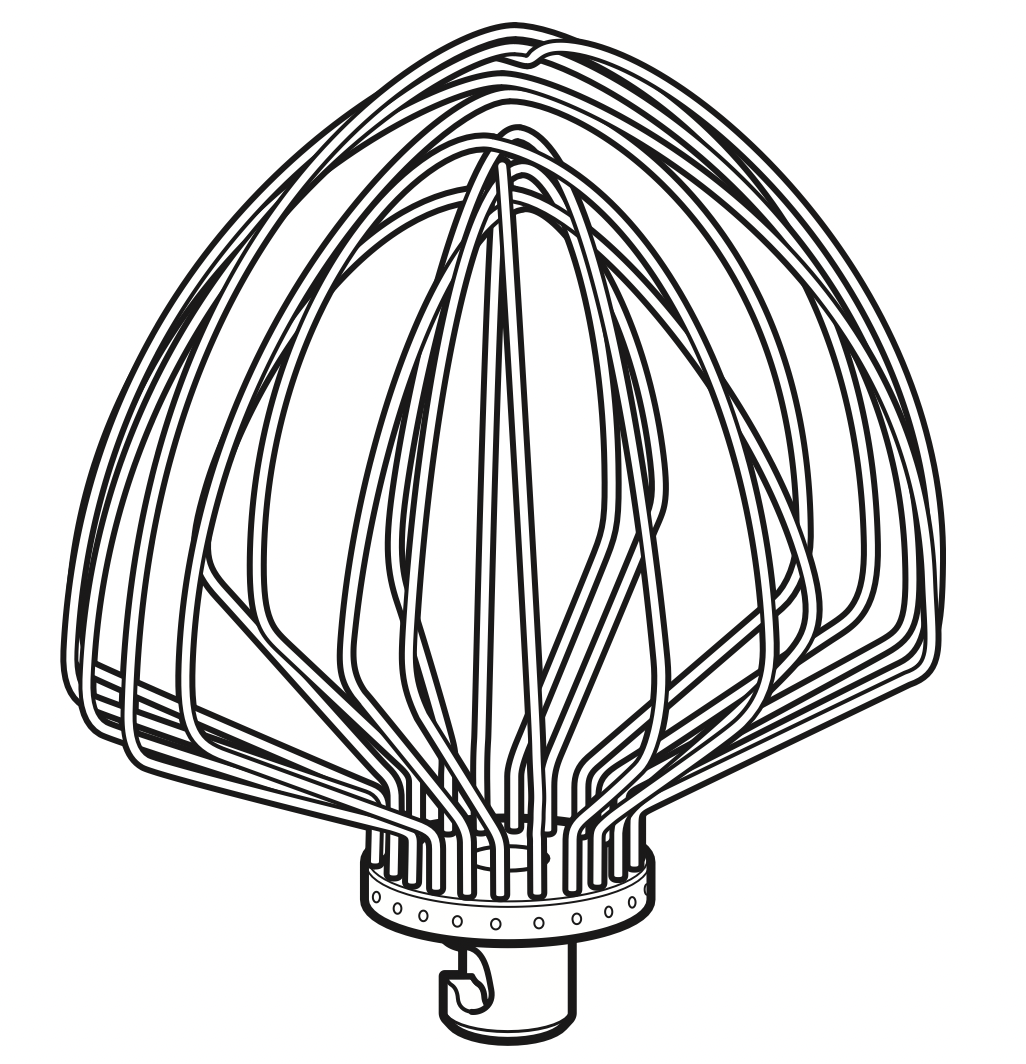
11-Wire stainless steel elliptical whip
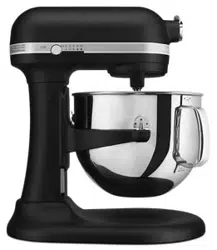
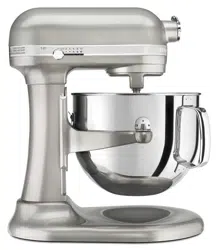
ASSEMBLING YOUR BOWL-LIFT STAND MIXER
WARNING - Electrical Shock Hazard
- Plug into a grounded 3 prong outlet.
- Do not remove ground prong.
- Do not use an adapter.
- Do not use an extension cord.
- Failure to follow these instructions can result in death, fire, or electrical shock.
To Attach Bowl
- Be sure speed control is OFF and Stand Mixer is unplugged.
- Place bowl-lift lever in down position.
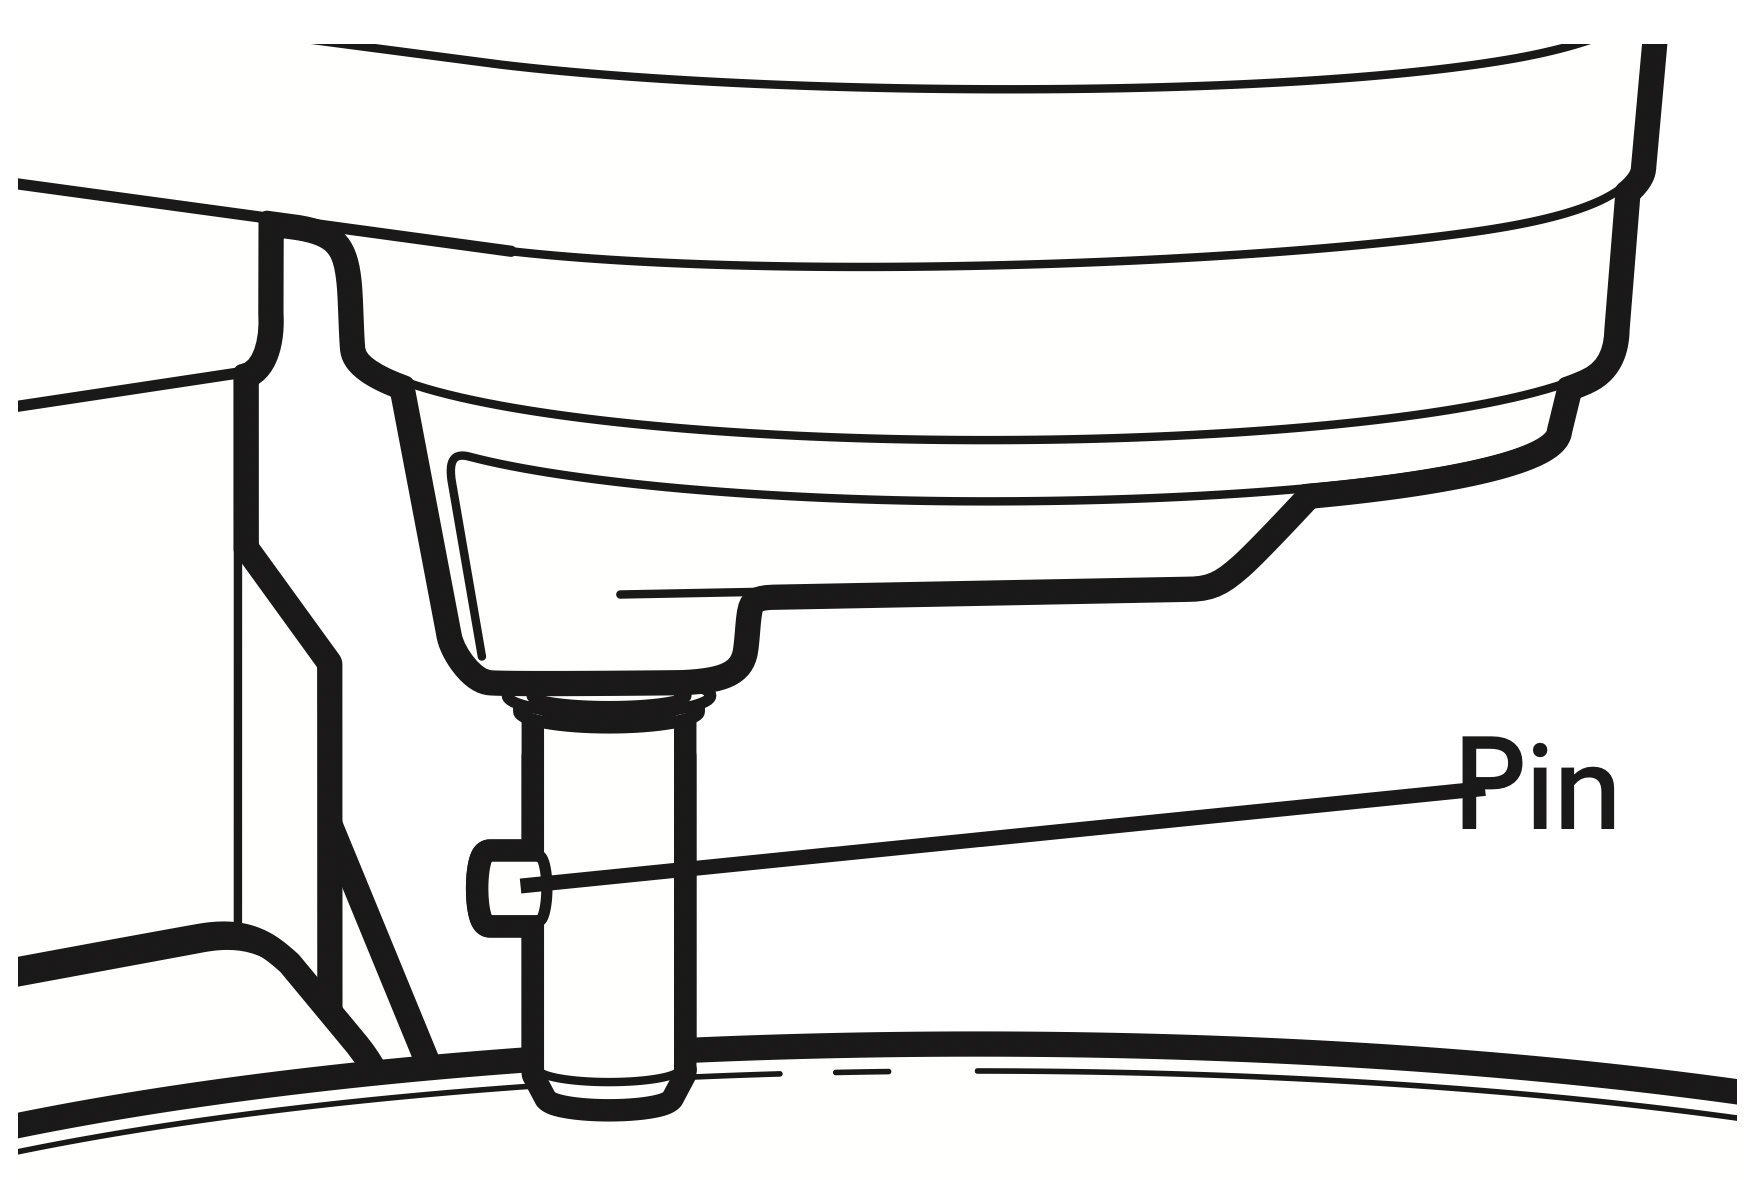
- Fit bowl supports over locating pins.
- Press down on back of bowl until bowl pin snaps into spring latch.
- Raise bowl before mixing.
- Plug into a grounded 3 prong outlet.
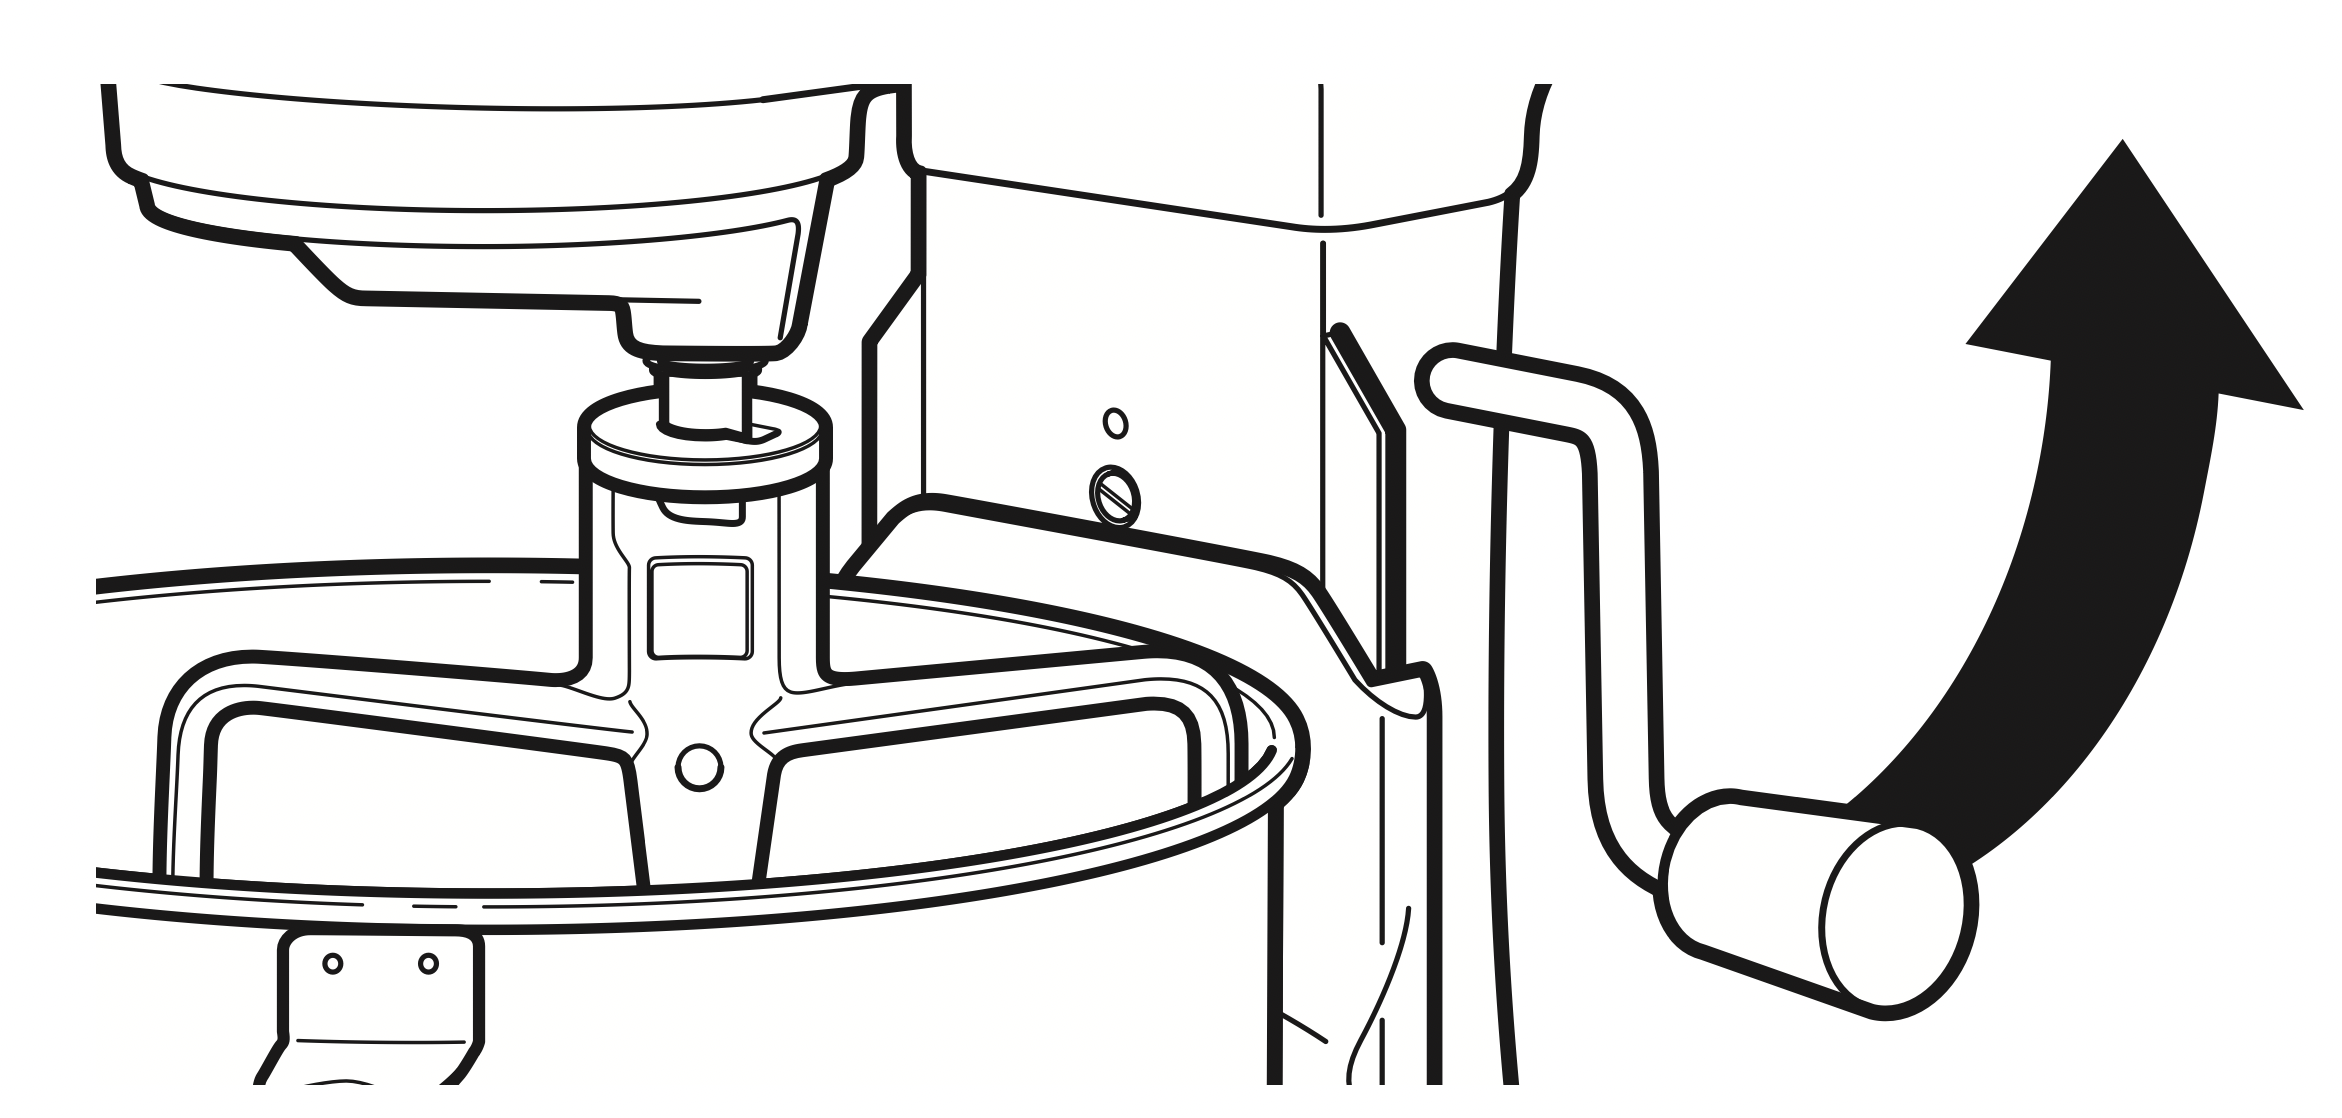
To Raise Bowl
- Rotate lever to straight-up position.
- Bowl must always be in raised, locked position when mixing.
To Lower Bowl
- Rotate lever back and down.
To Remove Bowl
- Be sure speed control is OFF and Stand Mixer is unplugged.
- Place bowl-lift lever in down position.
- Remove flat beater, wire whip, or spiral dough hook.
- Grasp bowl handle and lift straight up and off locating pins.
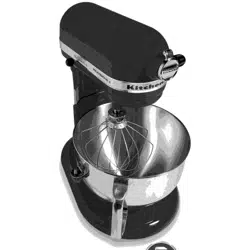
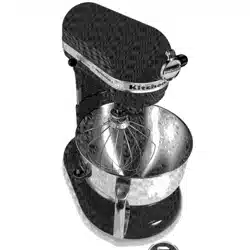
To Attach Flat Beater, Wire Whip, or PowerKnead™ Spiral Dough Hook
- Slide speed control to OFF and unplug.
- Slip flat beater on beater shaft.
- Turn beater to right, hooking beater over the pin on shaft.
- Plug into a grounded 3 prong outlet.
To Remove Flat Beater, Wire Whip, or PowerKnead™ Spiral Dough Hook
- Slide speed control to OFF and unplug.
- Press beater upward and turn to the left.
- Pull beater from beater shaft.
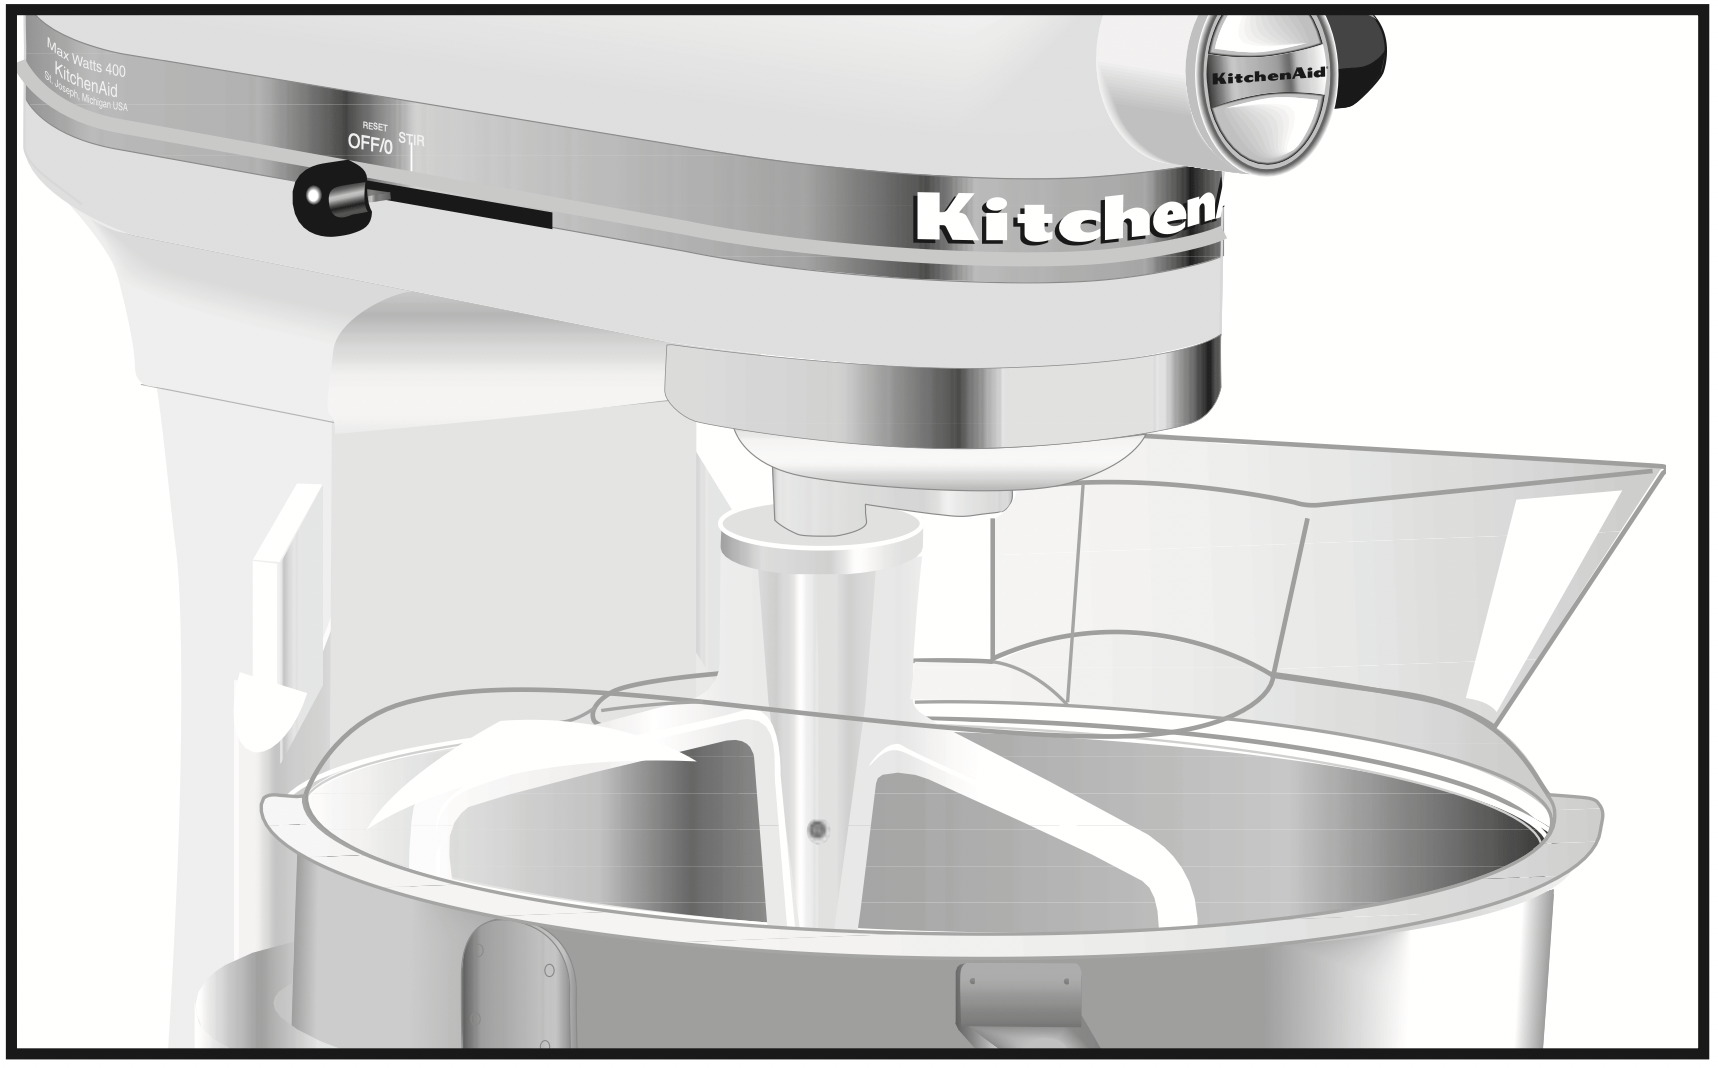
Household Stand Mixer Speed Control

Plug into a grounded 3 prong outlet. Speed control lever should always be set on lowest speed for starting, then gradually moved to desired higher speed to avoid splashing ingredients out of bowl. See the “Speed Control Guide” section.
BEATER TO BOWL CLEARANCE
Your Stand Mixer is adjusted at the factory so the flat beater just clears the bottom of the bowl. If, for any reason, the flat beater hits the bottom of the bowl or is too far away from the bowl, you can correct the clearance easily.
- Unplug Stand Mixer.
- Place bowl-lift lever in down position.
- Attach flat beater.
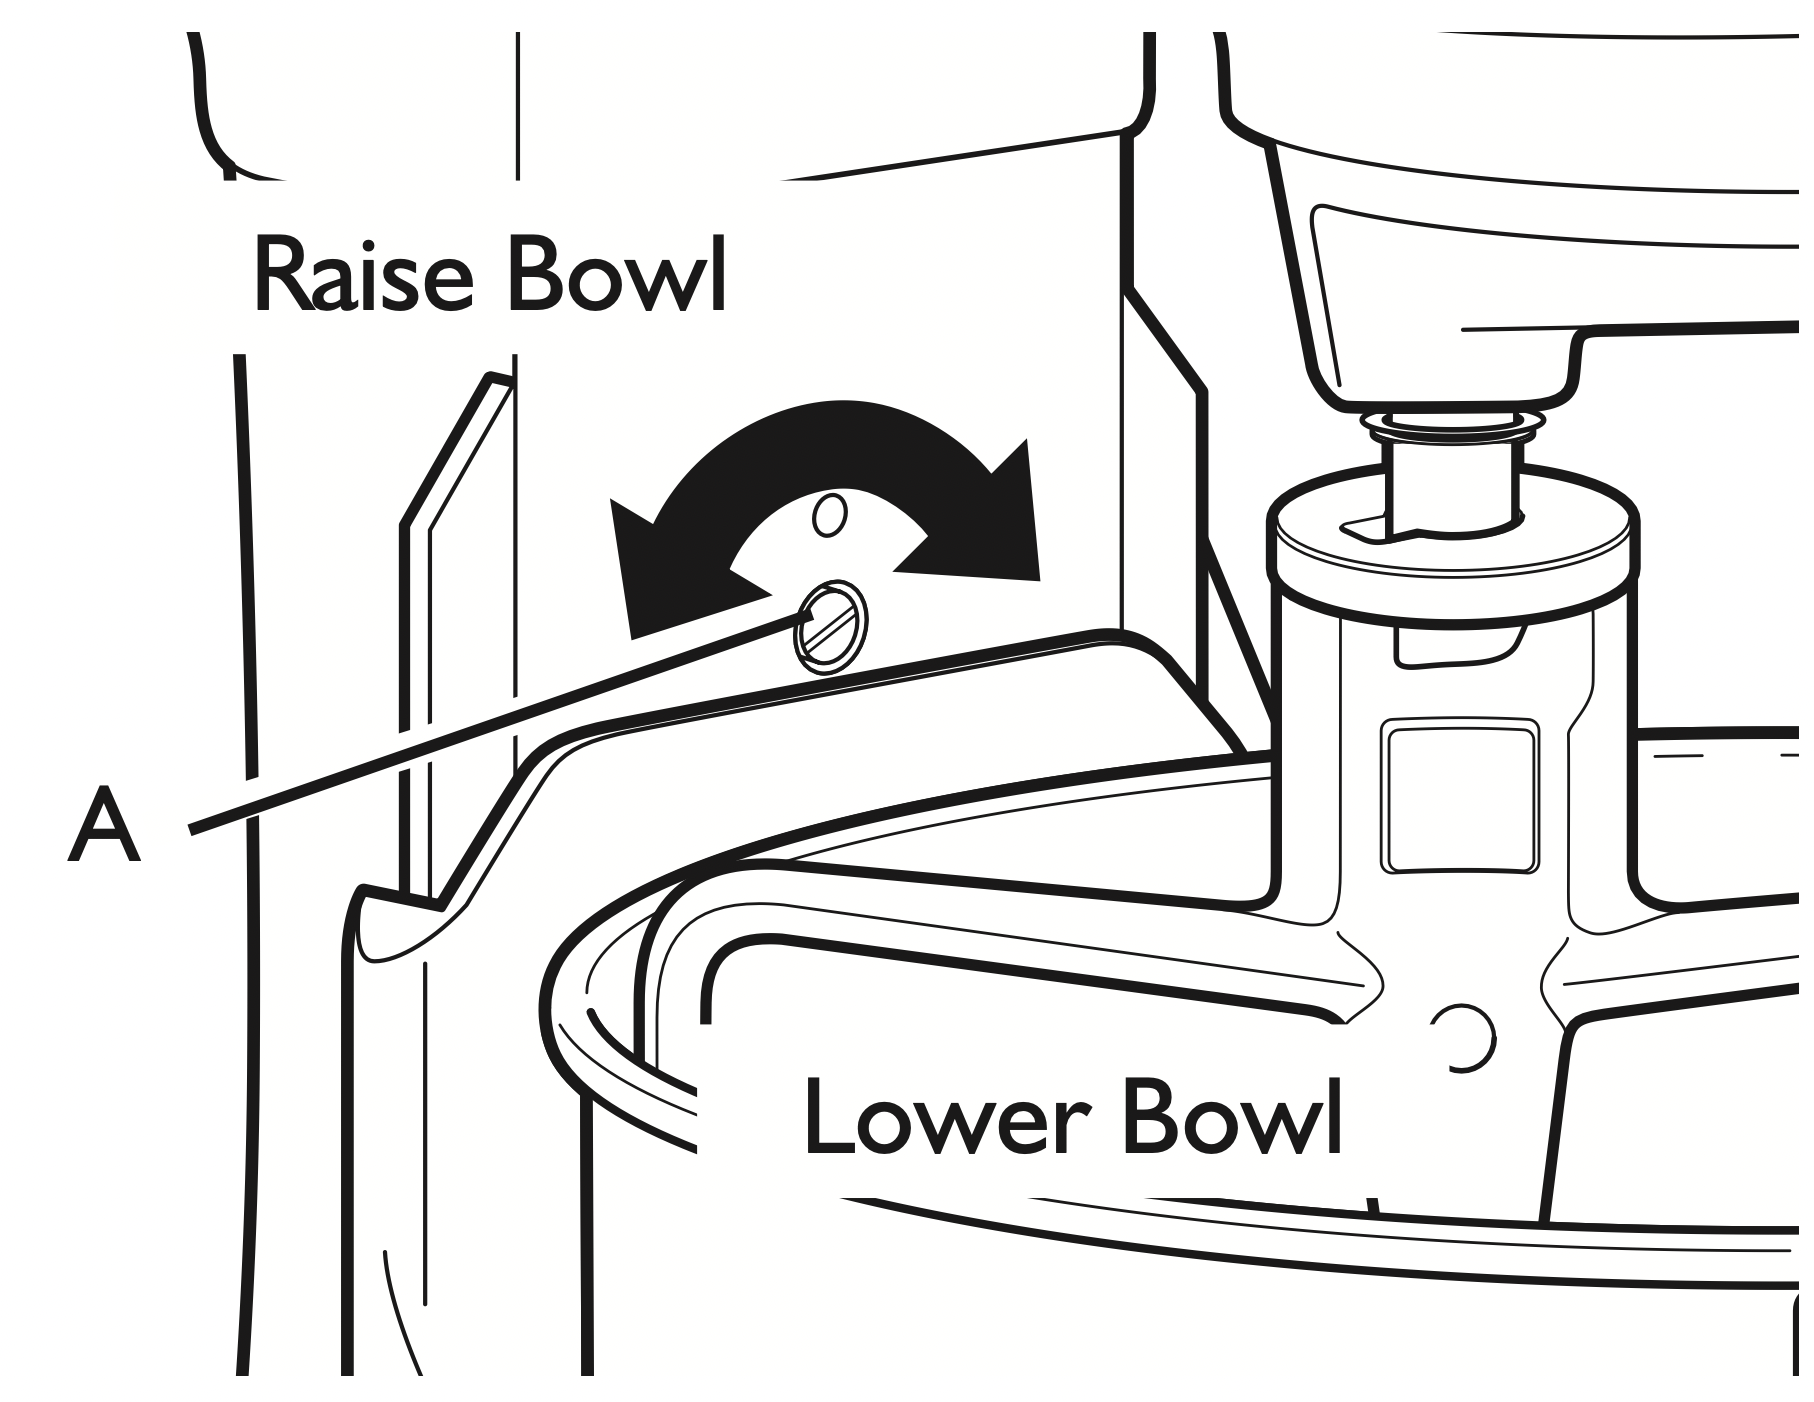
- Adjust so flat beater just clears bottom surface of bowl when in lifted position by turning screw (A) counterclockwise to raise the bowl and clockwise to lower the bowl. Just a slight turn is all that is required: the screw will not rotate more than 1/4 turn (90 degrees) in either direction. (The full range of adjustment is 1/2 turn, or 180 degrees.)
- Place bowl-lift lever in up position to check clearance.
- Repeat steps 4 and 5 if necessary.
NOTE: When properly adjusted, the flat beater will not strike on the bottom or side of the bowl. If the flat beater or the wire whip is so close that it strikes the bottom of the bowl, coating may wear off the beater or wires on whip may wear.
USING YOUR STAND MIXER
Mixing time
Your KitchenAid ® Stand Mixer will mix faster and more thoroughly than most other electric stand mixers. Therefore, the mixing time in most recipes must be adjusted to avoid overbeating. With cakes, for example, beating time may be half as long as with other stand mixers.
Mixer use
Warning - Injury Hazard
- Unplug mixer before touching beaters
- Failure to do so can result in broken bones, cuts, or bruises.
NOTE: Do not scrape bowl while Stand Mixer is operating.
The bowl and beater are designed to provide thorough mixing without frequent scraping. Scraping the bowl once or twice during mixing is usually sufficient. Turn Stand Mixer off before scraping. The Stand Mixer may warm up during use. Under heavy loads with extended mixing time, you may not be able to comfortably touch the top of the Stand Mixer. This is normal.
Using the pouring shield*
Attaching the Pouring Shield
- Make sure the speed control lever is set to the OFF/O position.
- Unplug the Stand Mixer.
- Attach desired accessory and raise the mixing bowl.
- Slide pouring shield collar around beater shaft, centering collar over rim of bowl.
Using the Pouring Shield*
Pour ingredients into the mixing bowl through the chute portion of shield.
IMPORTANT: Make sure the guides on the bottom of the chute rest on the rim of the bowl to keep ingredients from falling outside the bowl as they are added.
*Included with some models.

Removing the Pouring Shield
- Make sure the speed control lever is set to the OFF/O position.
- Unplug the Stand Mixer.
- Slide the pouring shield off the bowl.
- Lower the bowl support by turning the bowl-lift lever down.
- Remove accessory and the mixing bowl.
Using your KitchenAid ® beater attachments
Flat Beater for normal to heavy mixtures:
- cakes
- creamed frostings
- candies
- cookies
- pie
- biscuits
- quick breads
- meat loaf
- mashed potatoes
- pastry
Wire Whip for mixtures that need air incorporated:
- eggs
- egg whites
- heavy cream
- boiled frostings
- sponge cakes
- angel food cakes
- mayonnaise
- some candies
PowerKnead™ Spiral Dough Hook for mixing and kneading yeast doughs:
- breads
- rolls
- pizza dough
- coffee cakes
- buns
SPEED CONTROL GUIDE - 10 SPEED STAND MIXERS
All speeds have the Soft Start ® feature that automatically starts the Stand Mixer at a lower speed to help avoid ingredient splash-out and “flour puff” at start-up, then quickly increases to the selected speed for optimal performance.
| Speed |
Use for |
Description |
| STIR |
STIRRING |
For slow stirring, combining, mashing, starting all mixing procedures. Use to add flour and dry ingredients to batter, and add liquids to dry ingredients. Do not use STIR speed to mix or knead yeast doughs.
|
| 2 |
SLOW MIXING |
For slow mixing, mashing, faster stirring. Use to mix and knead yeast doughs, heavy batters, and candies; start mashing potatoes or other vegetables; cut shortening into flour; mix thin or splashy batters.
|
| 4 |
MIXING, BEATING |
For mixing semi-heavy batters, such as cookies. Use to combine sugar and shortening and to add sugar to egg whites for meringues. Medium speed for cake mixes. Use with: Food Grinder, Rotor Slicer/ Shredder, Pasta Roller, and Fruit/Vegetable Strainer.
|
| 6 |
BEATING, CREAMING |
For medium-fast beating (creaming) or whipping. Use to finish mixing cake, doughnut, and other batters. High speed for cake mixes. Use with Citrus Juicer attachment.
|
| 8 |
FAST BEATING, WHIPPING
|
For whipping cream, egg whites, and boiled frostings.
|
| 10 |
FAST WHIPPING |
For whipping small amounts of cream, egg whites or for final whipping of mashed potatoes. Use with Pasta Maker and Grain Mill attachments.
NOTE: Will not maintain fast speeds under heavy loads, such as when using Pasta Maker or Grain Mill attachments.
|
NOTE: Use Speed 2 to mix or knead yeast doughs. Use of any other speed creates high potential for Stand Mixer failure. The PowerKnead™ Spiral Dough Hook efficiently kneads most yeast dough within 4 minutes.
MIXING TIPS
General information
Converting Your Recipes for the Stand Mixer
Use the following guidelines to adapt your favorite recipes to use with your KitchenAid ® Stand Mixer.
The “quick mix” method (sometimes referred to as the “dump” method) is ideal for simple cakes. This method calls for combining dry ingredients with most or all liquid ingredients in one step.
More elaborate cakes should be prepared using the traditional cake mixing method. With this method, sugar and the shortening, butter, or margarine are thoroughly mixed (creamed) before other ingredients are added.
For all cakes, mixing times may change because your KitchenAid ® Stand Mixer works more quickly than other mixers. In general, mixing a cake with the KitchenAid ® Stand Mixer will take about half the time called for in most cake recipes.
To help determine the ideal mixing time, observe the batter or dough and mix only until it has the desired appearance described in your recipe, such as “smooth and creamy.”
To select the best mixing speeds, use the “Speed Control Guide” section.
Adding Ingredients
Always add ingredients as close to side of bowl as possible, not directly into moving beater. The Pouring Shield can be used to simplify adding ingredients.
NOTE: If ingredients in very bottom of bowl are not thoroughly mixed, then the beater is not far enough into the bowl. See the “Beater to Bowl Clearance” section.
Cake Mixes
When preparing packaged cake mixes, use Speed 2 for low speed, Speed 4 for medium speed, and Speed 6 for high speed. For best results, mix for the time stated on the package directions.
Adding Nuts, Raisins, or Candied Fruits
Follow individual recipes for guidelines on including these ingredients. In general, solid materials should be folded in the last few seconds of mixing on STIR Speed. The batter should be thick enough to keep the fruit or nuts from sinking to the bottom of the pan during baking. Sticky fruits should be dusted with flour for better distribution in the batter.
Liquid Mixtures
Mixtures containing large amounts of liquid ingredients should be mixed at lower speeds to avoid splashing. Increase speed only after mixture has thickened.
Egg whites
Place room temperature egg whites in clean, dry bowl. Attach bowl and wire whip. To avoid splashing, gradually turn to designated speed and whip to desired stage. See chart below.
|
AMOUNT
|
SPEED |
| 1 egg white |
GRADUALLY to 10
|
| 2-4 egg whites |
GRADUALLY to 8
|
|
6 or more egg whites
|
GRADUALLY to 8
|
Whipping Stages
With your KitchenAid ® Stand Mixer, egg whites whip quickly. So watch to avoid overwhipping. This list tells you what to expect.
Frothy
Large, uneven air bubbles.
Begins to Hold Shape
Air bubbles are fine and compact; product is white.
Soft Peak
Tips of peaks fall over when wire whip is removed.
Almost Stiff
Sharp peaks form when wire whip is removed, but whites are actually soft.
Stiff but not Dry
Sharp, stiff peaks form when wire whip is removed. Whites are uniform in color and glisten.
Stiff and Dry
Sharp, stiff peaks form when wire whip is removed. Whites are speckled and dull in appearance
Whipped cream
Pour cold whipping cream into chilled bowl. Attach bowl and wire whip.
To avoid splashing, gradually turn to designated speed and whip to desired stage. See chart below.
|
AMOUNT
|
SPEED |
| 1/4 cup (50 mL) |
GRADUALLY to 10
|
| 1/2 cup (125 mL) |
GRADUALLY to 10
|
| 1 cup (250 mL) |
GRADUALLY to 8
|
| 2 cups (500 mL) |
GRADUALLY to 8
|
Whipping Stages
Watch cream closely during whipping. Because your KitchenAid ® Stand Mixer whips so quickly, there are just a few seconds between whipping stages. Look for these characteristics:
Begins to Thicken
Cream is thick and custard-like.
Holds its Shape
Cream forms soft peaks when wire whip is removed. Can be folded into other ingredients when making desserts and sauces.
Stiff
Cream stands in stiff, sharp peaks when wire whip is removed. Use for topping on cakes or desserts, or filling for cream puffs.
BREAD MAKING TIPS
General information
Making bread with a mixer is quite different from making bread by hand. Therefore, it will take some practice before you are completely comfortable with the new process. For your convenience, we offer these tips to help you become accustomed to bread-making the KitchenAid brand way.
- Start out with an easy recipe, until you are familiar with using the PowerKnead™ Spiral Dough Hook.
- Always use the PowerKnead™ Spiral Dough Hook to mix and knead yeast doughs.
- Use Speed 2 to mix or knead yeast dough or fondants. Use of any other speed with heavy doughs may cause mixer to stop rotating to limit mixer mixer damage. This is normal operation. If this occurs, turn the speed selector to off, and then turn back on to a lower speed.
- Do not use recipes calling for more than 16 cups (3.8 L) all-purpose flour or 10 (2.4 L) cups whole-wheat flour when making dough with a 7 qt. mixer.
- Use a candy or other kitchen thermometer to assure that liquids are at temperature specified in the recipe. Liquids at higher temperature can kill yeast, while liquids at lower temperatures will retard yeast growth.
- Warm all ingredients to room temperature to ensure proper rising of dough. If yeast is to be dissolved in bowl, always warm bowl first by rinsing with warm water to avoid cooling of liquids.
- Allow bread to rise in a warm place, 80°F (27°C) to 85°F (30°C), free from draft, unless otherwise specified in recipe.
- Here are some alternative rising methods to use: (1) The bowl containing the dough can be placed on a wire rack over a pan of hot water. (2) The bowl can be placed on the top rack of an unheated oven; put a pan of hot water on the rack below. (3) Turn the oven to 400°F (204°C) for 1 minute; then turn it off; place the bowl on the center rack of the oven and close the door.
Cover bowl with waxed paper, if desired. Always cover with towel to retain warmth in the bowl and protect the dough from drafts.
- Recipe rising times may vary due to temperature and humidity in your kitchen. Dough has doubled in bulk when indentation remains after tips of fingers are pressed lightly and quickly into dough.
- Most bread recipes give a range for the amount of flour to be used. Enough flour has been added when the dough starts to clean sides of bowl. If dough is sticky or humidity is high, slowly add more flour, about 1/2 cup (125 mL) at a time but do not exceed recommended flour capacity. Knead after each addition until flour is completely worked into dough. If too much flour is added, a dry loaf will result.
- When done, yeast breads and rolls should be deep golden brown in color. Other tests for doneness of breads are: Bread pulls away from the sides of pan, and tapping on the top of the loaf produces a hollow sound. Turn loaves and rolls onto racks immediately after baking to avoid sogginess.
Mixing and kneading yeast dough with the rapid mix method
“Rapid Mix” describes a bread baking method that calls for dry yeast to be mixed with other dry ingredients before liquid is added. In contrast, the traditional method is to dissolve yeast in warm water.
- Place all dry ingredients including yeast into bowl, except last 1 cup (240 mL) to 2 cups (470 mL) flour.
- Attach bowl and PowerKnead™ Spiral Dough Hook. Raise mixer bowl. Turn to Speed 2 and mix about 15 seconds, or until ingredients are combined.
- Continuing on Speed 2, gradually add liquid ingredients to flour mixture and mix 1 to 2 minutes longer. See Illustration A.
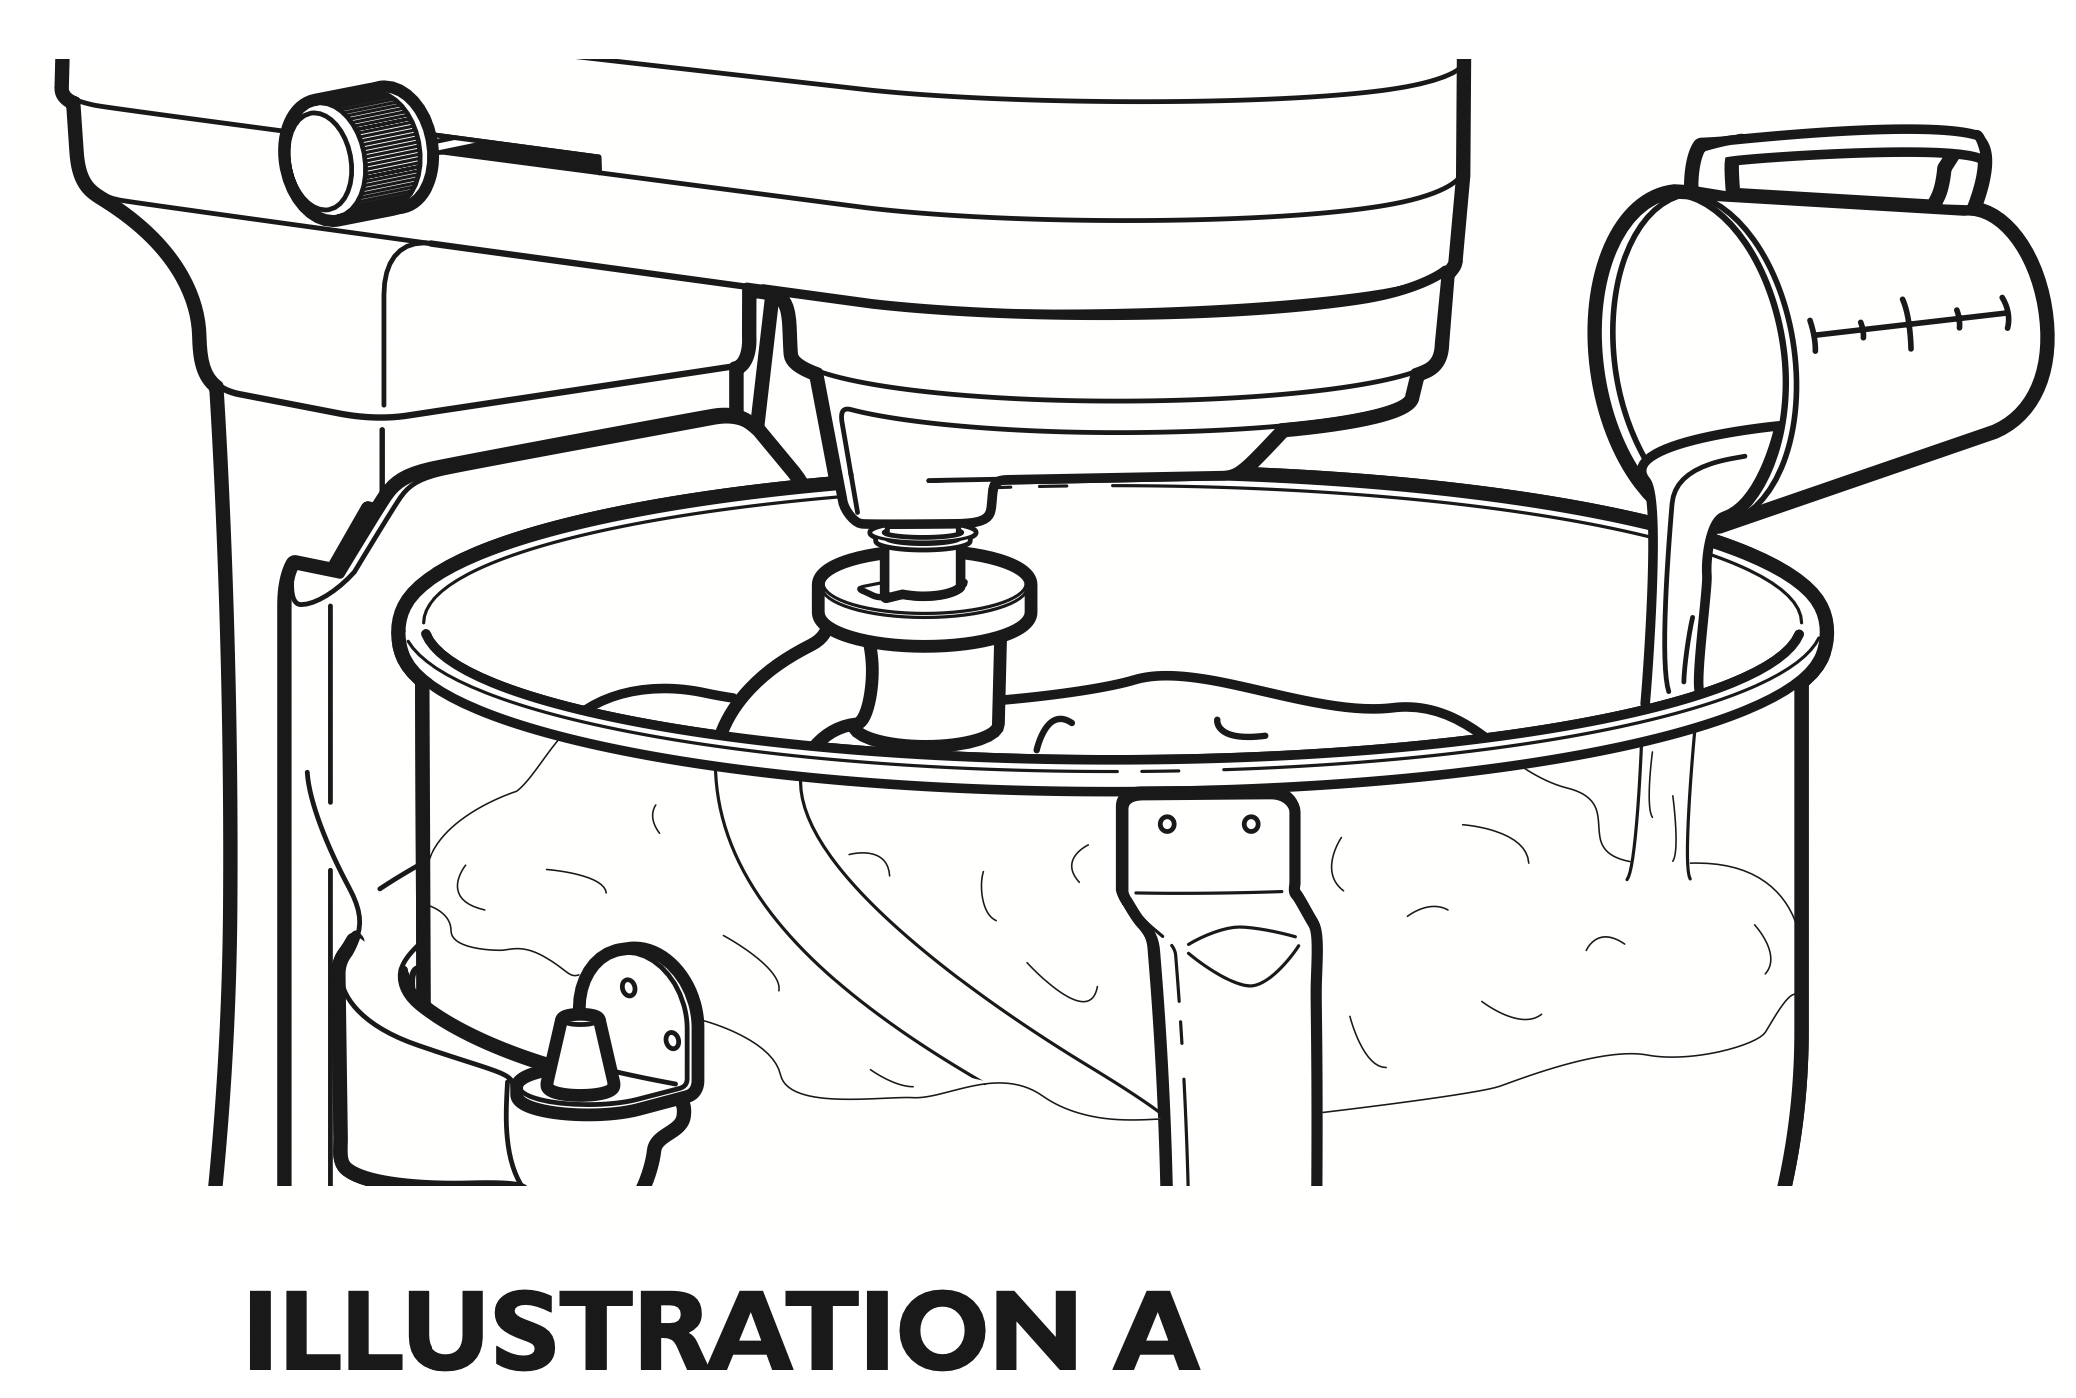
NOTE: If liquid ingredients are added too quickly, they will form a pool around the PowerKnead™ Spiral Dough Hook and slow down mixing process.
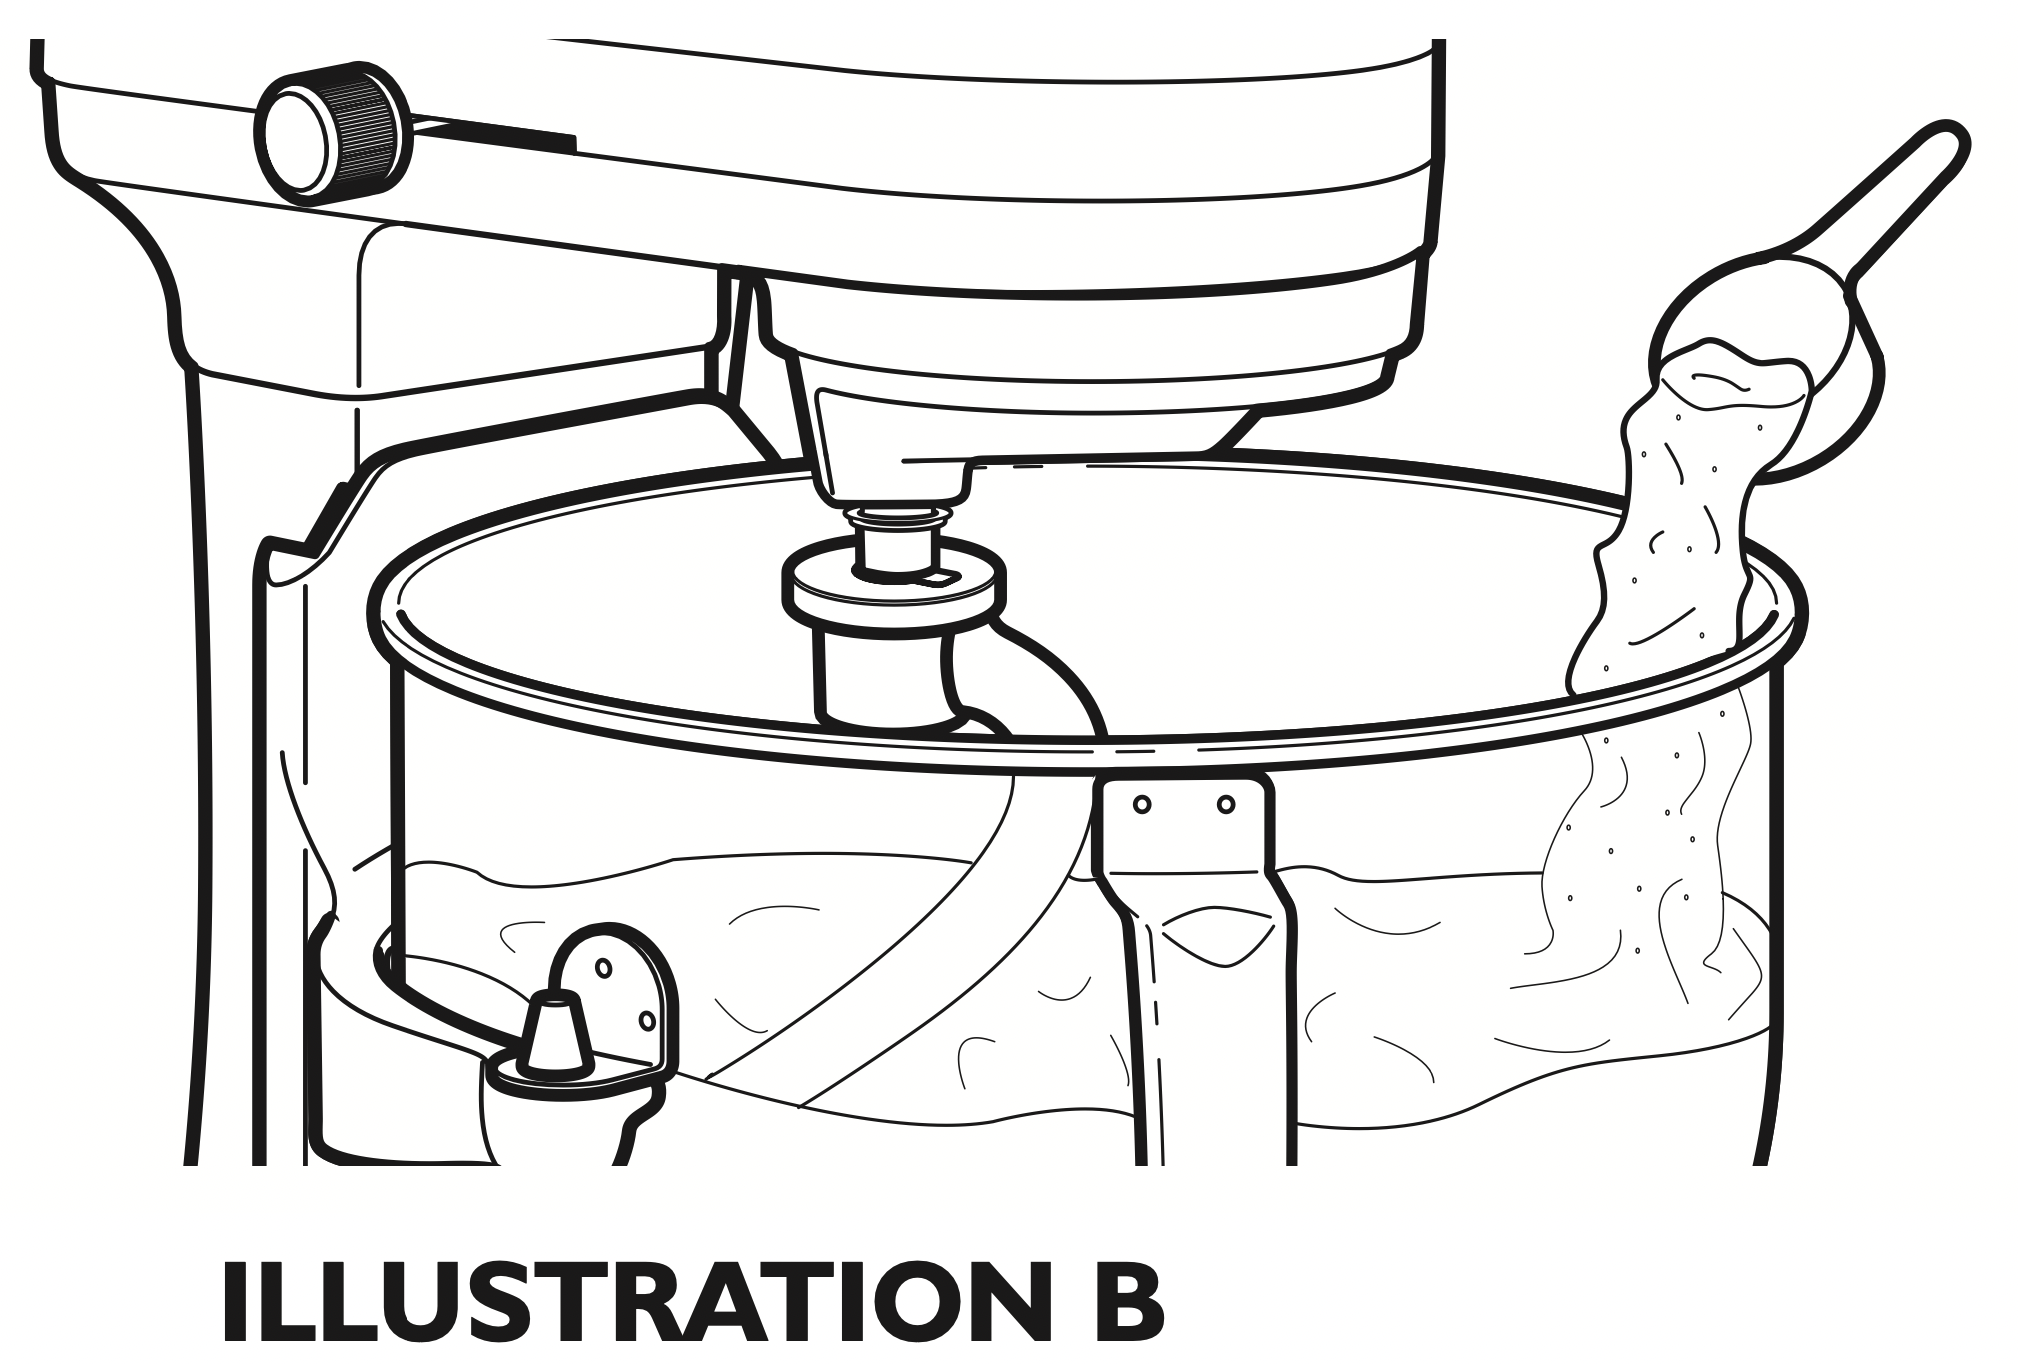
- Continuing on Speed 2, gently add remaining flour, 1/2 cup (120 mL) at a time. See Illustration B. Mix until dough starts to clean sides of bowl, about 2 minutes.
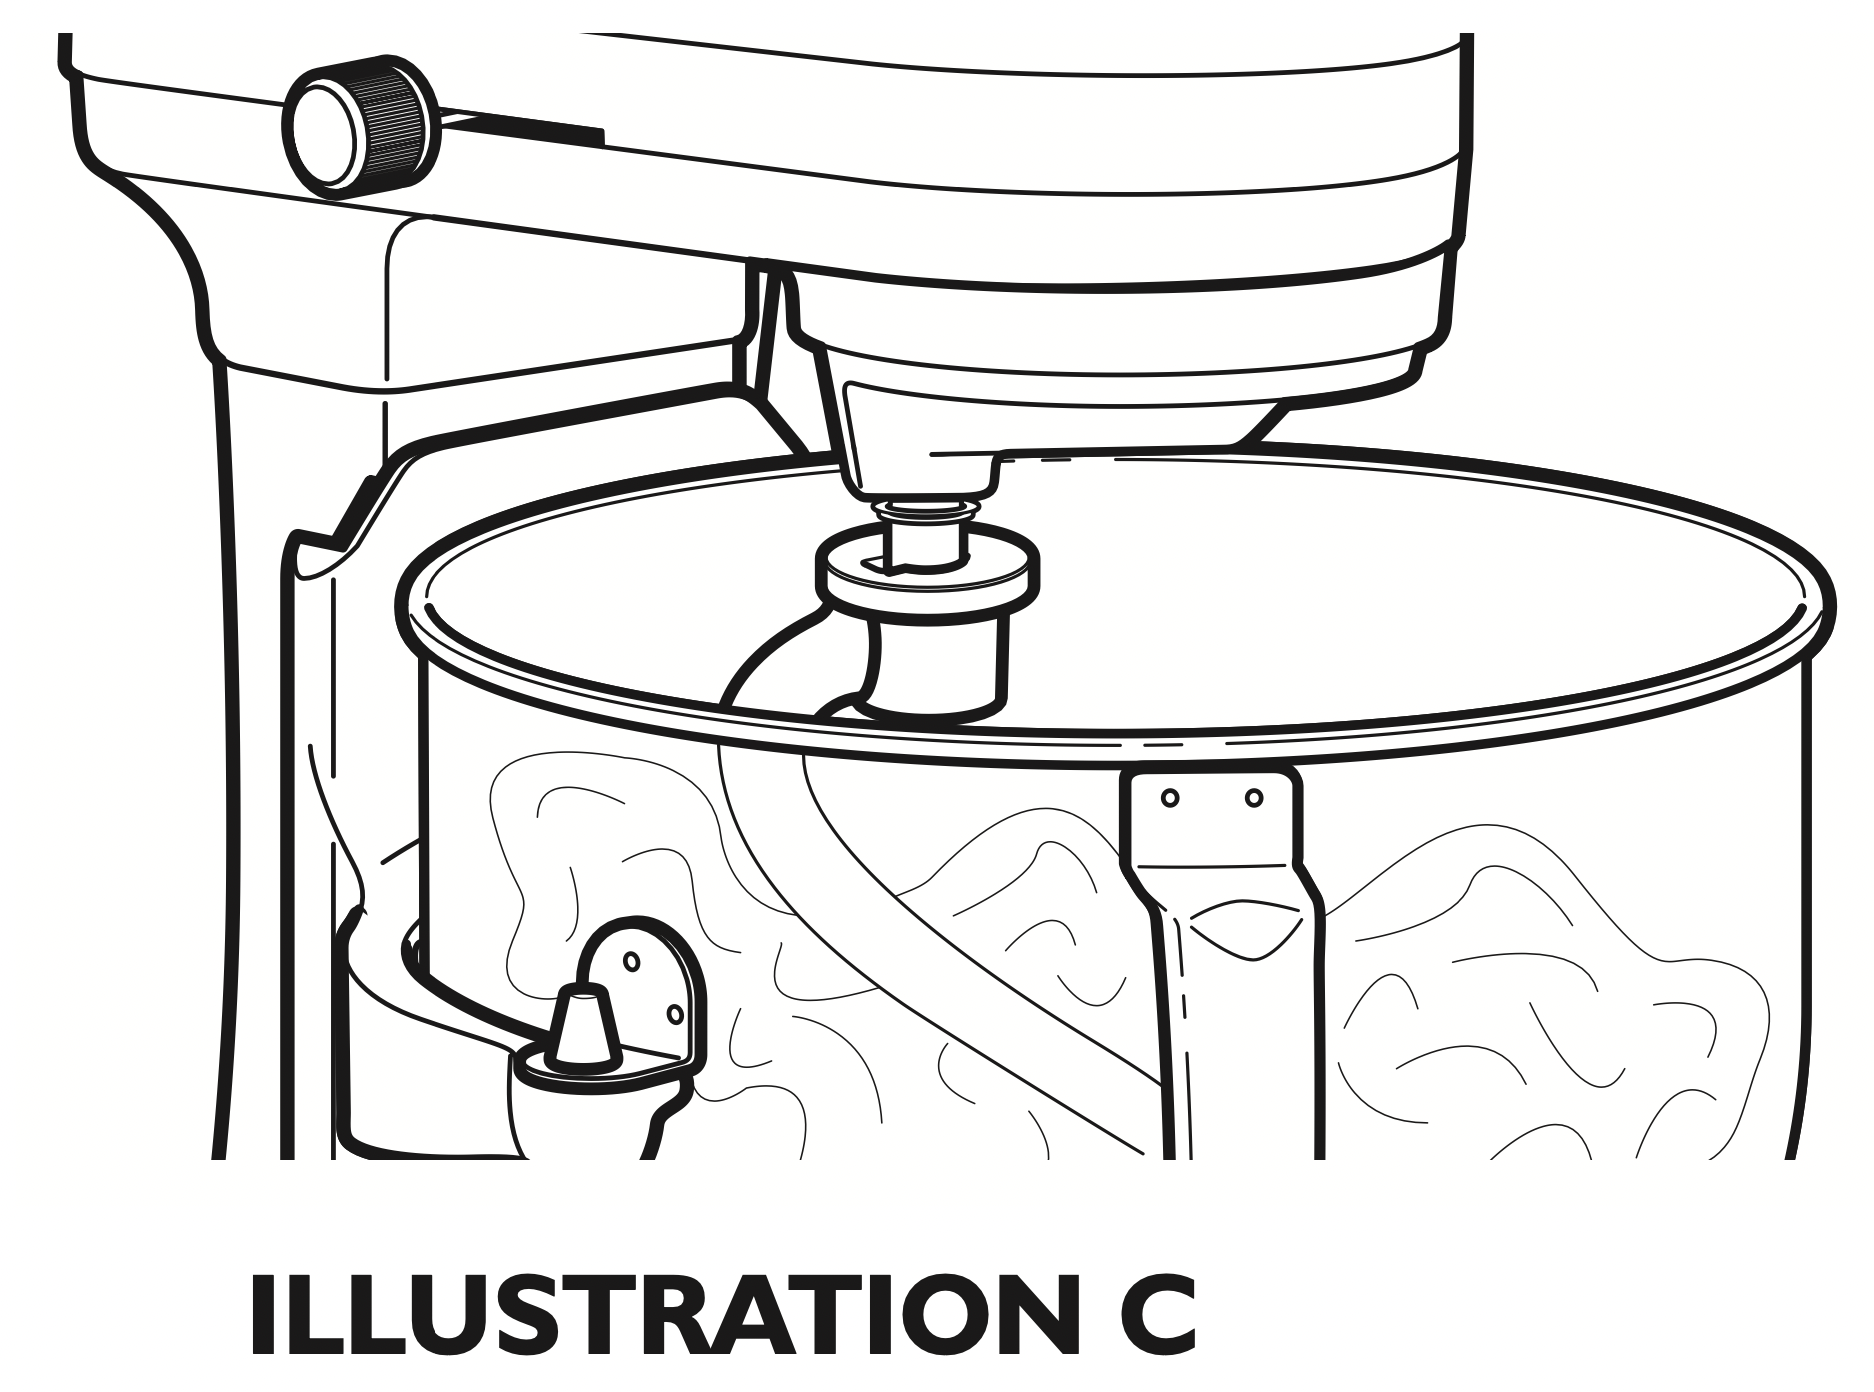
- Knead on Speed 2 for 2 more minutes, or until dough is smooth and elastic. See Illustration C.
- Lower bowl on mixer and remove dough from the bowl andPowerKnead™ Spiral Dough Hook. Follow directions in recipe for rising, shaping, and baking.
When using the traditional method to prepare a favorite recipe, dissolve yeast in warm water in warmed bowl. Add remaining liquids and dry ingredients, except last 1 cup (240 mL) to 2 cups (470 mL) flour. Turn to Speed 2 and mix about 1 minute, or until ingredients are thoroughly mixed. Proceed with steps 4 through 6.
Both methods work equally well for bread preparation. However, the “Rapid Mix” method may be a bit faster and easier for new bread bakers. It is slightly more temperature tolerant because the yeast is mixed with dry ingredients rather than with warm liquid.
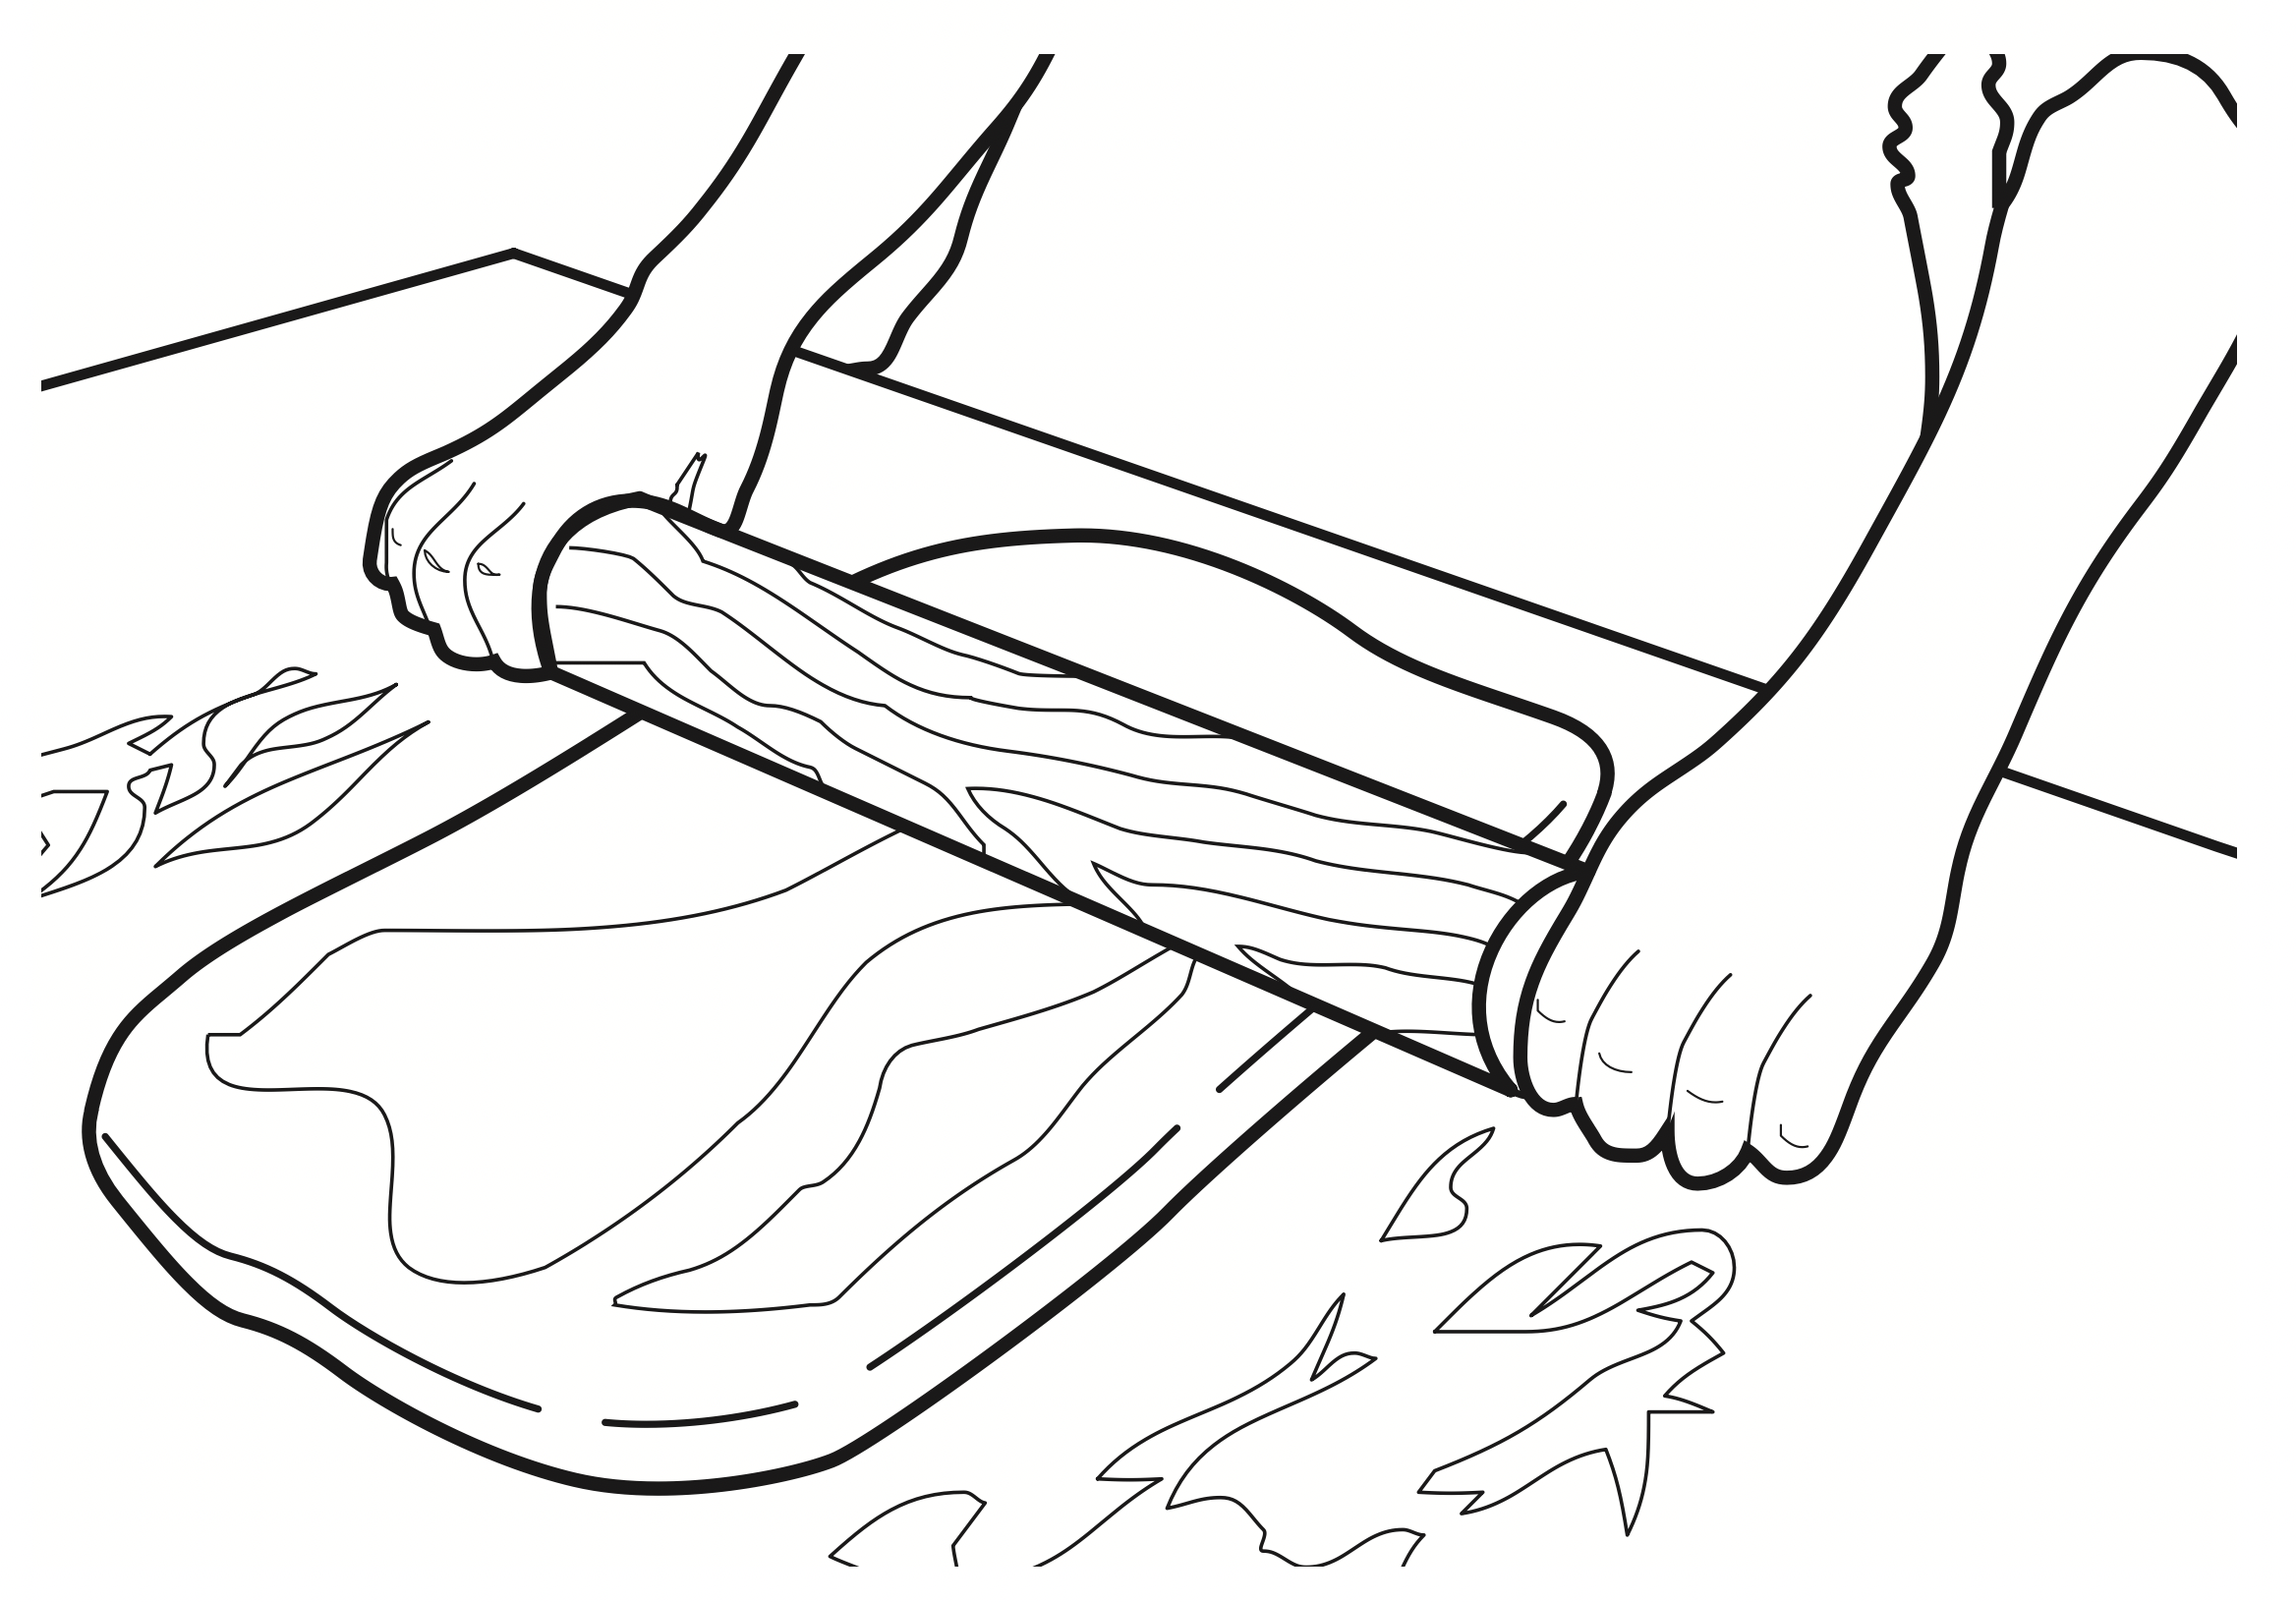
Shaping a loaf
- Divide dough in half. On lightly floured surface, roll each half into a rectangle, approximately 9" x 14" (23 cm x 36 cm). A rolling pin will smooth dough and remove gas bubbles.
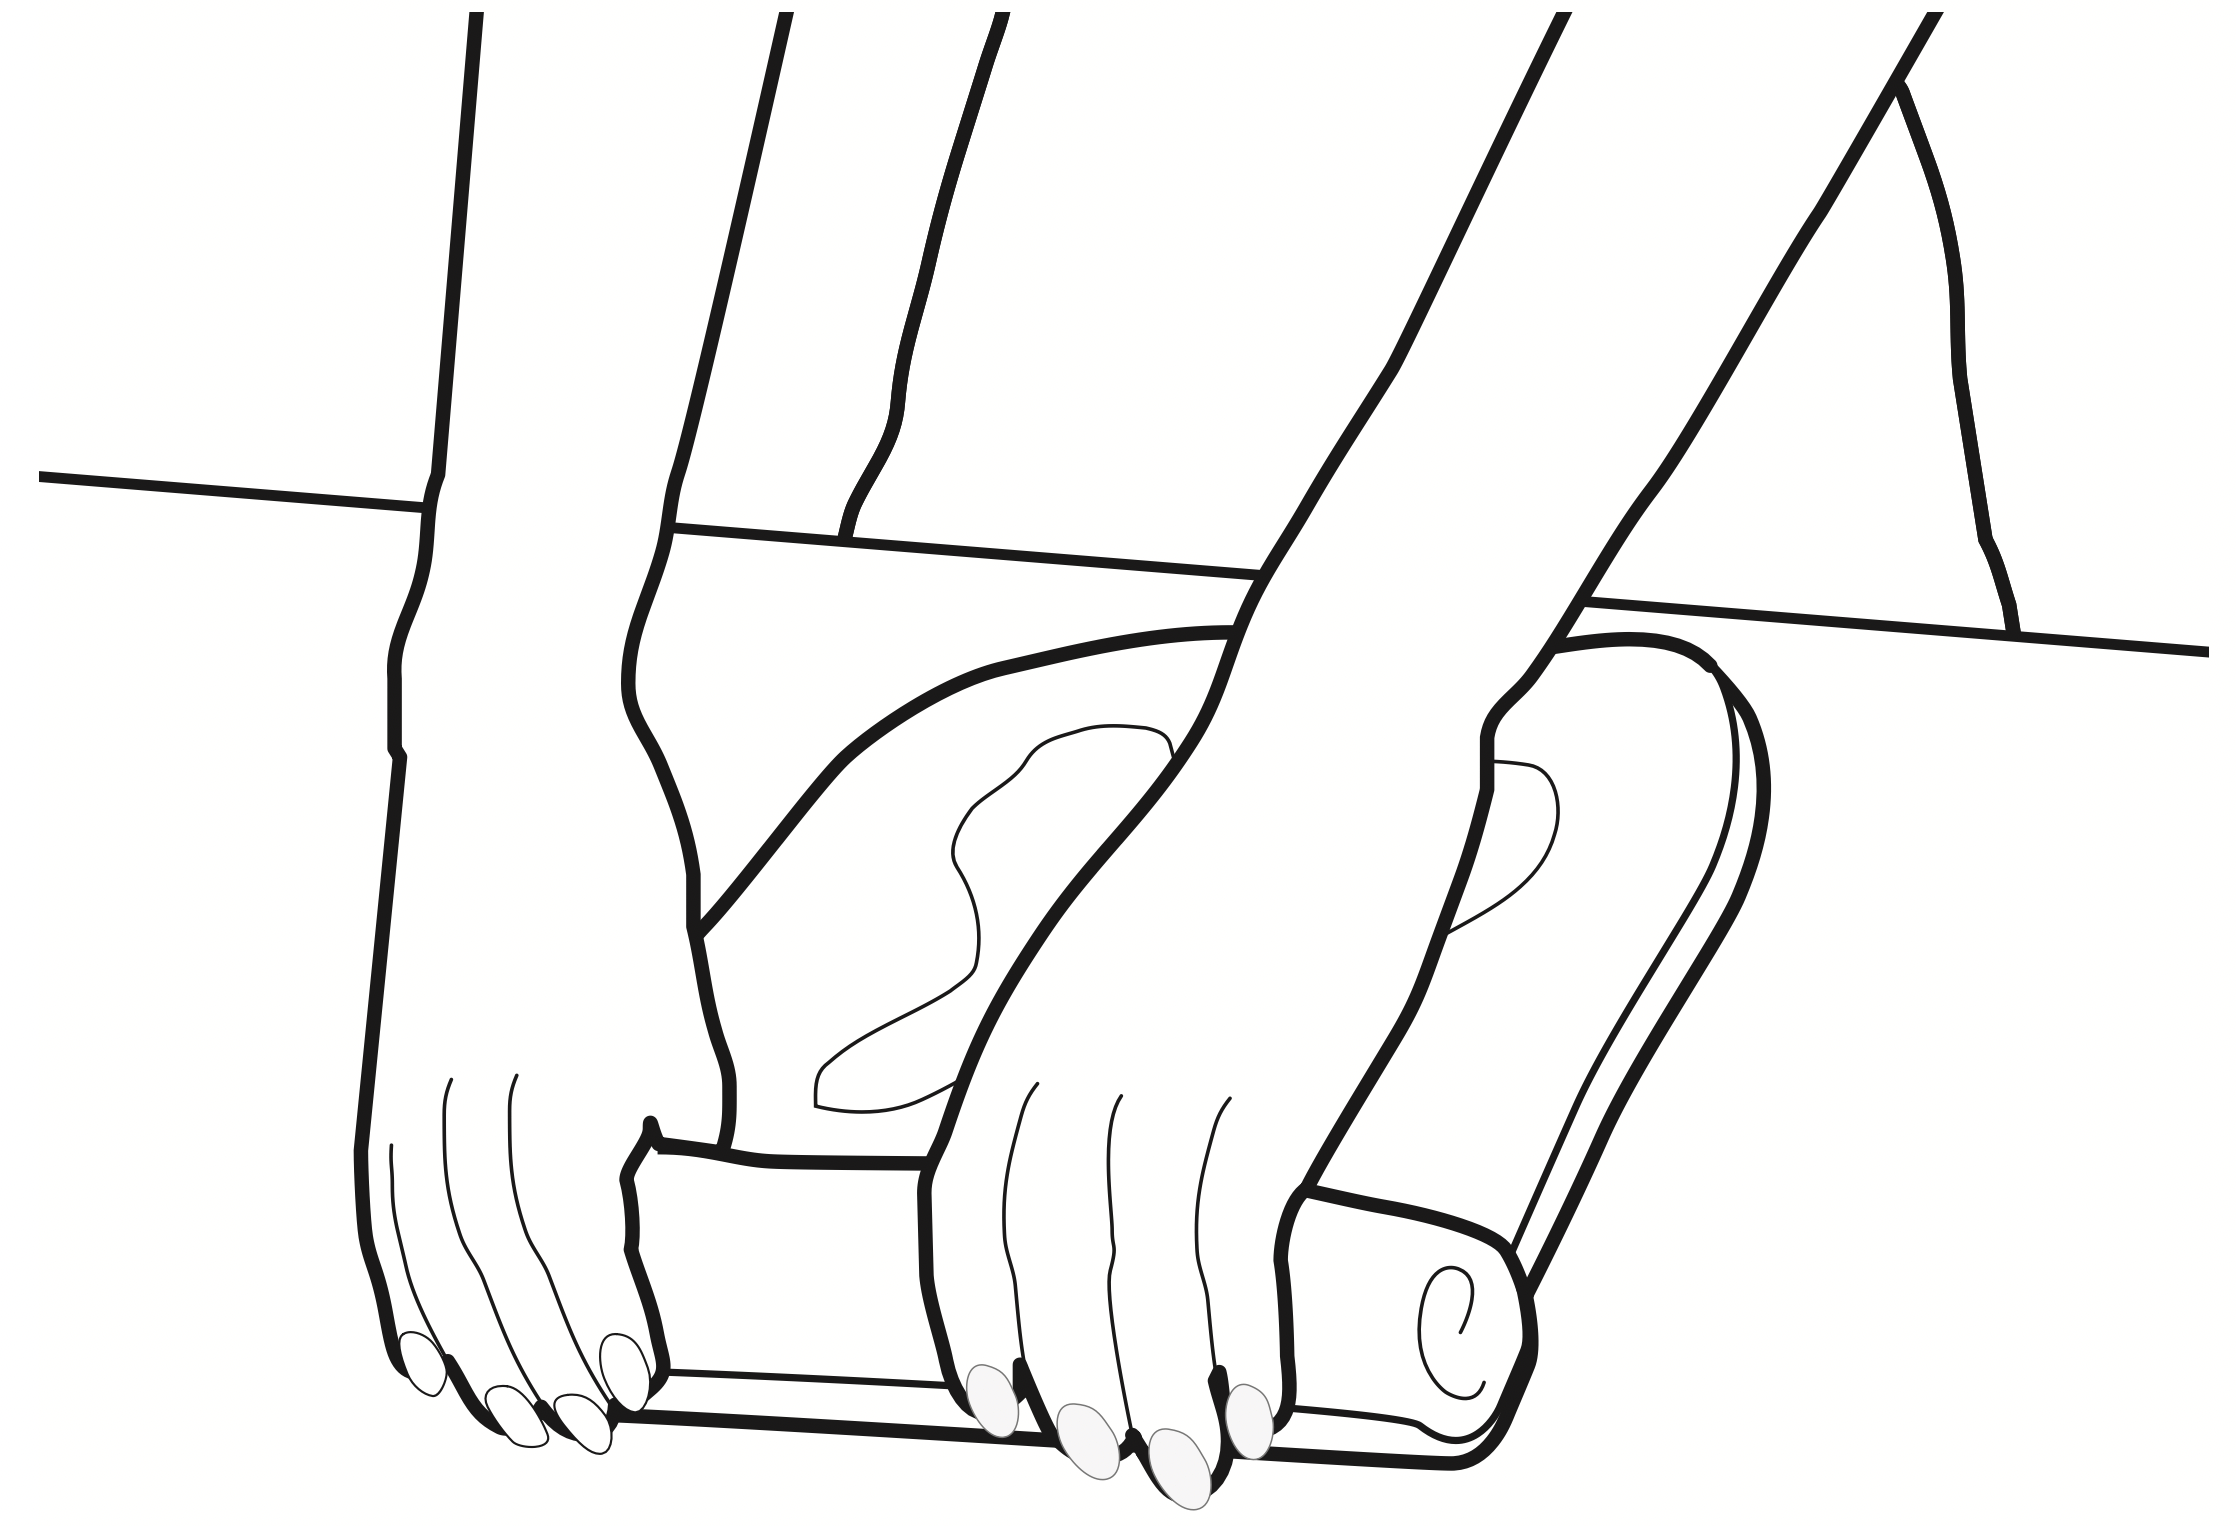
- Starting at a short end, roll dough tightly. Pinch dough to seal seam.
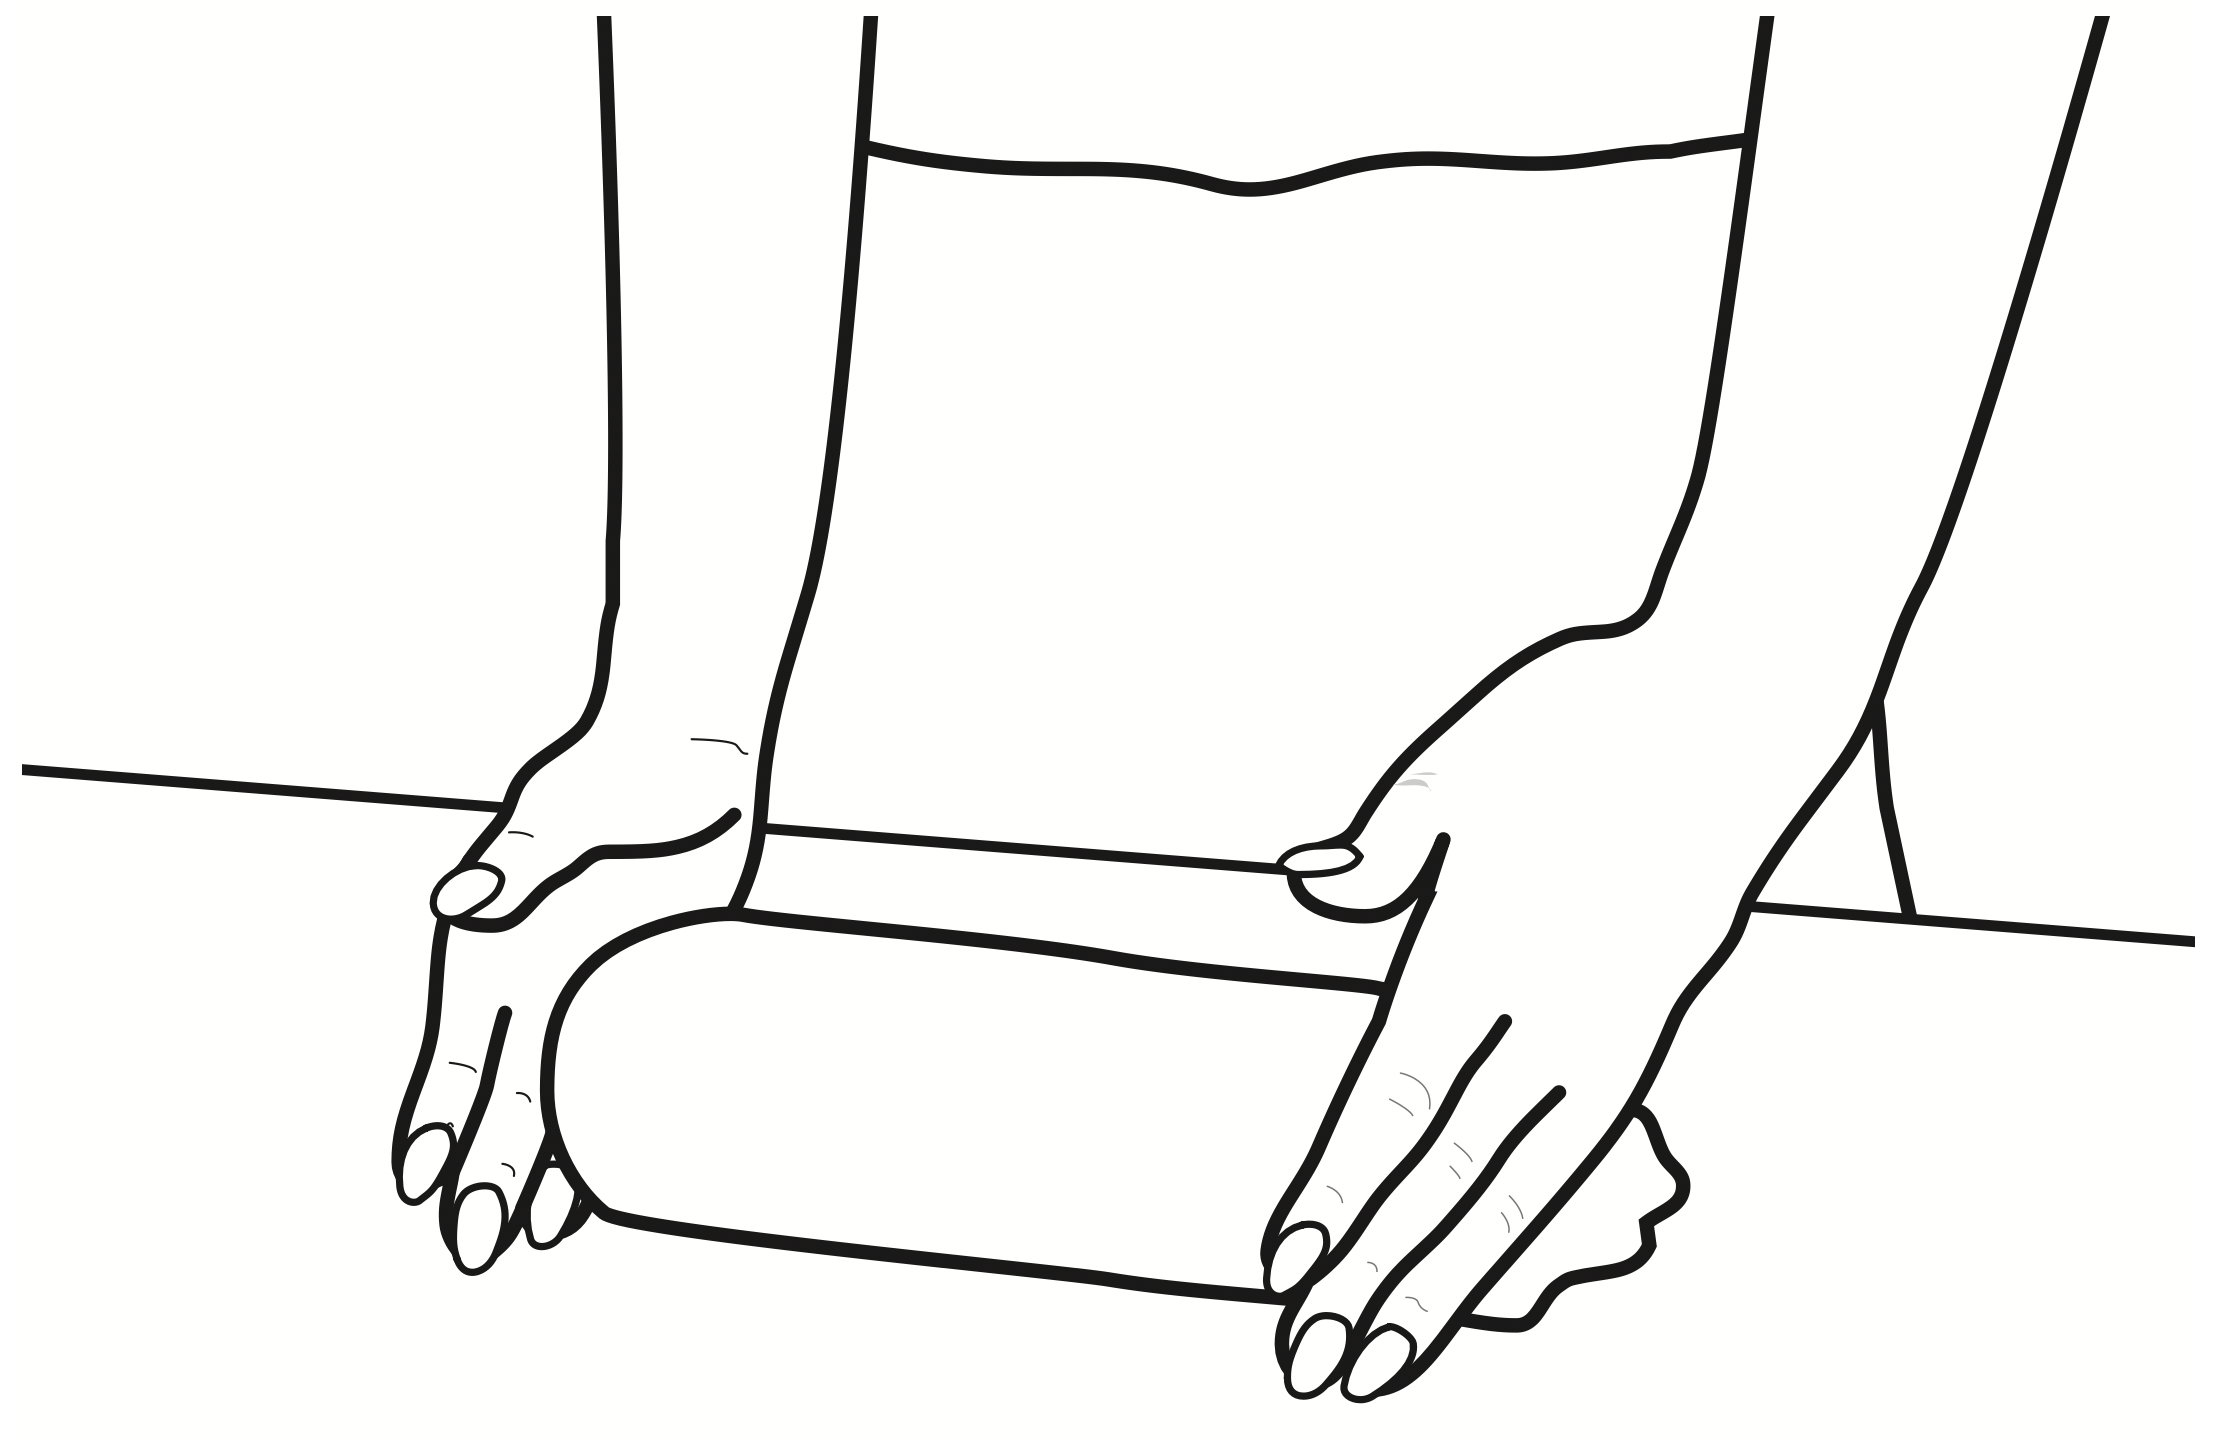
- Pinch ends and turn under. Place, seam side down, in loaf pan. Follow directions in recipe for rising and baking.
ATTACHMENTS AND ACCESSORIES
General information
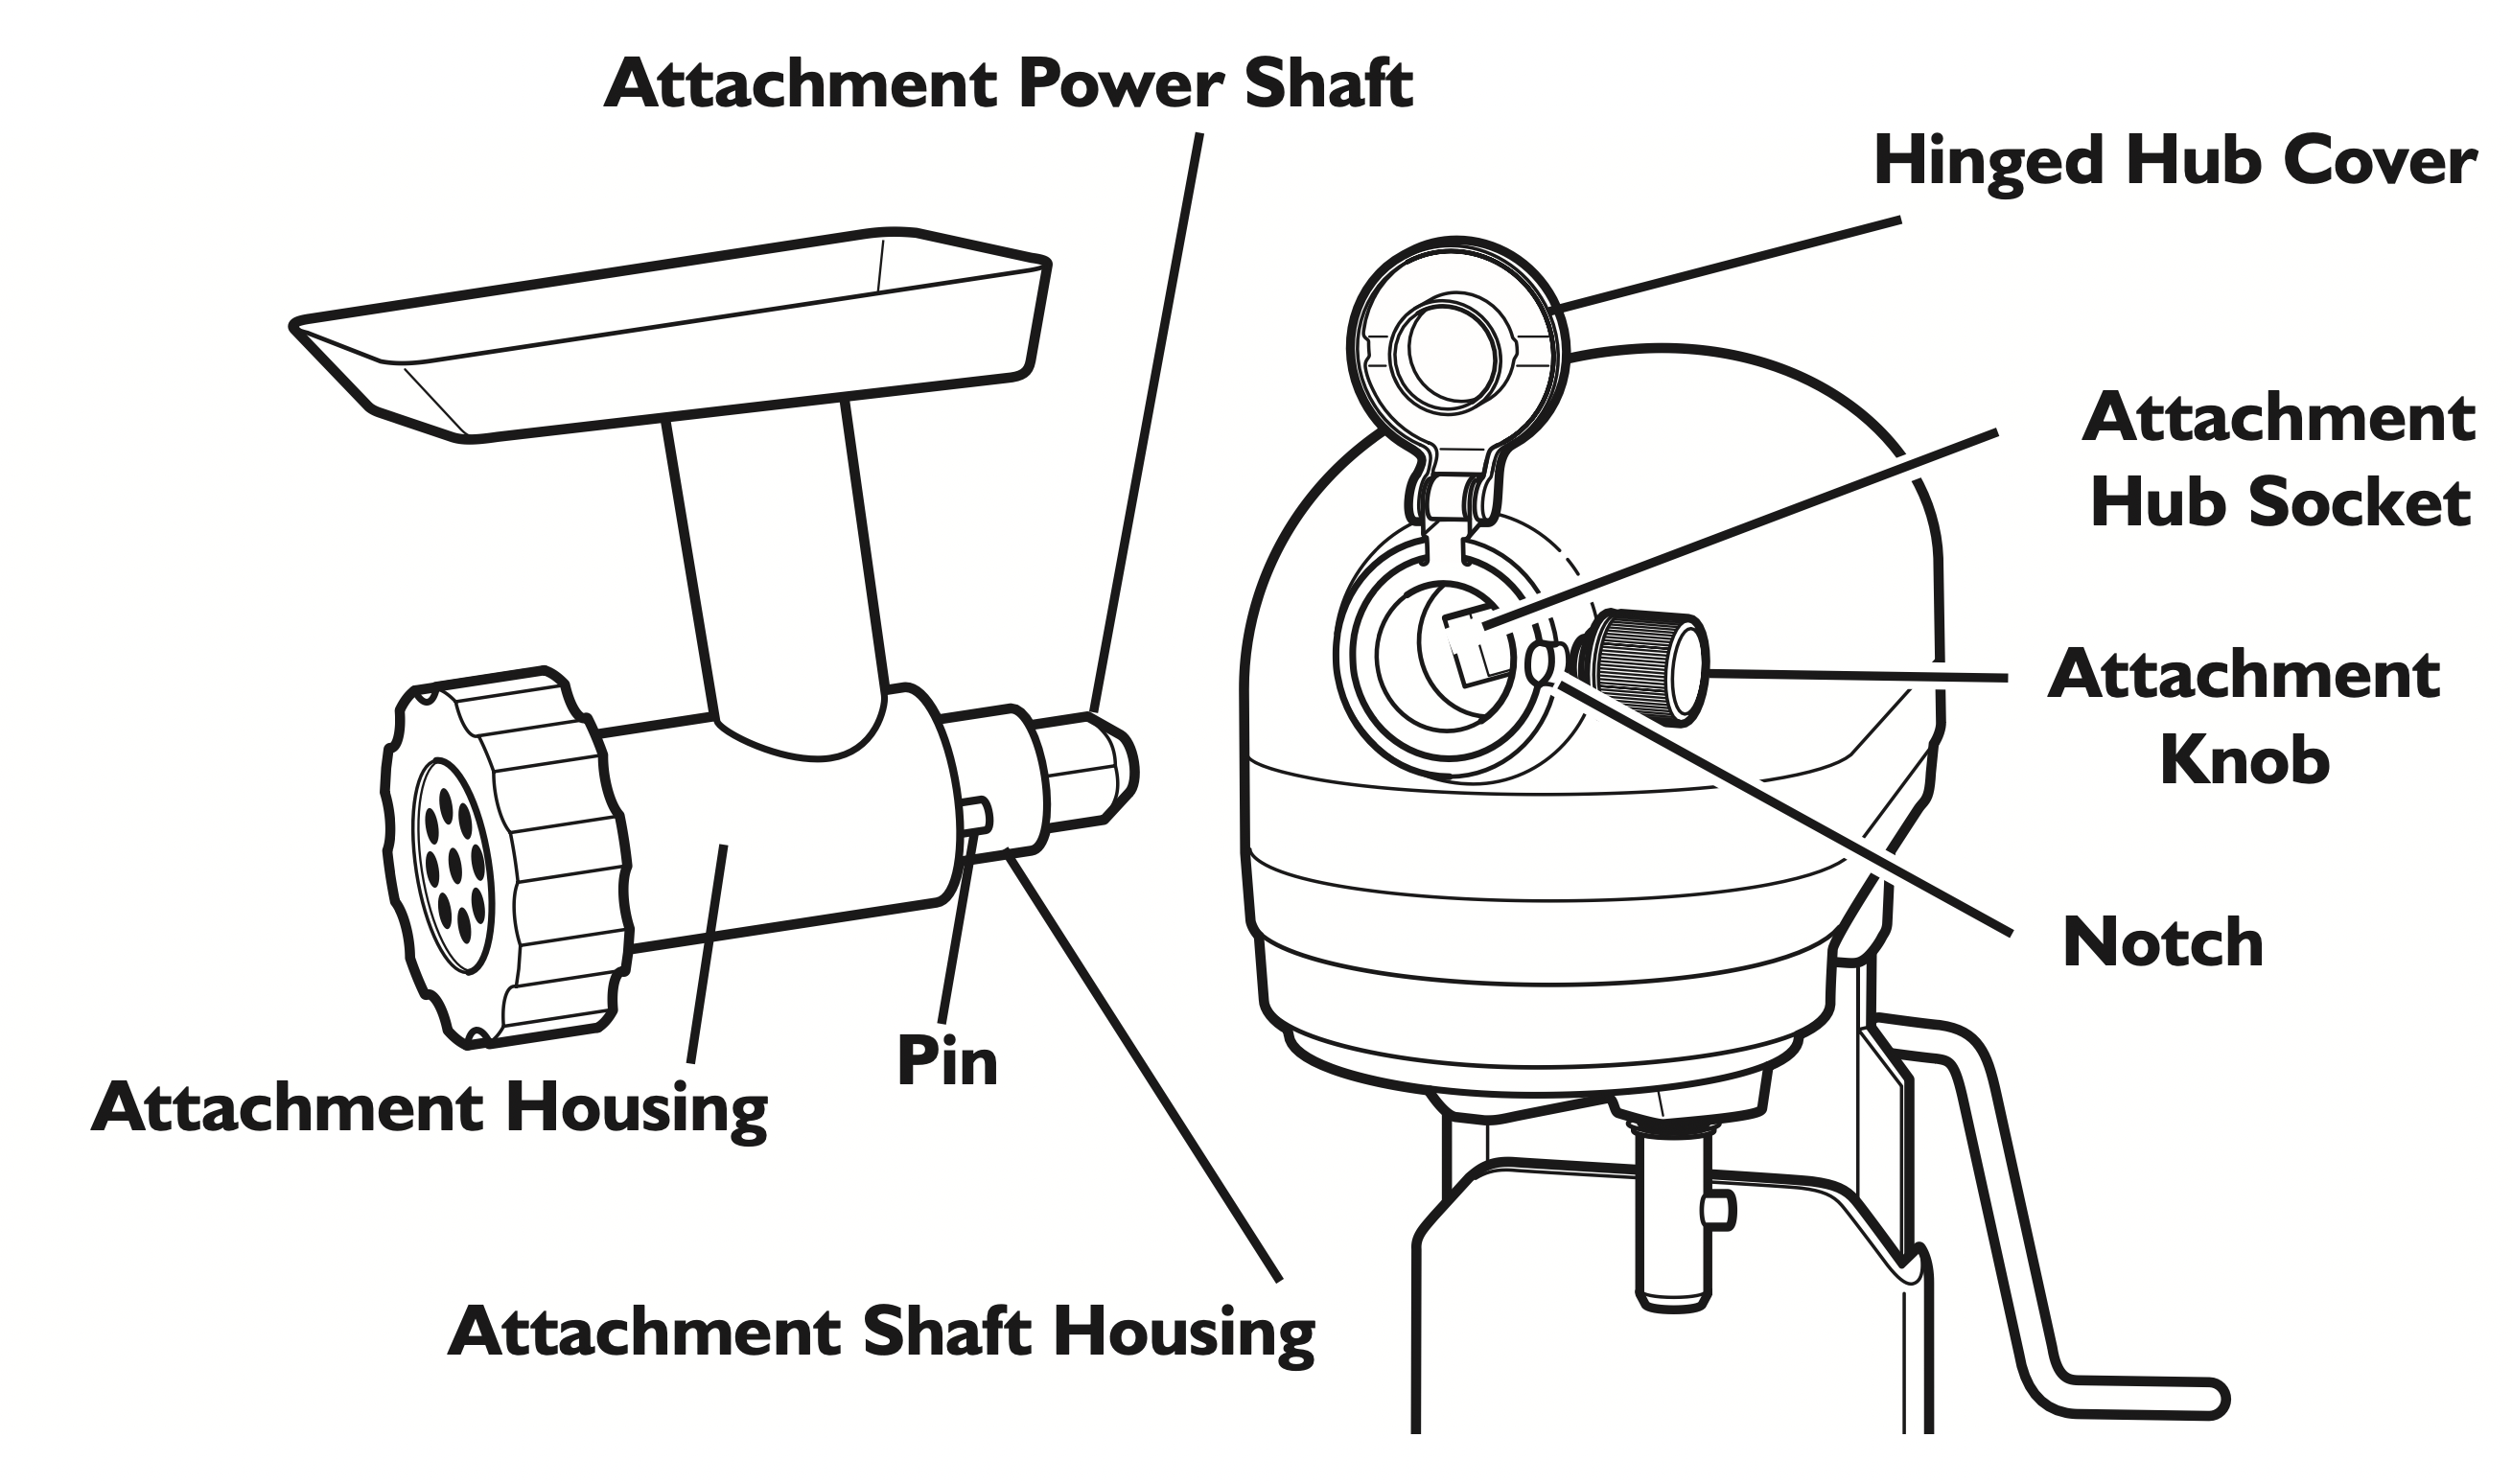
KitchenAid ® attachments are designed to assure long life. The attachment power shaft and hub socket are of a square design, to eliminate any possibility of slipping during the transmission of power to the attachment. The hub and shaft housing are tapered to assure a snug fit, even after prolonged use and wear. KitchenAid ® attachments require no extra power unit to operate them; the power unit is built-in.
See the Instructions that came with your Stand Mixer attachments for speed settings and operating time.
General instructions
WARNING - Electrical Shock Hazard
- Plug into a grounded 3 prong outlet.
- Do not remove ground prong.
- Do not use an adapter.
- Do not use an extension cord.
- Failure to follow these instructions can result in death, fire, or electrical shock.
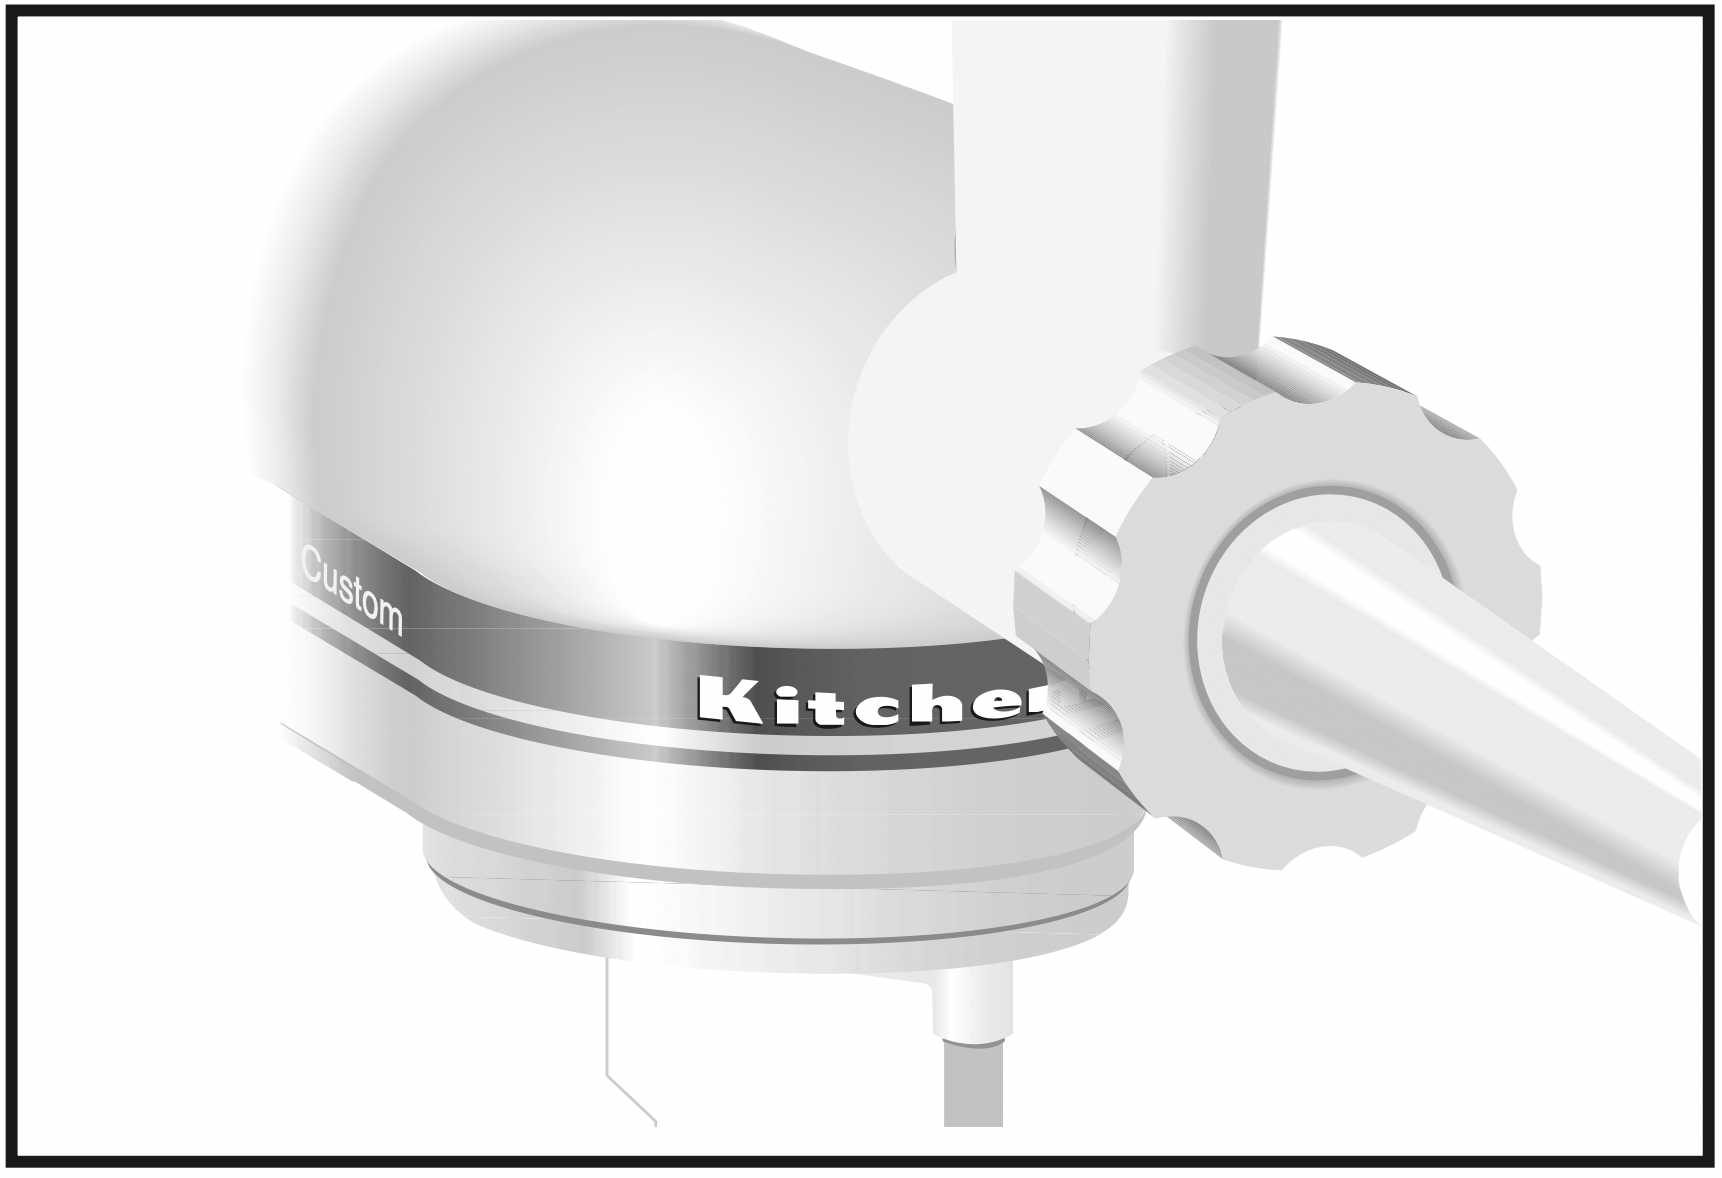
To Attach
- Turn Stand Mixer off and unplug.
- Loosen attachment knob by turning it counterclockwise.
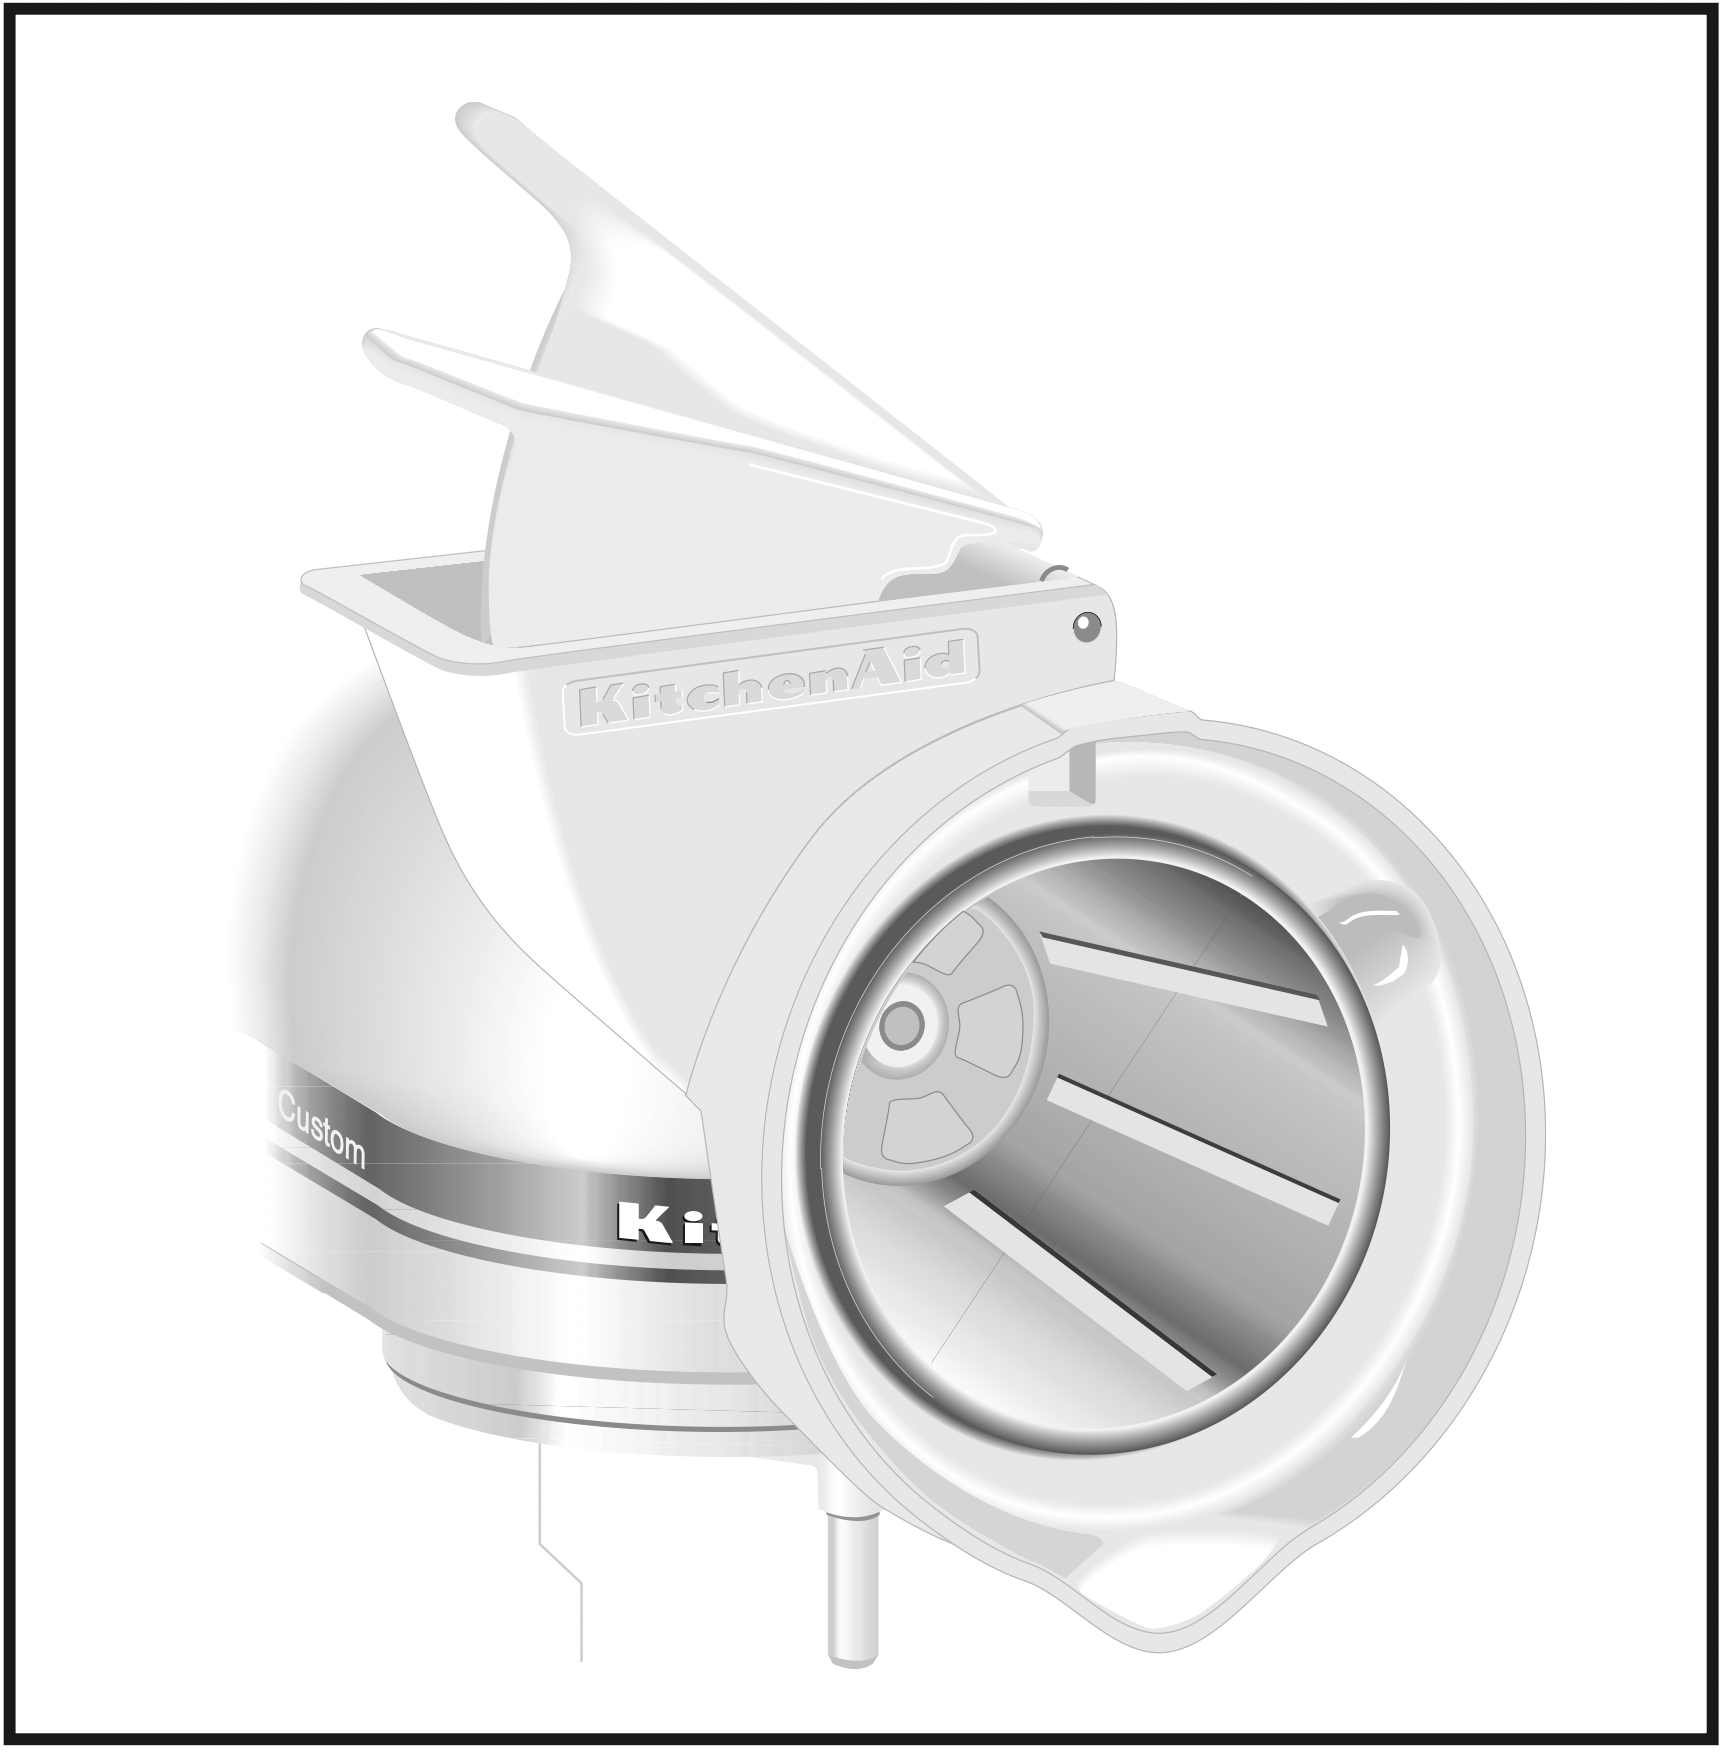
- Flip up hinged hub cover.
- Insert attachment shaft housing into attachment hub, making certain that attachment power shaft fits into square attachment hub socket. It may be necessary to rotate attachment back and forth. When attachment is in proper position, the pin on the attachment will fit into the notch on the hub rim.
- Tighten attachment knob by turning clockwise until attachment is completely secured to Stand Mixer.
- Plug into a grounded 3 prong outlet.
To Remove
- Turn Stand Mixer off and unplug.
- Loosen attachment knob by turning it counterclockwise. Rotate attachment slightly back and forth while pulling out.
- Replace attachment hub cover.
Tighten attachment knob by turning it clockwise.
ATTACHMENTS GUIDE
Multifunction Attachment Pack
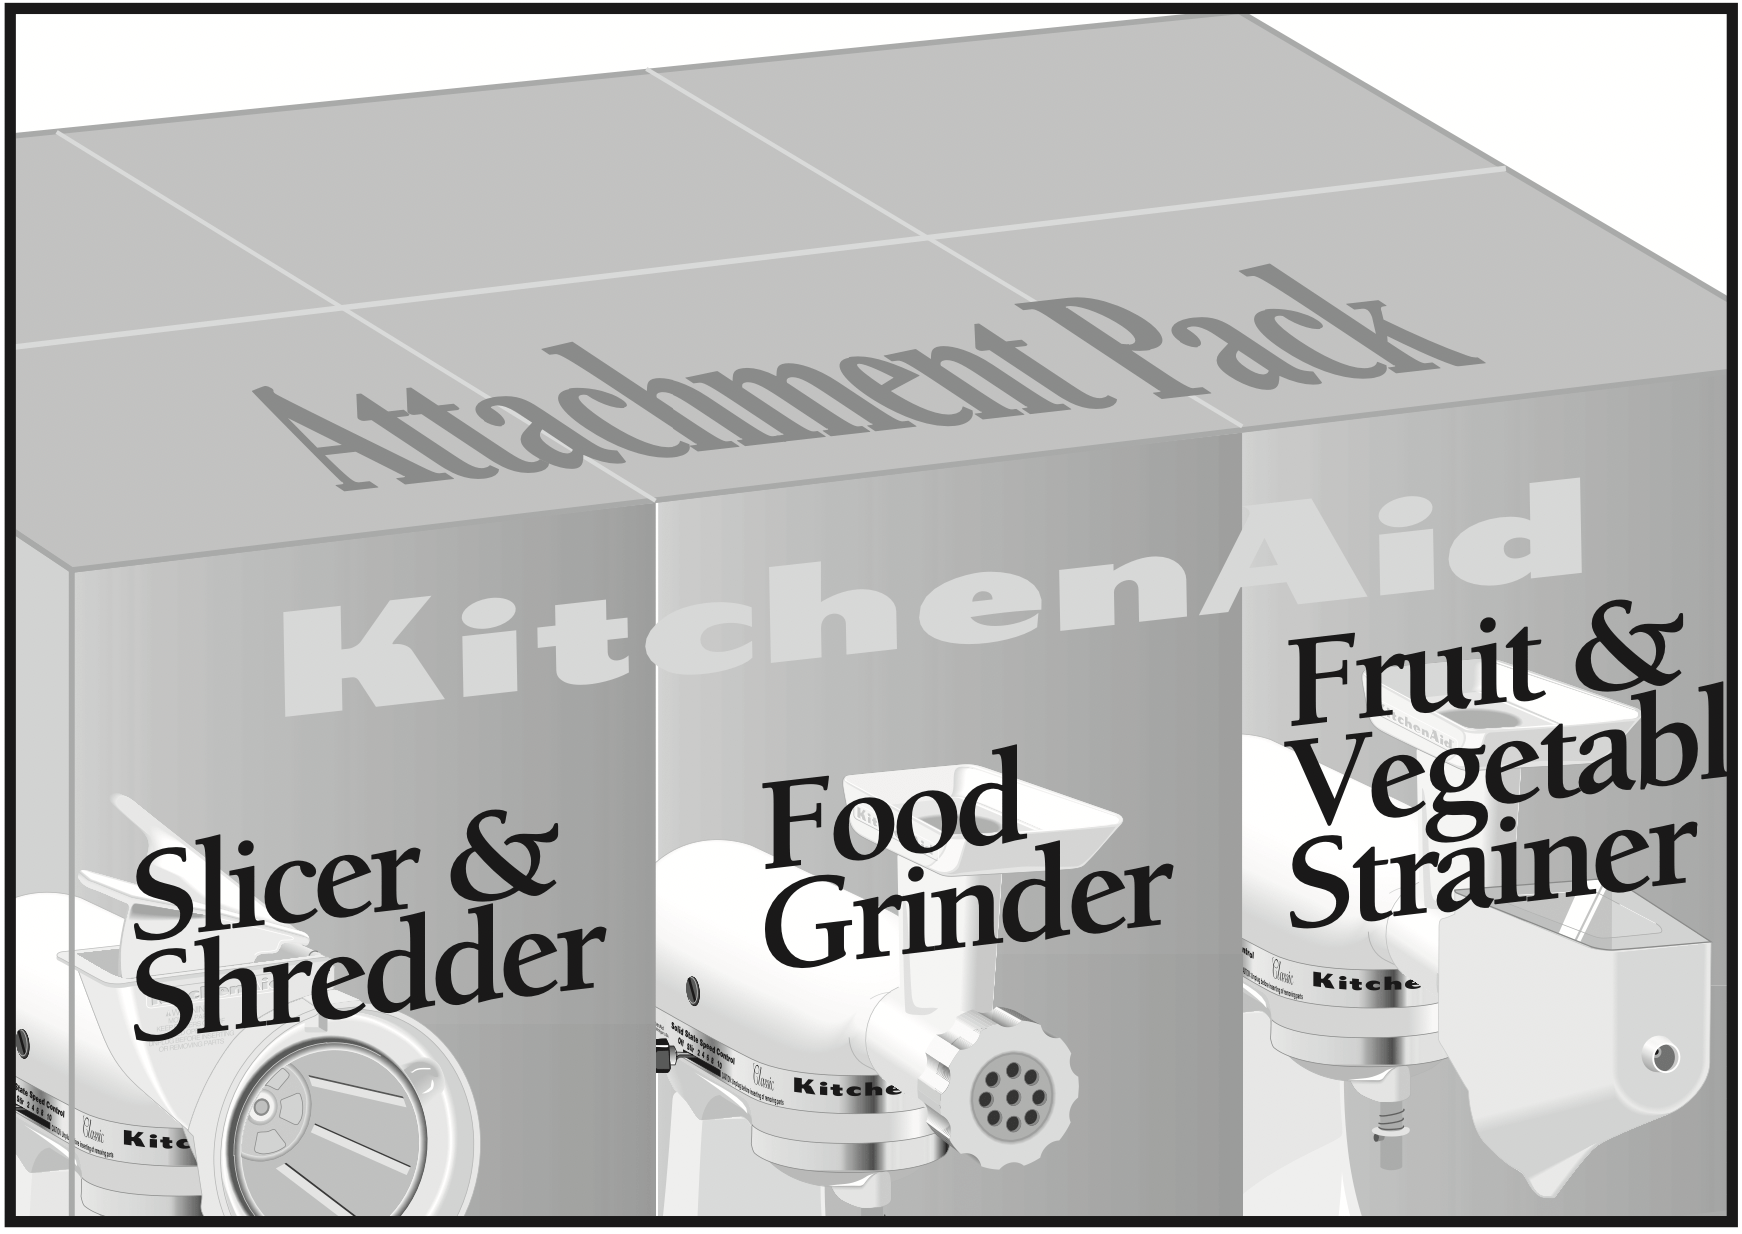
Model FPPA
Three popular KitchenAid ® attachments have been packaged in one carton. It includes a Rotor Slicer/Shredder (RVSA), Food Grinder (FGA), and Fruit/Vegetable Strainer Parts (FVSP).
Food Grinder
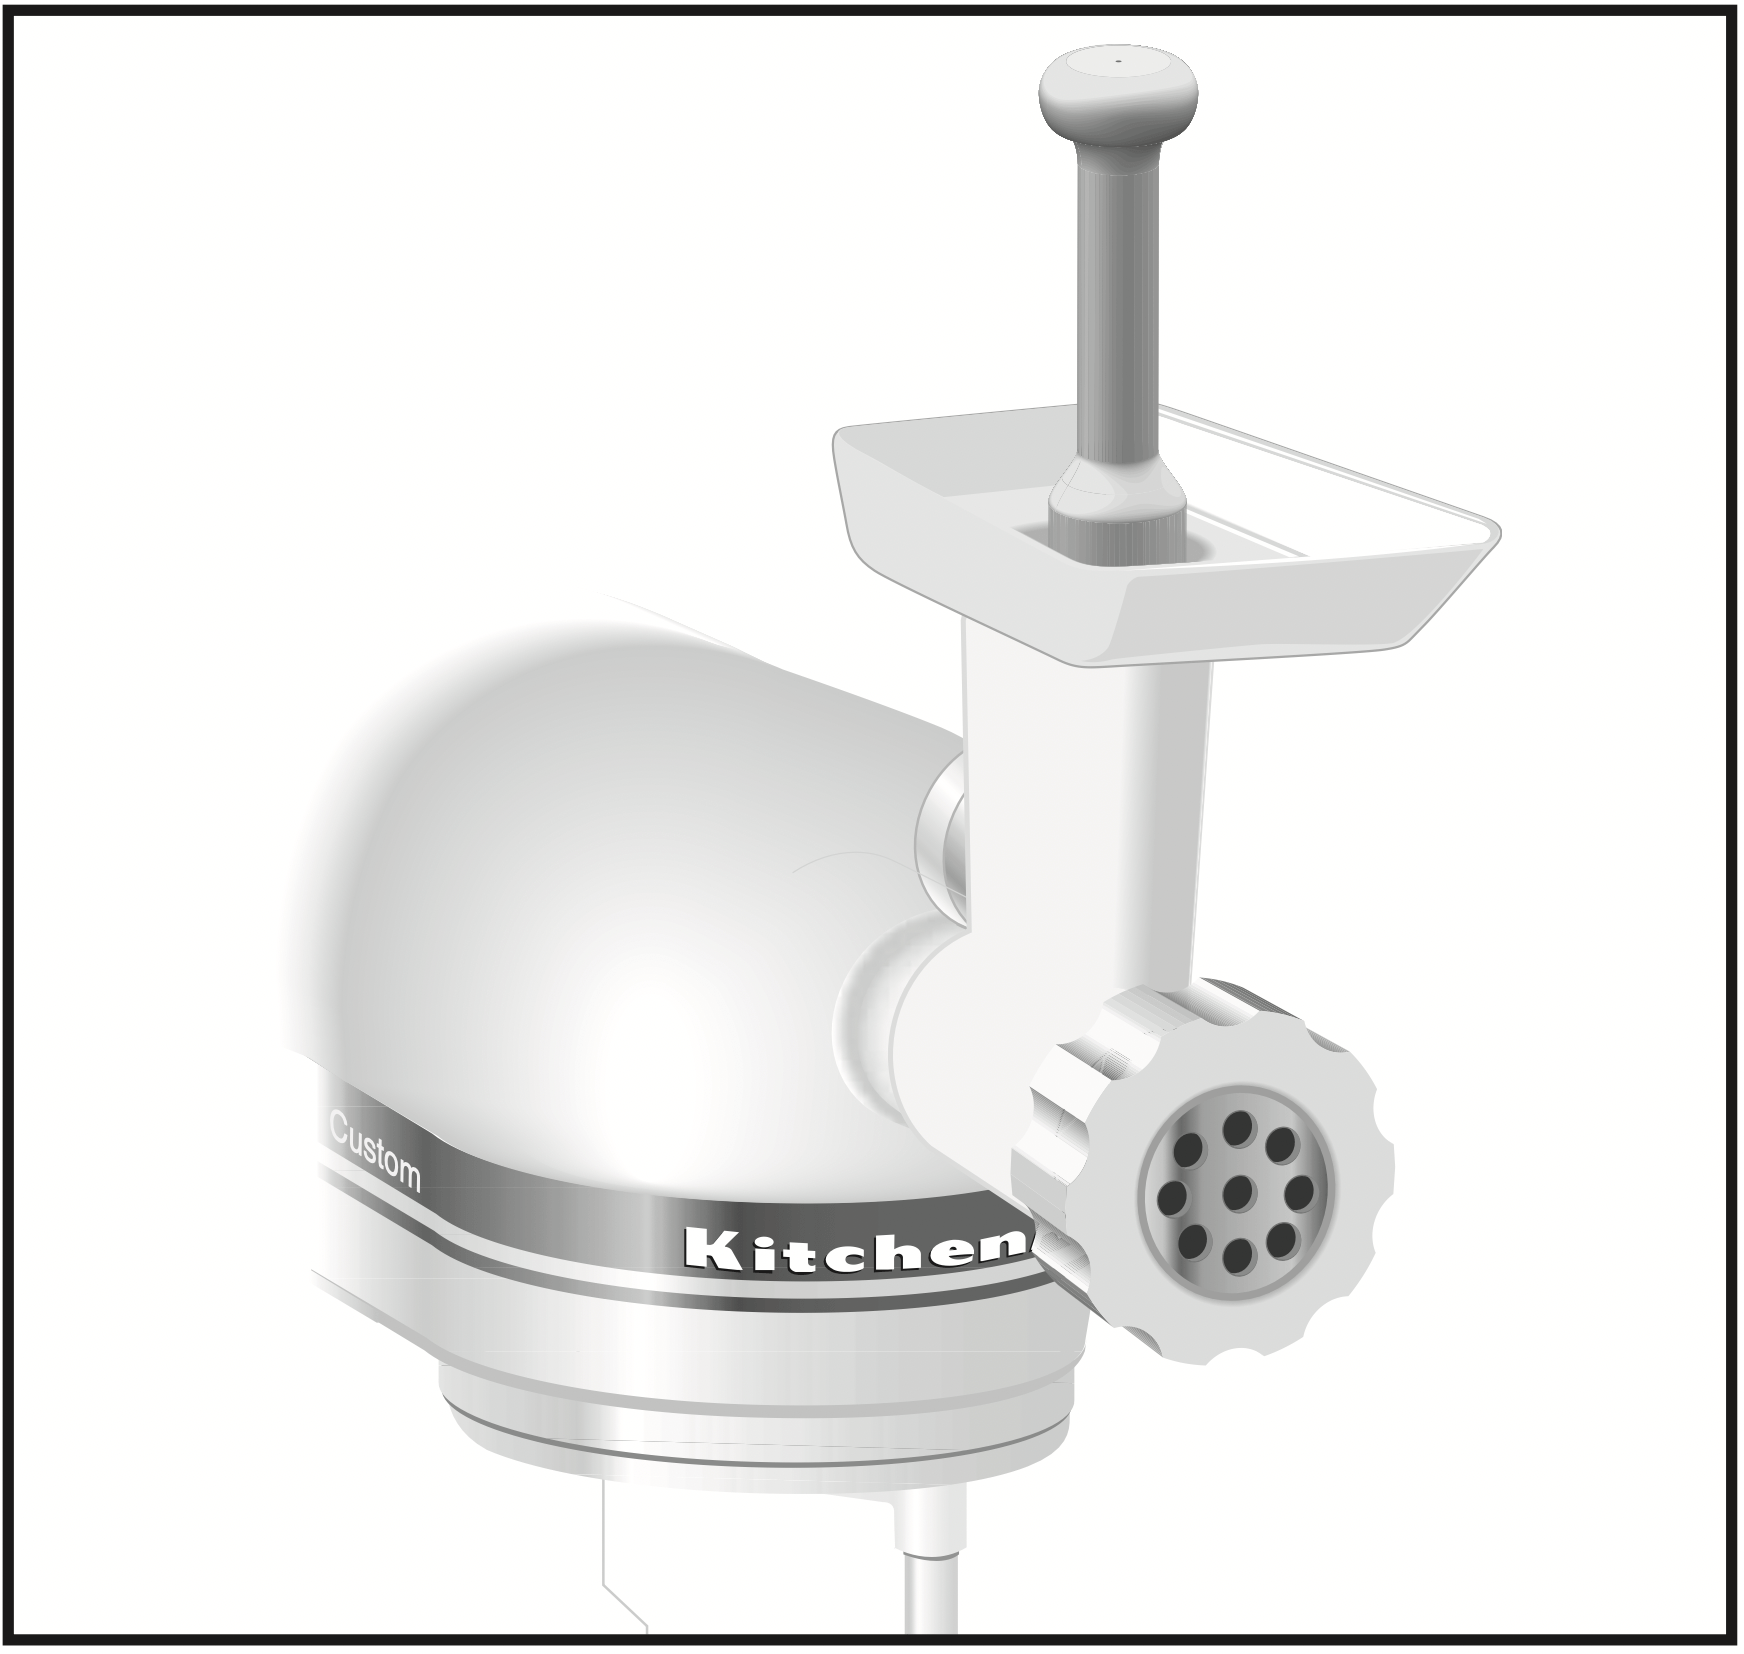
Model FGA
Grinds meat, firm fruits and vegetables, and dry bread.
Fruit/Vegetable Strainer
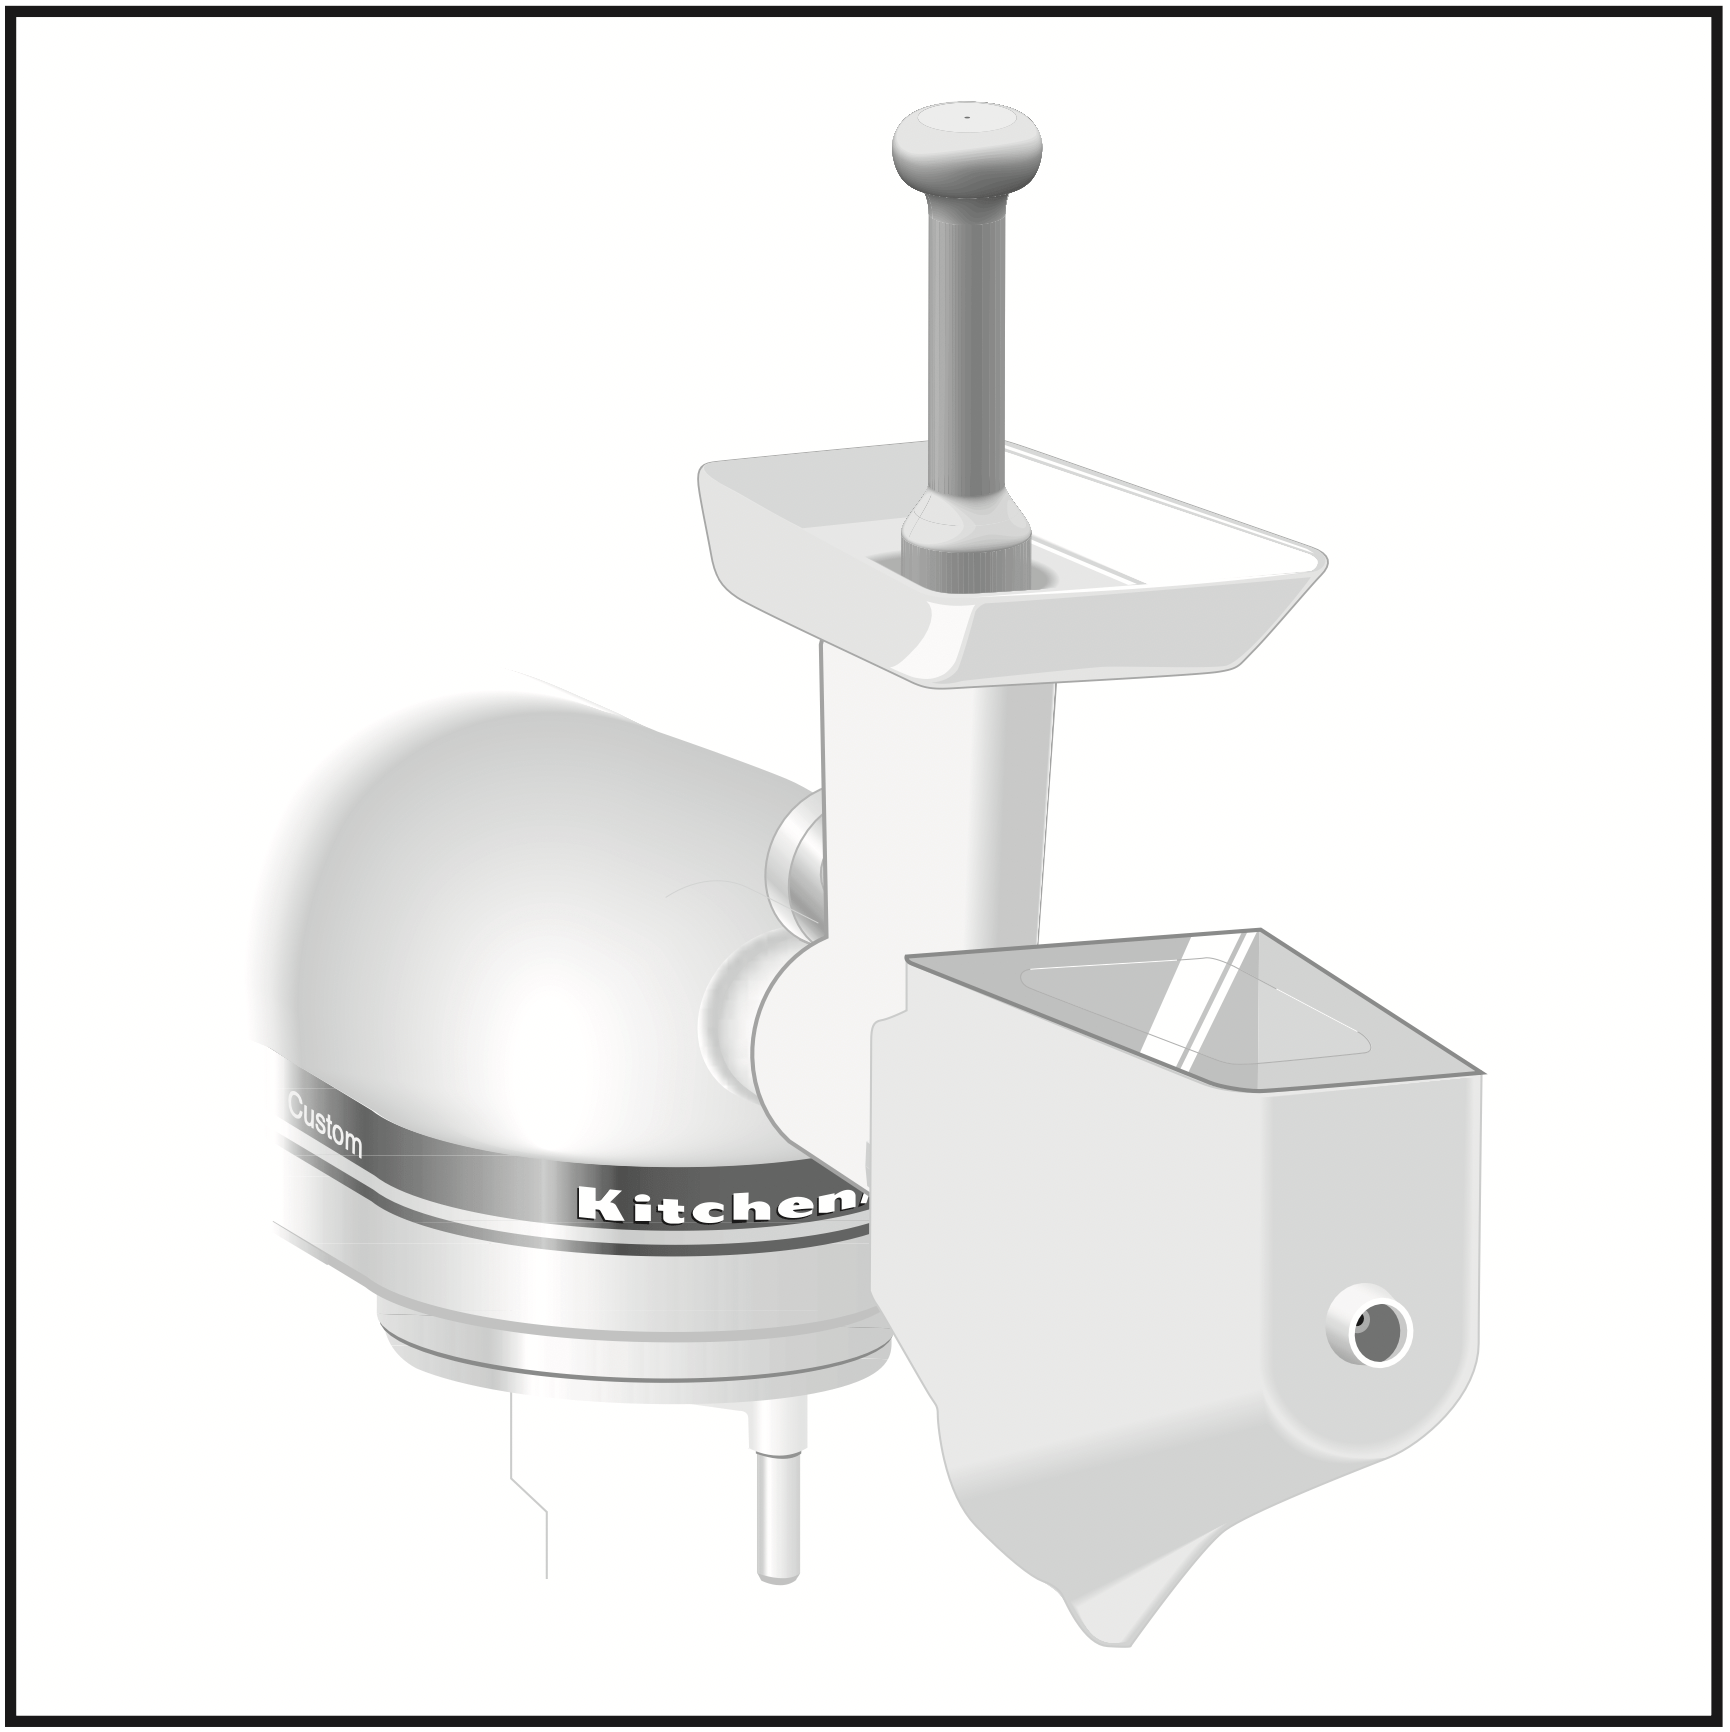
Model FVSFGA
Makes preparing jams, purées, sauces, and baby foods quick and easy. Comes with Food Grinder.
Food Tray
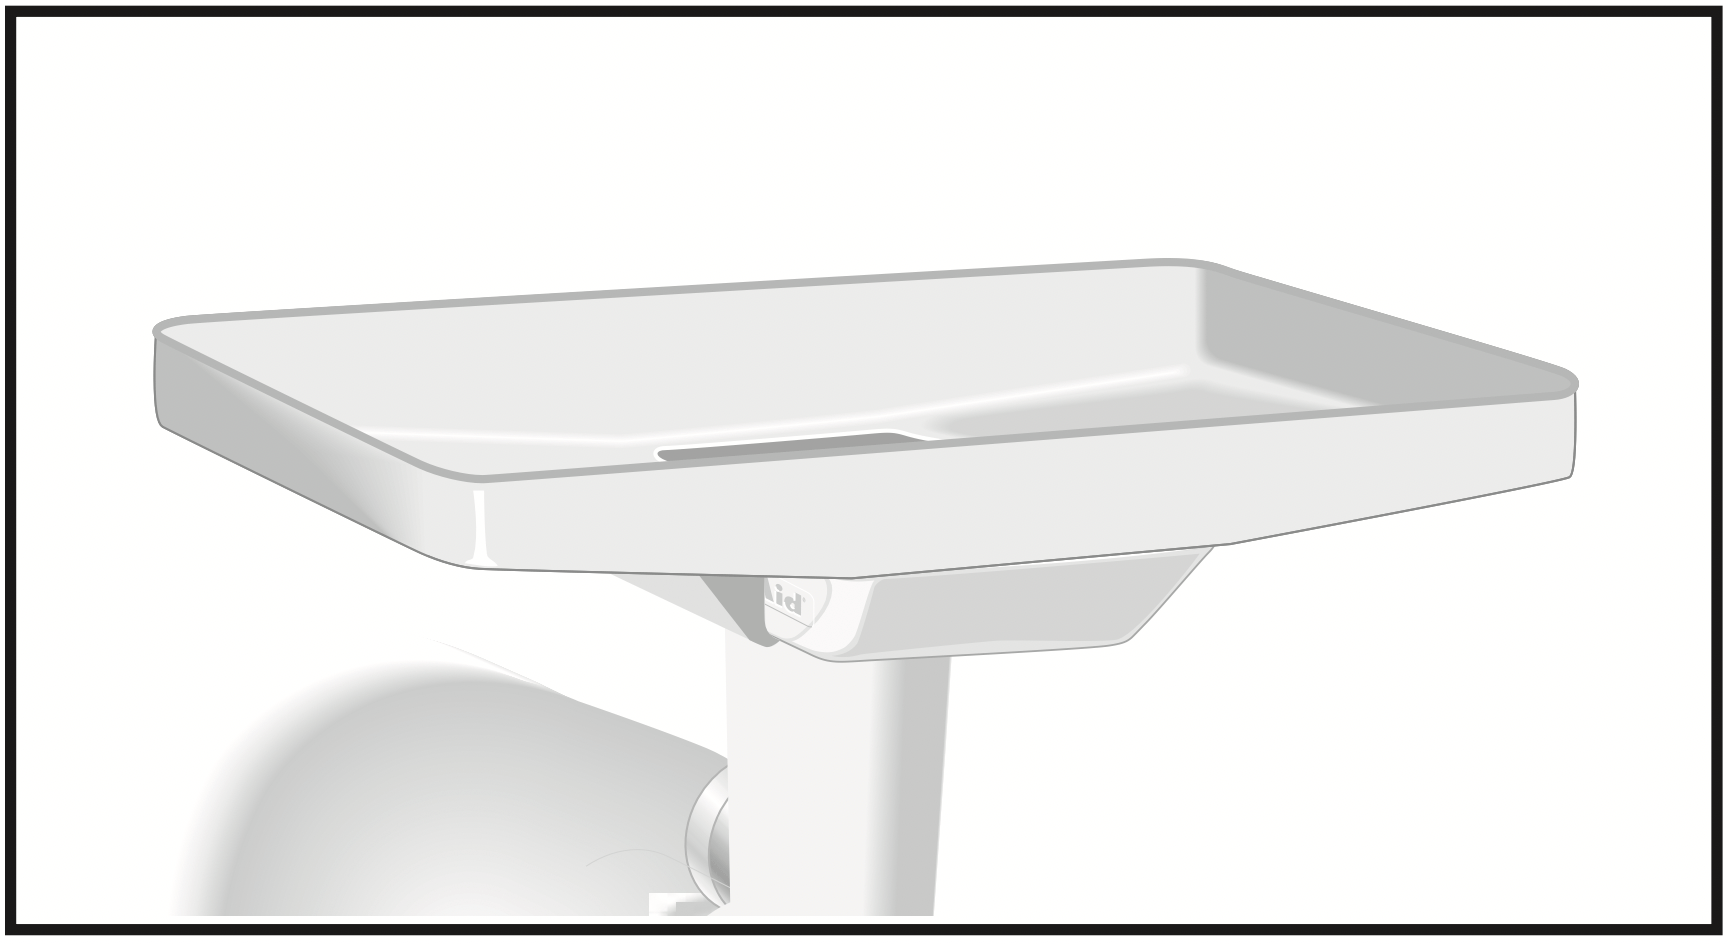
Model FT
Holds large quantities of food for quicker and easier juicing, puréeing, and grinding. For use with FGA.
Sausage Stuffer
Model SSA
3/8" (1 cm) to 5/8"(1.5 cm) stuffing tubes make Bratwurst, Kielbasa, Italian, or Polish Sausage and breakfast links. For use with FGA.
Rotor Slicer/Shredder
Model RVSA
Includes 4 cones: thin and thick slicer, fine and coarse shredder.
Grain Mill
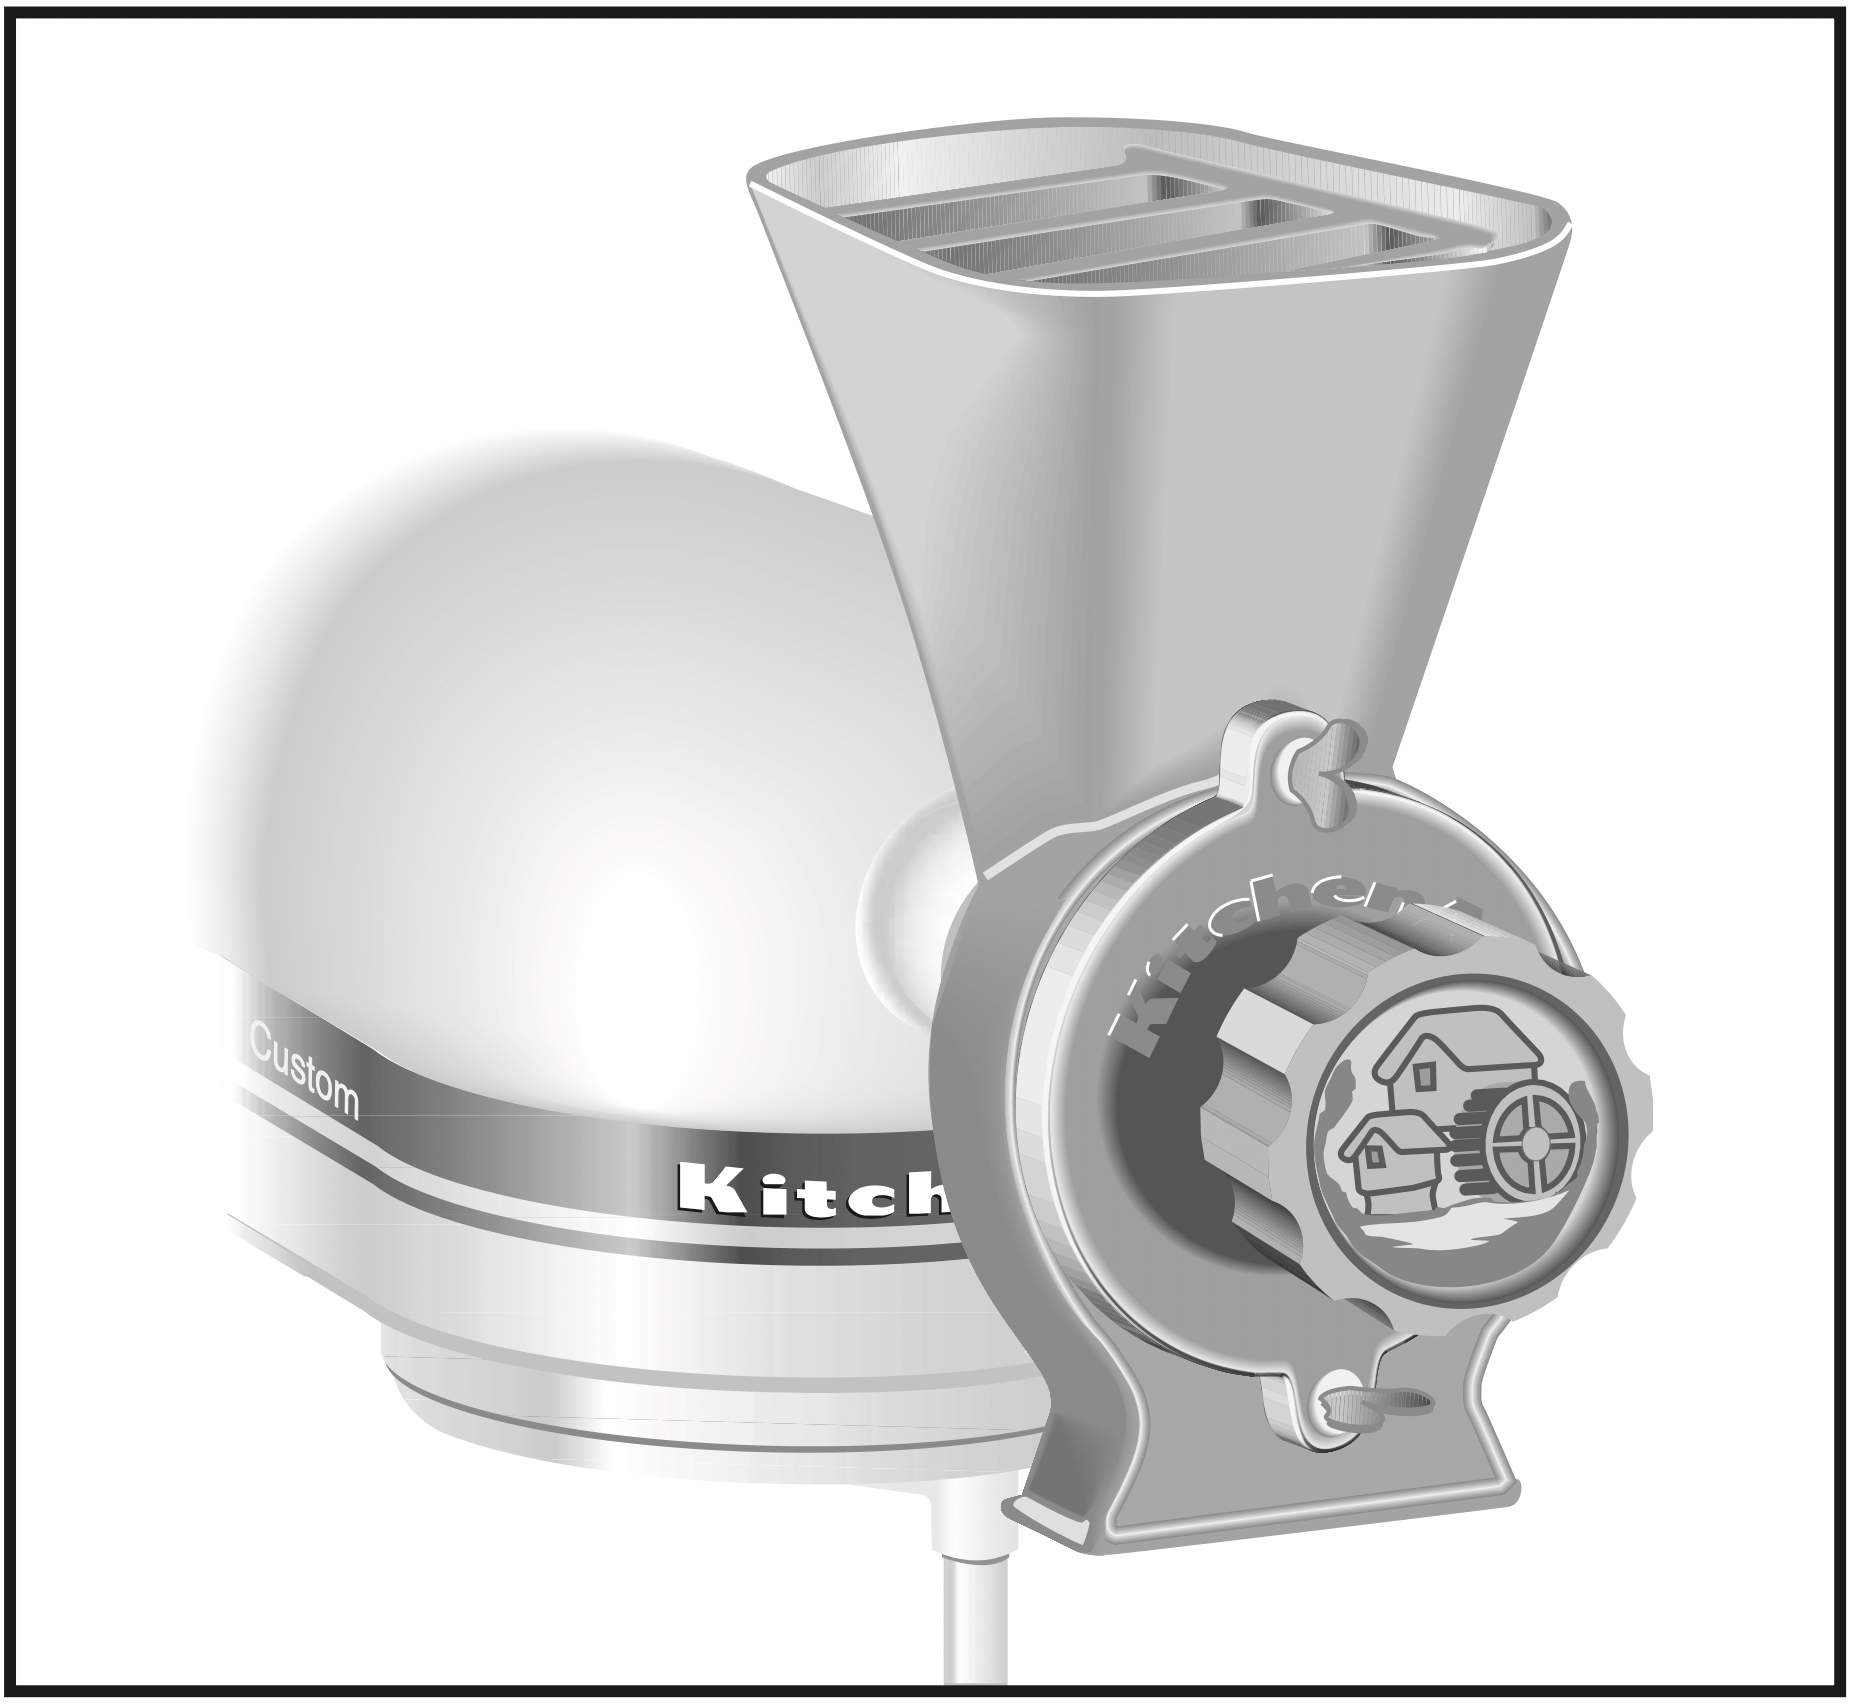
Model KGMA
Grinds low-moisture grains from very fine to extra coarse textures.
Pasta Roller Set
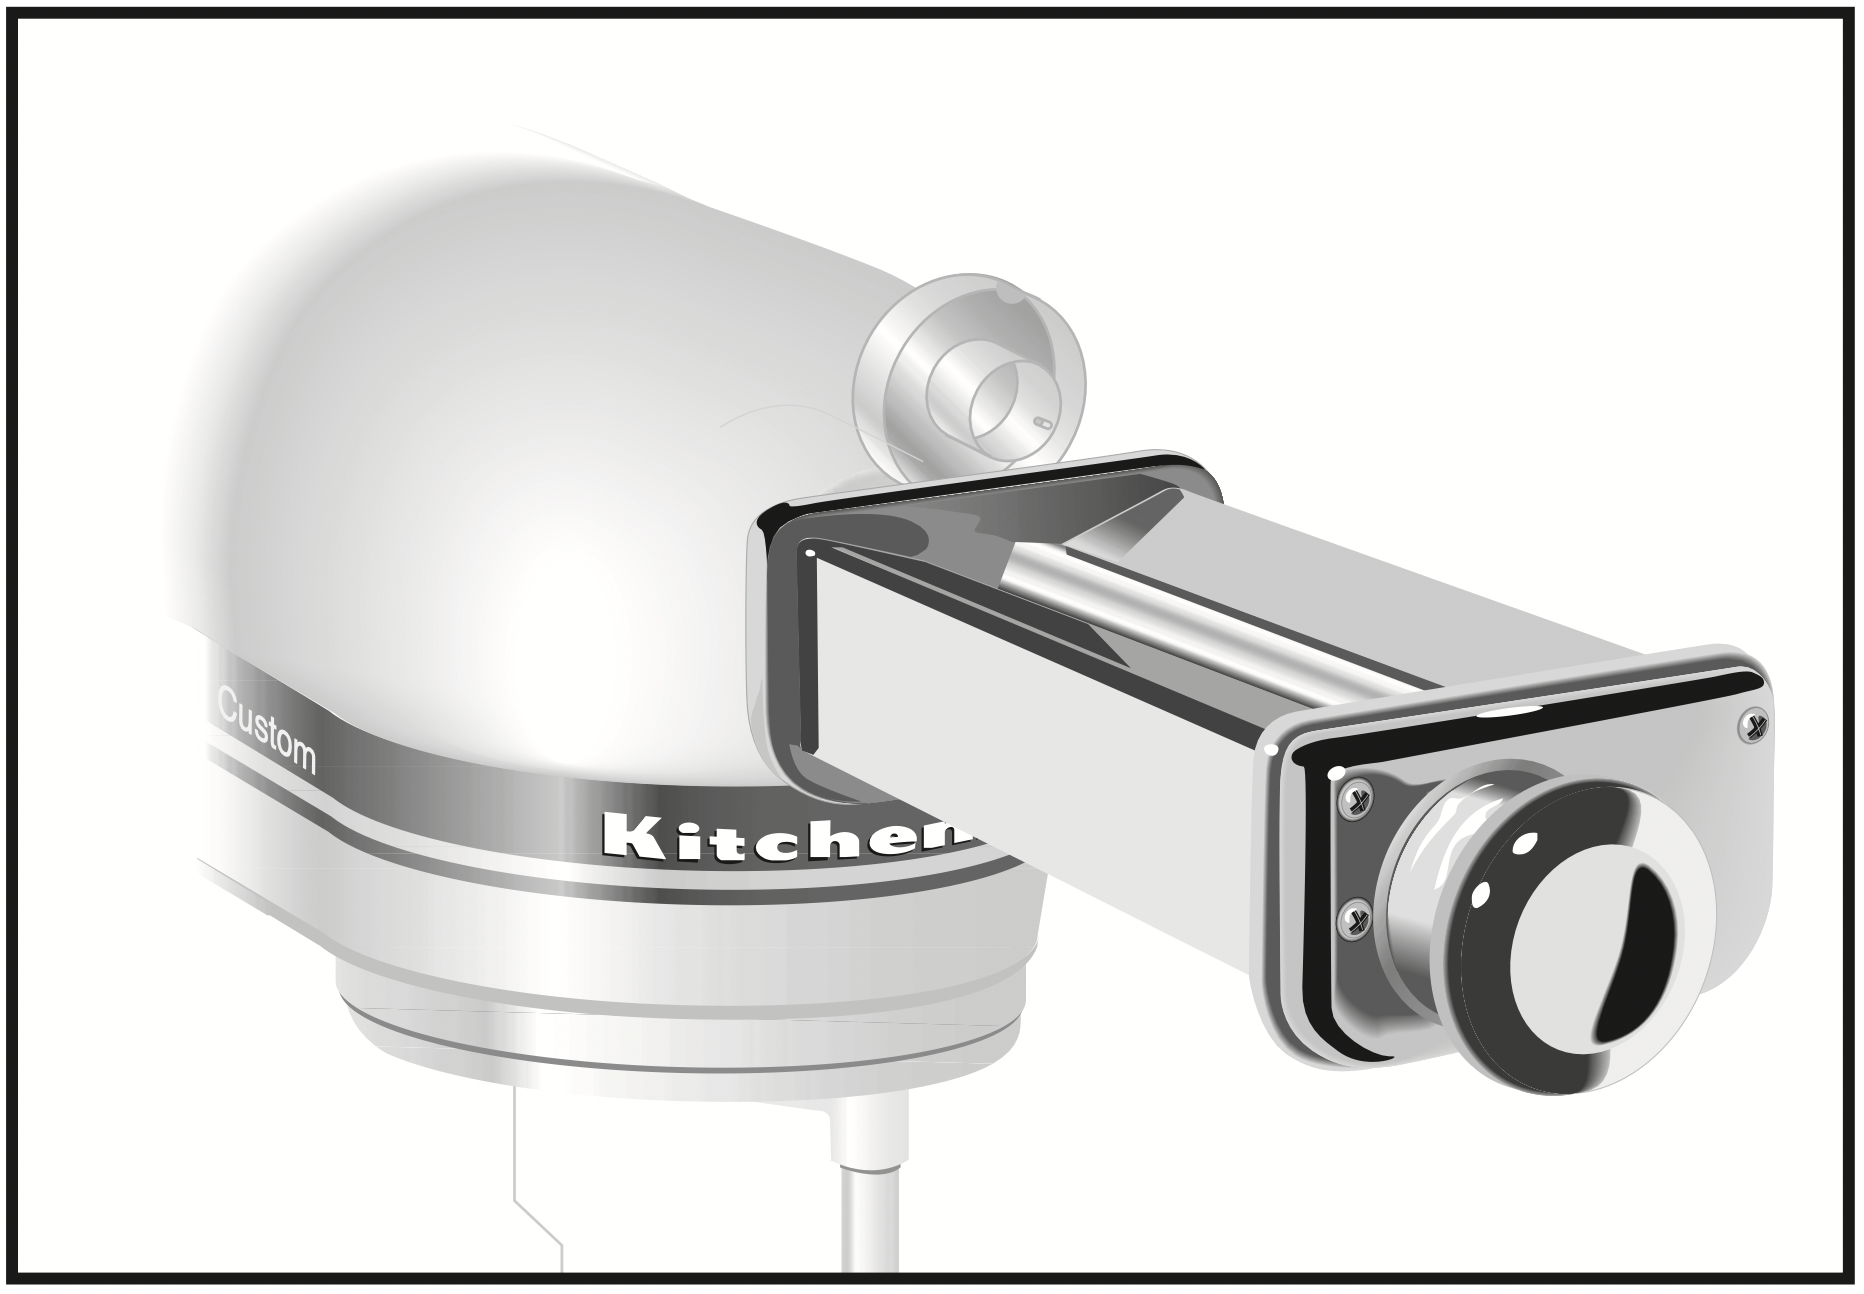
Model KPRA
Makes lasagna noodles, fettuccini, and linguine fini. 3 piece set includes Roller, Fettuccine Cutter, and Linguine Fini Cutter.
Citrus Juicer
Model JE
Juices citrus fruits quickly and thoroughly; strains out pulp.
Pouring Shield
Model KN2PS
(Fits all 7 qt. wide bowl-lift models) Minimizes splash-out when adding ingredients.
CARE AND CLEANING
Bowl, flat beater, stainless steel wire whip, and spiral dough hook may be washed in an automatic dishwasher. Or, clean them thoroughly in hot sudsy water and rinse completely before drying. Do not store beaters on shaft.
NOTE: Always be sure to unplug stand mixer before cleaning. Wipe stand mixer with a soft, damp cloth. Do not use household/commercial cleaners. Do not immerse in water. Wipe off beater shaft frequently, removing any residue that may accumulate.
Cleaning the Pouring Shield*
Wash in warm, sudsy water. If you wish, you may place on the top rack of your dishwasher.
TROUBLESHOOTING
Please read the following before calling your service center.
- The Stand Mixer may become warm during use. Under heavy loads with extended mixing time periods, you may not be able to comfortably touch the top of the Stand Mixer. This is normal.
- The Stand Mixer may emit a pungent odor, especially when new. This is common with electric motors.
- If the flat beater hits the bowl, stop the Stand Mixer. See the “Beater to Bowl Clearance” section.
Keep a copy of the sales receipt showing the date of purchase. Proof of purchase will assure you of in-warranty service.
If your Stand Mixer should malfunction or fail to operate, please check the following:
- Is the Stand Mixer plugged in?
- Is the fuse in the circuit to the Stand Mixer in working order?
If you have a circuit breaker box, be sure the circuit is closed.
- Turn the Stand Mixer off for 10-15 seconds, then turn it back on.
If the mixer still does not start, allow it to cool for 30 minutes before turning it back on.
- If the problem is not due to one of the above items, see the “Arranging for Service” section.
- Do not return the Stand Mixer to the retailer, as they do not provide service.