Loading ...
Loading ...
Loading ...
25
OPERATION
EN
position. This stops the supply of water so you
can go over areas that are already wet.
WARNING
• To avoid injury, do not attach the mop pad while
the mop attachment plate is rotating.
CAUTION
• Do not let the appliance stand on the floor while
the wet mop pads are attached. Doing so may
result in damage or swelling to wood flooring.
Using with the Mop Nozzle
1
Attach the water tank and mop pads to the
mop nozzle.
2
Set the water adjustment button to the
STOP
position.
3
Press the
Power
button to start cleaning.
Drying the Water Tank and Mop
Pads
Drying the Water Tank
When cleaning is completed, make sure to empty
the water tank and dry it before storing the mop
nozzle.
CAUTION
• Turn the water inlet caps to make sure they
remain open when storing the water tank. If
caps are closed and not properly dried, it may
cause odour.
• Do not remove the water inlet caps from the
water tank. Caps may tear.
• Do not add detergent, vinegar or baking soda to
the water tank when washing. It is not easily
removed in the water tank, which may soil the
floor.
• After cleaning, wipe off any remaining water on
the water supply inlet
a
on the mop nozzle with
a soft cloth. The water could drip onto the floor
and damage it.
• Do not pull or stretch the rubber gasket on the
water supply inlet. Doing so may tear or damage
it.
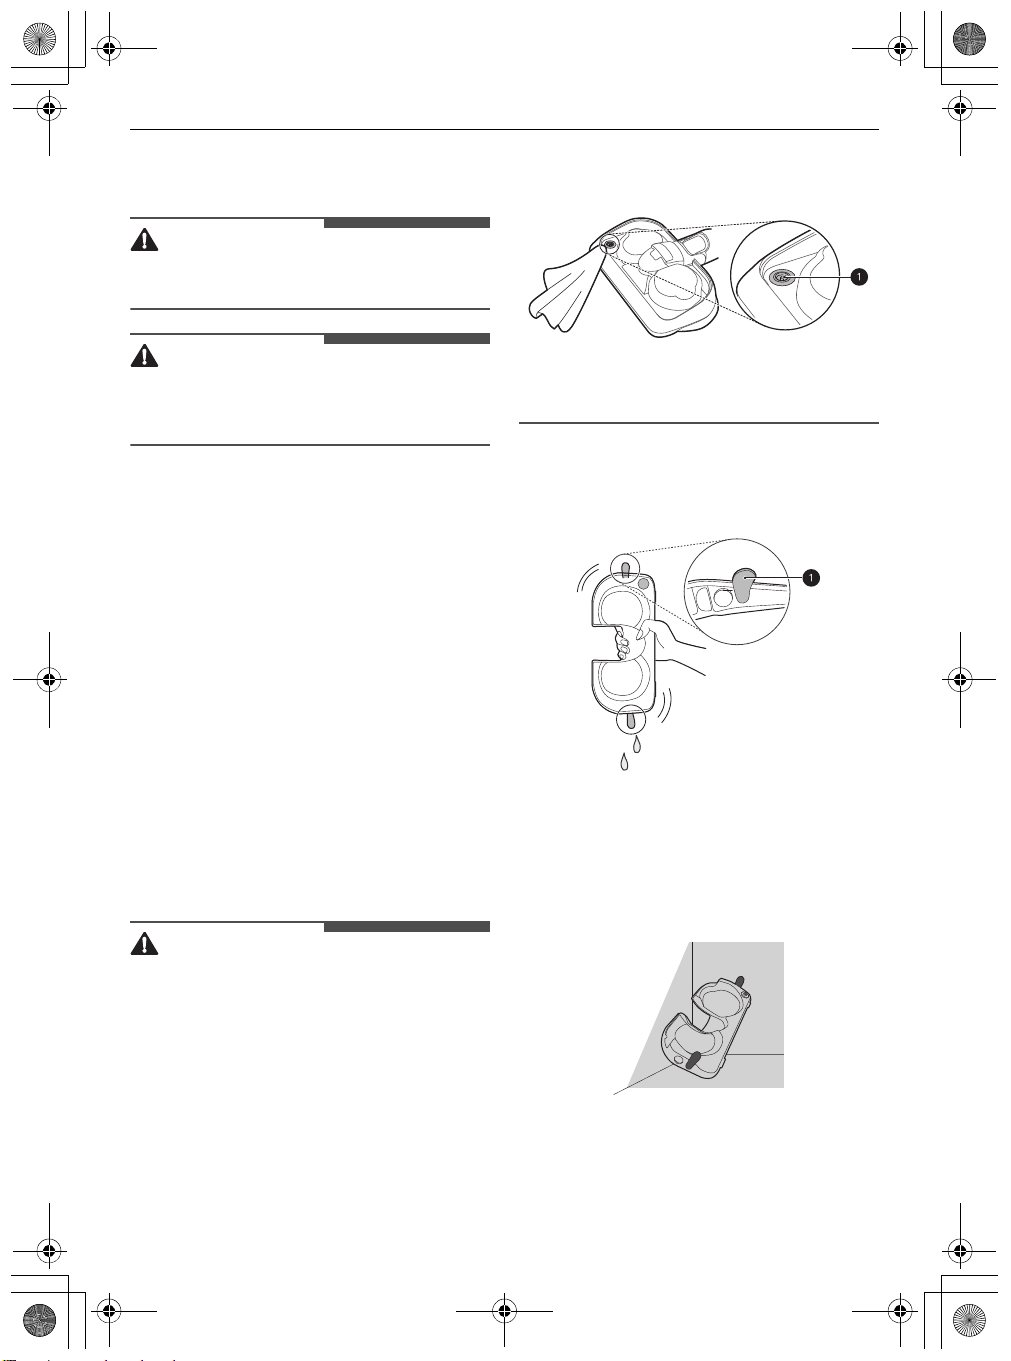
1
Open the 2 water inlet caps
a
on the side of
the water tank and empty the water tank.
Shake the water tank to remove the remaining
water.
2
Leave the 2 water inlet caps open and allow the
water tank to dry in a well-ventilated area out
of direct sunlight for at least 24 hours.
• Keep the water tank after water is
completely empty and dry. Moisture or
residual water in the tank may cause odour.
Drying the Mop Pads
After using the mop pads, hand wash them and
allow them to dry before storing them.
global_main.book.book Page 25 Monday, July 13, 2020 4:53 PM
Loading ...
Loading ...
Loading ...