Loading ...
Loading ...
Loading ...
11
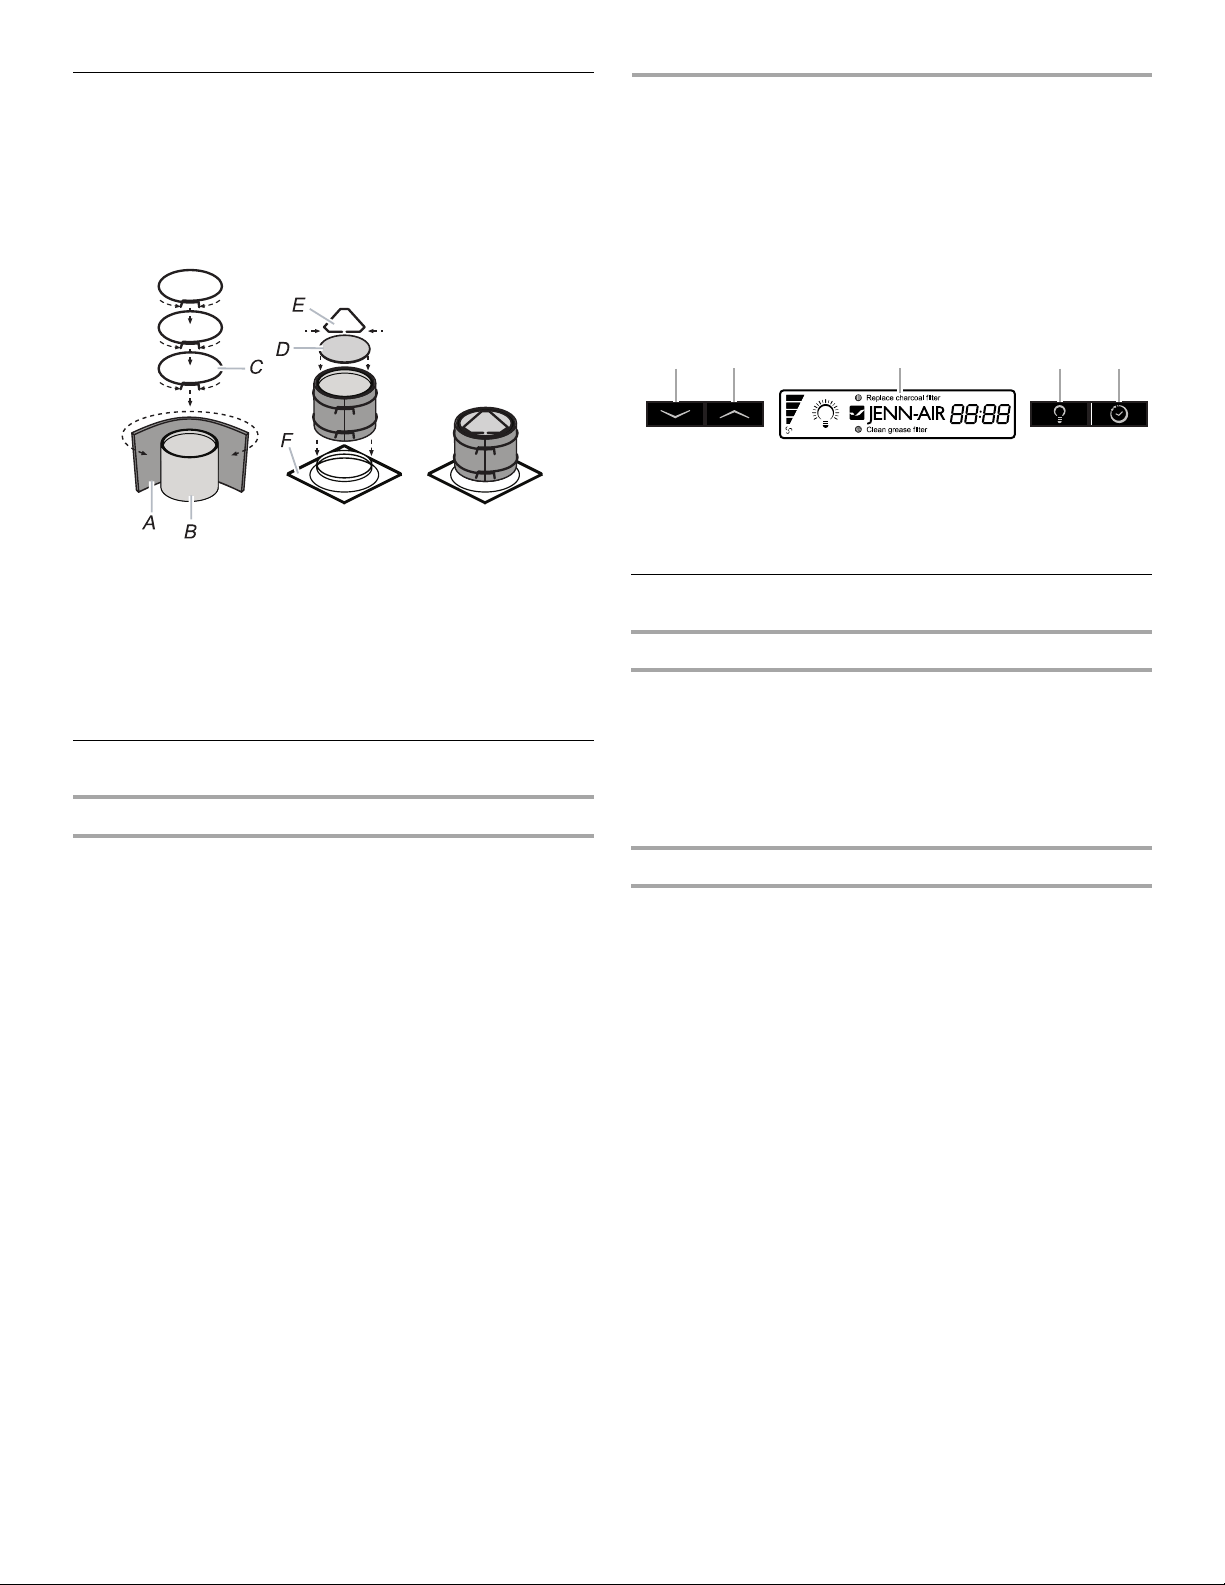
Install Filters
1. For non-vented (recirculating installations) install charcoal
filter, wrapping it around the grease filter.
2. Place the charcoal filter mat around the grease filter and fix it
in place by using the cap lock springs provided.
3. Position the upper cap and fix it in place using the cap lock
spring provided.
4. For all installations, install the grease filter. See “Range Hood
Care” section.
Complete Installation
Check Range Hood Operation
If range hood does not operate, check to see whether a circuit
breaker has tripped or a household fuse has blown.
NOTE: To get the most efficient use from your new range hood,
read the “Range Hood Use” section.
RANGE HOOD USE
The range hood is designed to remove smoke, cooking vapors
and odors from the cooktop area. For best results, start the hood
before cooking and allow it to operate several minutes after the
cooking is complete to clear all smoke and odors from the
kitchen.
Control Panel
The range hood controls are located on the front side of the
canopy.
Display
Grease Filter Saturation Alarm
After 30 hours of fan function, the display will show “Clean
Grease Filter” when the fan is active. When this icon shows in the
display, the installed grease filters should be washed. See
“Range Hood Care” section.
■ To reset the grease filter saturation alarm, press and hold the
POWER INCREASE button for 5 seconds. The “Clean Grease
Filter” icon will no longer be displayed.
Charcoal Filter Saturation Alarm
After 120 hours of fan function, the display will show “Replace
Charcoal Filter” when the fan is active. When this icon shows in
the display, the charcoal filters should be replaced. See “Range
Hood Care” section.
■ To reset the charcoal filter saturation alarm, press and hold
the POWER DECREASE button for 5 seconds. The “Replace
Charcoal Filter” icon will no longer be displayed.
A. Charcoal filter mat
B. Grease filter
C. Charcoal filter side lock springs
D. Upper cap
E. Cap lock spring
F. Grease filter support
A. Power decrease
B. Power increase
C. Display
D. Light
E. Timer
A
B
C
D
E
Loading ...
Loading ...
Loading ...