Loading ...
Loading ...
Loading ...
5
All specifications and informations are subject to change without notice.
6
All specifications and informations are subject to change without notice.
IV. User Setup
1. Schematic Diagram of Keys
2. Description of Keys' Functions
Note: The physical keys of the specific model shall govern.
1 2 3
4
5
6
7
Power switch: Powers on/off the monitor.
Projection light; Press this key to turn on/off。
When menu is opened, as right or up selection key,the
progress bar value will increases. When the menu is closed,
switch the game front sight
Long bright: normal boot state; flicker: power saving standby state.
2.
When menu is opened, as left or down selection key,
progress bar value will decreases;When menu is closed,
enter the preset mode.
3.
4.
6.
5.
LED
indicator
light
1.
7.
Open the menu;select the function。。
When menu is opened, returning to the previous menu or
pressing this key will exit the entire menu; when menu is closed,
switch the signal source.
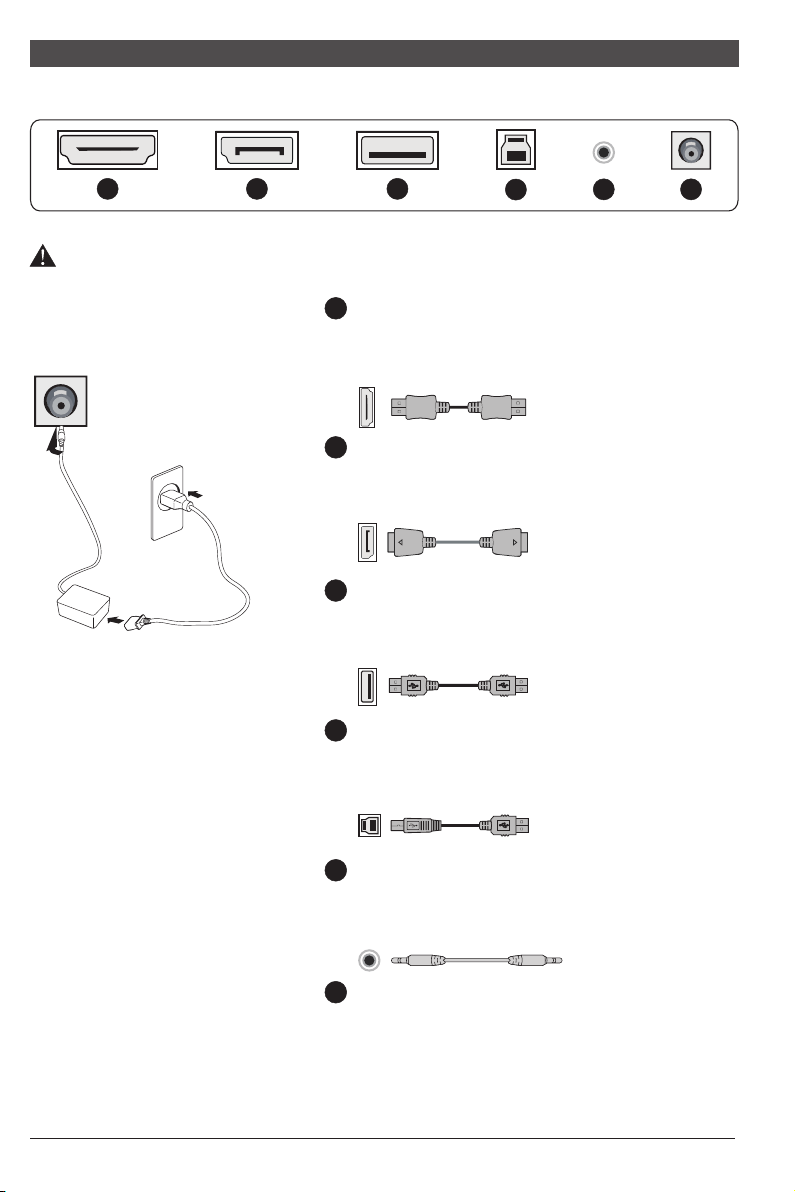
III. Connect the Monitor to PC
(The above pictures are for illustration only and the physical accessories shall govern.)
Before connecting the LCD monitor to the PC, please power down the PC and
the monitor.
* Warning: Always use the power
cord of standard configuration.
Power adapter
2
4
3
1
5 6
HDMI Port
Connect the HDMI cable into the HDMI IN
port into the back of the monitor (this needs
the support of the monitor).
DP Port
Connect the DP cable into the DP IN port of
the monitor (this needs the support of the
monitor).
USB IN Port
Connect the USB cable into the USB IN port
in the back of the monitor (this needs the
support of the monitor).
USB OUT Port
Connect the USB cable into the USB OUTport
in the back of the monitor (this needs the
support of the monitor).
Audio Interface
Connect the AUDIO cable to the AUDIO IN
port in the back of the display (this needs the
support of the monitor).
Power Plug
Connect the power cord of the monitor into the
POWER port in the back of the monitor.
1
2
3
4
5
6
Loading ...
Loading ...
Loading ...