Loading ...
Loading ...
Loading ...
6
Op No.
Sunday Monday ··· Saturday
No. 1
No. 2
···
No. 8
• 8:30
• ON
• 23 °C
• 10:00
• OFF
• 10:00
• OFF
• 10:00
• OFF
• 10:00
• OFF
▲
<Operation 1 settings for
Sunday>
Start the air conditioner at
8:30, with the temperature
set to 23 °C.
<Operation 2 settings for
every day>
Turn off the air conditioner
at 10:00.
▲
˚C
SUN
ON
WEEKLY
PAR-21MAA
ON/OFF
FILTER
CHECK
OPERATION
CLEAR
TEST
TEMP.
MENU
BACK DAY
MONITOR/SET
CLOCK
ON/OFF
2
42 3
A9 78
0
4
1
3
B
1
˚C
SUN
ON
WEEKLY
6
7
5
Shows the selected operation (ON or OFF)
* Does not appear if operation is not set.
Shows the temperature setting
* Does not appear if tempera-
ture is not set.
2. Operation
2.10. Using the timer [For wired remote controller]
This section explains how to set and use the timer. You can use Function
Selection of remote controller to select which of three types of timer to use:
1 Weekly timer, 2 Simple timer, or 3 Auto Off timer.
For information about how to set the Function Selection of remote control-
ler, refer to section 2.13. [4]–3 (3).
2.10.1. Using the Weekly Timer
■ The weekly timer can be used to set up to eight operations for each day
of the week.
• Each operation may consist of any of the following: ON/OFF time
together with a temperature setting, or ON/OFF time only, or tem-
perature setting only.
• When the current time reaches a time set at this timer, the air condi-
tioner carries out the action set by the timer.
■ Time setting resolution for this timer is 1 minute.
Note:
*1. Weekly Timer/Simple Timer/Auto Off Timer cannot be used at the same time.
*2. The weekly timer will not operate when any of the following conditions is in
effect.
The timer feature is off; the system is in an malfunction state; a test run is
in progress; the remote controller is undergoing self-check or remote con-
troller check; the user is in the process of setting a function ; the user is in
the process of setting the timer; the user is in the process of setting the
current day of the week or time; the system is under central control. (Spe-
cifically, the system will not carry out operations (unit on, unit off, or tem-
perature setting) that are prohibited during these conditions.)
ss
ss
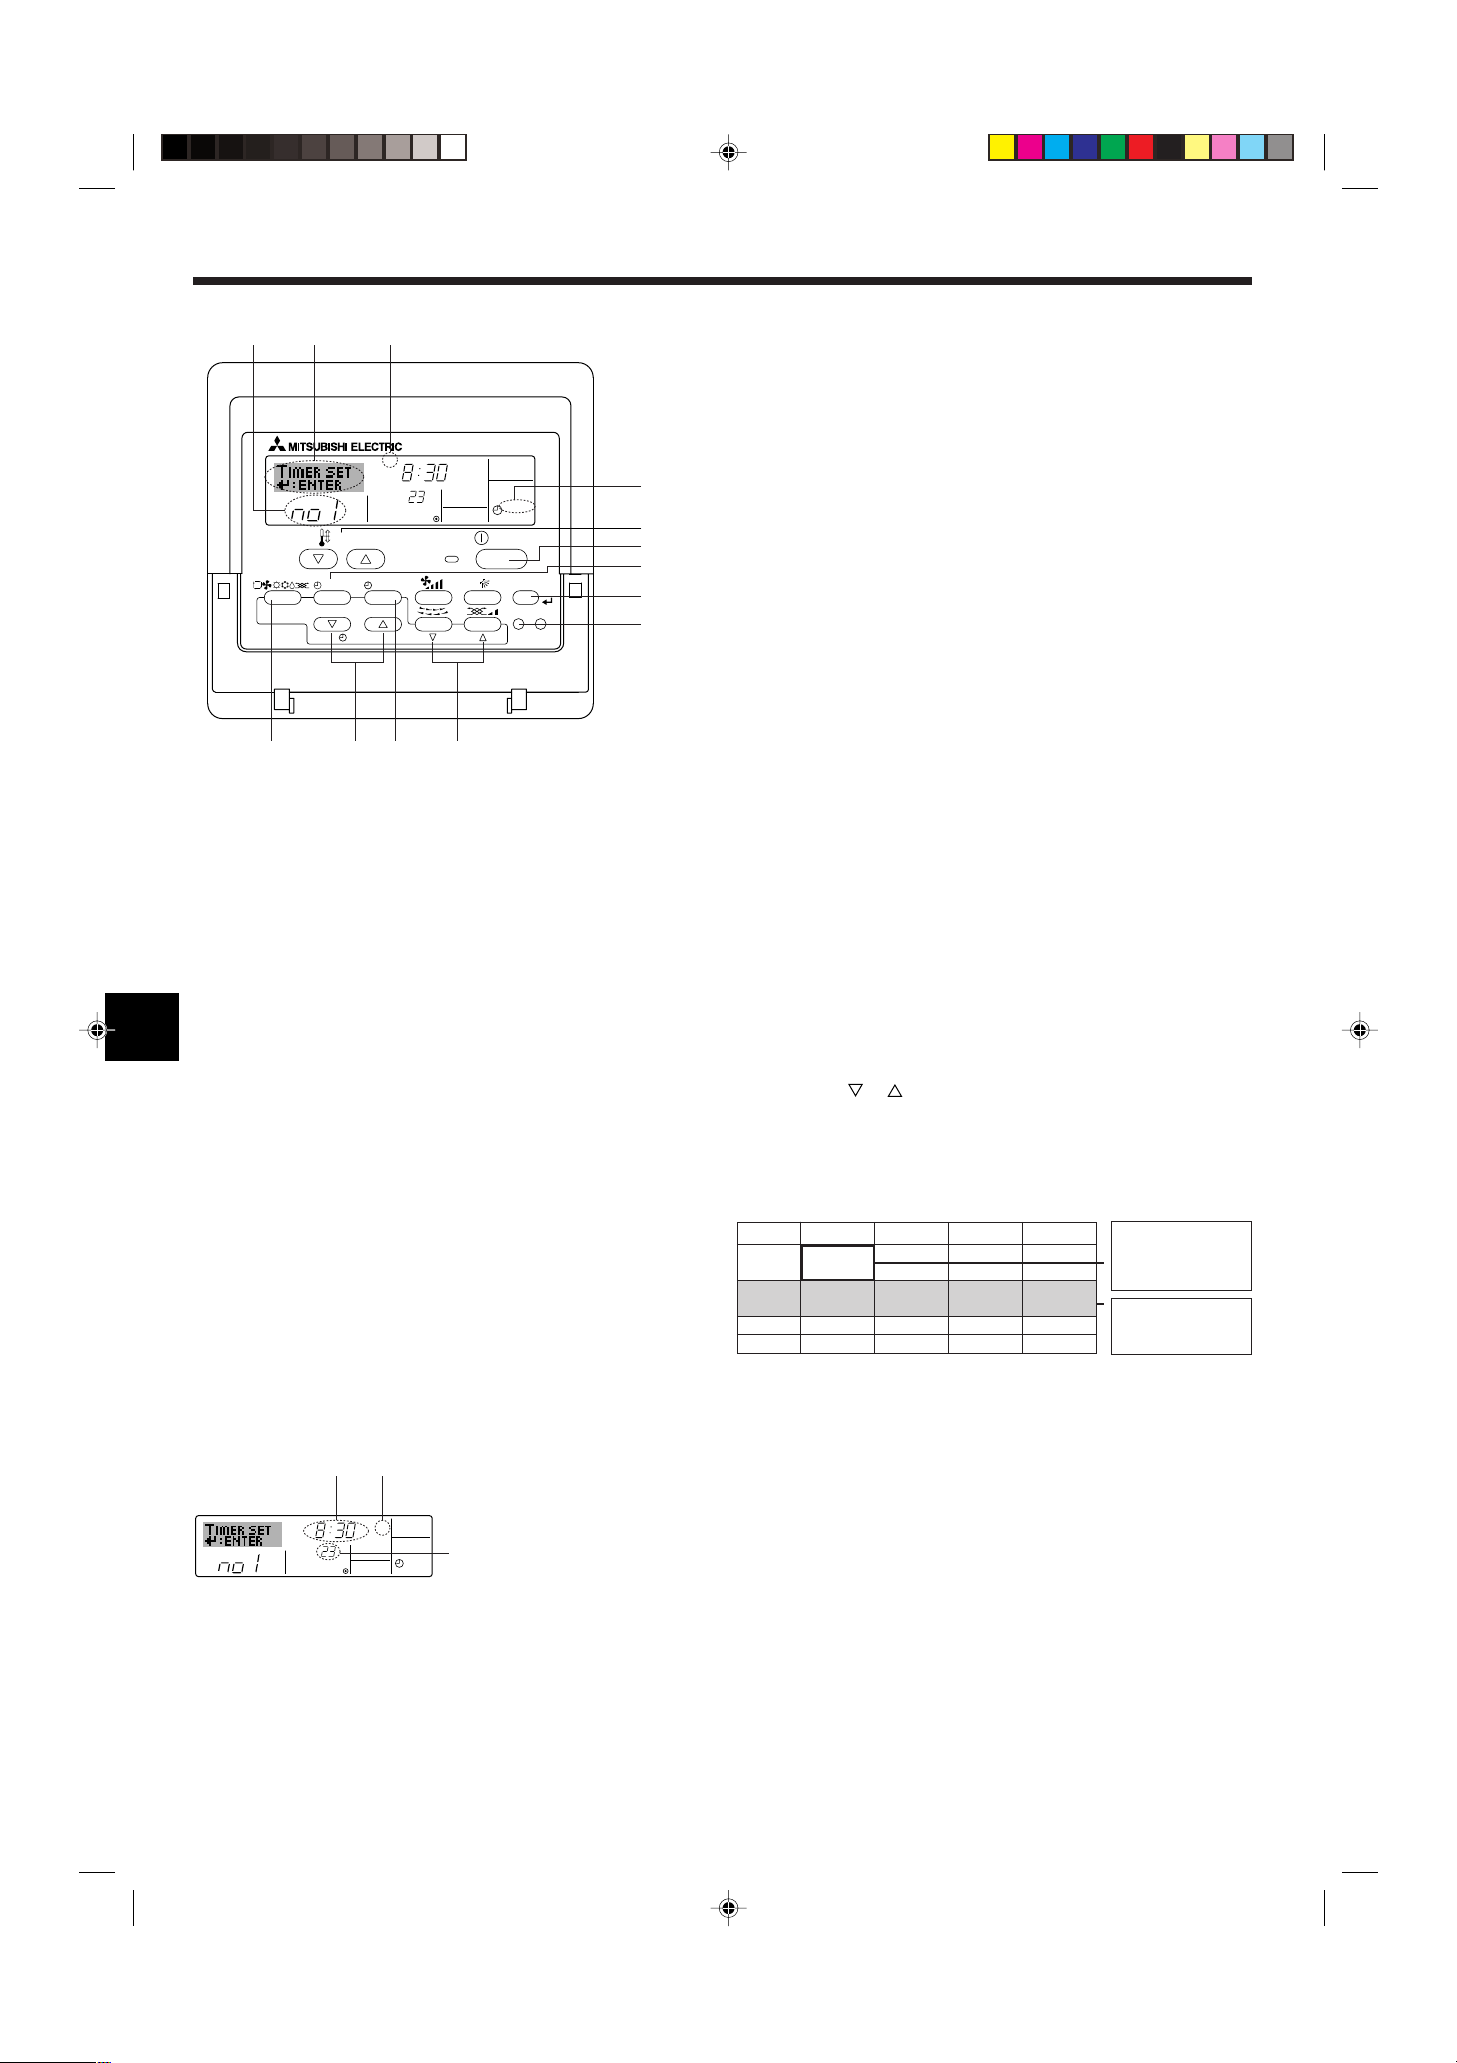
sHow to Set the Weekly Timer
1. Be sure that you are at a standard control screen, and that the weekly
timer indicator 1 is shown in the display.
2. Press the Timer Menu button B, so that the “Set Up” appears on the
screen (at 2).
(Note that each press of the button toggles the display between “Set
Up” and “Monitor”.)
3. Press the Timer On/Off (Set Day) button 9 to set the day. Each press
advances the display at 3 to the next setting, in the following se-
quence: “Sun Mon Tues Wed Thurs Fri Sat” → “Sun” → ... → “Fri” →
“Sat” → “Sun Mon Tues Wed Thurs Fri Sat”...
4. Press the or Operation button (7 or 8) as necessary to select
the appropriate operation number (1 to 8) 4.
* Your inputs at Steps 3 and 4 will select one of the cells from the
matrix illustrated below. (The remote-controller display at left shows
how the display would appear when setting Operation 1 for Sun-
day to the values indicated below.)
Setup Matrix
Note:
By setting the day to “Sun Mon Tues Wed Thurs Fri Sat”, you can set the same
operation to be carried out at the same time every day.
(Example: Operation 2 above, which is the same for all days of the week.)
ss
ss
sSetting the Weekly Timer
5. Press the appropriate Set Time button A as necessary to set the
desired time (at 5).
* As you hold the button down, the time first increments in minute inter-
vals, then in ten-minute intervals, and then in one-hour intervals.
6. Press the ON/OFF button 1 to select the desired operation (ON or
OFF), at 6.
* Each press changes the next setting, in the following sequence:
No display (no setting) → “ON” → “OFF”
7. Press the appropriate Set Temperature button 3 to set the desired
temperature (at 7).
* Each press changes the setting, in the following sequence: No
display (no setting) ⇔ 24 ⇔ 25 ⇔ ... ⇔ 29 ⇔ 30 ⇔ 12 ⇔ ... ⇔ 23
⇔ No display.
(Available range: The range for the setting is 12 °C to 30 °C. The
actual range over which the temperature can be controlled, how-
ever, will vary according to the type of the connected unit.)
Shows the time
setting
Operation No.
Day Setting
Loading ...
Loading ...
Loading ...