Loading ...
Loading ...
Loading ...
ENGLISH
C 5 Pour the Jet Clean Solution into the
canister up to a level between the two
lines located inside the canister.
C 6 Carefully lower the Jet Clean System
over the canister making sure the release
buttons snap back into position.
Replacing the Shaving Unit
◗ Replace the shaving unit once a year for
optimal shaving results.
◗ Replace damaged or worn shaver heads with
model RQ11 Philips Norelco shaver heads
only.
◗ The individual shaving heads (cutters and
combs) are NOT replaceable. Only the one-
piece shaving unit can be replaced.
36
ENGLISH
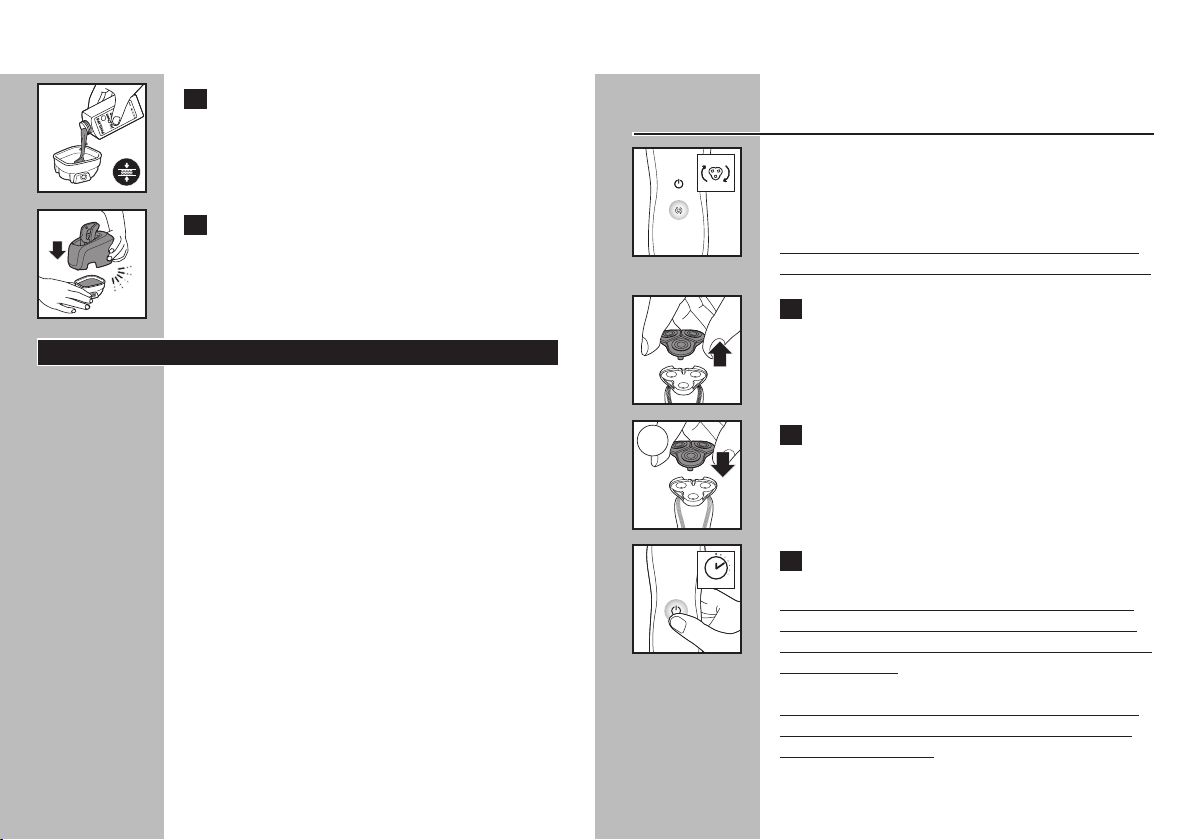
Replacement Shaver Head Assembly
Indication
C
◗ After 12 months of use, the replacement head
indicator symbol starts to blink to remind you
to check if it’s time to replace your shaving
unit to obtain optimal shaving results.
Note: The displays of models 1160X, 1160XCC
and 1150X look different, but work the same way.
C 1 Pull the shaving head holder off the
bottom part of the shaving unit.
C 2 Attach the new shaving head holder to the
bottom part of the shaving unit (‘click’).
C 3 To reset the shaver, press and hold the On/
Off button for approximately 10 seconds.
Note: If you do not reset the shaver at the first
replacement reminder, it continues to show the
shaving unit symbol at 8 more shaves or until you
reset the shaver.
This shaver/charging stand/Jet Clean System has
no other user-serviceable parts. For assistance
call 1-800-243-3050.
37
RQ11
3 sec.10 sec.
Loading ...
Loading ...