Loading ...
Loading ...
Loading ...
ENGLISH
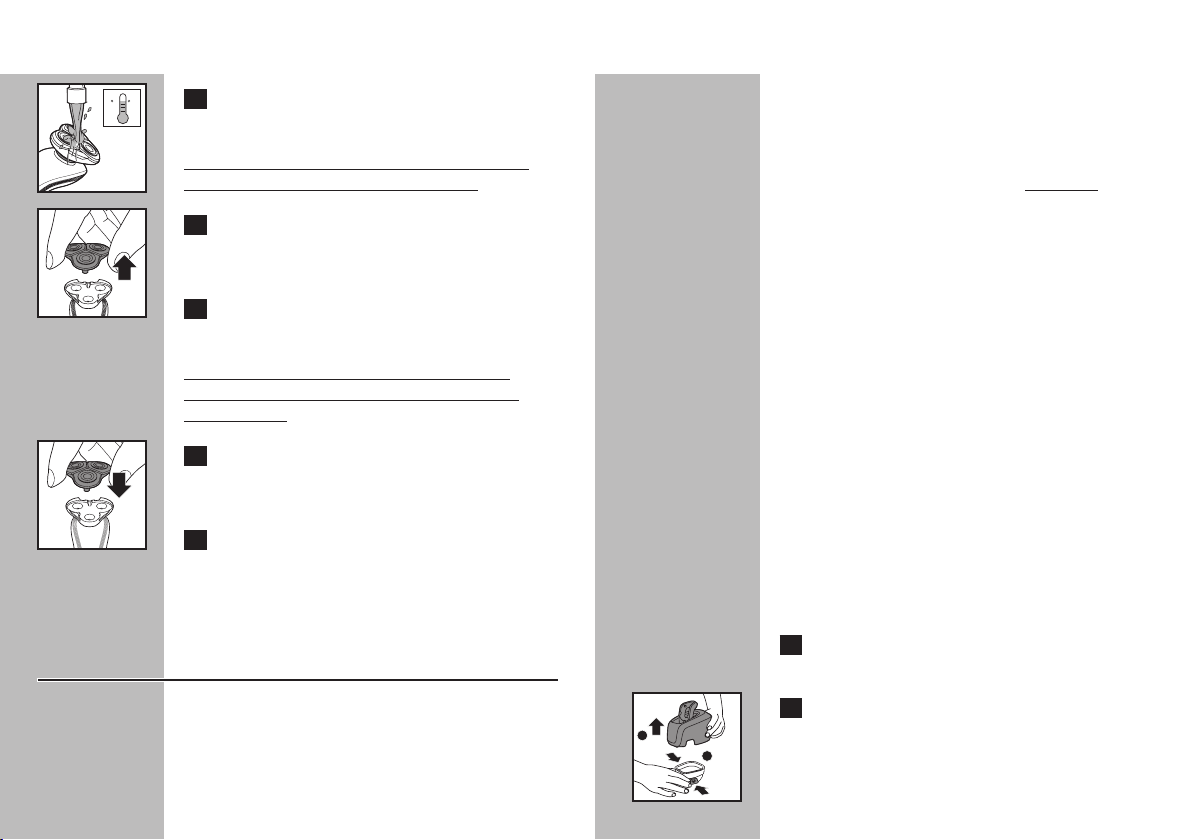
C 2 For best results rinse the shaving unit by
running under hot water for a few minutes.
BE CAREFUL TO TEST WATER FIRST SO AS
NOT TO BURN OR SCALD HANDS.
C 3 Pull the shaving head holder off the
bottom part of the shaving unit and rinse
under hot water for 30 seconds.
4 Carefully shake off excess water and let
the shaving unit air dry.
NOTE: Do not wipe or dry the shaving unit
with a towel or tissue. This could damage the
shaving heads.
C 5 Push the shaving head holder back onto
the bottom of the shaving unit. You will
hear a ‘click’.
6 You may also clean the shaving unit and
hair chamber without water by using the
supplied brush.
Cleaning the Shaving Unit in the Jet
Clean System (1180XCC/1160XCC)
CAUTION: Keep cleaning solution out of
reach of children. Do not take internally. Avoid
contact with eyes. In case of eye contact,
thoroughly flush with cold water. If irritation
persists, get medical attention.
26
ENGLISH
Important
◗ Only use this shaver, charging stand,
Jet Clean
System
and HQ200 cleaning solution provided
to charge or clean shaver.
◗ Other Philips Norelco shavers DO NOT work
with this
Jet Clean System.
◗ Empty the cleaning solution canister and
thoroughly rinse the canister clean with warm
water every 2 weeks.
◗ The Jet Clean System thoroughly cleans but
does not disinfect your shaver, therefore, do
not share shaver with others.
◗ The charging plug converts 100-240V AC to
less than 24V DC.
◗ Place the
Jet Clean System
on a flat, stable and
fluid-resistant surface to avoid any leakage. Be
careful not to tip or move the
Jet Clean System
if it is filled with the cleaning solution.
◗ To avoid evaporation, do not expose cleaning
solution to direct sunlight.
◗ Remove the protective cap from the shaver
before charging or cleaning the shaver in the
Jet Clean System
.
◗ Use this appliance for its intended household
use as described in this manual.
1 Place the Jet Clean System on a flat, level
surface.
C 2 Simultaneously press the buttons located
on both sides of the Jet Clean System
(1) and lift the appliance off the Jet Clean
canister (2).
27
2
1
CF
Loading ...
Loading ...
Loading ...