Loading ...
Loading ...
Loading ...
Before you move your appliance into the place where it
will operate, check that it will have adequate clearance.
Clearance is required for air circulation and too little
clearance may affect the performance of your appliance.
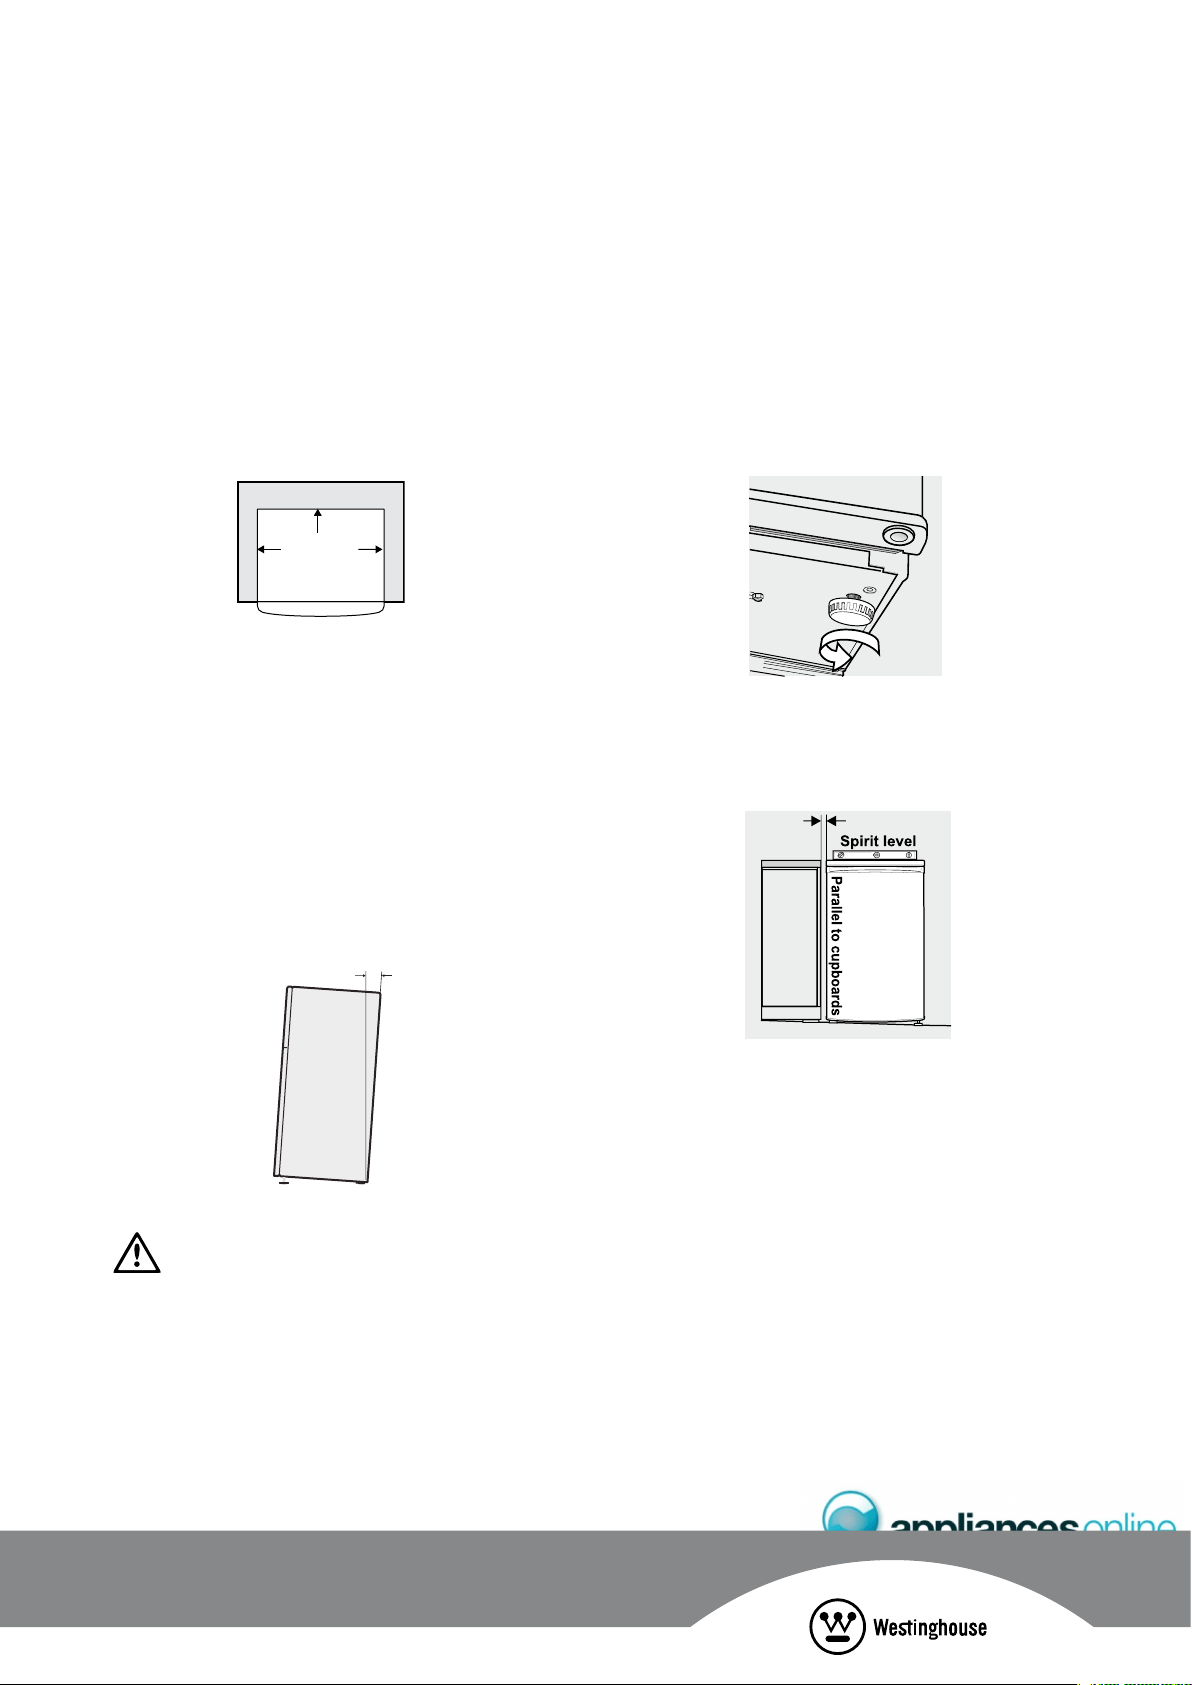
We recommend minimum clearances of:
• 30mm on each side.
• 25mm above the refrigerator.
• 50mm minimum/75mm maximum behind the refrigerator
NOTE:
Doors are designed to sit proud of cabinetry (not flush).
The clearances shown above are the recommended
minimum clearances. The clearance at the rear must not
exceed 75mm.
The appliance should arrive with the front levelling feet
wound up. The appliance may need to be tilted backward
at the top by about 10-15mm from vertical (see diagram
below). This will allow the door to gravitate to the closed
position. The complete closure of the door seal is reliant on
manually pushing the door closed to provide a consistent
door seal.
CAUTION
The rollers are designed for forward or backward movement
only. They are not castors. Moving the refrigerator sideways
may damage your floor and the rollers.
1. Move the appliance into its final position.
2. If the appliance is not tilting back as described earlier,
minor adjustments can be made to the two front
levelling legs by turning the feet in an anticlockwise
direction (below). This will increase the height of
the feet. If you have difficulty turning the foot, have
someone tilt the appliance back to gain better access.
If it is not tilted back enough and the levelling legs are
fully extended, additional packing might be required
(see note 4 for appropriate materials).
3. Compare the alignment of the appliance to the
surrounding cupboard. The top of the appliance should
be level from side to side (see diagram below). If
you need to adjust the level, use the levelling feet as
detailed in step 2.
4. If the appliance now rocks from one corner to the
opposite rear corner, this means that the floor is uneven.
You may need to put some packing under the ridge to
the rear of the appliance. You could use thin pieces of
solid material such as thin board, vinyl floor tiles
or laminate.
5. You may now need to fine tune the installation by
repeating steps 2, 3 and 4.
6. Wipe off any dust that has accumulated during shipping
and clean following the directions on page 17.
7. Plug the appliance into the power point. Don’t use a
double adaptor or extension cord.
8. It is recommended that you let the appliance for an hour
or two (three hours for a freezer) before you put any
food in it. This will confirm that it is operating correctly
and make the conditions appropriate for food storage.
Congratulations! You have successfully installed your
refrigerator/freezer.
10 –15mm
Height adjustable
front rollers
50mm (75mm max)
30mm
30mm
Recommended
airspace
CABINET
DOOR
Loading ...
Loading ...
Loading ...