Loading ...
Loading ...
Loading ...
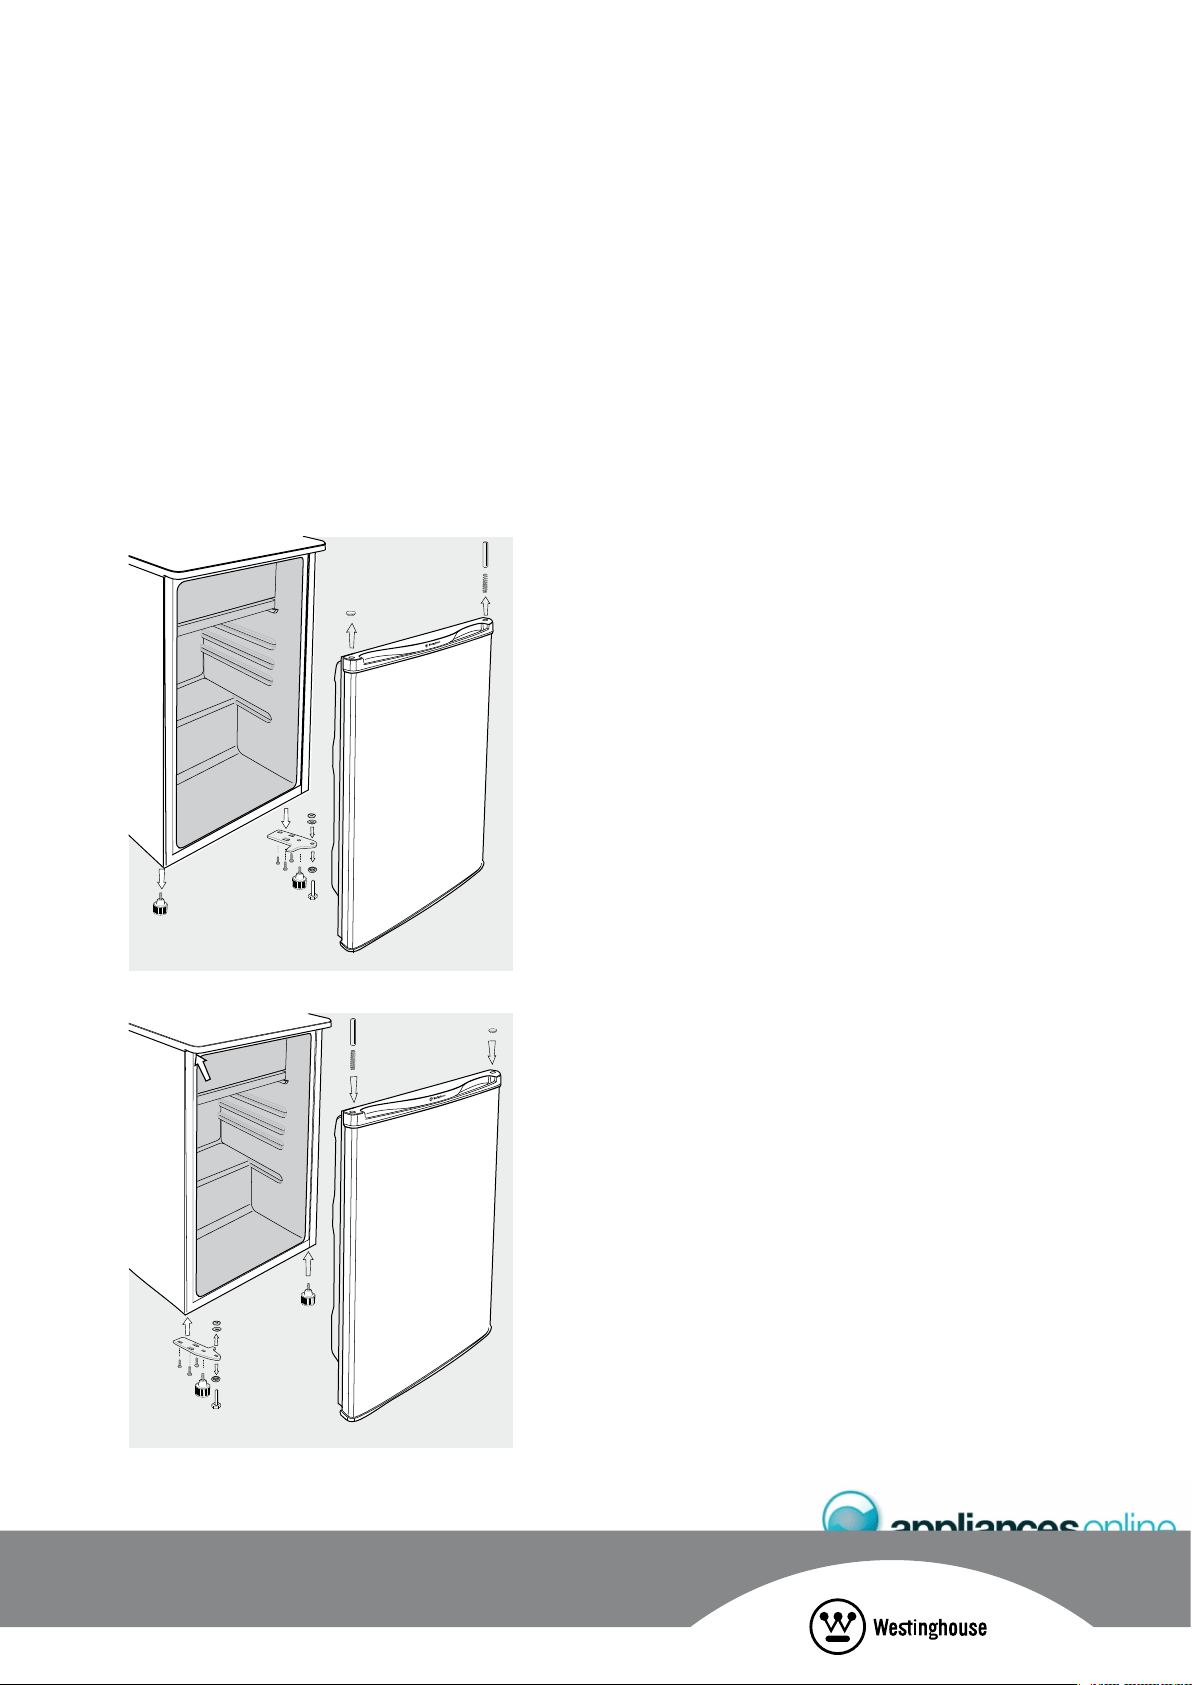
• Support the door from below and remove the two screws
(1) that secure the hinge (2) to the bottom right side of the
appliance. Stand the door to one side carefully.
• Unscrew the left front leg (3) and transfer it to the
right side.
• Remove the levelling foot (4) and the bottom hinge pin (5)
from the hinge (2), turn the hinge (2) over and screw the
levelling foot (4) into the other side of the hinge.
• Remove the metal hinging pin (7) and the spring (6)
beneath it from the hole in the top right hand corner of
the door.
• Remove the plug (8) – if supplied with your appliance –
from the hole in the top left of the door and press firmly
into the hole on the top right.
• Insert the spring (6) rst and then the pin (7) – previously
removed from the right hand side – into the hole in the
top left of the door.
• Position the door on the cabinet with the pin (7)
protruding from the top left corner entering the
corresponding hole (arrowed in left hinging assembly
illustration) under the top frame of the cabinet.
• While holding the door in the closed position, secure the
hinge (2) – previously removed from the other side – onto
the bottom left corner, tightening the 3 screws (1) firmly.
Note: All parts removed must be retained to reinstall door.
In these examples the operation is changed from right side
hinging to left side hinging.
• Turn off the appliance
• Unplug the power cable
• Remove all food from the appliance
• Remove shelves and baskets
• Do not lay the appliance down at on its back as this will
impair its operation.
• When tilting the appliance to access the underside,
support it so that it will not fall to the floor.
Left sided hinging assembly
Right sided hinging assembly
1
2
3
4
5
6
7
8
1
2
3
4
5
6
7 8
Loading ...
Loading ...
Loading ...