Loading ...
Loading ...
Loading ...
The reversing of doors or replacement of light bulbs is
not covered by warranty. Assistance, if required can be
arranged by calling our service centre on 13 13 49.
Normal service call and labour charges apply.
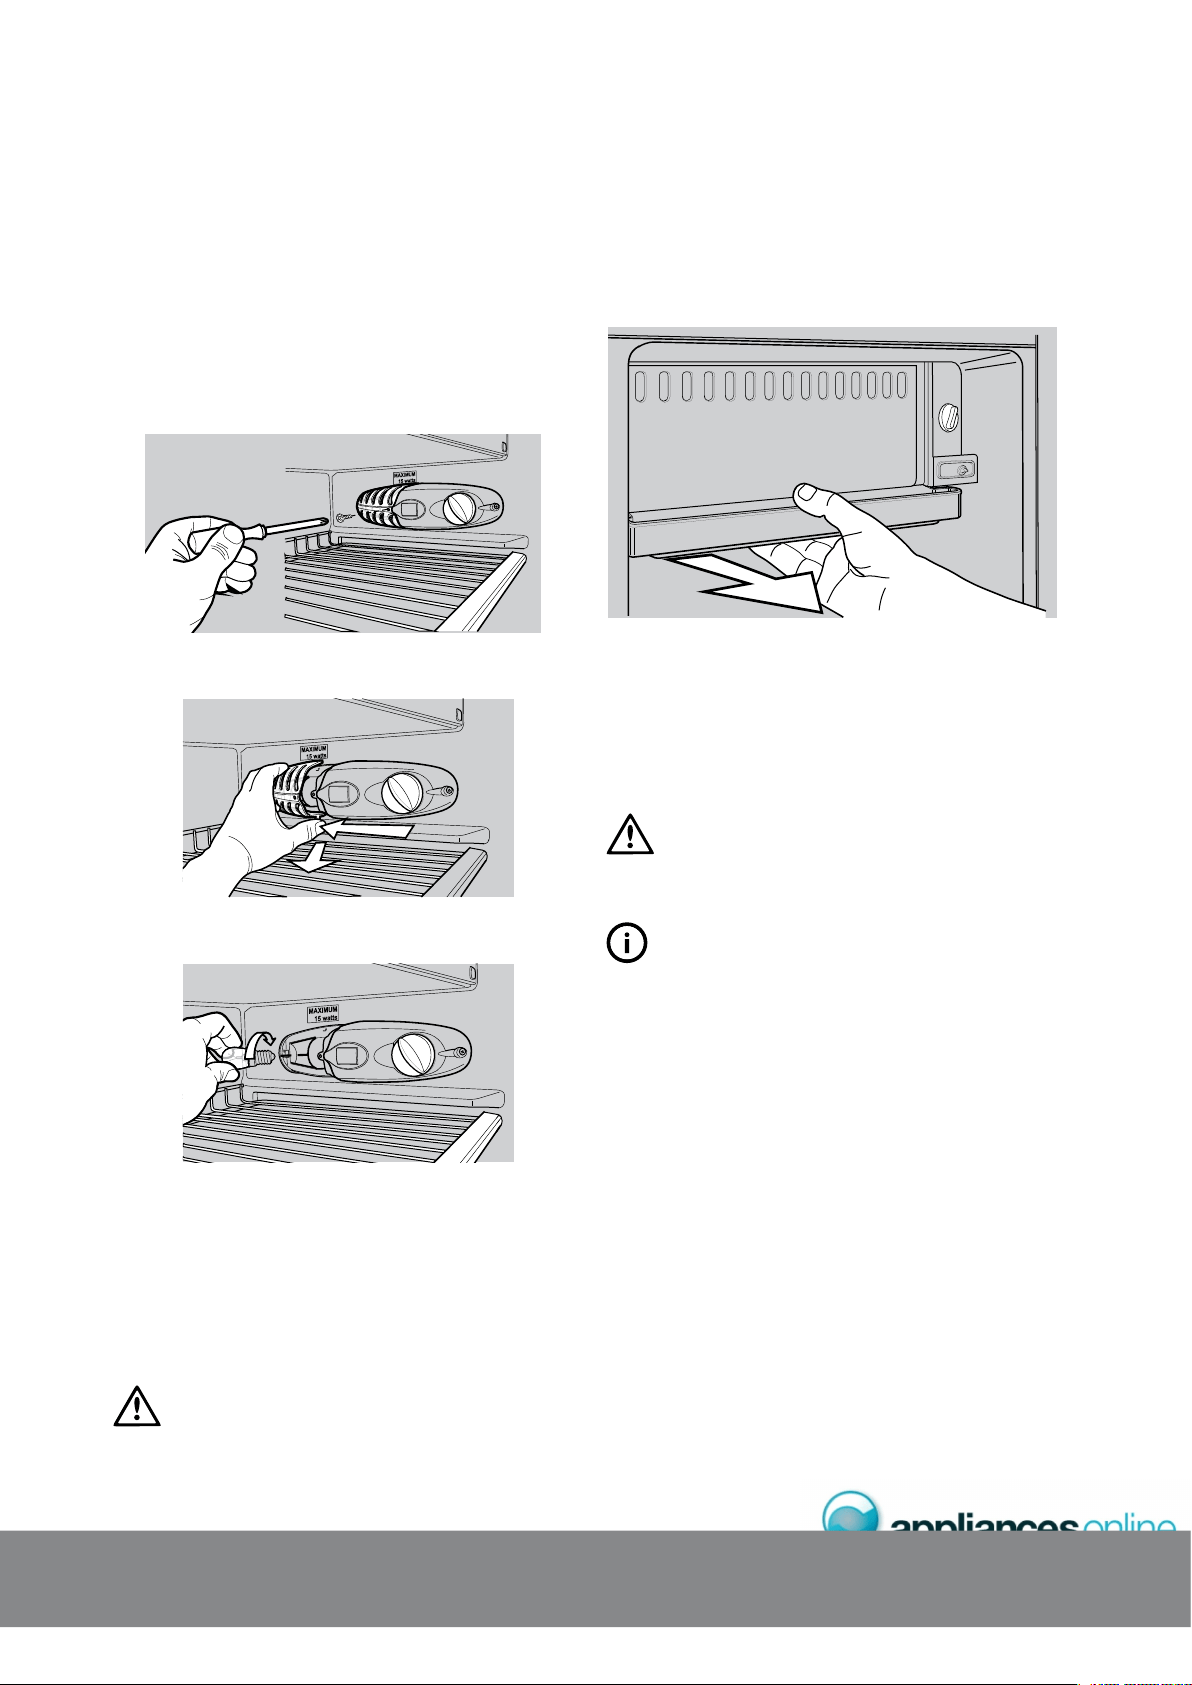
1. Switch off the power at the power point and remove the
cord by pulling the plug.
2. Remove the screw from the centre of the control panel.
3. Remove the light lens by pushing back and down on the
clear plastic tab protruding from the bottom of the lens.
4. Unscrew the spent light bulb in an anti-clockwise
direction.
5. Screw the replacement bulb into the socket in a
clockwise direction.
6. Replace the light lens and screw.
7. Wait 5 minutes to ensure pressures in the refrigeration
system are equalised, before turning the refrigerator on
at the power point.
WARNING
Never insert your finger into the light bulb socket.
1. Switch off the power at the power point and remove the
cord by pulling the plug.
2. Slide out the drip tray from beneath the ice box.
3. Unscrew the light bulb in an anti-clockwise direction.
4. Screw the replacement bulb into the socket in a
clockwise direction.
6. Replace the drip tray.
7. Wait 5 minutes to ensure pressures in the refrigeration
system are equalised, before turning the refrigerator on
at the power point.
WARNING
Never insert your finger into the light bulb socket.
TIPS & INFORMATION
Not all 15 watt screw-in lamps will fit the lamp housing.
Appropriate replacement lamps can be purchased from
Electrolux or by calling 13 13 50.
Loading ...
Loading ...
Loading ...