Register your product and get support at
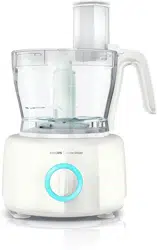
HR7782
www.philips.com/welcome
Specifications are subject to change without notice
© 2012 Koninklijke Philips Electronics N.V.
All rights reserved.
HR7782_WE_UM_V3.0
EN User manual
DE Benutzerhandbuch
FR Mode d’emploi
NL Gebruiksaanwijzing
IT Manuale utente
EL
Εγχειρίδιο χρήσης
ES Manual del usuario
NO Brukerhåndbok
FI Käyttöopas
SV Användarhandbok
DA Brugervejledning
PT Manual do utilizador
TR Kullanım kılavuzu
3140 035 29043
1/4
English
1 Important
Read this user manual carefully before you use the appliance, and save the user manual for
future reference.
Danger
• Do not immerse the motor unit in water nor rinse it under the tap.
Warning
• Neveruseyourngersoranobjecttopushingredientsintothefeedingtubewhilethe
applianceisrunning.Onlyusethepusher.
• Beforeyouconnecttheappliancetothepower,makesurethatthevoltageindicated
onthebottomoftheappliancecorrespondstothelocalpowervoltage.
• Never connect this appliance to a timer switch, to avoid a hazardous situation.
• Ifthepowercord,theplug,orotherpartsaredamaged,donotusetheappliance.
• Ifthepowercordisdamaged,youmusthaveitreplacedbyPhilips,aservicecenter
authorizedbyPhilips,orsimilarlyqualiedpersonstoavoidahazard.
• Thisapplianceisnotintendedforusebypersons(includingchildren)withreduced
physical,sensoryormentalcapabilities,orlackofexperienceandknowledge,unless
theyhavebeengivensupervisionorinstructionconcerninguseoftheappliancebya
person responsible for their safety.
• For their safety, do not allow children to play with the appliance.
• Never let the appliance run unattended.
• Iffoodstickstothewallofthebowl,switchofftheapplianceandunplugit.Thenusea
spatula to remove the food from the wall.
• Be careful when you handle or clean the discs, the blade units of the food processor.
Thecuttingedgesareverysharp.
• Donottouchtheblades,especiallywhentheapplianceispluggedin.Thebladesare
very sharp.
• Ifthebladesgetstuck,unplugtheappliancebeforeyouremovetheingredientsthat
block the blades.
Caution
• Neverswitchofftheappliancebyturningthebowl,oritslids.Alwaysswitchoffthe
appliancebyturningtheknobto0.
• Unplugtheapplianceimmediatelyafteruse.
• Waituntilthemovingpartsstoprunningbeforeyouremovethelidofthebowl.
• Do not exceed the maximum level indication on the bowl.
• Thoroughlycleanthepartsthatcomeintocontactwithfoodbeforeyouusethe
applianceforthersttime.
• Beforeyouremoveorcleanthekneadingaccessoryordiscs,unplugtheappliance.
• Never use any accessories or parts from other manufacturers or that Philips does not
specicallyrecommend.Ifyouusesuchaccessoriesorparts,yourguaranteebecomes
invalid.
• This appliance is intended for household use only.
• Donotexceedthequantitiesandprocessingtimeindicatedintheusermanual.
• Lethotingredientscooldown(<80ºC)beforeprocessingthem.
• Always let the appliance cool down to room temperature after each batch that you
process.
• Certainingredientsmaycausediscolorationsonthesurfaceoftheparts.Thisdoesnot
haveanegativeeffectontheparts.Thediscolorationsusuallydisappearaftersome
time.
• Noise level = 85 dB [A]
Electromagnetic elds (EMF)
ThisPhilipsappliancecomplieswithallstandardsregardingelectromagneticelds(EMF).If
handledproperlyandaccordingtotheinstructionsinthisusermanual,theapplianceissafe
tousebasedonscienticevidenceavailabletoday.
Recycling
Yourproductisdesignedandmanufacturedwithhighqualitymaterialsandcomponents,
which can be recycled and reused.
When you see the crossed-out wheel bin symbol attached to a product, it means the
productiscoveredbytheEuropeanDirective2002/96/EC:
Never dispose of your product with other household waste. Please inform yourself about
the local rules on the separate collection of electrical and electronic products. The correct
disposalofyouroldproducthelpspreventpotentiallynegativeconsequencesonthe
environment and human health.
2 Introduction
CongratulationsonyourpurchaseandwelcometoPhilips!Tofullybenetfromthesupport
thatPhilipsoffers,registeryourproductatwww.philips.com/welcome.
Forrecipestousewithyourfoodprocessor,gotowww.philips.com/kitchen
3 Food processor
Warning
• Neveruseyourngersoranobject(forexample,aspatula)topushingredientsintothefeeding
tubewhiletheapplianceisrunning.Onlyusethepusher.
Chopper knife
Beforeyoustart,makesureyouassembleaccordingtoFig.2.
Youcanusethechopperknifetochop,mix,blend,orpureeingredients.Youcanalsouseitto
mix and blend cake batters.
Caution
• Donotusethechopperknifetochophardingredients,likecoffeebeans,turmeric,nutmeg,andicecubes,asthis
maycausethebladetogetblunt.
Note
• Donotlettheapplianceruntoolongwhenyouchop(hard)cheeseorchocolate.Otherwisethese
ingredientsbecometoohot,starttomelt,andturnlumpy.
• Precutlargepiecesoffoodintopiecesofapprox.3x3x3cm.
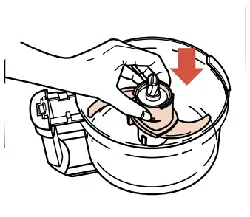
1 Turnthethebowlclockwisetoxitonthemotorunit,andthenputthetoolholder
in the bowl.
» Whenthebowlisxedcorrectly,youhearaclick.
2 Put the chopper knife on the tool holder.
3 Puttheingredientsinthebowl.
4 Putthelidonthebowl,andthenturnthelidclockwisetoxit.
» Whenthelidisassembledcorrectly,youhearaclickandthelidisxedtothe
bowl handle.
5 Putthepusherintothefeedingtube.
6 Connectthepowerplugtothepowersupply.
7 Checkthepreparationtime,themaximumamountandthespeedsettingrequiredfor
theingredientsinTable1.Turntheknobtothedesiredspeedsetting.
8 After use, turn the knob to 0,andthenunplugtheappliance.
Tip
• When you chop onions, turn the knob to Pafewtimestopreventtheonionsfrombecomingtoo
nelychopped.
• Whenthefoodstickstothebladeorinsidethebowl,youcandothefollowingsteps:1.Switchoff
theappliance,andthenunplugit.2.Removethelidfromthebowl.3.Removetheingredientsfrom
the blade or from the side of the bowl with a spatula.
Serrated blade
Beforeyoustart,makesureyouassembleaccordingtoFig.3.
Use the serrated blade to crush frozen fruit.
Note
• Always put the blade unit in the bowl before you start.
• Itisrecommendedtocutthefruitinto2x2x2cmcubesizebeforehavingitfrozen.
• Formakingfruitdesserts,itisrecommendedtousespeed2 for smooth result, and speed 1 for
chunky result.
1 Turnthethebowlclockwisetoxitonthemotorunit,andthenputthetoolholder
in the bowl.
» Whenthebowlisxedcorrectly,youhearaclick.
2 Put the serrated ice blade on the tool holder.
3 Put the frozen fruit in the bowl.
4 Putthelidonthebowl,andthenturnthelidclockwisetoxit.
» Whenthelidisassembledcorrectly,youhearaclickandthelidisxedtothe
bowl handle.
5 Putthepusherintothefeedingtube.
6 Connectthepowerplugtothepowersupply.
7 Turn the knob to 1 or 2 .
8 After use, turn the speed selector to 0,andthenunplugtheappliance.
Kneading accessory
Beforeyoustart,makesureyouassembleaccordingtoFig.4.
Youcanusethekneadingtooltokneadyeastdoughforbreadandpizzas.Youneedto
adjusttheamountofliquidtoformthedoughaccordingtothehumidityandtemperature
condition.
Note
• Donotusethekneadingtooltoblendcakebatters.Usethechopperknifeforthisjob.
• Alwaysputthekneadingtoolinthebowlbeforeyouaddtheingredients.
Tip
• IfusingHighGlutenFlour,forbestresults,use60gwaterforevery100gofour,andkneadatspeed
1for2minutes(maxtime).
1 Turnthethebowlclockwisetoxitonthemotorunit,andthenputthetoolholder
in the bowl.
» Whenthebowlisxedcorrectly,youhearaclick.
2 Putthekneadingtoolonthetoolholder.
3 Puttheingredientsinthebowl.
4 Putthelidonthebowl,andthenturnthelidclockwisetoxit.
» Whenthelidisassembledcorrectly,youhearaclickandthelidisxedtothe
bowl handle.
5 Putthepusherintothefeedingtube.
6 Connectthepowerplugtothepowersupply.
7 Turn the knob to the 1 position.
8 Checkthepreparationtime,themaximumamountandthespeedsettingrequiredfor
theingredientsinTable1.
9 After use, turn the knob to 0,andthenunplugtheappliance.
Balloon beater
Beforeyoustart,makesureyouassembleaccordingtoFig.5:
1 Put the tool holder in the bowl.
2 Put the balloon beater on the tool holder in the bowl.
3 Puttheingredientsinthebowl.
4 Putthelidonthebowl.Turnthelidclockwisetoxit.Putthepusherinthefeeding
tube.
5 Select speed 1.
6 After use, turn the speed selector to 0,andthenunplugtheappliance.
Citrus press
Beforeyoustart,makesureyouassembleaccordingtoFig.6.
You can use the citrus press to squeeze citrus fruits.
1 Turnthethebowlclockwisetoxitonthemotorunit,andthenputthetoolholder
in the bowl.
» Whenthebowlisxedcorrectly,youcanhearaclick.
2 Put the sieve for citrus press on the tool holder in the bowl. Make sure that the
projectiononthesieveislockedintheslotofthebowlhandle.
» Whenthesieveisxedcorrectly,youcanhearaclick.
3 Put the cone on the sieve.
4 Connectthepowerplugtothepowersupply.
5 CheckthemaximumamountrequiredfortheingredientsinTable1.Turntheknobto
speed 1.
» Theconestartsrotating.
6 Press the citrus fruit onto the cone.
7 Stoppressingfromtimetotimetoremovethepulpfromthesieve.Whenyounish
pressingorwhenyouwanttoremovethepulp,turntheknobto0 and remove the
bowl from the appliance with the sieve and cone on it.
Slicing discs and shredding discs
Beforeyoustart,makesureyoupickyourdesireddiscandassembleaccordingtoFig.7:
• Adjustableslicingdisctoadjustdifferentthickness
• Reversibleshreddingdisc(biggerorsmallsize)
Caution
• Becarefulwhenyouhandlethedisc.Ithasaverysharpcuttingedge.
• Neverusethedisctoprocesshardingredients,likeicecubes.
• Donotexerttoomuchpressureonthepusherwhenyoupressingredientsintothefeedtube.
4 Cleaning
Warning
• Beforeyoucleantheappliance,unplugit.
Caution
• Makesurethatthecuttingedgesofthebladesanddiscsdonotcomeintocontactwithhardobjects.
Thismaycausethebladetogetblunt.
• Thecuttingedgesaresharp.Becarefulwhenyoucleanthebladeunitofthefoodprocessorandthe
discs.
1 Cleanthemotorunitwithamoistcloth.
2 Cleantheotherpartsinhotwater(<60ºC)withsomewashing-upliquidorina
dishwasher.
Quick cleaning
Youcanfollowthefollowingstepstocleanthefoodprocessorbowlandblenderjareasier.
Note
• Make sure that the blade is assembled in the bowl if you clean the food processor bowl.
1 Pourlukewarmwater(notmorethan0.5liters)andafewdropsofwashing-upliquid
into the food processor bowl.
2 Placethelidonthefoodprocessorbowl,andthenturnitclockwisetoxit.
3 Turn the knob to P. Let the appliance run for 30 seconds or until the food processor
bowl is clean.
4 After use, turn the knob to 0,andthenunplugtheappliance.
5 Detach the food processor bowl and rinse it with clean water.
5 Storage
1 Pushthepowercordintotheintegratedcordstorage(Fig.10).
2 Store the product in a dry place.
3 Putthediscs,kneadingtoolandshaft,andothersmallaccessoriesinthefoodprocessor
bowl(Fig.11).
6 Guarantee and service
If you have a problem, need service, or need information, see www.philips.com/support or
contactthePhilipsConsumerCareCenterinyourcountry.Thephonenumberisinthe
worldwideguaranteeleaet.IfthereisnoConsumerCareCenterinyourcountry,goto
your local Philips dealer.
1
2 min 1 kg 1
20 sec 500 g1
30 sec 1 kg
1
30 sec 200 g
1
30 sec 3 pcs
1
30 sec 1 kg
1
(MAX)
(MAX)
(MAX)
(MAX)
5 x 1 sec 750 gP
5 x 1 sec 1 kg P/2
30 sec 100 gP
60 sec 1 kg 2
45 sec 500 g2
30 sec 400 g2
750 ml
8 pcs
1
1
30 sec 1 kg1
30 sec
1 k
g1
2 min 1 kg
600 ml
1
60-180 sec
60-300 sec
P
0
1
2
30 sec 750 g 1
30 sec 3 pcs 1
30 sec 3 pcs 1
750 g 1-260-180 sec
-4
o
C
10 11 12
0
1
P
2
9
6
5
2 3 4
-4
o
C
8
7

Deutsch
1 Wichtig
LesenSiedieseBedienungsanleitungvordemGebrauchdesGerätsaufmerksamdurchund
bewahrenSiesiefüreinespätereVerwendungauf.
Gefahr
• Tauchen Sie die Motoreinheit niemals in Wasser. Spülen Sie sie auch nicht unter
ießendemWasserab.
Warnhinweis
• VerwendenSienieIhreFingerodereinenGegenstand,umZutatenindieEinfüllöffnung
zuschieben,währenddasGerätläuft.VerwendenSieausschließlichdenStopfer.
• BevorSiedasGerätaneineSteckdoseanschließen,überprüfenSie,obdieauf
derUnterseitedesGerätsangegebeneSpannungmitderNetzspannungvorOrt
übereinstimmt.
• UmGefährdungenzuvermeiden,solltenSiedasGerätnieaneinenZeitschalter
anschließen.
• WenndasNetzkabel,derSteckeroderandereTeilebeschädigtsind,verwendenSiedas
Gerätnicht.
• IstdasNetzkabeldefekt,darfesnurvoneinemPhilipsService-Center,einervonPhilips
autorisiertenWerkstattodereinerähnlichqualiziertenPersondurcheinOriginal-
Ersatzkabelausgetauschtwerden,umGefährdungenzuvermeiden.
• DiesesGerätistfürBenutzer(einschl.Kinder)miteingeschränktenphysischen,
sensorischenoderpsychischenFähigkeitenbzw.ohnejeglicheErfahrungoderVorwissen
nurdanngeeignet,wenneineangemesseneAufsichtoderausführlicheAnleitungzur
BenutzungdesGerätsdurcheineverantwortlichePersonsichergestelltist.
• ErlaubenSieKindernzuihremSchutznicht,mitdemGerätzuspielen.
• LassenSiedaseingeschalteteGerätniemalsunbeaufsichtigt.
• WennZutateninnenanderSchüsselklebenbleiben,schaltenSiedasGerätab,und
ziehenSiedenSteckerausderSteckdose.LösenSiedieZutatendannmithilfeeines
TeigschabersvonderBecherwand.
• SeienSievorsichtig,wennSiedieScheibenunddieMessereinheitender
Küchenmaschineverwendenbzw.reinigen.DieKlingensindsehrscharf.
• BerührenSiedieMessernicht,besonderswenndasGerätandasStromnetz
angeschlossenist.DieMessersindsehrscharf.
• Wenn die Messer blockiert sind, ziehen Sie stets den Netzstecker aus der Steckdose,
bevorSiedieblockierendenZutatenentfernen.
Vorsicht
• SchaltenSieniedasGerätdurchDrehenderSchüsseloderderDeckelaus.DrehenSie
zumAusschaltendesGerätsdenSchalterimmerauf0.
• ZiehenSienachGebrauchsofortdenNetzsteckerausderSteckdose.
• NehmenSiedenDeckelderSchüsselerstab,wennallebeweglichenTeilezum
Stillstandgekommensind.
• ÜberschreitenSienichtdieaufderSchüsselangegebenemaximaleFüllmenge.
• ReinigenSievordemerstenGebrauchdesGerätsalleTeile,diemitLebensmittelnin
Kontaktkommen.
• BevorSiedasKnetzubehöroderdieScheibenentfernenoderreinigen,ziehenSieden
SteckerdesGerätsausderSteckdose.
• VerwendenSieniemalsZubehöroderTeile,dievonDrittherstellernstammenbzw.
nichtvonPhilipsempfohlenwerden.WennSiediese(s)ZubehöroderTeileverwenden,
erlischtIhreGarantie.
• DiesesGerätistnurfürdenGebrauchimHaushaltbestimmt.
• ÜberschreitenSienichtdieimBenutzerhandbuchaufgeführtenMengenund
Verarbeitungszeiten.
• LassenSieheißeZutatenabkühlen(<80°C),bevorSiesieverarbeiten.
• LassenSiedasGerätimmeraufRaumtemperaturabkühlen,bevorSiedienächste
Portion verarbeiten.
• BestimmteZutatenkönnendieOberächederTeileverfärben.Dieswirktsichnicht
negativaufdieTeileaus.DieVerfärbungenverschwindengewöhnlichnacheiner
gewissenZeit.
• Geräuschpegel=85dB[A]
Elektromagnetische Felder
DiesesPhilipsGeräterfülltsämtlicheNormenbezüglichelektromagnetischerFelder.
NachaktuellenwissenschaftlichenErkenntnissenistdasGerätsicherimGebrauch,sofern
esordnungsgemäßundentsprechenddenAnweisungenindiesemBenutzerhandbuch
gehandhabtwird.
Recycling
IhrGerätwurdeunterVerwendunghochwertigerMaterialienundKomponentenentwickelt
undhergestellt,dierecyceltundwiederverwendetwerdenkönnen.
BendetsichdasSymboleinerdurchgestrichenenAbfalltonneaufRädernaufdemGerät,
bedeutetdies,dassfürdiesesGerätdieEuropäischeRichtlinie2002/96/EGgilt.
EntsorgenSiediesesProduktniemitdemrestlichenHausmüll.BitteinformierenSiesichüber
dieörtlichenBestimmungenzurgetrenntenEntsorgungvonelektrischenundelektronischen
Produkten.DurchdiekorrekteEntsorgungIhrerAltgerätewerdenUmweltundMenschen
vormöglichennegativenFolgengeschützt.
2 Einführung
HerzlichenGlückwunschzuIhremKaufundwillkommenbeiPhilips.UmdieUnterstützung
vonPhilipsoptimalnutzenzukönnen,solltenSieIhrProduktunterwww.philips.com/
welcomeregistrieren.
RezeptefürIhreKüchenmaschinendenSieunterwww.philips.com/kitchen.
3 Küchenmaschine
Warnung
• VerwendenSienieIhreFingerodereinenGegenstand(z.B.einenTeigschaber),umZutatenindie
Einfüllöffnungzuschieben,währenddasGerätläuft.VerwendenSieausschließlichdenStopfer.
Schneidmesser
BevorSiebeginnen,vergewissernSiesich,dassSiedieTeilegemäßAbbildung2montieren.
MitdemSchneidmesserkönnenSieZutatenhacken,verrühren,mixenoderpürieren.Sie
könnensieauchzumMixenundMischenvonTeigverwenden.
Achtung
• ZerkleinernSiemitdemSchneidmesserkeinehartenZutatenwieKaffeebohnen,Kurkuma,Muskatnüsseoder
Eiswürfel, da die Messer sonst stumpf werden.
Hinweis
• LassenSiedasGerätnichtzulangelaufen,wennSie(Hart-)KäseoderSchokoladezerkleinern.
AnsonstenwerdendieseZutatenzuheiß,schmelzenundwerdenklumpig.
• SchneidenSiegroßeZutatenvorderVerarbeitunginca.3x3x3cmgroßeStücke.
1 DrehenSiedieSchüsselimUhrzeigersinn,umsieanderMotoreinheitanzubringen,und
setzenSiedanndenZubehörhalterindieSchüssel.
» WenndieSchüsselrichtigangebrachtwurde,rastetsiehörbarein.
2 SetzenSiedasSchneidmesseraufdenZubehörhalter.
3 GebenSiedieZutatenindieSchüssel.
4 SetzenSiedenDeckelaufdieSchüssel.DrehenSiedenDeckelimUhrzeigersinn,biser
einrastet.
» WennderDeckelrichtigangebrachtwurde,rasteterhörbaramGriffderSchüssel
ein.
5 SetzensiedenStopferindieEinfüllöffnungein.
6 SchließenSiedenSteckerandieSteckdosean.
7 ÜberprüfenSiedieZubereitungszeit,diemaximaleMengeunddie
Geschwindigkeitsstufe,diefürZutateninTabelle1erforderlichsind.DrehenSieden
SchalteraufdiegewünschteGeschwindigkeitsstufe.
8 DrehenSiedenReglernachderVerwendungauf0, und ziehen Sie den Netzstecker des
GerätsausderSteckdose.
Tipp
• WennSieZwiebelnhackenmöchten,drehenSiedenReglereinigeMaleaufP, um zu verhindern,
dassdieZwiebelnzufeingehacktwerden.
• WennSpeisenamMesseroderinnerhalbderSchüsselkleben,könnenSiefolgendermaßenvorgehen:
1.SchaltenSiedasGerätaus,undziehenSiedenNetzsteckerausderSteckdose.2.NehmenSieden
DeckelvonderSchüsselab.3.VerwendenSieeinenTeigschaber,umdieZutatenvomMesserund
von der Innenwand der Schüssel zu entfernen.
Gezacktes Messer
BevorSiebeginnen,stellenSiesicher,dassSiedieTeilegemäßAbbildung3montieren.
VerwendenSiedasgezackteMesserzumZerkleinernvonTiefkühlobst.
Hinweis
• SetzenSiestetsdieMessereinheitindieSchüssel,bevorSiebeginnen.
• Eswirdempfohlen,dasObstvordemEinfriereninWürfelderGröße2x2x2cmzuschneiden.
• FürNachtischmitObstsolltenSiedieGeschwindigkeit2 für fein zerkleinertes Obst und die
Geschwindigkeit1fürgrobzerkleinertesObstverwenden.
1 DrehenSiedieSchüsselimUhrzeigersinn,umsieanderMotoreinheitanzubringen,und
setzenSiedanndenZubehörhalterindieSchüssel.
» WenndieSchüsselrichtigangebrachtwurde,rastetsiehörbarein.
2 SetzenSiedasgezackteEismesseraufdenZubehörhalter.
3 GebenSiedasTiefkühlobstindieSchüssel.
4 SetzenSiedenDeckelaufdieSchüssel.DrehenSiedenDeckelimUhrzeigersinn,biser
einrastet.
» WennderDeckelrichtigangebrachtwurde,rasteterhörbaramGriffderSchüssel
ein.
5 SetzensiedenStopferindieEinfüllöffnungein.
6 SchließenSiedenSteckerandieSteckdosean.
7 Drehen Sie den Schalter auf 1 oder 2.
8 StellenSienachGebrauchdenGeschwindigkeitsreglerauf0, und ziehen Sie den
SteckerdesGerätsausderSteckdose.
Knethaken
BevorSiebeginnen,stellenSiesicher,dassSiedieTeilegemäßAbbildung4montieren.
MitdemKnethakenkönnenSieHefeteigfürBrotundPizzenkneten.Siemüssen
dieFlüssigkeitsmengeeinstellen,umdenTeiggemäßderLuftfeuchtigkeits-und
Temperaturbedingungenzuformen.
Hinweis
• VerwendenSiedenKnethakennichtzumVermengendesTeigs.VerwendenSiedafürdas
Schneidmesser.
• SetzenSiestetsdenKnethakenindieSchüssel,bevorSiedieZutateneinfüllen.
Tipp
• WennSieMehlmiteinemhohenGlutenanteilverwenden,nehmenSiefürbesteErgebnisse60gWasser
pro100gMehl,undknetenSiemiteinerGeschwindigkeitvon1für2Minutenlang(max.Zeit).
1 DrehenSiedieSchüsselimUhrzeigersinn,umsieanderMotoreinheitanzubringen,und
setzenSiedanndenZubehörhalterindieSchüssel.
» WenndieSchüsselrichtigangebrachtwurde,rastetsiehörbarein.
2 SetzenSiedenKnethakenaufdenZubehörhalter.
3 GebenSiedieZutatenindieSchüssel.
4 SetzenSiedenDeckelaufdieSchüssel.DrehenSiedenDeckelimUhrzeigersinn,biser
einrastet.
» WennderDeckelrichtigangebrachtwurde,rasteterhörbaramGriffderSchüssel
ein.
5 SetzensiedenStopferindieEinfüllöffnungein.
6 SchließenSiedenSteckerandieSteckdosean.
7 StellenSiedenRegleraufdiePosition1.
8 ÜberprüfenSiedieZubereitungszeit,diemaximaleMengeunddie
Geschwindigkeitsstufe,diefürZutateninTabelle1erforderlichsind.
9 DrehenSiedenReglernachderVerwendungauf0, und ziehen Sie den Netzstecker des
GerätsausderSteckdose.
Quirl
BevorSiebeginnen,stellenSiesicher,dassSiedieTeilegemäßAbbildung5montieren.
1 SetzenSiedenZubehörhalterindieSchüsselein.
2 SetzenSiedenSchneebesenaufdenZubehörhalterderSchüssel.
3 GebenSiedieZutatenindieSchüssel.
4 SetzenSiedenDeckelaufdenBehälter.DrehenSiedenDeckelimUhrzeigersinn,um
ihnzubefestigen.SetzensiedenStopferindieEinfüllöffnung.
5 Den Schalter auf Stufe 1 drehen.
6 StellenSienachGebrauchdenGeschwindigkeitsreglerauf0, und ziehen Sie den
SteckerdesGerätsausderSteckdose.
Zitruspresse
BevorSiebeginnen,stellenSiesicher,dassSiedieTeilegemäßAbbildung6montieren.
SiekönnendieZitruspressezumAusdrückenvonZitrusfrüchtenverwenden.
1 DrehenSiedieSchüsselimUhrzeigersinn,umsieanderMotoreinheitanzubringen,und
setzenSiedanndenZubehörhalterindieSchüssel.
» WenndieSchüsselrichtigangebrachtwurde,rastetsiehörbarein.
2 SetzenSiedasSiebfürdieZitruspresseaufdieAntriebswelleinderSchüssel.StellenSie
sicher,dassdieAusbuchtungdesSiebsindenSchlitzamGriffderSchüsseleinrastet.
» WenndasSiebrichtigangebrachtwurde,rastetsiehörbarein.
3 StellenSiedenKegelaufdasSieb.
4 SchließenSiedenSteckerandieSteckdosean.
5 ÜberprüfenSiediemaximaleMenge,diefürZutateninTabelle1erforderlichsind.
DrehenSiedenRegleraufdieGeschwindigkeit1.
» DerKegelbeginnt,sichzudrehen.
6 DrückenSiedieZitrusfruchtaufdenPresskegel.
7 UnterbrechenSiedenVorgangvonZeitzuZeit,umdasFruchteischausdemSiebzu
entfernen.WennSiemitdemSaftpressenfertigsindoderdasFruchteischentfernen
möchten,drehenSiedenSchalterauf0, und nehmen Sie die Schüssel mit Sieb und
PresskegelvomGerät.
Schneidescheiben und Raspelscheiben
BevorSiebeginnen,stellenSiesicher,dassSiediegewünschteScheibeauswählenundsie
gemäßAbb.7einbauen:
• VerstellbareSchneidescheibefürunterschiedlichdickeZutaten
• UmkehrbareRaspelscheibe(größereoderkleineGröße)
Achtung
• GehenSievorsichtigmitderScheibeum.SiehateinesehrscharfeKlinge.
• VerarbeitenSiemitdenScheibenkeinehartenZutatenwieEiswürfel.
• ÜbenSienichtzuvielDruckaufdenStopferaus,wennSieZutatenindieEinfüllöffnungfüllen.
4 Reinigung
Warnung
• ZiehenSiedenNetzstecker,bevorSiedasGerätreinigen.
Achtung
• AchtenSiedarauf,dassdieKlingenderMesserundderScheibennichtmithartenGegenständenin
Berührungkommen.Siekönntenstumpfwerden.
• DieKlingensindsehrscharf.SeienSievorsichtig,wennSiedieMessereinheitderKüchenmaschine
unddieScheibenreinigen.
1 ReinigenSiedieMotoreinheitmiteinemfeuchtenTuch.
2 ReinigenSiedieanderenTeileinheißemWasser(<60ºC)miteinemSpülmitteloder
ineinemGeschirrspüler.
Schnellreinigung
ReinigenSiedieSchüsselderKüchenmaschineunddenMixbecherwiefolgt:
Hinweis
• VergewissernSiesich,dassdasMesserinderSchüsselmontiertist,wennSiedieSchüsselder
Küchenmaschinereinigen.
1 GießenSielauwarmesWasser(nichtmehrals0,5l)mitetwasSpülmittelindieSchüssel
derKüchenmaschine.
2 SetzenSiedenDeckelaufdieSchüsselderKüchenmaschine,unddrehenSieihnim
Uhrzeigersinnfest.
3 Drehen Sie den Schalter auf P.LassenSiedasGerät30Sekundenlangoderbisdie
SchüsselderKüchenmaschinesauberistlaufen.
4 DrehenSiedenReglernachderVerwendungauf0, und ziehen Sie den Netzstecker des
GerätsausderSteckdose.
5 NehmenSiedieSchüsselderKüchenmaschineab,undspülenSiesiemitsauberem
Wasser ab.
5 Aufbewahrung
1 SchiebenSiedasNetzkabelindieintegrierteKabelaufwicklung(Abb.10).
2 BewahrenSiedasGerätaneinemtrockenenOrtauf.
3 LegenSiedieScheiben,denKnethakenunddenSchaftsowieanderekleine
ZubehörteileindieSchüsselderKüchenmaschine(Abb.11).
6 Garantie und Kundendienst
Besuchen Sie bei evtl. Problemen, für Service oder Informationen www.philips.com/support,
oderwendenSiesichandasPhilipsService-CenterinIhremLand.DieTelefonnummer
bendetsichinderGarantieschrift.SollteesinIhremLandkeinService-Centergeben,
wendenSiesichbitteanIhrenlokalenPhilipsHändler.
Français
1 Important
Lisez attentivement ce mode d'emploi avant d'utiliser l'appareil et conservez-le pour un
usageultérieur.
Danger
• Neplongezpasleblocmoteurdansl'eauetnelerincezpassousl'eaudurobinet.
Avertissement
• N'utilisezjamaisvosdoigtsouunobjetpourintroduiredesingrédientsdansla
cheminéederemplissageencoursd'utilisation.Utilisezexclusivementlepoussoir.
• Avantdebrancherl'appareilsurlesecteur,assurez-vousquelatensionindiquéeaubas
de l'appareil correspond à la tension secteur locale.
• Pourévitertoutaccident,neconnectezjamaiscetappareilàunprogrammateur.
• Silecordond'alimentation,lacheoud'autrespiècessontendommagés,n'utilisezpas
l'appareil.
• Silecordond'alimentationestendommagé,ildoitêtreremplacéparPhilips,unCentre
ServiceAgrééouuntechnicienqualiéand'évitertoutaccident.
• Cetappareiln'estpasdestinéàêtreutilisépardespersonnes(notammentdesenfants)
dontlescapacitésphysiques,sensoriellesouintellectuellessontréduites,oupardes
personnesmanquantd'expérienceoudeconnaissances,àmoinsquecelles-cine
soient sous surveillance ou qu'elles n'aient reçu des instructions quant à l'utilisation de
l'appareilparunepersonneresponsabledeleursécurité.
• Pourleursécurité,nelaissezpaslesenfantsjoueravecl'appareil.
• Nelaissezjamaisl'appareilfonctionnersanssurveillance.
• Sidesingrédientss'accumulentsurlesparoisdubol,éteignezl'appareiletdébranchez-
le.Décollezensuitelesingrédientsdesparoisàl'aided'unespatule.
• Soyezprudent(e)lorsquevousmanipulezounettoyezlesdisquesoulesensembles
lamesdurobotménager.Lesbordssonttrèscoupants.
• Netouchezpasleslames,surtoutlorsquel'appareilestbranchécarellessonttrès
coupantes.
• Sileslamessebloquent,débrancheztoujoursl'appareilavantderetirerlesingrédients
àl'originedublocage.
Attention
• N'éteignezjamaisl'appareilentournantlebolousoncouvercle.Pouréteindre
l'appareil,régleztoujoursleboutonsur0.
• Débranchezl'appareilimmédiatementaprèsutilisation.
• Avantderetirerlecouvercledubol,patientezjusqu'àl'arrêtcompletdesélémentsen
mouvement.
• Nedépassezpasleniveaumaximalindiquésurlebol.
• Avantlapremièreutilisation,nettoyezsoigneusementtouteslespiècesencontactavec
des aliments.
• Avantd'enleveroudenettoyerl'accessoiredepétrissageoulesdisques,débranchez
l'appareil.
• N'utilisezjamaisd'accessoiresoudepiècesd'unautrefabricantoun'ayantpasété
spéciquementrecommandésparPhilips.L'utilisationdecetyped'accessoiresoude
piècesentraînel'annulationdelagarantie.
• Cetappareilestdestinéàunusagedomestiqueuniquement.
• Nedépassezpaslesquantitésetlestempsdepréparationindiquésdanslemanuel
d'utilisation.
• Laissezrefroidirlesalimentschauds(<80°C)avantdelestraiter.
• Laisseztoujoursrefroidirl'appareilaprèschaqueutilisation.
• Certainsalimentspeuventaltérerlacolorationdelasurfacedespièces.Celaestsans
conséquencesurlebonfonctionnementdel'appareil.Cesaltérationsdelacoloration
disparaissentgénéralementavecletemps.
• Niveau sonore = 85 dB [A]
Champs électromagnétiques (CEM)
CetappareilPhilipsestconformeàtouteslesnormesrelativesauxchamps
électromagnétiques(CEM).Ilrépondauxrèglesdesécuritéétabliessurlabasedes
connaissancesscientiquesactuelless'ilestmanipulécorrectementetconformémentaux
instructions de ce manuel d'utilisation.
Recyclage
Votreproduitaétéconçuetfabriquéavecdesmatériauxetdescomposantsdehaute
qualitépouvantêtrerecyclésetréutilisés.
Laprésencedusymboledepoubellebarréeindiquequeleproduitestconformeàla
directiveeuropéenne2002/96/CE:
Nejetezpasceproduitaveclesorduresménagèresordinaires.Renseignez-voussurles
dispositionsenvigueurdansvotrerégionconcernantlacollecteséparéedesappareils
électriquesetélectroniques.Lamiseaurebutcorrectedel'ancienproduitpermetde
préserverl'environnementetlasanté.
2 Introduction
FélicitationspourvotreachatetbienvenuechezPhilips!Pourproterpleinementde
l'assistanceofferteparPhilips,enregistrezvotreproduitàl'adressesuivante:www.philips.
com/welcome.
VoustrouverezdesrecettespourvotrerobotménagersurlesiteWebwww.philips.com/
kitchen.
3 Robot ménager
Avertissement
• N'utilisezjamaisvosdoigtsouunobjet(parexemple,unespatule)pourintroduiredesingrédients
danslacheminéederemplissageencoursd'utilisation.Utilisezexclusivementlepoussoir.
Couteau du hachoir
Avantdecommencer,assurez-vousquevousavezeffectuélemontageselonlag.2.
Vouspouvezutiliserlecouteauduhachoirpourhacher,mélangeroumixerdesingrédients,
ouencorepourenfairedelapurée.Vouspouvezégalementl'utiliserpourmixeretmélanger
despâtesàgâteau.
Attention
• N'utilisezpaslecouteauduhachoirpourhacherdesingrédientsdurs,telsquedesgrainsdecafé,ducurcuma,
desnoixdemuscadeoudesglaçons.Celapourraitémousserleslames.
Remarque
• Nefaitespasfonctionnerl'appareiltroplongtempslorsquevousrâpezdufromage(àpâtedure)ou
duchocolatcarlesingrédientsdeviendraienttropchauds,commenceraientàfondreetàformerdes
grumeaux.
• Coupezlesgrandsalimentsenmorceauxd'environ3x3x3cm.
1 Tournezleboldanslesensdesaiguillesd'unemontrepourlexersurleblocmoteur,
puis placez le support pour outil dans le bol.
» Lorsquelebolestcorrectementxé,vousentendezunclic.
2 Placez le couteau du hachoir sur le support pour outil.
3 Placezlesingrédientsdanslebol.
4 Placezlecouverclesurleboletfermez-leenletournantdanslesensdesaiguilles
d'une montre.
» Lorsquelecouvercleestcorrectementassemblé,vousentendezunclicetle
couvercleestxéàlapoignéedubol.
5 Insérezlepoussoirdanslacheminéederemplissage.
6 Branchezlacheélectrique.
7 Vériezletempsdepréparation,laquantitémaximaleetlavitessenécessairespourles
ingrédientsdansleTableau1.Réglezleboutonsurlavitessesouhaitée.
8 Aprèsutilisation,réglezleboutonsur0etdébranchezl'appareil.
Conseil
• Lorsquevoushachezdesoignons,réglezleboutonsurlapositionPàplusieursreprisesand'éviter
quelesoignonsnesoienthachéstropnement.
• Lorsquedesingrédientss'accumulentsurlalameousurlesparoisintérieuresdubol,vouspouvez
procédercommesuit:1.Arrêtezl'appareil,puisdébranchez-le.2.Retirezlecouvercledubol.3.
Détachezlesingrédientsdelalameoudelaparoidubolàl'aided'unespatule.
Lame dentelée
Avantdecommencer,assurez-vousquevousavezeffectuélemontageselonlag.3.
Utilisezlalamedenteléepourhacherdesfruitscongelés.
Remarque
• Inséreztoujoursl'ensemblelamesdanslebolavantdecommencer.
• Ilestrecommandédecouperlesfruitsencubesde2x2x2cmavantdelescongeler.
• Pourréaliserdesdessertsdefruits,ilestrecommandéd'utiliserlavitesse2 pour une consistance
douce et la vitesse 1pouruneconsistanceépaisse.
1 Tournezleboldanslesensdesaiguillesd'unemontrepourlexersurleblocmoteur,
puis placez le support pour outil dans le bol.
» Lorsquelebolestcorrectementxé,vousentendezunclic.
2 Placezlalamedenteléesurlesupportpouroutil.
3 Placezlesfruitscongelésdanslebol.
4 Placezlecouverclesurleboletfermez-leenletournantdanslesensdesaiguilles
d'une montre.
» Lorsquelecouvercleestcorrectementassemblé,vousentendezunclicetle
couvercleestxéàlapoignéedubol.
5 Insérezlepoussoirdanslacheminéederemplissage.
6 Branchezlacheélectrique.
7 Réglezleboutonsur1 ou 2 .
8 Aprèsutilisation,réglezlesélecteurdevitessesurlaposition0,puisdébranchez
l'appareil.
Accessoire de pétrissage
Avantdecommencer,assurez-vousquevousavezeffectuélemontageselonlag.4.
Vouspouvezutiliserl'outildepétrissagepourpétrirdelapâteàpainouàpizza.Vousdevez
adapterlaquantitédeliquidepourformerlapâteenfonctiondesconditionsd'humiditéet
detempérature.
Remarque
• N'utilisezpasl'outildepétrissagepourmélangerdespâtesàgâteau.Pourcela,utilisezlecouteaudu
hachoir.
• Inséreztoujoursl'outildepétrissagedanslebolavantd'yajouterdesingrédients.
Conseil
• Sivousutilisezdelafarineàtauxélevédegluten,utilisez60gd'eaupar100gdefarineetpétrissez
àlavitesse1pendant2minute(maximum)pourobtenirunrésultatoptimal.
1 Tournezleboldanslesensdesaiguillesd'unemontrepourlexersurleblocmoteur,
puis placez le support pour outil dans le bol.
» Lorsquelebolestcorrectementxé,vousentendezunclic.
2 Placezl'outildepétrissagesurlesupportpouroutil.
3 Placezlesingrédientsdanslebol.
4 Placezlecouverclesurleboletfermez-leenletournantdanslesensdesaiguilles
d'une montre.
» Lorsquelecouvercleestcorrectementassemblé,vousentendezunclicetle
couvercleestxéàlapoignéedubol.
5 Insérezlepoussoirdanslacheminéederemplissage.
6 Branchezlacheélectrique.
7 Réglezleboutonsurlaposition1.
8 Vériezletempsdepréparation,laquantitémaximaleetlavitessenécessairespourles
ingrédientsdansleTableau1.
9 Aprèsutilisation,réglezleboutonsur0etdébranchezl'appareil.
Fouet
Avantdecommencer,assurez-vousquevousavezeffectuélemontageselonlag.5.
1 Placez le support pour outil dans le bol.
2 Placez le fouet sur le support pour outil dans le bol.
3 Placezlesingrédientsdanslebol.
4 Placez le couvercle sur le bol. Fermez le couvercle en le tournant dans le sens des
aiguillesd'unemontre.Insérezlepoussoirdanslacheminéederemplissage.
5 Sélectionnezlavitesse1.
6 Aprèsutilisation,réglezlesélecteurdevitessesurlaposition0,puisdébranchez
l'appareil.
Presse-agrumes
Avantdecommencer,assurez-vousquevousavezeffectuélemontageselonlag.6.
Vouspouvezutiliserlepresse-agrumespourpresserdesagrumes.
1 Tournezleboldanslesensdesaiguillesd'unemontrepourlexersurleblocmoteur,
puis placez le support pour outil dans le bol.
» Lorsquelebolestcorrectementxé,vouspouvezentendreunclic.
2 Placezleltrepourpresse-agrumessurlesupportpouroutildanslebol.Assurez-
vousquelapartiesaillantedultres'enclenchecorrectementdanslelogementdela
poignéedubol.
» Lorsqueleltreestcorrectementxé,vouspouvezentendreunclic.
3 Placezlecônesurleltre.
4 Branchezlacheélectrique.
5 Vériezlaquantitémaximalerequisepourlesingrédientsautableau1.Réglezle
bouton sur la vitesse 1.
» Le cône commence à pivoter.
6 Pressezl'agrumesurlecône.
7 Detempsàautre,arrêtezdepresserlesagrumesetretirezlapulpedultre.Lorsque
vousavezterminéousivoussouhaitezretirerlapulpe,réglezleboutonsur0 et retirez
leboldel'appareilavecleltreetlecône.
Disques à trancher et disques à râper
Avantdecommencer,veillezàchoisirledisquesouhaitéetàl'assemblersurl'appareil
conformémentàlag.7:
• Disqueàtrancherréglablepourtrancherlesingrédientsàdifférentesépaisseurs
• Disqueàrâperréversible(petitetgrand)
Attention
• Soyezprudent(s)lorsquevousmanipulezledisque.Ilestextrêmementcoupant.
• N'utilisezjamaislesdisquespourtraiterdesingrédientsdurs,telsquedesglaçons.
• N'exercezpasunepressiontropfortesurlepoussoiraprèsavoirintroduitdesingrédientsdansla
cheminéederemplissage.
4 Nettoyage
Avertissement
• Avantdenettoyerl'appareil,débranchez-le.
Attention
• Évitezdecognerlespartiescoupantesdeslamesetdesdisquescontredesobjetsdurscarcela
pourraitlesémousser.
• Leslamessontcoupantes.Soyezprudent(s)lorsquevousnettoyezl'ensemblelamesdurobot
ménageretlesdisques.
1 Nettoyez le bloc moteur à l'aide d'un chiffon humide.
2 Nettoyezlesautrespiècesàl'eauchaude(<60°C)avecunpeudeliquidevaisselleou
au lave-vaisselle.
Nettoyage rapide
Vouspouvezsuivrelesétapessuivantespournettoyerplusfacilementleboldurobot
ménageretleblender.
Remarque
• Assurez-vousquelalameestxéedanslebolsivousnettoyezleboldurobotménager.
1 Versezdel'eautiède(pasplusde0,5litre)etquelquesgouttesdeliquidevaisselledans
leboldurobotménager.
2 Placezlecouverclesurleboldurobotménagerettournez-ledanslesensdesaiguilles
d'unemontrepourlexer.
3 RéglezleboutonsurP.Faitesfonctionnerl'appareilpendant30secondesoujusqu'àce
queleboldurobotménagersoitpropre.
4 Aprèsutilisation,réglezleboutonsur0etdébranchezl'appareil.
5 Retirezleboldurobotménageretrincez-leàl'eauclaire.
5 Rangement
1 Rangezlecordond'alimentationdanssoncompartimentintégré(g.10).
2 Rangezl'appareildansunendroitsec.
3 Mettezlesdisques,l'outildepétrissageetl'axe,ainsiquelesautrespetitsaccessoires
dansleboldurobotménager(g.11).
6 Garantie et service
Sivousrencontrezunproblèmeousouhaitezobtenirdesinformationssupplémentaires,
visitez le site Web Philips à l'adresse www.philips.com/support ou contactez le
ServiceConsommateursPhilipsdevotrepays.Voustrouverezlenumérodetéléphonedans
ledépliantdegarantieinternationale.S'iln'existepasdeServiceConsommateursPhilipsdans
votrepays,renseignez-vousauprèsdevotrerevendeurPhilips.

2/4 3140 035 31413
Italiano
1 Importante
Leggereattentamenteilpresentemanualeprimadiutilizzarel'apparecchioeconservarloper
riferimenti futuri.
Pericolo
• Nonimmergerelabasemotorenell'acquaenonsciacquarlamaisottol'acqua
corrente.
Avviso
• Nonutilizzaremaileditaoaltrioggettiperspingeregliingredientinell'aperturadi
inserimentocibomentrel'apparecchioèinfunzione.Servirsiesclusivamentedel
pestello.
• Primadicollegarel'apparecchioall'alimentazioneelettrica,vericarechelatensione
riportata sulla parte inferiore dell'apparecchio corrisponda a quella della rete locale.
• Alnedievitaresituazionipericolose,noncollegaremail'apparecchioauntimer.
• Seilcavodialimentazione,laspinaoaltrepartisonodanneggiate,nonutilizzare
l'apparecchio.
• SeilcavodialimentazioneèdanneggiatodeveesseresostituitodaPhilips,dauncentro
diassistenzaautorizzatoPhilipsodapersonequalicatealnedievitarepossibilidanni.
• L'apparecchiononèdestinatoapersone(inclusibambini)concapacitàmentali,siche
o sensoriali ridotte, fatti salvi i casi in cui tali persone abbiano ricevuto assistenza o
formazione per l'uso dell'apparecchio da una persona responsabile della loro sicurezza.
• Perlalorosicurezza,nonconsentireaibambinidigiocareconl'apparecchio.
• Non lasciare mai in funzione l'apparecchio incustodito.
• Segliingredientisiattaccanoallaparetedelrecipiente,spegnerel'apparecchioe
staccare la spina. Servirsi quindi di una spatola per staccare il cibo dalla parete.
• Fareattenzionequandosimaneggianoopulisconoidischieilgruppolamedelrobot
dacucina.Iborditaglientisonomoltoaflati.
• Nontoccarelelame,specialmentequandol'apparecchioècollegatoallapresadi
corrente.Lelamesonomoltoaflate.
• Selelamesibloccano,toglierelaspinadallapresadicorrenteprimadirimuoveregli
ingredientichehannobloccatolelame.
Attenzione
• Nonspegneremail'apparecchioruotandoilrecipienteoirelativicoperchi.Spegnere
sempre l'apparecchio portando la manopola di controllo su 0.
• Scollegarelaspinadell'apparecchiosubitodopol'uso.
• Primaditogliereilcoperchiodalrecipiente,aspettarechelepartimobilisiarrestino.
• Non superare l'indicazione di livello massimo sul recipiente.
• Prima di usare l'apparecchio per la prima volta, lavare con cura tutte le parti che
verrannoacontattocongliingredienti.
• Prima di rimuovere o pulire l'accessorio per impastare o i dischi, staccare la spina
dell'apparecchio.
• Non utilizzare mai accessori o parti di altri produttori oppure componenti non
consigliatiinmodospecicodaPhilips.Incasodiutilizzoditaliaccessorioparti,la
garanziasiannulla.
• Questoapparecchioèdestinatoesclusivamenteall'usodomestico.
• Non superare le dosi massime e i tempi di lavorazione indicati nel manuale.
• Lasciareraffreddaregliingredienticaldi(<80ºC)primadilavorarli.
• Lasciaresempreraffreddarel'apparecchioatemperaturaambientedopoogniutilizzo.
• Alcuniingredientipossonofarscolorirelasuperciedegliaccessori.Sitrattadiun
fenomenodeltuttoinnocuo:dinormagliaccessoritornanoalcoloreoriginariodopo
un po' di tempo.
• Livello di rumorosità = 85 db [A]
Campi elettromagnetici (EMF)
QuestoapparecchioPhilipsèconformeatuttiglistandardrelativiaicampielettromagnetici
(EMF).Seutilizzatoinmanieraappropriataesecondoquantoriportatonelmanualedi
istruzioni,l'apparecchiorisultasicuroinconformitàalleprovescientichedisponibiliadoggi.
Riciclaggio
Questoprodottoèstatoprogettatoerealizzatoconmaterialiecomponentidialtaqualità,
che possono essere riciclati e riutilizzati.
Se su un prodotto si trova il simbolo di un bidone con ruote, ricoperto da una X, vuol dire
cheilprodottosoddisfairequisitidellaDirettivaComunitaria2002/96/CE.
Nonsmaltirequestoprodottoconiriutidomestici.Informarsisuiregolamentilocaliperla
raccolta differenziata dei prodotti elettrici ed elettronici. Il corretto smaltimento dei prodotti
usaticontribuisceaprevenirepotenzialieffettinegativisull'ambienteesullasalute.
2 Introduzione
Congratulazioniperl'acquistoebenvenutoinPhilips!Pertrarreilmassimovantaggio
dall'assistenzafornitadaPhilips,registrareilproprioprodottosulsito:www.philips.com/
welcome.
Per ricette da utilizzare con il robot da cucina, andare su www.philips.com/kitchen
3 Robot da cucina
Avvertenza
• Nonutilizzaremaileditaoaltrioggetti(adesempiounaspatola)perspingeregliingredienti
nell'aperturadiinserimentocibomentrel'apparecchioèinfunzione.Servirsiesclusivamentedel
pestello.
Coltello tritatutto
Primadiiniziare,assemblareleparticomeindicatonellaFig.2.
Utilizzareilcoltellotritatuttopertritare,mescolare,frullareoridurreinpurègliingredienti.
Puòessereutilizzatopermescolaregliimpastiperdolci.
Attenzione
• Nonutilizzareilcoltellotritatuttopertritareingredientiduricomecaffèingrani,curcuma,nocemoscatae
cubettidighiaccio,perevitaredidanneggiareospuntarelelame.
Nota
• Quandositritanoformaggiduriocioccolato,nonlasciarel'apparecchioinfunzionetroppoalungo,
perevitarechequestiingredientisiriscaldinoeccessivamente,inizinoasciogliersieforminogrumi.
• Pretagliaregliingredientipiùgrossiriducendoliacubettidicirca3cmdilato.
1 Ruotareilrecipienteinsensoorarioperbloccarlosulgruppomotore,quindiinserireil
porta-accessori nel recipiente.
» Ilrecipienteèmontatocorrettamentequandoscattainposizione.
2 Posizionare il coltello tritatutto sul porta-accessori.
3 Metteregliingredientinelcontenitore.
4 Posizionare il coperchio sul recipiente, quindi ruotarlo in senso orario per bloccarlo.
» Ilcoperchioèmontatocorrettamentequandoscattainposizioneedèssato
all'impugnaturadelrecipiente.
5 Spingereilpestellonell'aperturadiinserimentocibo.
6 Collegarelaspinaall'alimentazioneelettrica.
7 Vericareiltempodipreparazione,laquantitàmassimael'impostazionedellavelocità
richiestapergliingredientinellaTabella1.Ruotarelamanopolasull'impostazionedella
velocità desiderata.
8 Dopo l'uso, ruotare la manopola su 0,quindiscollegarel'apparecchio.
Suggerimento
• Quando si tritano le cipolle, ruotare alcune volte la manopola su Pperevitarechevenganotritate
tropponemente.
• Quandogliingredientisiattaccanoallalamaonelrecipiente,èpossibileeseguireipassaggiseguenti:
1.Spegnerel'apparecchioestaccarelaspina.2.Togliereilcoperchiodalrecipiente.3.Staccaregli
ingredientidallelameodallaparetedelrecipienteconunaspatola.
Lama seghettata
Primadiiniziare,accertarsidiassemblareleparticomeindicatonellaFig.3.
Usarelalamaseghettataperfrantumarelafruttasurgelata.
Nota
• Inseriresempreilgruppolamenelrecipienteprimadiiniziare.
• Siconsigliaditagliarelafruttaincubettidi2x2x2cmprimadisurgelarla.
• Perprepararedessertdifrutta,siconsigliadiusarelavelocità2perrisultatiomogeneielavelocità1
per ottenere pezzetti.
1 Ruotareilrecipienteinsensoorarioperbloccarlosulgruppomotore,quindiinserireil
porta-accessori nel recipiente.
» Ilrecipienteèmontatocorrettamentequandoscattainposizione.
2 Posizionarelalamaseghettataperilghiacciosulporta-accessori.
3 Posizionarelafruttasurgelatanelrecipiente.
4 Posizionare il coperchio sul recipiente, quindi ruotarlo in senso orario per bloccarlo.
» Ilcoperchioèmontatocorrettamentequandoscattainposizioneedèssato
all'impugnaturadelrecipiente.
5 Spingereilpestellonell'aperturadiinserimentocibo.
6 Collegarelaspinaall'alimentazioneelettrica.
7 Ruotare la manopola su 1 o 2 .
8 Dopo l'uso, ruotare il selettore di velocità su 0, quindi staccare la spina dell'apparecchio.
Accessorio per impastare
Primadiiniziare,assemblareleparticomeindicatonellaFig.4.
Utilizzare l'accessorio per impastare per preparare pasta per pane e pizze. È necessario
regolarelaquantitàdeiliquidiperformarel'impastotenendocontodellecondizionidi
umidità e temperatura.
Nota
• Nonutilizzarel'accessorioperimpastarepermescolaregliimpastipertorte.Usareilcoltello
tritatutto per questo lavoro.
• Inseriresemprel'accessorioperimpastarenelrecipienteprimadiaggiungeregliingredienti.
Suggerimento
• Sesiutilizzafarinaadelevatocontenutodiglutine,perrisultatiottimali,utilizzare60gdiacquaper
ogni100gdifarinaelavorarel'impastoallavelocità1per2minuti(tempomassimo).
1 Ruotareilrecipienteinsensoorarioperbloccarlosulgruppomotore,quindiinserireil
porta-accessori nel recipiente.
» Ilrecipienteèmontatocorrettamentequandoscattainposizione.
2 Posizionare l'accessorio per impastare sul porta-accessori.
3 Metteregliingredientinelcontenitore.
4 Posizionare il coperchio sul recipiente, quindi ruotarlo in senso orario per bloccarlo.
» Ilcoperchioèmontatocorrettamentequandoscattainposizioneedèssato
all'impugnaturadelrecipiente.
5 Spingereilpestellonell'aperturadiinserimentocibo.
6 Collegarelaspinaall'alimentazioneelettrica.
7 Ruotare la manopola in posizione 1.
8 Vericareiltempodipreparazione,laquantitàmassimael'impostazionedellavelocità
richiestapergliingredientinellaTabella1.
9 Dopo l'uso, ruotare la manopola su 0,quindiscollegarel'apparecchio.
Frusta
Primadiiniziare,assemblareleparticomeindicatonellaFig.5.
1 Mettete il porta-accessori nel recipiente.
2 Posizionare la frusta sul porta-accessori nel recipiente.
3 Metteregliingredientinelcontenitore.
4 Metteteilcoperchiosulrecipiente.Girareilcoperchioinsensoorarioperssarlo.
Inserire il pestello nell'apertura di inserimento cibo.
5 Selezionare la velocità 1.
6 Dopo l'uso, ruotare il selettore di velocità su 0, quindi staccare la spina dell'apparecchio.
Spremiagrumi
Primadiiniziare,assemblareleparticomeindicatonellaFig.6.
Lospremiagrumipuòessereutilizzatoperspremeregliagrumi.
1 Ruotareilrecipienteinsensoorarioperbloccarlosulgruppomotore,quindiinserireil
porta-accessori nel recipiente.
» Ilrecipienteèmontatocorrettamentequandoscattainposizione.
2 Inserireilsetacciodellospremiagrumisulporta-accessoridelrecipiente.Accertarsiche
lapartesporgentedelsetacciosiabloccatanellafessuradell'impugnaturadelrecipiente.
» Ilsetaccioèmontatocorrettamentequandoscattainposizione.
3 Mettere il cono sul setaccio.
4 Collegarelaspinaall'alimentazioneelettrica.
5 VericarelaquantitàmassimadiingredientinellaTabella1.Impostarelamanopolasulla
velocità 1.
» Ilconoiniziaagirare.
6 Premetel'agrumesulcono.
7 Ognitantointerrompetel'operazionepertoglierelapolpadalsetaccio.Altermine
dell'operazioneosesidesideratoglierelapolpa,ruotarelamanopolasu0etogliereil
contenitore con il setaccio e il cono.
Dischi per affettare e per grattugiare
Primadiiniziare,scegliereildiscodesideratoeassemblarlosecondolaFig.7.
• Discoperaffettareregolabileperregolarelospessoredesiderato
• Discopergrattugiarereversibile(piùgrandeopiccolo)
Attenzione
• Fareattenzionequandosimaneggiaildisco.Quest'ultimaèmoltoaflata.
• Nonutilizzaremaiildiscoconingredientiduricomeicubettidighiaccio.
• Nonesercitareunapressioneeccessivasulpestelloquandosispingonogliingredientinell'apertura
di inserimento cibo.
4 Pulizia
Avvertenza
• Prima di pulire l'apparecchio, staccare la spina.
Attenzione
• Iborditaglientidellelameedeidischinondevonomaivenireacontattoconoggettiduri,perevitare
didanneggiareospuntarelelame.
• Iborditaglientisonoaflati.Fareattenzionequandosipulisceilgruppolamedelrobotdacucinae
i dischi.
1 Pulireilgruppomotoreconunpannoumido.
2 Lavarelealtrepartiinacquacalda(<60°C)conunpo'didetergenteliquidoperpiatti
oinlavastoviglie.
Pulizia rapida
Perlavarepiùfacilmenteilrecipientedelroboteilvasofrullatore,attenersiallaprocedura
seguente:
Nota
• Quandosipulisceilrecipientedelrobot,assicurarsichelelamesianossatenelrecipiente.
1 Versareacquatiepida(max.0,5l)ealcunegoccedidetergenteliquidoperpiattinel
recipiente del robot.
2 Posizionare il coperchio sul recipiente del robot, quindi ruotarlo in senso orario per
bloccarlo.
3 Ruotare la manopola su P. Lasciare in funzione l'apparecchio per almeno 30 secondi o
noaquandoilrecipientedelrobotnonèpulito.
4 Dopo l'uso, ruotare la manopola su 0,quindiscollegarel'apparecchio.
5 Estrarre il recipiente del robot e risciacquarlo con acqua pulita.
5 Conservazione
1 Inserireilcavodialimentazionenelvanoportacavointegrato(Fig.10).
2 Riporrel'apparecchioinunluogoasciutto.
3 Posizionareidischi,l'accessorioperimpastare,ilpernoeglialtripiccoliaccessorinel
recipientedelrobotdacucina(Fig.11).
6 Garanzia e assistenza
Incasodiproblemi,perassistenzaoperinformazioni,consultarelapaginaWebwww.philips.
com/supportocontattarel'assistenzaclientiPhilipsdelpropriopaese.Ilnumeroditelefonoè
nell'opuscolodellagaranziainternazionale.Senelpropriopaesenonèpresentealcuncentro
diassistenzaclienti,rivolgersialpropriorivenditorePhilips.
Nederlands
1 Belangrijk
Leesdezegebruiksaanwijzingzorgvuldigdoorvoordatuhetapparaatgaatgebruiken.Bewaar
degebruiksaanwijzingomdezeindiennodigtekunnenraadplegen.
Gevaar
• Dompel de motorunit niet in water en spoel deze ook niet af.
Let op
• Gebruiknooituwvingersofeenvoorwerpomingrediëntendoordevultrechterte
duwenterwijlhetapparaatwerkt.Gebruikalleendestamper.
• Controleervoordatuhetapparaataansluitopnetspanningofhetvoltagedataan
deonderkantvanhetapparaatwordtaangegevenovereenkomtmetdeplaatselijke
netspanning.
• Sluitditapparaatnooitaanopeentijdschakelaaromgevaarlijkesituatiestevermijden.
• Gebruikhetapparaatnietindienhetnetsnoer,destekkerofandereonderdelen
beschadigdzijn.
• Indienhetnetsnoerbeschadigdis,moethetwordenvervangendoorPhilips,eendoor
Philipsgeautoriseerdservicecentrumofpersonenmetvergelijkbarekwalicatiesom
gevaartevoorkomen.
• Ditapparaatisnietbedoeldvoorgebruikdoorpersonen(waaronderkinderen)
metverminderdelichamelijke,zintuiglijkeofgeestelijkevermogens,ofdiegebrekaan
ervaringofkennishebben,tenzijiemanddieverantwoordelijkisvoorhunveiligheid
toezichtophenhoudtofhenheeftuitgelegdhoehetapparaatdientteworden
gebruikt.
• Laatkinderennietmethetapparaatspelenvoorhuneigenveiligheid.
• Laat het apparaat nooit zonder toezicht werken.
• Schakelhetapparaatuitenhaaldestekkeruithetstopcontactalseringrediëntenaan
dewandvandekomblijvenkleven.Verwijderdeingrediëntenvervolgensvandewand
met een spatel.
• Weesvoorzichtigwanneerudeschijvenofdemesunitsvandekeukenmachine
aanraaktofschoonmaakt.Desnijkantenzijnzeerscherp.
• Raakdemessennietaan,vooralnietwanneerdestekkervanhetapparaatnoginhet
stopcontactzit.Demessenzijnzeerscherp.
• Als de messen vastlopen, haal dan eerst de stekker uit het stopcontact voordat u de
ingrediëntendiedemessenblokkerenverwijdert.
Let op
• Schakel het apparaat nooit uit door aan de kom of de deksels te draaien. Schakel het
apparaataltijduitdoordeknopnaar0 te draaien.
• Haalnagebruikaltijddirectdestekkeruithetstopcontact.
• Wachttotdebewegendedelenstilstaanvoordatuhetdekselvandekomverwijdert.
• Overschrijddemaximumindicatieopdekomniet.
• Maakdeonderdelendieincontactkomenmetvoedselgoedschoonvoordatuhet
apparaatvoordeeerstekeergebruikt.
• Haal de stekker van het apparaat uit het stopcontact voordat u het kneedaccessoire of
deschijvenverwijdertofschoonmaakt.
• Gebruiknooitaccessoiresofonderdelenvananderefabrikantenofdienietspeciek
zijnaanbevolendoorPhilips.Alsudergelijkeaccessoiresofonderdelengebruikt,vervalt
degarantie.
• Ditapparaatisuitsluitendbedoeldvoorhuishoudelijkgebruik.
• Overschrijddehoeveelhedenenbewerkingstijdindegebruiksaanwijzingniet.
• Laatheteingrediëntenafkoelen(<80°C)voordatudezegaatverwerken.
• Laat het apparaat afkoelen tot kamertemperatuur na iedere portie die u hebt verwerkt.
• Bepaaldeingrediëntenkunnenverkleuringenopdeonderdelenveroorzaken.Ditheeft
geennegatiefeffectopdeonderdelen.Deverkleuringenverdwijnennaeentijdje
meestal vanzelf.
• Geluidsniveau:85dB[A]
Elektromagnetische velden (EMV)
DitPhilips-apparaatvoldoetaanallerichtlijnenmetbetrekkingtotelektromagnetische
velden(EMV).Mitshetapparaatopdejuistewijzeenvolgensdeinstructiesindeze
gebruiksaanwijzingwordtgebruikt,ishetveiligtegebruikenvolgenshetnubeschikbare
wetenschappelijkebewijs.
Recycling
Uwproductisvervaardigdvankwalitatiefhoogwaardigematerialenenonderdelendie
gerecycledenopnieuwgebruiktkunnenworden.
Wanneer een product is voorzien van een symbool van een afvalcontainer met een kruis
erdoorheen,valthetproductonderdeEuropeserichtlijn2002/96/EG:
Gooihetproductnooitwegmetanderhuishoudelijkafval.Informeeruoverdelokale
regelsinzakegescheidenafvalophalingvanelektrischeenelektronischetoestellen.Eengoede
afvalverwerkingvanuwoudeproductdraagtbijtothetvoorkomenvanmogelijkeschade
voorhetmilieuendevolksgezondheid.
2 Inleiding
GefeliciteerdmetuwaankoopenwelkombijPhilips!Registreeruwproductopwww.
philips.com/welcomeomoptimaalgebruiktekunnenmakenvandedoorPhilipsgeboden
ondersteuning.
Gavoorreceptendieumetuwkeukenmachinekuntmakennaarwww.philips.com/kitchen
3 Keukenmachine
Waarschuwing
• Gebruiknooituwvingersofeenvoorwerp(bijvoorbeeldeenspatel)omingrediëntendoorde
vultrechterteduwenterwijlhetapparaatwerkt.Gebruikalleendestamper.
Hakmolenmes
Zorgervoordatuvoorubegintallesinelkaarzetvolgensg.2.
Ukunthethakmolenmesgebruikenomingrediëntentehakken,mixen,mengenofpureren.U
kuntdezeookgebruikenomcakebeslagtemixenentemengen.
Let op
• Gebruikhethakmolenmesnietomhardeingrediëntenzoalskofebonen,kurkuma,nootmuskaatofijsblokjeste
hakken. Hierdoor kan het mes bot worden.
Opmerking
• Laathetapparaatniettelangwerkenwanneeru(harde)kaasofchocoladehakt.Dezeingrediënten
wordenandersteheet,waardoorzegaansmeltenenklonteren.
• Snijdgrotestukkenvoedselvantevoreninstukjesvancirca3x3x3cm.
1 Draaidekomrechtsomomdezeopdemotorunittebevestigenenplaatsdande
accessoirehouder in de kom.
» Alsdekomcorrectisgeplaatst,hoortueenklik.
2 Plaats het hakmes op de accessoirehouder.
3 Doedeingrediëntenindekom.
4 Plaats het deksel op de kom en draai het deksel rechtsom om het vast te zetten.
» Wanneerhetdekselcorrectisgeplaatst,hoortueenklik.Hetdekselisdanaan
hethandvatvandekombevestigd.
5 Plaats de stamper in de vultrechter.
6 Steek de stekker in het stopcontact.
7 ControleerinTabel1devereistebereidingstijd,maximalehoeveelheidensnelheidvoor
deingrediënten.Draaideknopnaardegewenstesnelheidsstand.
8 Draainagebruikdeknopnaar0 en haal de stekker uit het stopcontact.
Tip
• Als u uien hakt, draai dan de knop een paar keer naar Pomtevoorkomendatdeuientejn
wordengehakt.
• Ukuntdevolgendestappenvolgenwanneerhetvoedselaanhetmesofindekomblijftplakken:1.
Schakel het apparaat uit en haal de stekker uit het stopcontact. 2. Neem het deksel van de kom. 3.
Verwijderdeingrediëntenmeteenspatelvanhetmesenvandezijkantvandekom.
Getand mes
Zorgervoordatuvoorubegintallesinelkaarzetvolgensg.3.
Gebruikhetgetandemesombevrorenfruittevermalen.
Opmerking
• Plaatsdemesunitaltijdindekomvoorubegint.
• Hetwordtaangeradenhetfruitinblokjesvan2x2x2cmtesnijdenalvorenshettebevriezen.
• Voorhetmakenvanfruitdessertswordthetaangeradensnelheid2tegebruikenvooreenjn
resultaat en snelheid 1vooreengrofresultaat.
1 Draaidekomrechtsomomdezeopdemotorunittebevestigenenplaatsdande
accessoirehouder in de kom.
» Alsdekomcorrectisgeplaatst,hoortueenklik.
2 Plaatshetgetandemesomijsmeetevermalenopdeaccessoirehouder.
3 Doe het bevroren fruit in de kom.
4 Plaats het deksel op de kom en draai het deksel rechtsom om het vast te zetten.
» Wanneerhetdekselcorrectisgeplaatst,hoortueenklik.Hetdekselisdanaan
hethandvatvandekombevestigd.
5 Plaats de stamper in de vultrechter.
6 Steek de stekker in het stopcontact.
7 Draai de knop naar 1 of 2.
8 Draainagebruikdesnelheidskeuzeknopnaar0enhaalvervolgensdestekkervanhet
apparaat uit het stopcontact.
Kneedaccessoire
Zorgervoordatuvoorubegintallesinelkaarzetvolgensg.4.
Ukunthetkneedaccessoiregebruikenomgistdeegvoorbroodenpizza'stekneden.Umoet
dehoeveelheidvloeistofaanpassenomhetdeegtevormenaandehandvandevochtigheid
en temperatuur.
Opmerking
• Gebruikhetkneedaccessoirenietomcakebeslagtemengen.Gebruikdaarhethakmolenmesvoor.
• Plaatshetkneedaccessoirealtijdindekomvoordatudeingrediëntentoevoegt.
Tip
• Gebruikbijglutenmeelvoordebesteresultaten60gwatervooriedere100gmeelenkneedop
snelheid1gedurende2minuut(max.tijd).
1 Draaidekomrechtsomomdezeopdemotorunittebevestigenenplaatsdande
accessoirehouder in de kom.
» Alsdekomcorrectisgeplaatst,hoortueenklik.
2 Plaats het kneedaccessoire op de accessoirehouder.
3 Doedeingrediëntenindekom.
4 Plaats het deksel op de kom en draai het deksel rechtsom om het vast te zetten.
» Wanneerhetdekselcorrectisgeplaatst,hoortueenklik.Hetdekselisdanaan
hethandvatvandekombevestigd.
5 Plaats de stamper in de vultrechter.
6 Steek de stekker in het stopcontact.
7 Draai de knop naar stand 1.
8 ControleerinTabel1devereistebereidingstijd,maximalehoeveelheidensnelheidvoor
deingrediënten.
9 Draainagebruikdeknopnaar0 en haal de stekker uit het stopcontact.
Ballonklopper
Zorgervoordatuvoorubegintallesinelkaarzetvolgensg.5:
1 Plaats de accessoirehouder in de kom.
2 Plaats de ballonklopper op de accessoirehouder in de kom.
3 Doedeingrediëntenindekom.
4 Plaats het deksel op de kom. Draai het deksel rechtsom om het vast te zetten. Plaats de
stamper in de vultrechter.
5 Selecteer snelheid 1.
6 Draainagebruikdesnelheidskeuzeknopnaar0enhaalvervolgensdestekkervanhet
apparaat uit het stopcontact.
Citruspers
Zorgervoordatuvoorubegintallesinelkaarzetvolgensg.6.
Ukuntdecitruspersgebruikenomcitrusvruchtenuittepersen.
1 Draaidekomrechtsomomdezeopdemotorunittebevestigenenplaatsdande
accessoirehouder in de kom.
» Alsdekomcorrectisgeplaatst,hoortueenklik.
2 Plaatsdezeefvoordecitruspersopdeaccessoirehouderindekom.Controleerofhet
uitsteeksel van de zeef in de sleuf van het handvat van de kom zit.
» Alsdezeefcorrectisgeplaatst,hoortueenklik.
3 Zetdekegelopdezeef.
4 Steek de stekker in het stopcontact.
5 ControleerdemaximalevereistehoeveelheidvoordeingrediënteninTabel1.Draaide
knop naar snelheid 1.
» Dekegelbeginttedraaien.
6 Drukdecitrusvruchtopdeperskegel.
7 Stopafentoemetpersenompulpuitdezeefteverwijderen.Draaideknopnaar0 en
neemdekommetdezeefenperskegelvanhetapparaatafwanneeruklaarbentmet
persenofwanneerupulpwiltverwijderen.
Snijschijven en raspschijven
Kiesvoorubegintdegewensteschijfenbevestigdievolgensg.7:
• Verstelbaresnijschijfomverschillendediktesintestellen
• Omkeerbareraspschijf(kleinengroter)
Let op
• Weesvoorzichtigwanneerudeschijfaanraakt.Hetheefteenzeerscherpesnijkant.
• Gebruikdeschijfnooitomhardeingrediëntenzoalsijsblokjesteverwerken.
• Oefennietteveeldrukuitopdestamperwanneerudeingrediëntenindevultrechterduwt.
4 Reiniging
Waarschuwing
• Haal de stekker uit het stopcontact voordat u het apparaat schoonmaakt.
Let op
• Voorkomdatdesnijkantenvandemessenenschijvenincontactkomenmethardevoorwerpen.
Hierdoor kan het mes bot worden.
• Desnijkantenzijnscherp.Weesvoorzichtigwanneerudemesunitvandekeukenmachineende
schijvenschoonmaakt.
1 Maakdemotorunitschoonmeteenvochtigedoek.
2 Maakdeandereonderdelenschooninwarmwater(<60ºC)meteenbeetje
afwasmiddel of in de vaatwasmachine.
Snel schoonmaken
Omdekeukenmachinekomenblenderkangemakkelijkerschoontemakengaatualsvolgt
te werk.
Opmerking
• Controleerofhetmesindekomisbevestigdalsudekeukenmachinekomschoonmaakt.
1 Gietlauwwarmwater(nietmeerdan0,5liter)eneenpaardruppelsafwasmiddelinde
kom van de keukenmachine.
2 Plaats het deksel op de kom van de keukenmachine en draai het deksel rechtsom om
het vast te zetten.
3 Draai de knop naar P. Laat het apparaat 30 seconden werken of totdat de kom van de
keukenmachine schoon is.
4 Draainagebruikdeknopnaar0 en haal de stekker uit het stopcontact.
5 Maak de kom van de keukenmachine los en spoel deze met schoon water uit.
5 Opbergen
1 Duwhetnetsnoerindegeïntegreerdesnoeropbergruimte(g.10).
2 Berghetproductopeendrogeplaatsop.
3 Plaatsdeschijven,hetkneedaccessoire,dekneedasenanderekleineaccessoiresinde
keukenmachinekom(g.11).
6 Garantie en service
Alsueenprobleemhebtofvraaghebtofservicenodighebt,gaatunaarwww.philips.com/
supportofneemtucontactopmethetPhilipsConsumerCareCenterinuwland.Het
telefoonnummervindtuinhet'worldwideguarantee'-vouwblad.AlsergeenConsumerCare
Centreinuwlandis,gadannaaruwPhilips-dealer.

Español
1 Importante
Antesdeusarelaparato,leaatentamenteestemanualdeusuarioyconsérveloporsi
necesitara consultarlo en el futuro.
Peligro
• Nosumerjalaunidadmotoraenaguanilaenjuaguebajoelgrifo.
Advertencia
• Nuncautilicelosdedosniunobjetoparaempujaringredienteseneloriciodeentrada
mientraselaparatoestáenfuncionamiento.Utilicesóloelempujador.
• Antesdeconectarelaparatoalacorriente,asegúresedequeelvoltajeindicadoenla
parteinferiordelaparatosecorrespondeconeldelaredeléctricalocal.
• Paraevitarsituacionesdepeligro,noconectenuncaelaparatoauninterruptorcon
temporizador.
• Si el cable de alimentación, el enchufe u otra pieza ha sufrido daños, no utilice el aparato.
• Si el cable de alimentación está dañado, debe ser sustituido por Philips o por un centro
deservicioautorizadoporPhilipsuotropersonalcualicado,conelndeevitar
situacionesdepeligro.
• Esteaparatonodebeserusadoporpersonas(adultosoniños)consucapacidad
física,psíquicaosensorialreducida,niporquienesnotenganlosconocimientosyla
experiencia necesarios, a menos que sean supervisados o instruidos acerca del uso del
mismoporunapersonaresponsabledesuseguridad.
• Parasuseguridad,nopermitaquelosniñosjueguenconelaparato.
• Nodejenuncaqueelaparatofuncionesinvigilancia.
• Silosalimentossepeganalapareddelrecipiente,apagueelaparatoydesenchúfelo.A
continuación, utilice una espátula para separar los alimentos de la pared.
• Tengacuidadoalmanipularolimpiarlosdiscosylasunidadesdecuchillasdelrobotde
cocina.Losbordesdelascuchillasestánmuyalados.
• Notoquelascuchillas,sobretodocuandoelaparatoestéenchufado.Lascuchillasestán
muyaladas.
• Silascuchillassebloquean,desenchufeelaparatoantesderetirarlosingredientesque
están bloqueándolas.
Precaución
• Noapaguenuncaelaparatogirandoelrecipienteolastapas.Apaguesiempreel
aparatogirandoelbotónalaposición0.
• Desenchufeelaparatoinmediatamentedespuésdeusarlo.
• Antes de quitar la tapa del recipiente, espere hasta que las piezas móviles se paren.
• No exceda el nivel máximo indicado en el recipiente.
• Antes de usar el aparato por primera vez, limpie bien las piezas que vayan a entrar en
contacto con los alimentos.
• Antes de retirar o limpiar el accesorio para amasar o los discos, desenchufe el aparato.
• No utilice nunca accesorios ni piezas de otros fabricantes o que Philips no recomiende
especícamente.Silohace,quedaráanuladasugarantía.
• Esteaparatoessóloparausodoméstico.
• No supere las cantidades y los tiempos indicados en el manual del usuario.
• Dejequelosingredientescalientesseenfríen(80ºComenos)antesdeprocesarlos.
• Dejesiemprequeelaparatoseenfríeatemperaturaambientedespuésdeprocesar
cada lote.
• Ciertosingredientespuedencausardecoloracionesenlasuperciedelaspiezas.Esto
notieneunefectonegativoenellas.Lasdecoloracionesdesaparecengeneralmente
despuésdealgúntiempo.
• Nivel de ruido = 85 dB [A]
Campos electromagnéticos (CEM)
EsteaparatoPhilipscumpletodoslosestándaressobrecamposelectromagnéticos(CEM).
Si se utiliza correctamente y de acuerdo con las instrucciones de este manual, el aparato se
puedeusardeformasegurasegúnlosconocimientoscientícosdisponibleshoyendía.
Reciclaje
El producto ha sido diseñado y fabricado con materiales y componentes de alta calidad que
pueden reciclarse y reutilizarse.
Cuandoveaelsímbolodecubodebasuratachadoenunproducto,signicaquecumplela
Directivaeuropea2002/96/EC:
Nuncasedeshagadelproductoconelrestodelabasuradoméstica.Infórmeseacercade
lanormativalocalsobreelreciclajedeproductoseléctricosyelectrónicos.Laeliminación
correctadeunproductousadoayudaaevitarpotencialmenteconsecuenciasnegativaspara
el medio ambiente y la salud humana.
2 Introducción
EnhorabuenaporsucompraybienvenidoaPhilips.Parapoderbeneciarseporcompletode
laasistenciaqueofrecePhilips,registreelproductoenwww.philips.com/welcome.
Para obtener recetas para cocinar con el robot de cocina, visite www.philips.com/kitchen
3 Robot de cocina
Advertencia
• Nuncautilicelosdedosniunobjeto(porejemplo,unaespátula)paraempujaringredientesenel
oriciodeentradamientraselaparatoestáenfuncionamiento.Utilicesóloelempujador.
Cuchilla de la picadora
Antesdecomenzar,asegúresedequerealizaelmontajesegúnlag.2.
Puedeutilizarlacuchilladelapicadoraparacortar,mezclarybatirlosingredientesohacerlos
puré.Tambiénlopuedeutilizarparamezclarmasasligeras.
Precaución
• Noutilicelacuchilladelapicadoraparapicaringredientesduroscomogranosdecafé,cúrcuma,nuezmoscaday
cubitosdehielo,yaquepodríanestropearellodelascuchillas.
Nota
• Nodejeelaparatoenfuncionamientodemasiadotiempocuandocortequesoochocolateduro.De
locontrario,estosingredientespuedencalentarsedemasiado,empezarafundirseyformargrumos.
• Cortelosalimentosgrandesentrozosdeaproximadamente3x3x3cm.
1 Gireelrecipientehacialaderechaparajarloenlaunidadmotorayacontinuación
coloque el soporte de accesorios en el recipiente.
» Cuandoelrecipientesejacorrectamente,seoyeunclic.
2 Coloquelacuchilladelapicadoraenelsoportedeaccesorios.
3 Pongalosingredientesenelrecipiente.
4 Coloquelatapasobreelrecipienteygírelaenelsentidodelasagujasdelrelojpara
ajustarla.
» Cuandolatapasemontacorrectamente,seoyeunclicylatapaquedajadaal
asa del recipiente.
5 Coloqueelempujadoreneloriciodeentrada.
6 Conecteeladaptadordealimentaciónalafuentedealimentación.
7 Compruebeeltiempodepreparación,lacantidadmáximaylaposicióndevelocidad
necesariosparalosingredientesenlaTabla1.Gireelbotónalaposicióndevelocidad
deseada.
8 Despuésdeluso,gireelbotónalaposición0 y, a continuación, desenchufe el aparato.
Consejo
• Sivaapicarcebolla,gireelbotónalaposiciónP unas cuantas veces para evitar picarla demasiado
na.
• Silosalimentossepeganalacuchillaoalinteriordelrecipiente,puedeseguirlospasossiguientes:
1.Apagueelaparatoydesenchúfelo.2.Quitelatapadelrecipiente.3.Retirelosingredientesdelas
cuchillas o de las paredes del recipiente con una espátula.
Cuchilla con lo de sierra
Antesdecomenzar,asegúresedequerealizaelmontajesegúnlag.3.
Utilicelacuchillaconlodesierraparapicarfrutacongelada.
Nota
• Coloquesiemprelaunidaddecuchillasenelrecipienteantesdeempezar.
• Serecomiendacortarlafutaendadosde2x2x2cmantesdecongelarla.
• Para preparar postres de fruta, se recomienda utilizar la velocidad 2 para obtener una textura
cremosa y la velocidad 1 para obtener una textura con trozos.
1 Gireelrecipientehacialaderechaparajarloenlaunidadmotorayacontinuación
coloque el soporte de accesorios en el recipiente.
» Cuandoelrecipientesejacorrectamente,seoyeunclic.
2 Coloquelacuchillaparahieloconlodesierraenelsoportedeaccesorios.
3 Coloquelafrutacongeladaenelrecipiente.
4 Coloquelatapasobreelrecipienteygírelaenelsentidodelasagujasdelrelojpara
ajustarla.
» Cuandolatapasemontacorrectamente,seoyeunclicylatapaquedajadaal
asa del recipiente.
5 Coloqueelempujadoreneloriciodeentrada.
6 Conecteeladaptadordealimentaciónalafuentedealimentación.
7 Gireelbotóna1 o 2.
8 Despuésdeluso,gireelselectordevelocidadalaposición0 y, a continuación,
desenchufe el aparato.
Accesorio para amasar
Antesdecomenzar,asegúresedequerealizaelmontajesegúnlag.4.
Puedeutilizarelamasadorparahacermasadelevaduraparapanypizza.Debeajustarla
cantidaddelíquidoparaformarlamasasegúnlascondicionesdehumedadylatemperatura.
Nota
• Noutiliceelamasadorparamezclarmasasligeras.Paraello,utilicelacuchilladelapicadora.
• Coloquesiempreelamasadorenelrecipienteantesdeañadirlosingredientes.
Consejo
• Siutilizaharinaconaltocontenidoengluten,utilice60gdeaguaporcada100gdeharinayamasea
unavelocidadde1durante2minutos(tiempomáximo).
1 Gireelrecipientehacialaderechaparajarloenlaunidadmotorayacontinuación
coloque el soporte de accesorios en el recipiente.
» Cuandoelrecipientesejacorrectamente,seoyeunclic.
2 Coloqueelamasadorenelsoportedeaccesorios.
3 Pongalosingredientesenelrecipiente.
4 Coloquelatapasobreelrecipienteygírelaenelsentidodelasagujasdelrelojpara
ajustarla.
» Cuandolatapasemontacorrectamente,seoyeunclicylatapaquedajadaal
asa del recipiente.
5 Coloqueelempujadoreneloriciodeentrada.
6 Conecteeladaptadordealimentaciónalafuentedealimentación.
7 Gireelbotónalaposición1.
8 Compruebeeltiempodepreparación,lacantidadmáximaylaposicióndevelocidad
necesariosparalosingredientesenlaTabla1.
9 Despuésdeluso,gireelbotónalaposición0 y, a continuación, desenchufe el aparato.
Varilla ovalada
Antesdecomenzar,asegúresedequerealizaelmontajesegúnlag.5:
1 Pongaelsoportedeaccesoriosenelrecipiente.
2 Coloquelavarillaovaladaenelsoportedeaccesoriosdelrecipiente.
3 Pongalosingredientesenelrecipiente.
4 Coloquelatapasobreelrecipiente.Girelatapaaladerechaparajarla.Coloqueel
empujadoreneloriciodeentrada.
5 Seleccione la velocidad 1.
6 Despuésdeluso,gireelselectordevelocidadalaposición0 y, a continuación,
desenchufe el aparato.
Exprimidor
Antesdecomenzar,asegúresedequerealizaelmontajesegúnlag.6.
Puede utilizar el exprimidor para exprimir zumos de frutas cítricas.
1 Gireelrecipientehacialaderechaparajarloenlaunidadmotorayacontinuación
coloque el soporte de accesorios en el recipiente.
» Cuandoelrecipientesejacorrectamente,seoyeunclic.
2 Coloqueeltamizdelexprimidorenelsoportedeaccesoriosdelrecipiente.Asegúrese
dequeelsalientedeltamizencajaconlaranuradelasadelrecipiente.
» Cuandoeltamizsejacorrectamente,seoyeunclic.
3 Coloqueelconoeneltamiz.
4 Conecteeladaptadordealimentaciónalafuentedealimentación.
5 Consultelacantidadmáximanecesariadeingredientesenlatabla1.Gireelbotónala
posición 1.
» Elconoempiezaagirar.
6 Presione con la fruta sobre el cono.
7 Dejedepresionardevezencuandoparaquitarlapulpadeltamiz.Cuandohayadejado
depresionarocuandoquieraretirarlapulpa,gireelbotónalaposición0 y quite el
recipiente del aparato con el tamiz y el cono puestos.
Discos para cortar en rodajas y para cortar en tiras
Antesdecomenzar,asegúresedequeescogeeldiscoquedeseaymóntelosegúnlag.7:
• Discoajustableparacortarenrodajasparaajustardistintosgrosores
• Discoparacortarentirasreversible(tamañomásgrandeopequeño)
Precaución
• Tengacuidadoalmanipulareldisco.Tieneunbordemuyalado.
• Noutilicenuncaeldiscoparaprocesaringredientesduros,comocubitosdehielo.
• Noejerzademasiadapresiónconelempujadorcuandoempujelosingredientesporeloriciode
entrada.
4 Limpieza
Advertencia
• Antesdelimpiarelaparato,desenchúfelo.
Precaución
• Asegúresedequelosbordesdelascuchillasydelosdiscosnoentranencontactoconobjetos
duros.Podríanestropearellodelascuchillas.
• Losbordesdelascuchillasestánmuyalados.Tengacuidadoallimpiarlaunidaddecuchillasdel
robot de cocina y los discos.
1 Limpielaunidadmotoraconunpañohúmedo.
2 Lavelasotraspiezasconaguacaliente(menosde60º)y,siesnecesario,conunpoco
dedetergentelíquidooenellavavajillas.
Limpieza rápida
Puedeseguirlospasossiguientesparalimpiarelrecipientedelrobotdecocinaylajarradela
batidora con más facilidad.
Nota
• Asegúresedequelacuchillaestámontadaenelrecipientesilimpiaelrecipientedelrobotdecocina.
1 Viertaaguatibia(nomásdemediolitro)yunasgotasdedetergentelíquidoenel
recipiente del robot de cocina.
2 Coloquelatapadelrecipientedelrobotdecocinaygírelaenelsentidodelasagujas
delrelojparajarla.
3 GireelbotónaP.Dejequeelaparatofuncionedurante30segundosohastaqueel
recipiente del robot de cocina quede limpio.
4 Despuésdeluso,gireelbotónalaposición0 y, a continuación, desenchufe el aparato.
5 Desmonteelrecipientedelrobotdecocinayenjuágueloconagualimpia.
5 Almacenamiento
1 Introduzcaelcableenelcompartimentoincorporadoparaguardarlo(Fig.10).
2 Guardeelaparatoenunlugarseco.
3 Coloquelosdiscos,elamasadoryeleje,yelrestodeaccesoriospequeñosenel
recipientedelrobotdecocina(Fig.11).
6 Garantía y servicio
Si tiene cualquier problema, necesita ayuda o información, visite www.philips.com/support o
póngaseencontactoconelServiciodeAtenciónalClientedePhilipsdesupaís.Elnúmero
deteléfonoseencuentraenelfolletodegarantíamundial.SinohayServiciodeAtenciónal
Clienteensupaís,diríjasealdistribuidorPhilipslocal.
1 Γυρίστετομπολπροςταδεξιάγιακουμπώσειστομοτέρκαιστησυνέχεια
τοποθετήστετοεξάρτημασυγκράτησηςεργαλείωνστομπολ.
» Ότανκουμπώσεισωστάτομπολ,θαακούσετεένακλικ.
2 Τοποθετήστετηνοδοντωτήλεπίδατουπάγουστοεξάρτημασυγκράτησηςεργαλείων.
3 Τοποθετήστεταπαγωμέναφρούταστομπολ.
4 Βάλτετοκαπάκιστομπολκαιστησυνέχειαγυρίστετοκαπάκιπροςταδεξιάγια
ναασφαλίσει.
» Αντοκαπάκιέχειτοποθετηθείσωστά,θαακούσετεέναχαρακτηριστικόήχο
καιτοκαπάκιθακουμπώσειστηλαβήτουμπολ.
5 Τοποθετήστετοεξάρτημαώθησηςστοστόμιοτροφοδοσίας.
6 Συνδέστετοβύσματροφοδοσίαςστηνυποδοχήτροφοδοσίαςρεύματος.
7 Γυρίστετοκουμπίστο1ήστο2.
8 Μετάτηχρήση,ρυθμίστετοδιακόπτηταχυτήτωνστηθέση0καιαποσυνδέστετη
συσκευήαπότορεύμα.
Εξάρτημα ζύμωσης
Πρινξεκινήσετε,βεβαιωθείτεότιέχετεκάνειτησυναρμολόγησησύμφωναμετηνεικ.4.
Μπορείτεναχρησιμοποιήσετετοεξάρτημαζύμωσηςγιαναετοιμάσετεζύμηγιαψωμί
καιπίτσα.Πρέπειναρυθμίσετετηνποσότητατουυγρούγιατηζύμηανάλογαμετην
υγρασίακαιτηθερμοκρασία.
Σημείωση
• Μηνχρησιμοποιήσετετοεξάρτημαζύμωσηςγιανααναμείξετεζύμηγιακέικ.Γιααυτόντο
σκοπό,χρησιμοποιήστετομαχαίριτουκόφτη.
• Νατοποθετείτεπάντατοεξάρτημαζύμωσηςστομπολπροτούπροσθέσετεταυλικά.
Συμβουλή
• Ανχρησιμοποιείτεαλεύριμευψηλήπεριεκτικότητασεγλουτένη,προσθέστε60γρ.νερόανά100γρ.αλεύρι
καιεπεξεργαστείτεταστηνταχύτητα1για2λεπτάτοπολύ.
1 Γυρίστετομπολπροςταδεξιάγιακουμπώσειστομοτέρκαιστησυνέχεια
τοποθετήστετοεξάρτημασυγκράτησηςεργαλείωνστομπολ.
» Ότανκουμπώσεισωστάτομπολ,θαακούσετεένακλικ.
2 Τοποθετήστετοεξάρτημαζύμωσηςστοεξάρτημασυγκράτησηςεργαλείων.
3 Βάλτεταυλικάστομπολ.
4 Βάλτετοκαπάκιστομπολκαιστησυνέχειαγυρίστετοκαπάκιπροςταδεξιάγια
ναασφαλίσει.
» Αντοκαπάκιέχειτοποθετηθείσωστά,θαακούσετεέναχαρακτηριστικόήχο
καιτοκαπάκιθακουμπώσειστηλαβήτουμπολ.
5 Τοποθετήστετοεξάρτημαώθησηςστοστόμιοτροφοδοσίας.
6 Συνδέστετοβύσματροφοδοσίαςστηνυποδοχήτροφοδοσίαςρεύματος.
7 Γυρίστετοκουμπίστηθέση1.
8 Ελέγξτετοχρόνοπαρασκευής,τημέγιστηποσότητακαιτηρύθμισηταχύτητας
πουαπαιτείταιγιαταυλικά,στονΠίνακα1.
9 Μετάτηχρήση,γυρίστετοκουμπίστο0καιέπειταβγάλτετησυσκευήαπότηνπρίζα.
Χτυπητήρι
Πρινξεκινήσετε,βεβαιωθείτεότιέχετεκάνειτησυναρμολόγησησύμφωναμετηνεικ.5.
1 Τοποθετήστετοεξάρτημασυγκράτησηςεργαλείωνστονκάδο.
2 Τοποθετήστετοχτυπητήριστοεξάρτημασυγκράτησηςεργαλείωνστομπολ.
3 Βάλτεταυλικάστομπολ.
4 Τοποθετήστετοκαπάκιστομπολ.Γυρίστετοκαπάκιπροςταδεξιάγιανατο
στερεώσετε.Τοποθετήστετοεξάρτημαώθησηςστοστόμιοτροφοδοσίας.
5 Επιλέξτετηνταχύτητα1.
6 Μετάτηχρήση,ρυθμίστετοδιακόπτηταχυτήτωνστηθέση0καιαποσυνδέστετη
συσκευήαπότορεύμα.
Συμβουλή
• Γιακαλύτερααποτελέσματαστακέικ,χρησιμοποιήστετοχτυπητήρι.
Στύφτης
Πρινξεκινήσετε,βεβαιωθείτεότιέχετεκάνειτησυναρμολόγησησύμφωναμετηνεικ.6.
Μπορείτεναχρησιμοποιήσετετολεμονοστύφτηγιαναστύψετεεσπεριδοειδή.
1 Γυρίστετομπολπροςταδεξιάγιακουμπώσειστομοτέρκαιστησυνέχεια
τοποθετήστετοεξάρτημασυγκράτησηςεργαλείωνστομπολ.
» Ότανκουμπώσεισωστάτομπολ,θαακούσετεένακλικ.
2 Τοποθετήστετησήτατουλεμονοστύφτηστοεξάρτημασυγκράτησηςεργαλείων
μέσαστομπολ.Βεβαιωθείτεότιηπροεξοχήτηςσήταςέχειασφαλίσειστην
υποδοχήτηςλαβήςτουμπολ.
» Αντοποθετήσετεσωστάτησήτα,θαακούσετεένακλικ.
3 Τοποθετήστετονκώνοπάνωστησήτα.
4 Συνδέστετοβύσματροφοδοσίαςστηνυποδοχήτροφοδοσίαςρεύματος.
5 ΑνατρέξτεστονΠίνακα1γιαναδείτετημέγιστηποσότηταπουαπαιτείταιγιατα
υλικά.Γυρίστετοκουμπίστηνταχύτητα1.
» Οκώνοςαρχίζειναπεριστρέφεται.
6 Πιέστετοεσπεριδοειδέςπάνωστονκώνο.
7 Κατάδιαστήματανασταματάτεπροκειμένουνααφαιρείτετονπολτόαπότο
σουρωτήρι.Όταντελειώσετετοστύψιμοήότανθελήσετενααφαιρέσετετον
πολτό,γυρίστετοκουμπίστο0καιβγάλτετομπολαπότησυσκευή,μετησήτα
καιτονκώνοπάνωστομπολ.
Δίσκοι κοπής και τεμαχισμού
Πρινξεκινήσετε,φροντίστεναεπιλέξετετονκατάλληλοδίσκοκαισυναρμολογήστετον
σύμφωναμετηνεικ.7:
• Ρυθμιζόμενοςδίσκοςκοπήςγιαδιαφορετικάπάχη
• Δίσκοςτεμαχισμούδύοόψεων(μικρόκαιμεγάλομέγεθος)
Προσοχή
• Ναπροσέχετεότανχρησιμοποιείτετουςδίσκους.Τοάκροκοπήςείναιπολύαιχμηρό.
• Μηνχρησιμοποιείτεποτέτοδίσκογιατηνεπεξεργασίασκληρώνυλικών,όπωςταπαγάκια.
• Ότανσπρώχνετευλικάστοστόμιοτροφοδοσίας,μηνασκείτευπερβολικήπίεσηστοεξάρτημα
ώθησης.
4 Καθάρισμα
Προειδοποίηση
• Γιανακαθαρίσετετησυσκευή,αποσυνδέστετηνπροηγουμένωςαπότορεύμα.
Προσοχή
• Φροντίστετααιχμηράάκρατωνλεπίδωνκαιτωνδίσκωνναμηνέρχονταισεεπαφήμεσκληρά
αντικείμενα.Οποιαδήποτεεπαφήμπορείναστομώσειτιςλεπίδες.
• Ταάκρατωνλεπίδωνείναιαιχμηρά.Ναπροσέχετεότανκαθαρίζετετουςδίσκουςκαιτις
λεπίδεςτηςκουζινομηχανής.
1 Καθαρίστετομοτέρμεέναυγρόπανί.
2 Γιανακαθαρίσετεταυπόλοιπαεξαρτήματα,χρησιμοποιήστεζεστόνερό(<60ºC)
καιυγρόαπορρυπαντικόήβάλτεταστοπλυντήριοπιάτων.
Γρήγορος καθαρισμός
Γιανακαθαρίσετεπιοεύκολατομπολτηςκουζινομηχανής,μπορείτεναακολουθήσετε
ταπαρακάτωβήματα.
Σημείωση
• Βεβαιωθείτεότιότανκαθαρίζετετομπολτηςκουζινομηχανής,ηλεπίδαείναιστερεωμένηστομπολ.
1 Ρίξτεχλιαρόνερό(όχιπάνωαπό0,5λίτρο)καιλίγεςσταγόνεςυγρού
απορρυπαντικούστομπολτηςκουζινομηχανής.
2 Τοποθετήστετοκαπάκιστομπολτηςκουζινομηχανήςκαιγυρίστετοπροςτα
δεξιάγιανακουμπώσει.
3 ΓυρίστετοκουμπίστοP.Αφήστετησυσκευήναλειτουργήσειτουλάχιστονγια
30δευτερόλεπταήμέχριτομπολτηςκουζινομηχανήςνακαθαρίσει.
4 Μετάτηχρήση,γυρίστετοκουμπίστο0καιέπειταβγάλτετησυσκευήαπότηνπρίζα.
5 Αφαιρέστετομπολτηςκουζινομηχανήςκαιξεπλύνετέτομεκαθαρόνερό.
5 Συστήματα αποθήκευσης
1 Σπρώξτετοκαλώδιοτροφοδοσίαςμέσαστηνενσωματωμένηθήκηφύλαξης
καλωδίου(εικ.10).
2 Αποθηκεύστετησυσκευήσεμέροςχωρίςυγρασία.
3 Τοποθετήστετουςδίσκους,τοεξάρτημαζύμωσης,τονάξονακαιταυπόλοιπα
μικροεξαρτήματαμέσαστομπολτηςκουζινομηχανής(εικ.11).
6 Εγγύηση και σέρβις
Εάναντιμετωπίζετεκάποιοπρόβλημα,χρειάζεστεπληροφορίεςήησυσκευήσας
χρειάζεταισέρβις,επισκεφθείτετηδιεύθυνσηwww.philips.com/supportήεπικοινωνήστεμε
τοΚέντροΕξυπηρέτησηςΚαταναλωτώντηςPhilipsστηχώρασας.Οαριθμόςτηλεφώνου
βρίσκεταιστοδιεθνέςφυλλάδιοεγγύησης.ΕάνδενυπάρχειΚέντροΕξυπηρέτησης
Καταναλωτώνστηχώρασας,απευθυνθείτεστοντοπικόαντιπρόσωποτηςPhilips.
Ελληνικά
1 Σημαντικό
Διαβάστεπροσεκτικάτοπαρόνεγχειρίδιοχρήσηςπροτούχρησιμοποιήσετετη
συσκευήκαικρατήστετογιαμελλοντικήαναφορά.
Κίνδυνος
• Μηνβυθίζετετομοτέρσενερόκαιμηντοξεπλένετεμενερόβρύσης.
Προειδοποίηση
• Μηνχρησιμοποιείτεποτέταδάχτυλάσαςήκάποιοαντικείμενογιανασπρώξετε
υλικάστοστόμιοτροφοδοσίαςενώησυσκευήβρίσκεταισελειτουργία.Πρέπεινα
χρησιμοποιείτεμόνοτοεξάρτημαώθησης.
• Προτούσυνδέσετετησυσκευήστηνπρίζα,βεβαιωθείτεότιητάσηπουαναγράφεται
στοκάτωμέροςτηςσυσκευήςαντιστοιχείστηντοπικήτάσηρεύματος.
• Προςαποφυγήεπικίνδυνωνκαταστάσεων,μηνσυνδέετεποτέαυτήντησυσκευή
σεχρονοδιακόπτη.
• Μηνχρησιμοποιείτετησυσκευήεάντοκαλώδιοτροφοδοσίας,τοφιςήάλλαμέρη
τηςσυσκευήςέχουνυποστείφθορά.
• Εάντοκαλώδιοτροφοδοσίαςυποστείφθορά,θαπρέπεινααντικατασταθείαπότη
Philips,απόένακέντροεπισκευώνεξουσιοδοτημένοαπότηPhilipsήαπόεξίσου
εξειδικευμέναάτομα,προςαποφυγήκινδύνου.
• Αυτήησυσκευήδενπροορίζεταιγιαχρήσηαπόάτομα(συμπεριλαμβανομένων
τωνπαιδιών)μεπεριορισμένεςσωματικές,αισθητήριεςήδιανοητικέςικανότητες
ήαπόάτομαχωρίςεμπειρίακαιγνώση,εκτόςκαιεάντηχρησιμοποιούνυπό
επιτήρησηήέχουνλάβειοδηγίεςσχετικάμετηχρήσητηςσυσκευήςαπόάτομο
υπεύθυνογιατηνασφάλειάτους.
• Γιατηνασφάλειάτους,μηνεπιτρέπετεσταπαιδιάναπαίζουνμετησυσκευή.
• Μηναφήνετεποτέτησυσκευήναλειτουργείχωρίςεπίβλεψη.
• Αντατρόφιμακολλήσουνστιςπλευρικέςεπιφάνειεςτουμπολ,απενεργοποιήστε
τησυσκευήκαιαποσυνδέστετηναπότηνπρίζα.Στησυνέχεια,χρησιμοποιήστεμια
σπάτουλαγιανααφαιρέσετετοφαγητόαπότατοιχώματα.
• Προσέχετεότανχρησιμοποιείτεήκαθαρίζετετουςδίσκουςκαιτιςλεπίδεςτης
κουζινομηχανής.Ταάκρακοπήςείναιπολύαιχμηρά.
• Μηναγγίζετετιςλεπίδες,ειδικάότανησυσκευήείναισυνδεδεμένηστηνπρίζα.Οι
λεπίδεςείναιπολύαιχμηρές.
• Εάνοιλεπίδεςκολλήσουν,αποσυνδέστετησυσκευήαπότηνπρίζαπριν
απομακρύνετεταυλικάπουμπλοκάρουντιςλεπίδες.
Προσοχή
• Μηναπενεργοποιήσετεποτέτησυσκευήπεριστρέφονταςτομπολήτακαπάκια.
Νααπενεργοποιείτεπάντατησυσκευήγυρίζονταςτοκουμπίστο0.
• Αποσυνδέστετησυσκευήαπότηνπρίζααμέσωςμετάτηχρήση.
• Γιανααφαιρέσετετοκαπάκιαπότομπολ,περιμένετεώσπουνασταματήσουννα
λειτουργούνταπεριστρεφόμεναμέρητηςσυσκευής.
• Μηνυπερβαίνετετημέγιστηστάθμηπουσημειώνεταιστομπολ.
• Πρινχρησιμοποιήσετετησυσκευήγιαπρώτηφορά,καθαρίστεσχολαστικάτα
μέρητηςσυσκευήςπουθαέρθουνσεεπαφήμετρόφιμα.
• Πριναφαιρέσετεήκαθαρίσετετοεξάρτημαζύμωσηςήτουςδίσκους,
αποσυνδέστετησυσκευήαπότηνπρίζα.
• Μηνχρησιμοποιείτεποτέεξαρτήματαήμέρηαπόάλλουςκατασκευαστέςήπου
ηPhilipsδενσυνιστάρητώς.Ανχρησιμοποιήσετετέτοιαεξαρτήματαήμέρη,η
εγγύησήσαςκαθίσταταιάκυρη.
• Αυτήησυσκευήπροορίζεταιγιαοικιακήχρήσημόνο.
• Μηνυπερβαίνετετιςποσότητεςκαιτοχρόνοεπεξεργασίαςπουαναφέρονταιστο
εγχειρίδιοχρήσης.
• Πρινχρησιμοποιήσετεζεστάυλικά,αφήστετανακρυώσουν(<80ºC).
• Νααφήνετεπάντατησυσκευήνακρυώσεισεθερμοκρασίαδωματίουμετάαπό
τηνεπεξεργασίακάθεποσότητας.
• Ορισμέναυλικάενδέχεταιναπροκαλέσουναποχρωματισμούςστηνεπιφάνεια
τωνεξαρτημάτων.Αυτόδενεπηρεάζειαρνητικάταεξαρτήματα.Συνήθως,οι
αποχρωματισμοίεξαφανίζονταιμετάαπόκάποιοχρονικόδιάστημα.
• Επίπεδοθορύβου=85dB[A]
Ηλεκτρομαγνητικά Πεδία (EMF)
ΗσυγκεκριμένησυσκευήτηςPhilipsσυμμορφώνεταιμεόλαταπρότυπαπουαφορούν
ταηλεκτρομαγνητικάπεδία(EMF).Εάνγίνεισωστόςχειρισμόςκαισύμφωνοςμετις
οδηγίεςτουπαρόντοςεγχειριδίουχρήσης,ησυσκευήείναιασφαλήςστηχρήσηβάσει
τωνεπιστημονικώναποδείξεωνπουείναιδιαθέσιμεςμέχρισήμερα.
Ανακύκλωση
Τοπροϊόνείναισχεδιασμένοκαικατασκευασμένοαπόυψηλήςποιότηταςυλικάκαι
εξαρτήματα,ταοποίαμπορούνναανακυκλωθούνκαιναξαναχρησιμοποιηθούν.
Ότανδείτετοσύμβολοτουδιαγραμμένουκάδουμερόδεςπάνωσεπροϊόν,τότεαυτό
τοπροϊόνκαλύπτεταιαπότηνΕυρωπαϊκήοδηγία2002/96/ΕΚ:
Μηναπορρίπτετεποτέαυτότοπροϊόνμαζίμεάλλααπορρίμματατουσπιτιούσας.
Παρακαλούμεενημερωθείτεγιατουςτοπικούςκανόνεςσχετικάμετηνξεχωριστή
συλλογήηλεκτρικώνκαιηλεκτρονικώνπροϊόντων.Ησωστήαπόρριψητουπαλιούσας
προϊόντοςθαβοηθήσειστηναποτροπήτυχόναρνητικώνεπιπτώσεωνπουενδέχεταινα
υπάρξουνστοπεριβάλλονκαιστηνανθρώπινηυγεία.
2 Εισαγωγή
ΣυγχαρητήριαγιατηναγοράσαςκαικαλωσορίσατεστηPhilips!Γιαναεπωφεληθείτε
πλήρωςαπότηνυποστήριξηπουπροσφέρειηPhilips,καταχωρήστετοπροϊόνσαςστη
διεύθυνσηwww.philips.com/welcome.
Μπορείτεναβρείτεσυνταγέςγιατηνκουζινομηχανήστηδιεύθυνσηwww.philips.com/kitchen
3 Κουζινομηχανή
Προειδοποίηση
• Μηνχρησιμοποιείτεποτέταδάχτυλάσαςήκάποιοαντικείμενο(π.χ.μιασπάτουλα)γιανα
σπρώξετευλικάστοστόμιοτροφοδοσίαςενώησυσκευήβρίσκεταισελειτουργία.Πρέπεινα
χρησιμοποιείτεμόνοτοεξάρτημαώθησης.
Μαχαίρι κόφτη
Πρινξεκινήσετε,βεβαιωθείτεότιέχετεκάνειτησυναρμολόγησησύμφωναμετηνεικ.2.
Μπορείτεναχρησιμοποιήσετετομαχαίριτουκόφτηγιανακόψετε,νααναμείξετε,να
ανακατέψετεήναπολτοποιήσετευλικά.Μπορείτεεπίσηςνααναμείξετεζύμηγιακέικ.
Προσοχή
• Μηνχρησιμοποιείτετομαχαίριτουκόφτηγιανακόψετεπολύσκληράυλικάόπωςκόκκουςκαφέ,
κουρκούμη,μοσχοκάρυδοκαιπαγάκια,επειδήμπορείναστομώσει.
Σημείωση
• Μηναφήνετετησυσκευήναλειτουργείγιαπολύμεγάλοδιάστημαότανκόβετε(σκληρό)τυρίή
σοκολάτα.Διαφορετικά,αυτάταυλικάζεσταίνονταιυπερβολικά,αρχίζουνναλιώνουνκαισβολιάζουν.
• Προετοιμάστετατρόφιμακόβοντάςτασεμεγάλακομμάτιαδιαστάσεωνπερίπου3x3x3εκ.
1 Γυρίστετομπολπροςταδεξιάγιακουμπώσειστομοτέρκαιστησυνέχεια
τοποθετήστετοεξάρτημασυγκράτησηςεργαλείωνστομπολ.
» Ότανκουμπώσεισωστάτομπολ,θαακούσετεένακλικ.
2 Τοποθετήστετομαχαίριτουκόφτηστοεξάρτημασυγκράτησηςεργαλείων.
3 Βάλτεταυλικάστομπολ.
4 Βάλτετοκαπάκιστομπολκαιστησυνέχειαγυρίστετοκαπάκιπροςταδεξιάγια
ναασφαλίσει.
» Αντοκαπάκιέχειτοποθετηθείσωστά,θαακούσετεέναχαρακτηριστικόήχο
καιτοκαπάκιθακουμπώσειστηλαβήτουμπολ.
5 Τοποθετήστετοεξάρτημαώθησηςστοστόμιοτροφοδοσίας.
6 Συνδέστετοβύσματροφοδοσίαςστηνυποδοχήτροφοδοσίαςρεύματος.
7 Ελέγξτετοχρόνοπαρασκευής,τημέγιστηποσότητακαιτηρύθμισηταχύτητας
πουαπαιτείταιγιαταυλικά,στονΠίνακα1.Γυρίστετοκουμπίστηρύθμιση
ταχύτηταςπουεπιθυμείτε.
8 Μετάτηχρήση,γυρίστετοκουμπίστο0καιέπειταβγάλτετησυσκευήαπότηνπρίζα.
Συμβουλή
• Ότανκόβετεκρεμμύδια,γυρίστετοκουμπίστοPμερικέςφορές,ώστεναμηντακόψετε
υπερβολικάλεπτά.
• Ανταυλικάκολλήσουνστηλεπίδαήστοεσωτερικότουμπολ,μπορείτεναακολουθήσετετα
παρακάτωβήματα:1.Απενεργοποιήστετησυσκευήκαιαποσυνδέστετηναπότηνπρίζα.2.
Αφαιρέστετοκαπάκιαπότομπολ.3.Αφαιρέστεταυλικάαπότηλεπίδαήαπότιςπλευρικές
επιφάνειεςτουμπολμεμιασπάτουλα.
Οδοντωτή λεπίδα
Πρινξεκινήσετε,βεβαιωθείτεότιέχετεκάνειτησυναρμολόγησησύμφωναμετηνεικ.3.
Μετηνοδοντωτήλεπίδα,μπορείτεναθρυμματίσετεπαγωμέναφρούτα.
Σημείωση
• Νατοποθετείτεπάντατημονάδατηςλεπίδαςστομπολπρινξεκινήσετε.
• Πρινπαγώσετεταφρούτα,σαςσυμβουλεύουμενατακόβετεσεκυβάκια2x2x2εκ.
• Ότανφτιάχνετεεπιδόρπια,μπορείτεναχρησιμοποιήσετετηνταχύτητα2γιαομοιόμορφο
αποτέλεσμακαιτηνταχύτητα1γιαπιοτραγανόαποτέλεσμα.

3/4 3140 035 31423
Norsk
1 Viktig
Lesdennebrukerveiledningennøyeførdubrukerapparatet,ogtavarepådenforbruksenere.
Fare
• Motorenhetenmåikkedyppesivannellerskyllesunderspringen.
Advarsel
• Brukaldringreneelleretobjekttilåskyveingredienserinnimaterøretmens
apparatet er i bruk. Bruk bare stapperen.
• Førdukoblerapparatettilstrømnettet,mådukontrollereatspenningensomerangitt
påundersidenavapparatet,stemmeroverensmednettspenningenpåstedet.
• Foråunngåfarligesituasjonerskaldetteapparatetaldrikoblestilentimer.
• Ikkebrukapparatethvisstrømledningen,støpseletellerandredelererødelagt.
• Hvisledningenerødelagt,mådenalltidskiftesutavPhilips,etservicesentersomer
godkjentavPhilipsellerlignendekvalisertpersonellforåunngåfarligesituasjoner.
• Detteapparateterikketiltenktbrukavpersoner(inkludertbarn)somharnedsatt
sanseevneellerfysiskellerpsykiskfunksjonsevne,ellerpersonersomikkeharerfaring
ellerkunnskap,unntatthvisdefårtilsynellerinstruksjonerombrukavapparatetaven
personsomeransvarligforsikkerheten.
• Forbarnetsegensikkerhetmåduikkeladetlekemedapparatet.
• Laaldriapparatetgåutentilsyn.
• Hvismatklebersegtilveggenpåbollen,slårduavapparatetogkoblerdetfra
stikkontakten.Brukderetterenslikkepotttilåfjernematenfraveggen.
• Værforsiktignårduhåndtererellerrengjørskiveneogknivenhetenetil
foodprocessoren.Knivseggeneersværtskarpe.
• Ikkeberørknivene,spesielthvisapparateterkoblettilstrømnettet.Kniveneersvært
skarpe.
• Hvisknivenesettersegfast,mådutrekkestøpseletutavstikkontaktenførdufjerner
ingrediensenesomblokkererknivene.
Forsiktig
• Slåaldriavapparatetvedåvribollenellerlokkene.Slåalltidavapparatetvedåvri
bryteren til 0.
• Kobleapparatetfrastrømnettetumiddelbartetterbruk.
• Venttildebevegeligedeleneharstansetførdufjernerlokkettilbollen.
• Ikkeoverskridmaksimumsnivåetsomerangittpåbollen.
• Førdubrukerapparatetforførstegang,måalledelersomkommerikontaktmedmat,
rengjøresgrundig.
• Koblefraapparatetførdufjernerellerrengjøreltetilbehørellerskiver.
• IkkebruktilbehørellerdelerfraandreprodusenterellersomPhilipsikkespesikt
anbefaler.Hvisdubrukerslikttilbehørellerslikedeler,blirgarantienugyldig.
• Detteapparatetskalkunbrukesihusholdningen.
• Ikkeoverskridmaksimumsmengdeneogtilberedningstidenesomerangitti
bruksanvisningen.
• Avkjølvarmeingredienser(<80ºC)førdebearbeides.
• Laalltidapparatetavkjølestilromtemperaturmellomhverporsjonsombearbeides.
• Visseingredienserkanforårsakemisfargingavoveratentildelene.Detteharingen
negativinnvirkningpådelene.Misfargingenforsvinnervanligvisetternoetid.
• Støynivå=85dB(A).
Elektromagnetiske felt (EMF)
DettePhilipsapparatetoverholderallestandardersomgjelderelektromagnetiskefelt(EMF).
Hvisapparatethåndteresriktigogisamsvarmedinstruksjoneneidennebrukerhåndboken,
erdettrygtåbrukedetutfradenkunnskapenviharperdagsdato.
Resirkulering
Produkteterutformetogprodusertmedmaterialerogdeleravsværthøykvalitetsomkan
resirkuleresoggjenbrukes.
Nåretproduktermerketmedensøppeldunkmedkryssover,betyrdetatproduktetdekkes
avEU-direktiv2002/96/EF:
Produktetskalikkekastessammenmedannethusholdningsavfall.Gjørdegkjentmed
lokalebestemmelseromavfallsdeponeringavelektriskeogelektroniskeprodukter.Hvisdu
deponerergamleprodukterriktig,bidrardutilåforhindrenegativekonsekvenserforhelse
ogmiljø.
2 Innledning
Gratulerermedkjøpet,ogvelkommentilPhilips!Hvisduvildrafullnytteavstøttensom
Philipstilbyr,kanduregistrereproduktetdittpåwww.philips.com/welcome.
Nårdetgjelderoppskriftenetilbrukmedfoodprocessoren,kandugåtilwww.philips.com/
kitchen
3 Foodprocessor
Advarsel
• Brukaldringreneelleretobjekt(foreksempelenslikkepott)tilåskyveingredienserinnimaterøret
mensmotorenerigang.Brukbarestapperen.
Hakkerkniv
Førdubegynner,mådukontrollereatdumontererihenholdtilg.2.
Dukanbrukehakkerkniventilåhakke,mikse,blandeellermoseingredienser.Dukanogså
brukedentilåblandeogmiksekakerøre.
Forsiktig
• Ikkebrukhakkerkniventilåhakkeingrediensersomerharde,f.eks.kaffebønner,gurkemeie,muskatnøttogisbiter,
dadettekangjøreknivensløv.
Merknad
• Ikkelaapparatetgåforlengenårduhakker(harde)osterellersjokolade.Disseingrediensenekanbli
forvarme,slikatdebegynneråsmelteogblirklumpete.
• Deloppstørrestykkerpåforhåndibiterpåca.3x3x3cm.
1 Vribollenmedklokkenforåfestedenpåmotorenheten,ogplasserutstyrsholdereni
bollen.
» Nårbollensitterfastpåriktigmåte,hørerduetklikk.
2 Plasserhakkerknivpåutstyrsholderen.
3 Haingredienseneibollen.
4 Settlokketpåbollen,ogvrilokketmedklokkenforåfestedet.
» Nårlokketermontertriktig,hørerduetklikkoglokketerfestettilbollens
håndtak.
5 Plasserstapperenimaterøret.
6 Koblestøpselettilstikkontakten.
7 Kontrollertilberedningstid,maksimalmengdeoghastighetsinnstillingsomkrevesfor
ingredienseneiTabell1.Vripåknappentilønskethastighetsinnstilling.
8 Etter bruk vrir du bryteren til 0ogkoblerfraapparatet.
Tips
• Nårduhakkerløk,vrirdubryterentilPetpargangerforåhindreatløkenblirhakketfornt.
• Nårmatenhengerfastpåknivenellerinnsidenavbollen,kanduutførefølgendetrinn:1.Slå
apparatetav,ogtrekkderetterutstøpseletfrastikkontakten.2.Taavlokketpåbollen.3.Fjern
ingrediensenefraknivenellerinnsidenavbollenmedenslikkepott.
Taggete kniv
Førdubegynner,mådukontrollereatdumontererihenholdtilg.3.
Brukdentaggetekniventilåknusefrossenfrukt.
Merknad
• Settalltidknivenhetenibollenførdubegynner.
• Detanbefalesatdukutterfrukteniterningerpå2x2x2cmførdufryserden.
• Nårduskallagefruktdesserter,anbefalesdetåbrukehastighet2foråfåetjevntresultat,og
hastighet1foretgrovereresultat.
1 Vribollenmedklokkenforåfestedenpåmotorenheten,ogplasserutstyrsholdereni
bollen.
» Nårbollensitterfastpåriktigmåte,hørerduetklikk.
2 Settdentaggeteisknivenpåutstyrsholderen.
3 Leggdenfrosnefruktenibollen.
4 Settlokketpåbollen,ogvrilokketmedklokkenforåfestedet.
» Nårlokketermontertriktig,hørerduetklikkoglokketerfestettilbollens
håndtak.
5 Plasserstapperenimaterøret.
6 Koblestøpselettilstikkontakten.
7 Vri knappen til 1 eller 2.
8 Etterbrukvrirduhastighetsvelgerentil0ogkoblerfraapparatet.
Eltetilbehør
Førdubegynnermådukontrollereatdumontererihenholdtilg.4.
Dukanbrukeeltetilbehørettilåeltegjærdeigtilbrødogpizza.Dumåjusteremengden
væskeforåformedeigenihenholdtilluftfuktighetogtemperatur.
Merknad
• Ikkebrukeltetilbehørettilåblandekakerøre.Brukhakkerkniventildette.
• Settalltideltetilbehøretibollenførduhariingrediensene.
Tips
• Hvisdubrukermelmedhøytgluteninnhold,kandubruke60gvannihver100gmelogeltemed
hastighet1i2minutter(maks.)foråoppnåbestmuligresultat.
1 Vribollenmedklokkenforåfestedenpåmotorenheten,ogplasserutstyrsholdereni
bollen.
» Nårbollensitterfastpåriktigmåte,hørerduetklikk.
2 Setteltetilbehøretpåutstyrsholderen.
3 Haingredienseneibollen.
4 Settlokketpåbollen,ogvrilokketmedklokkenforåfestedet.
» Nårlokketermontertriktig,hørerduetklikkoglokketerfestettilbollens
håndtak.
5 Plasserstapperenimaterøret.
6 Koblestøpselettilstikkontakten.
7 Vribryterenpå1-stillingen.
8 Kontrollertilberedningstid,maksimalmengdeoghastighetsinnstillingsomkrevesfor
ingredienseneiTabell1.
9 Etter bruk vrir du bryteren til 0ogkoblerfraapparatet.
Ballongvisp
Førdubegynner,mådukontrollereatdumontererihenholdtilg.5:
1 Plasser utstyrsholderen i bollen.
2 Settballongvispenpåutstyrsholderenibollen.
3 Haingredienseneibollen.
4 Settlokketpåbollen.Vrilokketmedklokkenforåfestedet.Leggskyverenimaterøret.
5 Velghastighet1.
6 Etterbrukvrirduhastighetsvelgerentil0ogkoblerfraapparatet.
Sitruspresse
Førdubegynner,mådukontrollereatdumontererihenholdtilg.6.
Dukanbrukesitruspressentilåpressesitrusfrukter.
1 Vribollenmedklokkenforåfestedenpåmotorenheten,ogplasserutstyrsholdereni
bollen.
» Nårbollensitterfastpåriktigmåte,hørerduetklikk.
2 Settsilentilsitruspressenpåutstyrsholderenibollen.Kontrolleratfremspringetpåsilen
erlåstisporetpåbollenshåndtak.
» Nårsilensitterfastpåriktigmåte,hørerduetklikk.
3 Settsafttoppenpåsilen.
4 Koblestøpselettilstikkontakten.
5 Kontrollermaksimalmengdensomkrevesforingrediensene,iTabell1.Vribryterentil
hastighet1.
» Safttoppenbegynnerårotere.
6 Trykk sitrusfrukt ned i safttoppen.
7 Stopppressingenmedjevnemellomromforåfjernefruktkjøttetfrasilen.Nårduer
ferdigmedåpresseellernårduønskeråfjernefruktkjøttet,vrirdubryterentil0og
fjernerbollenmedsilenogsafttoppenfraapparatet.
Kutte- og raspeskiver
Førdubegynner,mådukontrollereatduvelgerriktigskiveogmontereihenholdtilg.7:
• Justerbarkutteskiveforåjustereforskjelligetykkelser
• Vendbarraspeskive(størreellerlitenstørrelse)
Forsiktig
• Værforsiktignårduhåndtererskiven.Denharensværtskarpknivkant.
• Brukaldriskiventilåbearbeidehardeingrediensersomisbiter.
• Ikketrykkforhardtpåstapperennårdupresseringredienseneinnimaterøret.
4 Rengjøring
Advarsel
• Kobleapparatetfrastrømnettetførdurengjørdet.
Forsiktig
• Sørgforateggenpåkniveneogskiveneikkekommerikontaktmedhardeobjekter.Dettekangjøre
knivenesløve.
• Knivseggeneerskarpe.Værforsiktignårdurengjørknivenhetentilfoodprocessorenogskivene.
1 Rengjørmotorenhetenmedenfuktigklut.
2 Vaskdeandredeleneivarmtvann(<60ºC)medoppvaskmiddelellerien
oppvaskmaskin.
Rask rengjøring
Dukangjørefølgendeforårengjørefoodprocessorbollenoghurtigmikserkannenenklere.
Merknad
• Sørgforatknivenermontertibollenhvisdurengjørfoodprocessorbollen.
1 Helllunkentvann(ikkemerenn0,5liter)ognoendråperoppvaskmiddeli
foodprocessorbollen.
2 Settlokketpåfoodprocessorbollen,ogvridetderettermedklokkenforåfestedet.
3 Vri knappen til P.Laapparatetgåi30sekunderellertilfoodprocessorbollenerren.
4 Etter bruk vrir du bryteren til 0ogkoblerfraapparatet.
5 Taavfoodprocessorbollen,ogskylldenirentvann.
5 Oppbevaring
1 Skyvstrømledningeninnidetinnebygdeledningskammeret(g.10).
2 Oppbevarproduktettørt.
3 Settskivene,eltetilbehøretogskaftetsamtandresmåtilbehørifoodprocessorbollen
(g.11).
6 Garanti og service
Hvisduharetproblemellertrengerhjelpellerinformasjon,kandugåtilwww.philips.
com/supportellerkontaktePhilipskundestøttederdubor.Dunnertelefonnummereti
garantiheftet.Hvisdetikkeernoenkundestøttederdubor,kandugåtildenlokalePhilips-
forhandleren.
Suomi
1 Tärkeää
Luetämäkäyttöopashuolellisestiennenlaitteenensimmäistäkäyttökertaajasäilytäsetulevaa
käyttöävarten.
Vaara
• Äläupotarunkoaveteenäläkähuuhtelesitävesihananalla.
Varoitus
• Äläkoskaankäytäsormiasitaimitäänesinettävalmistusaineidentyöntämiseen
syöttösuppiloonlaitteenollessakäynnissä.Käytävainsyöttöpaininta.
• Ennenkuinliitätlaitteenvirtalähteeseen,varmista,ettälaitteenpohjanjännitemerkintä
vastaapaikallistajännitettä.
• Äläkoskaanliitälaitettaajastinkytkimeen,jotteiaiheuduvaaratilanteita.
• Josvirtajohto,pistoketaimuutosatvahingoittuivat,äläkäytälaitetta.
• Josvirtajohtoonvahingoittunut,vaihdataseomanturvallisuutesivuoksiPhilipsin
valtuuttamassahuoltoliikkeessätaimuullaammattitaitoisellakorjaajalla.
• Laitettaeioletarkoitettulastentaisellaistenhenkilöidenkäyttöön,joidenfyysinen
taihenkinentoimintakykyonrajoittunuttaijoillaeiolekokemustataitietoalaitteen
käytöstä,muutenkuinheidänturvallisuudestaanvastaavanhenkilönvalvonnassaja
ohjauksessa.
• Äläannalastenleikkiälaitteellaheidänturvallisuutensavuoksi.
• Äläjätälaitettakäyntiinilmanvalvontaa.
• Josruoka-aineettarttuvatkulhonreunoihin,katkaiselaitteestavirtajairrotapistoke
pistorasiasta.Irrotasittenruokaseinämästälastanavulla.
• Olevarovainen,kunkäsittelettaipuhdistatmonitoimikoneenlevyjätaiteräyksiköitä.
Terätovaterittäinteräviä.
• Äläkosketeriinetenkäänlaitteenollessakytkettyverkkovirtaan.Terätovathyvinteräviä.
• Josteräjuuttuupaikalleen,irrotapistokepistorasiastaennenkuinirrotatkiinni
juuttuneetainekset.
Varoitus
• Äläkoskaansammutalaitettakiertämälläkulhoataisenkantta.Katkaiseainalaitteesta
virtakääntämällävalitsin0-asentoon.
• Irrotapistotulppapistorasiastakäytönjälkeen.
• Odota,kunnesliikkuvatosatovatpysähtyneet,ennenkuinpoistatkulhonkannen.
• Äläylitäkulhoonmerkittyäenimmäisrajaa.
• Pesekaikkiruuankanssakosketuksiinjoutuvatosatennenkäyttöönottoa.
• Ennen kuin irrotat tai puhdistat taikinakoukun tai levyt, irrota laite pistorasiasta.
• ÄläkoskaankäytämuitakuinPhilipsinvalmistamiataisuosittelemialisävarusteitatai
-osia.Joskäytätmuitaosia,takuueiolevoimassa.
• Tämälaiteontarkoitettuvainkotitalouksienkäyttöön.
• Äläylitäkäyttöoppaassaannettujamääriäjavalmistusaikoja.
• Annakuumienvalmistusaineidenjäähtyä(<80ºC)ennenniidenkäsittelemistä.
• Annalaitteenainajäähtyähuoneenlämpötilaavastaavaksijokaisenkäsitellynerän
jälkeen.
• Tietytvalmistusaineetsaattavataiheuttaaosienpintojenvärjääntymistä.Tämäei
heikennäosia.Värjääntymisetkatoavattavallisestiajanmyötä.
• Käyttöääni=85dB[A]
Sähkömagneettiset kentät (EMF)
TämäPhilips-laitevastaakaikkiasähkömagneettisiakenttiä(EMF)koskeviastandardeja.Jos
laitettakäytetäänoikeinjatämänkäyttöohjeenohjeidenmukaisesti,senkäyttäminenon
turvallistatämänhetkisentutkimustiedonperusteella.
Kierrätys
Tuotteensuunnittelussajavalmistuksessaonkäytettylaadukkaitamateriaalejajaosia,jotka
voidaankierrättääjakäyttääuudelleen.
Jostuotteeseenonmerkittyroskasäiliö,jonkaylionvedettyrasti,setarkoittaa,ettätuotetta
koskeeEU-direktiivi2002/96/EY:
Älähävitätuotettamuunkotitalousjätteenmukana.Otaselvääpaikallisistasähkölaitteidenja
elektronistenlaitteidenerillistäkeräystäkoskevistasäädöksistä.Hävittämällävanhantuotteen
oikeinvoitehkäistämahdollisiaympäristö-jaterveyshaittoja.
2 Johdanto
OnnitteluttekemäsiostoksenjohdostajatervetuloaPhilipsinkäyttäjäksi!Saatparhaan
mahdollisenhyödynPhilipsinpalveluistarekisteröimällätuotteenosoitteessawww.philips.
com/welcome.
Reseptejämonitoimikoneelleonosoitteessawww.philips.com/kitchen
3 Monitoimikone
Vakava varoitus
• Äläkoskaankäytäsormiasitaimitäänesinettä(esimerkiksilastaa)valmistusaineidentyöntämiseen
syöttösuppiloonlaitteenollessakäynnissä.Käytävainsyöttöpaininta.
Teräosa
Kokoalaiteohjeenmukaanennenkäyttöä,kuva2.
Teräosallavoipilkkoa,sekoittaataisoseuttaaaineksia.Voitvatkatajasekoittaasillämyös
kakkutaikinoita.
Varoitus
• Älähienonnaterälläkoviaaineita,kutenkahvipapuja,maustekurkumaa,muskottipähkinäätaijääpaloja,silläne
voivattylsyttääterää.
Huomautus
• Äläannalaitteenollapitkäänkäynnissäpilkkoessasi(kovaa)juustoataisuklaata.Muutennämä
aineksetkuumenevat,alkavatsulaajamuuttuvatkokkareisiksi.
• Leikkaa isokokoiset aineet pienemmiksi paloiksi, noin 3 x 3 x 3 cm.
1 Kiinnitäkulhorunkoonkiertämälläsitämyötäpäiväänjaasetasittentarviketeline
kulhoon.
» Kunkulhoonkiinnitettyoikein,kuuletnaksahduksen.
2 Asetateräosatarviketelineeseen.
3 Mittaa aineet kulhoon.
4 Asetakansikulhoonjakiinnitäsesittenkiertämälläkanttamyötäpäivään.
» Kunkansionkoottuoikein,kuuletnaksahduksenjakansiontukevastikiinnikulhon
kahvassa.
5 Asetasyöttöpaininsyöttösuppiloon.
6 Liitävirtajohtovirtalähteeseen.
7 Tarkistavalmistusaika,enimmäismääräjavalmistusaineidentarvitsemanopeusasetus
taulukosta1.Käännävalitsinhaluttuunnopeusasetukseen.
8 Käännävalitsinasentoon0jairrotapistokepistorasiastakäytönjälkeen.
Vihje
• Kunpilkotsipuleita,käännävalitsinasentoonPmuutamankerran,jottasipuliteiväthienontuisiliikaa.
• Josruokatarttuuterääntaikulhoon,toimiseuraavasti:1.Katkaiselaitteestavirtajairrotapistoke
pistorasiasta.2.Poistakansikulhonpäältä.3.Irrotaaineetterästätaikulhonpinnastalastalla.
Sahalaitainen terä
Kokoalaiteohjeenmukaanennenkäyttöä,kuva3.
Murskaajäisethedelmätsahalaitaisellaterällä.
Huomautus
• Asetaainateräyksikkökulhoonennenaloittamista.
• Onsuositeltavaaleikatahedelmät2x2x2cmkokoisiksikuutioiksiennenniidenpakastamista.
• Hedelmäistenjälkiruokientekemiseensuositellaannopeutta2,joshaluattasaisentuloksen,ja
nopeutta 1,josethaluatäysintasaistatulosta.
1 Kiinnitäkulhorunkoonkiertämälläsitämyötäpäiväänjaasetasittentarviketeline
kulhoon.
» Kunkulhoonkiinnitettyoikein,kuuletnaksahduksen.
2 Asetasahalaitainenjääterätarviketelineeseen.
3 Asetajäisethedelmätkulhoon.
4 Asetakansikulhoonjakiinnitäsesittenkiertämälläkanttamyötäpäivään.
» Kunkansionkoottuoikein,kuuletnaksahduksenjakansiontukevastikiinnikulhon
kahvassa.
5 Asetasyöttöpaininsyöttösuppiloon.
6 Liitävirtajohtovirtalähteeseen.
7 Käännävalitsinasentoon1 tai 2.
8 Käytönjälkeenkäännänopeudensäädinasentoon0jairrotasittenlaitepistorasiasta.
Vaivausosa
Kokoalaiteohjeenmukaanennenkäyttöä,kuva4.
Vaivausosallavoivaivatahiivataikinaaesimerkiksileipäätaipizzaavarten.Taikinannesteen
määrääonsäädettäväilmankosteudenjalämpötilanmukaan.
Huomautus
• Äläkäytävaivausosaakakkutaikinoidenvatkaamiseen.Käytäsiihenteräosaa.
• Asetaainavaivauslisälaitekulhoonennenaineidenlisäämistä.
Vihje
• Kunkäytätrunsasgluteenisiajauhoja,saatparhaattuloksetkäyttämällä60gvettä100gjauhojakohti
javaivaamallanopeuksilla12minuuttia(enimmäisaika).
1 Kiinnitäkulhorunkoonkiertämälläsitämyötäpäiväänjaasetasittentarviketeline
kulhoon.
» Kunkulhoonkiinnitettyoikein,kuuletnaksahduksen.
2 Aseta vaivausosa tarviketelineeseen.
3 Mittaa aineet kulhoon.
4 Asetakansikulhoonjakiinnitäsesittenkiertämälläkanttamyötäpäivään.
» Kunkansionkoottuoikein,kuuletnaksahduksenjakansiontukevastikiinnikulhon
kahvassa.
5 Asetasyöttöpaininsyöttösuppiloon.
6 Liitävirtajohtovirtalähteeseen.
7 Käännävalitsinasentoon1.
8 Tarkistavalmistusaika,enimmäismääräjavalmistusaineidentarvitsemanopeusasetus
taulukosta 1.
9 Käännävalitsinasentoon0jairrotapistokepistorasiastakäytönjälkeen.
Vispilä
Kokoalaiteohjeenmukaanennenkäyttöä,kuva5.
1 Aseta tarviketeline kulhoon.
2 Asetavispilätarviketelineeseenkulhoon.
3 Mittaa aineet kulhoon.
4 Laitakansikulhonpäälle.Kiinnitäkansikääntämälläsitämyötäpäivään.Laitasyöttöpainin
syöttösuppiloon.
5 Valitse nopeus 1.
6 Käytönjälkeenkäännänopeudensäädinasentoon0jairrotasittenlaitepistorasiasta.
Sitruspuserrin
Kokoalaiteohjeenmukaanennenkäyttöä,kuva6.
Sitruspusertimellavoipusertaasitrushedelmiä.
1 Kiinnitäkulhorunkoonkiertämälläsitämyötäpäiväänjaasetasittentarviketeline
kulhoon.
» Kunkulhoonkiinnitettyoikein,kuuletnaksahduksen.
2 Asetasitruspusertimensiiviläkulhontarviketelineeseen.Varmista,ettäsiivilänulokeon
lukittunut kulhon kahvan vastaavaan kohtaan.
» Kunsiiviläonkiinnitettyoikein,kuuletnaksahduksen.
3 Asetapuserrinosasiivilänpäälle.
4 Liitävirtajohtovirtalähteeseen.
5 Tarkistavalmistusaineidenenimmäismäärätaulukosta1.Käännävalitsin
nopeusasetukselle 1.
» Puserrinosaalkaapyöriä.
6 Painahedelmäpuserrintavasten.
7 Keskeytäpainaminenvälilläjapoistahedelmäjätesiivilästä.Kunlopetatmehun
pusertamisentaihaluatpoistaahedelmäjätteen,käännävalitsinasentoon0jairrota
kulholaitteestasiten,ettäsiiviläjapuserrinosaovatpaikallaansenpäällä.
Viipalointiterät ja silppurilevyt
Valitsetarvittavateräennenkuinaloitatjakokoaohjeidenmukaan,kuva7.
• Säädettäväviipalointiteräpaksuudensäätämiseen
• Käännettäväsilppurilevy(isotaipienikoko)
Varoitus
• Käsittelelevyävarovasti.Senleikkuuteräonerittäinterävä.
• Äläkoskaankäytälevyäkovienaineidenkutenjääpalojenkäsittelyyn.
• Äläkäytäliikaavoimaapainaessasiraaka-aineitatyöntimenavullasyöttösuppiloon.
4 Puhdistus
Vakava varoitus
• Ennen kuin puhdistat laitteen, irrota sen pistorasiasta.
Varoitus
• Varmista,ettäterienjalevyjenleikkuuteräteivätosukoviinesineisiin.Tämävoiaiheuttaaterän
tylsymisen.
• Leikkuuterätovatteräviä.Olevarovainenpuhdistaessasimonitoimikoneenteräyksikköätailevyjä.
1 Pyyhi runko puhtaaksi kostealla liinalla.
2 Puhdistamuutosatkuumassavedessä(<60ºC)astianpesuaineellatai
astianpesukoneessa.
Pikapuhdistus
Voitpuhdistaamonitoimikoneenkulhonjasekoituskulhonhelpomminnoudattamalla
seuraaviaohjeita.
Huomautus
• Varmista,ettäteräonkoottukulhossa,jospuhdistatmonitoimikoneenkulhon.
1 Kaadamonitoimikoneenkulhoonlämmintävettä(eienempääkuin0,5l)jamuutama
tippa astianpesuainetta.
2 Asetamonitoimikoneenkulhonkansipaikalleenjakiinnitäsekääntämälläsitä
myötäpäivään.
3 KäännävalitsinasentoonP.Annalaitteenkäydäainakin30sekuntiataikunnes
monitoimikoneen kulho on puhdas.
4 Käännävalitsinasentoon0jairrotapistokepistorasiastakäytönjälkeen.
5 Irrotamonitoimikoneenkulhojahuuhtelesepuhtaallavedellä.
5 Säilytys
1 Työnnävirtajohtosisäänrakennettuunjohdonsäilytyspaikkaan,kuva10.
2 Säilytälaitettakuivassapaikassa.
3 Asetalevyt,vaivausosajavarsisekämuutpienetlisäosatmonitoimikoneenkulhoon,
kuva 11.
6 Takuu ja huolto
Jossinullaonongelmataitarvitsetpalvelua,katsolisätietojaosoitteestawww.philips.com/
supporttaiotayhteyttäPhilipsinasiakaspalveluun.Puhelinnumeroontakuulehtisessä.Jos
maassasieiolekuluttajapalvelukeskusta,otayhteyspaikalliseenPhilips-jälleenmyyjään.

Svenska
1 Viktigt
Läsanvändarhandbokennoggrantinnanduanvänderapparatenochsparadenförframtidabruk.
Fara
• Sänkintenedmotorenhetenivattenochsköljdeninteunderkranen.
Varning
• Användaldrigngrarnaellernågontypavföremålföratttryckainingredienseri
matningsröretnärapparatenärigång.Användbarapressklossen.
• Innanduansluterapparatentilleluttagetserdutillattspänningensomangespå
apparatensundersidamotsvarardenlokalanätspänningen.
• Anslutaldrigapparatentillentimereftersomdetkanledatillenfarligsituation.
• Användinteapparatenomnätsladden,kontaktenellerandradelarärskadade.
• OmnätsladdenärskadadmåstedenalltidbytasutavPhilips,ettavPhilips
auktoriseradeserviceombudellerliknandebehörigapersonerförattundvikaolyckor.
• Apparatenärinteavseddföranvändningavpersoner(inklusivebarn)medolika
funktionshinder,elleravpersonersominteharkunskapomhurapparatenanvänds,
omdeinteövervakasellerfårinstruktionerangåendeanvändningavapparatenaven
personsomäransvarigförderassäkerhet.
• Låtintebarnlekamedapparaten,förderassäkerhetsskull.
• Lämnainteapparatenobevakadnärdenärigång.
• Ommatfastnarpåskålenskanterstängerduavapparatenochdrarurkontakten.
Användsedanenslickepottföratttabortmatenfrånsidorna.
• Varförsiktignärduhanterarellerrengörskivorna,matberedarensknivenheter.
Knivseggarnaärmycketvassa.
• Vidrörinteknivarna,isynnerhetintenärapparatenäranslutentillelnätet.Knivarnaär
mycket vassa.
• Omknivarnafastnardrarduurnätsladdeninnanduavlägsnaringrediensernasom
blockerar knivarna.
Varning
• Stängaldrigavapparatengenomattvridapåskålenellerdesslock.Stängalltidav
apparatengenomattvridakontrollvredettill0.
• Draurnätsladdendirektefteranvändning.
• Väntatillsallarörligadelarharstannatinnandutarbortlocketfrånskålen.
• Fyllinteskålenövermarkeringenförmaxnivån.
• Rengörnoggrantdedelarsomkommerikontaktmedmatinnanduanvänder
apparatenförförstagången.
• Drautstickkontakteninnandutarbortellerrengörapparatensknådningstillbehöreller
skivor.
• Användaldrigtillbehörellerdelarfrånandratillverkare,ellerdelarsominteuttryckligen
harrekommenderatsavPhilips.Omduanvändersådanatillbehörellerdelargällerinte
garantin.
• Apparatenärendastavseddförhushållsbruk.
• Överskridintemängdernaochtillredningstidernasomangesianvändarhandboken.
• Låthetaingrediensersvalna(<80ºC)innanduberederdem.
• Låtalltidapparatensvalnatillrumstemperatureftervarjegångduanväntden.
• Vissaingredienserkanorsakamissfärgningarpådelarnasytor.Detharintenågon
negativeffektpådelarna.Missfärgningarnaförsvinnervanligtviseftervisstid.
• Ljudnivå=85dB[A]
Elektromagnetiska fält (EMF)
DenhärapparatenfrånPhilipsuppfyllerallastandarderförelektromagnetiskafält(EMF).Om
apparatenhanteraspårättsättochenligtinstruktionernaidenhäranvändarhandbokenär
densäkerattanvändaenligtdevetenskapligabeläggsomnnsidagsläget.
Återvinning
Produktenärutveckladochtillverkadavhögkvalitativamaterialochkomponentersombåde
kanåtervinnasochåteranvändas.
Symbolenmedenöverkryssadsoptunnasomnnspåprodukteninnebärattprodukten
följerEU-direktivet2002/96/EC:
Kasseraaldrigproduktenmedannathushållsavfall.Taredapådelokalareglernaomseparat
insamlingavelektriskaochelektroniskaprodukter.Genomattkasseradinagamlaprodukter
pårättsättkandubidratillattminskamöjliganegativaeffekterpåmiljöochhälsa.
2 Introduktion
VigratulerartilldittköpochhälsardigvälkommentillPhilips!Genomattregistreradin
produktpåwww.philips.com/welcomekandudranyttaavPhilipssupport.
Receptattanvändamedmatberedarennnspåwww.philips.com/kitchen
3 Matberedare
Varning
• Användaldrigngrarnaellerettföremål(tillexempelenslickepott)föratttryckainingredienseri
matningsröretmedanapparatenärigång.Användbarapressklossen.
Hackarkniv
Innandubörjarmonterarduenhetenenligtbild2.
Dukananvändaknivenhetenföratthacka,blanda,mixaochmosaingredienser.Dukanäven
användadenförattgörakaksmet.
Var försiktig
• Användintehackarknivenföratthackahårdaingrediensersomkaffebönor,gurkmeja,muskotnötellerisbitar.Det
görknivenslö.
Kommentar
• Låtinteapparatengåförlängenärduhackar(hård)ostellerchoklad.Annarsblirdessaingredienser
förvarma,börjarsmältaochblirklimpiga.
• Skärstörrelivsmedelimindrebitar,cirka3x3x3cm.
1 Fästskålenpåmotorenhetengenomattvridadenmedursochplacerasedan
redskapshållareniskålen.
» Närskålenärordentligtpåplatshörsettklickljud.
2 Sätthackarknivenpåredskapshållaren.
3 Läggingrediensernaiskålen.
4 Placeralocketpåskålenochfästsedanlocketgenomattvridadetmedurs.
» Närlocketärordentligtpåplatshörsettklickljudochlocketärfästvidskålens
handtag.
5 Placerapressklossenimatningsröret.
6 Anslutstickkontaktentilletteluttag.
7 Kontrolleratillredningstiden,denmaximalamängdenochvilkenhastighetsomkrävsför
ingrediensernaiTabell1.Vridkontrollvredettillönskadhastighet.
8 Efteranvändningvriderdukontrollvredettill0 och drar ur kontakten.
Tips
• NärduhackarlökvriderdukontrollvredettillPnågragångerförattförhindraattlökenblirförnt
hackad.
• Närmatenfastnarvidknivenelleriskålengörduenligtföljande:1.Stängavapparatenochdraut
nätsladden.2.Taavlocketfrånskålen.3.Tabortingrediensernafrånknivenellerfrånskålenssidor
med en slickepott.
Sågtandad kniv
Innandubörjarmonterarduenhetenenligtbild3.
Använddensågtandadeknivenförattkrossafrystfrukt.
Kommentar
• Sättalltidknivenheteniskåleninnandubörjar.
• Virekommenderarattduskärfruktenikuberpå2x2x2cminnandufrysernedden.
• Förfruktdesserterrekommenderarviattduanvänderhastighet2förettjämntresultat,ochhastighet
1 om du vill ha bitar kvar.
1 Fästskålenpåmotorenhetengenomattvridadenmedursochplacerasedan
redskapshållareniskålen.
» Närskålenärordentligtpåplatshörsettklickljud.
2 Sättdensågtandadeisknivenpåredskapshållaren.
3 Läggdenfrystafrukteniskålen.
4 Placeralocketpåskålenochfästsedanlocketgenomattvridadetmedurs.
» Närlocketärordentligtpåplatshörsettklickljudochlocketärfästvidskålens
handtag.
5 Placerapressklossenimatningsröret.
6 Anslutstickkontaktentilletteluttag.
7 Vrid kontrollvredet till 1 eller 2.
8 Efteranvändningvriderduhastighetsväljarentill0ochdrarsedanutnätsladden.
Knådningstillbehör
Innandubörjarmonterarduenhetenenligtbild4.
Dukananvändaknådningstillbehöretförattknådajäsdegförbrödochpizza.Justeramängden
vätskautifrånfuktighets-ochtemperaturförhållandenförattformadegen.
Kommentar
• Användinteknådningstillbehöretnärdugörkaksmet.Användiställethackarkniven.
• Sättalltidknådningstillbehöretiskåleninnandutillsätteringredienserna.
Tips
• Omduanvändermjölmedhögglutenhalttardu60gvattenförvarje100gmjölochknådari
hastighet1i2minuter(maxtid)förbästaresultat.
1 Fästskålenpåmotorenhetengenomattvridadenmedursochplacerasedan
redskapshållareniskålen.
» Närskålenärordentligtpåplatshörsettklickljud.
2 Sättknådningsverktygetpåredskapshållaren.
3 Läggingrediensernaiskålen.
4 Placeralocketpåskålenochfästsedanlocketgenomattvridadetmedurs.
» Närlocketärordentligtpåplatshörsettklickljudochlocketärfästvidskålens
handtag.
5 Placerapressklossenimatningsröret.
6 Anslutstickkontaktentilletteluttag.
7 Vrid kontrollvredet till position 1.
8 Kontrolleratillredningstiden,denmaximalamängdenochvilkenhastighetsomkrävsför
ingrediensernaiTabell1.
9 Efteranvändningvriderdukontrollvredettill0 och drar ur kontakten.
Ballongvisp
Innandubörjarmonterarduenhetenenligtbild5:
1 Sättiredskapshållareniskålen.
2 Sättballongvispenpåredskapshållareniskålen.
3 Läggingrediensernaiskålen.
4 Sättpålocketpåskålen.Sättfastlocketgenomattvridadetmedurs.Lägg
ingrediensernaimatningsröret.
5 Väljhastighet1.
6 Efteranvändningvriderduhastighetsväljarentill0ochdrarsedanutnätsladden.
Citruspress
Innandubörjarmonterarduenhetenenligtbild6.
Dukananvändacitruspressenförattpressacitrusfrukter.
1 Fästskålenpåmotorenhetengenomattvridadenmedursochplacerasedan
redskapshållareniskålen.
» Närskålenärordentligtpåplatshörsettklickljud.
2 Sättcitruspressenssilpåverktygshållareniskålen.Setillattsilensutskjutandedellåser
fastiskåranpåskålenshandtag.
» Närsilenärordentligtpåplatshörsettklickljud.
3 Sättkonenpåsilen.
4 Anslutstickkontaktentilletteluttag.
5 Kontrolleradenmaximalamängdeningredienseritabell1.Vridkontrollvredettill
hastighet1.
» Konenbörjarrotera.
6 Tryck citrusfrukten mot konen.
7 Stoppapressendåochdåochavlägsnafruktköttfrånsilen.Närduärklarmed
pressningenellervilltabortfruktköttvriderdukontrollvredettill0ochtarbortskålen
medsilenochkonenfrånapparaten.
Skivor för skivning och rivning
Innandubörjarväljerdudenskivaduvillanvändaochmonterardenenligtbild7:
• Skivningsskivasomkanjusteraseftertjocklek
• Vändbarrivningsskiva(storellerliten)
Var försiktig
• Varförsiktignärduhanterarskivan.Eggenärmycketvass.
• Användaldrigskivantillattberedahårdaingrediensersomisbitar.
• Tryckinteförhårtpåpressklossennärdutryckernedingredienserimatningsröret.
4 Rengöring
Varning
• Drautnästsladdeninnandurengörapparaten.
Var försiktig
• Setillattknivarnasochskivornaseggarintekommerikontaktmedhårdaföremål.Detkanmedföra
attknivenblirslö.
• Eggenärvass.Varförsiktignärdurengörmatberedarensknivenhetochskivor.
1 Görrenmotorenhetenmedenfuktigtrasa.
2 Rengörövrigadelarihettvatten(<60ºC)medlitediskmedelelleridiskmaskin.
Snabbrengöring
Följandestegkanföljasförattlättarerengöramatberedarskålenochmixerbehållare.
Kommentar
• Setillattknivenärmonteradiskålenomdurengörmatberedarskålen.
1 Hällljummetvatten(intemerän0,5liter)ochlitediskmedelimatberedarskålen.
2 Placeralocketpåmatberedarskålenochvriddetmedursförattsättafastdet.
3 Vrid kontrollvredet till P.Körapparateni30sekunderellertillsmatberedarskålenärren.
4 Efteranvändningvriderdukontrollvredettill0 och drar ur kontakten.
5 Lossamatberedarskålenochsköljavdenmedrentvatten.
5 Förvaring
1 Tryckinsladdenisladdförvaringsutrymmet(bild10).
2 Förvaraproduktenpåentorrplats.
3 Läggskivorna,knådningsverktyget,drivaxelnochandrasmåtillbehörimatberedarskålen
(bild11).
6 Garanti och service
Omduharfrågorellerbehöverserviceellerinformationkandugåtillwww.philips.com/
supportellerkontaktaPhilipskundtjänstidittland.Telefonnumretnnsigarantibroschyren.
OmdetintennsnågonkundtjänstidittlandkanduvändadigtilldinlokalaPhilips-
återförsäljare.
Dansk
1 Vigtigt
Læsdennebrugervejledningomhyggeligtigennem,indenapparatettagesibrug.
Gembrugervejledningentileventuelsenerebrug.
Fare
• Motorenhedenmåikkekommesivandellerskyllesundervandhanen.
Advarsel
• Brugaldrigdinengreellerengenstandtilatskubbeingrediensernedi
påfyldningstragten,mensapparatetkører.Brugaltidkunnedstopperen.
• Førduslutterstrømtilapparatet,skaldukontrollere,atdennetspænding,dererangivet
ibundenafapparatet,svarertildenlokalenetspænding.
• Foratundgåfarligesituationermådualdrigslutteapparatettilentimerkontakt.
• Hvisstrømledningen,stikketellerandredeleerbeskadigede,skalduikkebruge
apparatet.
• Hvisledningenerbeskadiget,skaldenudskifteshosPhilips,etautoriseretPhilips-
serviceværkstedellerentilsvarendekvaliceretfagmandforatundgåenhverrisiko.
• Detteapparaterikkeberegnettilatblivebrugtafpersoner(herunderbørn)med
nedsattefysiskeogmentaleevner,nedsatfølesansellermanglendeerfaringogviden,
medmindredeerblevetvejledtellerinstrueretiapparatetsanvendelseafenperson,
dereransvarligforderessikkerhed.
• Afhensyntilbørnenesegensikkerhedbørdeikkelegemedapparatet.
• Ladaldrigapparatetkøreudenopsyn.
• Hvisdersættersigmadvarerfastpåindersidenafskålen,skalduslukkeapparatetog
tagestikketud.Brugderefterenspateltilatfjernedet,dersidderfast.
• Værforsigtig,nårduhåndtererellerrengørskiverne,knivenhederneifoodprocessoren.
Knivbladenesæggeermegetskarpe.
• Undgåatrørevedknivene,nårapparatetersluttettilstrømmen.Kniveneermeget
skarpe.
• Hvisknivenesættersigfast,skalstikkettagesudafstikkontakten,indendefastsiddende
ingredienserfjernes.
NB!
• Slukaldrigforapparatetvedatdrejeskålenellerdenslåg.Slukaltidforapparatetvedat
drejeknappentil0.
• Tagaltidstikketudafstikkontaktenstraksefterbrug.
• Vent,indtilallebevægeligedeleerstoppet,førdutagerlågetafskålen.
• Overskridikkemaksimum-markeringenpåskålen.
• Sørgforgrundigtatrengørededele,derkommeriberøringmedmad,indendubruger
apparatetførstegang.
• Tagaltidstikketudafstikkontakten,førdufjernerellerrengøræltetilbehørellerskiver.
• Brugaldrigtilbehørellerdelefraandrefabrikanterellertilbehør/dele,somikkespecikt
eranbefaletafPhilips.Hvisduanvenderensådantypetilbehørellerdele,annulleres
garantien.
• Detteapparaterkunberegnettilalmindelighusholdningsbrug.
• Deangivnemængderogtilberedningstideribrugervejledningenmåikkeoverskrides.
• Ladvarmeingredienserafkøle(<80ºC),førdekommesiapparatet.
• Ladaltidapparatetkølenedtilstuetemperaturefterhverportion.
• Visseingredienserkanforårsagemisfarvningafdelenesoverader.Detpåvirkerikke
delenesfunktionsevne.Misfarvningerneforsvindersomregelefternogentid.
• Støjniveau=85dB[A].
Elektromagnetiske felter (EMF)
DettePhilips-apparatoverholderallestandarderiforholdtilelektromagnetiskefelter(EMF).
Hvisapparatethåndtereskorrektihenholdtilinstruktionerneidennebrugervejledning,
erdetsikkertatbrugebaseretpådeforskningsresultater,dereradgangtilpånuværende
tidspunkt.
Genanvendelse
Ditprodukterudvikletogfremstilletimaterialerogkomponenterafhøjkvalitet,somkan
genbruges.
Nåretproduktbæreretaffaldsspandssymbolmedetkrydspå,betyderdet,atprodukteter
underlagtdeteuropæiskedirektiv2002/96/EC:
Bortskafaldrigproduktetsammenmedandethusholdningsaffald.Sørgforatkendedelokale
regleromseparatindsamlingafelektriskeogelektroniskeprodukter.Korrektbortskaffelse
afudtjenteprodukterermedtilatforhindrenegativpåvirkningafmiljøetogmenneskers
helbred.
2 Indledning
Tillykkemedditkøb,ogvelkommentilPhilips!Hvisduvilhavefuldtudbytteafdensupport,
somPhilipstilbyder,kanduregistrereditproduktpåwww.philips.com/welcome.
Foropskrifter,dukanbrugemeddinfoodprocessor,gåtilwww.philips.com/kitchen
3 Foodprocessor
Advarsel
• Brugaldrigdinengreellerengenstand,f.eks.enspatel,tilatskubbeingrediensernedi
påfyldningstragten,mensapparatetkører.Brugaltidkunnedstopperen.
Hakkerkniv
Førdustarter,skaldusørgeforatsamleapparatetsomvistiFig.2.
Dukanbrugehakkerkniventilathakke,mikse,blandeellerpurereingredienser.Dukanogså
brugedentilatmikseogblendekagedej.
Advarsel
• Brugikkehakkerkniventilhakningafhårdeingrediensersomf.eks.kaffebønner,gurkemeje,muskatnødog
isterninger,dadettekangøreknivensløv.
Bemærk
• Ladikkeapparatetkøreforlangtid,nårduhakker(hård)ostellerchokolade.Ellersbliver
ingredienserneforvarme,begynderatsmelteogbliverklumpede.
• Skærstørrestykkerudimindrestykkerpåca.3x3x3cm.
1 Drejskålenmeduretforatfastgøredentilmotorenheden,oganbringderefter
tilbehørsholdereniskålen.
» Dukanhøreetklik,nårskålenersatrigtigtfast.
2 Sæthakkerknivenitilbehørsholderen.
3 Komingredienserneiskålen.
4 Læglågetpåskålen,ogdrejderefterlågetmeduretforatsættedetfast.
» Dukanhøreetklik,nårlågetersatrigtigtfast.
5 Sætnedstopperennedipåfyldningstragten.
6 Tilslutstrømmen.
7 Kontrollertilberedningstiden,denmaksimalemængdeogdennødvendigehastighedtil
ingredienserneiTabel1.Drejknappentildenønskedehastighedsindstilling.
8 Efterbrugdrejesknappentil0,ogapparatetkoblesfrastikkontakten.
Tip
• Nårduhakkerløg,skaldudrejeknappentilPetpargangeforatforhindre,atløgenebliverhakket
fornt.
• Hvisdersættersigmadvarerfastpåknivenellerindersidenafskålen,kandugørefølgende:1.
Slukforapparatet,ogtagstikketudafstikkontakten.2.Taglågetafskålen.3.Fjernmadresternepå
knivenhedenellerindersidenafskålenmedenspatel.
Savtakket kniv
Førdustarter,skaldusørgeforatsamleapparatetsomvistiFig.3.
Brugdensavtakkedeknivtilknusningaffrossenfrugt.
Bemærk
• Sætaltidknivenhedeniskålen,førdustarter.
• Detanbefalesatskærefrugteniternpå2x2x2cmindennedfrysning.
• Tilfrugtdesserteranbefalesdetatbrugehastighed2foratopnåetjævntresultat,oghastighed1 for
etresultatmedstørrestykkeri.
1 Drejskålenmeduretforatfastgøredentilmotorenheden,oganbringderefter
tilbehørsholdereniskålen.
» Dukanhøreetklik,nårskålenersatrigtigtfast.
2 Sætdensavtakkedeknivtilisitilbehørsholderen.
3 Putdenfrosnefrugtiskålen.
4 Læglågetpåskålen,ogdrejderefterlågetmeduretforatsættedetfast.
» Dukanhøreetklik,nårlågetersatrigtigtfast.
5 Sætnedstopperennedipåfyldningstragten.
6 Tilslutstrømmen.
7 Drejknappentil1 eller 2.
8 Efterbrugskaldudrejehastighedsvælgerentil0ogfrakoblestrømmen.
Æltetilbehør
Førdustarter,skaldusørgeforatsamleapparatetsomvistiFig.4.
Dukanbrugeæltetilbehørettilatæltedejtilbrødogpizza.Duskaljusteremængdenaf
væsketilatformedejeniforholdtilluftfugtighedogtemperatur.
Bemærk
• Brugikkeæltetilbehørettilatblendeydendekagedej.Brughakkerkniventildettejob.
• Sætaltidæltetilbehøretiskålen,førdukommeringrediensernei.
Tip
• Hvisdubrugermelmedhøjtglutenindhold,skalduforatopnådebedsteresultaterbruge60gvand
tilhver100gmelogderefteræltemedhastighed1i2minutter(maks.tid).
1 Drejskålenmeduretforatfastgøredentilmotorenheden,oganbringderefter
tilbehørsholdereniskålen.
» Dukanhøreetklik,nårskålenersatrigtigtfast.
2 Sætæltetilbehøretitilbehørsholderen.
3 Komingredienserneiskålen.
4 Læglågetpåskålen,ogdrejderefterlågetmeduretforatsættedetfast.
» Dukanhøreetklik,nårlågetersatrigtigtfast.
5 Sætnedstopperennedipåfyldningstragten.
6 Tilslutstrømmen.
7 Drejknappentilposition1 .
8 Kontrollertilberedningstiden,denmaksimalemængdeogdennødvendigehastighedtil
ingredienserneiTabel1.
9 Efterbrugdrejesknappentil0,ogapparatetkoblesfrastikkontakten.
Ballonpiskeris
Førdustarter,skaldusørgeforatsamleapparatetsomvistiFig.5:
1 Sættilbehørsholderenfastiskålen.
2 Sætballonpiskerisetpåtilbehørsholdereniskålen.
3 Komingredienserneiskålen.
4 Sætlågetpåskålen.Drejlågetmeduretforatsættedetfast.Putingrediensernei
påfyldningstragten.
5 Vælghastighed1.
6 Efterbrugskaldudrejehastighedsvælgerentil0ogfrakoblestrømmen.
Citruspresser
Førdustarter,skaldusørgeforatsamleapparatetsomvistiFig.6.
Dukanbrugecitruspresserentilatpressecitrusfrugter.
1 Drejskålenmeduretforatfastgøredentilmotorenheden,oganbringderefter
tilbehørsholdereniskålen.
» Dukanhøreetklik,nårskålenersatrigtigtfast.
2 Sætsientilcitruspresserenpåtilbehørsholdereniskålen.Sørgfor,attappenpåsiener
låstfastoverskålenshåndtag.
» Dukanhøreetklik,nårsienersatrigtigtfast.
3 Sætpressekeglenpåsien.
4 Tilslutstrømmen.
5 Kontrollerdenmaksimalemængde,derkrævestilingredienserneiTabel1.Drejknappen
tilhastighed1.
» Pressekeglenbegynderatrotere.
6 Prescitrusfrugtennedoverkeglen.
7 Holdenpausemedjævnemellemrumforatfjernefrugtkødetfrasien.Nårduerfærdig
medpresningenellerønskeratfjernefrugtkødet,skaldudrejeknappentil0ogfjerne
skålenfraapparatetsammenmedsienogkeglen.
Skiver til snitning/rivning
Førdustarter,skaldusørgeforatvælgedenønskedeskiveogsættedenpåsomvistiFig.7:
• Justerbarsnitteskivetilforskelligetykkelser.
• Vendbarriveskive(storellerlillestørrelse)
Advarsel
• Værforsigtig,nårduhåndtererskiven.Denharenmegetskarpskæreside.
• Undgåatbrugeskiventilhårdeingrediensersomf.eks.isterninger.
• Trykikkenedstopperenforhårdtned,nåringrediensernepressesnedipåfyldningstragten.
4 Rengøring
Advarsel
• Tagstrømmenfraapparatet,førdurengørdet.
Advarsel
• Sørgfor,athverkenknivenhedernesellerskivernesæggekommerikontaktmedhårdegenstande.
Detkangøredemsløve.
• Knivbladenesæggeerskarpe.Værforsigtig,nårdurengørfoodprocessorensknivenhedogskiver.
1 Motorenhedenkanrengøresmedenfugtigklud.
2 Rengørdeøvrigedeleivarmtvand(<60ºC)tilsatlidtopvaskemiddelelleri
opvaskemaskinen.
Hurtig rengøring
Dukanbenyttefølgendetrintilatrengørefoodprocessorskålenogblenderglassetpåennem
måde.
Bemærk
• Sørgfor,atknivenhedenersamletiskålen,hvisdurengørfoodprocessorskålen.
1 Komlunkentvand(maks.0,5liter)ogetpardråberopvaskemiddeli
foodprocessorskålen.
2 Sætlågetpåfoodprocessorskålen,ogdrejmeduretforatfastgøredet.
3 DrejknappentilP.Ladapparatetkørei30sekunder,ellerindtilfoodprocessorskålen
er ren.
4 Efterbrugdrejesknappentil0,ogapparatetkoblesfrastikkontakten.
5 Tagfoodprocessorskålenaf,ogskyleftermedrentvand.
5 Opbevaring
1 Placerledningenidetintegreredeopbevaringsrum(Fig.10).
2 Opbevarproduktetpåettørtsted.
3 Lægskiver,æltetilbehørogskaftsamtandetsmåttilbehørifoodprocessorskålen(Fig.11).
6 Garanti og service
Hvisdufårproblemer,harbrugforserviceelleroplysninger,skaldusewww.philips.com/
supportellerkontaktedetlokalePhilipsKundecenter.Telefonnummeretndesifolderen
"World-WideGuarantee".Hvisderikkendesetkundecenteriditland,bedesdukontakte
din lokale Philips-forhandler.
Português
1 Importante
Leiacuidadosamenteestemanualdoutilizadorantesdeutilizaroaparelhoeguarde-opara
uma eventual consulta futura.
Perigo
• Nuncamergulheomotoremágua,nemoenxagúeemáguacorrente.
Aviso
• Nuncautilizeosseusdedosnemumobjectoparaempurraralimentosnotubode
alimentos, enquanto o aparelho está em funcionamento. Utilize apenas o pressor.
• Antesdeligaroaparelhoàalimentação,assegure-sequeavoltagemindicadanaparte
inferiordoaparelhocorrespondeàvoltagemeléctricalocal.
• Nuncaligueesteaparelhoaumtemporizadorparaevitarsituaçõesdeperigo.
• Seocabodealimentação,achaououtraspeçasestiveremdanicadas,nãoutilizeo
aparelho.
• Seocabodealimentaçãoestiverdanicado,estedevesersempresubstituídopela
Philips,porumcentrodeassistênciaautorizadopelaPhilipsouporpessoalcom
qualicaçãoequivalenteparaevitarsituaçõesdeperigo.
• Esteaparelhonãosedestinaaserutilizadoporpessoas(incluindocrianças)com
capacidadesfísicas,sensoriaisoumentaisreduzidas,oucomfaltadeexperiênciae
conhecimentos,salvosetiveremrecebidosupervisãoouinstruçõessobreousodo
aparelhoporalguémresponsávelpelasuasegurança.
• Pormotivosdesegurança,nãopermitaqueascriançasbrinquemcomoaparelho.
• Nuncadeixeoaparelhoafuncionarsemvigilância.
• Seosalimentosaderiremàtaça,desligueoaparelhoeretireachadatomada.Em
seguida,utilizeumaespátulaparasoltarosalimentos.
• Tenha cuidado quando manusear ou limpar os discos e as lâminas do robot. Os
rebordosdecortesãomuitoaados.
• Nãotoquenaslâminas,especialmentequandoachadoaparelhoestiverligada.As
lâminassãomuitoaadas.
• Seaslâminascarempresas,desligueachadoaparelhoantesderetiraros
ingredientesqueestiveremabloquearaslâminas.
Atenção
• Nuncadesligueoaparelhorodandoataçaouumatampa.Desliguesempreoaparelho
rodandoobotãodecontrolopara0.
• Desligueimediatamenteoaparelhodatomadaapóscadautilização.
• Aguardeatéaspeçasemmovimentopararemantesderetiraratampadataça.
• Nãoexcedaonívelmáximoindicadonataça.
• Limpe muito bem todas as peças que entrarem em contacto com os alimentos antes
de utilizar o aparelho pela primeira vez.
• Antesderetiraroulimparoacessórioparaamassarouosdiscos,desligueachado
aparelho.
• NuncautilizequaisqueracessóriosoupeçasdeoutrosfabricantesouqueaPhilipsnão
tenhaespecicamenterecomendado.Seutilizartaisacessóriosoupeças,agarantia
perderá a validade.
• Esteaparelhodestina-seapenasausodoméstico.
• Nãoexcedaasquantidadeseostemposdepreparaçãoindicadosnomanualdo
utilizador.
• Deixeosingredientesquentesarrefecer(<80°C)antesdeosprocessar.
• Deixesempreoaparelhoarrefeceratéàtemperaturaambienteentreapreparaçãode
cadaporção.
• Algunsingredientespodemcausardescoloraçõesnasuperfíciedaspeças.Istonãotem
umefeitonegativonaspeças.Normalmente,asdescoloraçõesdesaparecemdepoisde
algumtempo.
• Nível de ruído = 85 dB [A]
Campos electromagnéticos (CEM)
ThisPhilipsappliancecomplieswithallstandardsregardingelectromagneticelds(EMF).
Semanuseadocorrectamenteedeacordocomasinstruçõesfornecidasnestemanual
doutilizador,oaparelhopodeserutilizadoemsegurançacombaseemprovascientícas
disponíveis actualmente.
Reciclagem
O produto foi concebido e fabricado com materiais e componentes de alta qualidade, que
podem ser reciclados e reutilizados.
Quandoobservarosímbolodeumcaixotedolixotraçadoaxadonumproduto,signica
queoprodutoéabrangidopelaDirectivaEuropeia2002/96/CE:
Nuncaelimineesteprodutojuntamentecomosresíduosdomésticos.Informe-sesobre
osistemaderecolhaselectivalocalrelativamenteaprodutoseléctricoseelectrónicos.A
eliminaçãocorrectadoseuprodutoantigoajudaaevitarpotenciaisconsequênciasnegativas
paraoambienteeparaasaúdehumana.
2 Introdução
Parabénspelacompradoseuprodutoebem-vindoàPhilips!Parabeneciarnatotalidade
dosuportequeaPhilipsoferece,registeoseuprodutoemwww.philips.com/welcome.
Para obter mais receitas para preparar no seu robot, visite www.philips.com/kitchen
3 Robot
Aviso
• Nuncautilizeosseusdedosnemumobjecto(porexemplo,umaespátula)paraempurraralimentos
no tubo de alimentos, enquanto o aparelho está em funcionamento. Utilize apenas o pressor.
Lâmina da picadora
Antesdecomeçarautilizar,assegure-sedequemontouaspeçasdeacordocomaFig.2.
Aslâminasdapicadorapodemserutilizadasparapicar,misturar,liquidicaroureduzirapuré.
Tambémpodeutilizá-lasparamisturareliquidicarmassasparabolo.
Atenção
• Nãoutilizeaslâminasdapicadoraparapicaringredientesmuitoduros,comogrãosdecafé,açafrão,noz
moscadaecubosdegelo,poisistopoderátornaraslâminasrombas.
Nota
• Nãodeixeoaparelhofuncionarduranteumperíododetempomuitoprolongado,quandopica
queijo(duro)ouchocolate.Casocontrário,estesingredientesaquecem,começamaderretere
formamgrumos.
• Cortepreviamenteospedaçosgrandesdecomidaempedaçosdeaprox.3x3x3cm.
1 Rodeataçaparaadireitaparaxá-lonaunidadedomotore,emseguida,coloqueo
suporte dos acessórios na taça.
» Quandoataçaéxacorrectamente,ouve-seumestalido.
2 Coloqueaslâminasdapicadoranosuportedosacessórios.
3 Coloqueosingredientesnataça.
4 Coloqueatampanataçae,emseguida,rodeatampaparaadireitaparaaxar.
» Quandoatampaémontadacorrectamente,ouve-seumestalidoeatampaca
presaàpegadataça.
5 Introduza o pressor no tubo dos alimentos.
6 Ligueachadealimentaçãoàfontedealimentação.
7 Veriquearegulaçãodotempodepreparação,daquantidademáximaedadenição
davelocidadenecessáriaparaosingredientesnaTabela1.Rodeobotãoparaa
regulaçãodevelocidadedesejada.
8 Depoisdeutilizar,rodeobotãopara0e,emseguida,desligueachadoaparelho.
Dica
• Seestiverapicarcebolas,rodeobotãodavelocidadeparaPalgumasvezesparaevitarqueas
cebolasquemdemasiadopicadas.
• Quandoosalimentosaderiremàslâminasouaointeriordataça,podeexecutarosseguintespassos:
1.Desligueoaparelhoeretireacha.2.Retireatampadataça.3.Retireosingredientesdalâmina
ou das paredes da taça com uma espátula.
Lâmina serrilhada
Antesdecomeçarautilizar,assegure-sedequemontouaspeçasdeacordocomaFig.3.
Utilizealâminaserrilhadaparatriturarfrutacongelada.
Nota
• Coloquesempreaslâminasnataçaantesdecomeçar.
• Recomendamosquecorteafrutaemcubosde2x2x2cmantesdeacongelar.
• Paraprepararsobremesasdefruta,recomendamosautilizaçãodavelocidade2 para resultados
cremosos e da velocidade 1 para resultado com pedaços.
1 Rodeataçaparaadireitaparaxá-lonaunidadedomotore,emseguida,coloqueo
suporte dos acessórios na taça.
» Quandoataçaéxacorrectamente,ouve-seumestalido.
2 Coloquealâminaserrilhadaparagelonosuportedosacessórios.
3 Coloqueafrutacongeladanataça.
4 Coloqueatampanataçae,emseguida,rodeatampaparaadireitaparaaxar.
» Quandoatampaémontadacorrectamente,ouve-seumestalidoeatampaca
presaàpegadataça.
5 Introduza o pressor no tubo dos alimentos.
6 Ligueachadealimentaçãoàfontedealimentação.
7 Rodeobotãopara1 ou 2.
8 Depoisdautilização,rodeoselectordevelocidadepara0e,emseguida,desliguea
chadoaparelho.
Acessório para amassar
Antesdecomeçarautilizar,assegure-sedequemontouaspeçasdeacordocomaFig.4.
Aspásdeamassarpodemserutilizadasparaamassarmassaslevedadasparapãoepiza.
Deveajustaraquantidadedelíquidoparaprepararamassadeacordocomascondiçõesda
humidade e da temperatura.
Nota
• Nãoutilizeaspásdeamassarparaliquidicarmassasparabolo.Utilizeaslâminasdapicadorapara
esse processamento.
• Introduzasempreaspásdeamassarnataçaantesdecomeçaraadicionarosingredientes.
Dica
• Seutilizarfarinharicaemglúten,paraobtermelhoresresultados,utilize60gdeáguaparacada100gdefarinha
eamassenavelocidade1durante2minutos(tempomáximo).
1 Rodeataçaparaadireitaparaxá-lonaunidadedomotore,emseguida,coloqueo
suporte dos acessórios na taça.
» Quandoataçaéxacorrectamente,ouve-seumestalido.
2 Coloqueaspásdeamassarnosuportedosacessórios.
3 Coloqueosingredientesnataça.
4 Coloqueatampanataçae,emseguida,rodeatampaparaadireitaparaaxar.
» Quandoatampaémontadacorrectamente,ouve-seumestalidoeatampaca
presaàpegadataça.
5 Introduza o pressor no tubo dos alimentos.
6 Ligueachadealimentaçãoàfontedealimentação.
7 Rodeobotãoparaaposição1.
8 Veriquearegulaçãodotempodepreparação,daquantidademáximaedadenição
davelocidadenecessáriaparaosingredientesnaTabela1.
9 Depoisdeutilizar,rodeobotãopara0e,emseguida,desligueachadoaparelho.
Varas de bater
Antesdecomeçarautilizar,assegure-sedequemontouaspeçasdeacordocomaFig.5.
1 Coloqueosuportedosacessóriosdentrodataça.
2 Coloqueasvarasdebaternosuportedosacessóriosnataça.
3 Coloqueosingredientesnataça.
4 Coloqueatampanataça.Rodeatampaparaadireitaparaaxar.Introduzaopressor
no tubo dos alimentos.
5 Seleccione a velocidade 1.
6 Depoisdautilização,rodeoselectordevelocidadepara0e,emseguida,desliguea
chadoaparelho.
Dica
• Para obter bolos melhores, utilize as varas de bater.
Espremedor
Antesdecomeçarautilizar,assegure-sedequemontouaspeçasdeacordocomaFig.6.
Pode utilizar o espremedor de citrinos para extrair sumo a citrinos.
1 Rodeataçaparaadireitaparaxá-lonaunidadedomotore,emseguida,coloqueo
suporte dos acessórios na taça.
» Quandoataçaéxacorrectamente,ouve-seumestalido.
2 Coloqueocoadorparaoespremedordecitrinosnosuportedosacessóriosnataça.
Assegure-sedequeaprojecçãonocoadorestábloqueadanaranhuradapegadataça.
» Quandoocoadoréxocorrectamente,ouve-seumestalido.
3 Coloqueoconenocoador.
4 Ligueachadealimentaçãoàfontedealimentação.
5 Veriqueaquantidademáximanecessáriaparaosingredientesnatabela1.Rodeo
botãoparaavelocidade1.
» O cone começa a rodar.
6 Pressione os citrinos contra o cone.
7 Paredevezemquandopararetirarapolpadoltro.Quandoterminaraextracçãodo
sumoouquandoquiserretirarapolpa,rodeobotãopara0 e retire a taça do aparelho
juntamentecomocoadoreocone.
Discos para fatiar e cortar
Antesdecomeçarautilizar,assegure-sedequeseleccionouodiscopretendidoedeque
estefoimontadodeacordocomaFig.7:
• Discoparafatiarajustávelparaobterespessurasdiferentes
• Discoparacortarreversível(tamanhomaioroumaispequeno)
Atenção
• Tenhacuidadoaomanusearodisco.Estatemumrebordodecortemuitoaado.
• Nuncautilizeosdiscosparaprocessaringredientesduros,comocubosdegelo.
• Nãoexerçademasiadaforçasobreopressorquandoestiveraempurraralimentosnotubode
alimentos.
4 Limpeza
Aviso
• Antesdelimparoaparelho,desligueacha.
Atenção
• Assegure-sedequeosrebordosdecortedaslâminasedosdiscosnãoentramemcontactocom
objectosrígidos.Istopodetornaraslâminasrombas.
• Osrebordosdecortesãoaados.Tenhacuidadoaolimparaslâminaseosdiscosdorobot.
1 Limpeomotorcomumpanohúmido.
2 Laveasrestantespeçasemáguaquente(<60°C)comumpoucodedetergenteda
loiça ou coloque-as na máquina de lavar loiça.
Limpeza rápida
Podeseguirospassosseguintesparalimparataçadorobotdecozinhaeocopomisturar
com maior facilidade.
Nota
• Assegure-sedequealâminaestámontadanataça,quandolimparataçadorobotdecozinha.
1 Coloqueáguatépida(0,5litrosnomáximo)ealgumasgotasdedetergentedaloiça
dentro da taça do robot.
2 Coloqueatampanataçadoroboterode-aparaadireitaparaaxar.
3 RodeobotãoparaP.Deixeoaparelhofuncionardurante30segundosouatéataça
do robot de cozinha estar limpa.
4 Depoisdeutilizar,rodeobotãopara0e,emseguida,desligueachadoaparelho.
5 Retireataçadorobotepasse-aporágualimpa.
5 Armazenamento
1 Introduzaocabodealimentaçãonocompartimentointegradodearrumaçãodoo
(Fig.10).
2 Guardeoprodutonumlocalseguro.
3 Coloqueosdiscos,aspásdeamassar,oveioeoutrosacessóriospequenosnataçado
robotdecozinha(Fig.11).
6 Garantia e assistência
Setiveralgumproblemaouseprecisardeassistênciaouinformações,visitewww.philips.com/
supportoucontacteoCentrodeApoioaoClientedaPhilipsnoseupaís.Onúmerode
telefoneencontra-senofolhetodagarantiamundial.SenãoexistirumCentrodeApoioao
Clientenoseupaís,dirija-seaumrepresentantelocalPhilips.
4/4 3140 035 33851

Türkçe
1 Önemli
Cihazıkullanmadanöncebukullanımkılavuzunudikkatleokuyunvedahasonrabaşvurmak
üzeresaklayın.
Tehlike
• Motorünitesiniaslasuyasokmayınyadamuslukaltındayıkamayın.
Uyarı
• Cihazçalışırhaldeyken,beslemeborusunamalzemelerikesinlikleparmaklarınızlaveya
birnesneyardımıylaiterekdoldurmayaçalışmayın.Bununiçinyalnızcamalzemeiticiyi
kullanın.
• Cihazıanaşebekeyebağlamadanöncecihazınaltındabelirtilengeriliminyerelana
şebekegerilimineuygunolduğundaneminolun.
• Tehlikelibirdurumyaratmamakiçincihazıaslabirzamanlayıcıanahtarınabağlamayın.
• Güçkablosu,şveyadiğerparçalarhasargörmüşse,cihazıkullanmayın.
• Cihazıngüçkablosuhasarlıysa,birtehlikeoluşturmasınıönlemekiçinmutlakaPhilips'in
yetkiverdiğibirservismerkeziveyabenzerşekildeyetkilendirilmişkişilertarafından
değiştirilmesinisağlayın.
• Bucihaz,güvenliklerindensorumlukişilerinnezaretiveyatalimatıolmadan,ziksel,
sinirselyadazihinselbecerilerigelişmemişveyabilgivetecrübeaçısındanyetersizkişiler
tarafından(çocuklardadahil)kullanılmamalıdır.
• Çocuklarınkendigüvenliğiiçin,cihazileoynamalarınaizinvermeyin.
• Cihazıkesinlikleçalışırdurumdabırakmayın.
• Hazneniniçineyiyecekyapışmasıhalinde,cihazıkapatarakşiniprizdençekin.Ardından
birspatulaileyiyeceğitemizleyin.
• Disklerivemutfakrobotununbıçakünitelerinitaşırkenyadatemizlerkendikkatliolun.
Bıçaklarınağzıçokkeskindir.
• Özelliklecihazprizetakılıykenbıçaklaradokunmayın.Bıçaklarçokkeskindir.
• Eğerbıçaklarsıkışırsa,bıçaklarıengelleyenmalzemeleriçıkarmadanönce,cihazınşini
çekin.
Dikkat
• Cihazı,aslahazneyiveyakapaklarınıçevirerekkapatmayın.Cihazıherzamandüğmeyi0
konumunagetirerekkapatın.
• Kullanımsonrasında,cihazımutlakaprizdençekin.
• Hazneninkapağınıçıkarmadanöncehareketliparçalarındurmasınıbekleyin.
• Hazneninüzerindekimaksimumseviyegöstergesinigeçmeyin.
• Cihazıilkkezkullanmadanönceyiyeceklerletemasedenparçalarınıiyicetemizleyin.
• Yoğurmaaksesuarınıveyadiskleriçıkarmadanveyatemizlemedenönce,cihazınşini
prizden çekin.
• BaşkaüreticilereaitolanveyaPhilipstarafındanözellikletavsiyeedilmeyenaksesuar
veparçalarıkesinliklekullanmayın.Butüraksesuarveyaparçakullanırsanız,garantiniz
geçerliliğiniyitirir.
• Bucihazsadeceevdekullanımiçintasarlanmıştır.
• Kullanıcıkılavuzundabelirtilenmiktarlarıveişlemsüreleriniaşmayın.
• Sıcakmalzemeleriişlemealmadanöncesoğumasını(<80ºC)bekleyin.
• Herişlemdensonracihazınodasıcaklığınagelmesinibekleyin.
• Bazımalzemelerparçalarınyüzeyinderenkdeğişiminenedenolabilir.Bununparçalar
üzerindeolumsuzbiretkisiyoktur.Renkdeğişimigenelliklebelirlibirsüresonra
meydanagelir.
• Gürültüseviyesi=85dB[A]
Elektromanyetik alanlar (EMF)
BuPhilipscihazıelektromanyetikalanlar(EMF)hakkındakitümstandartlarauygundur.Doğru
vebukullanımkılavuzundakitalimatlarauygunşekildekullanılırsa,günümüzbilimselbulgularına
görecihazınkullanımıgüvenlidir.
Geri dönüşüm
Ürününüz,geridönüşümetabitutulabilenveyenidenkullanılabilen,yüksekkalitedemalzeme
veparçalardantasarlanmışveüretilmiştir.
Üzerindeçarpıişaretlitekerlekliçöpkutusuişaretlietiketbulunması,sözkonusuürünün
2002/96/ECsayılıAvrupaYönergesikapsamındaolduğuanlamınagelir.
Buürünükesinliklediğerevselatıklarlabirlikteatmayın.Lütfen,elektrikliveelektronikürünlerin
ayrıtoplanmasıileilgiliyerelkurallarhakkındabilgiedinin.Eskiyenürününüzünatıkişlemlerinin
doğrubiçimdegerçekleştirilmesi,çevreveinsansağlığıüzerindeolumsuzetkilereyolaçılmasını
önlemeyeyardımcıolur.
2 Giriş
Ürünümüzütercihettiğiniziçinteşekkürederiz,Philipsdünyasınahoşgeldiniz!Philips'in
sunduğudestektentamolarakyararlanmakiçin,ürününüzüwww.philips.com/welcome
adresinde kaydettirin.
Mutfakrobotunuzlahazırlayacağınıztarieriçinwww.philips.com/kitchenadresinegidin.
3 Mutfak robotu
Uyarı
• Cihazçalışırhaldeyken,beslemeborusunamalzemelerikesinlikleparmaklarınızlaveyabirnesne
yardımıyla(örneğinspatula)iterekdoldurmayaçalışmayın.Bununiçinyalnızcamalzemeiticiyikullanın.
Doğrayıcı bıçak
Başlamadanönce,montajıdoğrubirşekildeyaptığınızdaneminolmakiçinbkz.Şekil2.
Doğrayıcıbıçağımalzemeleridoğramak,karıştırmakveyapüreyapmakiçinkullanabilirsiniz.Kek
hamurlarınıkarıştırmakveharmanlamakiçindekullanabilirsiniz.
Dikkat
• Kahveçekirdeği,zerdeçal,muskatvebuzküplerigibisertmalzemeleridoğrarkendoğrayıcıbıçağıkullanmayın.Aksi
haldebıçakkörelecektir.
Not
• Peynir(sert)veyaçikolatadoğrarkencihazıçokuzunsüreçalıştırmayın.Aksihaldemalzemelerçok
ısınabilir,erimeyebaşlayabilirvetopaklanabilir.
• Büyükmalzemeleriöncedenyaklaşık3x3x3cmboyutlarındaküçükparçalarhalindekesin.
1 Hazneyisaatyönündeçevirerekmotorünitesininüzerindesabitleyinveardındanaparat
yuvasınıkaseniniçinekoyun.
» Haznedoğruşekildesabitlendiğindebirtıksesiduyulur.
2 Doğrayıcıbıçağıaparatyuvasınayerleştirin.
3 Malzemeleri hazneye koyun.
4 Kapağıhazneninüzerineyerleştirinveardındankapağısaatyönündeçevirereksabitleyin.
» Kapakdoğruşekildetakıldığındabirtıksesiduyulurvekapakhaznekulpunun
üzerinde sabitlenir.
5 Malzeme iticiyi besleme borusunun üzerine koyun.
6 Fişigüçkaynağınatakın.
7 Tablo1'denmalzemeleriçingereklihazırlamasüresini,maksimummiktarıvehızayarını
kontroledin.Düğmeyiistenenhızayarınagetirin.
8 Kullanımdansonra,düğmeyi0konumunagetirinveardındancihazıştençıkarın.
İpucu
• Soğandoğrarken,düğmeyiPayarınagetirereksoğanlarınçokincedoğranmasınıönleyin.
• Yiyecekler,bıçağaveyahazneiçineyapışırsaşuadımlarıizleyebilirsiniz:1.Cihazıkapatarakşiniprizden
çekin.2.Haznekapağınıaçın.3.Spatulayardımıilebıçağaveyahazneniniçineyapışanmalzemeleri
sıyırın.
Tırtıklı bıçak
Başlamadanönce,montajıdoğrubirşekildeyaptığınızdaneminolmakiçinbkz.Şekil3.
Donmuşmeyveleriparçalamakiçintırtıklıbıçağıkullanın.
Not
• Bıçakünitesini,herzamanbaşlamadanöncehazneyeyerleştirin.
• Dondurmadanöncemeyveleri2x2x2cmküpboyutundakesmenizönerilir.
• Meyvelitatlılarhazırlarken,pütürsüzbirsonuçeldeetmekiçin2hızını,parçacıklıbirsonuçeldeetmek
için de 1hızınıkullanmanızönerilir.
1 Hazneyisaatyönündeçevirerekmotorünitesininüzerindesabitleyinveardındanaparat
yuvasınıkaseniniçinekoyun.
» Haznedoğruşekildesabitlendiğindebirtıksesiduyulur.
2 Tırtıklıbuzbıçağınıaparatyuvasınayerleştirin.
3 Donmuşmeyvelerihazneyekoyun.
4 Kapağıhazneninüzerineyerleştirinveardındankapağısaatyönündeçevirereksabitleyin.
» Kapakdoğruşekildetakıldığındabirtıksesiduyulurvekapakhaznekulpunun
üzerinde sabitlenir.
5 Malzeme iticiyi besleme borusunun üzerine koyun.
6 Fişigüçkaynağınatakın.
7 Düğmeyi1 veya 2konumunagetirin.
8 Kullanımdansonra,hızseçmedüğmesini0ayarınagetirinvecihazınşiniprizdençıkarın.
Yoğurma aksesuarı
Başlamadanönce,montajıdoğrubirşekildeyaptığınızdaneminolmakiçinbkz.Şekil4.
Yoğurmaaparatınıekmekvepizzaiçinmayalıhamuryoğurmakamacıylakullanabilirsiniz.Nem
vesıcaklıkdurumunagörehamurubiçimlendirmekiçinkullanılacaksıvımiktarınıayarlamanız
gerekir.
Not
• Kekhamurlarınıkarıştırmakiçinyoğurmaaparatınıkullanmayın.Buişiçindoğrayıcıbıçağıkullanın.
• Yoğurmaaparatınıhazneyemutlakamalzemelerieklemedenönceyerleştirin.
İpucu
• YüksekGlutenliUnkullanıyorsanız,eniyisonuçlariçinher100guniçin60gsukullanınve1hızındamaksimum
2dakikayoğurun.
1 Hazneyisaatyönündeçevirerekmotorünitesininüzerindesabitleyinveardındanaparat
yuvasınıkaseniniçinekoyun.
» Haznedoğruşekildesabitlendiğindebirtıksesiduyulur.
2 Yoğurmaaparatınıaparatyuvasınayerleştirin.
3 Malzemeleri hazneye koyun.
4 Kapağıhazneninüzerineyerleştirinveardındankapağısaatyönündeçevirereksabitleyin.
» Kapakdoğruşekildetakıldığındabirtıksesiduyulurvekapakhaznekulpunun
üzerinde sabitlenir.
5 Malzeme iticiyi besleme borusunun üzerine koyun.
6 Fişigüçkaynağınatakın.
7 Düğmeyi1 konumuna çevirin.
8 Tablo1'denmalzemeleriçingereklihazırlamasüresini,maksimummiktarıvehızayarını
kontrol edin.
9 Kullanımdansonra,düğmeyi0konumunagetirinveardındancihazıştençıkarın.
Balon çırpıcı
Başlamadanönce,montajıdoğrubirşekildeyaptığınızdaneminolmakiçinbkz.Şekil5.
1 Aparatyuvasınıhazneyeyerleştirin.
2 Balonçırpıcıyıhaznedekiaparatyuvasınayerleştirin.
3 Malzemeleri hazneye koyun.
4 Hazneninkapağınıkapatın.Kapağısaatyönündeçevirerekyerinesabitleyin.İtme
borusunubeslemeborusunayerleştirin.
5 1hızınıseçin.
6 Kullanımdansonra,hızseçmedüğmesini0ayarınagetirinvecihazınşiniprizdençıkarın.
İpucu
• Dahaiyibirkekhazırlamakiçinlütfenbalonçırpıcıyıkullanın.
Narenciye sıkacağı
Başlamadanönce,montajıdoğrubirşekildeyaptığınızdaneminolmakiçinbkz.Şekil6.
Narenciyemeyvelerinisıkmakiçinnarenciyesıkacağınıkullanabilirsiniz.
1 Hazneyisaatyönündeçevirerekmotorünitesininüzerindesabitleyinveardındanaparat
yuvasınıkaseniniçinekoyun.
» Haznedoğruşekildesabitlendiğindebirtıksesiduyulur.
2 Narenciyesıkacağınıneleğinihaznedeaparatyuvasınınüzerineyerleştirin.Eleğin
üzerindekiçıkıntının,haznetutacağınınyuvasınakilitlendiğindeneminolun.
» Elekdoğruşekildesabitlendiğindebirtıksesiduyulur.
3 Huniyieleğinüzerineyerleştirin.
4 Fişigüçkaynağınatakın.
5 MalzemeleriçinmaksimummiktarıTablo1'denkontroledin.Düğmeyihız1ayarına
getirin.
» Hunidönmeyebaşlar.
6 Narenciyeyihuniyedoğrubastırın.
7 Aradabirelektekiposalarıtemizlemekiçinuygulamayıdurdurun.Sıkmaişlemini
bitirdiğinizdeveyaposayıtemizlemekistediğinizde,düğmeyi0konumunadöndürünve
hazneyi,süzgecivehunisiylebirliktecihazdançıkarın.
Dilimleme diskleri ve rendeleme diskleri
Başlamadanönce,istediğinizdiskiseçtiğinizdenvemontajıdoğrubirşekildeyaptığınızdanemin
olmakiçinbkz.Şekil7:
• Farklıkalınlıklardadilimlemeiçinayarlanabilirdilimlemediski
• Tersçevrilebilirrendelemediski(büyükveyaküçükboyutlarda)
Dikkat
• Diskitutarkendikkatliolun.Ağzıçokkeskindir.
• Disklekesinliklebuzküplerigibiçoksertcisimleriparçalamayaçalışmayın.
• Beslemeborusundanmalzemeeklerken,malzemeiticiyiçokfazlabastırmayın.
4 Temizleme
Uyarı
• Cihazıtemizlemedenönceşiniprizdençekin.
Dikkat
• Bıçaklarınvedisklerinkeskinuçlarınınsertcisimlerletemasetmediğindeneminolun.Bu,bıçağın
körelmesineyolaçabilir.
• Bıçaklarınağzıoldukçakeskindir.Mutfakrobotununbıçakünitesinivediskleritemizlerkençokdikkatli
olun.
1 Motor ünitesini nemli bezle silerek temizleyin.
2 Diğerparçalarısıcaksuda(<60ºC)bulaşıkdeterjanıileveyabulaşıkmakinesindeyıkayın.
Hızlı temizlik
Mutfakrobotukasesiniveblenderhaznesinidahakolaybirbiçimdetemizlemekiçinaşağıdaki
adımlarıizleyin.
Not
• Mutfakrobotukasesinitemizleyecekseniz,bıçağınhaznedetakılıolduğundaneminolun.
1 Mutfakrobotuhaznesineılıksu(enfazla0,5litre)doldurunvebirkaçdamlabulaşık
deterjanıekleyin.
2 Mutfakrobotuhaznesininkapağınıtakınvesaatyönündeçevirereksabitleyin.
3 DüğmeyiPkonumunadöndürün.Cihazı30saniyeyadamutfakrobotuhaznesi
temizlenenekadarçalıştırın.
4 Kullanımdansonra,düğmeyi0konumunagetirinveardındancihazıştençıkarın.
5 Mutfakrobotuhaznesiniçıkarınvesuyladurulayın.
5 Saklama
1 Güçkablosunuentegrekablogözüneyerleştirin(Şekil10).
2 Cihazıkurubiryerdesaklayın.
3 Diskleri,yoğurmaaparatını,milivediğerküçükaksesuarlarımutfakrobotuhaznesine
koyun(Şekil11).
6 Garanti ve servis
Birsorunyaşarsanızyadaserviseveyabilgiyeihtiyaçduyarsanız,www.philips.com/support
adresinebakınveyaülkenizdekiPhilipsMüşteriMerkeziileiletişimkurun.Gereklitelefon
numarasıiçingarantibroşürünebakın.ÜlkenizdeMüşteriMerkeziyoksa,yerelPhilipssatıcınıza
gidin.