Loading ...
Loading ...
Loading ...
English
7
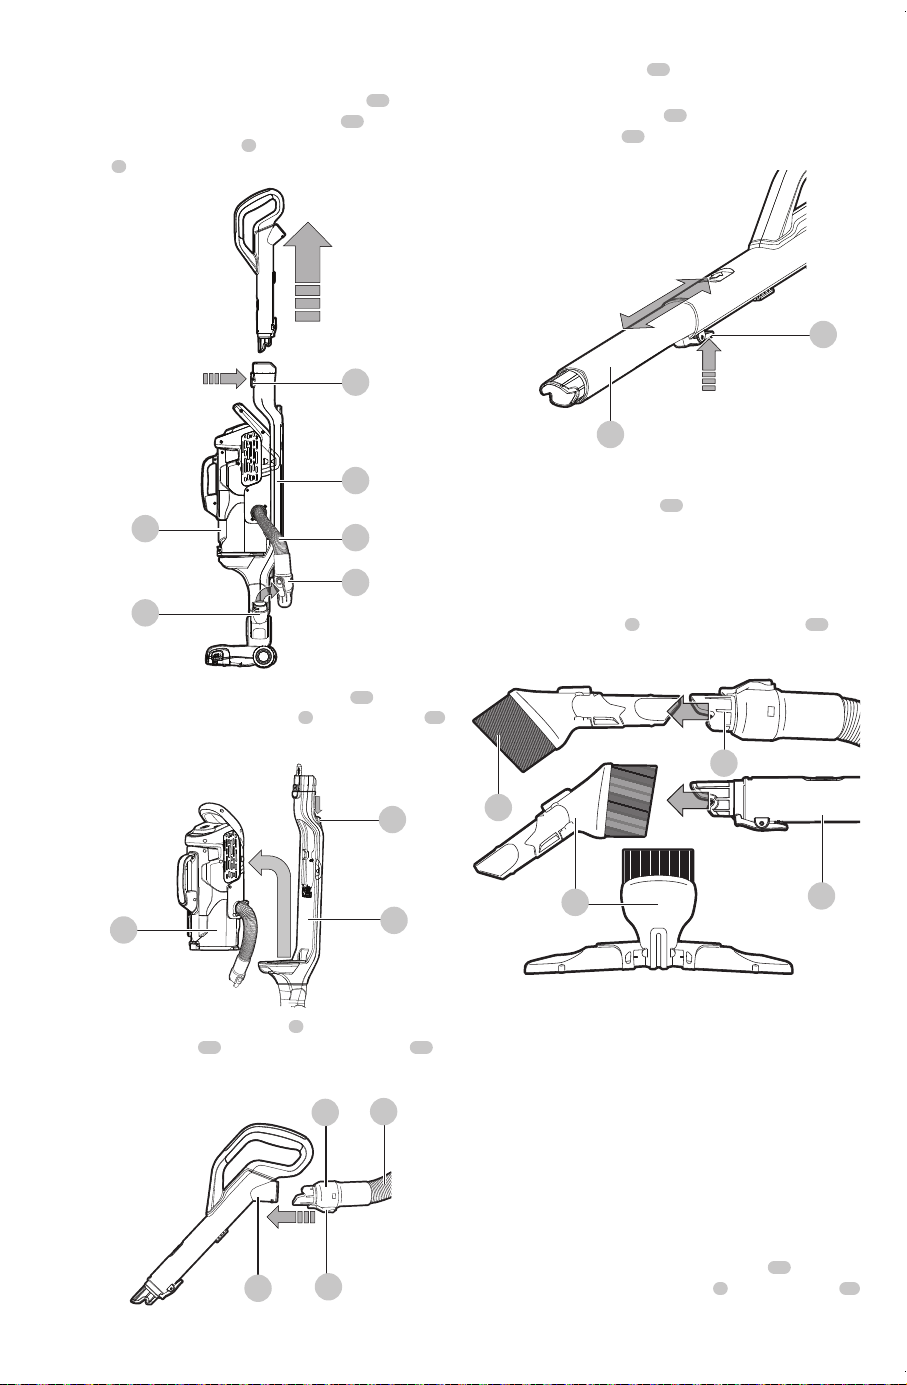
Using the accessory tool (Fig. L–O)
• Press the main handle/wand release button
17
to free
the main handle/wand from the chassis
23
.
• Free the hose connector
3
from the main body hose
port
6
as shown in FigureL.
Fig. L
23
4
5
3
6
17
• Press the lift away canister release button
41
to release
and remove the lift away canister
5
from the chassis
23
as shown in FigureM.
Fig. M
23
41
5
• Connect the hOSE CONNECTOR
3
TO THE ACCESSORY
TOOL HOSE PORT
15
ENSURING THAT THE LATCH
16
CLICKS SECURELY INTO PLACE AS SHOwn in FigureN.
Fig. N
3
4
16
15
• Extend the crevice tool
19
as shown in Figure O, until it
clicks inplace.
• To retract the crevice tool
19
press the crevice
tool release button
16
allowing it to return to its
normalposition.
Fig. O
19
16
Using the 3 in 1 Accessory tool (Fig. P)
• The 3-in-1 accessory tool
18
has threeconfigurations.
- Brushmode.
- Small crevicemode.
- Upholsterymode.
• The 3-in-1 accessory tool can be fitted either directly to
the hose connector
3
or to the pet crevice tool
19
as
shown in Figure P.
Fig. P
19
3
18
18
Cleaning and emptying the vacuum
WARNING: Projectile/Respiratory Hazard:
Never use the vac without itsfilter.
nOTE: The filter is re-usable, do not confuse it with a
disposable dust bag, and do not throw it away when the
product is emptied. We recommend that you replace the
filter every 6–9 months depending on frequency ofuse.
There are two methods of cleaning the canister, a quick
empty method and a thorough clean method.
To empty the dust canister (Fig. L, M, Q, R)
• Press the life away canister release button
41
to release
and remove the lift away canister
5
from the chassis
23
as shown in FigureM.
Loading ...
Loading ...
Loading ...