Loading ...
Loading ...
Loading ...
English
8
• Release the hose connector
3
from the main body hose
port
6
as shown in FigureL.
Fig. Q
27
12
• Place the dust canister over a trash bin and press
the dust canister lid release button
27
to empty the
canister as shown in FigureQ.
• Push the compaction handle
22
down to empty the
contents of the dust canister
9
as shown in FigureR.
nOTE: The dust compaction handle
22
can also be used to
compact the contents of the dust canister
9
, doubling the
capacity of the dustcanister.
• Close the dust canister lid
12
, until it
“clicks” firmly
intoposition.
Compacting the contents of the dust
canister (Fig. R)
With the dust canister lid
12
closed, push the compacting
handle
22
down to compact the contents of the dust
canister
9
thus increasing its capacity as shown in FigureR.
Fig. R
22
9
12
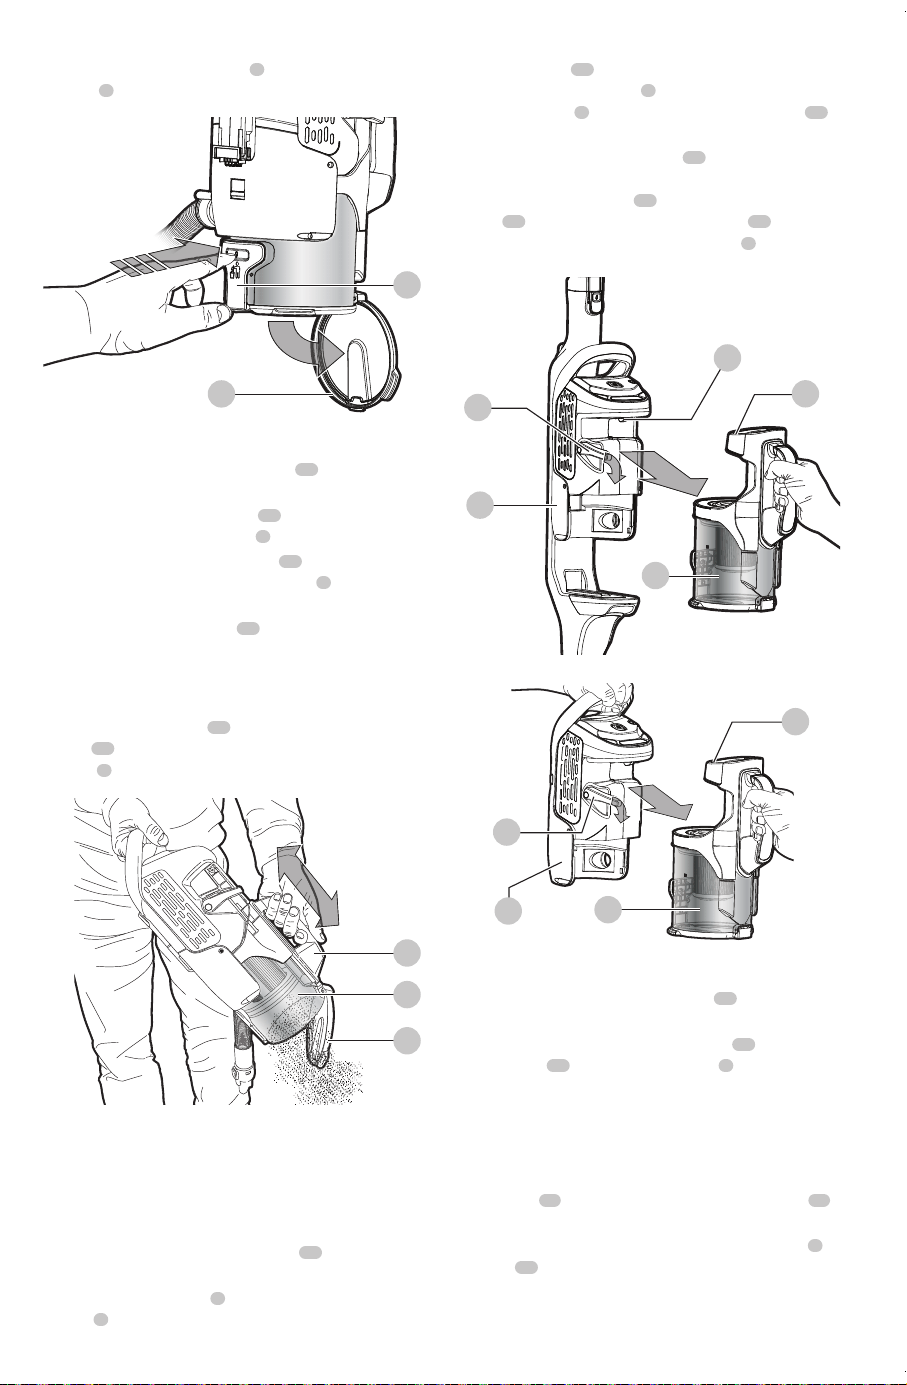
Releasing the dust canister (Fig. R–T)
nOTE: The dust canister can be released either from the
unit while it is in chassis mode, as shown in Figure S, or
when being used in the lift away canister vac mode, as
shown in FigureT.
• Press the dust canister release lever
10
down to release
the dustbowl.
• Free the dust canister
9
from the lift away canister
vac
5
.
nOTE: The catch
34
ensures that the unit will be unable to
start when the dust canister
9
is not connected to the lift
away canister vac
5
or when the compaction handle
22
is
inoperation.
• Using the dust canister handle
35
and holding the
unit over a suitable waste receptacle, press the dust
canister release button
27
to release the dust canister
lid
12
and push the compacting handle
22
down to
empty the contents of the dust canister
9
as shown in
FigureR.
Fig. S
5
9
10
34
35
Fig. T
9
10
5
35
Cleaning the filters (Fig. S–X)
• Press the dust canister release lever
10
down to release
the dust canister as shown in FigureS.
• While holding the compaction handle
22
, lift the filter
assembly
28
from the dust canister
9
by rotating
counter-clockwise as shown in FigureU.
nOTE: A scented disc will be provided in foil packaging. This
is to be opened and the disc is to be placed in the bottom
of the pre-filter allowing for a pleasing odor to be released
when the appliance is inuse.
• The filter
29
can now be removed from the prefilter
30
as
shown in FigureV.
• The dust canister can be seperated into two parts,
9
and
40
, for a more thorough cleaning as shown in
FigureW.
• Shake or lightly brush any loose dust off filter.
Loading ...
Loading ...
Loading ...