Loading ...
Loading ...
Loading ...
7
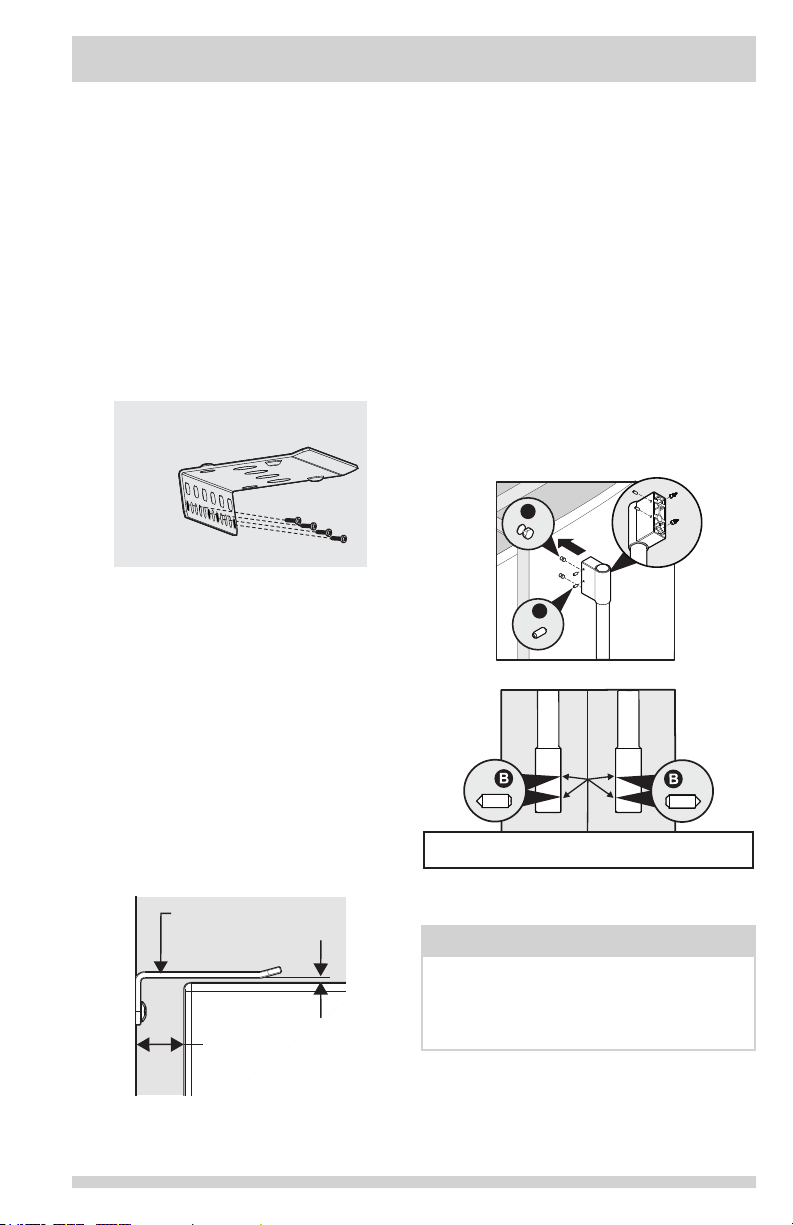
Door Handle Mounting
Instructions
1. Remove handle and any other protective
packaging.
2. Position refrigerator handle end caps over
upper and lower pre-installed shoulder
bolts (A) that are fastened into door,
ensuring the holes for the set screws are
facing towards the outside of door if a
single unit installation or the freezer door
(if installing the matching freezer).
3. While holding handle rmly against door,
fasten upper and lower Allen set screws
(B) with supplied Allen wrench.
4. Repeat steps 2 and 3 to install freezer
handle (if installing the matching freezer).
Ensure the holes for the set screws are
facing towards the refrigerator door.
INSTALLATION
This side
against
the wall.
Anti Tip Bracket
Figure 3
6. Measure the distance from the oor to the
top back edge of the unit and add
1
/
8
of
an inch.
7. Place the bracket against the wall and
align the bottom face of the bracket with
the measured height from step 6. Make
sure one of the center holes is aligned
with the mark made in step 4, and conrm
the bracket is in the proper orientation
(see Figures 1 and 2). Level the bracket.
8. Hold the bracket where the wall is marked
for the stud and mark the 2 corner holes
and any 2 center holes of the bracket on
the wall. Be sure a center hole location is
aligned with the vertical stud line made in
step 4 (see Figure 3).
9. Remove bracket.
10. Using a Phillips screw driver, push 4
drywall anchors into the marked corner
holes and center hole locations with no
stud behind them until the threads touch.
Screw the anchors clockwise until rm,
and then screw ¼ turn more.
11. Realign the bracket on top of the hole
location and screw the 4 screws into the
anchors or directly into the wall if a stud
is present. Screw clockwise until rm, and
then screw ¼ turn more.
12. Push the unit to its location, 1 inch away
from the wall (see Figure 4).
NOTE
All set screws should be tightened and sub-
ush (Allen set screw should be seated just
below the surface of the end cap) of handle
end cap. The end caps should be drawn
tight to refrigerator door with no gaps.
Approximate 1
˝ (2.54 cm)
Air Gap
Anti-Tip
Bracket
Clearance Gap
0.125˝ (0.32 cm)
Figure 4
A
B
Single Unit Installation
Ensure Handle Set Screws are Facing
Each Other with Doors Closed.
Matching Refrigerator and Freezer Door
Handle Installation
Frigidaire Professional
®
Ensure Handle Set Screws are Facing
Each Other with Doors Closed.
Loading ...
Loading ...
Loading ...