Loading ...
Loading ...
Loading ...
115
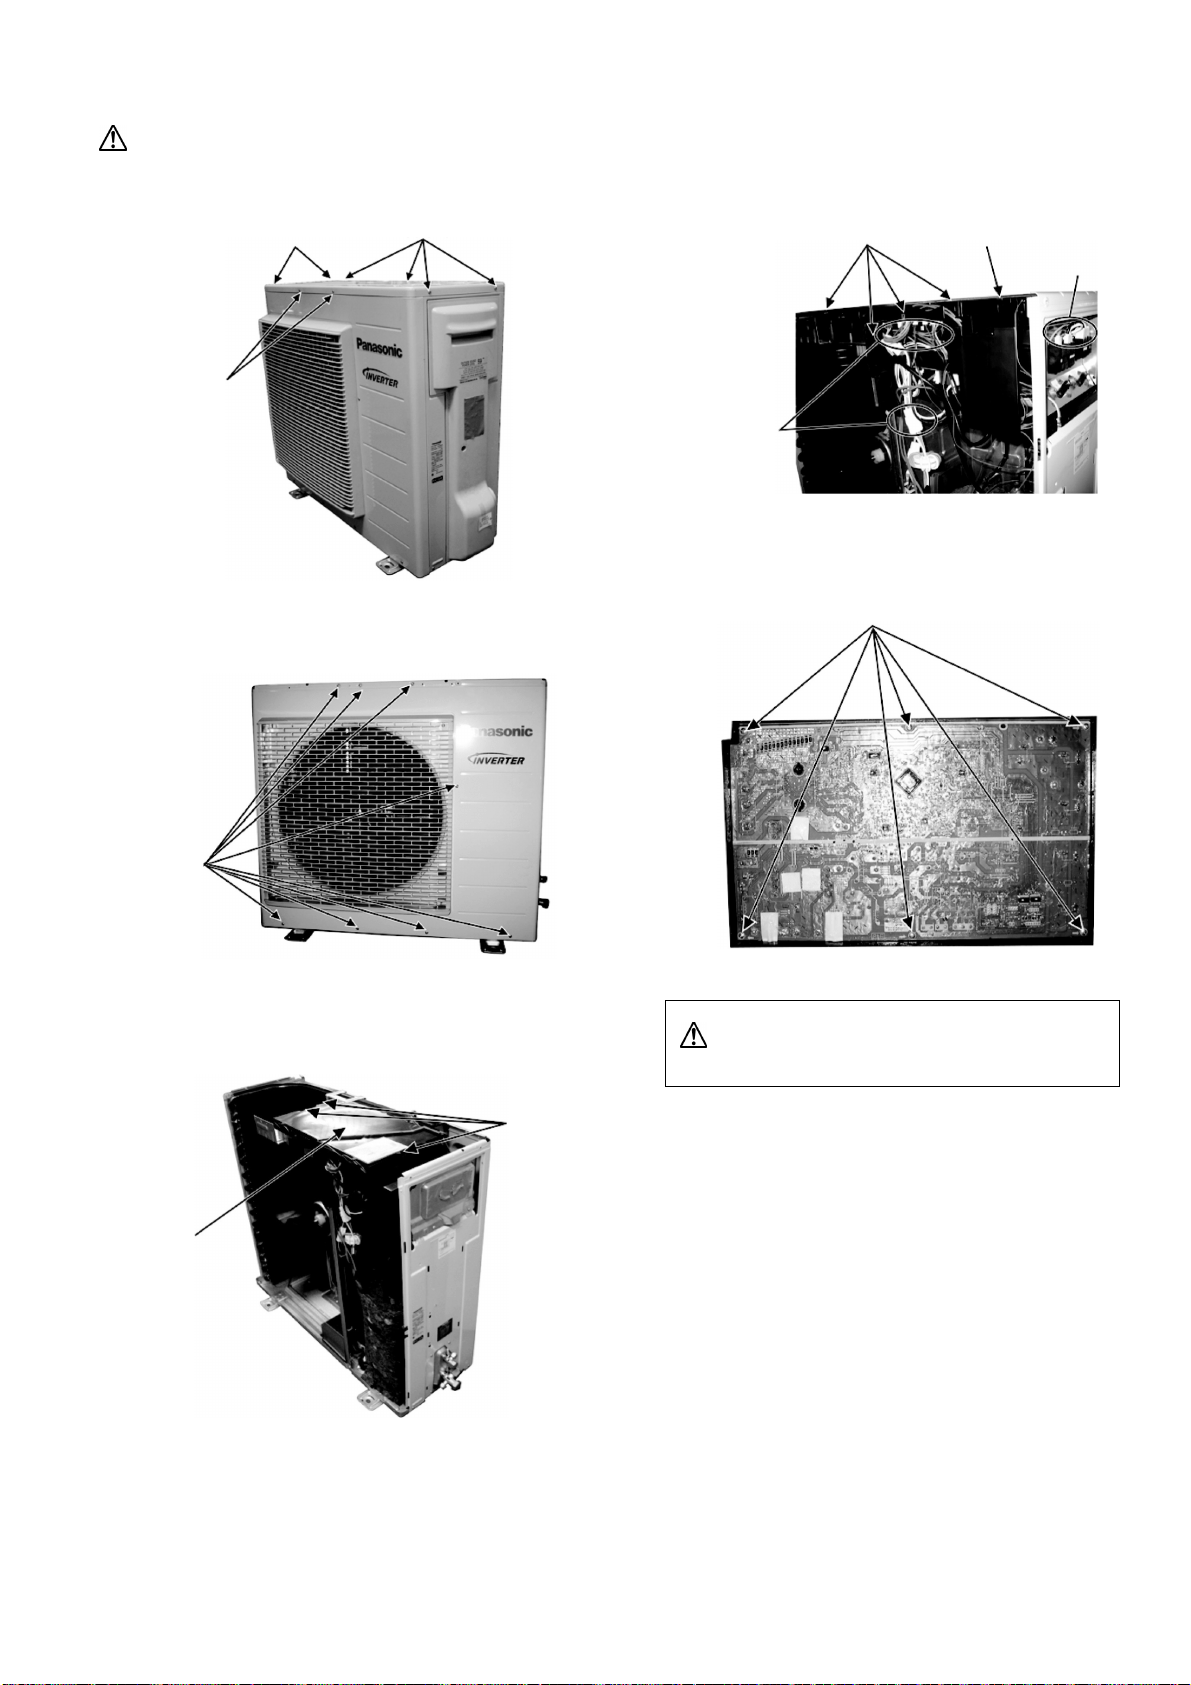
19.3.2 CU-E18RKUA CU-E24RKUA
Caution! When handling electronic controller, be careful of electrostatic discharge.
1 Remove the 8 screws of the Top Panel.
Fig. 1
2 Remove the 8 screws of the Front Panel.
Fig. 2
3 Remove the Top Cover of the Electronic
Controller.
Fig. 3
4 Remove the Control Board.
Fig. 4
5 Remove the 6 screws of the Electronic
Controller.
Fig. 5
Caution! When handling electronic controller, be careful
of electrostatic discharge.
Sc
r
e
w
s
Screws
Screws
Screws
Top Cover
Hooks
Release 8
connectors
R
e
l
e
a
s
e
7
terminal
connectors
Control boardRelease the hooks
Sc
r
e
ws
Loading ...
Loading ...
Loading ...