Loading ...
Loading ...
Loading ...
Installation Instructions
FINAL ASSEMBLY
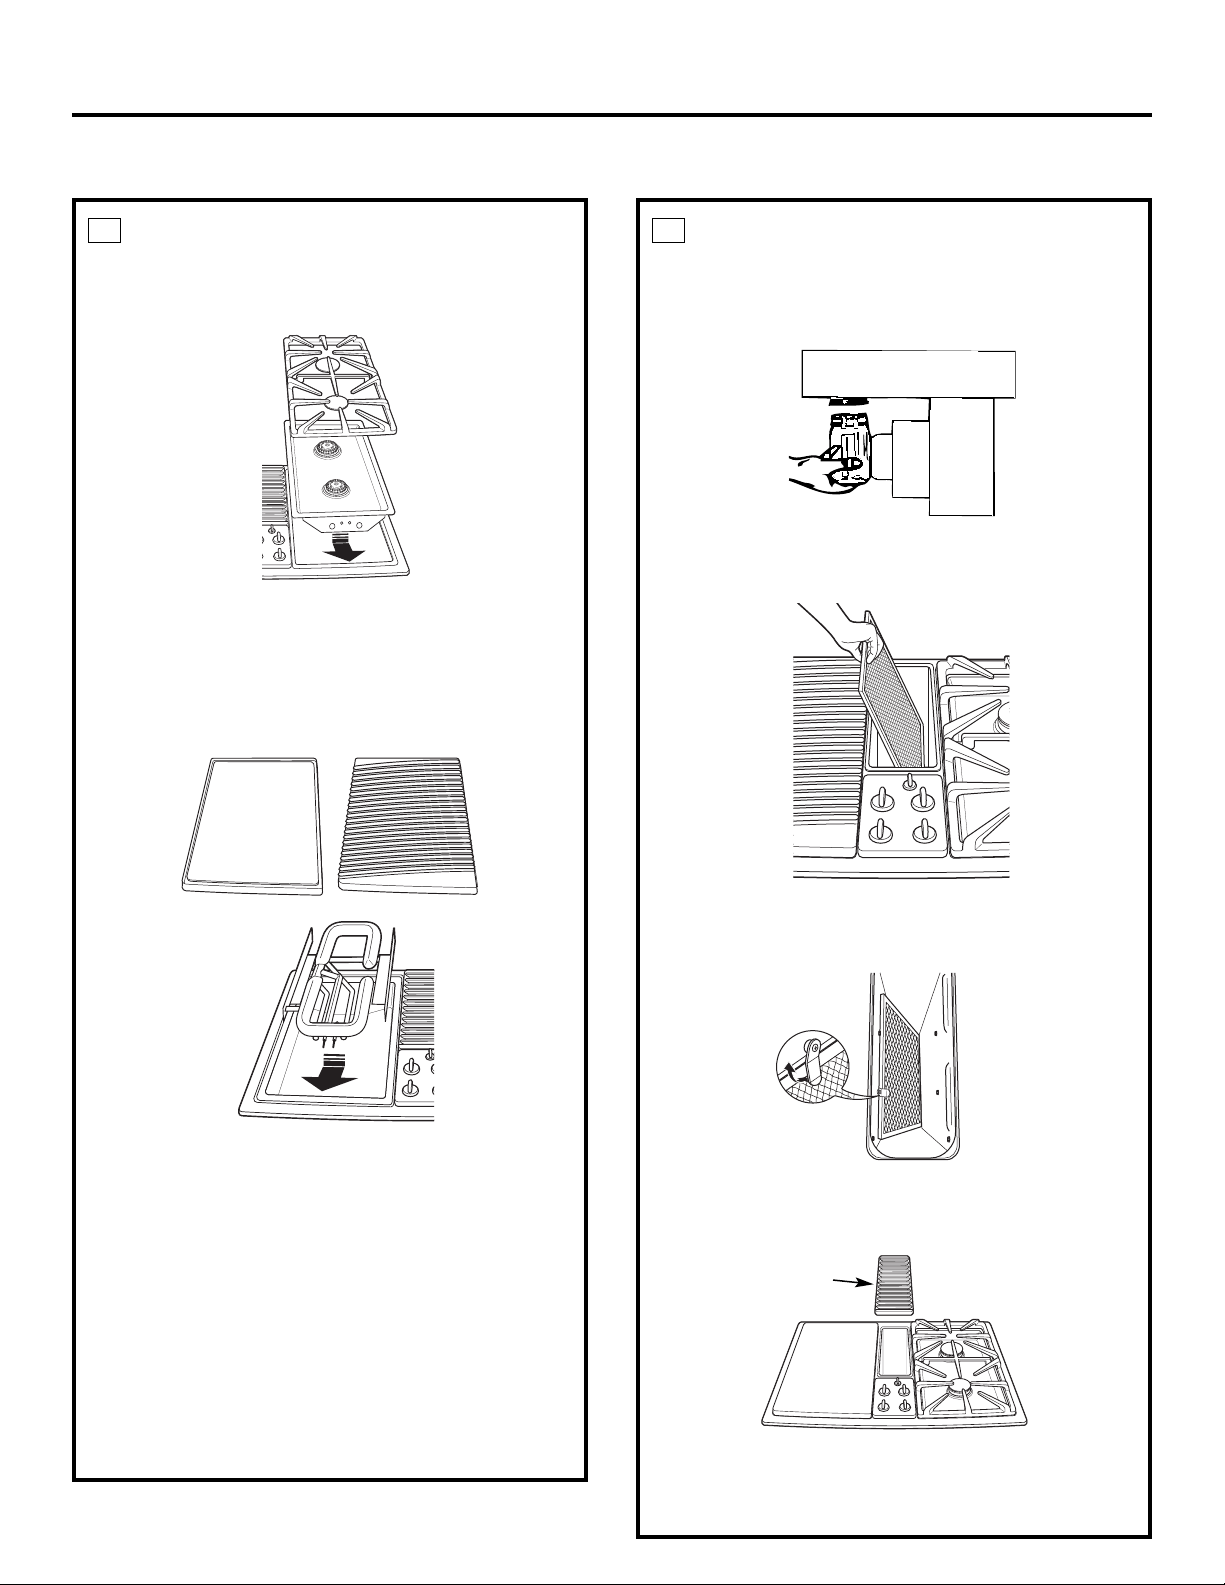
ASSEMBLE THE COOKTOP
Install the sealed burner module, caps and
grate on the right side of the unit. See page 10
for correct installation.
Install the optional sealed burner module or
the grill/griddle burner on the left side of the unit.
If the grill/griddle burner was installed, place
the grill grate or griddle cover over it as desired.
NOTE: The grill and griddle can be installed
on the left side only.
Check for proper ignition:
Push in one control knob and turn to LITE position.
The igniter will spark and the burner will light;
igniter will cease sparking when the burner is lit.
First test may require some time while air is
flushed out of the gas line.
Turn knob to OFF.
Repeat the procedure for each burner.
Adjust the air shutters (see LP Conversion
Instructions).
Adjust the low flame setting (see LP Conversion
Instructions).
17
INSTALL GREASE JAR, DOWNDRAFT
FILTER AND VENT GRILLE
Screw the grease jar into the grease jar holder
on the bottom of the cooktop.
Do not operate the vent without the filter in place.
Place the filter through the vent opening.
Make sure it rests, at an angle, on the supports
in the vent opening. Latch it in place.
Place the vent grille onto the downdraft opening
so that the open part of the grille is toward the rear
of the unit.
CHECK OPERATION OF DOWNDRAFT
Turn the vent fan speed control to HI, MED and LO
to make sure all speeds operate correctly.
18
29
or
Grille
Loading ...
Loading ...
Loading ...