Loading ...
Loading ...
Loading ...
Installation
Mounting Your Device in a Motorcycle
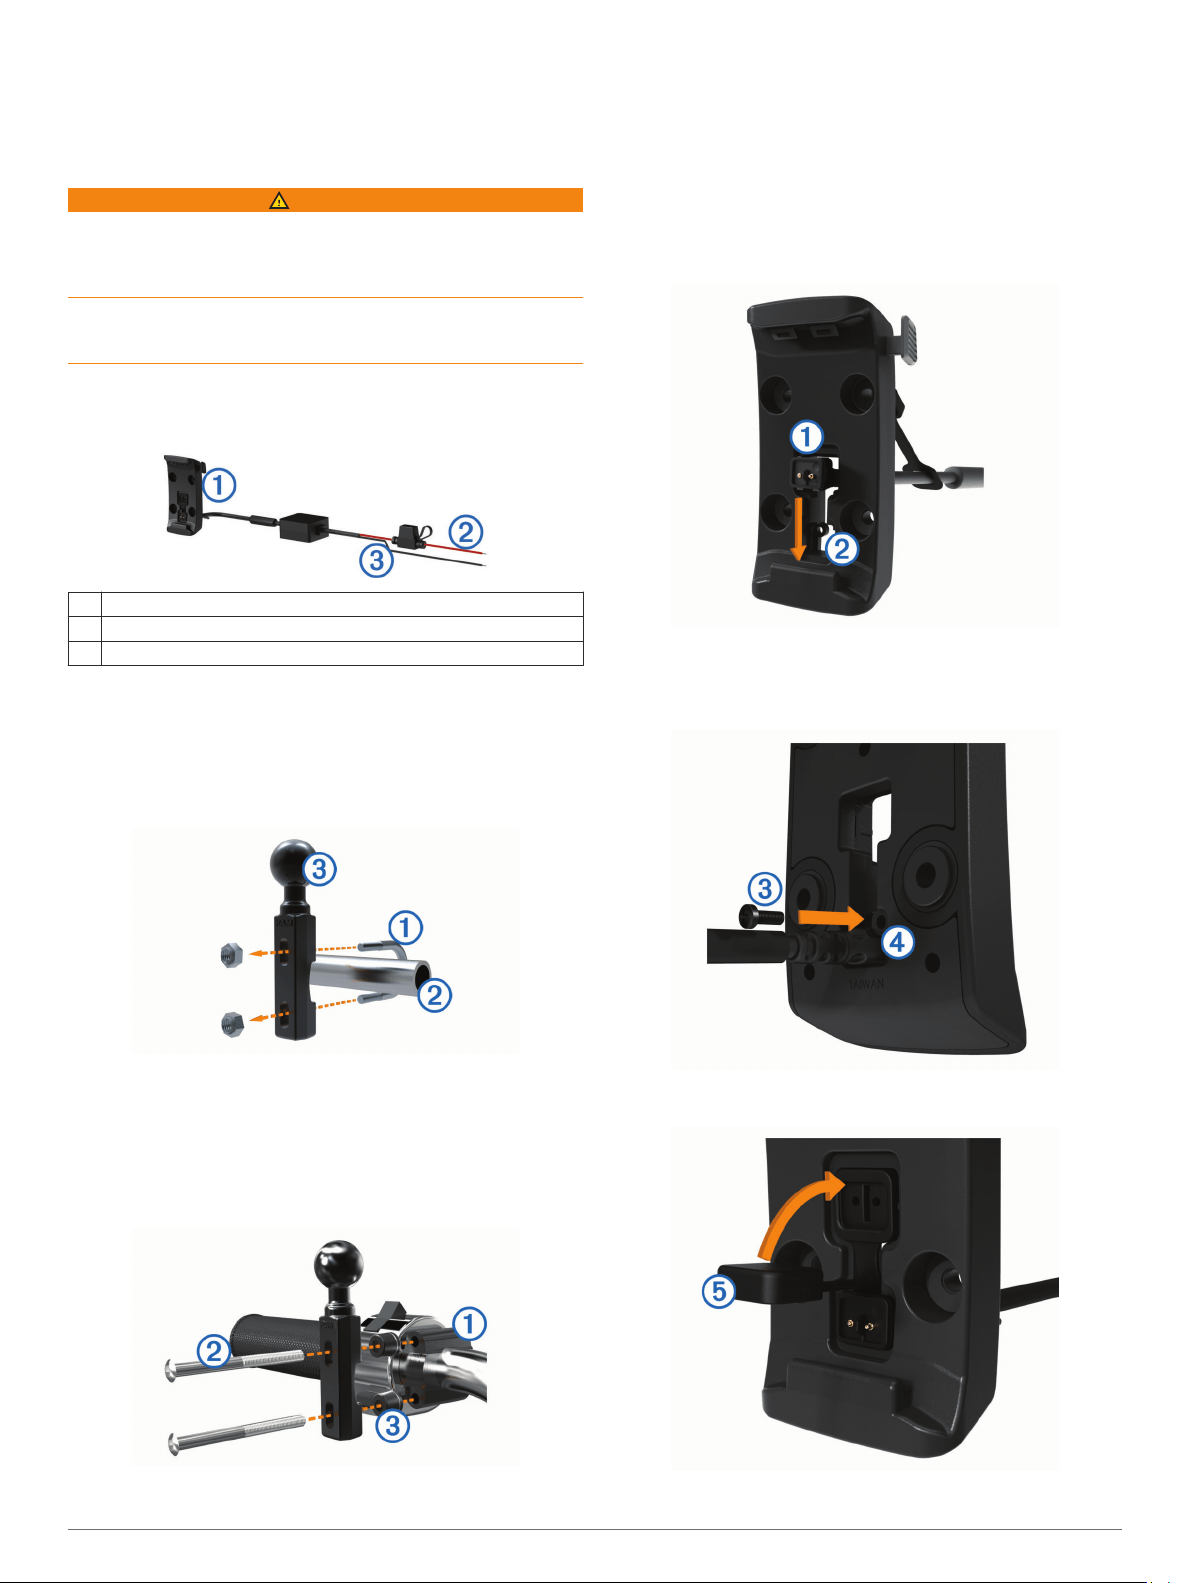
Powered Motorcycle Mount
WARNING
Garmin
®
strongly recommends having an experienced installer
with the proper knowledge of electrical systems install the
device. Incorrectly wiring the power cable can result in damage
to the vehicle or the battery and can cause bodily injury.
See the Important Safety and Product Information guide in the
product box for product warnings and other important
information.
The device must be mounted in a suitable and secure location
on your motorcycle, based on available power sources and safe
cable routing.
À
Motorcycle cradle
Á
12 to 24 Vdc system power (red) with in-line fuse
Â
System ground (black)
Installing the Handlebar Base
The device includes parts for two handlebar installation
solutions. Custom mounts may require additional hardware.
Installing the U-bolt and Handlebar Base
1
Place the U-bolt
À
around the handlebar
Á
, and thread the
ends through the handlebar base
Â
.
2
Tighten the nuts to secure the base.
NOTE: The recommended torque is 50 lbf-in (5.65 N-m). Do
not exceed torque of 80 lbf-in (9.04 N-m).
Installing the Handlebar Base to the Clutch-Clamp or Brake-
Clamp Brackets
1
Remove the two factory bolts on your clutch-clamp or brake-
clamp bracket
À
.
NOTE: Both 1/4 in. standard and M6 bolts are included.
Match the size of the factory bolts on your clutch-clamp or
brake-clamp bracket.
2
Thread the new bolts
Á
through the handlebar base, spacers
Â
, and clutch-clamp or brake-clamp bracket.
3
Tighten the bolts to secure the base.
Attaching the Power Cables to the Motorcycle Mount
1
Thread the power cable connector
À
through the top of the
opening in the motorcycle mount.
2
Slide the cable down to the bottom of the opening
Á
and pull
the cable back until it is snug.
3
Screw the black screw
Â
into the back of the mount
Ã
to
hold the cable in place.
4
Thread the weather cap
Ä
through the top hole and press it
into the hole.
Installation 1
Loading ...
Loading ...
Loading ...