Owner's Guide Networking
Getting started
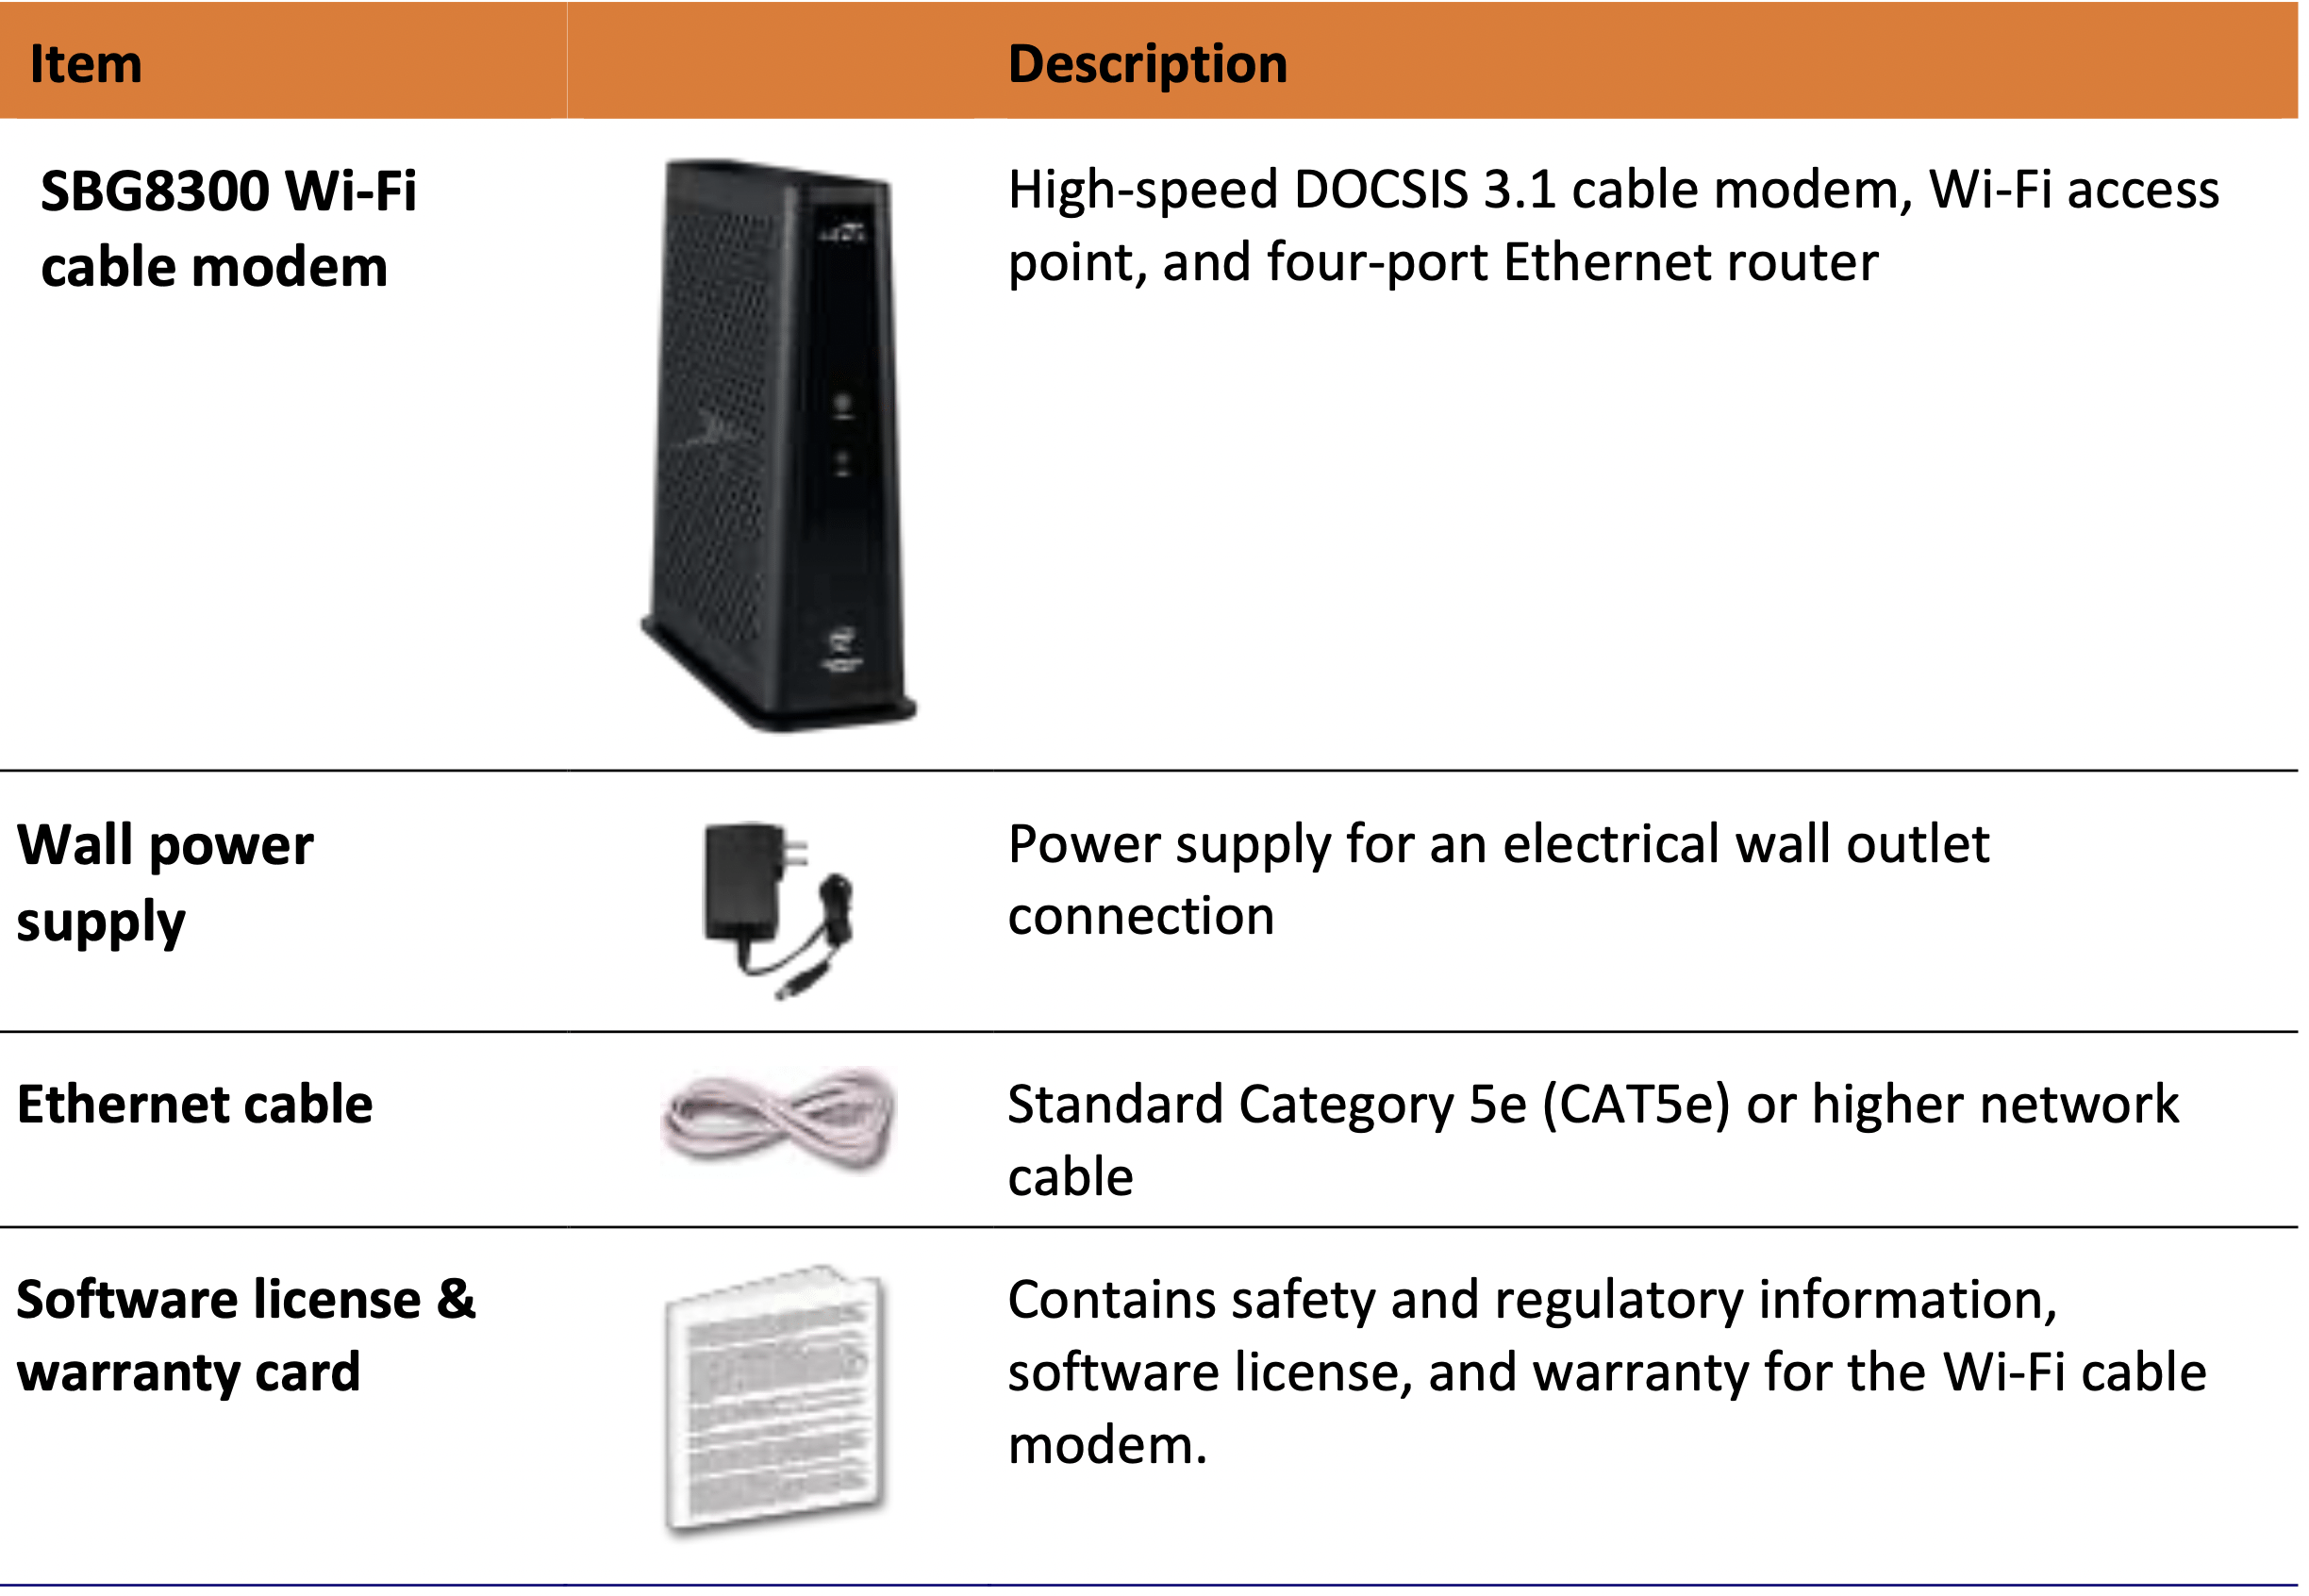
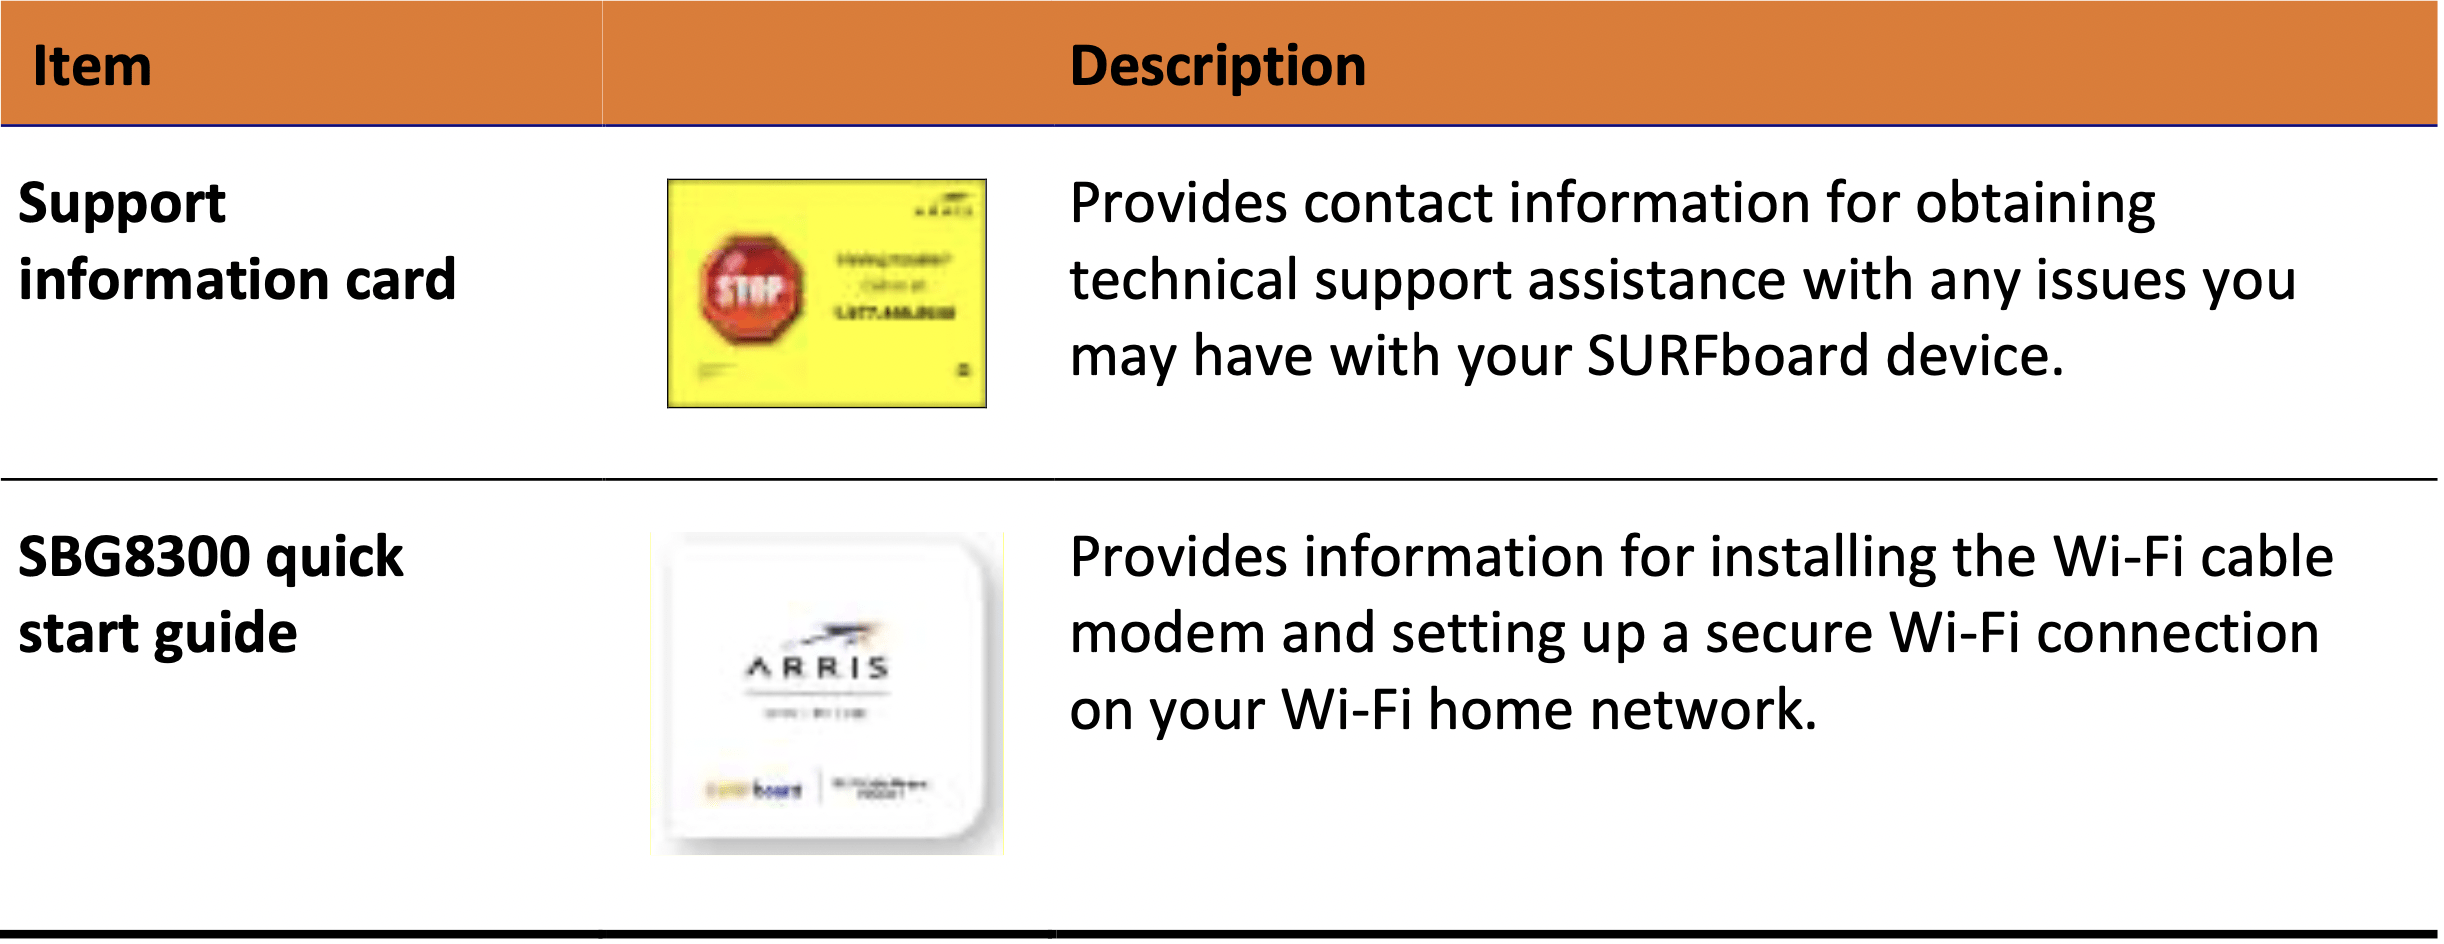
In the box
Additional items needed (not included)
The following items are not included in the box and must be purchased separately, if required:
- Coaxial (coax) cable, if one is not already connected to a cable wall outlet
- RF splitter (for additional coaxial cable connections, such as a set-top box or Smart TV)
- Ethernet cable for each additional Ethernet-enabled device
Product overview
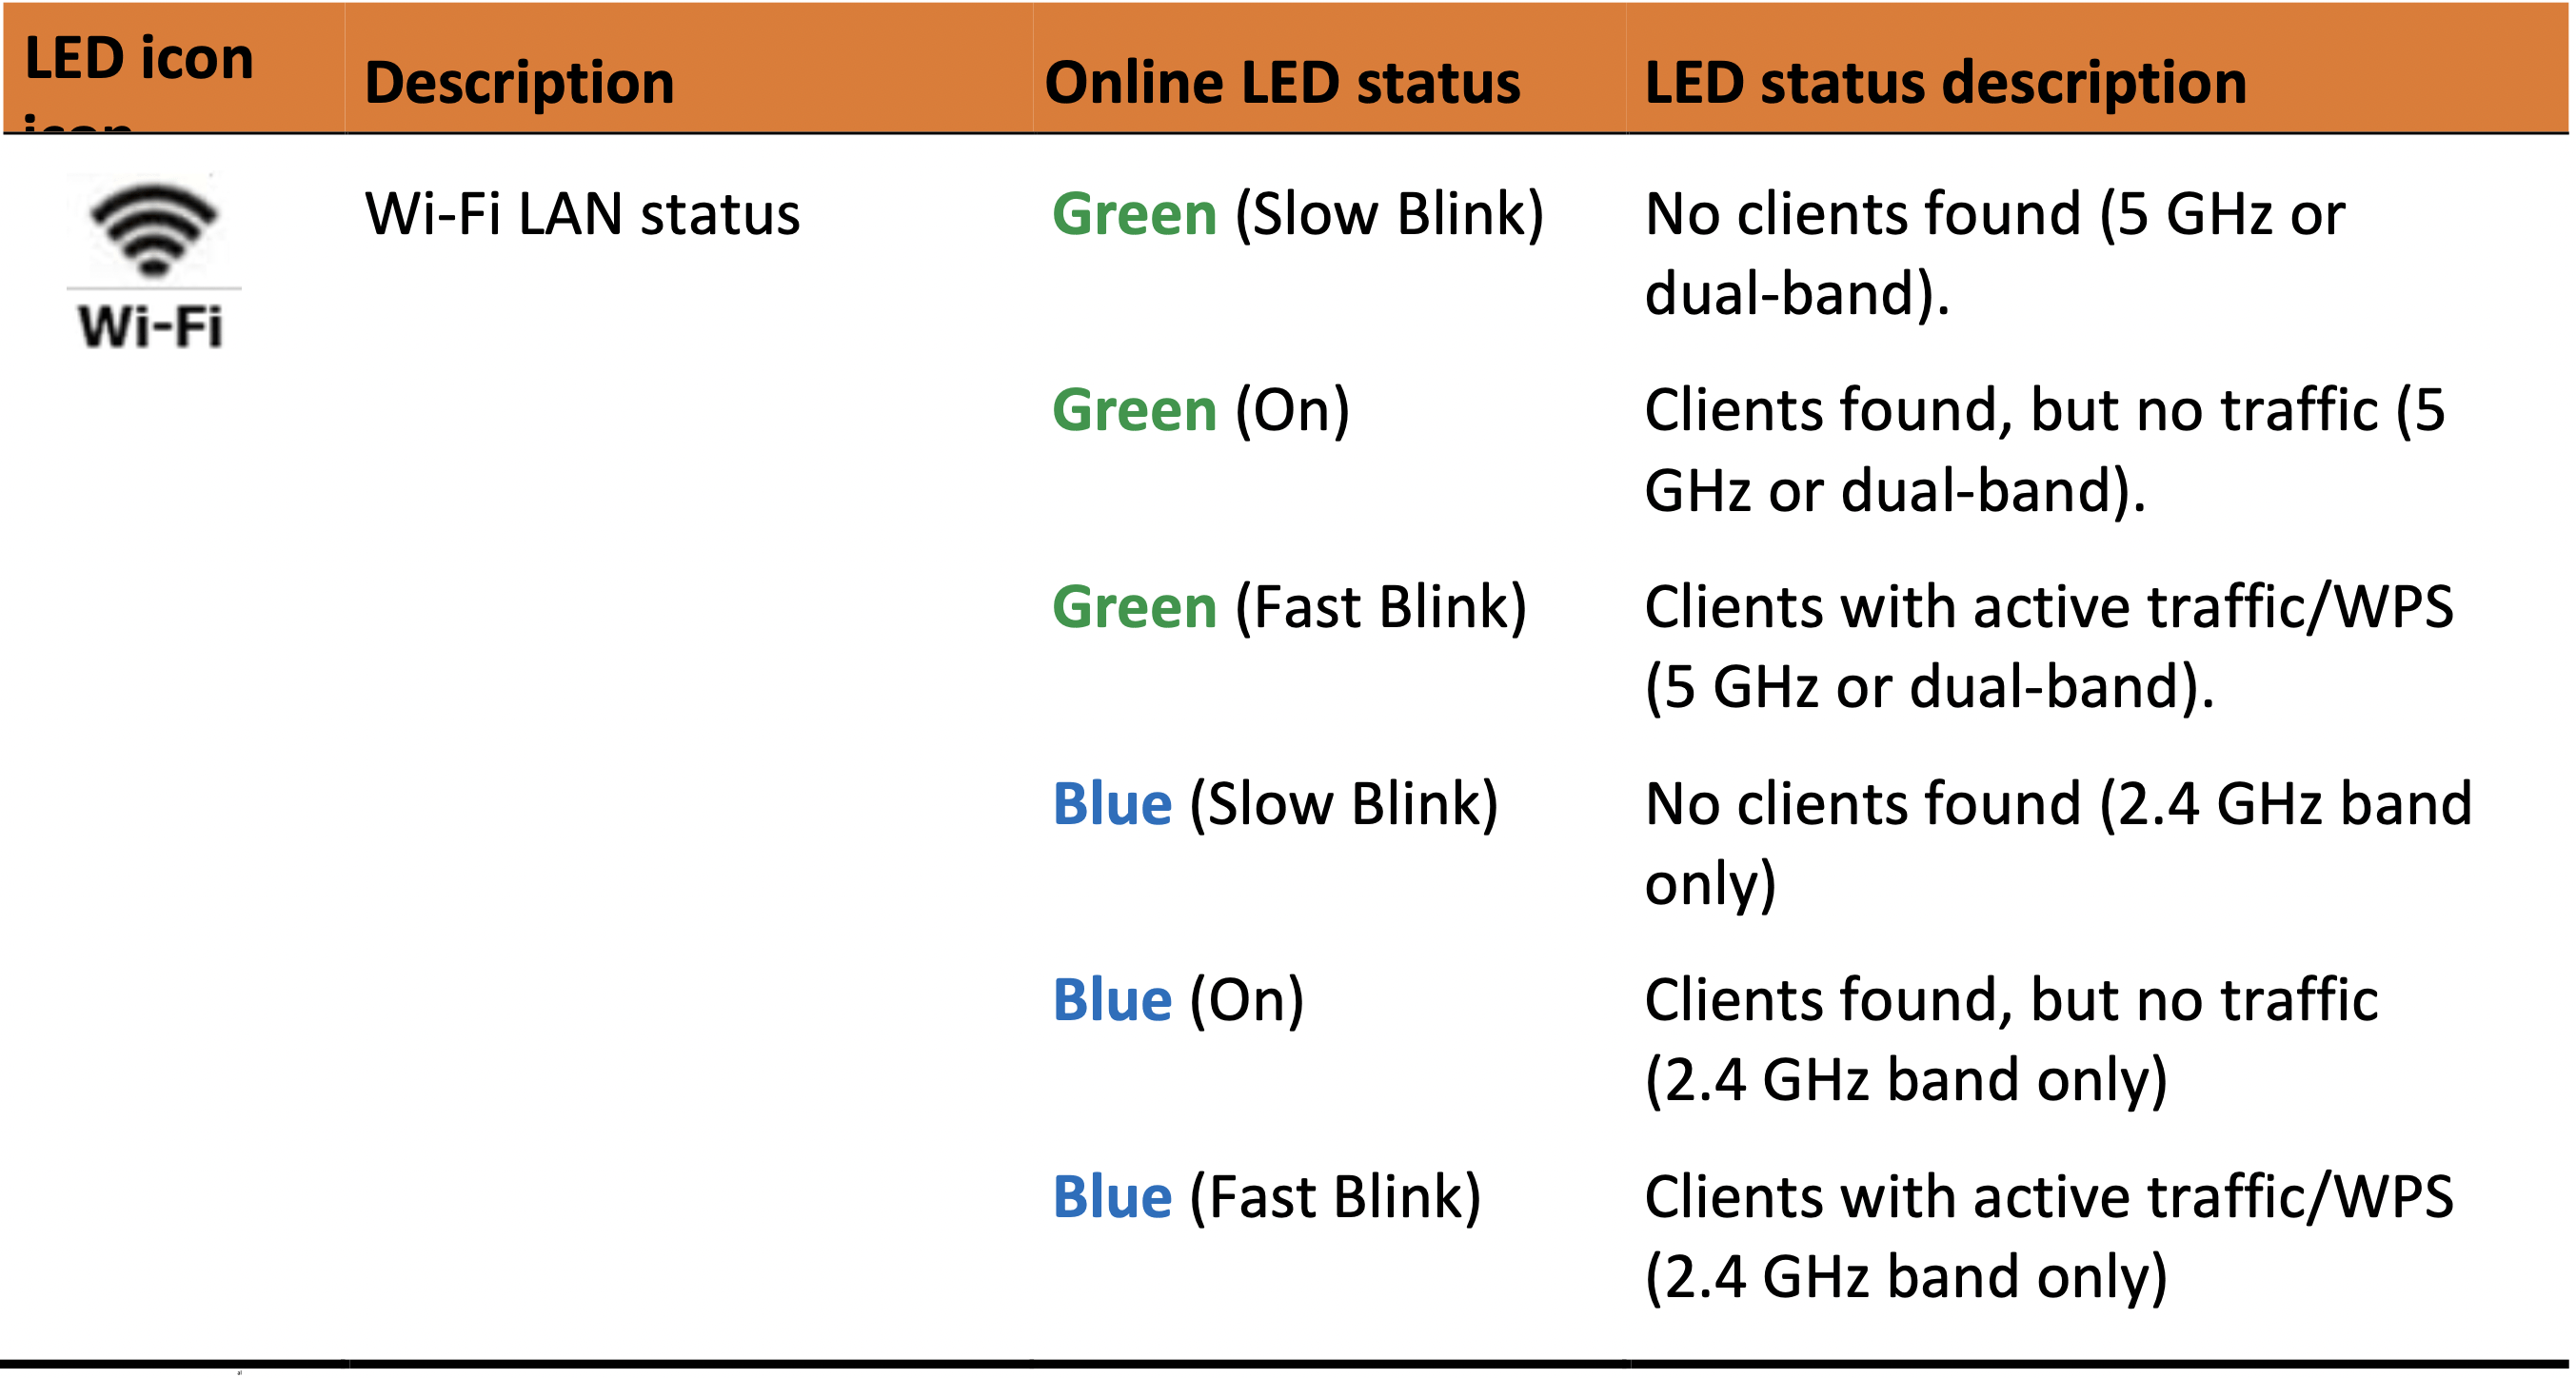
Front panel

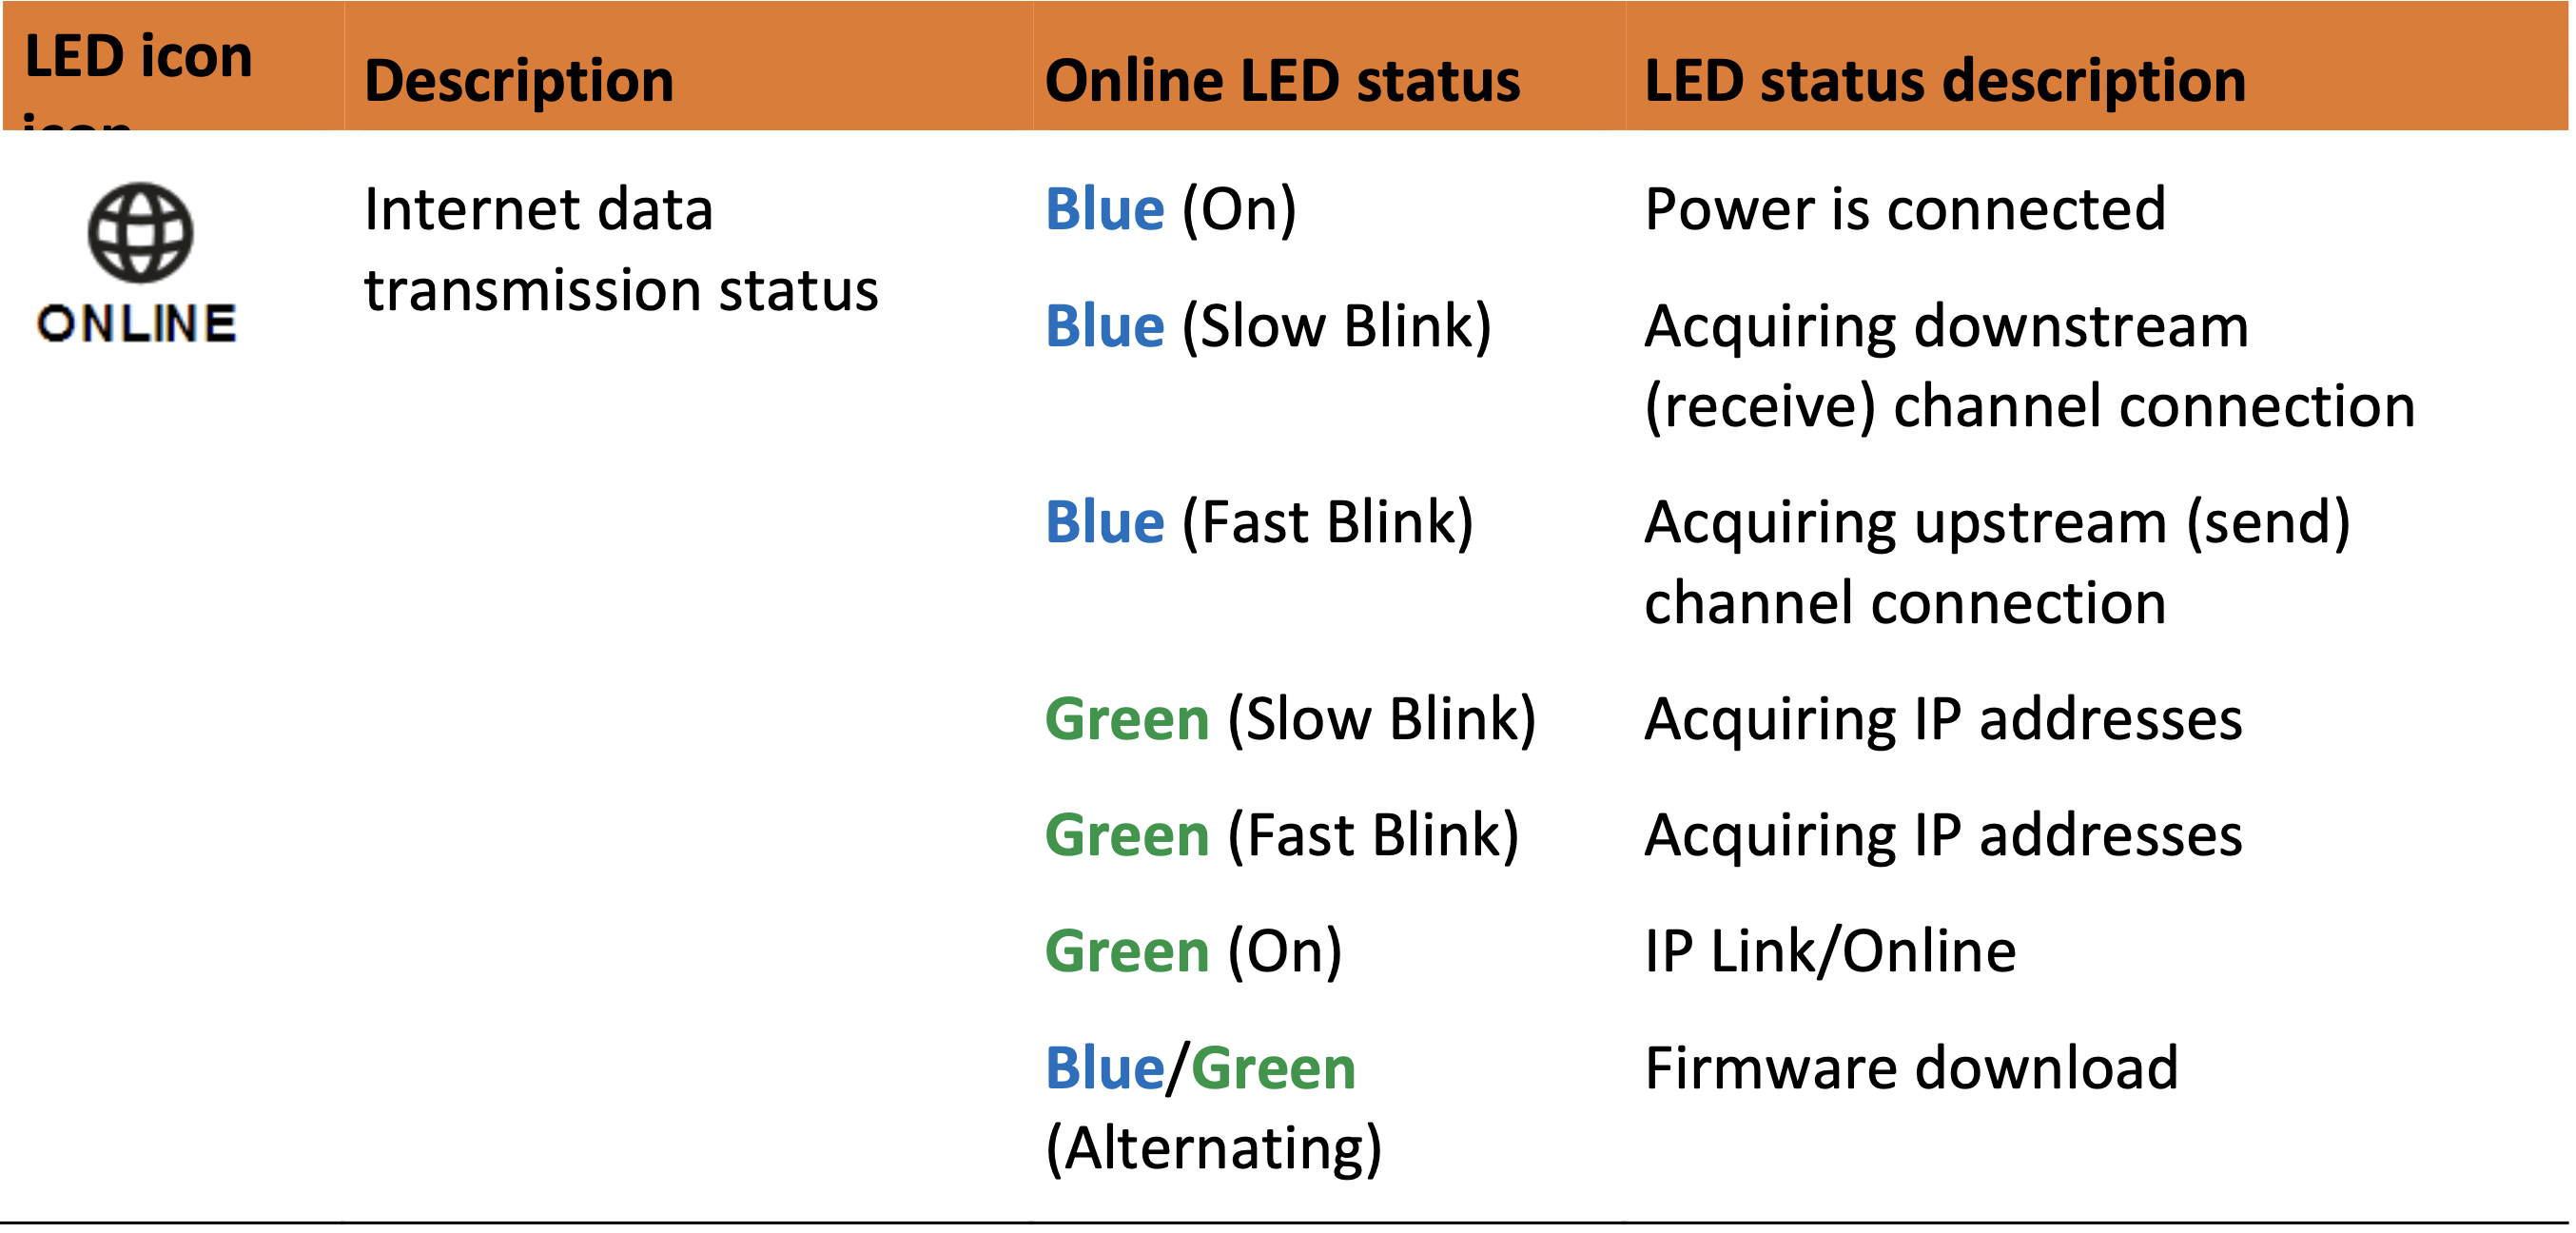
Caution: If all LEDs are blinking blue (fast blink), a grounding defect was detected. Unplug the SBG8300 until the grounding defect can be addressed.
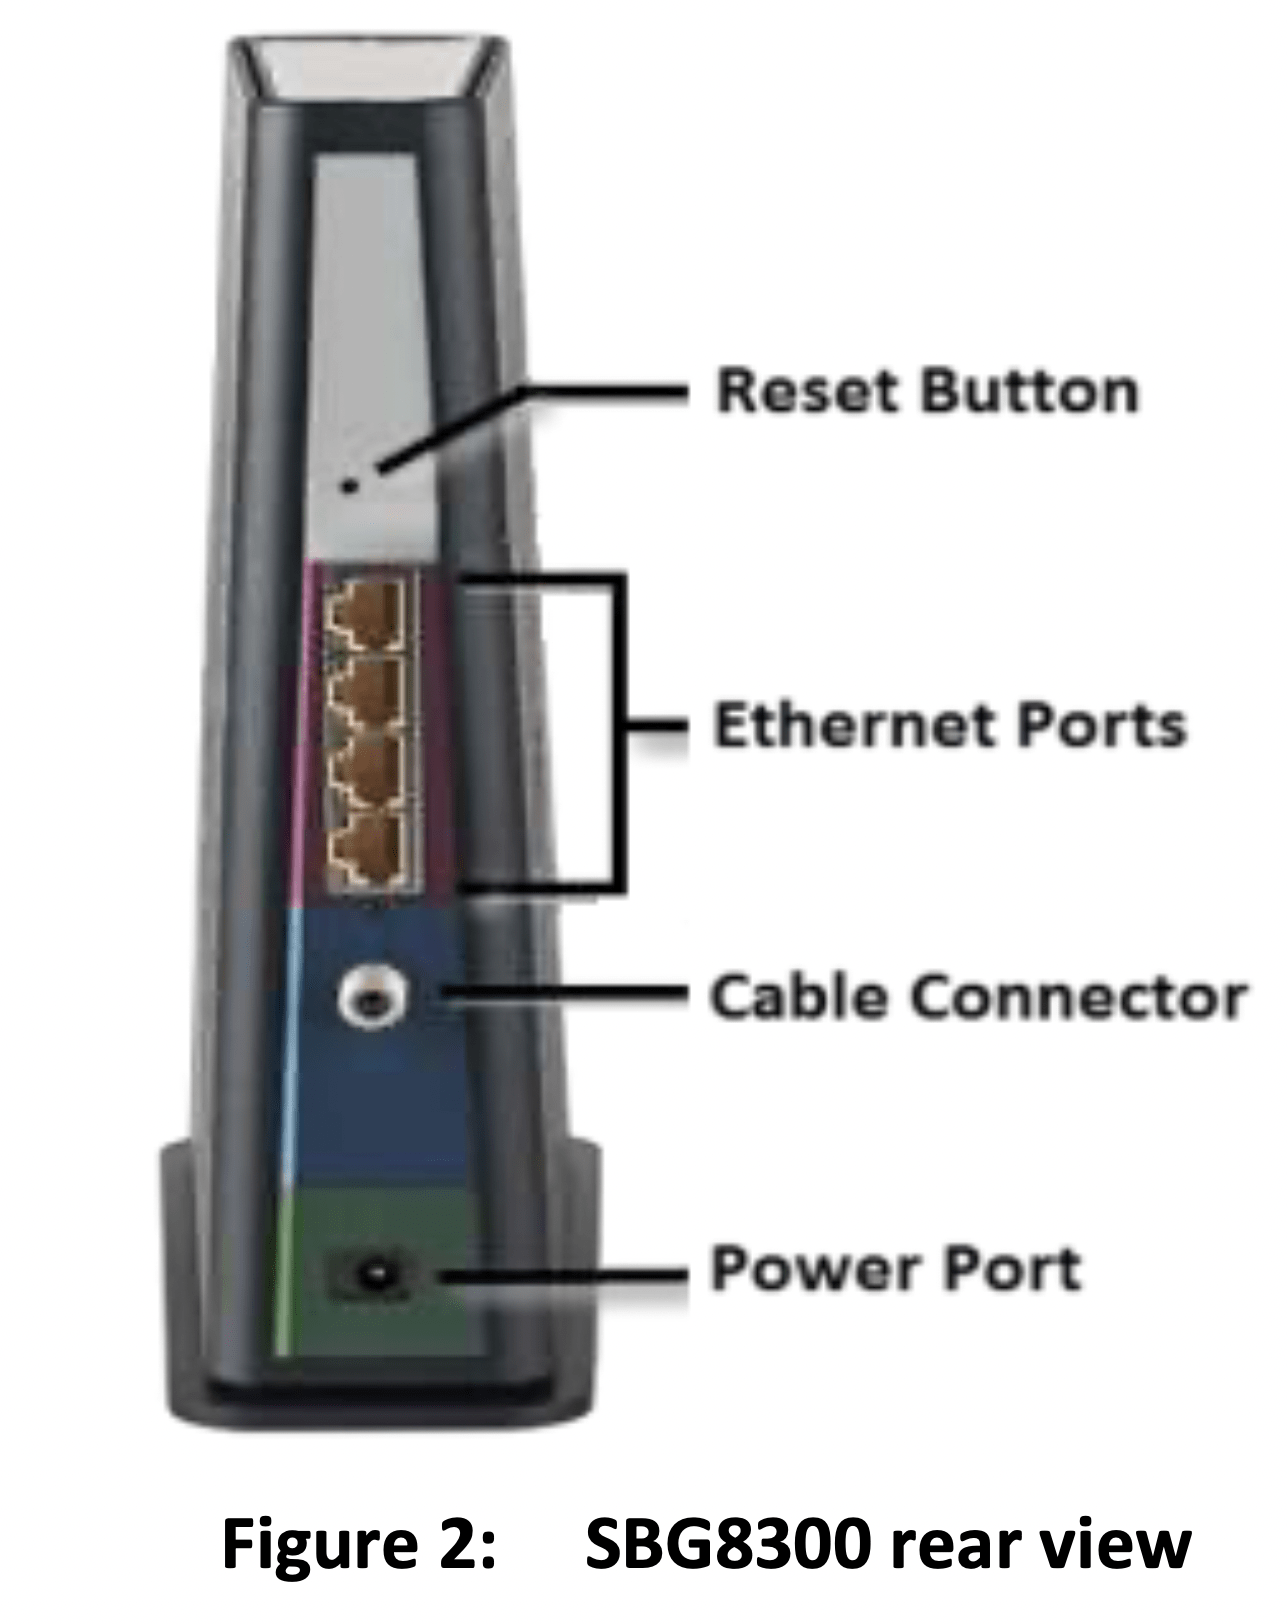
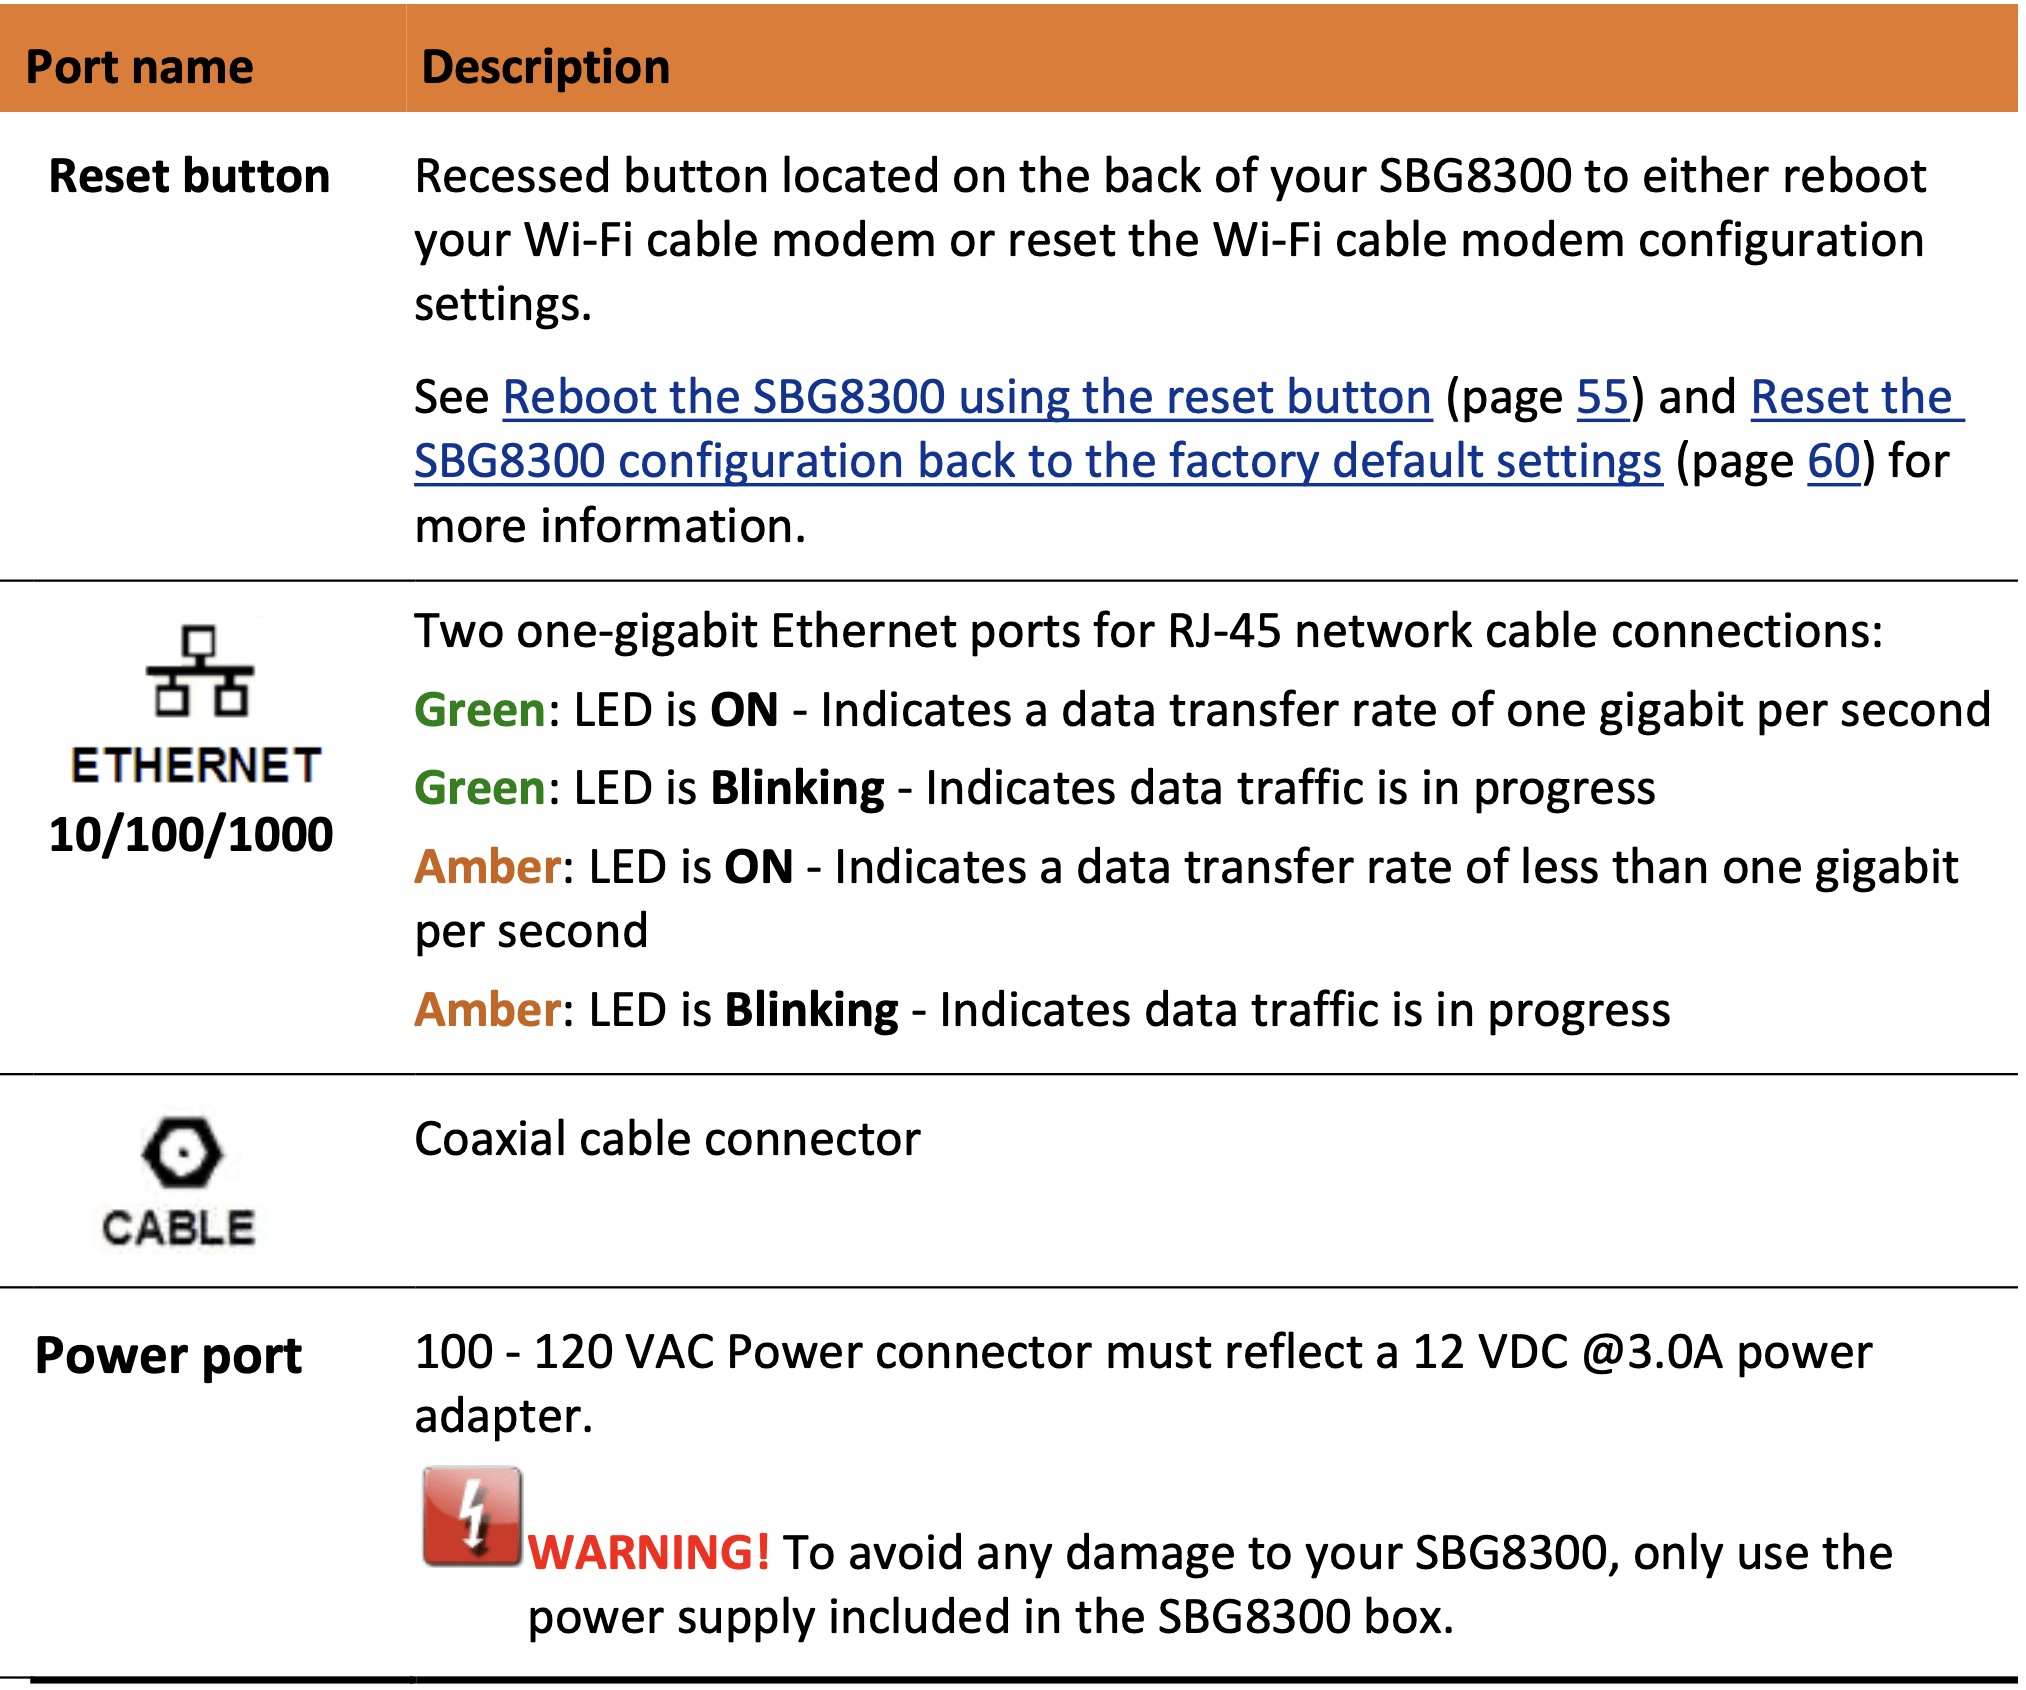
Rear panel
Wi-Fi cable modem label
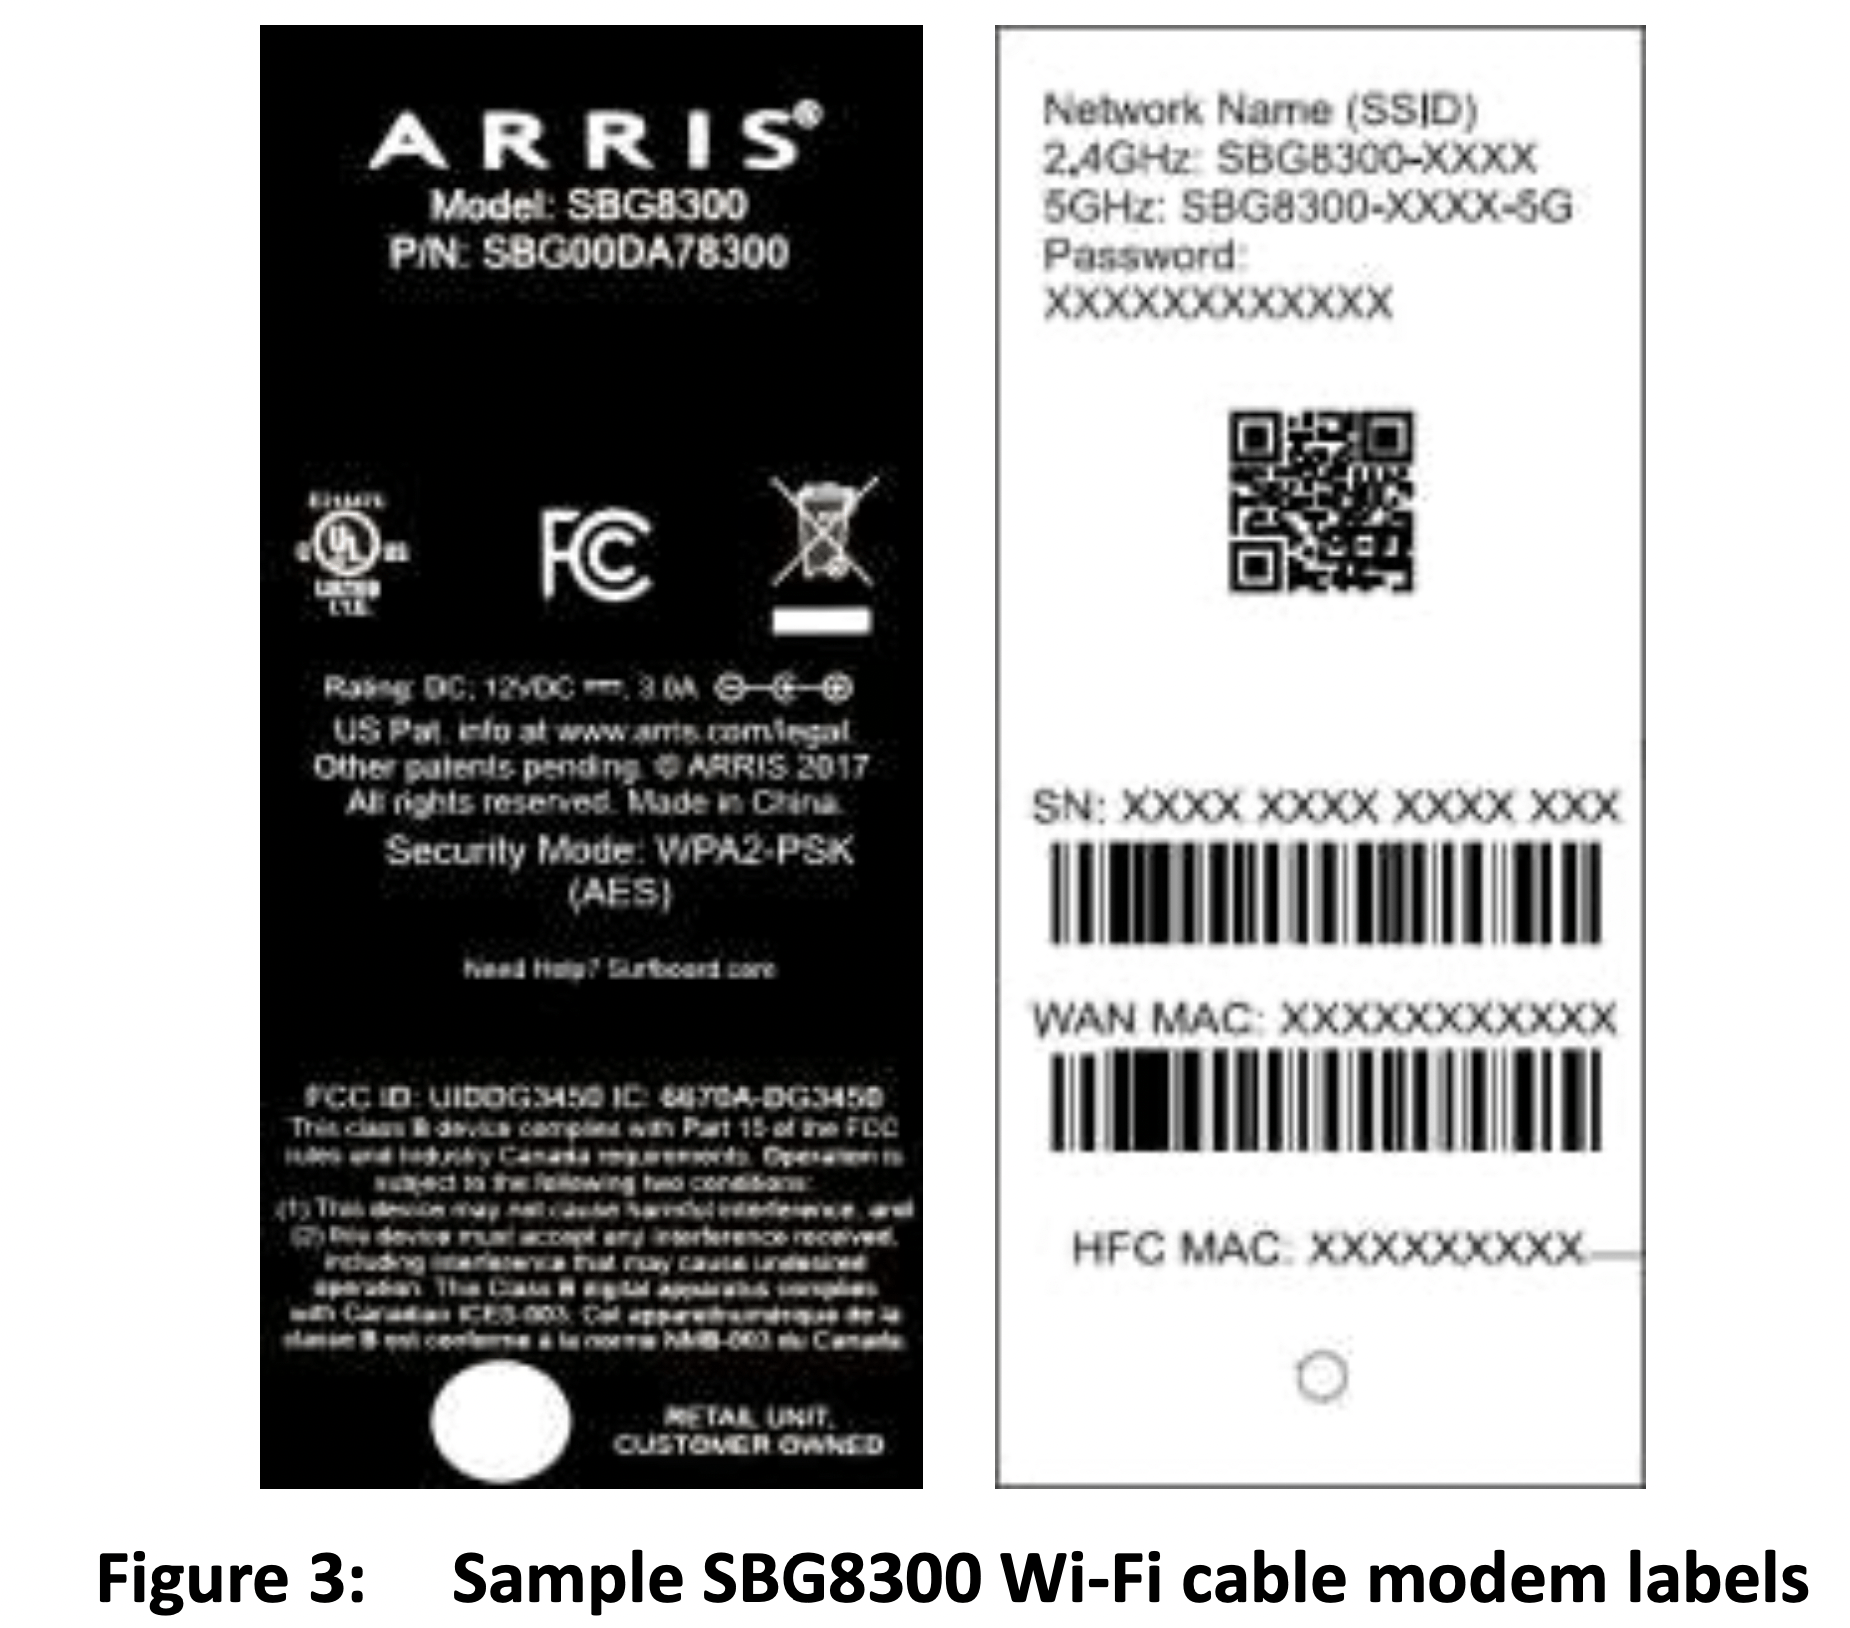
The Wi-Fi cable modem labels are located on the bottom of your SBG8300. The labels contain the information you will need to activate the SBG8300 for your home Internet service or technical support issues.
To activate your Internet service, contact your service provider for assistance. When contacting your service provider or ARRIS Technical Support (page 11), you may have to provide the following information listed on the SBG8300 labels:
- Wi-Fi cable modem Model name (SBG8300)
- Wi-Fi cable modem Serial number (SN)
- Wi-Fi cable modem MAC address (HFC MAC)
Installing the Wi-Fi cable modem
Caution: This product is for indoor use only. Do not route the Ethernet cable(s) outside of the building. Exposure of the cables to lightning could create a safety hazard and damage the product.
Connect the SBG8300 to your computer
Before installing your SBG8300:
- Check with your service provider (or local cable company) to ensure broadband cable service is available in your area.
To set up your Internet connection on your home network, you will need a high-speed Internet connection provided by an Internet service provider.
Note: When contacting your service provider, you may need the information listed on the SBG8300 label on the bottom of your SBG8300. Make sure you have the Wi-Fi cable modem model name (SBG8300), HFC MAC ID, and the serial number (SN). See Wi-Fi cable modem label (page 14) for more information.
- Choose a location in your home where your computer and Wi-Fi cable modem are preferably near existing cable and electrical wall outlets.
For the best Wi-Fi coverage, a central location in your home or building is recommended.
Note: The following installation procedure covers the wired Ethernet connection process so that you can confirm that your SBG8300 was properly installed and can connect to the Internet.
Note: The SBG8300 supports using an Ethernet port connection for your data input in place of an RF cable connection. You will be able to connect to an alternate Internet connection and use your SBG8300 as your router and Wi-Fi source. This is a useful feature if you choose to change your Internet Service to a provider that is not a cable operator. You can still use the SBG8300 as your Wi-Fi router.
You can enable or disable this feature which is available for the LAN Ethernet Port 4 as WAN over Ethernet. See Set up an ethernet port connection for your data input (page 57) for more information.
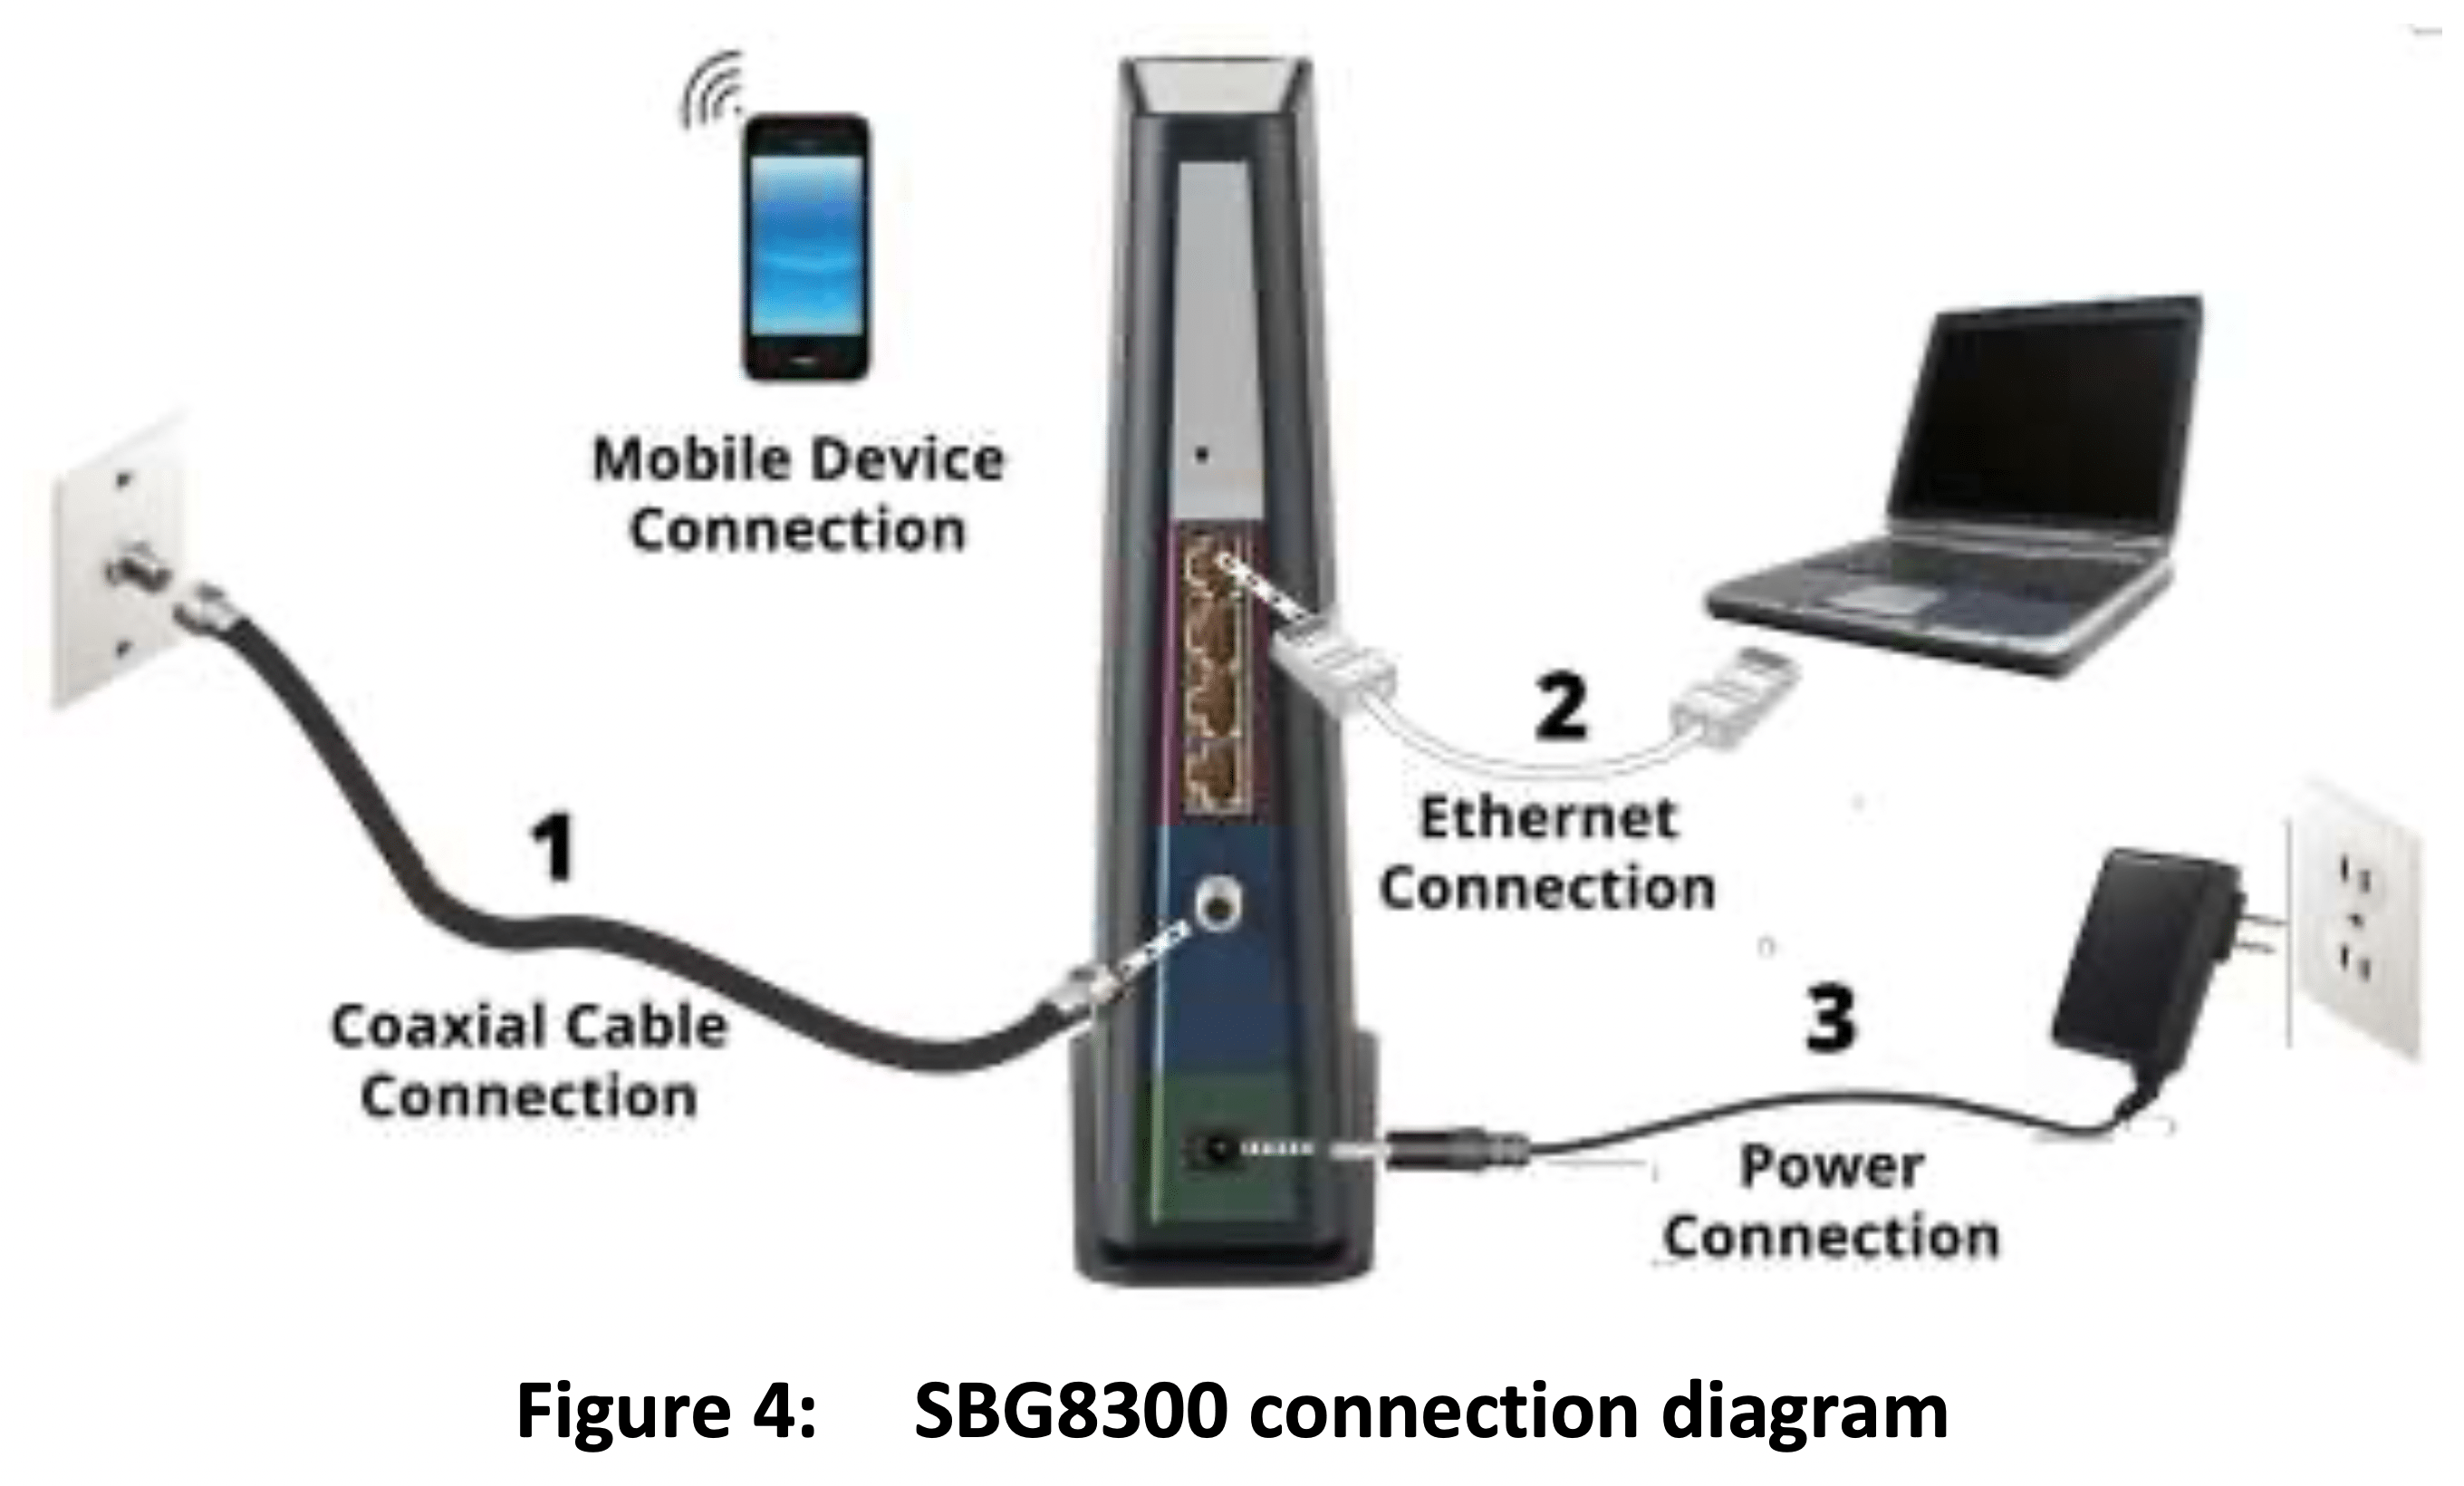
1. Check that a coaxial cable is already connected to a cable wall outlet or RF splitter (not included) and then connect the other end of the coaxial cable to the Cable connector on the rear of your SBG8300.
Use your hand to tighten the connectors to avoid damaging them. Proceed with step 2.
-or
Connect an Ethernet cable to the fourth Ethernet port on the rear of your SBG8300. Proceed with step 3.
2. Connect an Ethernet cable to any available Ethernet port on the rear of your SBG8300.
3. Connect the other end of the Ethernet cable to the Ethernet port on your computer.
Optional: Repeat steps 2 and 3 for an additional computer or other network device that you want to install as a wired connection on your home network.
4. Connect the power cord to the Power port on the rear of your SBG8300.
5. Plug the other end of the power cord into an electrical wall outlet that is not controlled by a wall switch.
Note: This automatically powers ON your SBG8300. There may be up to a 15 second delay for the Online LED on the SBG8300 front panel to light up after the power is connected.
Although your computer may already be configured to automatically access the Internet, you should still perform the following Wi-Fi cable modem connectivity test to verify that the devices were connected properly.
1. Power ON the computer connected to your SBG8300 if it is turned off, and then log in.
2. Contact your service provider to activate (provision) the SBG8300. You may have to provide the HFC MAC ID listed on the Wi-Fi cable modem label.
Note: Your service provider may allow for self-activation, which will automatically launch their special website on your computer when you open a web browser.
3. After the SBG8300 is provisioned (or activated), open a web browser (such as Internet Explorer, Google Chrome, Firefox, or Safari) on your computer.
4. Click type a valid URL in the address bar and then press Enter.
The ARRIS SURFboard website or your URL of choice should open. If the website fails to open, please contact your service provider for assistance.
5. Check that the Online and Wi-Fi front panel LEDs on the SBG8300 light up in sequential order. See Front panel (page 12) for additional LED status information.
- If both LEDs did not light up and you do not have an Internet connection, you may have to contact your service provider to reactivate the SBG8300 or check for signal issues.
- If you still cannot connect to the Internet, please call ARRIS Technical Support at 1-877-466-8646 for assistance.
Setting up a Wi-Fi network connection
ARRIS recommends that you first verify that your computer (or laptop) can access the Internet using a wired Ethernet connection before configuring your Wi-Fi home network.
For Internet connections in your home, you must have access to an Internet service in your home before you can set up a Wi-Fi network connection. If you do not have Internet service already set up in your home, contact a broadband service provider of your choice for assistance. Before proceeding with the mobile app download, check that the SBG8300 and your connected client device (e.g., laptop or personal computer) are connected to the Internet.
There are four network connection options available to set up your Wi-Fi network connection on your home network. Choose one of the following:
- Set up a Wi-Fi network connection using your mobile device (recommended)
- Set up a Wi-Fi network connection using your client device
- Quick connect using the Windows taskbar
- Connect using the Windows control panel
Set up a Wi-Fi network connection using your mobile device
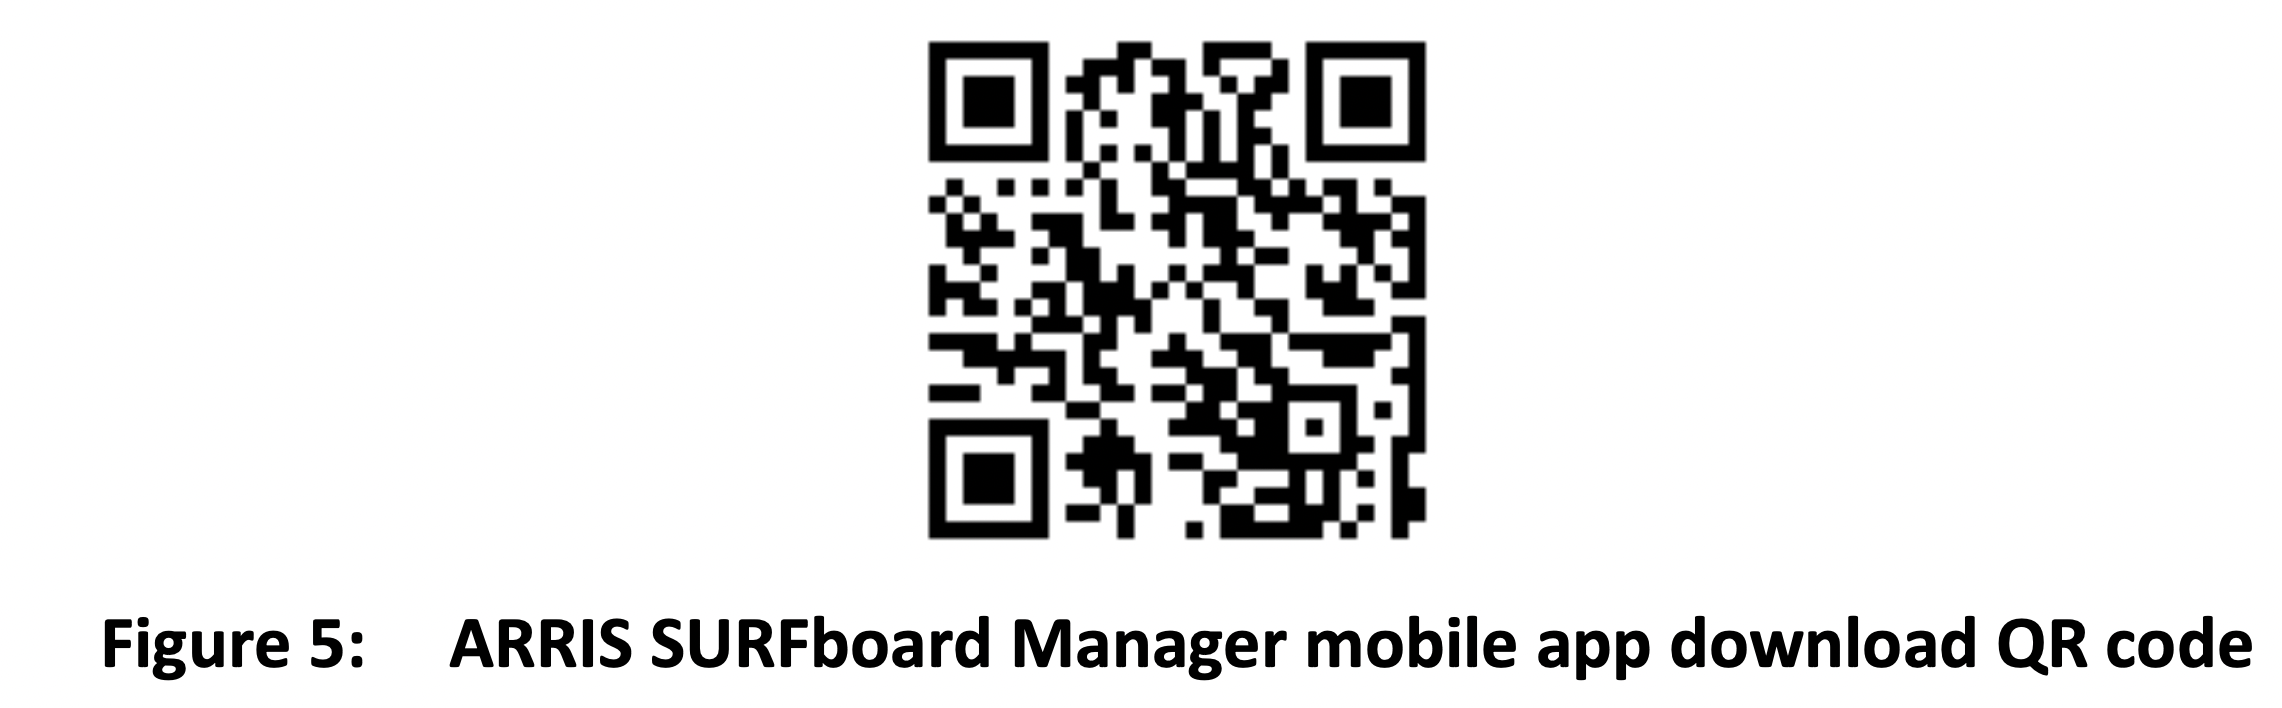
The ARRIS SURFboard Manager mobile app is a quick and easy-to-use option to set up your Wi-Fi home network connection(s) using your iOS or Android mobile device.
1. Check that your mobile device is connected to your Wi-Fi home network.
2. Scan the QR code to download the ARRIS SURFboard Manager mobile app from the Apple App Store or Google Play Store on your iOS or Android mobile device.
The following ARRIS SURFboard Manager mobile app screen displays.
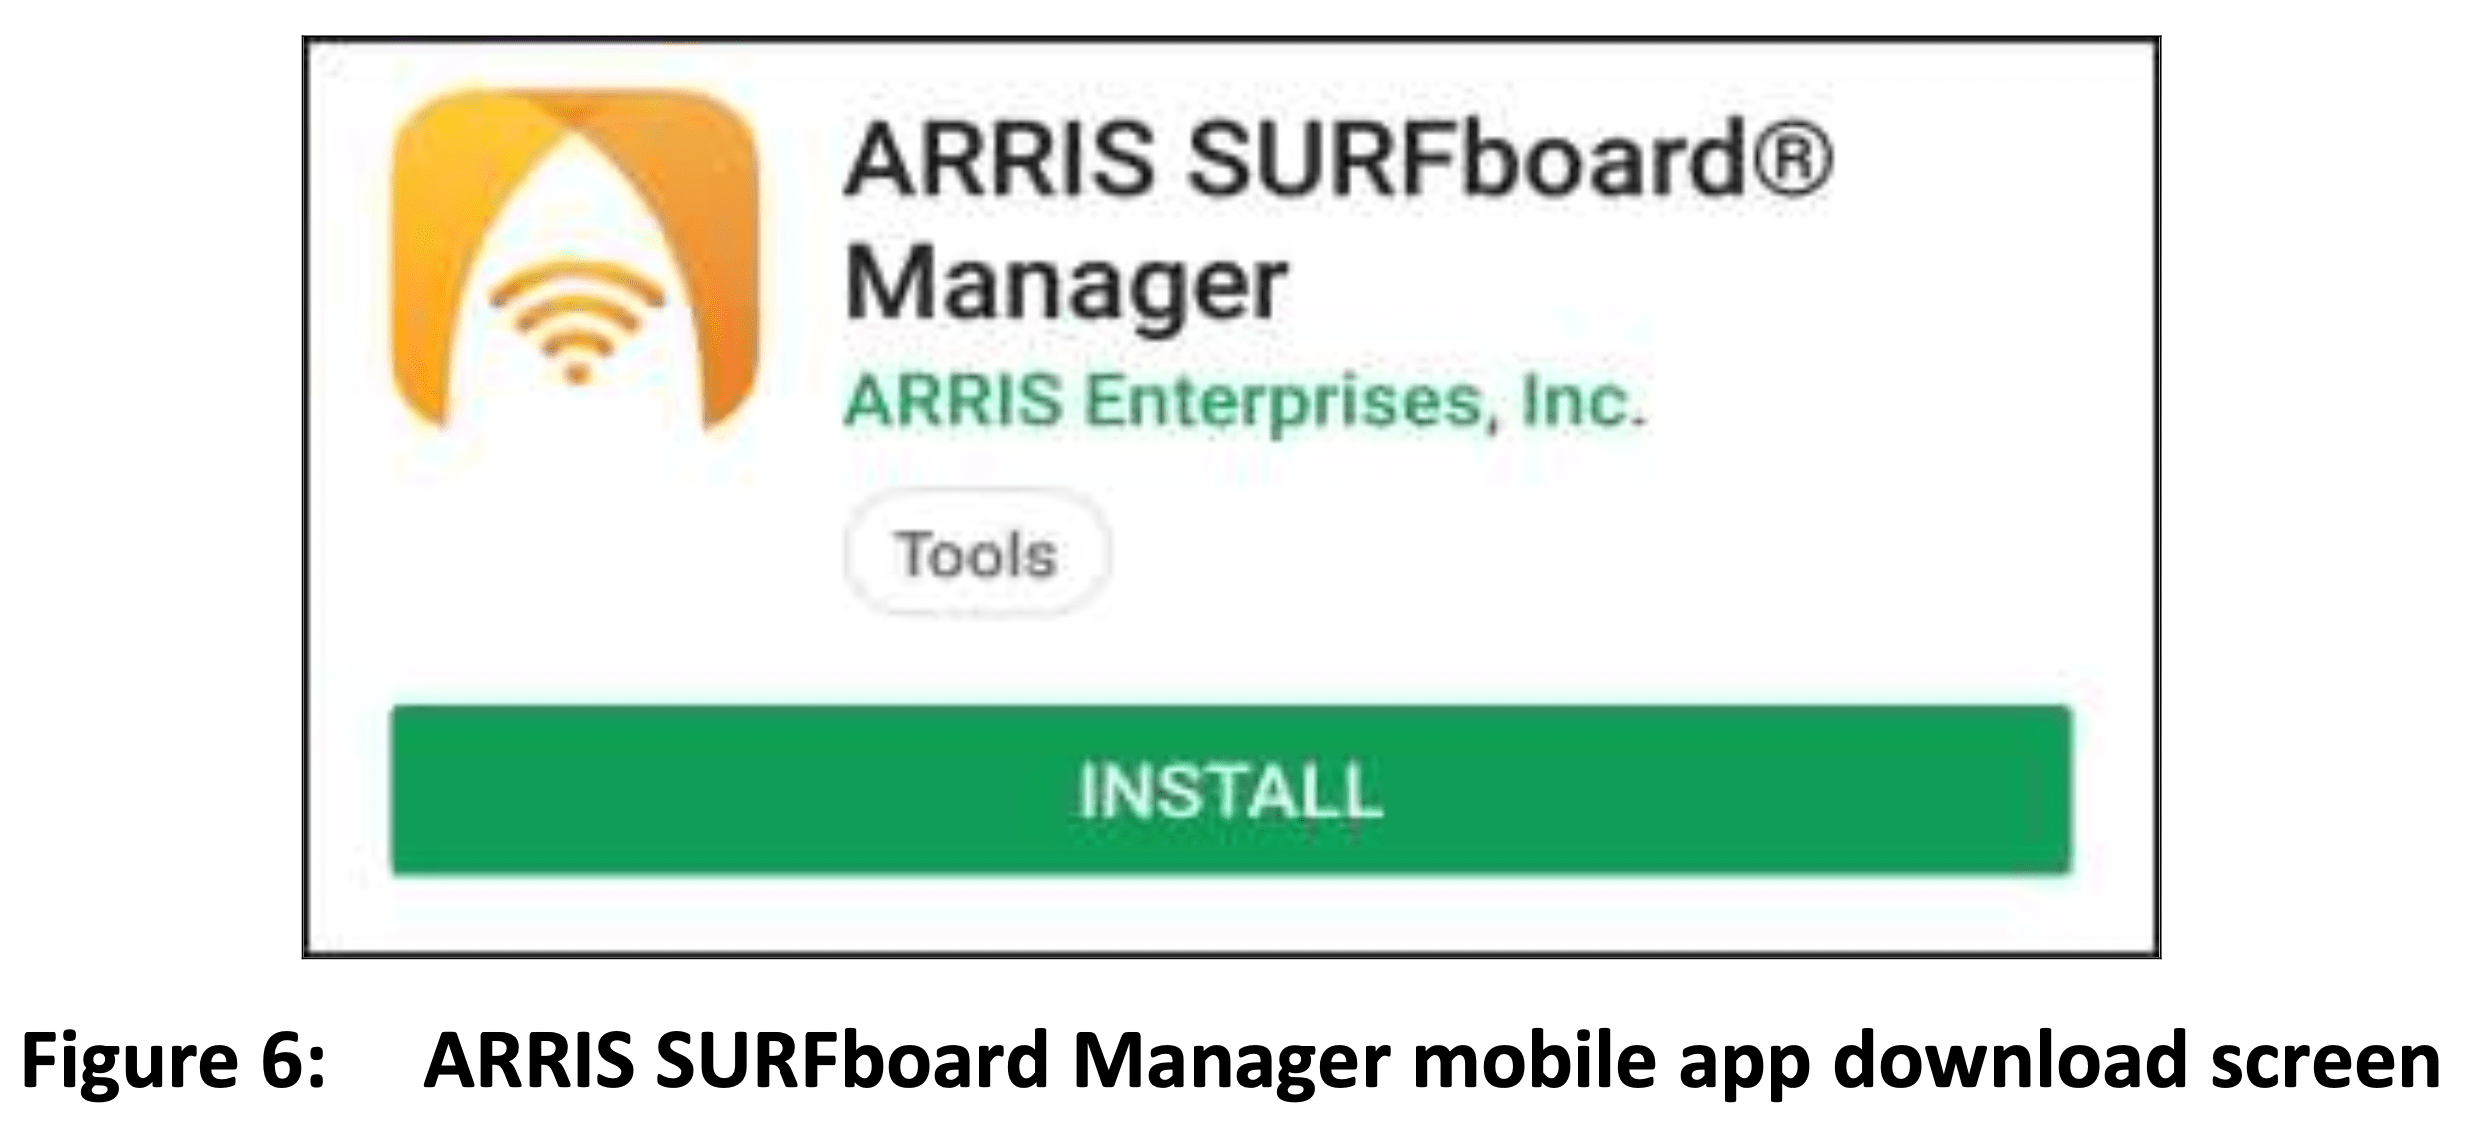
3. Tap INSTALL to download the SURFboard Manager mobile app on your mobile device.
The ARRIS SURFboard® Manager will be installed on your device soon message displays.
4. Tap OK.
The following ARRIS SURFboard Manager window displays.
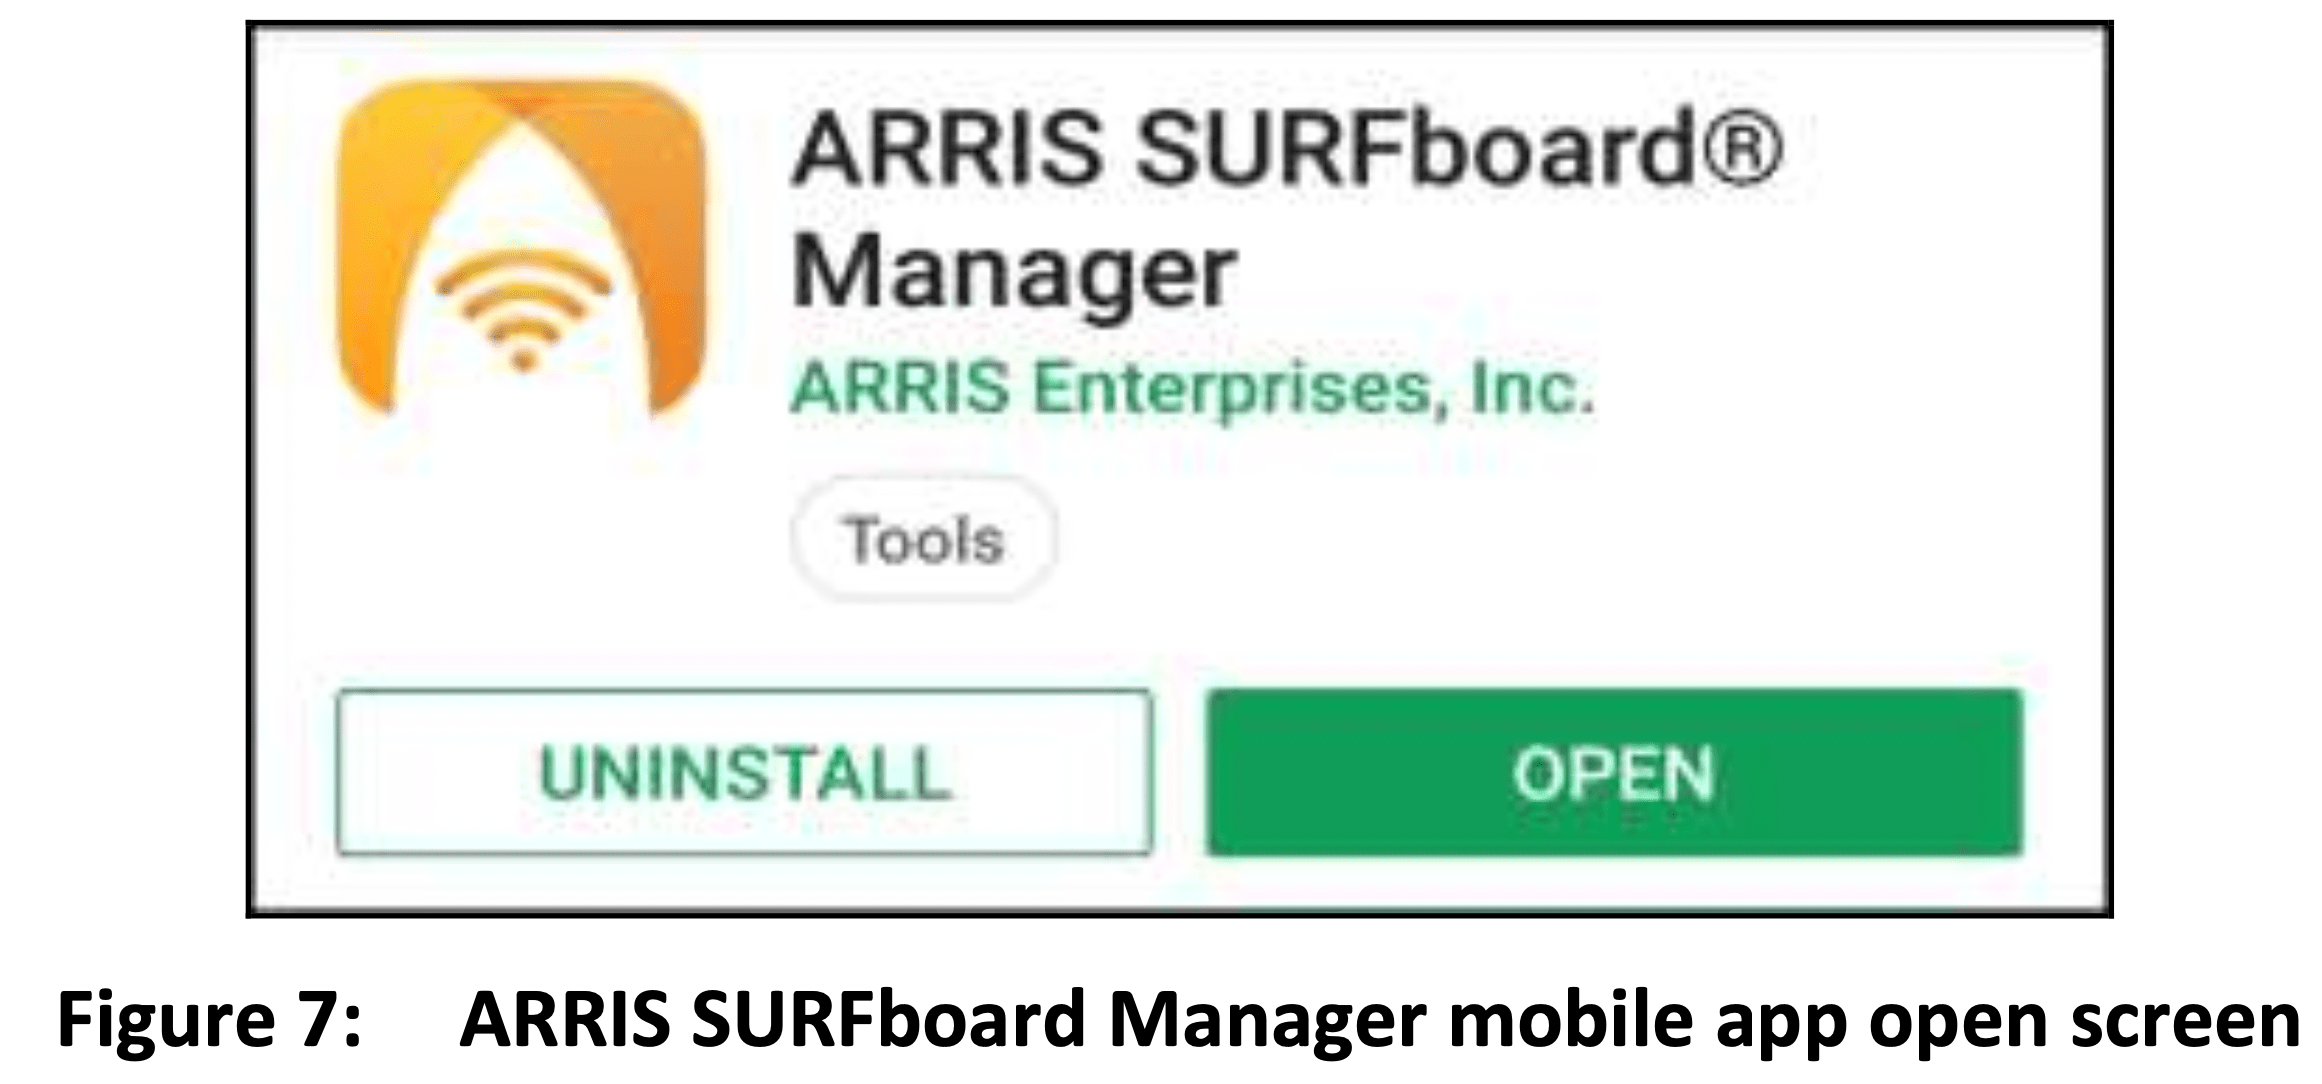
Note: After the download is finished, the ARRIS SURFboard Manager mobile app shortcut will be added to your mobile device Home or Apps screen.
5. Tap OPEN to launch the SURFboard Manager mobile app.
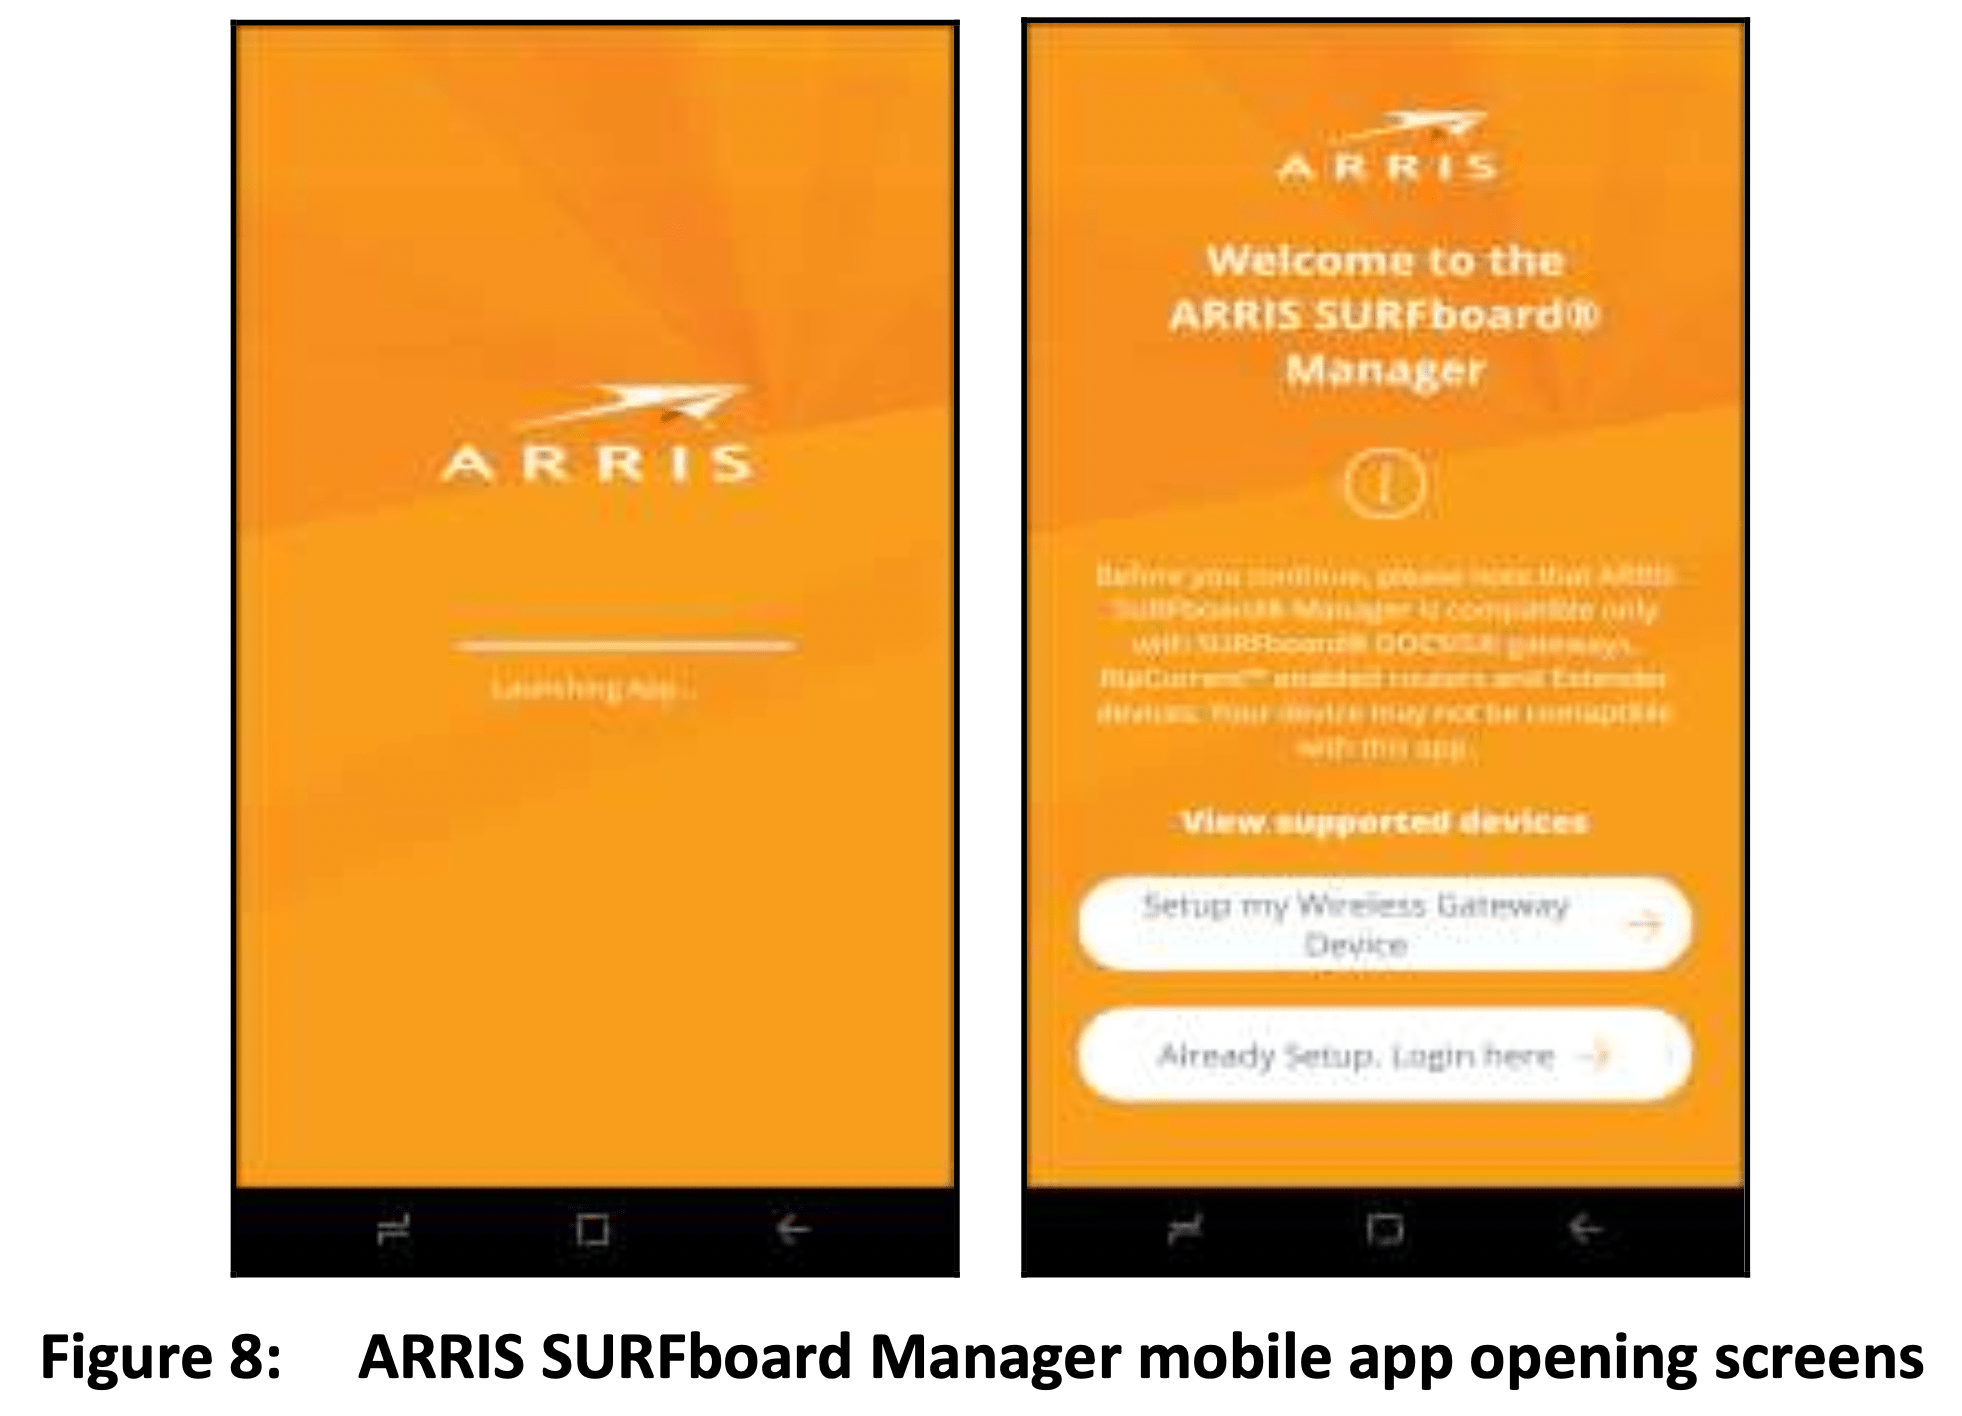
The ARRIS SURFboard Manager mobile app opening screens display (see Figure 8).
6. Continue to follow the mobile app prompts to configure your Wi-Fi home network connection.
For additional information or instructions for using the mobile app, see the ARRIS SURFboard Manager Mobile App User Guide available online at ARRIS SURFboard Manager.
Configuring your Wi-Fi network
You have the option to either use the default network settings which are unique to your SBG8300 for security purposes or you can configure different network settings. The SBG8300 supports a secure method for setting up multiple Wi-Fi networks on your SBG8300.
Set up your Wi-Fi network
1. If you are not logged on to the Internet, open a web browser and log on to the SBG8300 to open the SBG8300 Web Manager. See Start the SBG8300 web manager (page 32) for more information, if necessary.
2. Click the Gateway menu link and then click the Connection submenu options link.
3. Click Wi-Fi to open the Gateway Connection Wi-Fi screen.
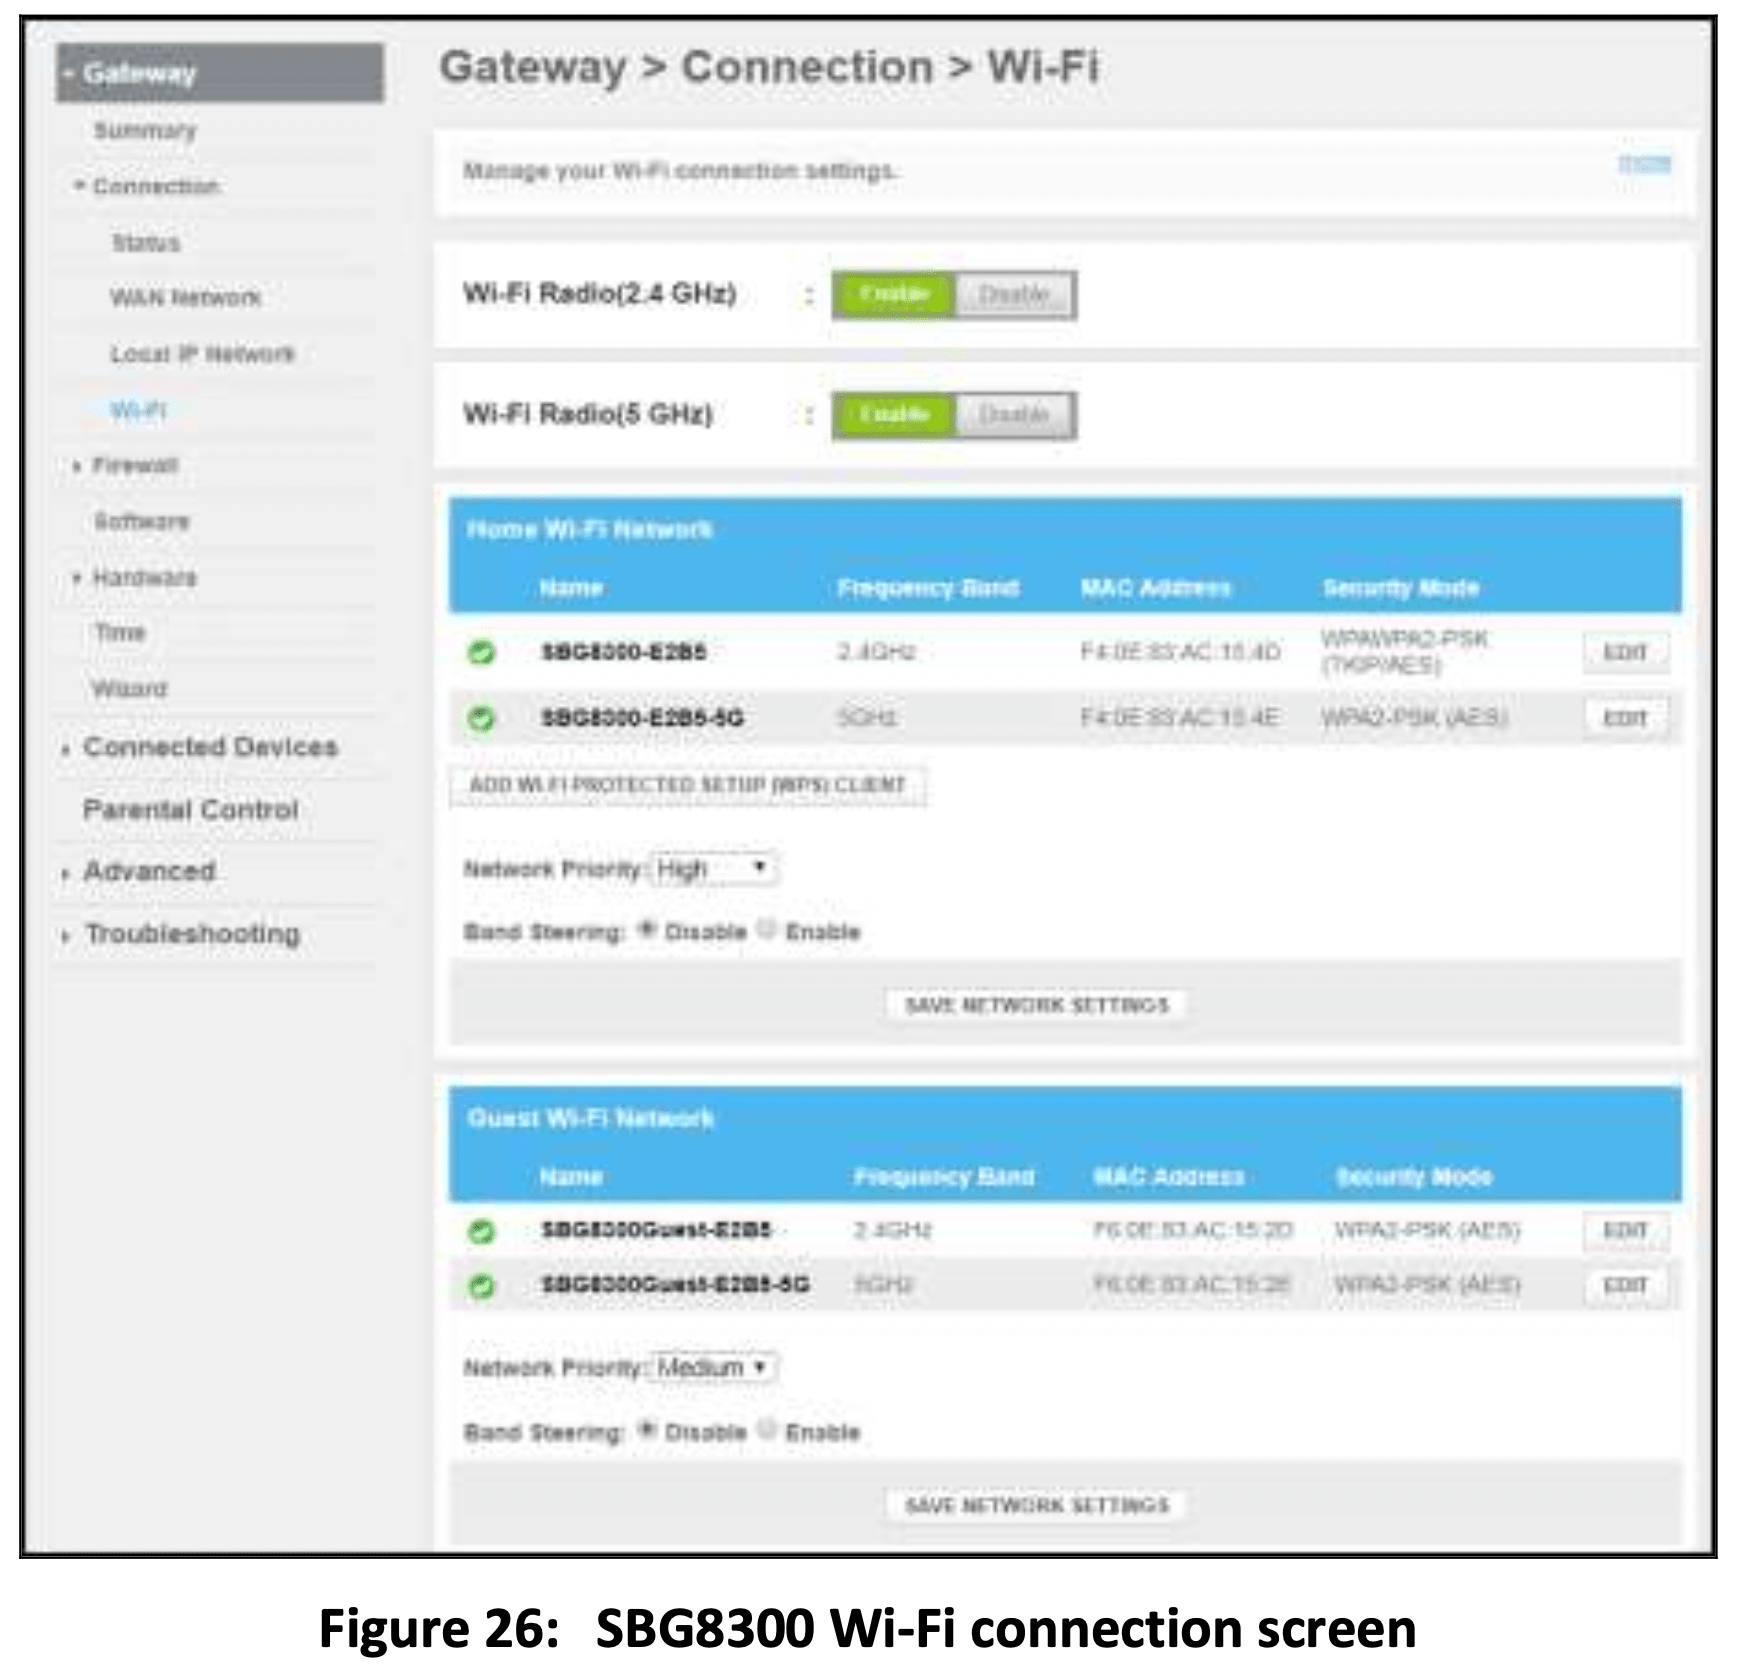
4. Click the Wi-Fi Radio (2.4 GHz) Enable or Disable button to turn ON or OFF the 2.4 GHz Wi-Fi frequency range that you are setting up for your Wi-Fi home network.
5. Click the Wi-Fi Radio (5 GHz) Enable or Disable button to turn ON or OFF the 5 GHz Wi-Fi frequency range that you are setting up for your Wi-Fi home network.
6. Click the Home Wi-Fi network 2.4 GHz EDIT button to set up the Network security mode for your Wi-Fi home network.
7. Click the Home Wi-Fi network 5 GHz EDIT button to set up the Network security mode for your Wi-Fi home network.
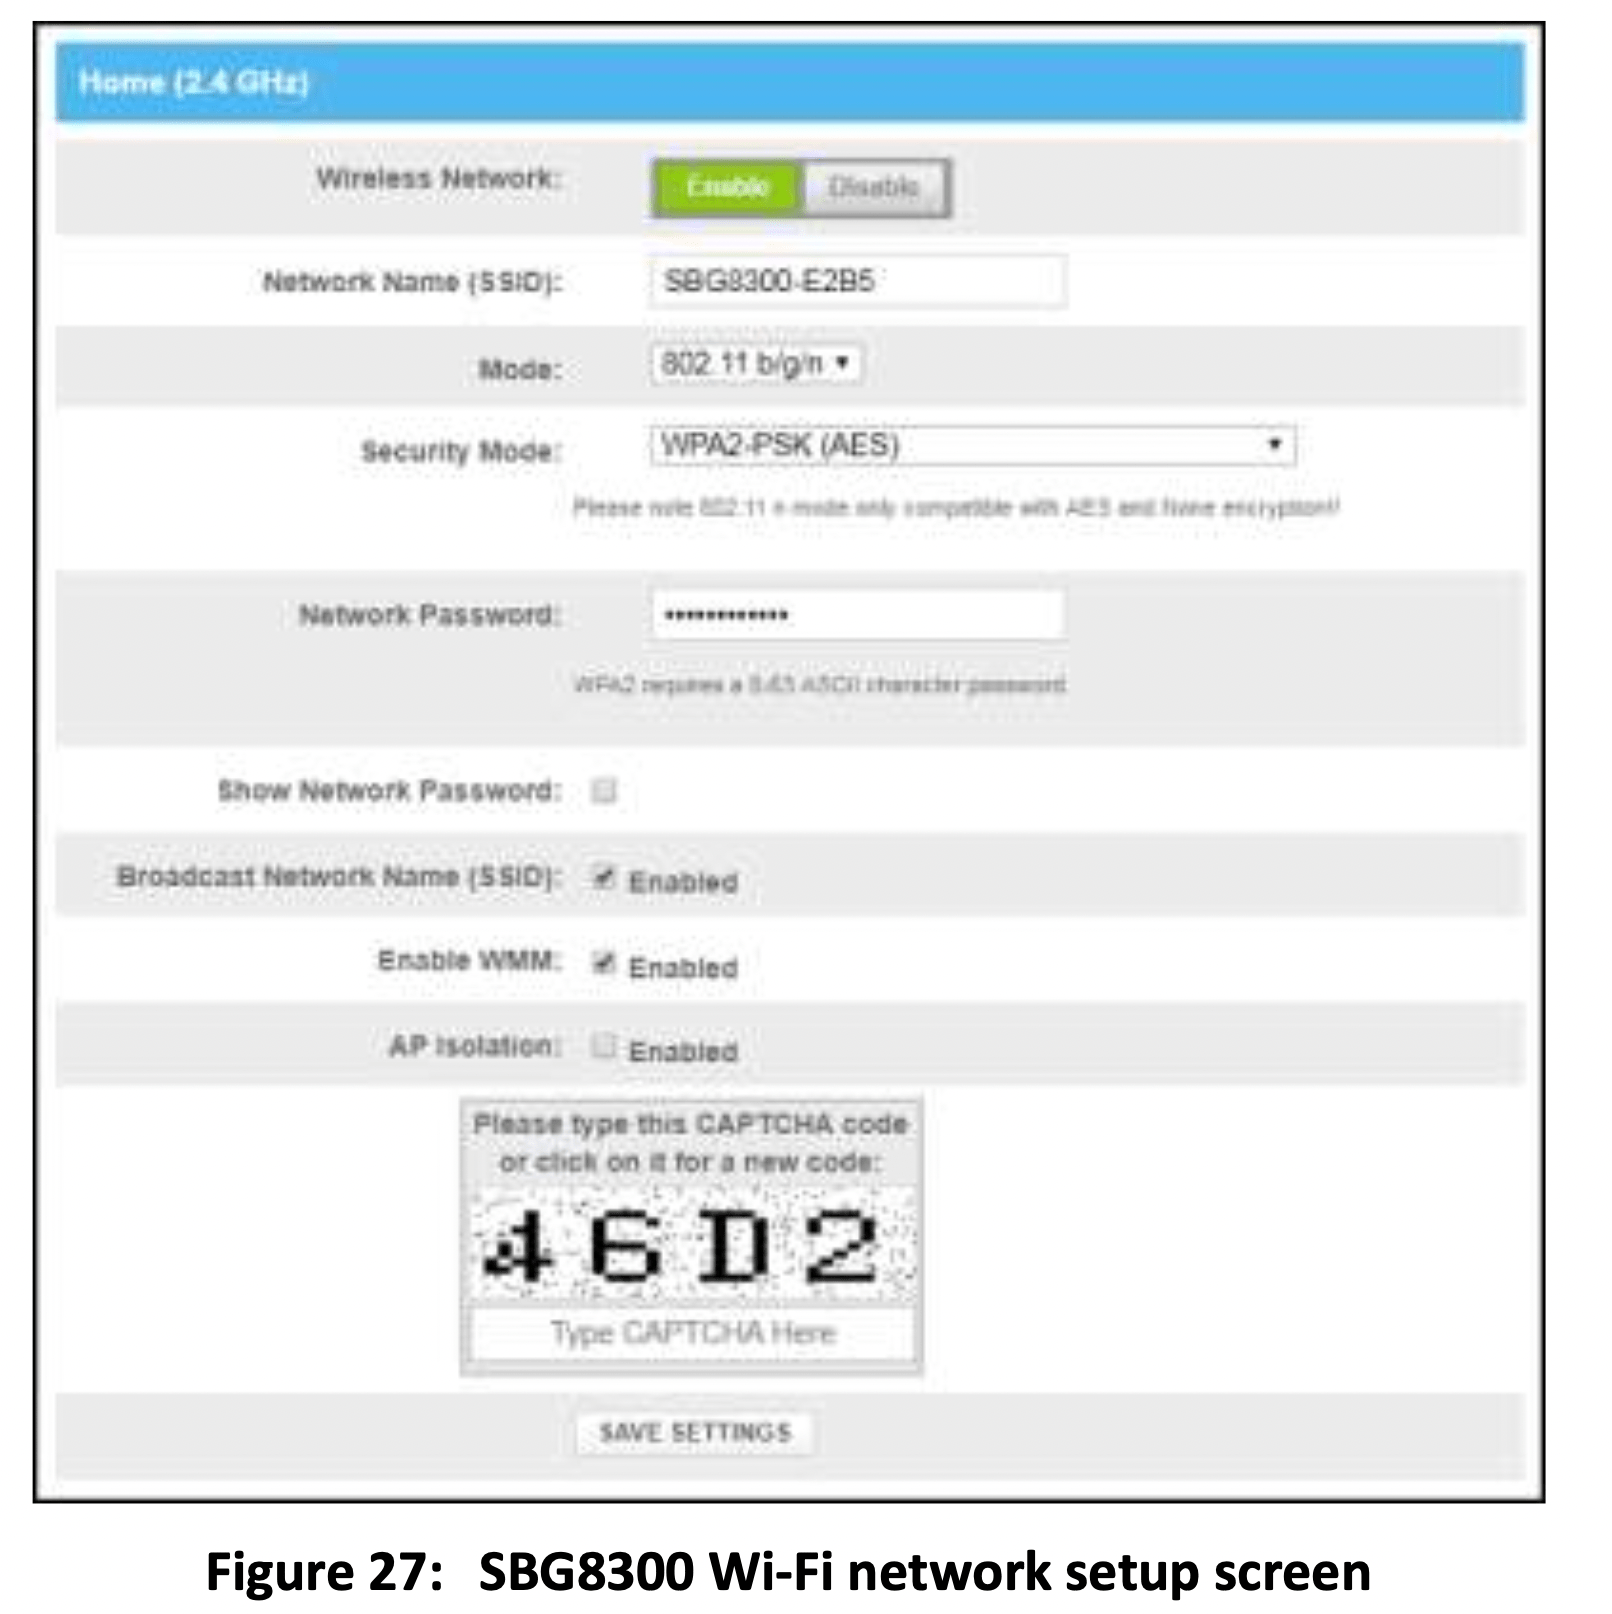
8. Click the Wireless Network Enable or Disable button field to turn ON or OFF Wi-Fi on your home network.
9. Choose to either keep the default network name SSID (Service Set Identifier) for your Wi-Fi home network in the Network Name (SSID) field or enter a new network name of your choice.
Note: The Wi-Fi network name cannot be the same name as any other SSID on your home network. You can use any combination of lowercase and uppercase letters, numbers, and/or special characters (symbols) up to a maximum of 32 characters.
10. Select the wireless networking standard mode for your Wi-Fi home network from the Mode drop-down list:
- 2.4 GHz
- 5 GHz
- 802.11 ac
- 802.11 n/ac
- 802.11 a/n/ac
- 802.11 n
11. Select one of the following Wi-Fi network security options for your SBG8300 from the Security Mode drop-down list:
- WPA2-PSK (TKIP/AES) (Recommended): Wi-Fi Protected Access version 2 with PreShared Key (most compatible). This is the default network security option for your SBG8300. It provides the highest security and performance for your Wi-Fi network.
- WPA2-PSK (AES): Wi-Fi Protected Access version 2 with Pre-Shared Key
- Open (risky); not secure; not recommended: This network security option does not provide any level of network security for your Wi-Fi network. It allows outside users to connect to your Wi-Fi network without having to use a Wi-Fi Security Key (network password).
12. Enter your Wi-Fi network password in the Network Password field.
Note: Keep in mind that network passwords are case-sensitive. You can use any combination of uppercase and lowercase letters, and numbers. Special characters and spaces are not acceptable.
13. Select the Show Network Password checkbox to view and confirm your network password.
14. Select the Broadcast Network Name (SSID) Enabled checkbox to display your SSID as an available Wi-Fi network to outside users.
- or -
Deselect the Broadcast Network Name (SSID) Enabled checkbox to disable displaying your SSID as an available Wi-Fi network to outside users.
Note: When Broadcast Network Name (SSID) is enabled, your SSID is visible and available to unauthorized Wi-Fi clients that are within range of your Wi-Fi network to connect to your home network.
15. Select or the Enabled checkbox in the Enable WMM field to turn ON Wi-Fi Multi-media functionality.
Enabling WMM can help control latency and jitter when transmitting multi-media content over a Wi-Fi connection. This quality of service mechanism uses four access categories:
- Voice
- Video
- Best effort
- Background
WMM ensures that applications with low tolerance for latency and jitter are treated with higher priority than less sensitive data applications. WMM sets different wait times for the above four categories to provide priority network access for applications that are less tolerant of packet delays.
16. Select the AP Isolation checkbox to enable separate virtual networks for your Wi-Fi clients.
- or
Deselect the AP Isolation checkbox to disable separate virtual networks for your Wi-Fi clients.
Note: When AP Isolation is enabled, each of your Wi-Fi clients will be in its own virtual network and will not be able to communicate with the other Wi-Fi clients. This may be useful if several guests are using your Wi-Fi network.
17. Enter the four-digit CAPTCHA code displayed in the Type CAPTCHA Here entry box.
18. Click SAVE SETTINGS to update your Wi-Fi network settings.


Protecting & monitoring your Wi-Fi network
After you have successfully connected the SBG8300 and your Wi-Fi devices, you should configure the SBG8300 to protect your Wi-Fi network from unwanted and unauthorized access by any Wi-Fi devices that are within range of your Wi-Fi network. Although network security for the SBG8300 is already configured, you can use the SBG8300 Web Manager to set the level of security and network access that you want to allow on your Wi-Fi network.
Change the login password
When logging in to the SBG8300 Web Manager, you will be prompted to change the default login password (password). You will have the option to either keep the default password or change it (recommended). Please note that if you do not change the default login password, the same message will display every time you log in to the SBG8300 Web Manager.
Note: If you are already logged in to the web manager, start with step 6 to change your login password.
1. Open a web browser on the computer or laptop connected to your SBG8300.
2. Type the XFINITY default LAN IP address, 192.168.0.1, in the Address bar and then press Enter to log on to your SBG8300. The SBG8300 Login screen displays.
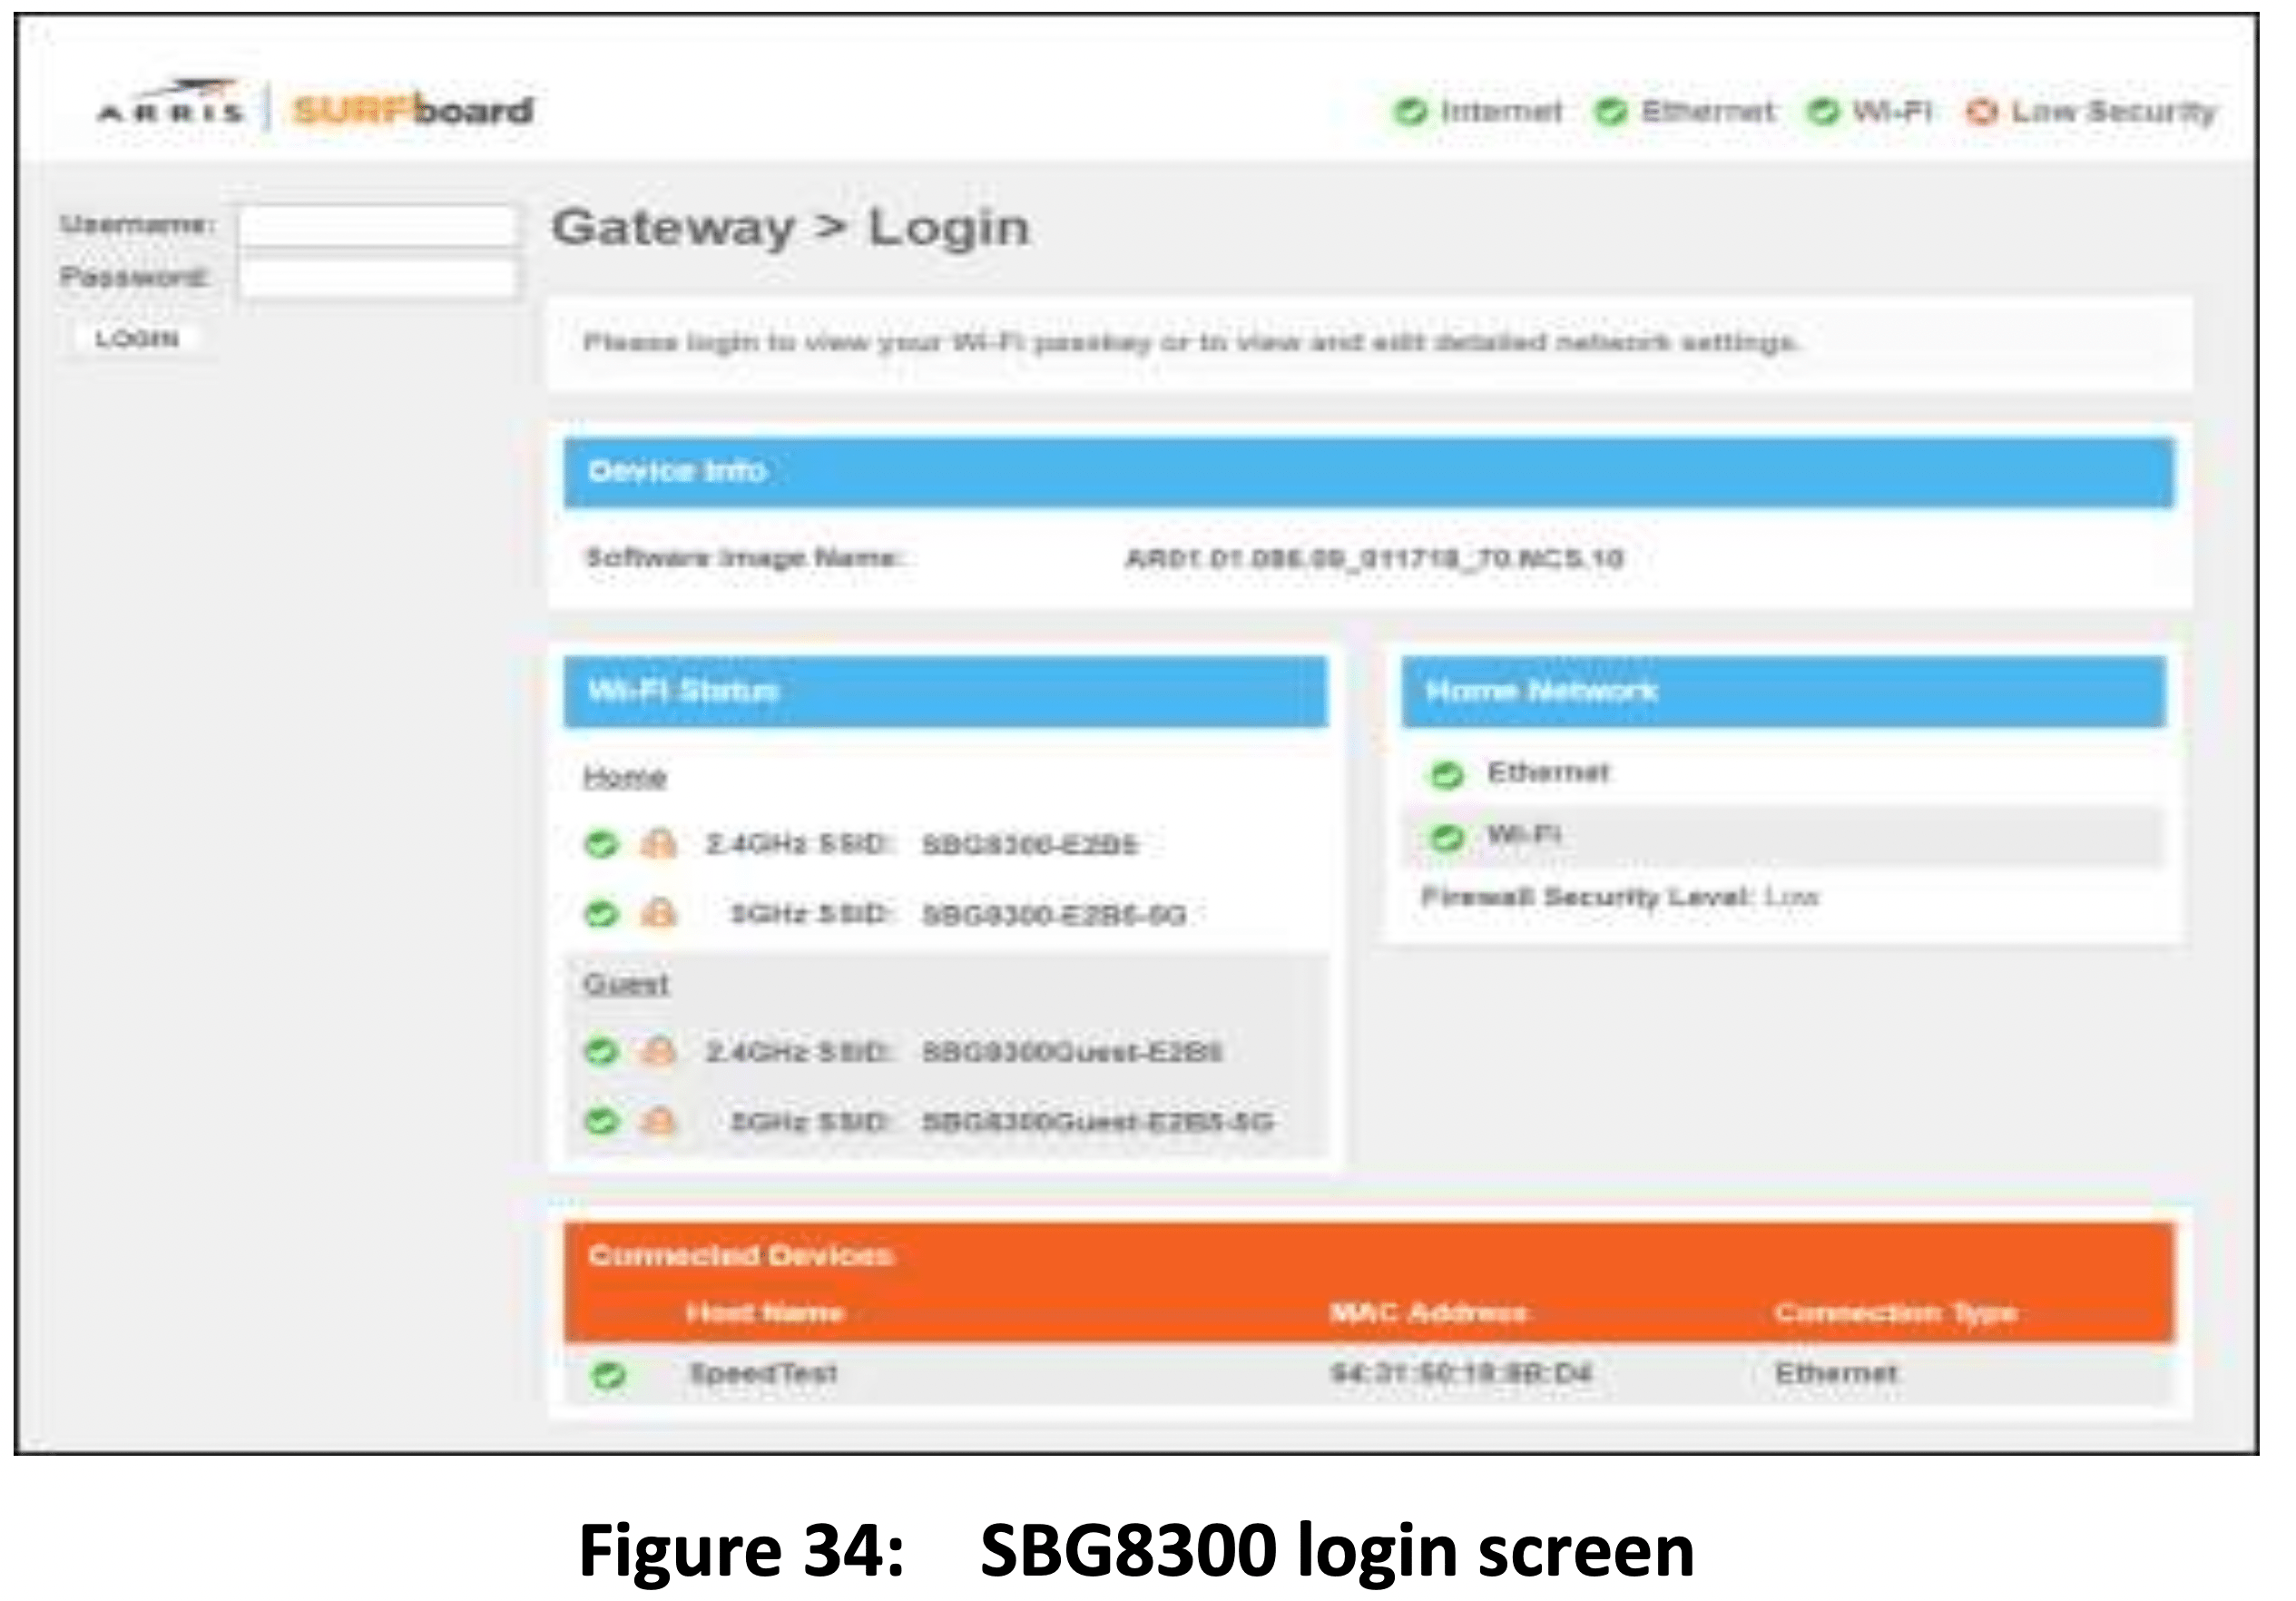
3. Type admin for the default user name (case-sensitive) in the Username field.
4. Type password for the default admin password (case-sensitive) in the Password field.
5. Click LOGIN to open the SBG8300 Web Manager.
6. Click the Troubleshooting main menu link and then click Change Password.
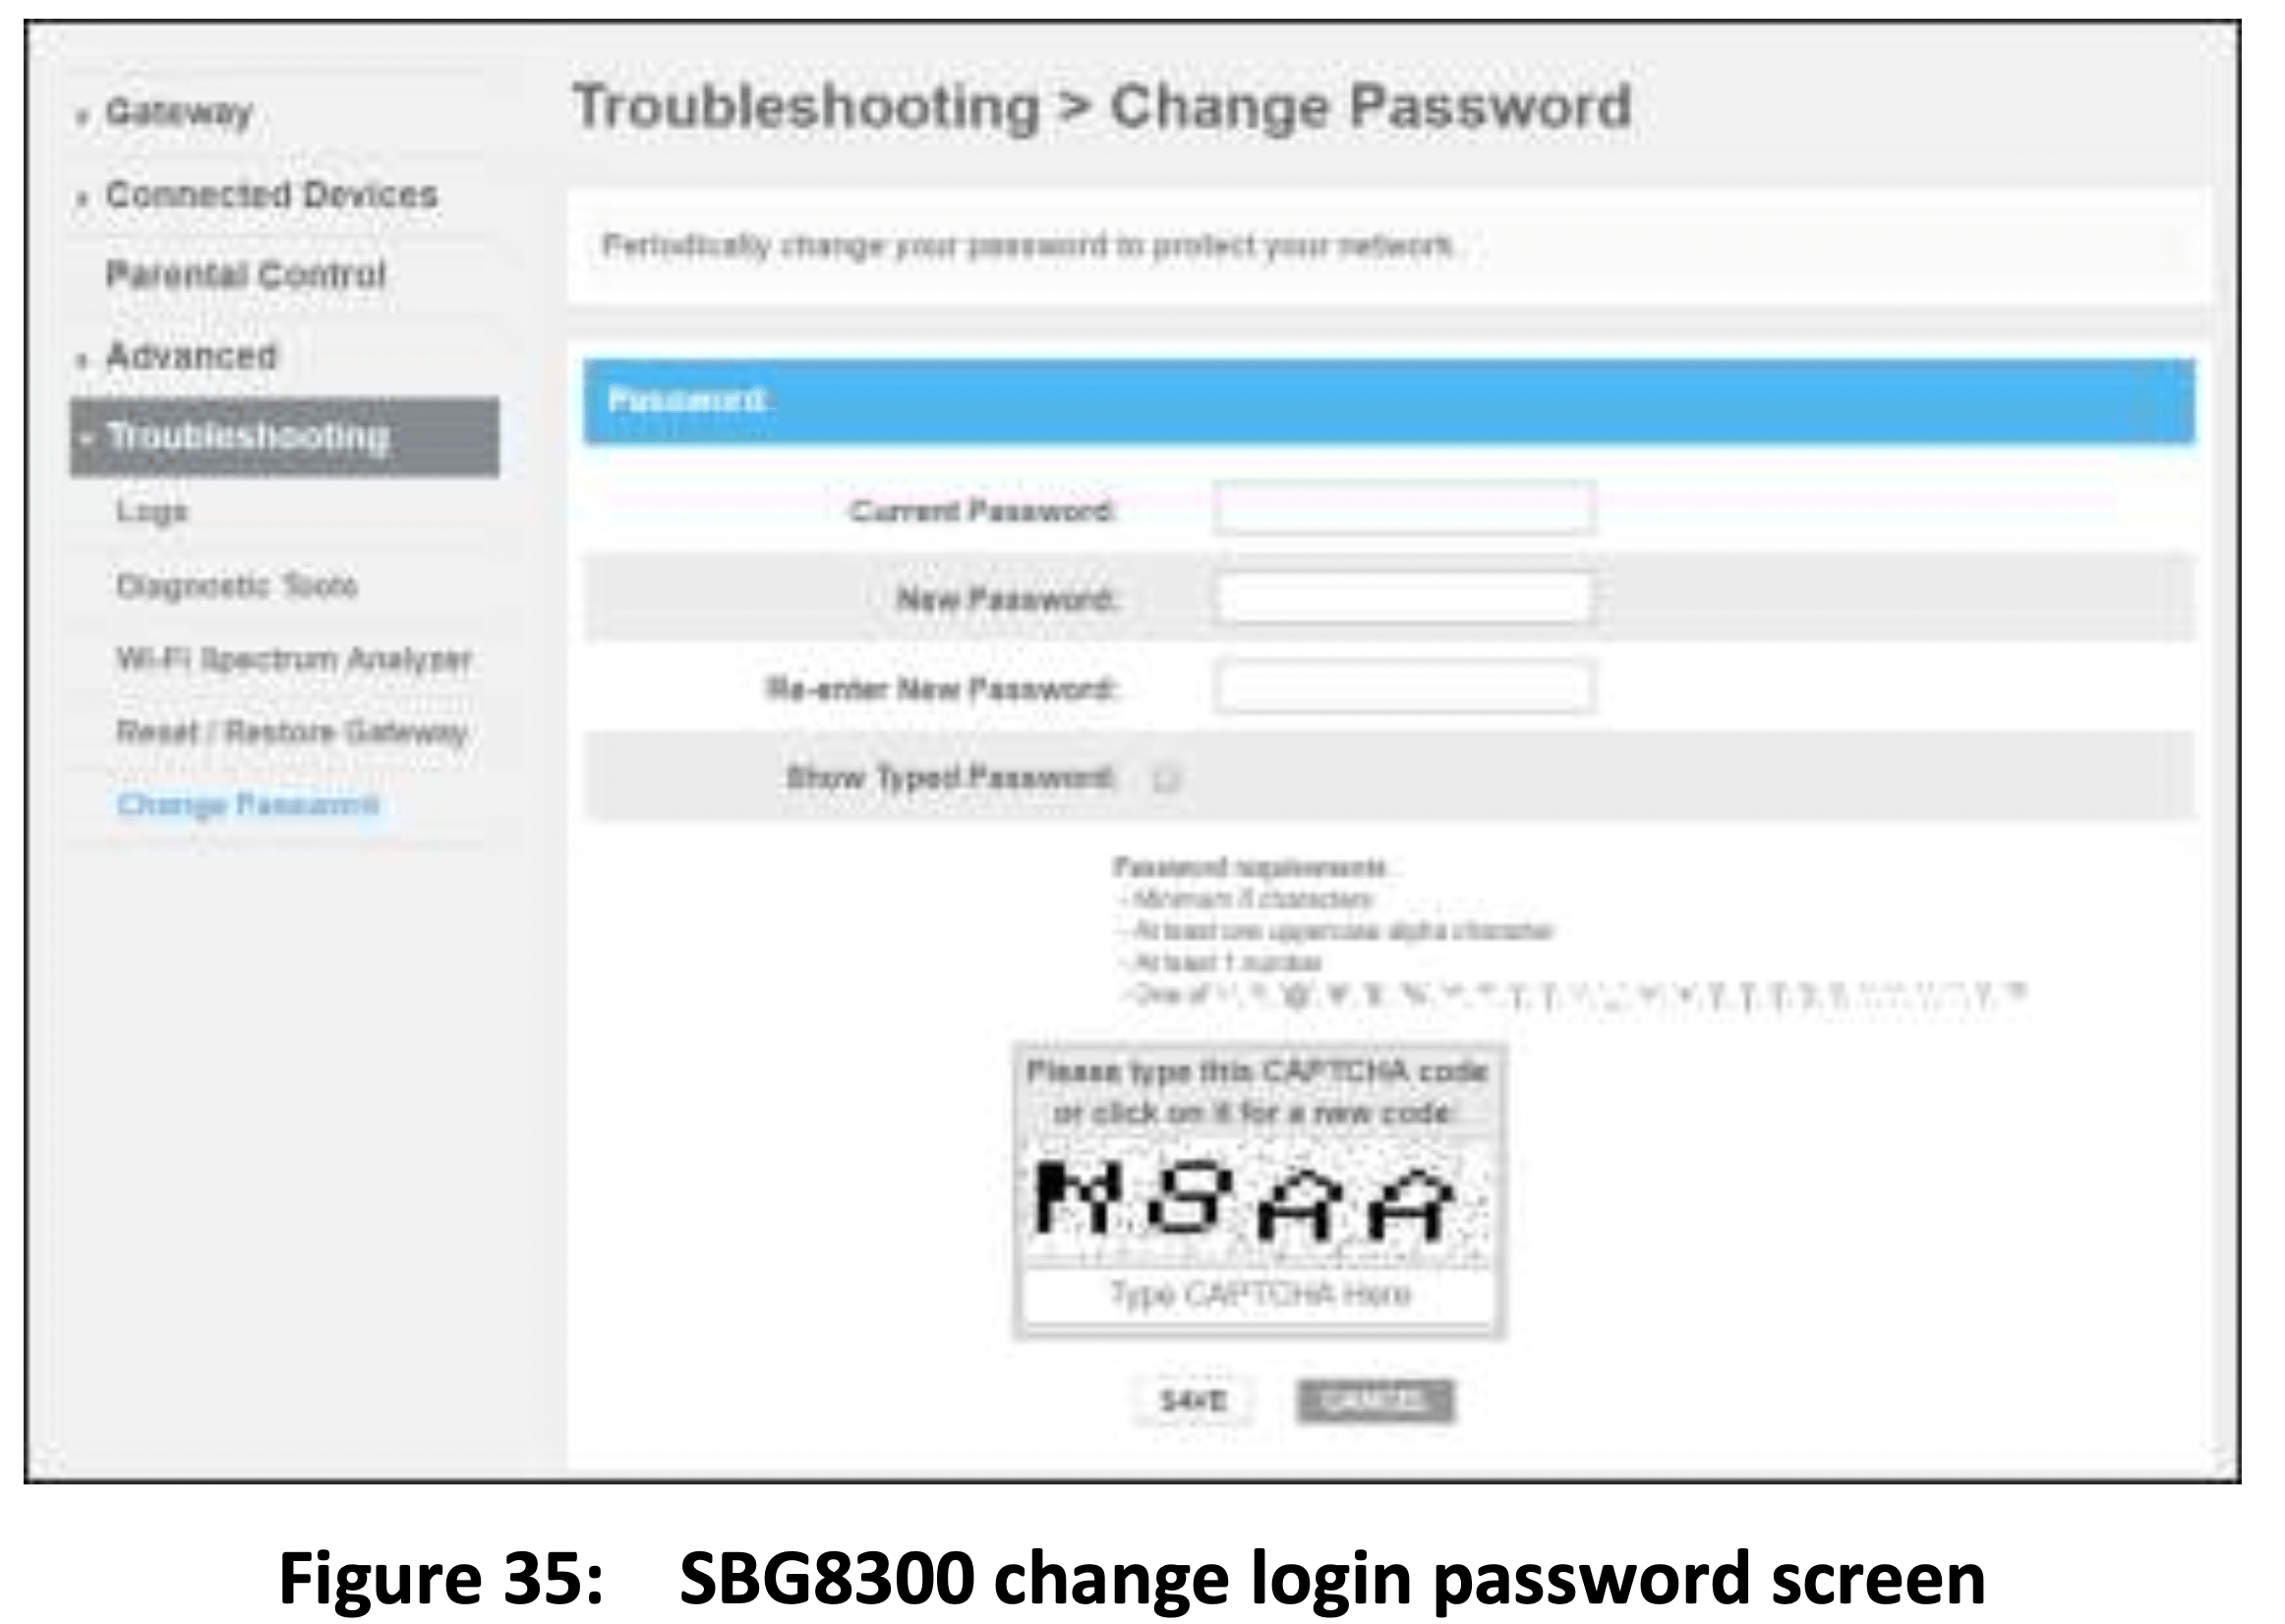
7. Enter the default or current admin password in the Current Password field.
8. Enter your new admin password in the New Password field.
Note: Remember passwords are case-sensitive and that you can use any combination of the following letters, numbers and special characters:
Letters: A through Z (uppercase and lowercase) Numbers: 0 to 9
9. Enter your new admin password in the Re-enter New Password field.
10. Select the Show Typed Password checkbox to view the new passwords and confirm that both passwords match.
11. Enter the four-digit CAPTCHA code located in the Type CAPTCHA Here entry box.
12. Click SAVE to update your admin password.
13. Find a secure place to write down and keep your new password for future reference.
Set up firewall protection
You can set up firewall filters and firewall alert notifications to protect your computer(s) and other connected network devices on your Wi-Fi home network. You can also block Java Applets, Cookies, ActiveX controls, popup windows, Proxies, and website access to protect the network devices on your home network from hackers, viruses, and other attacks from the Internet.
To set the firewall protection level on your SBG8300:
- From any SBG8300 Web Manager screen, click the Gateway menu link on the SBG8300 Web Manager screen.
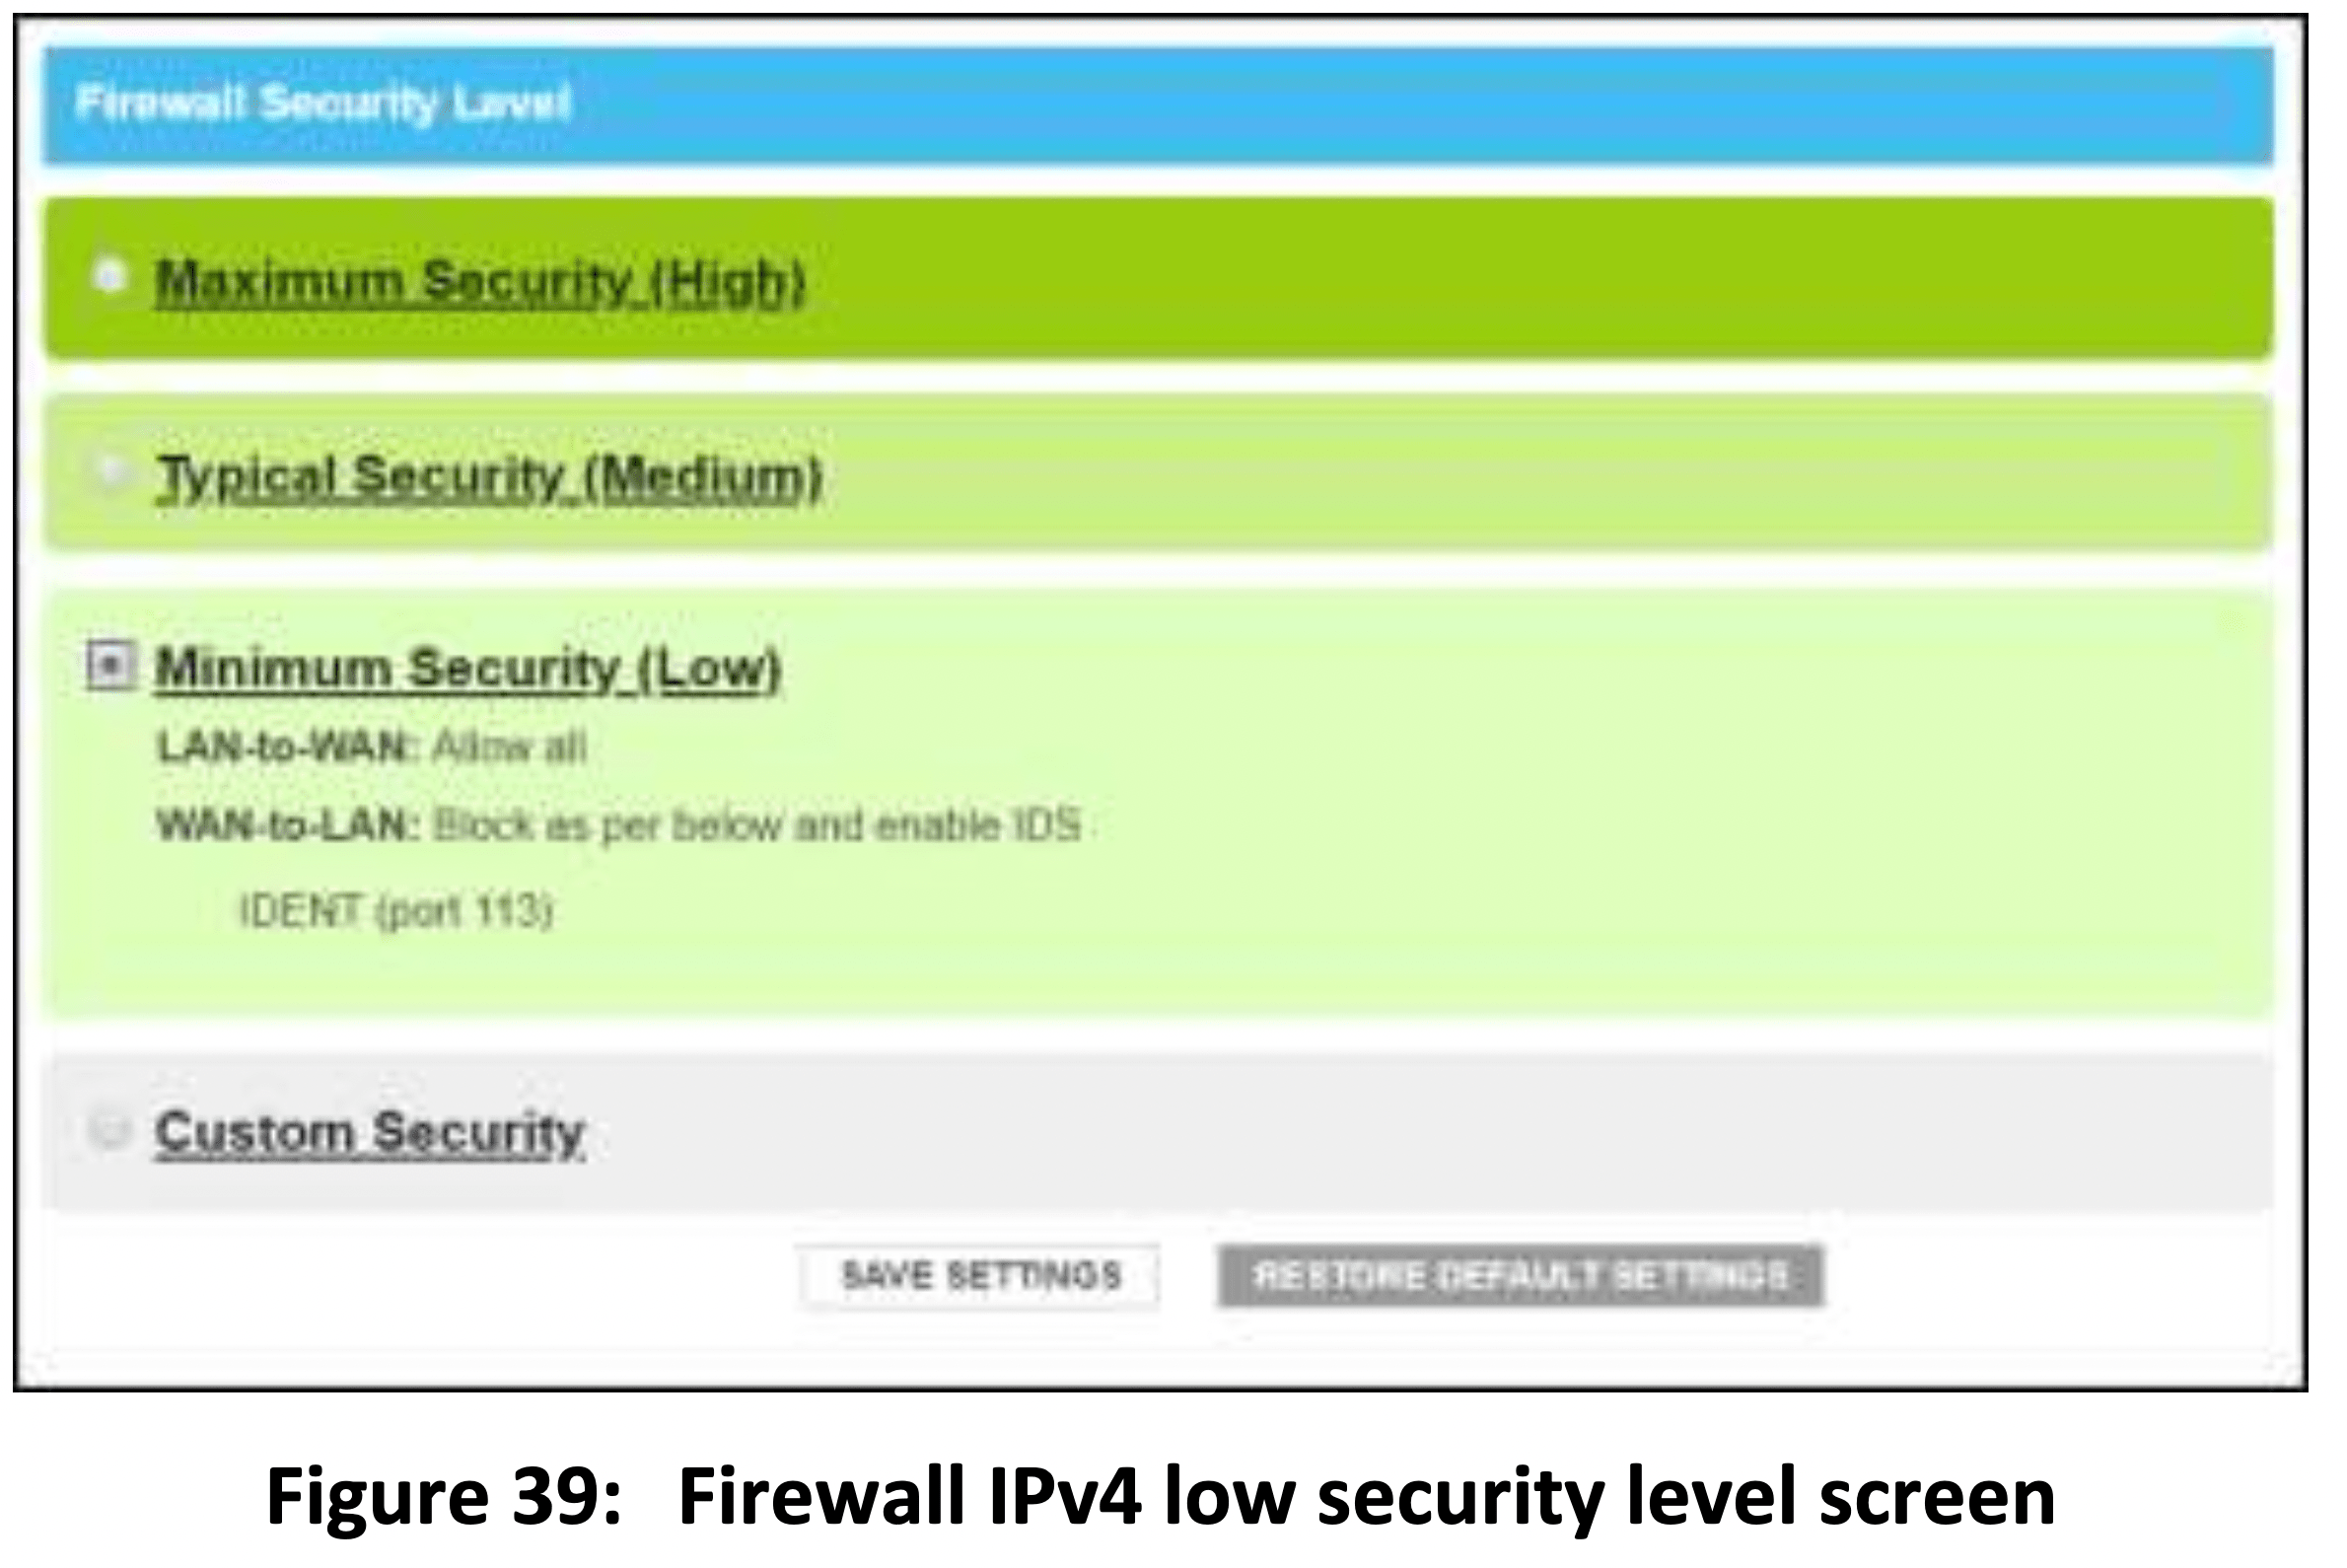
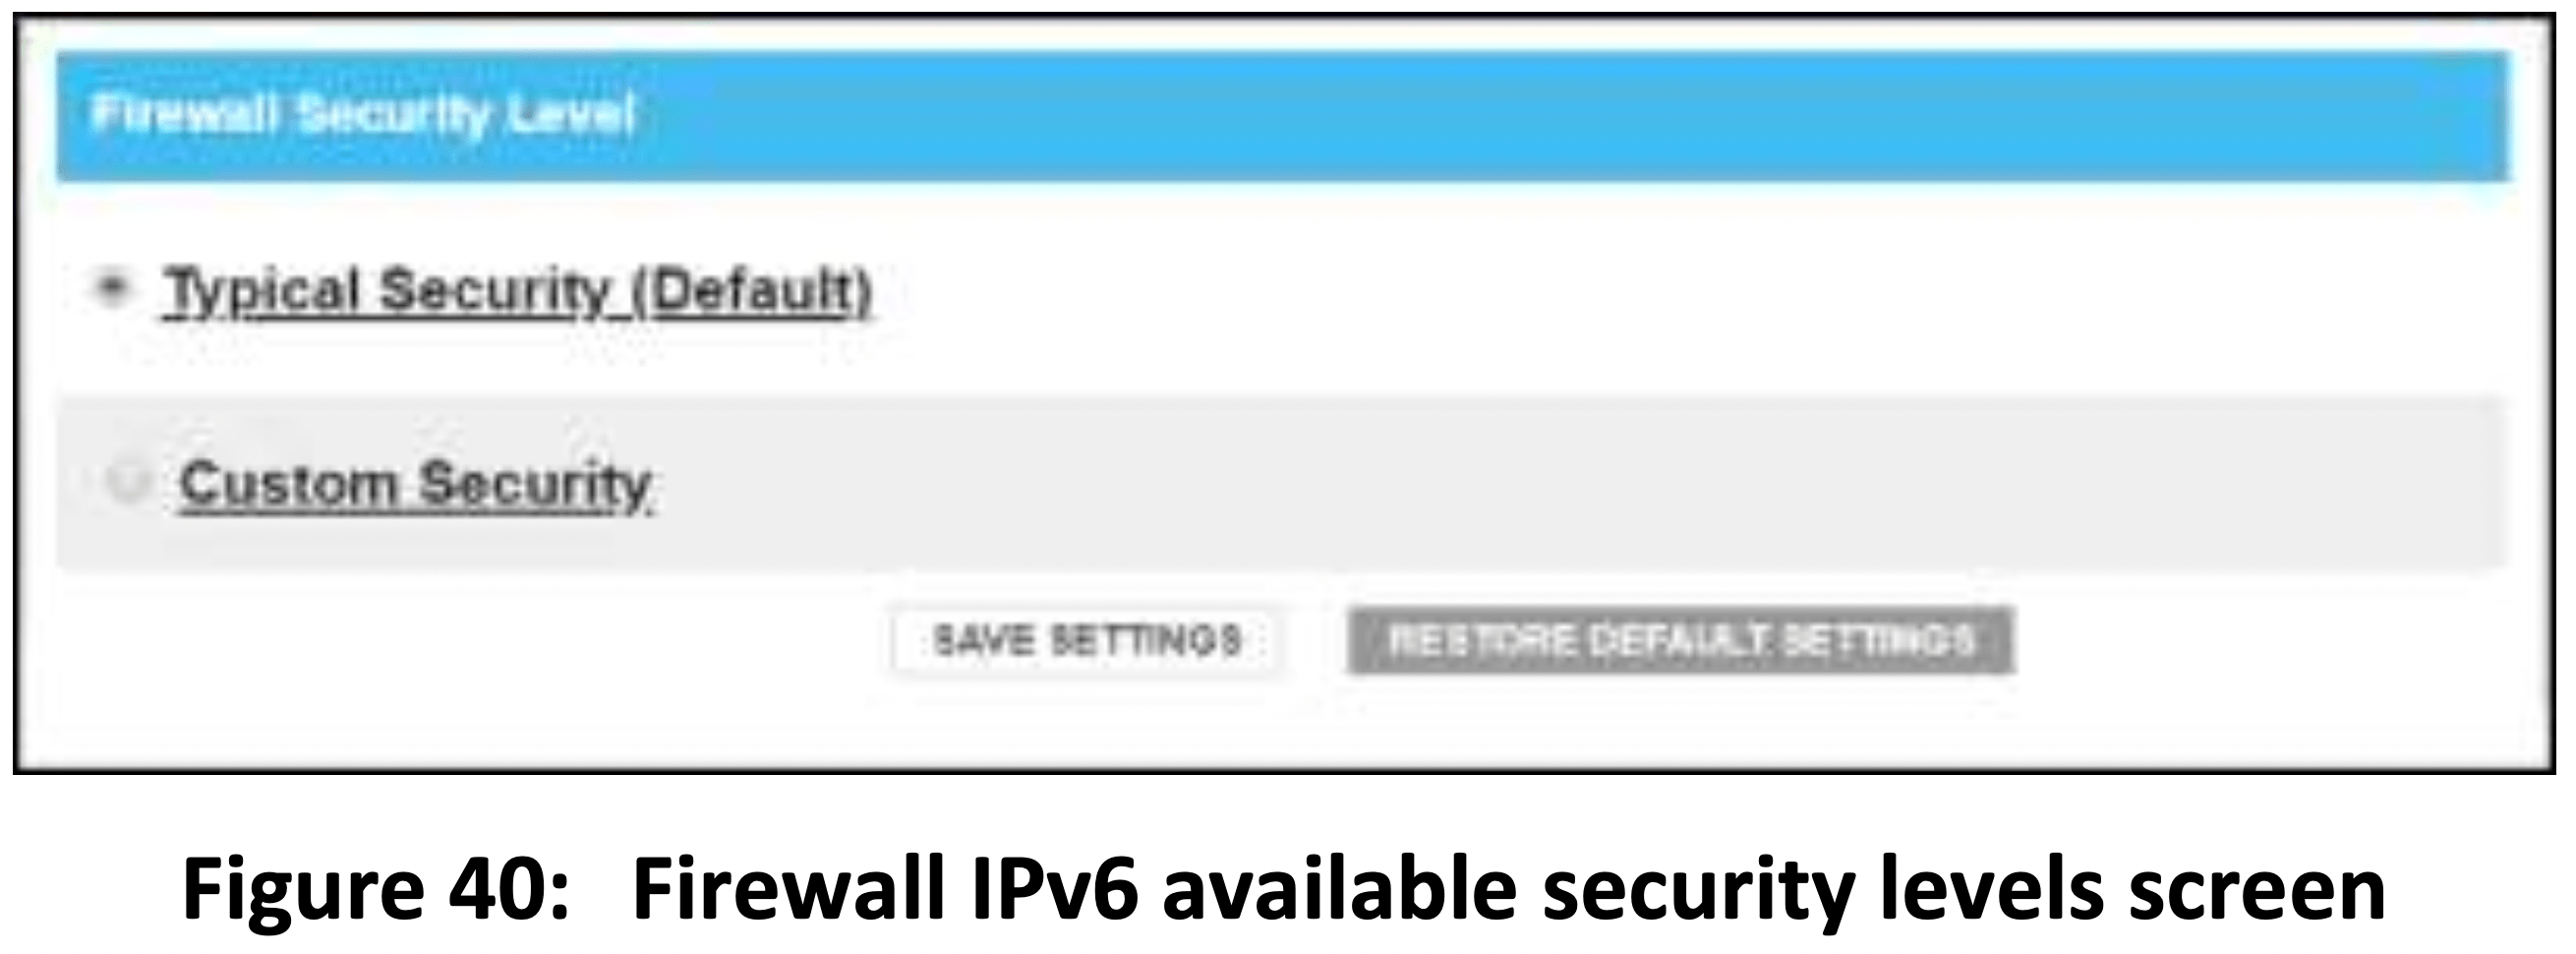
- Click the Firewall submenu link and then click IPv4 or IPv6 to display the Gateway Firewall Security Level screens.
- Select the security level that you want to set for your SBG8300 firewall.
- When done, click SAVE SETTINGS.
IPv4 security
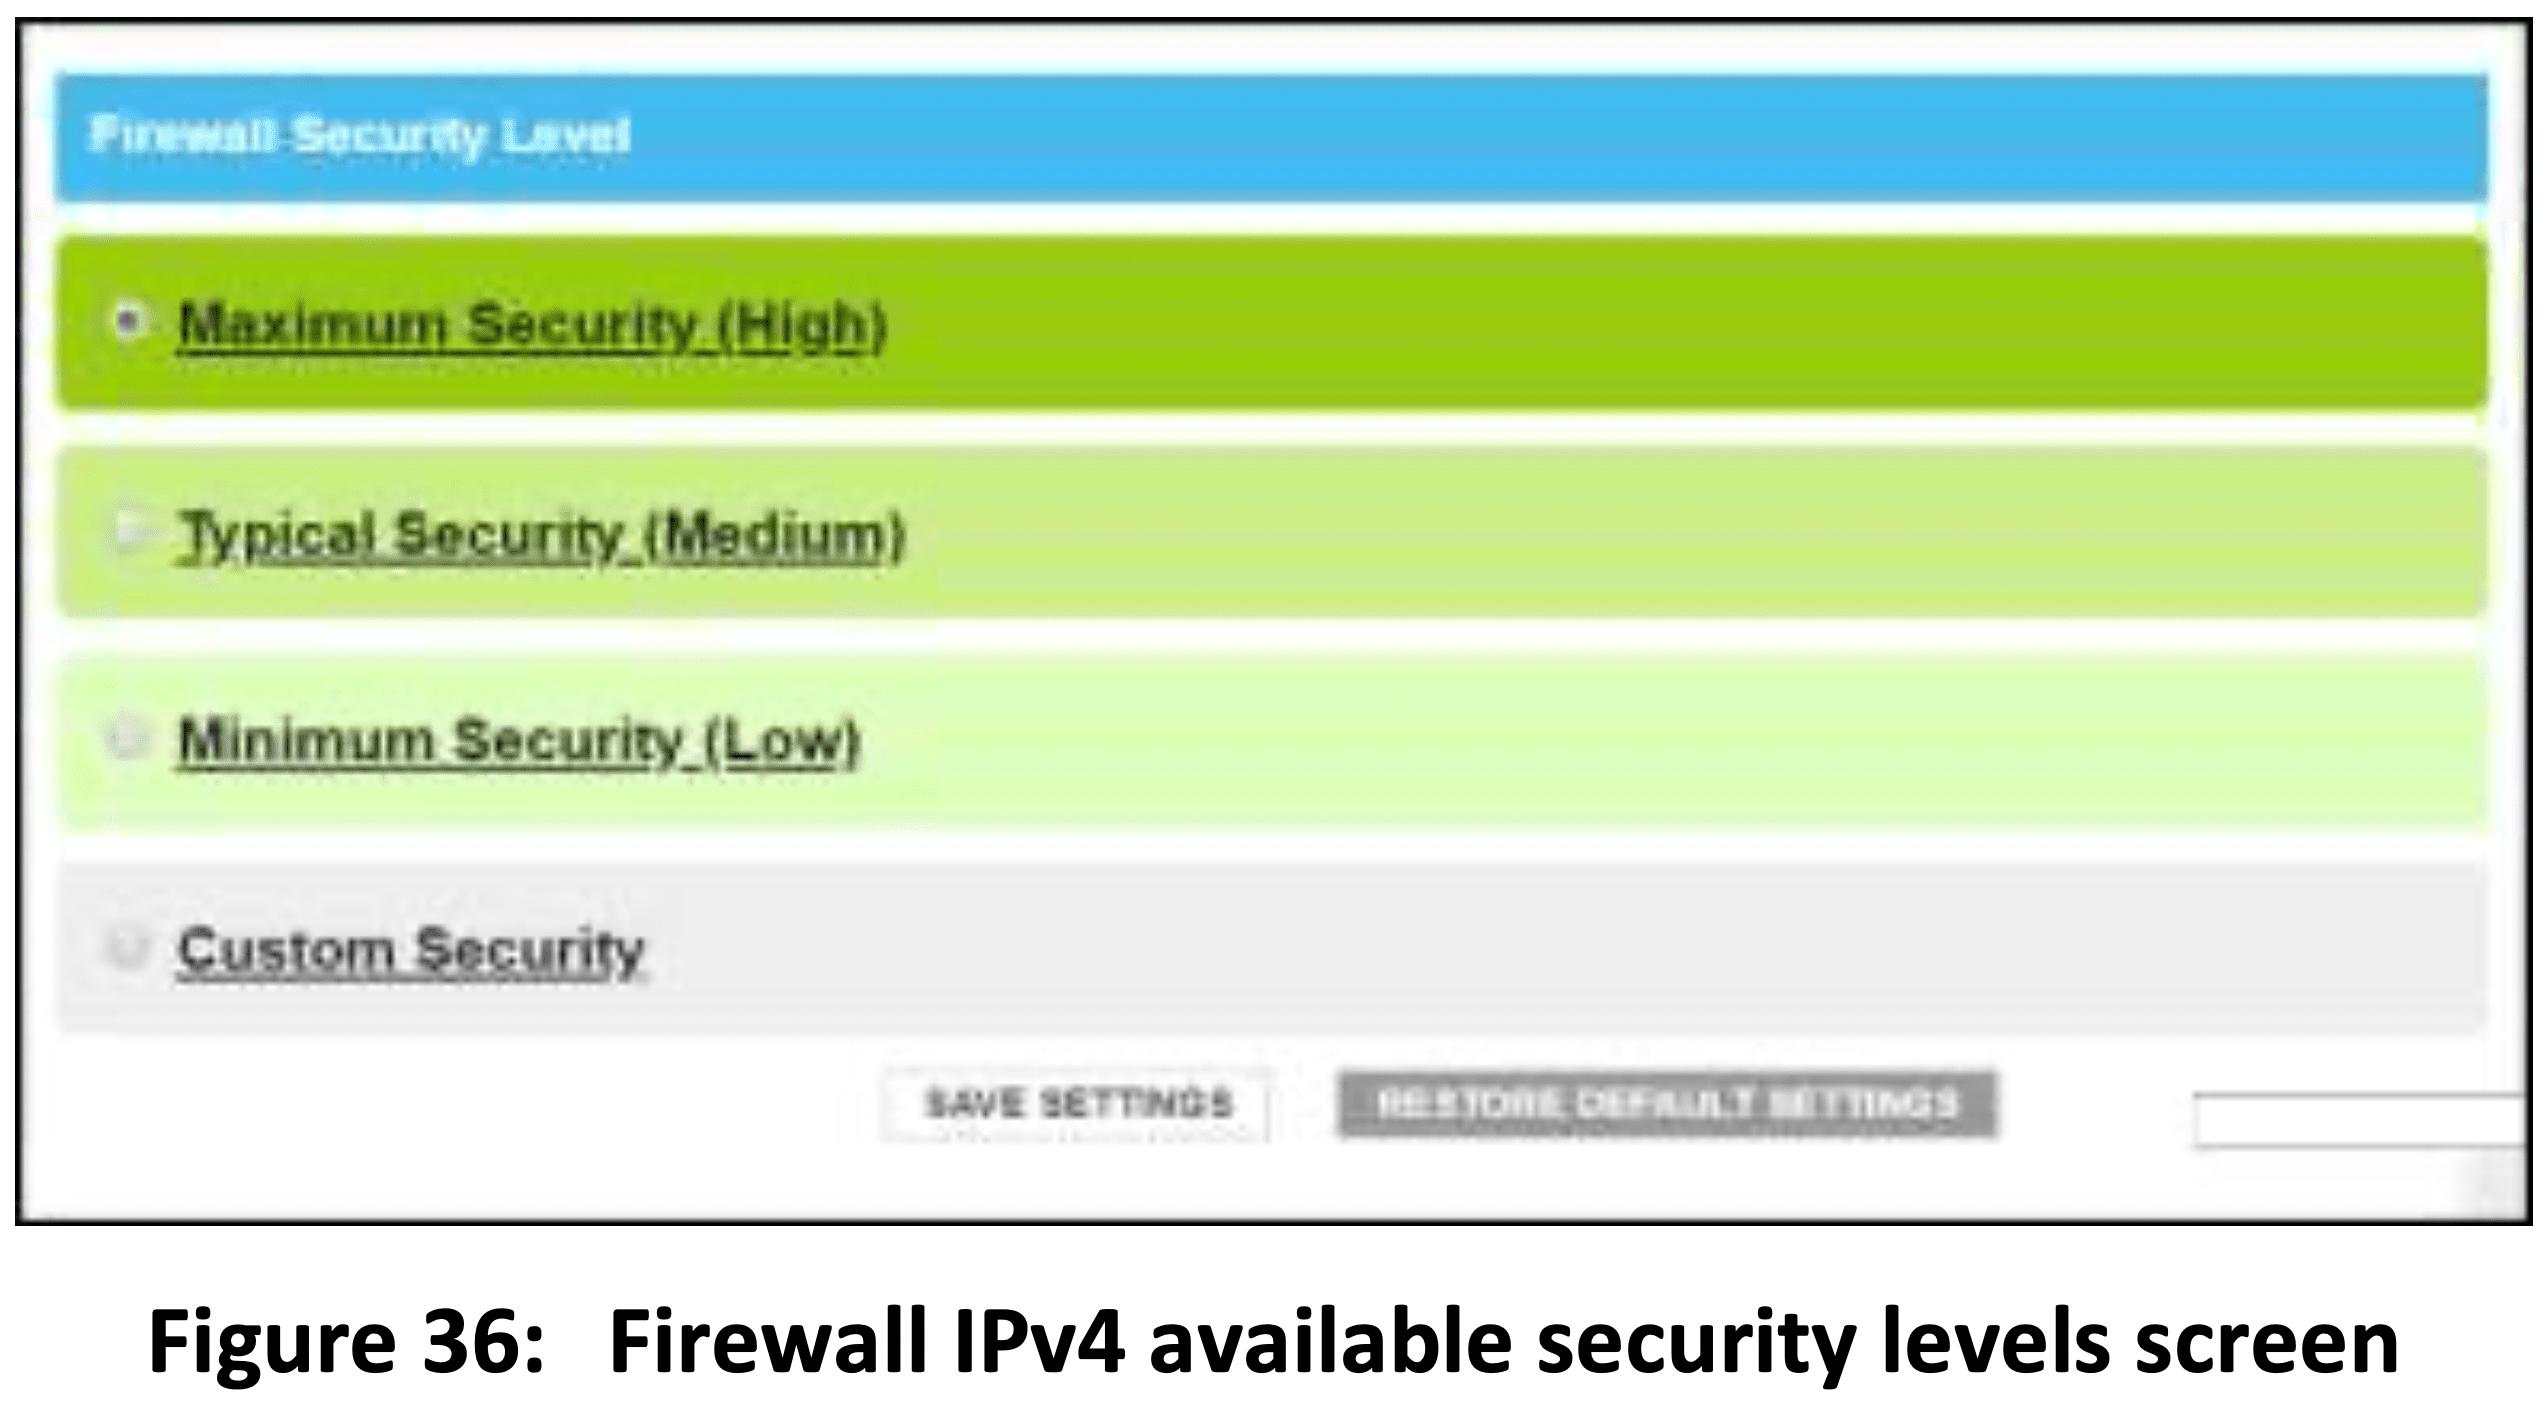
- High – Safest configuration, maximum security level

- Medium – Safer configuration, medium security level
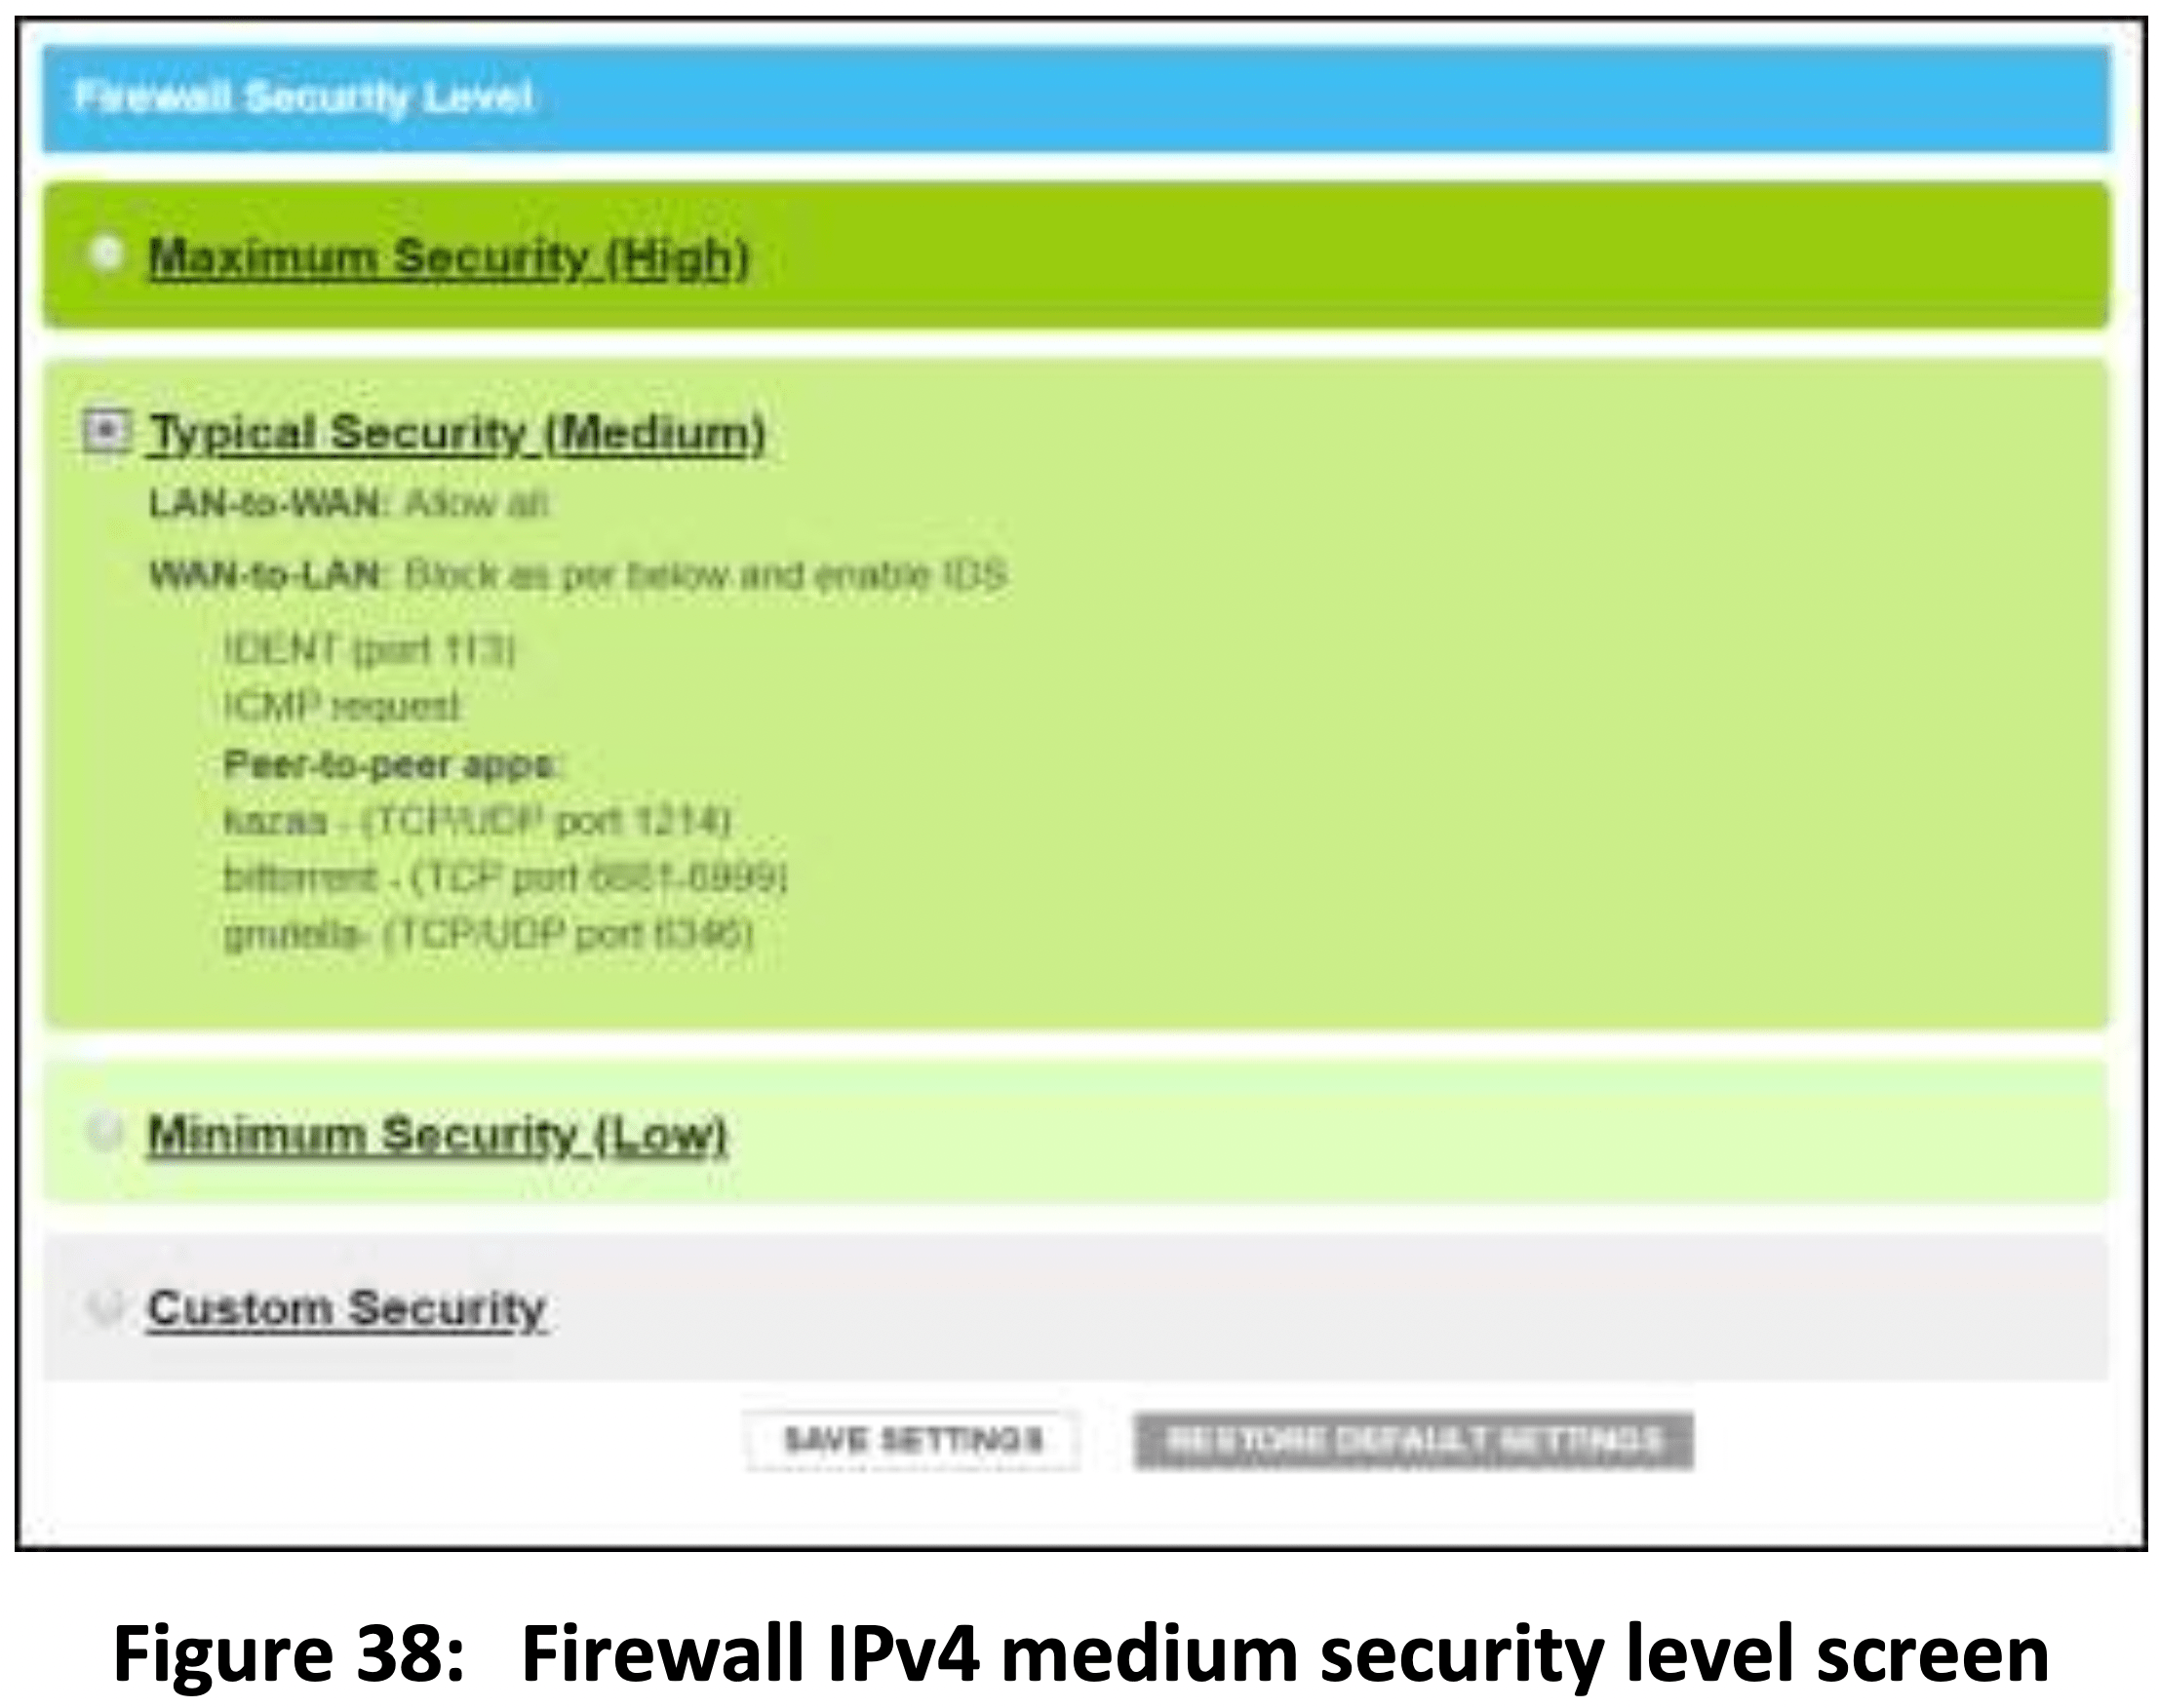
- Low – Common security, low security level, higher risk
IPv6 security
Set up parental control
You can set up the following parental controls to manage and limit the usage and activity for specific users and client devices on your home network:
- Allow or block access to specific Internet sites.
- Allow or block access to specific MAC addresses.
- Allow or block access based on specific keywords.
- Set time limitations for computer usage or Internet access.
Note: Any Parental Control filters that do not include assigned ports, will apply to all ports. This also applies to MAC addresses.
You can also link each user or client device on your home network to specific rules for login, time-access, and content filtering.
To set up Parental Control on your home network:
1. From any SBG8300 Web Manager screen, click the Parental Control menu link on the SBG8300 Web Manager screen.
2. Click Managed Sites from the Parental Control submenu options list to display the Parental Control Managed Sites screen.
3. Click the Managed Sites Enable button to turn ON website and keyword blocking.
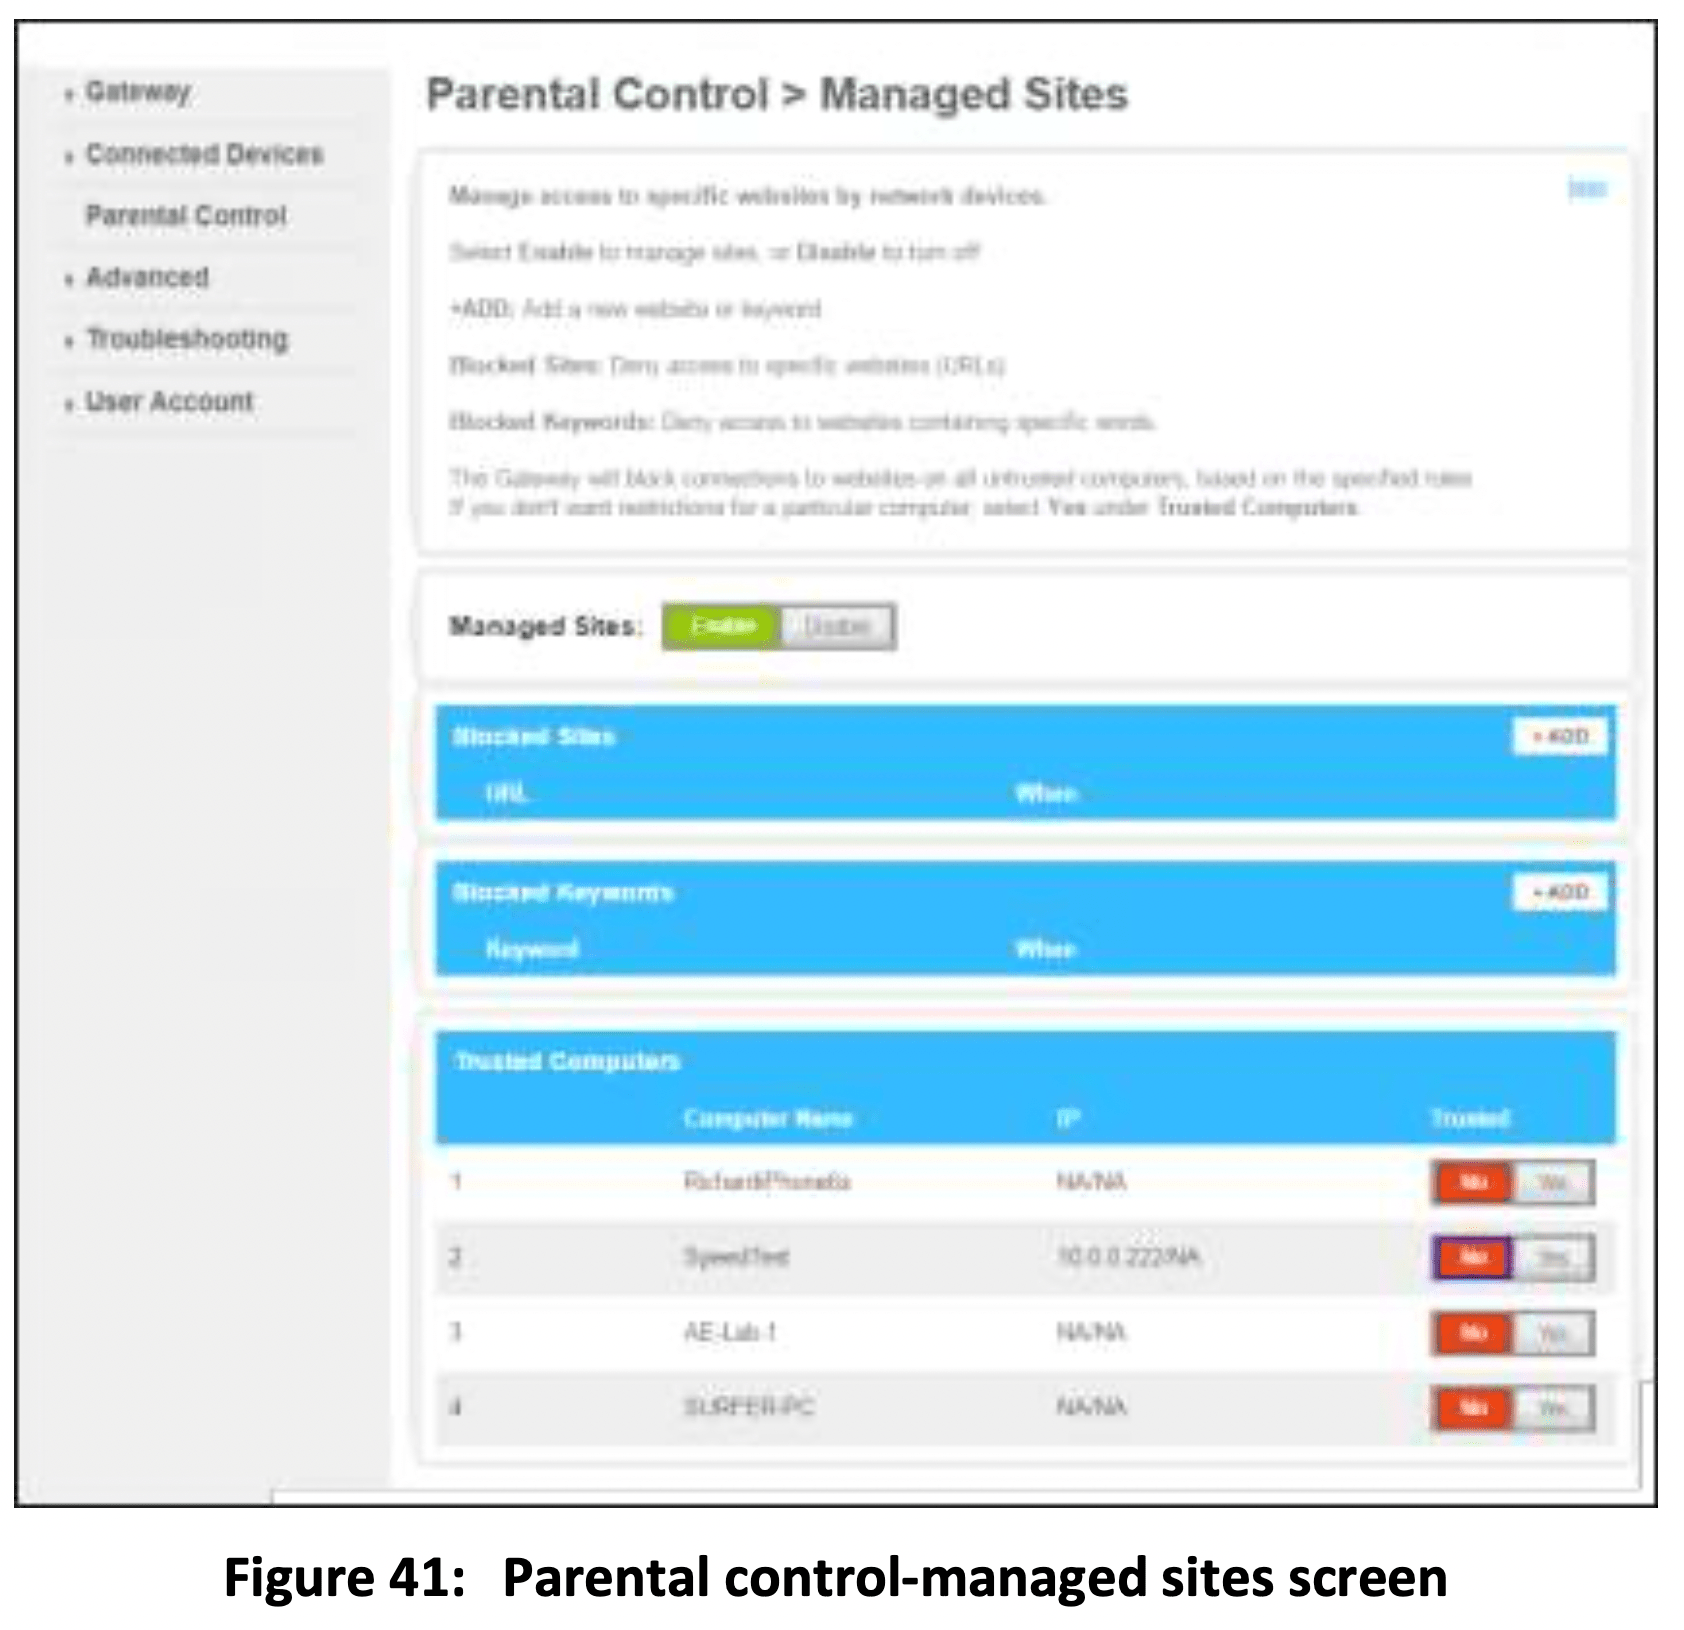
4. Click +ADD button in the Blocked Sites section to open the Add Site to be Blocked screen.
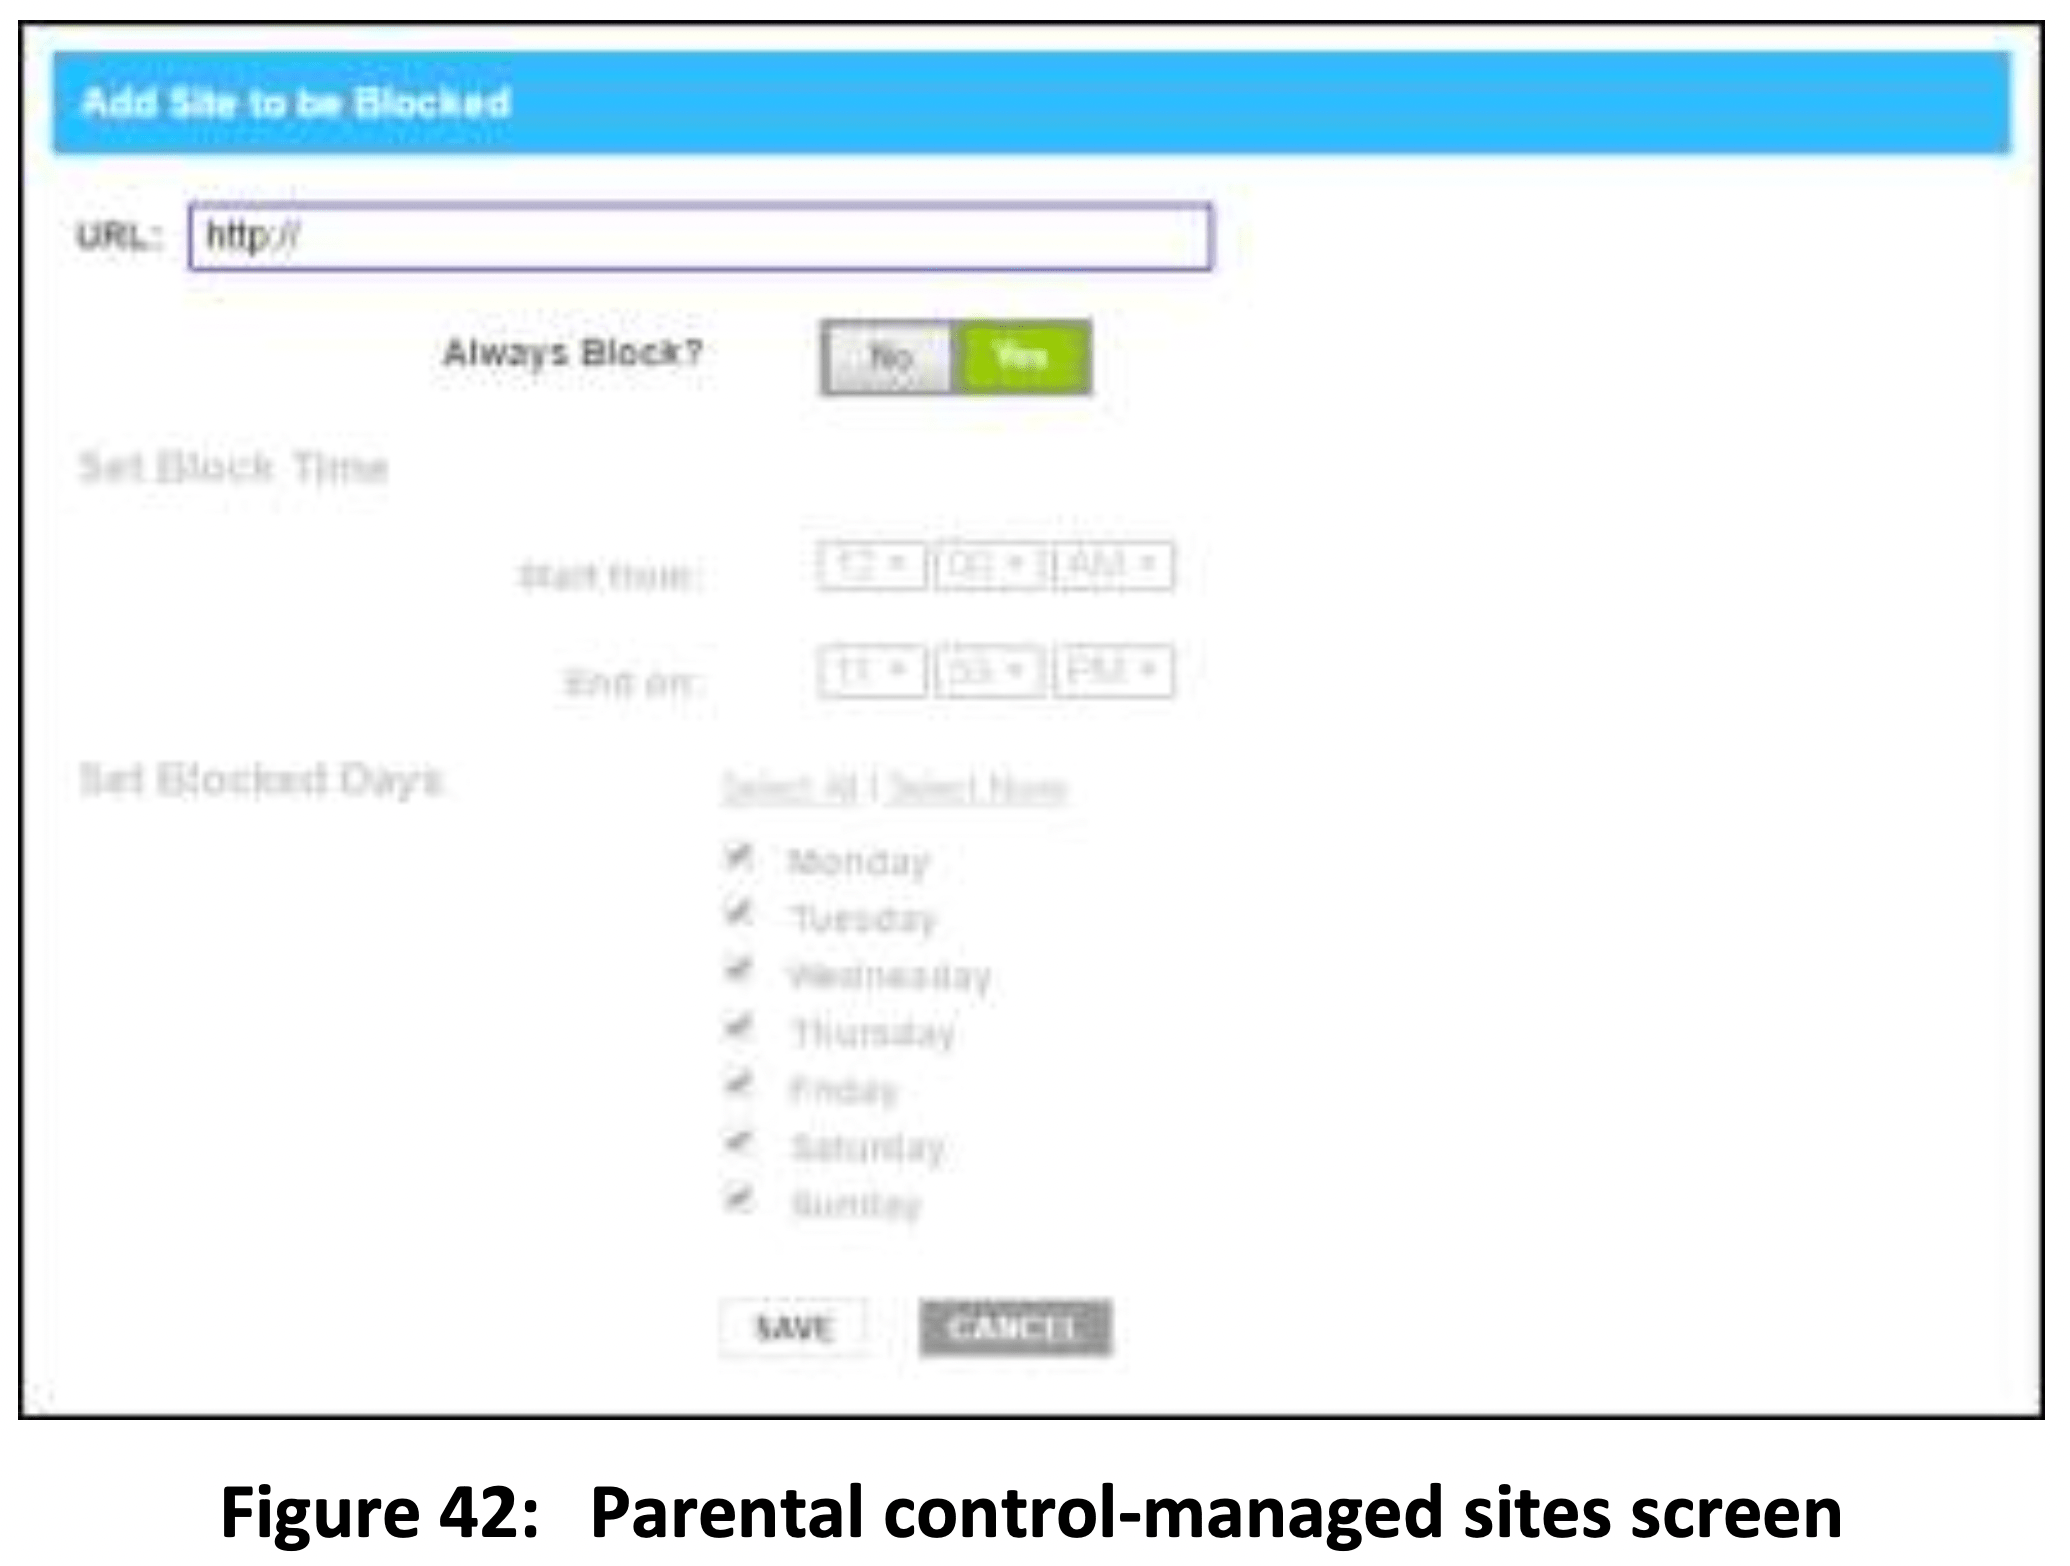
5. To fully block a website, enter the website address in the URL field and then click the Yes Always Block? button.
6. Click SAVE.
7. Repeat steps 5 and 6 for each website that you want to block.
8. To block a website for specific days and times, enter the website address in the URL field and then click the No Always Block? button.
9. Select the Start from and End on times of the day in the Set Block Time section.
10. Select the days of the week in the Set Blocked Days section.
11. Click SAVE.
Troubleshooting tips
Solutions
| Cable Modem Problem |
Possible Solution |
| Cannot send or receive data |
- Check each end of the coaxial cable connection on the Wi-Fi cable modem and cable wall outlet.
- Use your hand to tighten each connector, if necessary.
- Check the Ethernet cable (if connected) to make sure it is properly connected to your Wi-Fi cable modem and computer. If you have cable television service, check your television to ensure your cable service is operating properly.
- If none of the above solutions resolves the problem, contact your service provider or call ARRIS Technical Support at 1-877-466-8646 for assistance.
|
|
Cannot Access the Internet
|
- Check that all cable and power connections on your Wi-Fi cable modem and computer are properly connected.
- Check that the Online and Wi-Fi LED icons on the front panel are lit up solid.
- Contact your service provider for assistance.
|
|
Wi-Fi devices cannot send or receive data
|
- If the problem continues after checking the coaxial cable and Ethernet connections and your IP address, check the Wi-Fi Security Mode setting on the Gateway Wi-Fi Connection screen.
- If you enabled Wi-Fi security and configured a passphrase on the Wi-Fi cable modem, be sure each affected Wi-Fi client has the identical passphrase. If this does not solve the problem, check if the Wi-Fi client supports the selected Wi-Fi security method.
|
Front panel LED icons and error conditions
| Led Icon |
Status |
If, During Startup |
If, During Normal Operation |
 |
OFF
BLINKING
|
Wi-Fi cable modem is not properly plugged into the electrical wall outlet.
IP registration is unsuccessful.
|
Wi-Fi cable modem is unplugged
IP registration is lost.
|
 |
OFF
SLOW
BLINKING
|
LED is disabled (not working).
Green: No clients found (5 GHz or dual-band).
Blue: No clients found (2.4 GHz band only).
|
LED is disabled (not working). |