
Loading ...
Loading ...
Loading ...
Zip HydroTap Installation and Operating Instructions - 89585 - March 2016 v2.03 Page 9 of 16
- Fit the pressure limiting valve to the outlet side of the isolating valve (not
supplied).
- Mount the filter and flush valve assemblies in a convenient position using the
angle bracket supplied. Connect the filter assembly plumbing between the
pressure limiting valve and the inlet of the undersink unit, using the ¼” JG
fittings supplied (see Figure.1 on page 8). Take note of the flow direction,
marked with an arrow on the top of the filter head.
- Ensure the fl ush valve is accessible after installation as this will be required to
fl ush water through the fi lter, when the fi lter is installed or changed.
- When commissioning, it is advisable to flush the filter for several minutes
to remove any fine filter particles or accumulated plumbing debris. Use a
bucket to collect and dispose of, the waste water.
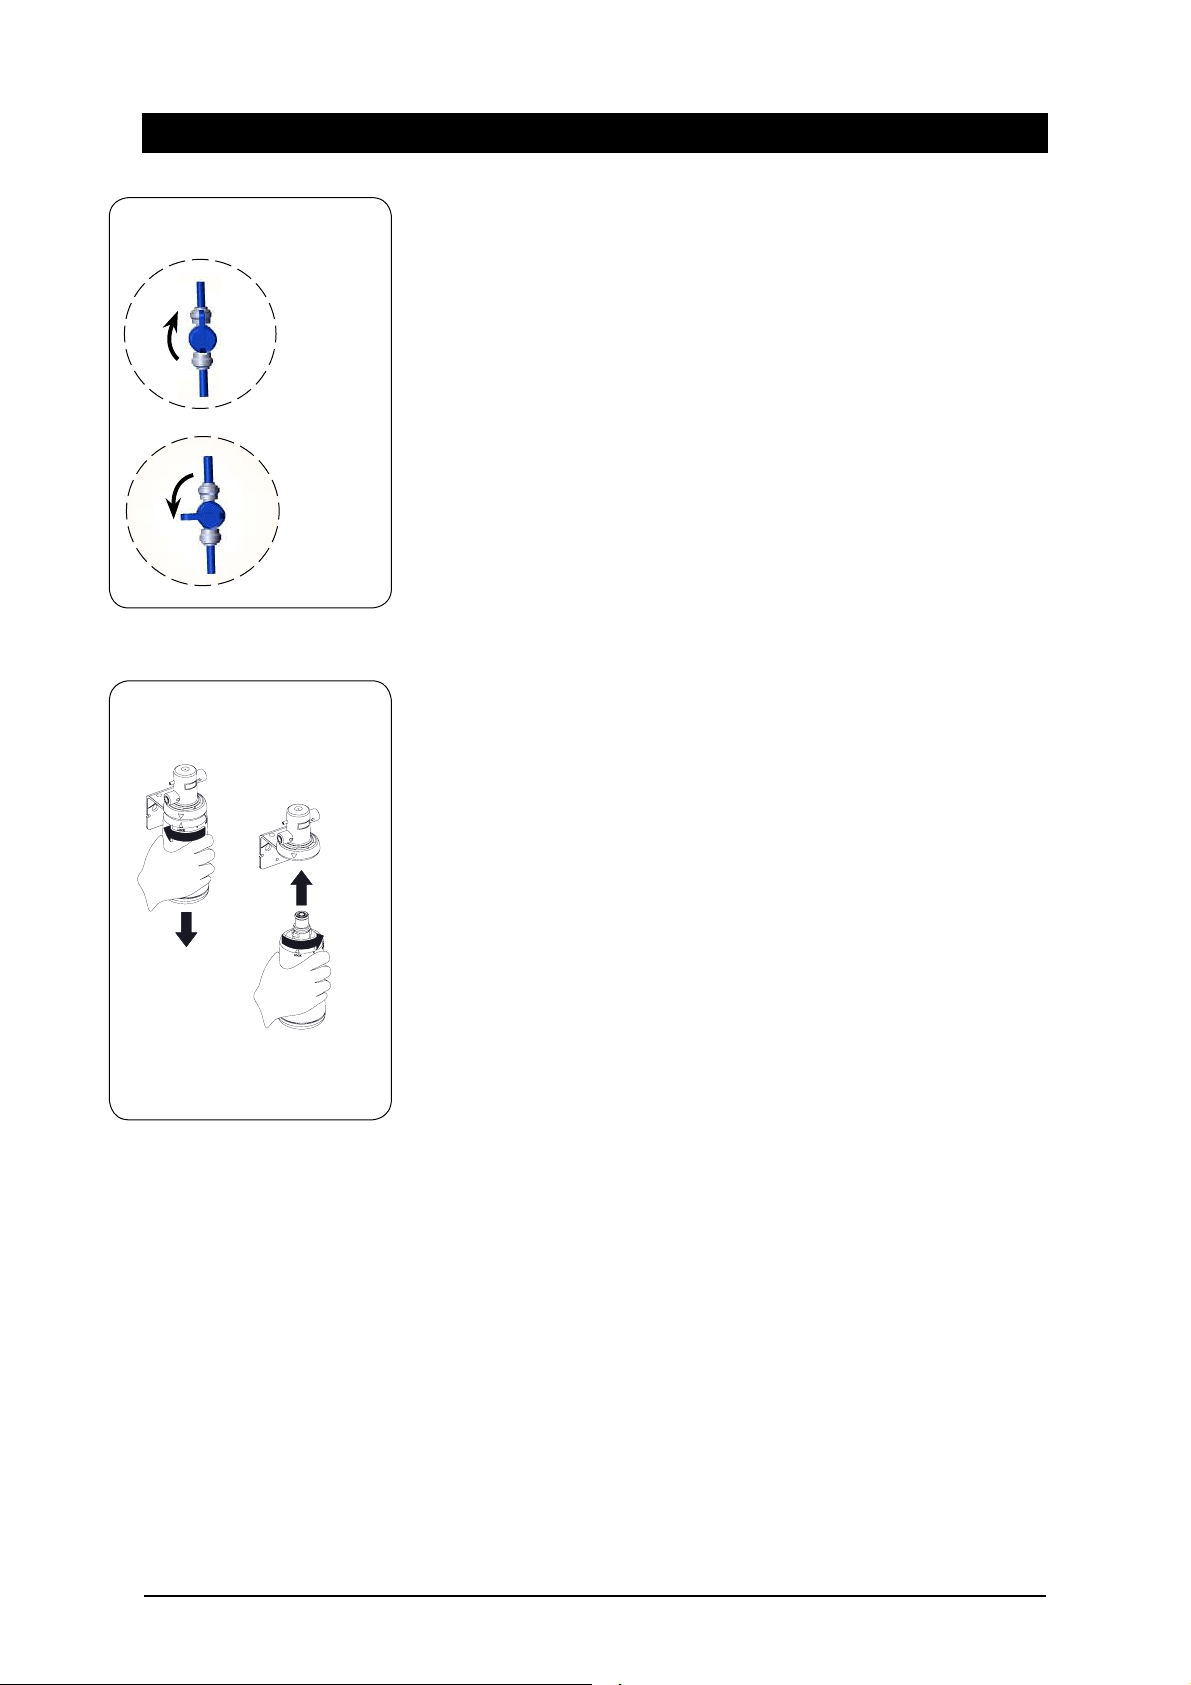
- To fl ush the fi lter, fi rst turn on the water supply and then turn on the fl ush valve
(see Fig.2) and discharge approximately 7.5L of water into the bucket.
- Once the filter has been flushed, turn the flush valve off.
Filter insertion and replacement: (see fig.3)
Align the tabs of the cartridge with the filter housing and insert it up into the
socket.
Turn the cartridge a quarter turn to the right until it locks into position.
Reverse this procedure for removal.
Step D - Connecting the tap
Measure and trim the RED tube and connect it to the hot water outlet located on
the top of the undersink unit.
Measure and trim the BLUE tube and connect it to the ambient outlet located on
the top of the undersink unit.
Measure and trim the clear tube and connect it to the vent outlet located on the
top of the undersink unit.
NOTE: All tubes must have a continuous fall back to the undersink unit.
Connect the tap USB connector to the USB port on the undersink unit. Orient the
USB plug carefully and connect, do not force the plug. Once connected, fix the
cable to the wall, ensure it is away from any possible water splashes and is off
the floor.
Note: When trimming any silicon tubes trim to minimum length, do not loop any
excess or allow kinking of the tubes. When connecting, slide the tube over the
pipe at least 15mm.
Step E - Connecting the water supply
To prevent sediment from entering the Zip HydroTap at connection, flush water
through the supply line thoroughly before connection to the Zip HydroTap.
Connect the water supply to the top of the undersink unit using the JG tube
supplied. Turn on water and check for leaks. If no leaks are evident turn the
power on.
NOTE :
New hose sets supplied with the unit should be used. Do not use old hose
sets.
Installation Procedure continued
Cartridge Replacement
Fig. 3
Filter Cartridge
Removal
Filter Cartridge
Insertion
Warning: If the Zip HydroTap is
switched off for a long period of
time (e.g. more than a weekend),
run water through the chilled
water outlet for at least 5 minutes
before consumption.
ON
OFF
Fig.2 - Flush Valve
Open position
Close position
Loading ...
Loading ...
Loading ...