■ This appliance is not intended for use by persons (including children) with reduced physical, sensory, or mental capabilities, or lack experience and knowledge, unless they have been given supervision or instruction concerning the use of appliance by a person responsible for their safety.
■ Do not use an extension cord.
■ Unplug dehumidifier before servicing.
■ Do not drink water collected in the water bucket.
■ Children should be supervised to ensure that they do not play with the appliance.
INSTALLATION REQUIREMENTS
Electrical Requirements—All Models
The electrical ratings for your dehumidifier are listed on the model and serial number label. The model and serial number label is located on the right-hand side of the dehumidifier cabinet.
Electrical Requirements
■ 115 Volts (103.5 min.-126.5 max.)
■ 0-12 amps
■ 15-amp time-delay fuse or circuit-breaker
■ If there is a “Single Circuit Only” label on the unit, use on a dedicated single-outlet circuit only. If a dedicated single-outlet circuit is not available, then it is the customer’s responsibility to have a single-outlet circuit installed by a qualified electrician.
■ If there is no “Single Circuit Only” label on the unit, the unit may be used on any branch circuit of correct voltage and adequate current protection rating.
Recommended Grounding Method
This dehumidifier must be grounded. This dehumidifier is equipped with a power supply cord having a grounded 3-prong plug. To minimize possible shock hazard, the cord must be plugged into a mating, grounded 3-prong outlet, grounded in accordance with all local codes and ordinances. If a mating outlet is not available, it is the customer’s responsibility to have a properly grounded 3-prong outlet installed by a qualified electrical installer. It is the customer’s responsibility:
■ to contact a qualified electrical installer.
■ to assure that the electrical installation is adequate and in conformance with National Electrical Code, ANSI/NFPA 70 - latest edition, and all local codes and ordinances.
Copies of the standards listed may be obtained from: National Fire Protection Association 1 Batterymarch Park Quincy, MA 02269
Installation Instructions
Remove Packaging Materials:
■ Handle the dehumidifier gently while unpacking the unit.
■ Remove the carton top and lift the dehumidifier from the base pad.
■ Remove tape and glue residue from surfaces before turning on the dehumidifier. Rub a small amount of liquid dish soap over the adhesive with your fingers. Wipe with a damp cloth and dry.
■ Do not use sharp instruments, rubbing alcohol, flammable fluids, or abrasive cleaners to remove tape or glue. These products can damage the surface of your dehumidifier.
■ Dispose of/recycle packaging materials in an appropriate way.
Placement
This dehumidifier may be placed on a stable, level, and solid floor that will support its weight with a full bucket of water. Allow at least 12-18" (30-45 cm) of clearance from walls and furniture. Do not allow the air inlet or outlet to be covered by drapes or curtains, as it will reduce performance.
■ Use the dehumidifier in an area where the temperature will not fall below 41˚ F (5˚ C). At temperatures below 41˚ F (5˚ C), the coils can become covered with frost, resulting in reduced performance.
■ Use the dehumidifier in cooking, laundry, bathing, and dishwashing areas that have excessive moisture.
■ Use the dehumidifier to prevent moisture damage anywhere books or valuables are stored.
■ Use the dehumidifier in a basement to help prevent moisture.
■ The dehumidifier must be operated in an enclosed area to be most effective.
■ Close all doors, windows, and other outside openings in the room.
Electrical Connection
Plug into grounded 3 prong outlet
Caster Installation
1. Remove casters from bucket
Remove the casters from the bucket.
2. Install casters
Tilt the dehumidifier at no more than a 45-degree angle. With force, insert the four casters into the caster locations at the bottom of the dehumidifier. Make sure the ring around the caster is flush against the bottom of the dehumidifier.
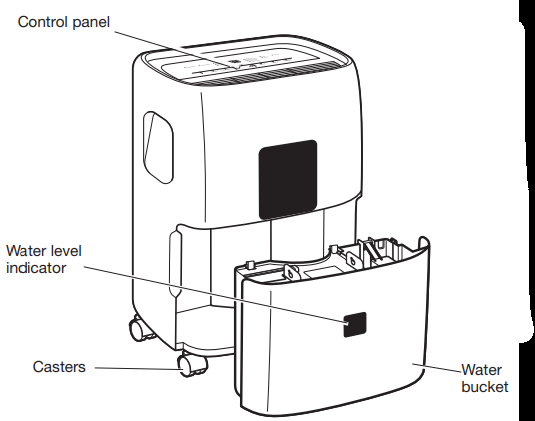
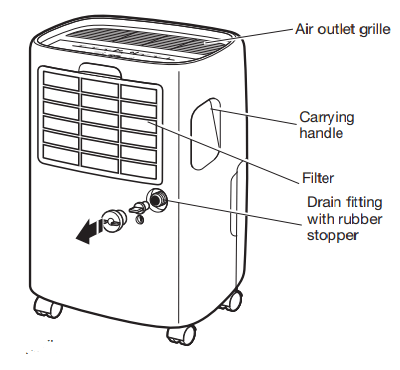
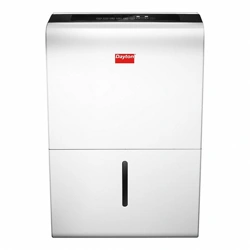
PARTS AND FEATURES
USING YOUR DEHUMIDIFIER
Turning the Dehumidifier on or off
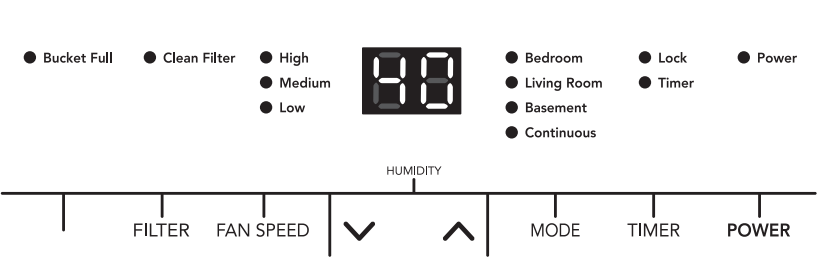
When you first plug in the dehumidifier, it will beep once and the display will show the current temperature and relative humidity level. Press POWER to turn the dehumidifier on or off.
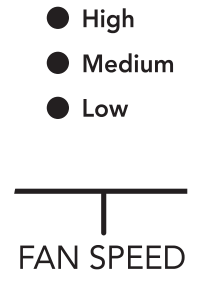
Selecting the Fan Speed
The Fan Speed has 3 settings:
■ Low
■ Medium
■ High
Press the FAN SPEED button until the indicator light for the desired setting is lit.
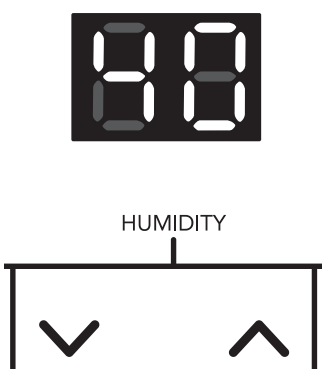
Selecting the Humidity Level
Press the up or down arrow button to increase or decrease the humidity setting. The relative humidity level can be adjusted between 35% and 80%. Each press of the button will change the desired room humidity by 5%. The unit will cycle on and off to maintain the humidity level chosen on the digital display. To operate the dehumidifier continuously regardless of the room humidity, press the Mode button until you see “CO” on the digital display. This will enable continuous operation and the “Continuous” indicator will light up on the control panel.
Using the Timer
Auto Shut-Off
You can set the dehumidifier to shut off automatically after a set amount of time, up to 24 hours.
To set Auto Shut-Off:
1. With the dehumidifier on, press TIMER.
2. Press the up or down arrow button to increase or decrease the timer in 30 min increments (0.5 hours) up to 10 hours. After 10 hours, each press of the button will increase the timer in 1-hour increments up to 24 hours.
3. After the set time, the dehumidifier will turn off automatically.
Auto Start
You can set the timer to start the dehumidfier automatically after a set amount of time, up to 24 hours.
1. With the dehumidfier off, press TIMER.
2. Press the up or down arrow button to increase or decrease the timer in 30 min increments (0.5 hours) up to 10 hours. After 10 hours, each press of the button will increase the timer in 1 hour increments up to 24 hours.
3. After the set time, the dehumidfier will start automatically with the last humidity and fan settings used.
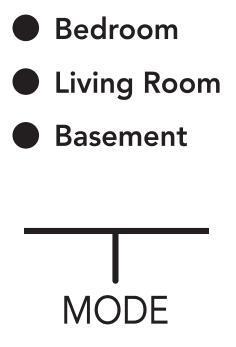
Preset Modes
Preset humidity level settings allow the user to easily move the dehumidifier from room to room. For optimum performance, select the corresponding mode for the location in which the dehumifier is operating. Press the MODE button to choose from Bedroom, Living Room, or Basement.
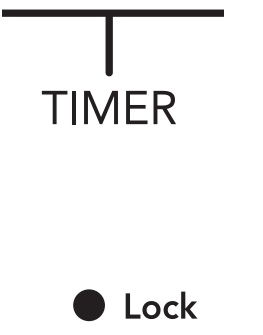
Child Lock Mode
Locking the control panel prevents someone from accidentally changing the settings.
1. To lock the control panel, press and hold TIMER for 3 seconds. The Lock indicator will light up.
2. To unlock the control panel, press and hold TIMER for 3 seconds. The Lock indicator will turn off.
Bucket Full Indicator
When the water bucket is full of water, the unit will automatically shut off, make a beeping noise, and the Bucket Full Indicator will light up. See the “Emptying the Water Bucket” section for more information.
Clean Filter Indicator
After 250 hours of use, the Clean Filter indicator will light up to indicate that the filter needs to be cleaned. See the “Cleaning the Filter” section for more information
Automatic Defrost
If the dehumidifier operates for an extended time in low temperatures, ice may form on the cooling coils. If this happens, the dehumidifier compressor will turn off and the fan with run until the accumulated ice has melted. When the coils are completely defrosted, the compressor or fan (depending on the model) will automatically restart and dehumidification will resume.
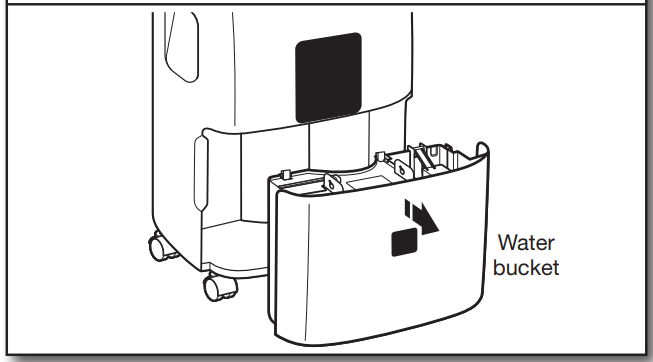
Emptying the Water Bucket
When the water collection bucket is full, the Bucket Full indicator will light and the dehumidifier will turn off. The dehumidifier will not function until the water bucket is emptied and replaced. When the bucket is removed from the machine, the compressor will turn off, but the fan will continue to run for a few miinutes. This is normal. The dehumidifier will not be removing moisture from the air at this time.
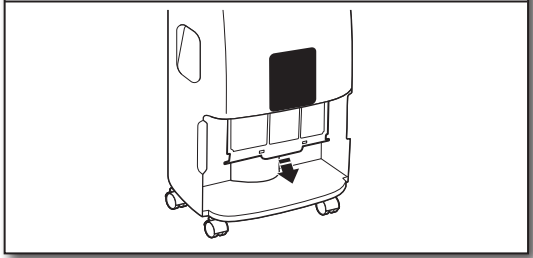
1. Remove water bucket
Remove the water bucket by pulling straight out from the bottom front of the dehumidifier. The bucket features a convenient carry handle for easier transport.
2. Empty water bucket
Continuous Mode and Drain Hose Connection (optional)
The Continuous mode allows the unit to run continuously (depending on the selected humidity level) without having to empty the water bucket.
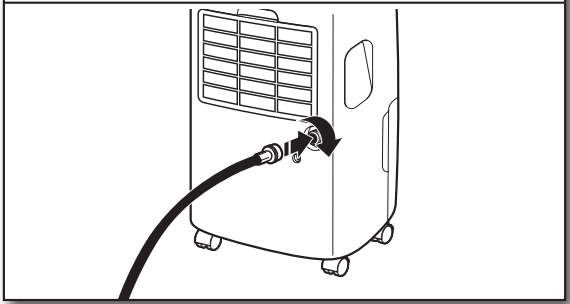
To drain continuously, attach a hose (not included) for water drainage into a floor drain.
The drain fitting uses a standard garden hose connector. The drain hose must be below the drain port on the back of the dehumidifier to ensure proper drainage.
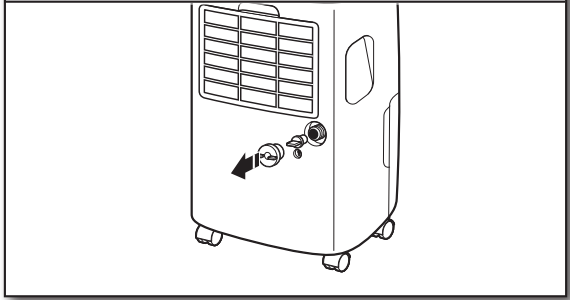
1. Remove drain fitting plug
Place the dehumidifier on a level surface. Unscrew the cap on the back of the unit to access the drain fitting.
2. Install drain hose
Thread the drain hose (not included) onto the drain fitting on the dehumidifier. Lead the rest of the hose to a floor drain and cut to length (no longer than 6’ long). Make sure that there are no kinks or knots in the garden hose. Turn on the unit and press the Mode button until set to Continuous mode.
CARE AND CLEANING
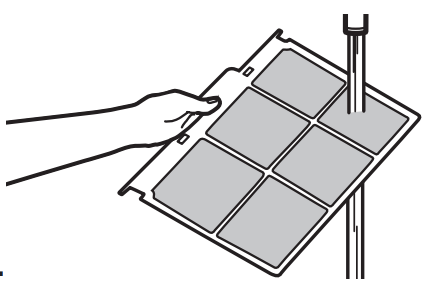
Cleaning the Filter
The filter is removable for easy cleaning. A clean filter helps remove dust, lint, and other particles from the air and is important for best operating efficiency. Check the filter every two weeks to see whether it needs cleaning
Remove the filter
Remove the filter from back of the unit by using your thumbs to press down on the tabs directly above the filter.
Reinstalling the filter:
1. Wait until the filter is completely dry.
2. Reinstall the filter in the dehumidifier.
3. Press the Filter button to reset the filter indicator.
Cleaning the Dehumidifier Cabinet
1. Turn off the dehumidifier.
2. Wipe the dehumidifier cabinet with a soft, damp cloth.
3. Wipe dry with soft cloth.
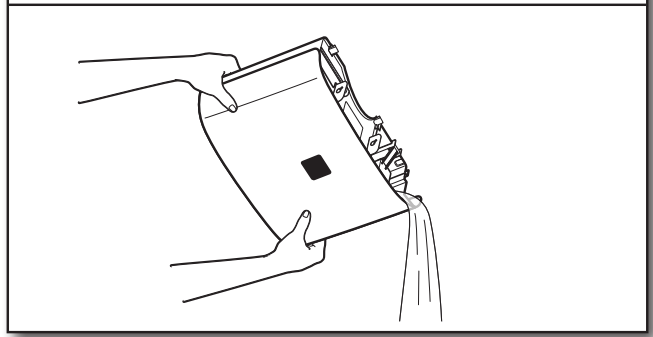
Cleaning the Water Bucket
The water bucket should be cleaned every few weeks to prevent mold and mildew growth.
1. Remove the water bucket.
2. Wash the bucket with a mixture of warm water and a mild detergent.
3. Rinse well, then reinstall water bucket.
Storing the Dehumidifier
If the dehumidifier will not be used for an extended period of time, prepare it for storage with the following steps.
1. Turn off the dehumidifier and unplug it.
2. Empty the bucket.
3. Remove, clean, and reinstall the filter.
TROUBLESHOOTING
PROBLEM
POSSIBLE CAUSES
RECOMMENDED SOLUTIONS
The Dehumidifier Will Not Start
The dehumidifier is unplugged.
Make sure the power supply cord is plugged into a grounded 3 prong outlet. See the “Electrical Requirements” section.
The fuse is blown/circuit breaker is tripped.
Check the house fuse/circuit breaker box and replace the fuse or reset the breaker. See the “Electrical Requirements” section.
Power failure
The unit will automatically restart when power is restored. There is a protective time delay (approximately 3 minutes) to prevent tripping of the compressor overload. The unit may not start normal cooling for 3 minutes after it is turned back on.
The dehumidifier has reached a set humidity level or the bucket is full.
The dehumidifier automatically turns off when either condition occurs. Change to a lower humidity level or empty the water bucket and replace properly
The bucket is not in the proper position.
Securely seat the bucket in place.
The Dehumidifier Is Not Drying the Air As It Should
Airflow is restricted.
Make sure there are no curtains, blinds, or furniture blocking the front of the air conditioner
The temperature control is not set correctly
Lower the set thermostat temperature
The humidity control may be set too high
For drier air, press the down arrow button to lower the percent humidity desired in the room, or set the dehumidifier to CO for maximum dehumidification.
The room is too cool.
Moisture removal works best at higher room temperatures. Lower room temperatures will reduce the moisture removal rate. Your dehumidifier is d
Doors and windows are not closed tightly
Check that all doors, windows, and other openings are securely closed.
The clothes dryer is blowing moist air into the room.
If the dryer vents into the house, the dehumidifier may not be able to keep up with the amount of moisture added to the air. The dryer vent should be vented to the outside
The dehumidifier has just been installed.
When first installed, allow at least 24 hours to reach the desired dryness.
The Dehumidifier Runs Too Much
The area to be dehumidified is too large.
The capacity of your dehumidifier may not be adequate for the room size.
Doors and windows are open.
Close all doors and windows to the outside.
Frost Appears On the Coils
The dehumidifier has recently been turned on or the room temperature is below 41° F (5° C).
This is normal. Frost will usually disappear within 60 minutes.
Controls Cannot Be Set
The compressor will turn off and the fan will automatically continue to run for approximately 3 minutes at a fixed setting.
This is normal. Wait approximately 3 minutes and set the fan speed at the desired level.
Air is moving through the unit.
This is normal.
There Is Water On the Floor
Hose connection may be loose
Check the hose connection and make sure it is tight. See the “Continuous Mode and Drain Hose Connection” section for more information.
Hose is attached but not draining.
Make sure the hose is placed so that the water will flow into a drain. See the “Continuous Mode and Drain Hose Connection” section for more information.