User manual Dehumidifier
INSTALLATION REQUIREMENTS
Electrical Requirements—All Models
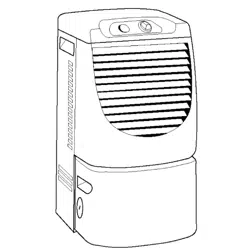
-849750.png)
The electrical ratings for your dehumidifier are listed on the model and serial number label. The model and serial number label is located on the right-hand side of the dehumidifier cabinet.
Specific electrical requirements are listed in the “Power Supply Cord Electrical Requirements” chart. Follow the requirements for the type of plug shown in the chart.
Electrical Requirements
- 115-volt (103.5 min. - 126.5 max.)
- 0-12 amps
- 15-amp time-delay fuse or circuit-breaker
-95440.png)
- If there is a “Single Circuit Only” label on the unit, use on a dedicated single-outlet circuit only. If a dedicated singleoutlet circuit is not available, then it is the customer’s responsibility to have a single-outlet circuit installed by a qualified electrician.
- If there is no “Single Circuit Only” label on the unit, the unit may be used on any branch circuit of correct voltage and adequate current protection rating.
Recommended Grounding Method
This dehumidifier must be grounded. This dehumidifier is equipped with a power supply cord having a grounded 3 prong plug. To minimize possible shock hazard, the cord must be plugged into a mating, grounded 3 prong outlet, grounded in accordance with all local codes and ordinances. If a mating outlet is not available, it is the customer’s responsibility to have a properly grounded 3 prong outlet installed by a qualified electrical installer. It is the customer’s responsibility:
- To contact a qualified electrical installer.
- To assure that the electrical installation is adequate and in conformance with National Electrical Code, ANSI/NFPA 70 - latest edition, and all local codes and ordinances.
Installation Instructions
Remove Packaging Materials:
- Handle the dehumidifier gently while unpacking the unit.
- Remove the carton top and lift the dehumidifier from the base pad.
- Remove tape and glue residue from surfaces before turning on the dehumidifier. Rub a small amount of liquid dish soap over the adhesive with your fingers. Wipe with a damp cloth and dry.
- Do not use sharp instruments, rubbing alcohol, flammable fluids, or abrasive cleaners to remove tape or glue. These products can damage the surface of your dehumidifier.
- Dispose of/recycle packaging materials in an appropriate way
Placement
This dehumidifier may be placed on a stable, level, and solid floor that will support its weight. Allow at least 21⁄2" (6.35 cm) of clearance from walls and furniture. Do not allow the air inlet or outlet to be covered by drapes or curtains, as it will reduce performance.
-895234.png)
Electrical Connection
-44101.png)
Plug into a grounded 3 prong outlet.
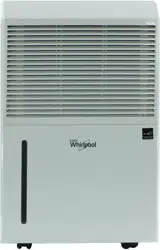
PARTS AND FEATURES
-20683.png)
USING YOUR DEHUMIDIFIER
-799259.png)
Turning the Dehumidifier ON or OFF
When you first plug in the dehumidifier, it will beep once and the display will show the current temperature and relative humidity level.
Press POWER to turn the dehumidifier ON or OFF. -507066.png)
IMPORTANT:
- If you turn off the dehumidifier, wait at least 3 minutes before turning it back on.
- Do not try to operate your dehumidifier if the temperature in the room is below 41°F (5°C) or above 95°F (35°C).
NOTE: In the event of a power failure, your dehumidifier will operate at the previous settings when the power is restored.
Display
During normal operation, display will show the current temperature and room humidity level. When the HUMIDITY/TIME -329449.png) buttons are pressed, the unit will display the set humidity or delay time.
buttons are pressed, the unit will display the set humidity or delay time. -50267.png)
Selecting the Fan Speed
The Fan Speed has 2 settings:
-617640.png)
Press the SPEED button until the indicator light for the desired setting is lit.
Selecting the Humidity Level
Press the HUMIDITY/TIME buttons to increase or decrease the humidity setting. The relative humidity level can be adjusted between 30% and 90%.
-644579.png)
Press HUMIDITY/TIME -131278.png) to increase the humidity level in 5% increments, up to 90% relative humidity. Press and hold to increase the humidity setting rapidly.
to increase the humidity level in 5% increments, up to 90% relative humidity. Press and hold to increase the humidity setting rapidly.
Press HUMIDITY/TIME -440829.png) to decrease the humidity level in 5% increments, down to 30% relative humidity. Press and hold to decrease the humidity setting rapidly
to decrease the humidity level in 5% increments, down to 30% relative humidity. Press and hold to decrease the humidity setting rapidly
Using the Timer
Auto Shut-Off
You can set the dehumidfier to shut off automatically after a set number of hours, up to 24 hours.
-557494.png)
To set Auto Shut-Off:
- With the dehumidfier ON, press TIMER.
- Use the HUMIDITY/TIME buttons select number of hours, up to 24 hours.
- After the set time, the dehumidfier will turn off automatically.
Auto Start
You can set the dehumidfier with the TIMER to start automatically after a set number of hours.
- With the dehumidfier OFF, press TIMER.
- Use the HUMIDITY/TIME buttons to select the number of hours before the dehumidifier should turn on, up to 24 hours. The TIMER indicator light will remain lit to let you know the timer is set.
- After the set time, the dehumidfier will start automatically with the last humidity and fan settings used.
Changing Units
Press the °C/°F button to change between degrees Celsius and degrees Fahrenheit in the display.
-139927.png)
Defrost Indicator
If the dehumidifier operates for an extended time in low temperatures, ice may form on the cooling coils. if this happens, the DEFROST indicator will come on, the dehumidifier compressor will turn off, and the fan with run until the accumulated ice has melted.
-38131.png)
Emptying the Water Bucket
When the water collection bucket is full, the BUCKET FULL indicator will light and the dehumidifier will turn off.
-761121.png)
-479353.png)
-872238.png)
Remove the water bucket by pulling straight out from the front of the dehumidifier. The bucket features a convenient carry handle for easier transport.
-58305.png)
Empty the water bucket into a sink or drain.
Slide the water bucket back into the dehumidifier
Drain Hose Connection (optional)
You may attach a hose (not included) for water drainage into a floor drain.
The drain fitting uses a standard garden hose connector. The drain hose must be below the drain port on the back of the dehumidifier to ensure proper drainage.
-857438.png)
Turn the drain port plug retainer counterclockwise to remove, then pull the drain plug straight out.
-488666.png)
Thread the drain hose (not included) onto the drain fitting on the dehumidifier. Insert the other end of the drain hose into a floor drain or other suitable drain.
CARE AND CLEANING
Your new dehumidifier is designed to give you many years of dependable service. This section tells you how to clean and care for your dehumidifier properly.
Cleaning the Filter
The filter is removable for easy cleaning. A clean filter helps remove dust, lint, and other particles from the air and is important for best operating efficiency. Check the filter every 2 weeks to see whether it needs cleaning.
NOTE: For best performance, do not operate the dehumidifier without the filter in place.
-381864.png)
Rinse the filter under the faucet. If the filter is very dirty, wash it in warm water with a mild detergent.
NOTE: Do not wash the filter in the dishwasher or use any chemical cleaners; it may damage the filter. Air dry the filter completely before replacing to ensure maximum efficiency
-722425.png)
1. Turn off the dehumidifier.
2. Remove the water bucket.
-107610.png)
Pull the filter straight down out of the dehumidifier.
Reinstalling the filter:
1. Reinstall the filter in the dehumidifier.
2. Slide the water bucket back into place.
Cleaning the Dehumidifier Cabinet
- Turn off the dehumidifier.
- Wipe the dehumidifier cabinet with a soft, damp cloth.
- Wipe dry with soft cloth.
Cleaning the Water Bucket
The water bucket should be cleaned every few weeks to prevent mold and mildew growth,
- Remove the water bucket.
- Wash the bucket with a mixture of warm water and a mild detergent.
- Rinse well, then reinstall water bucket. .
Storing the Dehumidifier
If the dehumidifier will not be used for an extended period of time, prepare it for storage with the following steps.
- Turn off the dehumidifier and unplug it.
- Empty the water bucket.
- Remove, clean, and reinstall the filter.
TROUBLESHOOTING
Before calling for service, try the suggestions below to see whether you can solve your problem without outside help
Dehumidifier will not operate
- The power supply cord is unplugged. Plug into a grounded 3 prong outlet. See “Electrical Requirements. ”
- A household fuse has blown, or circuit breaker has tripped.
- Replace the fuse or reset the circuit breaker. If the problem continues, call an electrician. See “Electrical Requirements. ”
- The Power button has not been pressed. Press POWER.
- The local power has failed. Wait for power to be restored.
- Water bucket is full. Empty bucket.
- Water bucket is not completely installed. Make sure the water bucket is properly installed.
Dehumidifier blows fuses or trips circuit breakers
- Too many appliances are being used on the same circuit. Unplug or relocate appliances that share the same circuit.
- Time-delay fuse or circuit breaker of the wrong capacity is being used. Replace with a time-delay fuse or circuit breaker of the correct capacity. See “Electrical Requirements.”
- You are trying to restart the dehumidifier too soon after turning off the dehumidifier. Wait at least 3 minutes after turning off the dehumidifier before trying to restart the dehumidifier.
NOTE: A damaged power supply cord must be replaced with a new power supply cord obtained from the product manufacturer and must not be repaired.
Dehumidifier seems to run too much
- The dehumidifier is in a room with very high humidity levels, or is too small for the room.
Ice forms on coils
- The dehumidifier features an automatic defrost mode that will shut off the compressor and allow the fan to run. This reduces the ice buildup on the coils. The compressor will cycle back on when the defrost sensor senses the correct operating conditions.
- The temperature of the room is too cold. Raise the room temperature or move the dehumidifier to a warmer location.
Fan runs but dehumidifier is not removing moisture
- The dehumidifier features an automatic defrost mode that will shut off the compressor and allow the fan to run. This reduces the ice build-up on the coils. The compressor will cycle back on when the defrost sensor senses the correct operating conditions.
- The filter is dirty. Clean the filter.
Error codes in display
- If E1 or E2 appears in the display, call for service.
- If LO appears in the display, the temperature in the room is too cold. Increase the room temperature or move the dehumidifier.
- If HI appears in the display, the temperature in the room is too warm. Decrease the room temperature or move the dehumidifier.
Normal Operating Sounds
When your dehumidifier is operating normally, you may hear sounds such as:
- Droplets of water hitting the condenser, causing a pinging or clicking sound. The water droplets help cool the condenser.
- Air movement from the fan.
- Clicks from the thermostat cycle.
- Vibrations or noise due to poor wall or window construction.
- A high-pitched hum or pulsating noise caused by the modern high-efficiency compressor cycling on and off.