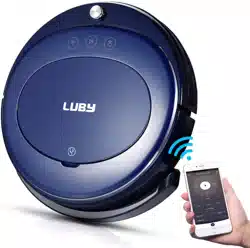
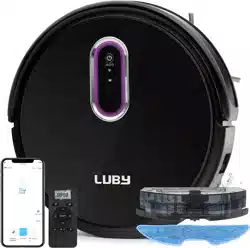
Luby HK1 Robot Vacuum Cleaner
Product's Documents
Below are documents related to this product, you can read online or download:
- Owner's manual - (English) Read Online | Download pdf

1. Main body
2. Charging station
3. Remote control
4. Adapter
5. Cleaning brush
6. Instruction Manual
7. Left / right side brush
Note: The actual product contains at least the above components. Please check the actual product.

1. Clean button
2. Bumper
3. Cover
4. Caster wheel
5. Auto charging contact
6. Battery cover
7. Cliff sensor
8. Roller brush assembly
9. Dustbin assembly
10. Bin release button
11. Adapter port
12. Drive wheel
13. Infrared signal receiver
14. Side brush

1 .Signal emitter
2.lndicator
3. Charging connector
4. Adapter port

1.Primary filter
2. HEPA filter
3. Bin top cover
4. Bin bottom cover

1 .Start/Pause
A. In standby mode, press the button and the robot starts automatic cleaning.
B. In sleep mode, press the button and the robot enters standby mode from sleep mode.
C. In working mode, press the button and the robot stops cleaning operation.
2. Direction
A. “ ” Forward:
In the standby or working mode, press the button and the robot moves forward.
B. “ ” Backward:
In the standby or working mode, the robot moves backward.
C. “ ” Leftward:
In the standby or working mode, press the button and the robot moves leftward.
D. " " Rightward:
In the standby or working mode, press the button and the robot moves rightward.
3. Auto
In the working mode, press the button and the robot starts scheduled cleaning.
4. Powerful
In the standby or working mode, press the button and the robot starts powerful cleaning.
5. Edge
In the working mode, press the button and the robot starts edge cleaning.
6. Return
In the standby or working mode, press the button and the robot returns to the charging station for charging.
1 .Properly place the charging station. Connect the adapter and the power supply, the power Indicator on the charging station will remain on.
Place the charging station against the wall and remove all obstacles within the space at least 1 m on each side and 2m in front of it.

2. Turn on the power switch on the bottom of the robot, the “Clean” button Is lit and the robot enters the standby mode.
Warning! Make sure the power switch Is ON before charging the robot, to avoid charging failure.
3. The robot can be charged in the following two ways.
1. Directly insert one end of the adapter into the robot and the other end into an outlet.

2. In the select mode. press the button “Recharge” on the remote control and the robot automatically returns to the charging station to get charged.

Note:
1. When battery power is lower than 20%, the robot automatically starts to search for the charging station to get charged.
2. The sensing range is 4m from the charging station. Make sure the charging station is ON and reduce the number of barriers as far as possible; otherwise, the robot cannot locate the charging station and get charged.
Note:
1. Operation procedure: sleep mode > standby mode > working mode
2. Start
Note:
When the robot is in the standby mode, press the clean button on the main body and the robot is wakened from the standby mode; press the clean button on the main body again and the robot starts to work.

3. Pause
Pause means that the robot is switched to the standby mode from the working mode; Pause can be realized by pressing the clean button on the main body or pressing the Start/Pause button on the remote control.
4. Standby Mode
If the machine is not operated for 20-25 seconds, the machine will automatically enters Sleep Mode.
Note:
Turn off the power switch when the robot is not used for a long time.
1. Functions of ASLAM system
ASLAM technology can realize real-time construction of 2D map and draw the cleaning path the robot has traveled, thereby determining whether the entire room has been covered. It processes the regional map of the room in real time according to the actual conditions detected in the cleaning process. The robot automatically enters the next region through auto navigation when cleaning of one region is finished, until all regions are cleaned. When regional cleaning is finished, it carries out overall edge cleaning and then returns to the charging station or the starting point. Consequently, ASLAM can realize construction of the global map and map coverage of multiple regions.
1. Small space

It carries out cleaning from the right to the left and finally along the edge, and afterwards returns to the starting point in the absence of the charging station.
2. Handling of barriers during regional cleaning

2. Framework of ASLAM system

1. Auto cleaning

Note:
You can press the Start/Pause button on the remote control or the clean button on the main body to stop, whichever cleaning mode the robot is in.
2. Powerful cleaning
Note:

3. Edge cleaning

4. Scheduled cleaning
Press the button and the robot enters the scheduled cleaning mode. The mode remains if it is not switched.

1. Download and install the “Tuya Smart” APP. You can connect your phone to the wireless network in your home, and then search for “Tuya Smart” in Application Store to download and install.
2. Register with mobile phone / E-mail. Enter your mobile phone number / E-mail firstly, after receiving the verification code, enter the password to complete registration.

3. Add floor mopping robot
Enter “Tuya Smart” APP, click “Add Device” on homepage or click “+” in upper right corner to enter device adding interface. Choose “Small Home Appliance”, then choose “Robot Vacuum”.

4. General Connection mode Please long press the “AUTO” button on host for 3-5 seconds, release “AUTO” button after you have heard “ding-dong” sound for one time. At this time, the host indicator is blinking fast. Click “Confirm indicator rapidly blink” button and enter the password of the WiFi connected. Click “Confirm” to enter connection waiting status. If the mobile phone prompts the connection fails, please repeat the above steps.

5. Compatible connection mode
If the product can't be connected under general connection mode, please try the compatible connection mode. Please long press the “AUTO” button on host for 8-10 seconds and release the button after you have heard “ding-dong” sound for two times. At this time, host indicator is blinking slowly. Click “Confirm indicator slowly blink” button and enter the password of the WiFi connected. Click “Confirm” to enter network setting interface, enter mobile phone wifi setting, select “Connect to SmartLift-xxxx”, then return to “Tuya Smart” APP. Enter network connection waiting state. If the mobile phone prompts that the connection fails, please repeat the above steps.

6. Device is added successfully.
After the device is added successfully, click “Completed” button to enter device list, then click the floor mopping robot added to enter the operation interface.

7. Make an appointment for cleaning
Click the “Schedule cleaning” button in operation interface to enter the appointment timing addition interface. Click “Add Schedule” button to select the startup time and number of repetition days. Once the scheduled time is reached, the host will start cleaning. You can delete the cleaning time scheduled just by deleting it in timing list.

8. Other interfaces
A. Personal center: you can set your user nickname on this page, share the device to your friends and make feedback for use opinions.
B. More interface: you can modify the device name on this page, learn about device information, make feedback for users’ opinion, and remove the device.

Clean dirty brushes with clean water and dry them in the air before use. Replace damaged brushes that cannot function properly.
Note:
For the replacement of side brushes, match L and R markings on the brushes with the corresponding positions on the bottom of the robot.


Note


Note:
All maintenance work shall be carried out with the dustbin removed as far as possible, to avoid accidental spill of dust from the dustbin.

Note: