Loading ...
Loading ...
Loading ...
11
The drum of your new washer spins at very high speeds.
To minimize vibration, noise, and unwanted movement,
the oor must be a level, solid surface.
NOTE: Adjust the leveling feet only as far as necessary
to level the washer. Extending the leveling feet more than
necessary can cause the washer to vibrate.
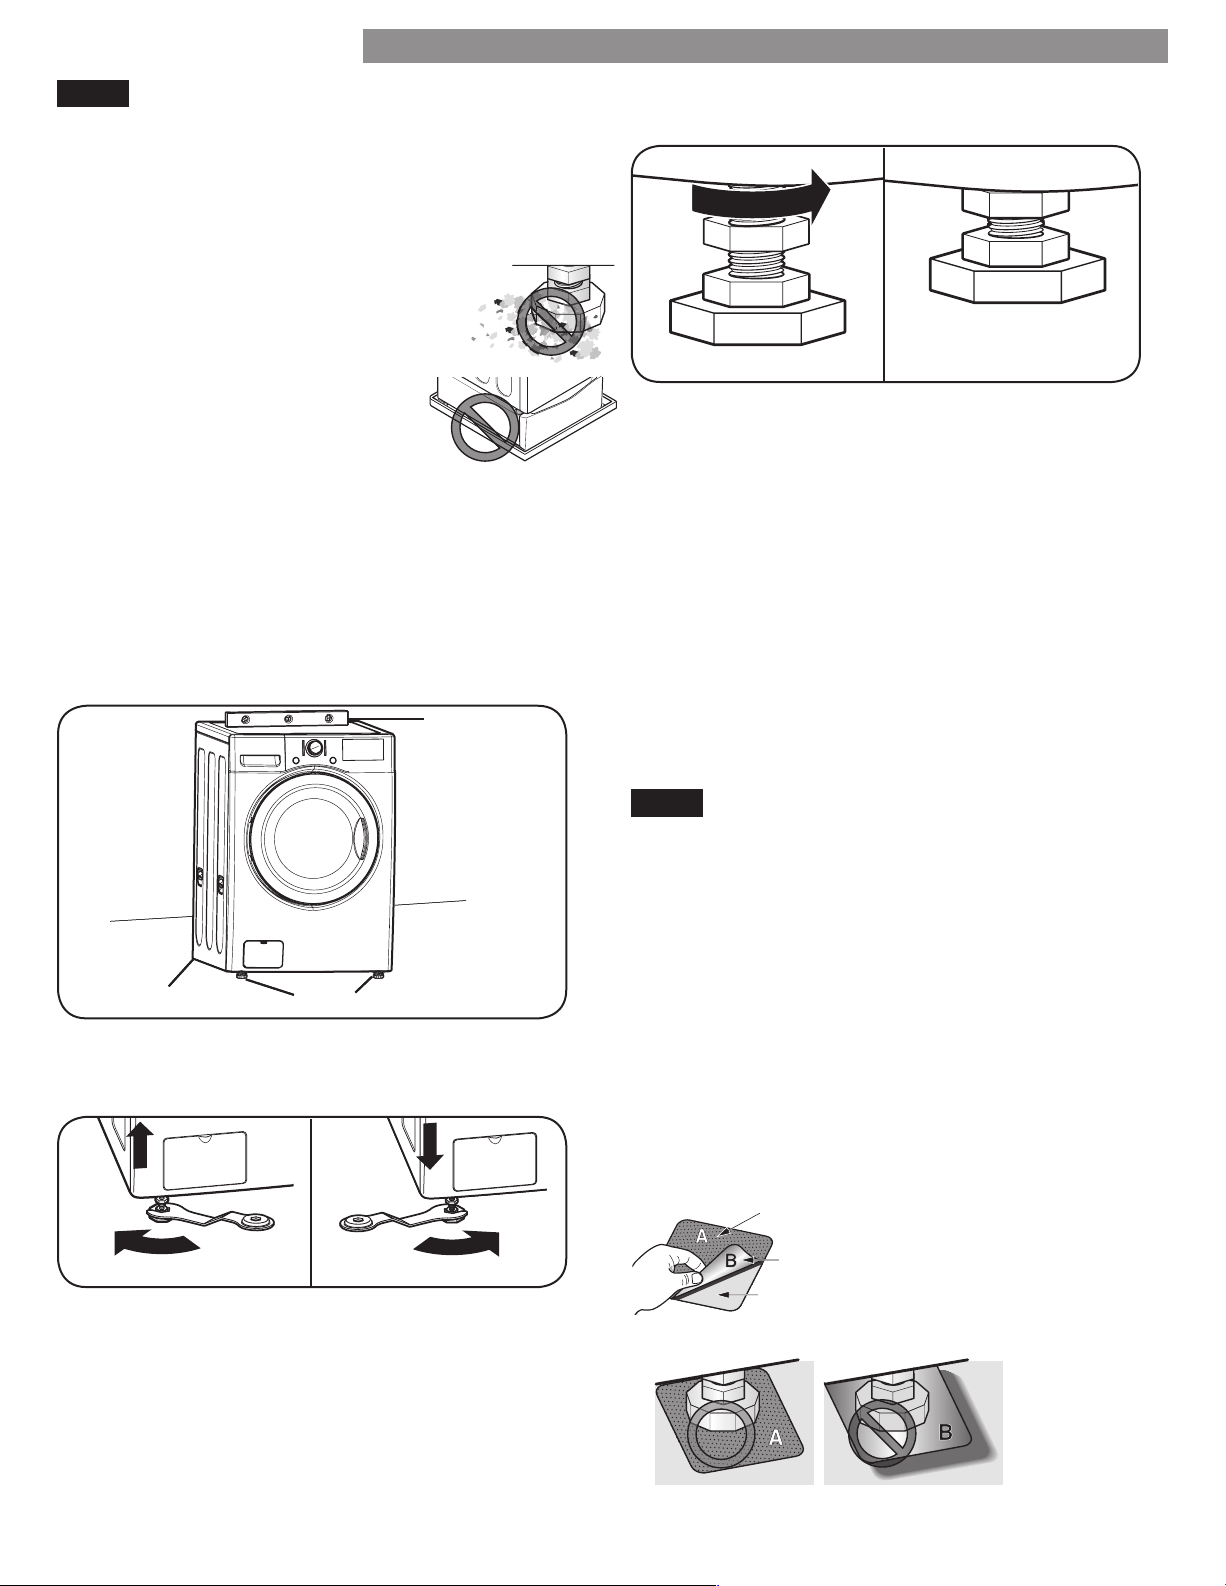
NOTE: Before installing the washer, make
sure that the oor is clean, dry and free of
dust, dirt, water and oils so the washer feet
cannot slide easily. Leveling feet that
move or slide on the oor can contribute
to excess vibration and noise due to
poor contact with the oor. See
INSTALLATION OF NON-SKID PADS
for more information.
NOTE: If a drip pan must be used, make sure to follow
the instructions provided with the drip pan and make
sure the leveling feet are adjusted for rm and even
contact with the pan. Use of drip pans and failure to
properly level the machine may result in increased
vibration and noise during operation.
All four leveling feet must rest solidly on the oor. Rock
the washer from corner to corner to make sure that all
four leveling feet are in rm and even contact with the
oor.
Position the washer in its nal location, taking special
care not to pinch, strain, or crush the water and drain
lines. Place a level across the top of the washer.
Raise Lower
Loosen the locknuts on all four leveling feet with the
wrench until you can adjust the feet (wrench appearance
may vary). Use the wrench to turn the feet clockwise
to raise the washer, and counterclockwise to lower the
washer. Using a level, adjust the feet until the washer is
level from side to side and front to back. Make sure that
all four feet are in rm contact with the oor.
NOTE: If you are installing the washer on the optional
pedestal, the washer leveling feet should be fully retracted.
Use the leveling feet on the pedestal to level the washer.
Tighten all 4 lock nuts
securely using the
wrench.
3. Once the washer is level from side to side and front
to back, use the adjusting wrench to tighten all four
lock nuts securely to prevent the legs from getting out
of adjustment during operation. Make sure that all
four leveling feet are in rm contact with the oor.
NOTE: To make sure that the washer is properly level,
run the washer with a test load: place a medium-sized
load of laundry in the machine. Then, press POWER,
select RINSE & SPIN, and press the START/PAUSE
button.
See the following sections for additional information
on cycle selection and operation. Verify that the
washer does not rock or vibrate excessively during
the spin cycle. If the washer vibrates or shakes, adjust
the leveling feet, while the washer is spinning, until the
vibrations are reduced.
INSTALLATION OF NON-SKID PADS
(optional)
Some oor surfaces are too slippery to prevent the
washer from moving on the oor during heavily
unbalanced loads. While it is normal for an occasional
load to be out of balance, excess noise and vibration
can result from the washer moving out of position. If
these conditions are encountered, follow the instructions
below for installation of the non-skid pads. These pads
will help prevent the washer from moving during heavy,
out of balance conditions, thereby reducing noise and
vibration.
NOTE: Non-skid pads are included in the installation
packet.
Non-skid pads
Level
Leveling Feet
Leveling Feet
INSTALLATION INSTRUCTIONS
This side up
Stick adhesive side to oor
Remove backing
*
Loading ...
Loading ...
Loading ...