Loading ...
Loading ...
Loading ...
Functional overview
Before you start
8
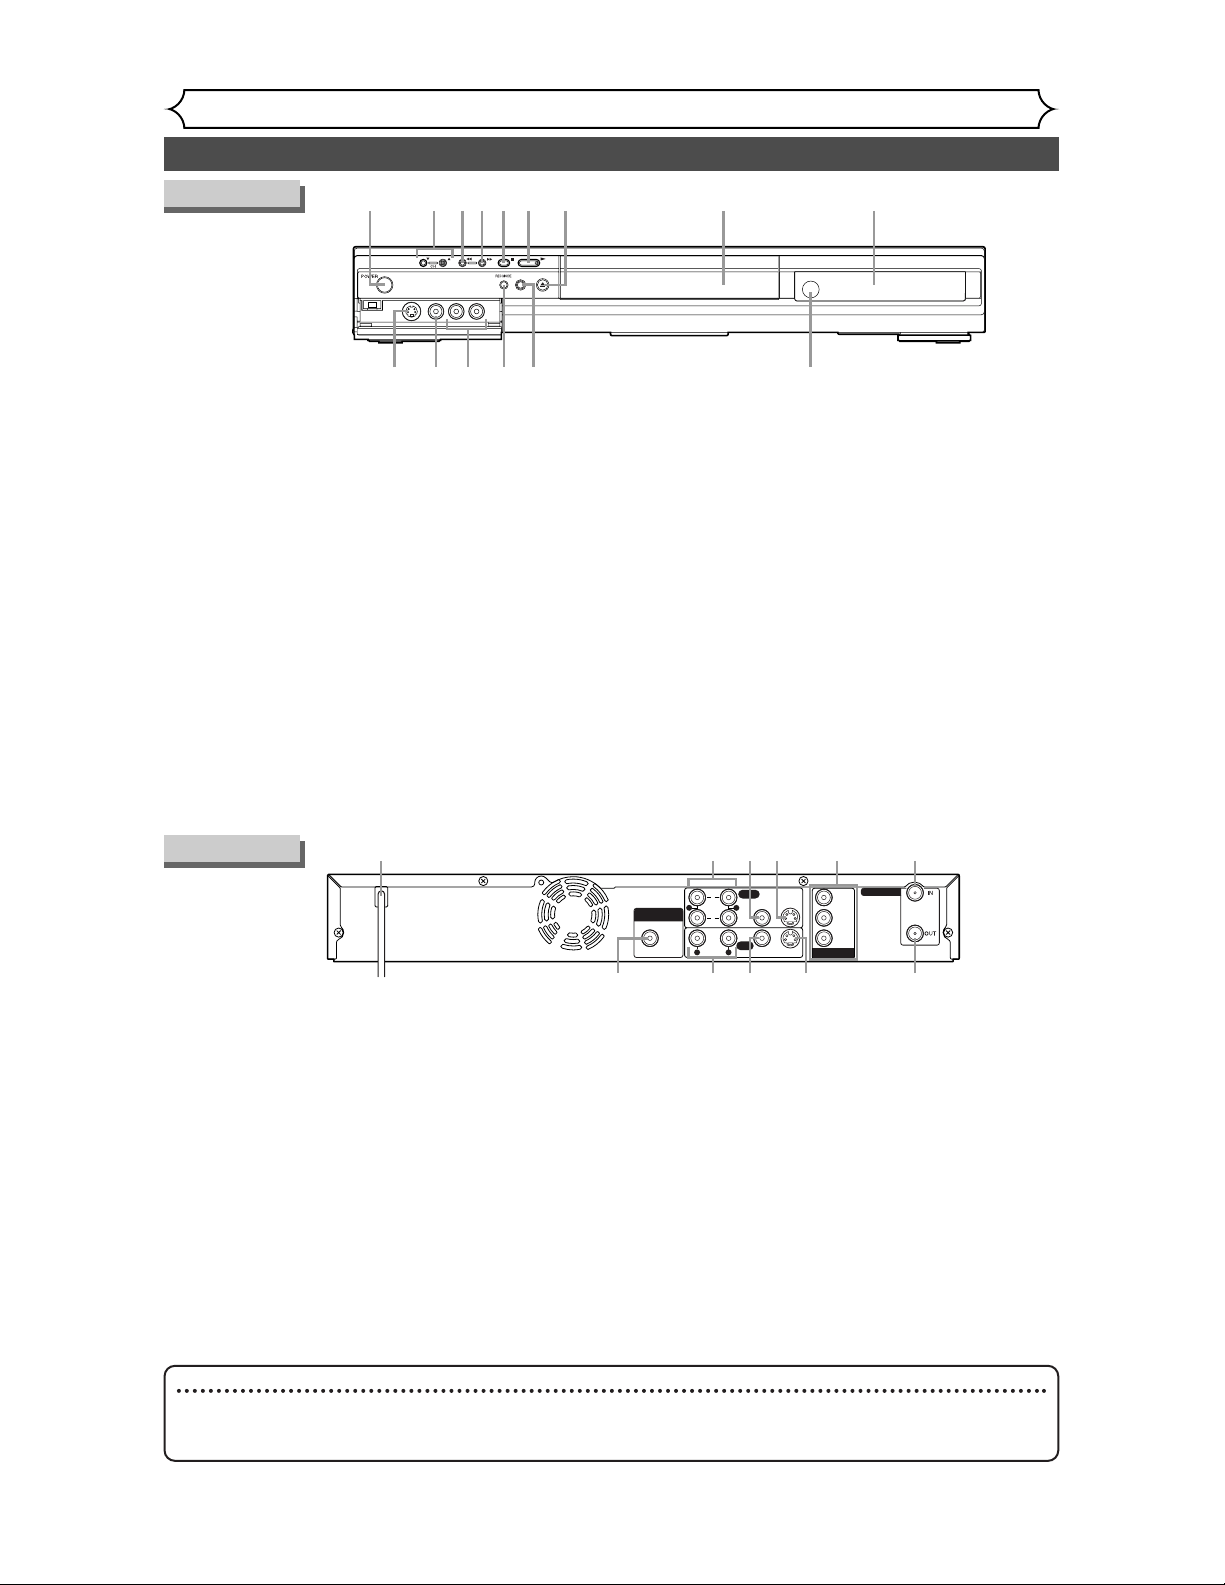
Front Panel
1. POWER button
Press to turn the DVD recorder on and off.
If timer programmings have been set, press to set the
unit in timer-standby mode.
2. CH L / K button
Press to change the channel up and down.
3. E (REV) button
During playback, press to skip to the previous chapter
or track.
During playback, press and hold for 1.5 seconds to fast reverse.
When playback is paused, press repeatedly to slow reverse.
4. D (FWD) button
During playback, press to skip to the next chapter or track.
During playback, press and hold for 1.5 seconds to
fast forward.
When playback is paused, press repeatedly to slow forward.
5. C (STOP) button*
Press to stop play or recording.
6. B (PLAY) button*
Press to start or resume play.
7. OPEN/CLOSE A button*
Press to open or close the disc tray.
8. Disc tray
Place a disc when open.
9. Display
Refer to “Front Panel Display Guide” on page 12.
10. Remote control sensor
Receive signals from your remote control so that you
can control the DVD recorder from a distance.
11. REC/OTR button
Press once to start a recording. Press repeatedly to
start a one-touch timer recording.
12. REC MODE button
Press to switch the recording speed.
13. AUDIO INPUT jacks (LINE2)
Use to connect external equipment with standard
audio cables.
14. VIDEO INPUT jack (LINE2)
Use to connect external equipment with a standard
video cable.
15. S-VIDEO INPUT jack (LINE2)
Use to connect the S-Video output of external equip-
ment with an S-Video cable.
Rear Panel
DIGITAL AUDIO OUTPUT
PCM / BITSTREAM
COAXIAL AUDIO
INPUT
COMPONENT
VIDEO OUTPUT
TV ANTENNA
OUTPUT
R
R
L
L
AUDIO
VIDEO
1
2
(L1)
VIDEO
S-VIDEO
S-VIDEO
P
R
/C
R
P
B
/C
B
Y
1 362
11 109
7
4
8
5
1. AC Power Cord
Connect to a standard AC outlet to supply power to this
unit.
2. AUDIO OUTPUT jacks 1, 2
Use to connect a TV monitor,AV receiver or other
equipment with standard audio cables.
3. VIDEO OUTPUT jack
Use to connect a TV monitor,AV receiver or other
equipment with a standard video cable.
4. S-VIDEO OUTPUT jack
Use to connect the S-Video input of a TV monitor,AV
receiver or other equipment with an S-Video cable.
5. COMPONENT VIDEO OUTPUT jacks
Use to connect a TV monitor with component video
inputs with component video cables.
6. TV ANTENNA IN jack
Use to connect an antenna.
7. TV ANTENNA OUT jack
Use to connect an antenna cable to pass the signal
from the TV ANTENNA IN to your TV monitor.
8. S-VIDEO INPUT jack(LINE1)
Use to connect the S-Video output of external equip-
ment with an S-Video cable.
9. VIDEO INPUT jack(LINE1)
Use to connect external equipment with a standard
video cable.
10. AUDIO INPUT jacks(LINE1)
Use to connect external equipment with standard
audio cables.
11. COAXIAL DIGITAL AUDIO OUTPUT jack
Use to connect an AV receiver, Dolby Digital decoder
or other equipment with a coaxial digital input jack
with a digital coaxial cable.
Note
• Do not touch the inner pins of the jacks on the rear panel. Electrostatic discharge may cause permanent damage to
the DVD recorder.
• This unit does not have an RF modulator
.
REC/OTR OPEN/CLOSE
1 2345*6*7* 8 9
12 11 1015 1314
(
*
) The unit can also
be turned on by
pressing these
buttons.
Loading ...
Loading ...
Loading ...