Owner Manual Beauty & Personal Care
Parts identification
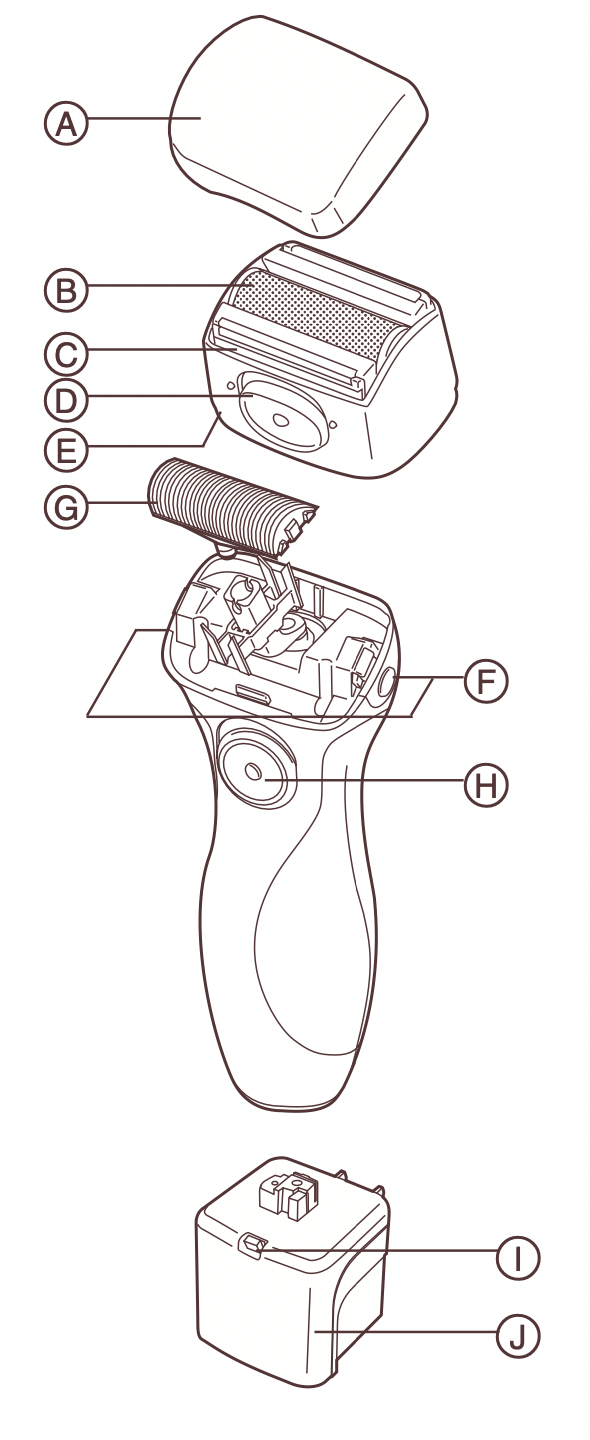
A Protective cap
B Outer foil
C Trimmer
D Pop-up trimmer switch
E Outer foil frame
F Outer foil frame release button
G Inner blade
H On/Off switch
I Charging indicator lamp
J Charging stand
Charging
Before use
Charge the shaver fully for 12 hours before using it for the first time, when it seems to be losing speed, or when it has not been used for an extended period. If not used regularly, the shaver should be recharged every six months to preserve battery life.
Charging once a week is recommended.
A full charge will supply enough power for about 7 shaves (three minutes per shave).
Turn the shaver off and set it firmly into the charging stand. Keep the stand level. Plug into an AC outlet.
The charge indicator lamp will glow and it will stay on until the charging stand is removed from the AC outlet.
Using your shaver
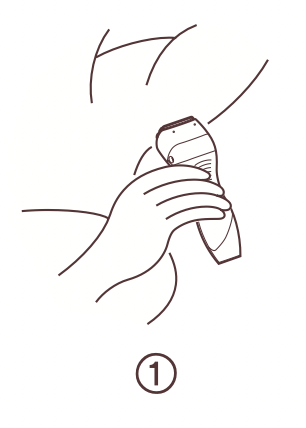
Remove the protective cap and apply shaving lather generously. For the best results, move the shaver in back and forth directions, while keeping the shaver head at a right angle (90°) to your skin so that the two trimmers and outer foil work together at the same time. Slide the pop-up trimmer switch up when using the pop-up trimmer to cut long hairs.
- Underarm
Hold your arm up enough to stretch your skin and shave back and forth.
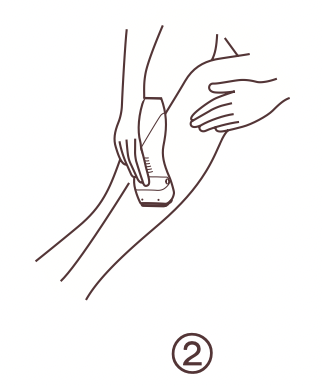
- Legs
Be sure to move the shaver from ankle to knee.
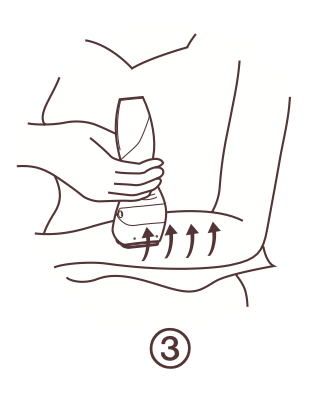
- Arms
Be sure to move the shaver from outside to inside.
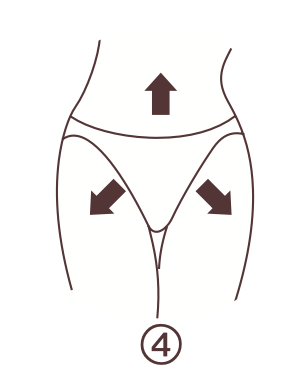
- Bikini
It is recommended to use the pop-up trimmer for proper shave.
Cleaning
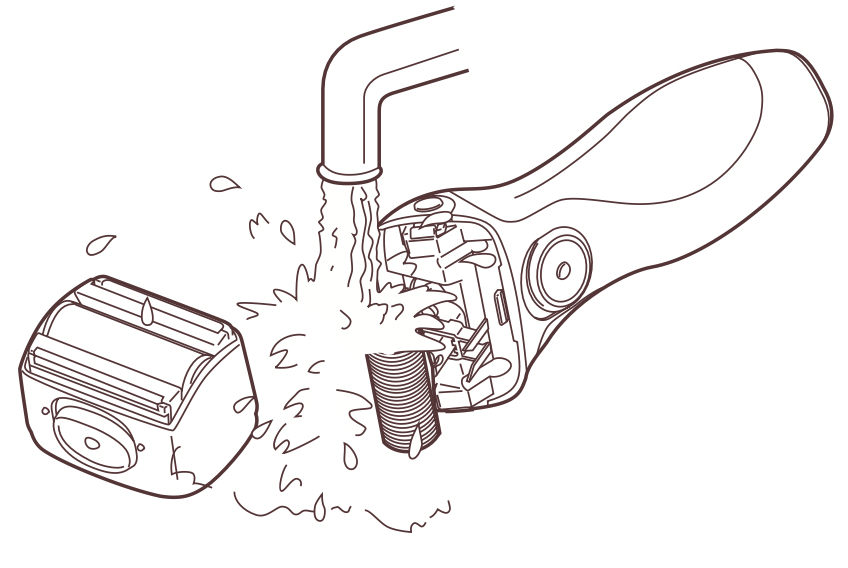
For cleanliness and convenience, we recommend that you clean your shaver with water and a liquid hand soap. Regular cleaning will keep your shaver in good condition while preventing odors or bacteria from developing, and maintain the cutting performance.
With the outer foil in place, apply some hand soap onto the outer foil.
Turn the shaver on and turn off after few seconds.
Next, press the outer foil frame release buttons to remove the outer foil frame and rinse the inner blade/outer foil under running water or in a basin. DO NOT USE BOILING WATER.
Next, close the outer foil frame and dry it gently. After the shaving head is dry, place the protective cap.
Replacing shaving head components
It is recommended that you replace the outer foil at least once every year and the inner blade at least once every two years to maintain your shaver’s cutting performance.
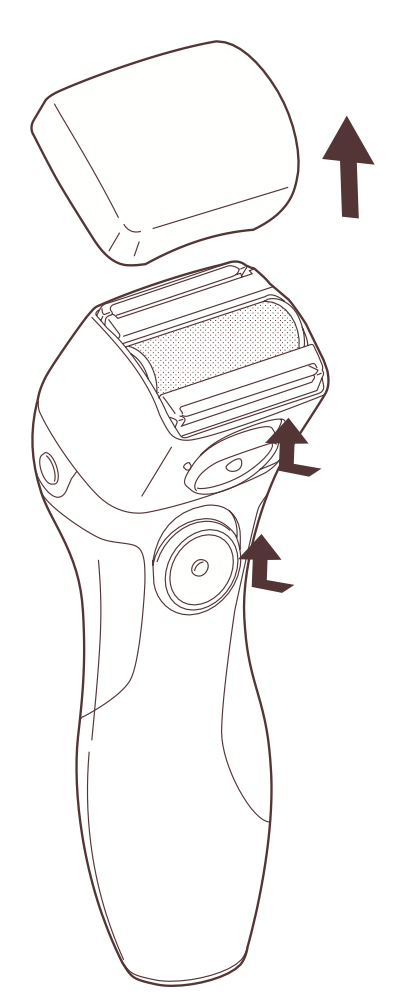
- Replacing the outer foil
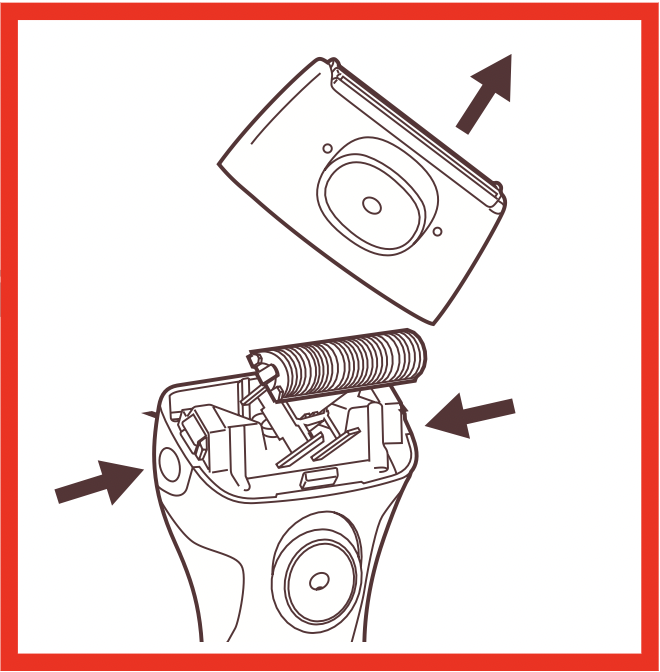
Press the outer foil frame release buttons to remove the outer foil frame.
Then, squeeze the front and the back side of the outer foil frame and lift up one of the two knobs on the outer foil.
- Inserting the new outer foil
Slip the foil into the frame and guide the plastic edges onto the hooks in the outer foil frame until it clicks into the shaver.
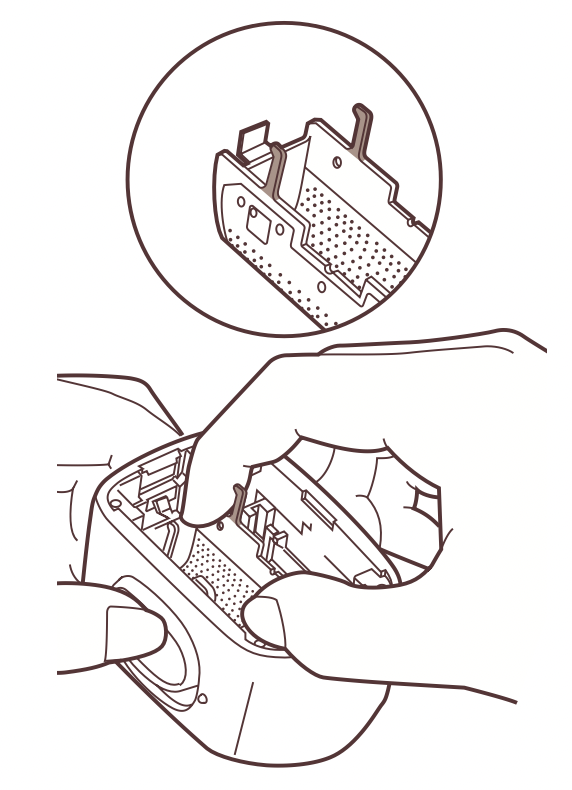
- Replacing the inner blade
Squeeze the outer foil frame release buttons and lift the outer foil frame upward to remove it. Remove the inner blade by grasping it firmly at both ends and pulling straight away from the shaver. To insert the new inner blade, hold the blade at both ends and press downward until it snaps into the shaver.

How to remove the built-in rechargeable battery before disposal of shavercomponents
ATTENTION:
- A nickel metal hydride battery that is recyclable powers the product you have purchased.
- Please call 1-800-8-BATTERY for information on how to recycle this battery.
The battery in this shaver is not intended to be replaced by consumers. However, the battery may be replaced at an authorized service center. The procedure described below is intended only for removal of the rechargeable battery for the purpose of proper disposal.
WARNING: Do not attempt to replace the battery for the purpose of reusing the shaver. This could result in the risk of fire or electric shock.
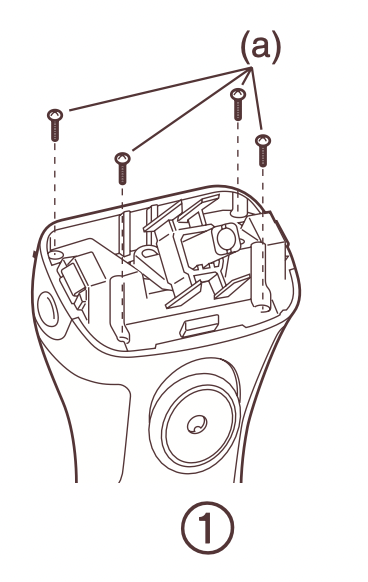
- Remove four screws (a).
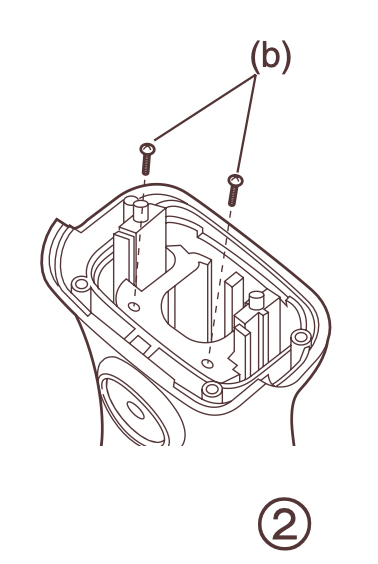
- Remove two screws (b).
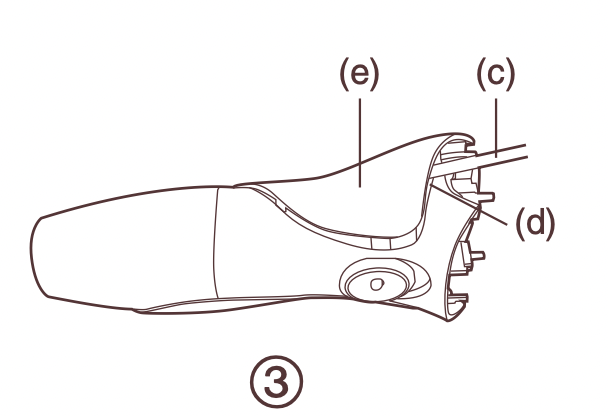
- Using a flat screwdriver (c), and insert into the space (d) to remove the panel (e).
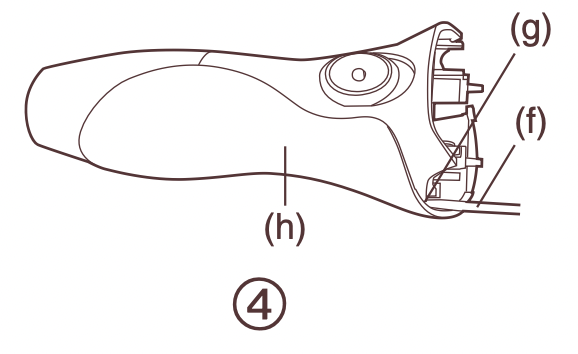
- Using a flat screwdriver (f), and insert into the space (g) to remove the panel (h).
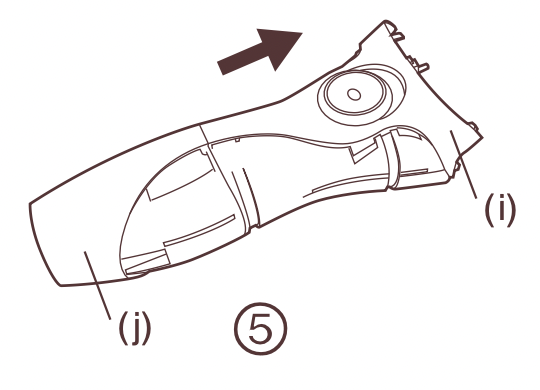
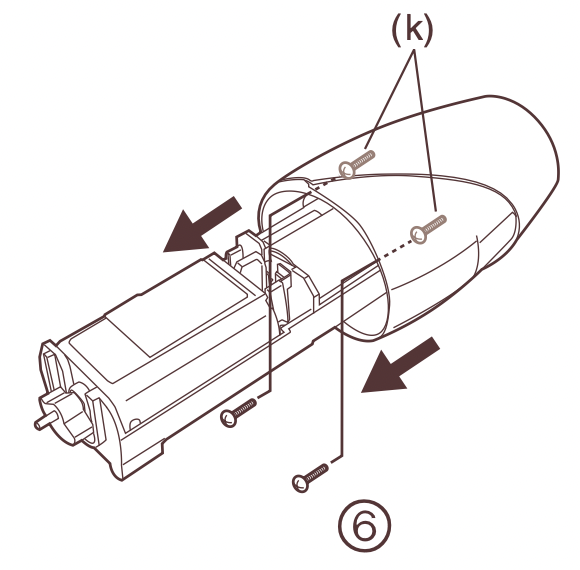
- Pull the housing (i) out of the end cap (j).
- Remove two screws (k) inside of the end cap and pull the battery.
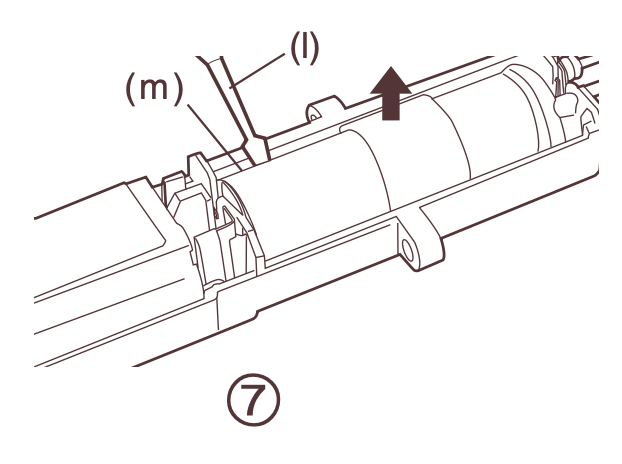
- Using a flat screwdriver (l), and insert into the space (m) to remove the battery.
ATTENTION: These laws of various states and municipalities restrict disposal of rechargeable batteries (and products from which such batteries have not been removed) in ordinary household waste. Please comply with your local laws. If you are not certain as to proper disposal, please contact your local sanitation department.