Loading ...
Loading ...
Loading ...
69-2715EF—07 6
Installing your thermostat
Wiring (Conventional System
continued)
c In the image on the right, check the
box next to each connection. You will
use this checklist in Step 9.
d Verify wire is firmly secured by gently
pulling on wire.
e Repeat steps a–d for all other wires.
f Push any excess wire back into the
wall opening after all wires are
installed.
g Continue to page 8.
Labels don’t match?
See alternate wiring keys
on pages 78.
Important!
Check the box for each wire
you connect. You will need
this information in Step 9.
C
K
Rc
R
W-O/B
Y
G
W2-
Aux/E
Y2
L
Wiring (Heat Pump System)
6B Wire smart thermostat to your heat
pump.
a Starting with the C Wire, match the
sticky tag on the wire to the terminal
labels.
You must have a C wire. See page 5.
b Slide wire gently into terminal hole
until it clicks into place. (If you need
to remove a wire, use a pen tip to
press the terminal release and then
pull the wire out.)
Note: Refer to the wiring picture you took
in Step 2.
Tip: To make it easier to slide the wire
into place, use a pen tip to hold down
the terminal release.
Note: The wiring for your
application might be different
than the wiring shown below.
MCR34566
C
K
Rc
R
W-
O/B
Y
G
W2-
Aux/E
Y2
L
O
Y
G
R
C
AUX
Labels don’t match?
See alternate wiring keys
on pages 78.
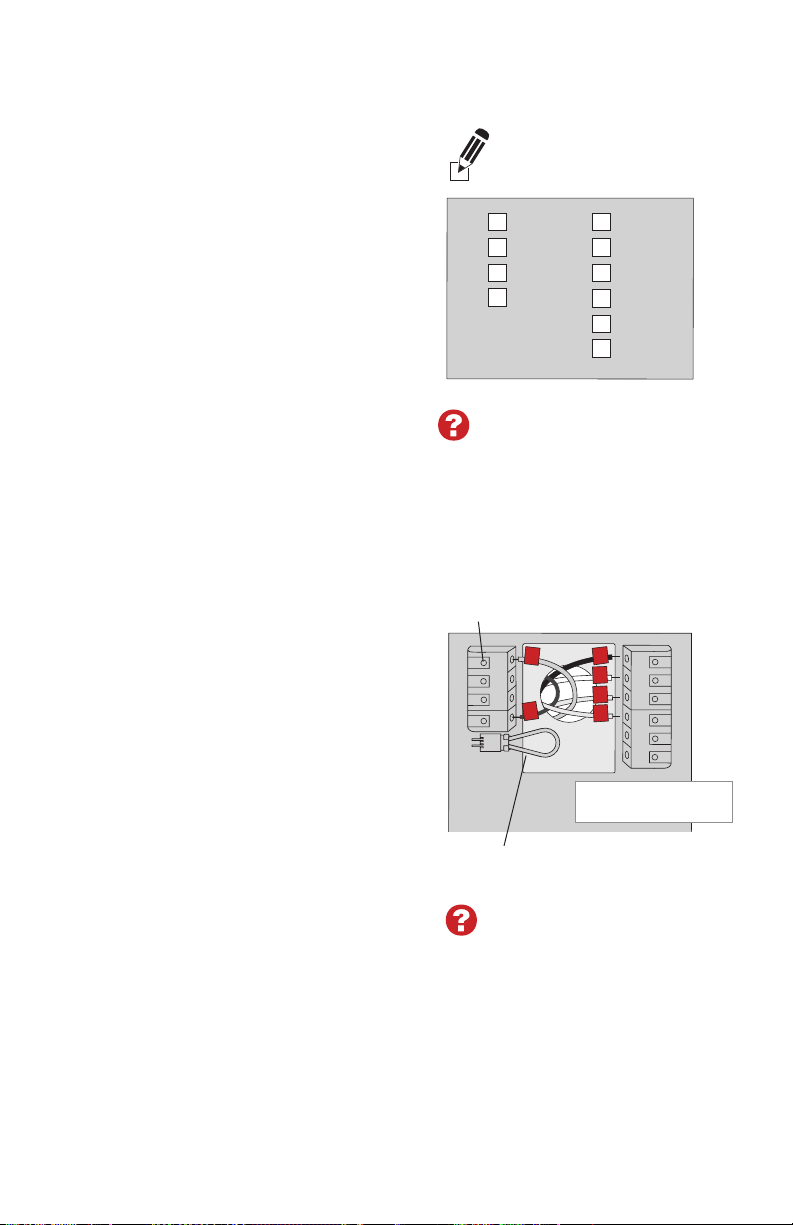
Terminal release
Remove jumper loop ONLY if
you have both R and Rc wires.
EXAMPLE WIRING
Yours may look different
Loading ...
Loading ...
Loading ...