Loading ...
Loading ...
Loading ...
4
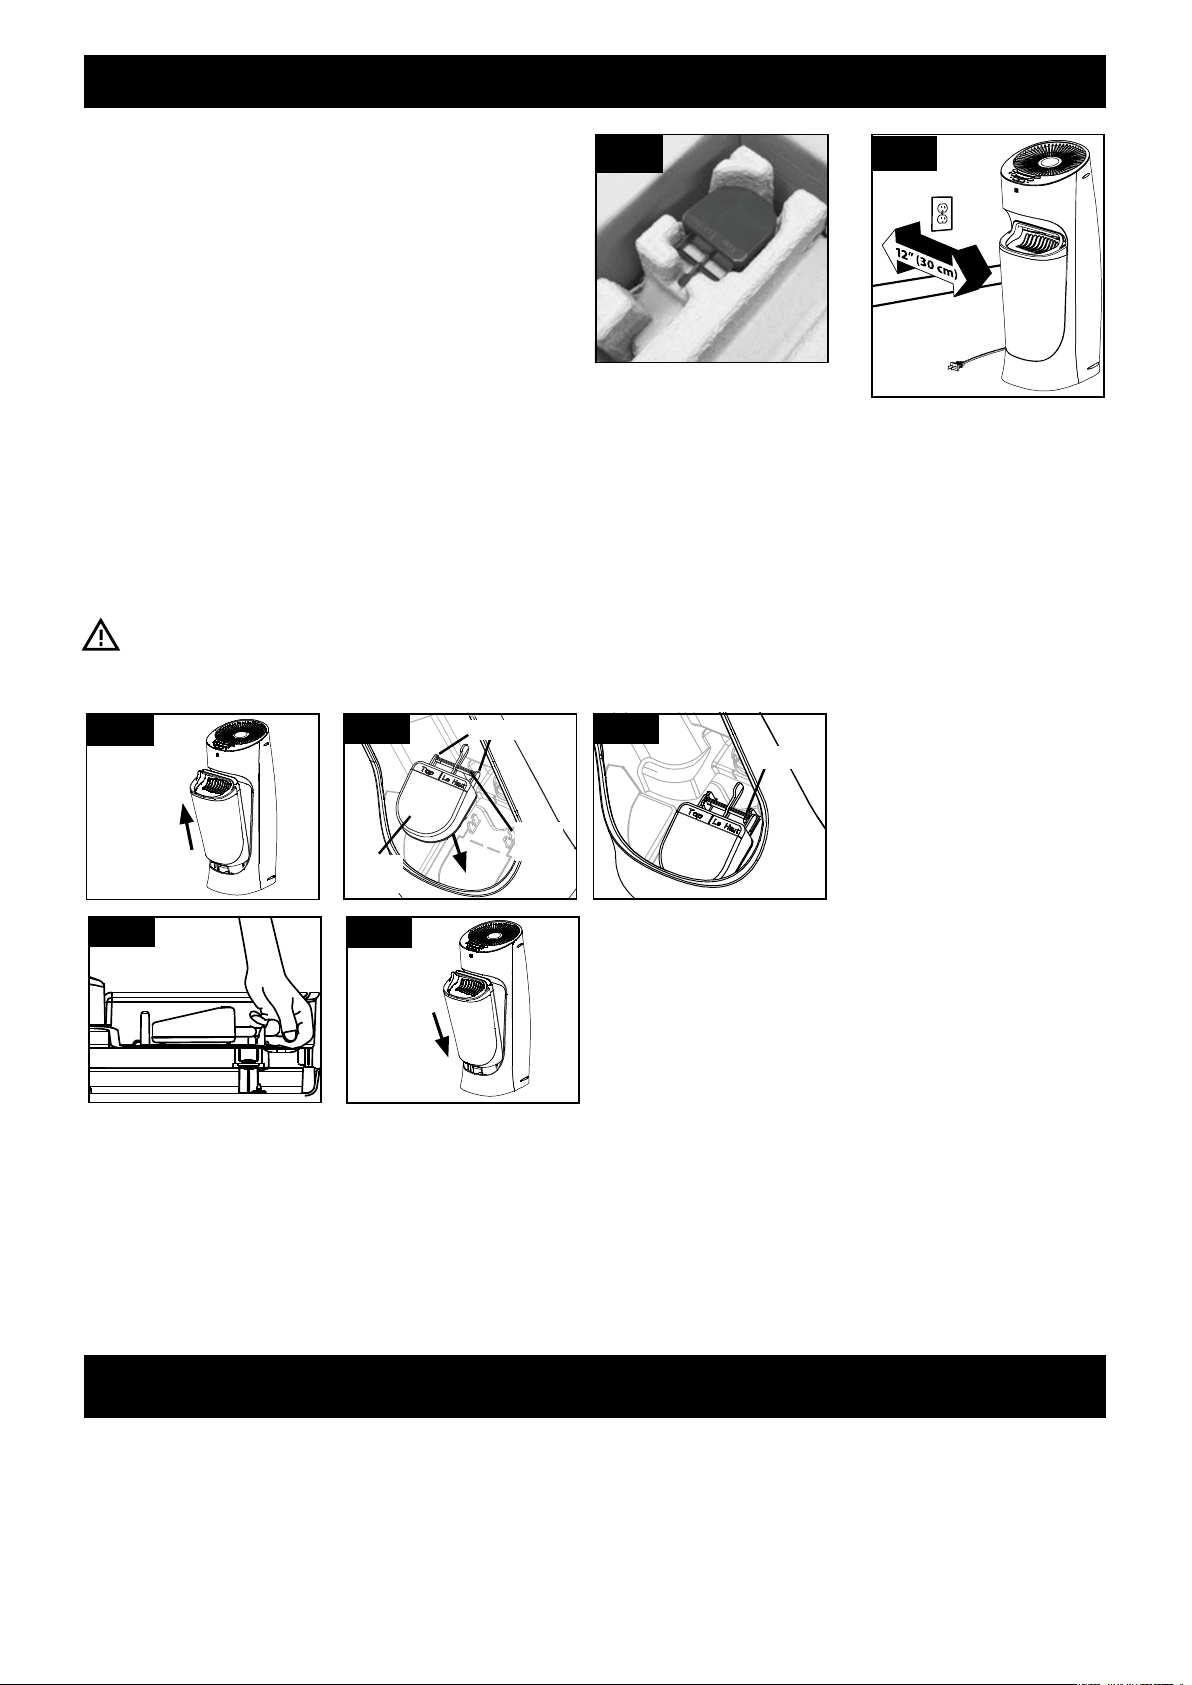
This humidifier uses a float system to regulate the water flow from the Tank to the Reservoir.
The Float Paddle must be properly installed for the unit to operate. If not properly installed,
water may not flow into the Reservoir or it may leak from the Base. The Float Paddle is
designed to be easy to install and remove.
CAUTION: Improper placement of the Float Paddle could result in leaking or water
not feeding to the Reservoir.
1. Remove Water Tank.
2. Line up Float Paddle with the float paddle shape on the bottom of the Reservoir.
3. Place Float Rod over the Brackets and press firmly until you hear it click into place.
4. Pull gently up on the Float Rod to be sure it doesn’t pop out of the Brackets.
5. Place Water Tank back in Base.
Float Paddle Installation – required for humidifier to operate
FILLING/REFILLING THE WATER TANK
DO NOT ADD ESSENTIAL OILS to the water tank. Doing so could cause damage to the
humidifier and void the warranty.
This humidifier holds a maximum of 1.7 gallons (6.4 liters) of water.
SETTING UP YOUR HUMIDIFIER
Step 2
Unpack the Humidifier
Keep this instruction manual for reference.
1. Remove packaging materials. Locate
Float Paddle and set aside. This is
required for operation.
2. Remove twist tie and extend power cord.
Place on a firm, level, water resistant
surface a minimum of 12 inches (30 cm) from walls.
Step 1
Step 2
Step 5
Step 1
Step 3
Step 4
Float
Paddle
Float
Rod
Brackets
“Click”
Loading ...
Loading ...
Loading ...