Loading ...
Loading ...
Loading ...
14
The Water Dispenser
IMPORTANT:
Dispense at least 1 qt. (1 L) of water every week to maintain a
fresh supply.
If the flow of water from the dispenser decreases, it could be
caused by low water pressure.
� With the water filter removed, dispense 1 cup (237 mL) of
water. If 1 cup of water is dispensed in 8 seconds or less, the
water pressure to the refrigerator meets the minimum
requirement.
� If it takes longer than 8 seconds to dispense 1 cup (237 mL) of
water, the water pressure to the refrigerator is lower than
recommended. See “Water Supply Requirements” and online
“Troubleshooting” for more information.
Cleaning the Ice Dispenser Chute
Humidity causes ice to naturally clump together. Ice particles can
build up until the ice dispenser chute becomes blocked.
If ice is not dispensed regularly, it may be necessary to empty the
ice storage bin and clean the ice delivery chute, the ice storage
bin and the area beneath the storage bin every 2 weeks.
� If necessary, remove the ice clogging the storage bin and
delivery chute, using a plastic utensil.
� Clean the ice delivery chute and the bottom of the ice storage
bin using a warm, damp cloth and dry thoroughly.
Ice Maker and Storage Bin
IMPORTANT:
To avoid low ice production and poor quality ice, flush the water
system before turning on the ice maker. See “Water and Ice
Dispenser” for details.
� Following installation, allow 24 hours to produce the first batch
of ice. Allow 2 to 3 days to fill the ice storage bin.
� For models with a water filter, after connecting the refrigerator
to a water source or replacing the water filter, fill and discard
three full containers of ice to prepare the water filter for use.
� The quality of your ice will be only as good as the quality of the
water supplied to your ice maker. Avoid connecting the ice
maker to a softened water supply. Water softener chemicals
(such as salt) can damage parts of the ice maker and lead to
poor quality ice. If a softened water supply cannot be avoided,
make sure the water softener is operating properly and is well
maintained.
� If the ice in the storage bin clumps together, break up ice using
a plastic utensil and discard ice. Do not use anything sharp to
break up the ice. This can cause damage to the ice bin and the
dispenser mechanism.
� Do not store anything on top of the ice maker or in the ice
storage bin.
Ice Production Rate
Allow 24 hours to produce the first batch of ice. Discard the first
three batches of ice produced.
Allow 3 days to completely fill the ice storage bin. The ice maker
should produce approximately 3 lbs (1.4 kg) (8 to 12 batches) of
ice in a 24-hour period.
To increase ice production, lower the freezer and refrigerator
temperature, or see “Control Panel Descriptions” in the Quick
Start Guide for details. Wait 24 hours between adjustments.
Ice Maker in the Freezer
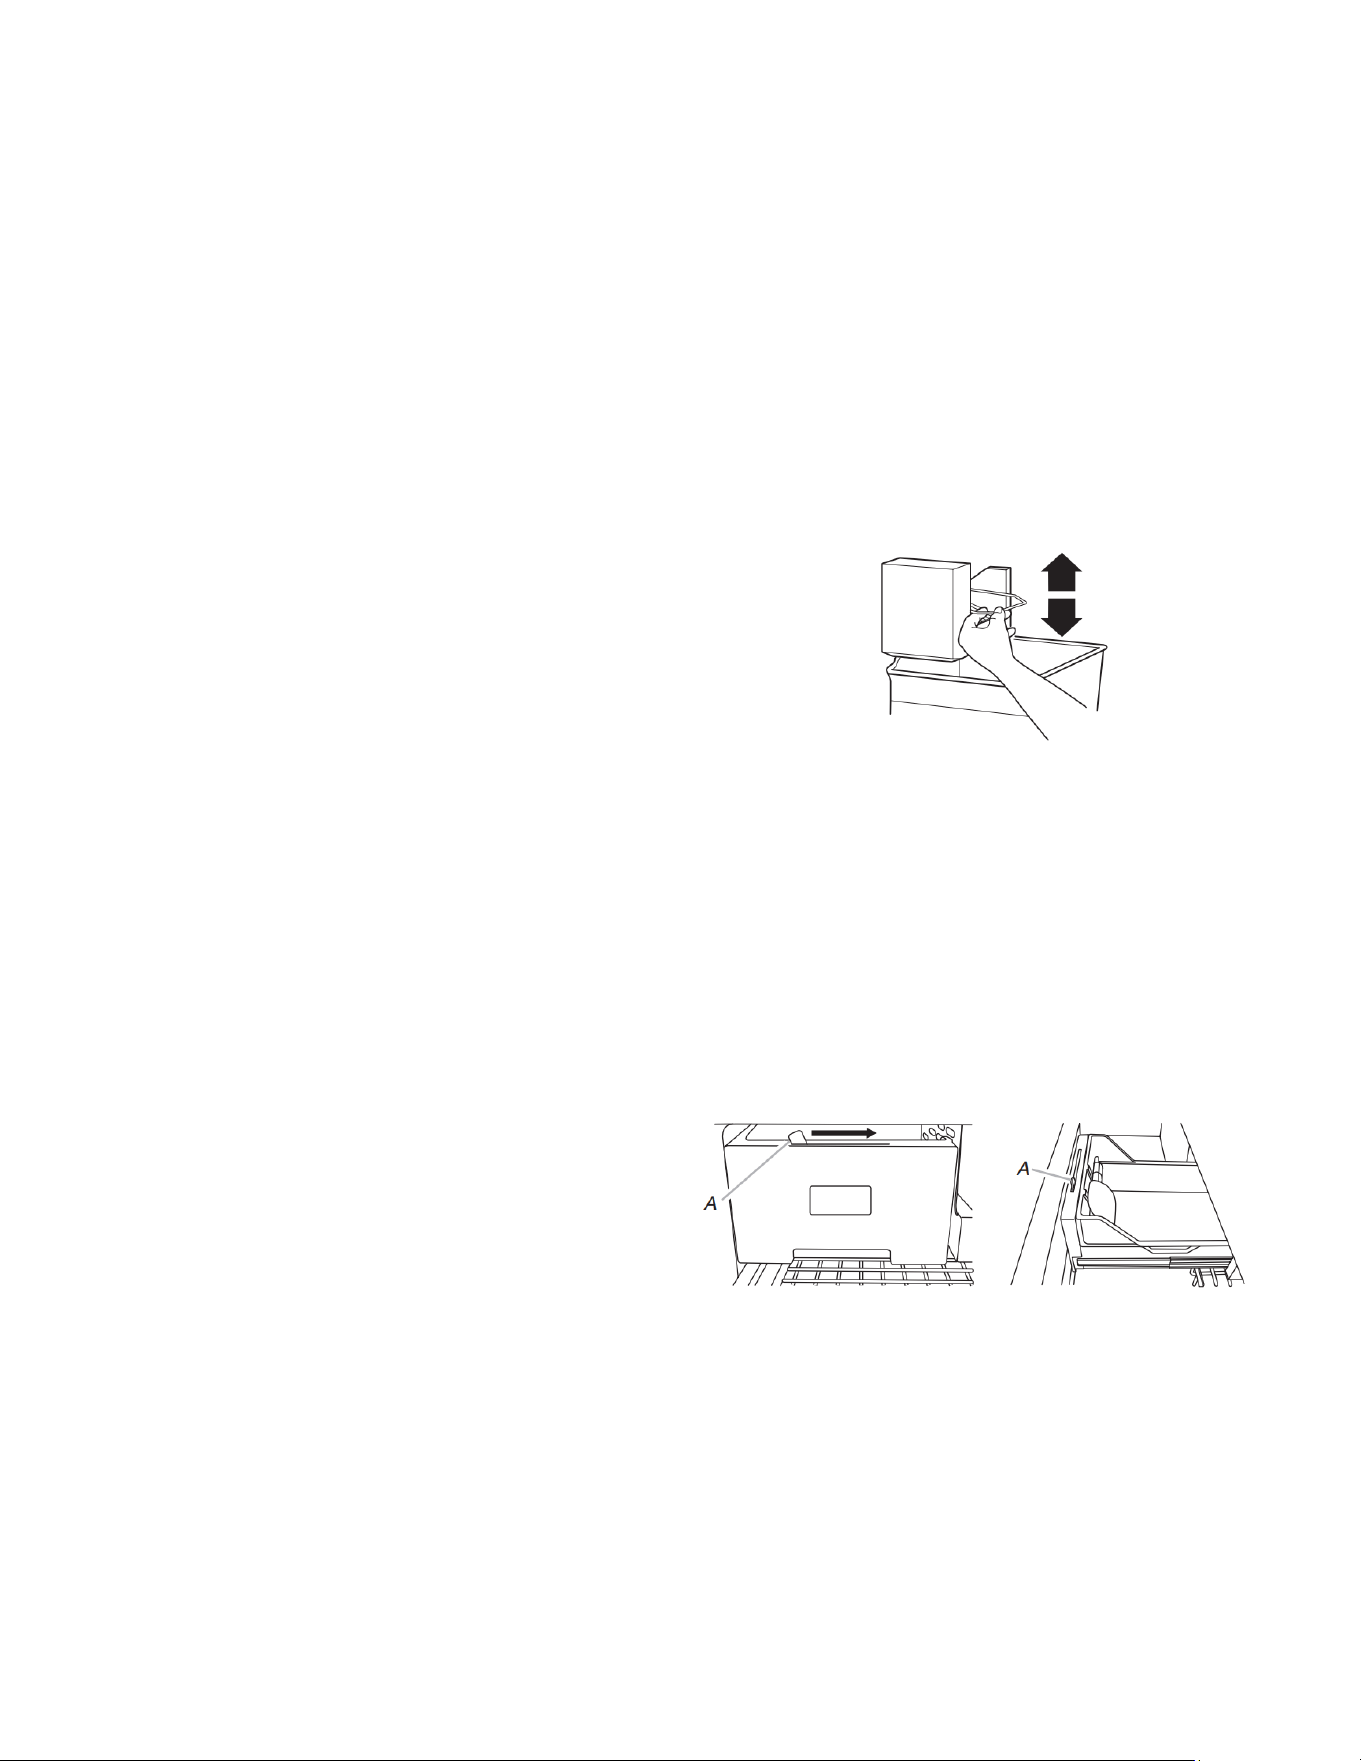
Turn the Ice Maker On/Off:
To turn on the ice maker, simply lower the wire shutoff arm.
To manually turn the ice maker off, lift the wire shutoff arm to the
off (arm up) position and listen for the click.
Your ice maker has an automatic shutoff. As ice is made, the ice
cubes will fill the ice storage bin and the ice cubes will raise the
wire shutoff arm to the off (arm up) position. Do not force the wire
shutoff arm up or down.
NOTE: Turn off the ice maker before removing the ice storage bin
to serve ice or to clean the bin. This will keep the ice cubes from
dropping out of the ice maker and into the freezer compartment.
After replacing the ice storage bin, turn on the ice maker.
Wash the ice storage bin with mild soap and warm water.
Slide the ice storage bin under the ice maker and push it toward
the back as far as it will go.
Auto Ice Storage Bin (on some models):
Your ice storage bin has a lever which allows the storage bin to
slide out with the drawer when it is pulled open or to stay in place.
� Move the lever to the right to attach the ice storage bin to the
freezer drawer.
� Move the lever to the left to release the ice storage bin from
the freezer drawer.
A. Ice storage bin lever
Loading ...
Loading ...
Loading ...