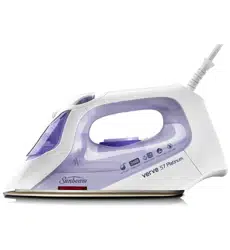
Sunbeam SR6851 Verve Max Glide Iron
Product's Documents
Below are documents related to this product, you can read online or download:
- User Manual - (English) Read Online | Download pdf

Iron Manual
Remove any adhesive stickers, plastic covers or cardboard sleeves from the soleplate.
Ensure that all adhesive is removed by rubbing the soleplate with a cloth dampened with methylated spirits.
Fill the water tank and empty the water. This will rinse out any foreign particles remaining in the water tank from the manufacturing process.
NOTE: When turned on for the first time, your new iron may give off vapours for up to 10 minutes. This is due to the initial heating of the materials used. It is safe, not detrimental to the performance of the iron, and will not reoccur.
Before filling the iron with water ensure the power is turned off and the plug is removed from the power outlet. The iron can be filled with water while it is hot.
Place the iron on its heel and open the water inlet cover.
Slowly pour water into the water inlet until the maximum water level is reached. Do not exceed the maximum water level indicator.
Push the water inlet cover firmly to close.
NOTE: The special soleplate design allows you to use tap water with your Verve iron without affecting the steam performance. However in very hard water areas, Sunbeam recommends the use of distilled water, or water which has been demineralised.
For best performance, we recommend the use of Sunbeam Demineralised Water, available from selected retailers. Use as a direct replacement for tap water to prolong the life of your iron.
Do not fill the iron with fabric conditioner, starches or any other solution as these will damage the steam mechanism. Do not use contaminated water.
NOTE: When the temperature dial is changed from a high setting to a lower temperature setting during ironing, the thermostat light will go out immediately. This indicates that the iron is cooling to the selected temperature.
To ensure that the iron has reached the selected temperature and is not too hot, wait until the thermostat light comes on again and then goes out before ironing.
Follow steps 1 and 2 above.
NOTE: When steam ironing, ensure that the temperature dial is set to any temperature within the steam band, and that the tank is at least ¼ full of water.
3. Turn the steam dial to the desired steam setting.
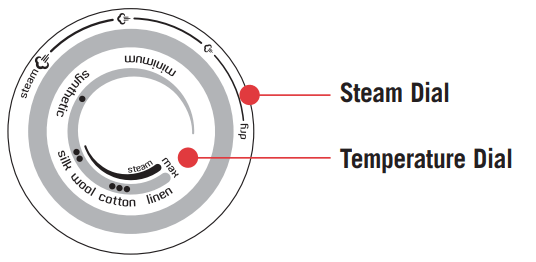
For best results, select the steam setting that corresponds to the selected temperature, as indicated on the temperature dial.
Follow steps 1 and 2 above.
3. Select DRY on the steam dial.
This will cut off the steam flow if there is water in the tank.
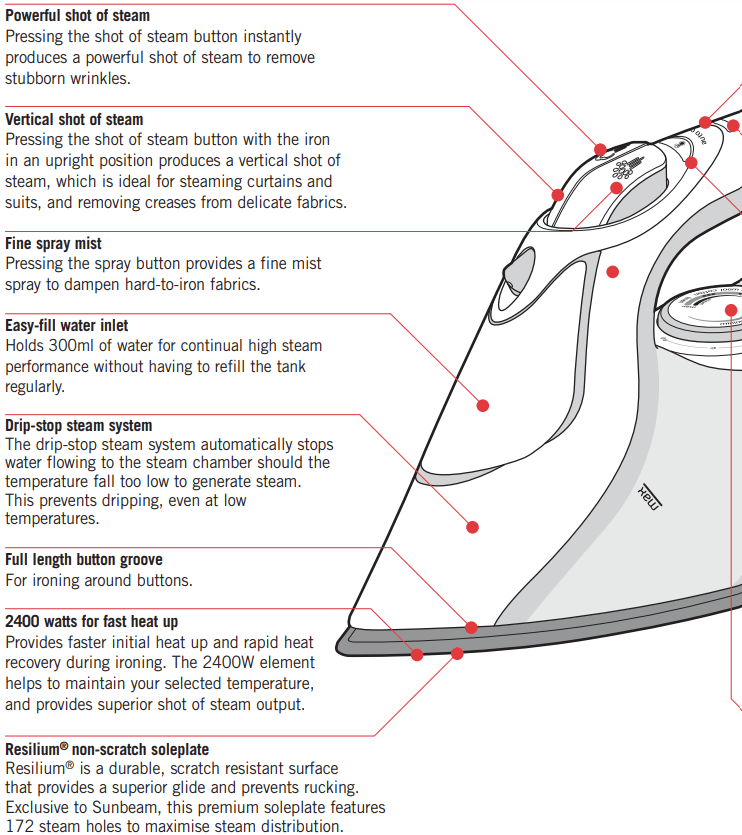
The shot of steam can be used when dry or steam ironing, when the temperature dial is set to any temperature within the steam band or above the two dot (••) setting.
Note: If the tank has run dry, it may be necessary to re-prime the pump after filling the iron with water.
The spray mist can be used whether dry or steam ironing to pre-dampen hard to iron fabrics.
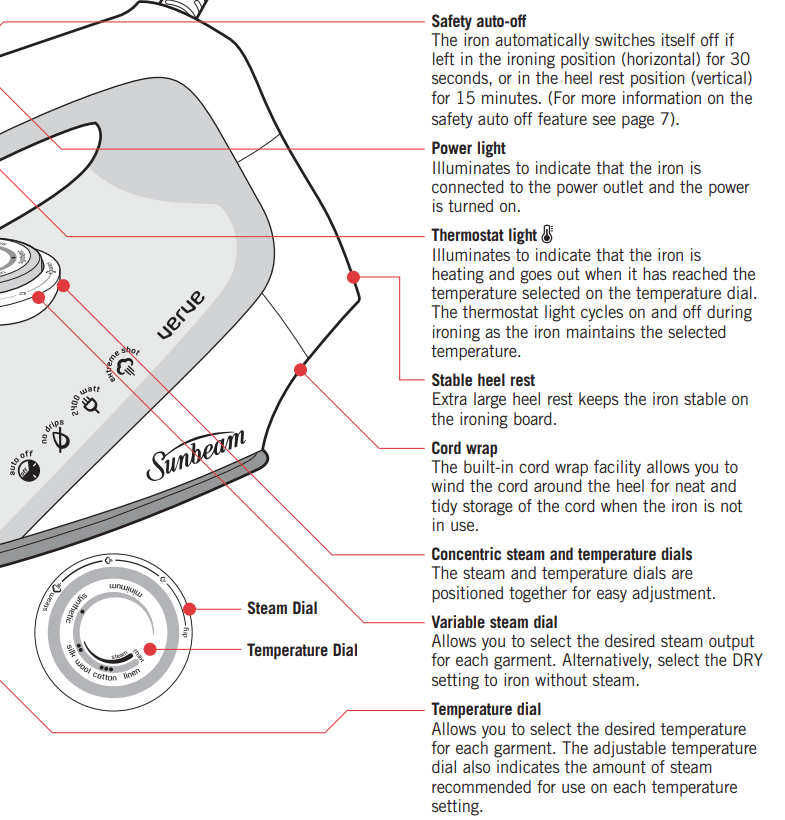
The safety auto-off mechanism automatically turns the iron off if you forget.
The iron will automatically shut off if left on the heel rest (vertical) for 15 minutes, or in the ironing position (horizontal) for 30 seconds, without being moved.(See figure 2).
The thermostat and power lights on the handle will flash and a warning beep will sound to let you know that you have left the iron unattended.
Power to the iron's heating element will be cut.
Once the iron is moved the power will reconnect. Allow the iron to heat until the thermostat light goes out, and continue ironing as normal.
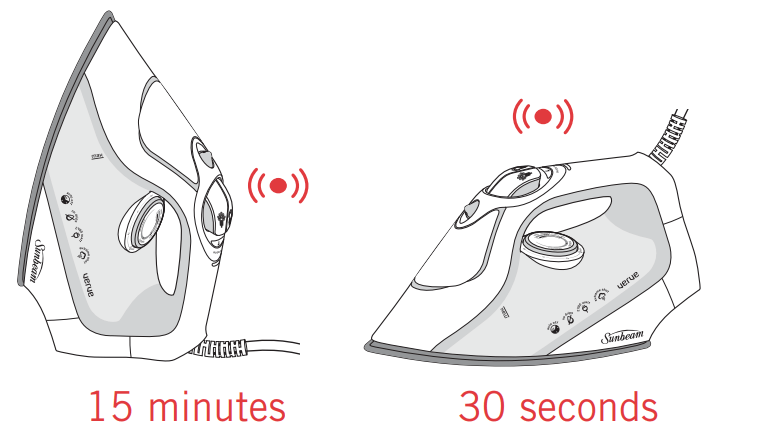
Figure 2
Always store the iron on its heel rest.
Do not store the iron with the soleplate facing down, or in the carton.
To clean the exterior of your iron, wipe over with a damp soft cloth and wipe dry.
Caution: Do not use harsh abrasives, chemical cleaners or solvents to clean the exterior of your iron as these will damage the surface.
To remove build up from the steam holes which may affect steam performance, use a cotton wool tip moistened in methylated spirits.
Wipe with a soft damp cloth and wipe dry.
Start with the collar, working from the outer edges into the middle. Iron the shoulder next, followed by the cuffs and sleeves.
Place the collar at the narrow end of the board so that one front panel of the shirt is extended flat. Iron the front panel from shoulder to shirt tail. Rotate to iron the back of the shirt. Rotate and complete the remaining front panel.
Straighten seams on t-shirts before hanging out to dry. To avoid damage to printed graphics and logos turn the t-shirt inside out and iron the reverse side of the print. Never iron areas of your t-shirt where perspiration marks are visible as the heat of the iron will permanently fix the stain.
When washing is complete, remove shirts from the machine immediately, shake them out and hang them on coat hangers to air dry this will keep wrinkles to a minimum.
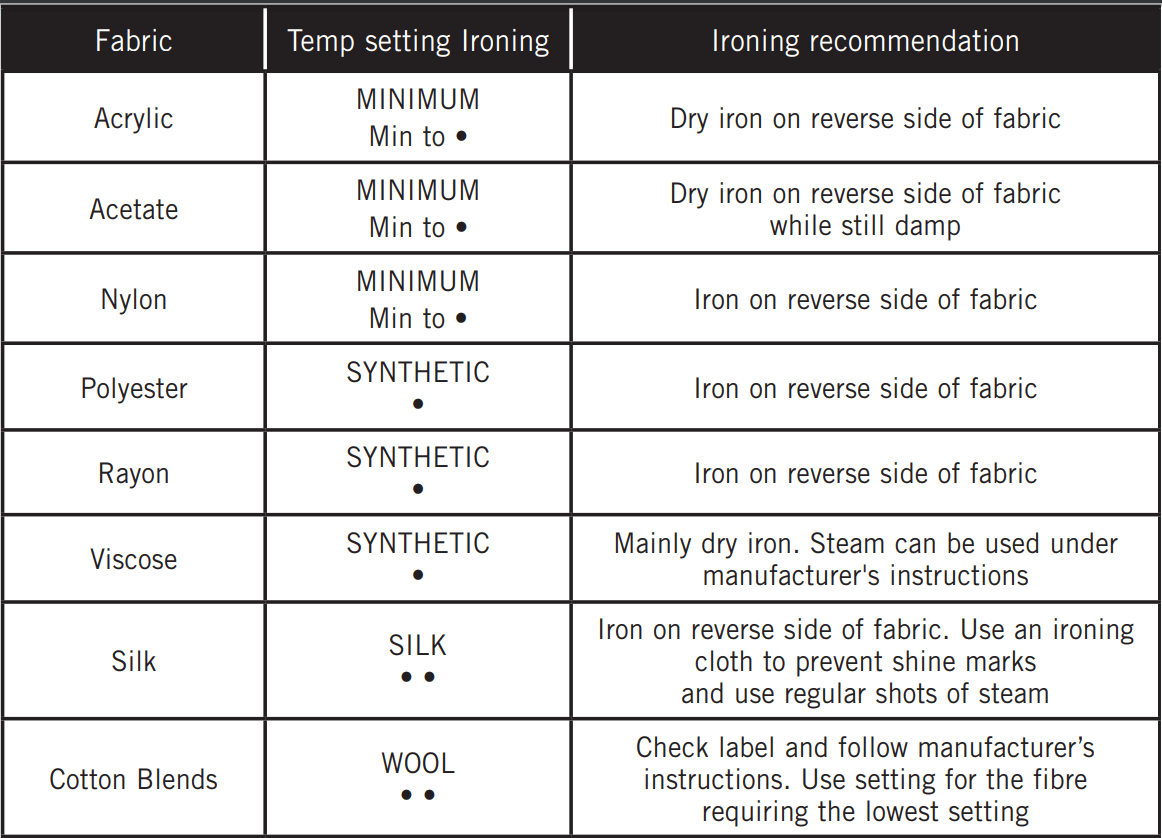
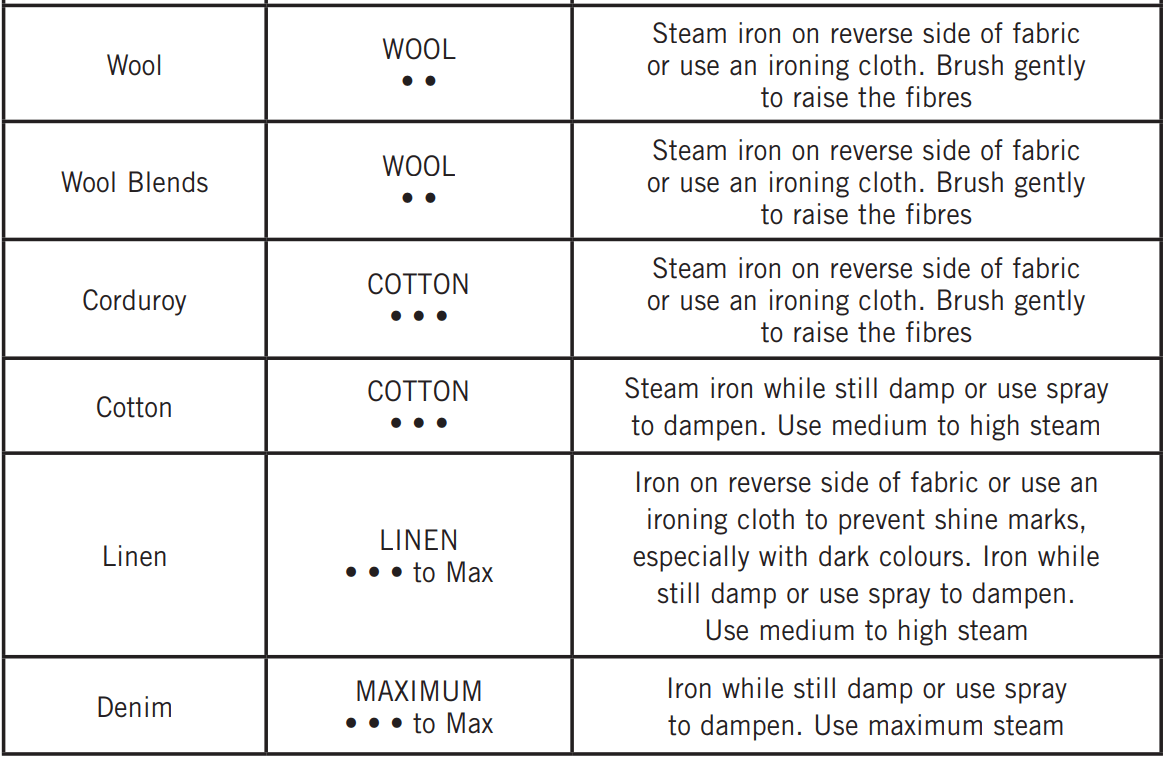
If you are unsure of the correct setting for a particular garment, test a small area such as a seam or inside hem before ironing a visible area. Start with a low temperature and slowly increase the heat to find the best setting.
Don’t be afraid to iron silk. Although delicate in appearance, silk is the strongest and most resilient of all natural fibres. To achieve the best results, set to a low cotton setting and use regular shots of steam. Always use a pressing cloth to avoid shine marks.
Always press seams in the same direction they were made. When a garment is produced, the fibres will naturally settle in the direction they were initially pressed, so it’s best not to iron against the grain.
Sort articles to be ironed according to the type of fabric. This will reduce the need to adjust the temperature constantly. Start with articles requiring lower temperatures and work your way through to items requiring higher settings.
Steam is the key when ironing delicate summer fabrics such as muslin, cotton and linen. Don’t press down with the iron, simply hover above the garment and steam it using a vertical shot of steam. Ruffling, netting, tulle or intricate hand detailing is also best ironed using this method.
Steam is crucial when pressing your winter woollies. Woollen garments can be hung and steamed using the vertical shot of steam feature. After steaming, brush the garment with your hand to plump up woollen fibres.
If ironing the garment flat it is best to use a pressing cloth. Don’t be afraid to apply pressure – steam and hold.
To avoid unwanted creases always iron your table cloth after taking it out of the cupboard. A dinner party is a special occasion, so treat the table cloth as you would your own outfit. For best results, lay towels across your table and iron the table cloth over the towels. This will save you time and ensure a beautifully presented table setting.
SAFETY PRECAUTIONS FOR YOUR IRON
Sunbeam is very safety conscious when designing and manufacturing consumer products, but it is essential that the product user also exercise care when using an electrical appliance. Listed below are precautions which are essential for the safe use of an electrical appliance:
Reference file: Sunbeam SR6851 Verve Max Glide Iron
Series: MASTER SERIES
Additionally, the document applies to other Sunbeam models: SR6856B