Table of Contents
3
EN
1Description 8
1.1 General Description 8
1.2 Control panel 8
1.3 Other parts 9
1.4 Available accessories 10
2Use 11
2.1 Warnings 11
2.2 First use 11
2.3 Use of accessories 12
2.4 Using the oven 13
2.5 Cooking tips 21
2.6 Special functions 23
2.7 Automatic programs 27
2.8 Secondary menu 30
3 Cleaning and maintenance 33
3.1 Warnings 33
3.2 Surface cleaning 33
3.3 Cleaning the door 34
3.4 Cleaning inside the oven 36
3.5 Vapor Clean 37
3.6 Extraordinary maintenance 39
IMPORTANT SAFETY INSTRUCTIONS
WARNING: If the instructions contained in this manual are not followed
precisely, fire or explosion may result causing property damage, personal
injury or loss of life.
READ AND SAVE THESE INSTRUCTIONS - Your safety and the safety of
others are very important.
We have provided many important safety messages throughout this manual and
on the appliance.
Read all the instructions before using the appliance and always obey all safety
messages.
Important Safety Instructions
4
The safety messages will inform you of potential hazards, how to avoid the risk of injury and
what can occur if the instructions are not followed.
IMPORTANT: Observe all codes and ordinances in force.
Do not store or use gasoline or other flammable vapors, liquids or materials near this or any
other appliance.
RECOGNIZE SAFETY INFORMATION
This is a safety alert symbol. This symbol alerts you to potential hazards that can
result in severe personal injury or loss of life.
UNDERSTAND SIGNAL WORDS
A signal word - DANGER, WARNING or CAUTION - is used with the safety alert
symbol. DANGER denotes the most serious hazards. It means you could lose your
life or be seriously injured if you do not immediately
follow the instructions.
WARNING means you could lose your life or be seriously injured if the instructions
are not followed. CAUTION indicates a potentially hazardous situation which, if
not avoided, could result in minor to moderate injury.
WARNING
• This appliance is intended for use in the home only.
• Use this appliance only for its intended purpose. The
manufacturer cannot be held liable for damage caused by
improper use of this appliance.
• This appliance complies with current safety regulations.
Improper use of this appliance can result in personal injury
and material damage.
• Read all the instructions before installing or using the
appliance for the first time.
• Keep these operating instructions in a safe place and pass
them on to any future user.
WARNING: For your safety, the instructions contained in this manual must be
followed to minimize the risk of fire or explosion and to prevent property damage,
personal injury or loss of life.
NOTE: This appliance is NOT designed for installation in manufactured (mobile)
homes or in recreational vehicles (RVs).
DO NOT install this appliance outdoors.

Important Safety Instructions
5
EN
• Read all instructions.
• Proper installation is your responsibility.
Have a qualified technician install and
ground this appliance in accordance
with these installation instructions.
• It is the responsibility of the installer to
comply with installation information
specified on the model/serial ID plate.
The ID plates are visibly located on the
back of the appliance and on the oven
door frame. These ID plates must never
be removed.
• Proper installation is your responsibility.
Make sure your appliance is properly
installed and grounded by a qualified
installer.
• WARNING: NEVER use this appliance
as a space heater to heat or warm the
room. Doing so may result in overheating
of the oven.
• DO NOT LEAVE CHILDREN
UNATTENDED: Children should not be
left alone or unattended in the area
where the appliance is being used.
Never allow children to sit or stand on
any part of the appliance.
• CAUTION: Do not store items of interest
to children in cabinets above a range or
on the backguard of a range - children
climbing on the range to reach items
could be seriously injured.
• WEAR PROPER APPAREL: Loose-fitting or
hanging garments should never be worn
while using the appliance.
• For safety reasons and to avoid damage
to your appliance, never sit, stand or
lean on the oven door.
• FLAMMABLE MATERIALS SHOULD
NEVER BE STORED IN THE OVEN.
• DO NOT TOUCH THE INSIDE OF THE
APPLIANCE: Heating elements may be
hot even though they are dark in color.
The oven cavity can be hot enough to
cause burns. During and after use, do not
touch areas inside of the oven until they
have had sufficient time to cool. Do not
allow garments or any flammable
material to come into contact with hot
surfaces. If personal clothing or hair
catches on fire, drop and roll
immediately to extinguish the flames.
• PLACE THE OVEN RACKS IN THE
DESIRED POSITION WHILE THE OVEN
IS COOL: If a rack must be removed
while the oven is hot, do not allow the
potholders to come in contact with the
broiler burner.
• USE CAUTION WHEN OPENING
THE OVEN DOOR: Allow hot air or
steam to escape before removing or
placing foods in the oven.
• Do not leave the packing materials
around the home. Sort the various items
of waste and take them to the nearest
specialized waste collection facility.
• Do not obstruct oven vents or openings
for air intake.
WARNING
To reduce the risk of fire, electrical shock, personal injury, or
damage when using the appliance, follow basic safety
precautions, including the following:

Important Safety Instructions
6
• ELECTRICAL GROUNDING IS
REQUIRED. It is the customer’s
responsibility:
1. To contact a qualified electrician.
2. To ensure that the electrical system is
adequate and in compliance with the
National Electrical Code ANSI / NFPA
70 Electrical Code – latest edition – or
the CANADIAN ELECTRICAL CODE,
C22.11 – 1982 and C22.2 No.
01982 – or latest edition – and all local
codes and ordinances.
• Always check that the controls are in the
"zero" (off) position when the oven is not
in use.
• Do not attempt to repair or replace any
part of this appliance unless specifically
recommended in this manual. All other
servicing should be done by a qualified
technician.
• Never use any part of the oven for
storage. Flammable materials can ignite
and plastic items may melt or burst into
flame.
• Do not hang articles on any part of the
appliance or place anything against the
oven. Some fabrics are extremely
flammable and could ignite.
• DO NOT USE ALUMINUM FOIL TO
LINE ANY PART OF THE OVEN. Use of
a foil liner can result in an electrical
shock or fire hazard or obstruct the flow
of heat and air. Foil is an excellent heat
insulator, allowing heat to be trapped
under it. This can interfere with cooking
and can damage the enamel of the
oven.
• Prevent aluminum foil from contacting the
heating elements.
• DO NOT HEAT UNOPENED FOOD
CONTAINERS: A buildup of pressure
can cause the containers to burst.
• DO NOT USE FLAMMABLE
PRODUCTS TO CLEAN THE OVEN.
• Do not clean, rub, damage or remove
the oven door gasket. It is essential for a
good, tight seal during baking and when
the self-clean cycle is engaged. Replace
the oven door gasket if it becomes
damaged or encrusted with food
residue.
• ONLY QUALIFIED SERVICE
PERSONNEL SHOULD PERFORM
REPAIRS. Service personnel must
disconnect the power supply before
servicing this unit.
NOTE: The California Safe Drinking Water and Toxic Enforcement Act requires the
Governor of California to publish a list of substances known to the State of
California to cause cancer, birth defects or other reproductive harm, and requires
businesses to warn customers of potential exposure to such substances.
WARNING: This product contains a chemical known by the State of California to
cause cancer, birth defects or other reproductive harm.
This appliance can cause low-level exposure to some of the substances listed,
including benzene, formaldehyde, carbon monoxide, toluene, and soot.
Important Safety Instructions
7
EN
• Do Not Use Water on Grease Fires -
Smother fire or flame or use dry chemical
or foam-type extinguisher.
• Use Only Dry Potholders - Moist or
damp potholders on hot surfaces may
result in burns from steam. Do not let
potholder touch hot heating elements.
Do not use a towel or other bulky cloth.
• Do not stand or sit on the oven door.
• Remove all packing materials and
temporary labels from the oven.
• Record the Model and Serial number on
Page 2 of this booklet. The Model and
Serial number are on the appliance ID
plate. The ID plates are visibly located
on the oven door frame. THE ID PLATE
MUST NOT BE REMOVED.
• BEFORE BAKING FOR THE FIRST TIME,
turn on the oven to burn off any dirt, oil or
grease remaining from the manufacturing
process. Turn the oven on and set to
450°F for 20 to 30 minutes.
How to read the user manual
This user manual uses the following reading
conventions:
1. Use instruction sequence.
• Single use instruction.
SAVE THESE INSTRUCTIONS
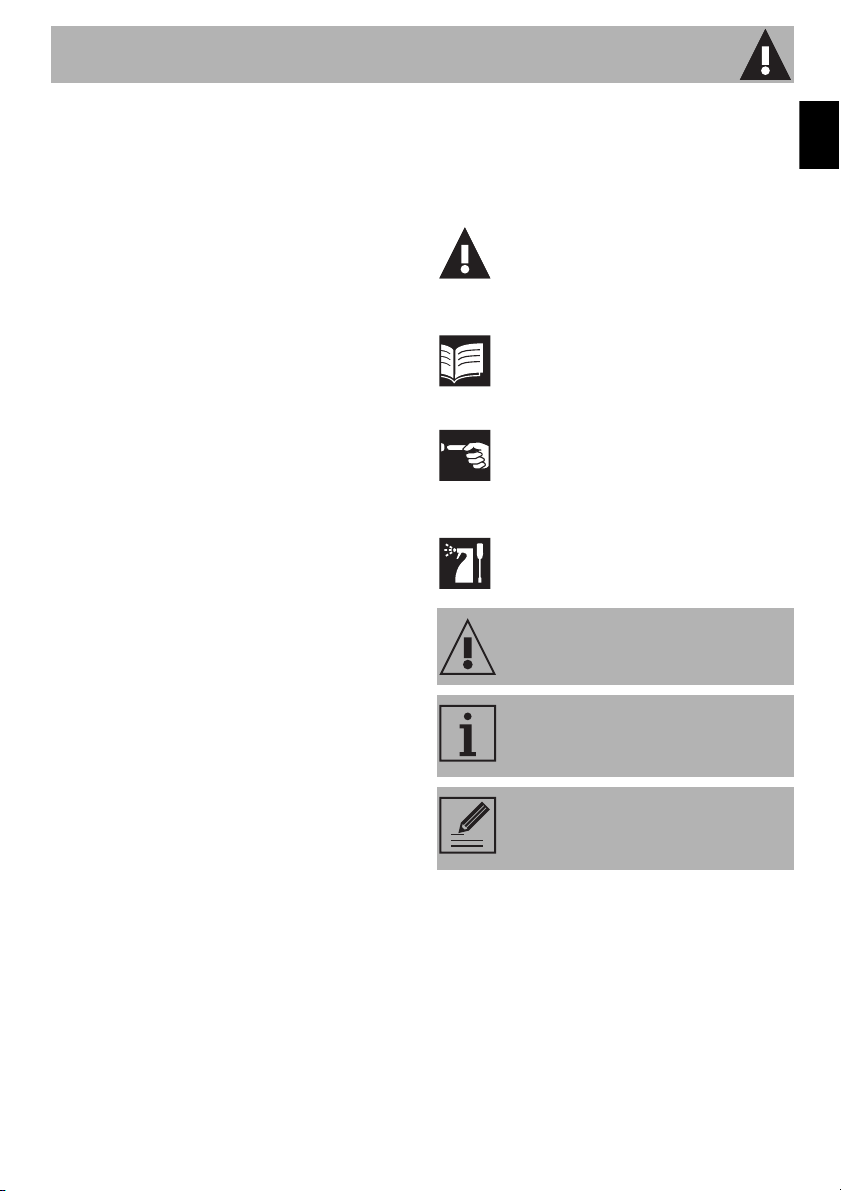
Instructions
General information on this user
manual, on safety and final
disposal.
Description
Description of the appliance and its
accessories.
Use
Information on the use of the
appliance and its accessories,
cooking advice.
Cleaning and maintenance
Information for proper cleaning and
maintenance of the appliance.
Safety instructions
Information
Advice
Description
8
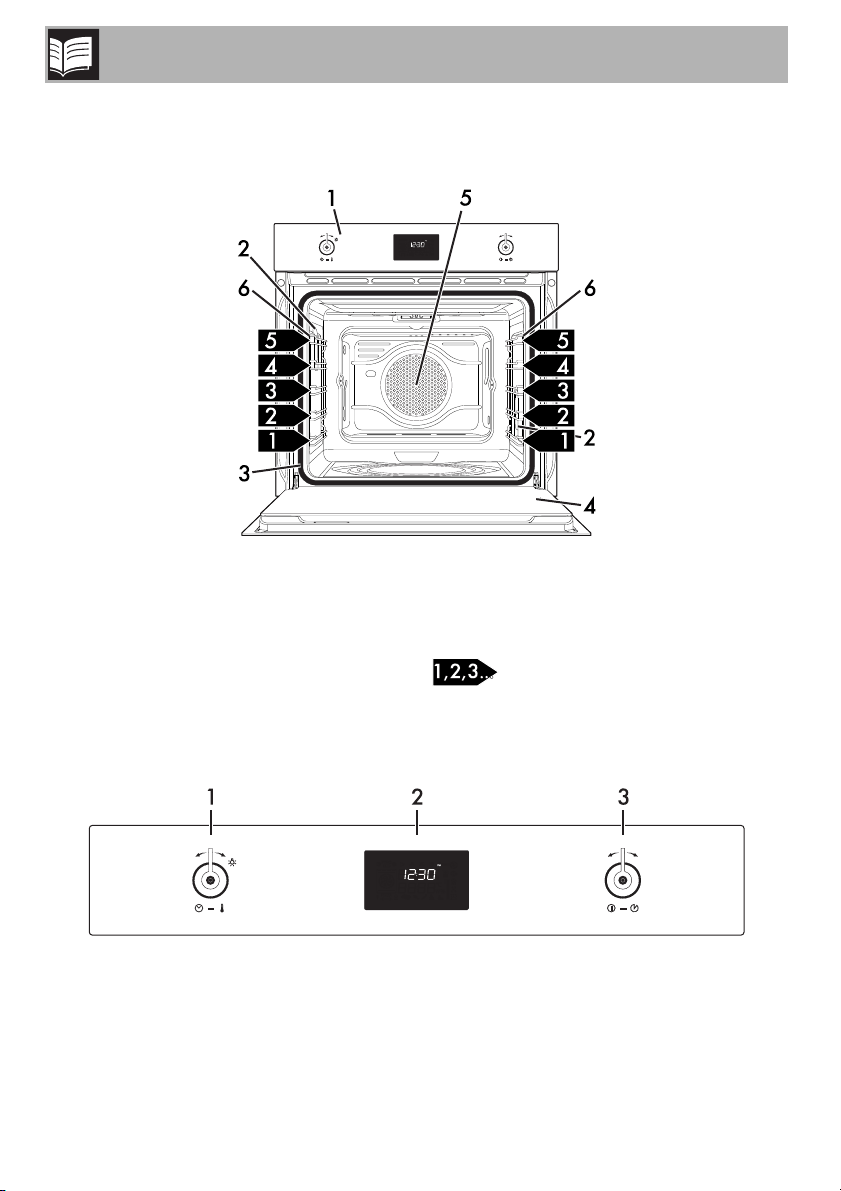
1 Description
1.1 General Description
1 Control panel
2 Oven light
3 Seal
4 Door
5 Fan
6 Rack/tray support frames
Frame shelf
1.2 Control panel
Description
9
EN
1 Temperature knob
Use this knob to select:
• the cooking temperature;
• the duration of a function;
• programmed cooking procedures;
• the current time;
• when the light within the appliance turns
on/off.
2 Display
Displays the current time, the cooking
function and temperature selected, and the
time assigned.
3 Function knob
Use this knob to:
• turn the appliance on/off;
• select a function;
• temporarily start or stop a function.
1.3 Other parts
Positioning shelves
The appliance has shelves for positioning
trays and racks at various heights. The
position heights go from the bottom
upwards (see 1.1 General Description).
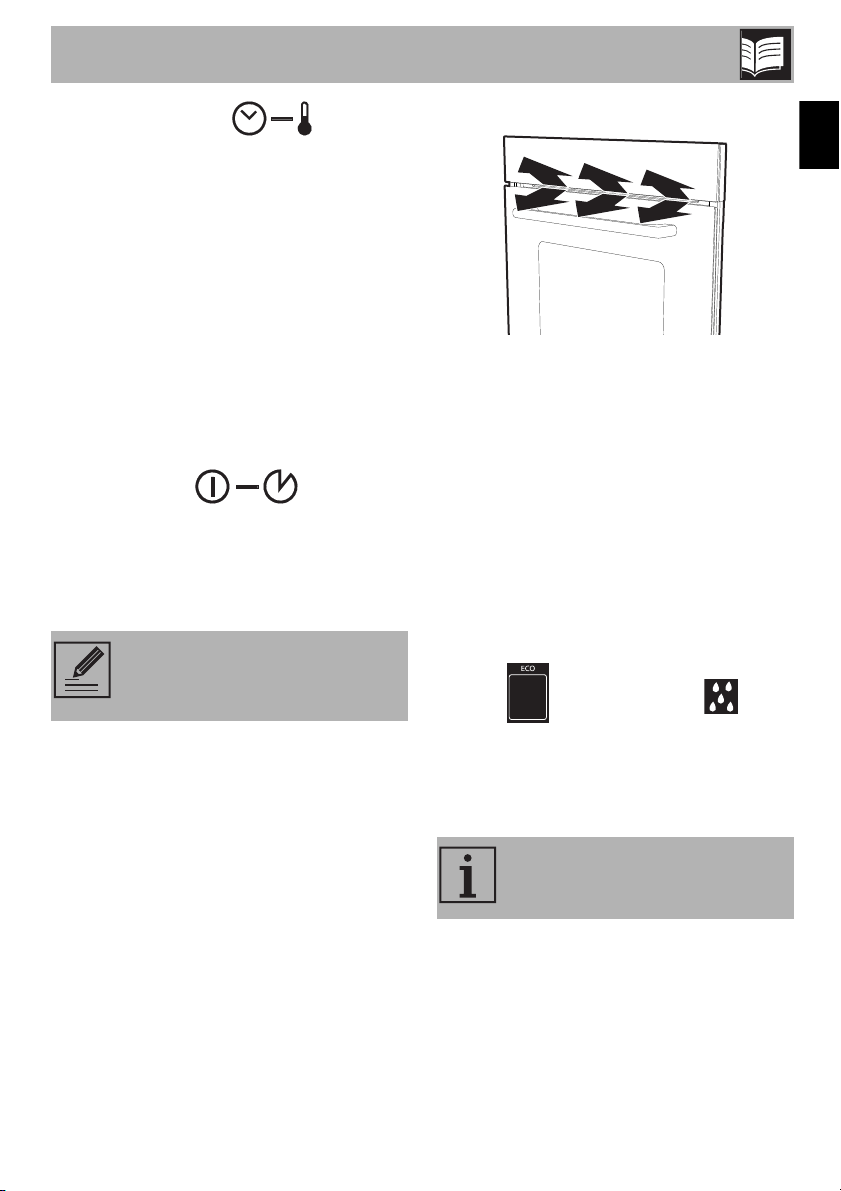
Cooling fan
The fan cools the appliance and turns on
during cooking or baking.
The fan provides a steady outflow of air
from above the door, which may continue
for a short time after the appliance has
been turned off.
Internal lighting
The internal lighting for the appliance turns
on:
• when the door is opened;
• when any setting is started, except for the
ECO and Vapor Clean
functions;
• when the temperature knob is turned
briefly to the right (manual activation/
deactivation).
To stop the active function and turn
the appliance off, press the
function knob for a few seconds.
When the door is open, you
cannot turn off the internal lighting.
Description
10
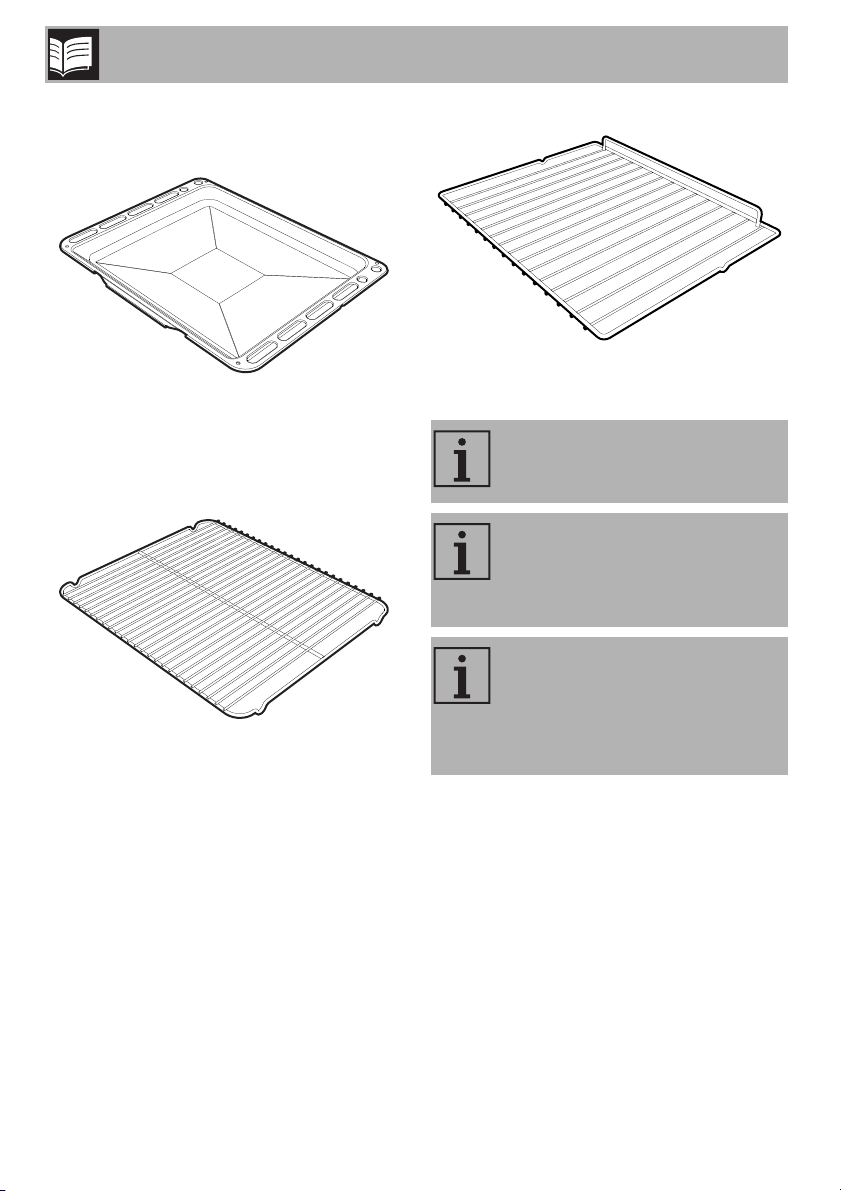
1.4 Available accessories
Tray
Used for collecting grease from foods on
the rack above and for baking cakes, pizza
and baked desserts.
Tray rack
This is placed above the tray, and is used
for cooking or baking foods that might drip.
Rack
Used to hold containers containing food to
be cooked.
Not all accessories are provided
on all models.
Accessories that may come into
contact with food are made of
materials that comply with all
legal provisions in force.
Original accessories supplied or
optional can be purchased at
authorized service centers.
Only use original manufacturer’s
accessories.
Use
11
EN
2 Use
2.1 Warnings
2.2 First use
1. Remove all protective film from the
outside and inside of the appliance
and accessories.
2. Remove all labels (except the nameplate
with technical data) from the inside of
the oven and accessories.
3. Remove and wash all accessories of
the appliance (see “Cleaning inside the
oven”).
4. To remove any production residues, turn
the oven on to the maximum cooking
temperature for at least 20 minutes
(see “Using the oven”).
5. To begin to use the appliance, you will
need to set the current time (see “Setting
the time”).
High temperature inside the oven
while in use
Burn hazard
• Keep the door closed while cooking or
baking.
• Use potholders or wear thermal gloves
to protect your hands when handling
pans that have been inside the oven.
• Do not touch the heating elements inside
the oven.
• Do not pour water directly on very hot
trays.
• Do not allow children near the
appliance during operation.
High temperature inside the oven
while in use
Danger of fire or explosion
• Do not use spray products near the
appliance.
• Do not use or store flammable materials
near the appliance.
• Do not use plastic dishes or containers
for cooking or baking food.
• Do not put sealed tin cans or containers
in the oven.
• Do not leave the appliance unattended
during cooking operations that could
release fats or oils.
• Remove all trays and racks that will not
be used during cooking or baking.
Improper use
Risk of damage to enameled
surfaces
• Do not cover the bottom of the oven with
sheets of aluminum or tin foil.
• If you wish to use parchment paper,
place it so that it will not interfere with the
hot air circulation inside the oven.
• Do not place pots or pans directly on
the bottom of the oven.
• Do not pour water directly on very hot
trays.
Use
12
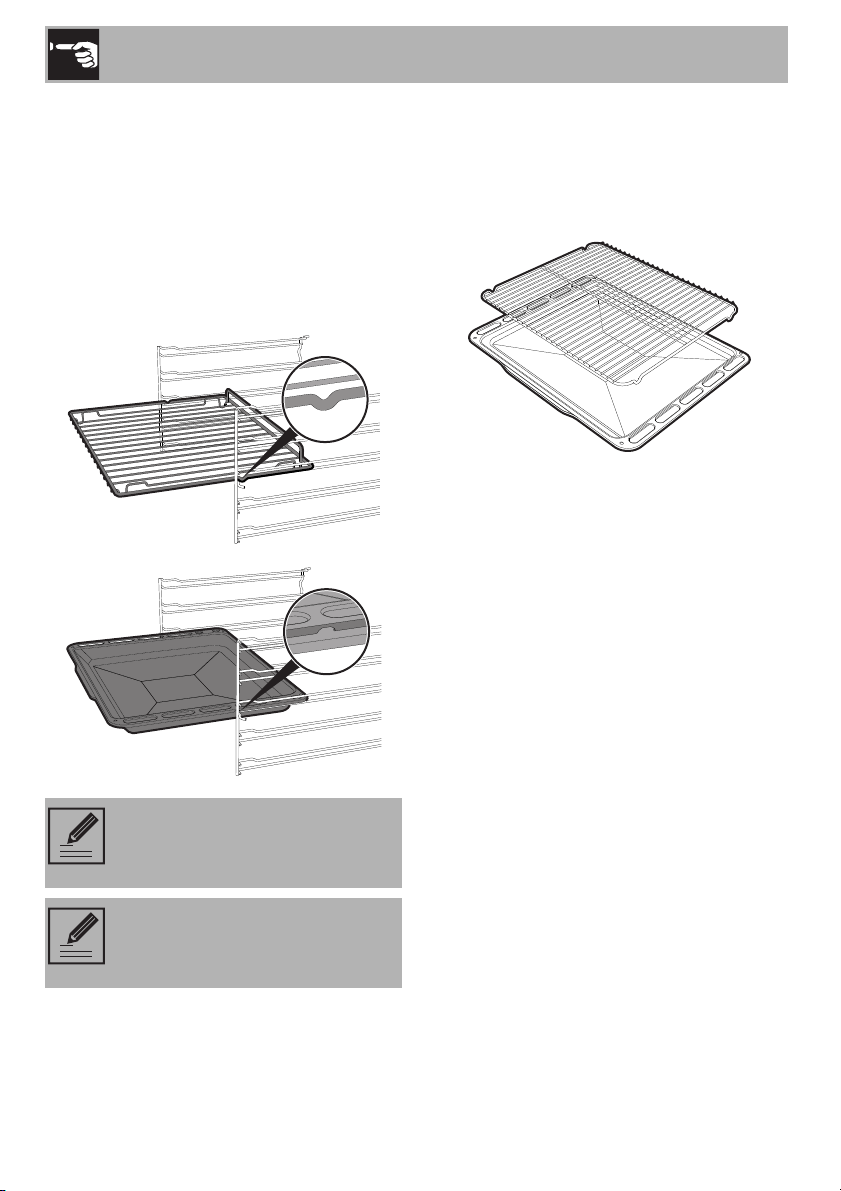
2.3 Use of accessories
Racks and trays
Racks and trays must be inserted into the
side guides until they stop.
• The mechanical safety locks that prevent
accidental removal of the racks must
face downward and towards the rear of
the oven.
Tray rack
The tray rack must be inserted into the tray.
This way, the grease can be collected
separately from the food being cooked or
baked.
Insert the racks and trays gently
into the oven and push back until
they stop.
Clean the trays before using them
for the first time to remove any
manufacturing residues.
Use
13
EN
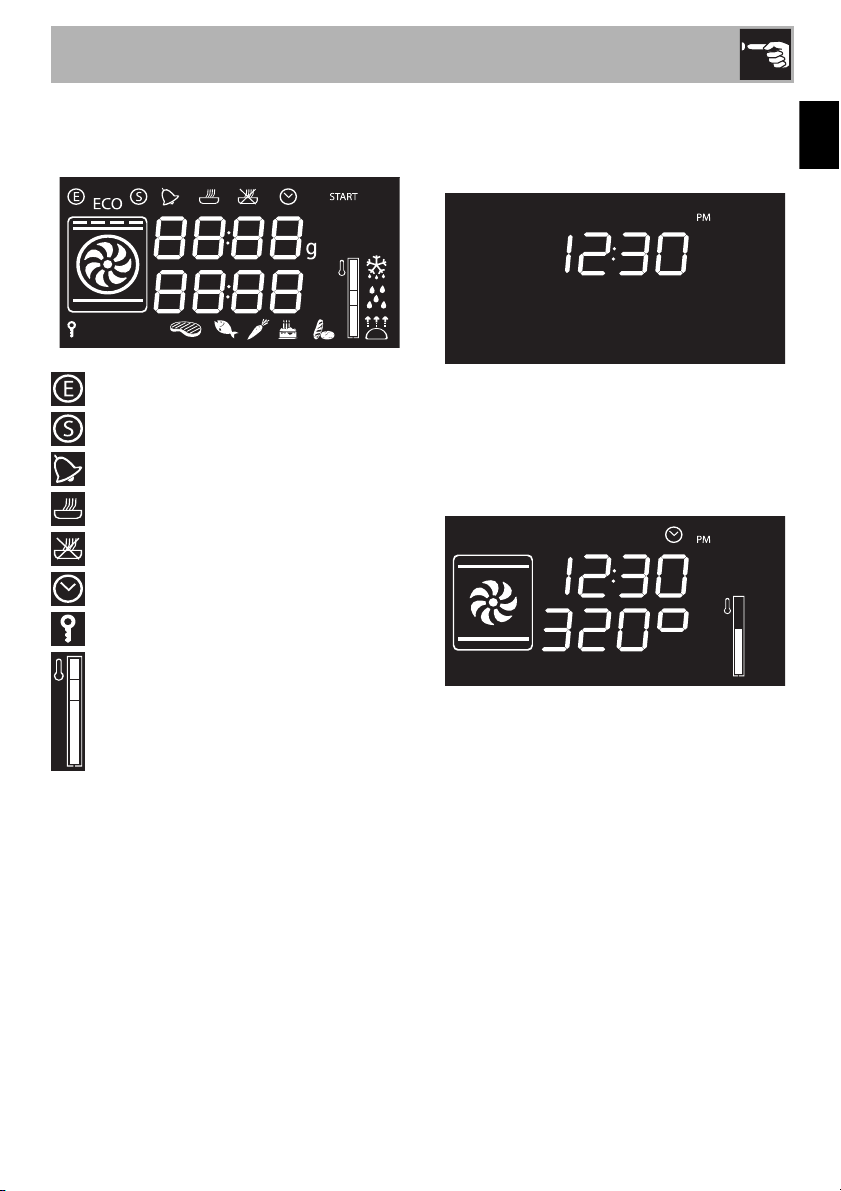
2.4 Using the oven
Display
Eco Logic indicator light
Showroom indicator light
Timer indicator light
Timed cooking indicator light
Programmed cooking indicator light
Clock indicator light
Child lock indicator light
Temperature progress indicator
Functions
Stand-by: The display will show the current
time until a function is selected
.
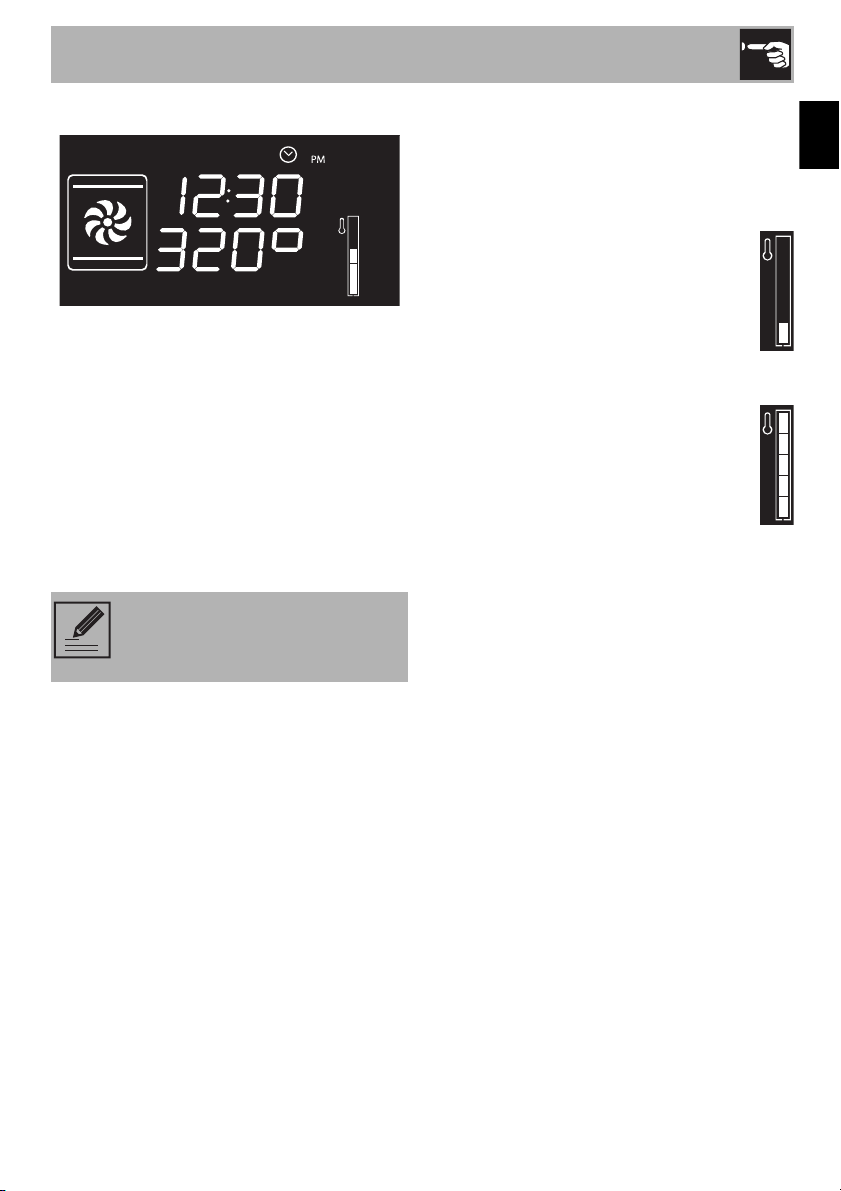
ON: Once a function has started, the
display will show its set parameters, such as
temperature, duration and temperature
progress.
Use
14
Pressing the temperature knob during an
active function will cycle through the
parameters in the following order.
Temperature
Timer duration
Function duration
Programmed cooking duration (if timed
cooking has been selected)
Time display
Each setting can be modified by rotating the
temperature knob to the right or left. Keep
rotating the knob to increase/decrease the
setting quickly.
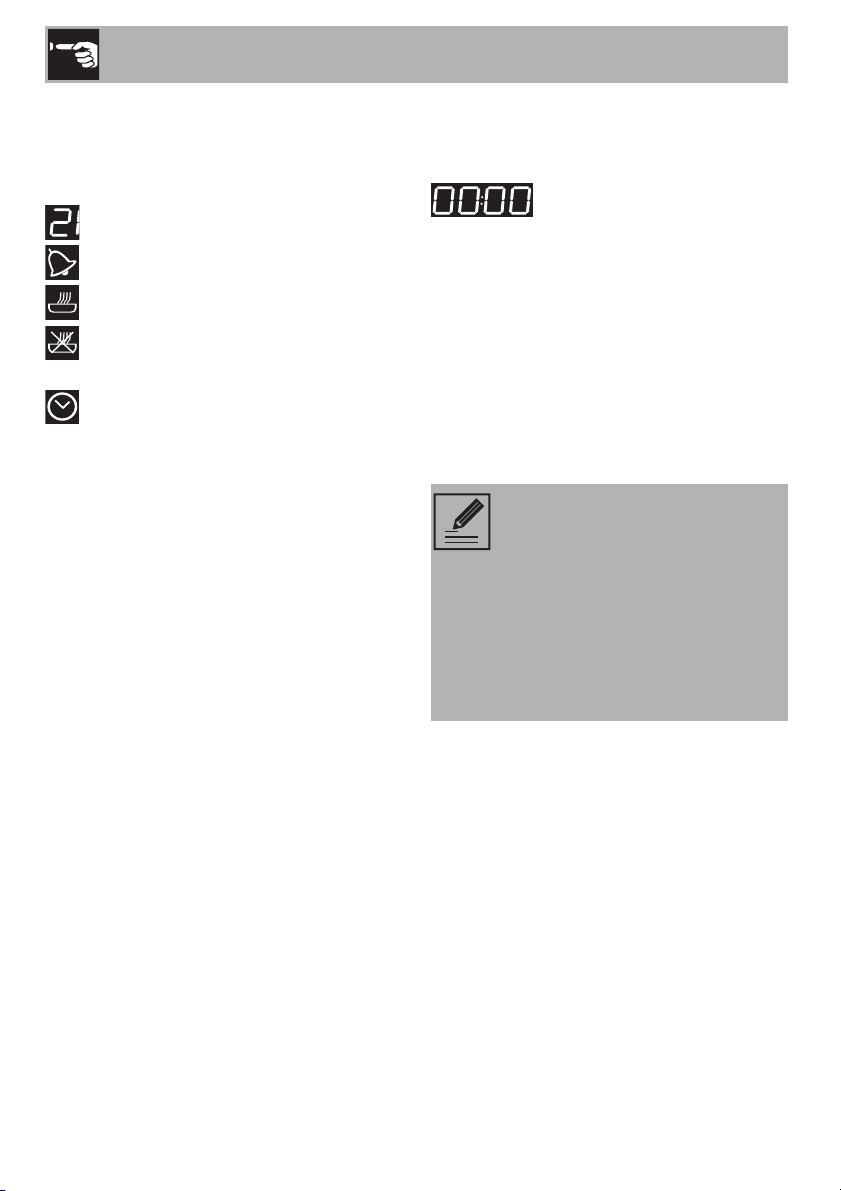
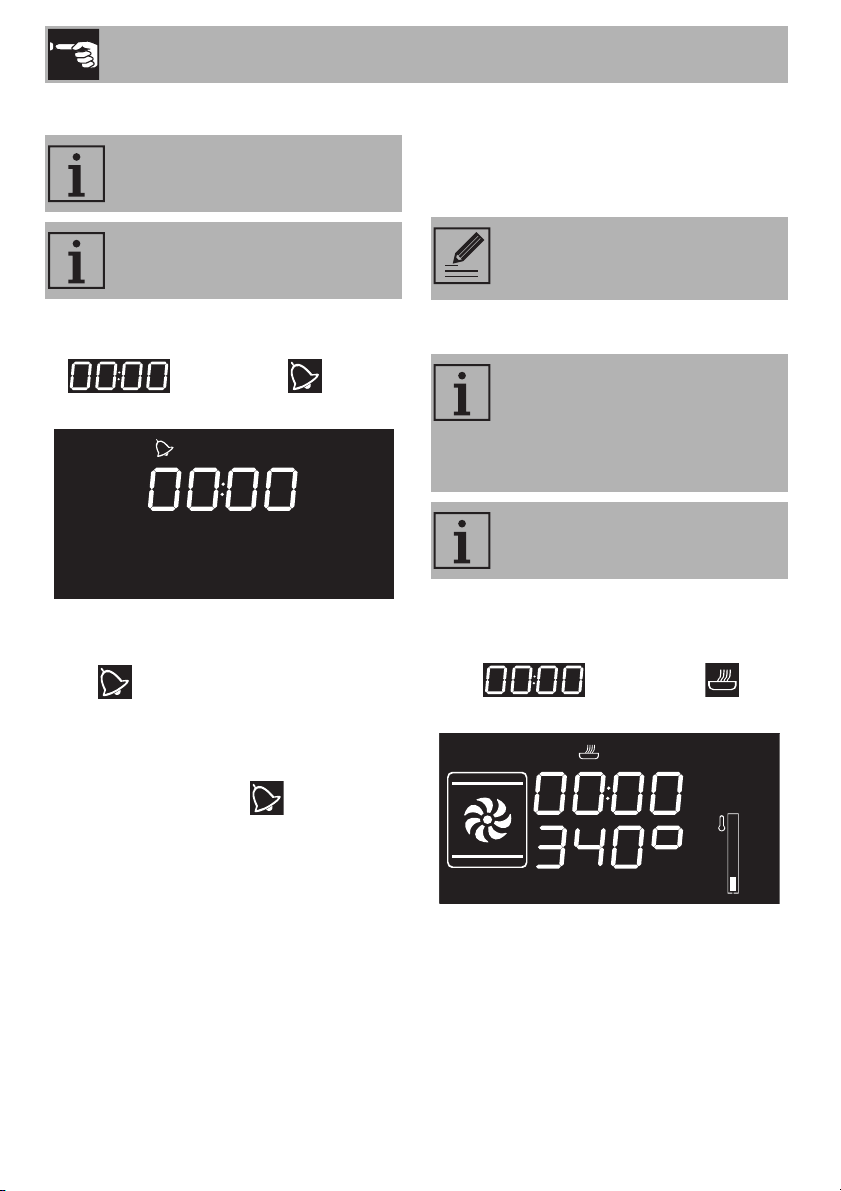
Setting the time
At first use, or after a power failure, the
appliance's display will show a flashing
symbol. To be able to start any
cooking function, the current time must be
set.
1. Turn the temperature knob to set the
displayed hour (keep rotating the knob in
either direction to cycle through quickly).
2. Press the temperature knob.
3. Turn the temperature knob to set the
minutes (keep rotating the knob in either
direction to cycle through quickly).
4. Press the temperature knob to set.
It might become necessary to
change the current time, for
example for daylight savings time.
From stand-by, keep rotating the
temperature knob to the right or left
until the hour display begins
flashing.
The time cannot be changed if the
appliance is ON.
Use
15
EN
Cooking functions
1. Press the function knob to activate the
appliance.
2. Turn the function knob to the left or right
to select a function.
3. To change the default temperature, press
the temperature knob.
4. Turn the temperature knob to the right or
left to set the desired temperature.
5. Press the function knob to start cooking.
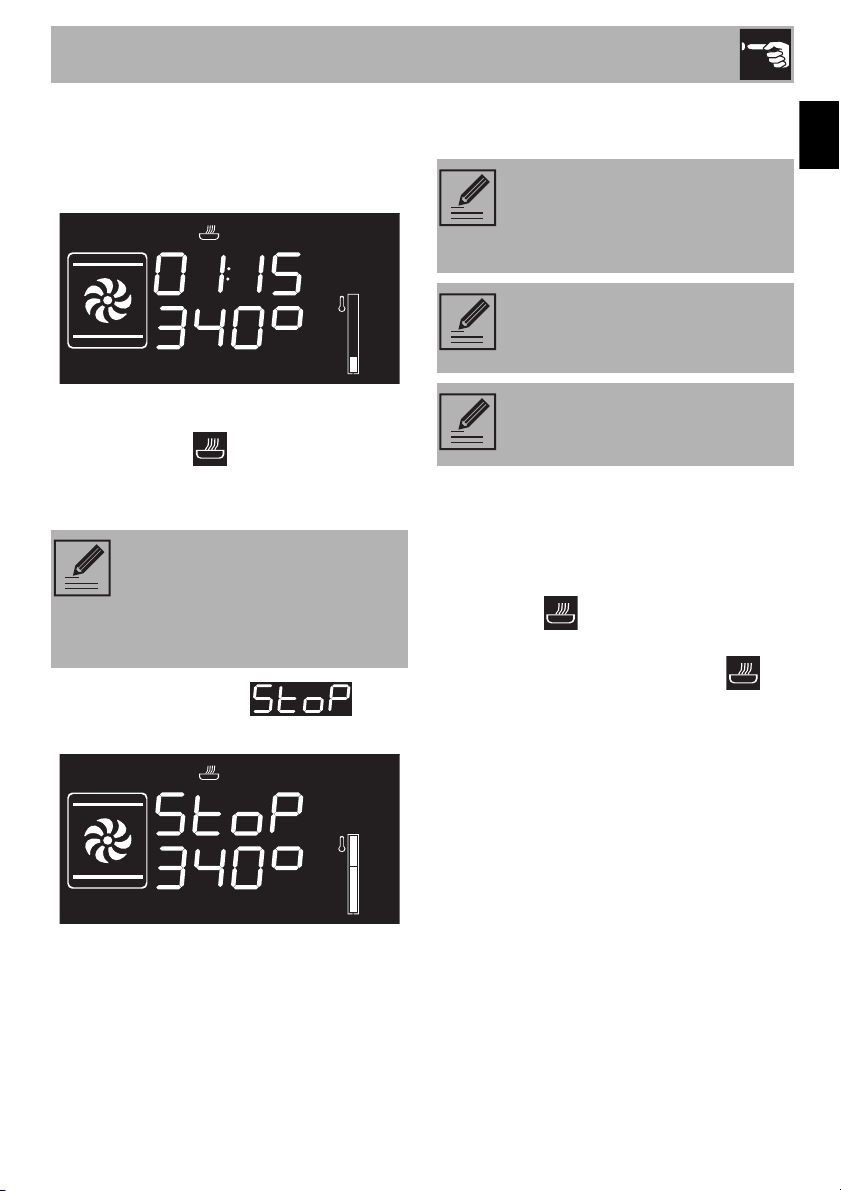
Preheating phase
Cooking is preceded by a preheating
stage, which allows the appliance to heat
to the cooking temperature.
The temp level icon will flash on the
display to indicate that this stage is in
progress.
When the preheating stage is over, the
temp level icon will remain on and a
buzzer will sound to indicate that the
food can be placed inside the oven.
To stop a function at any time,
press the function knob for at least
3 seconds.
Use
16
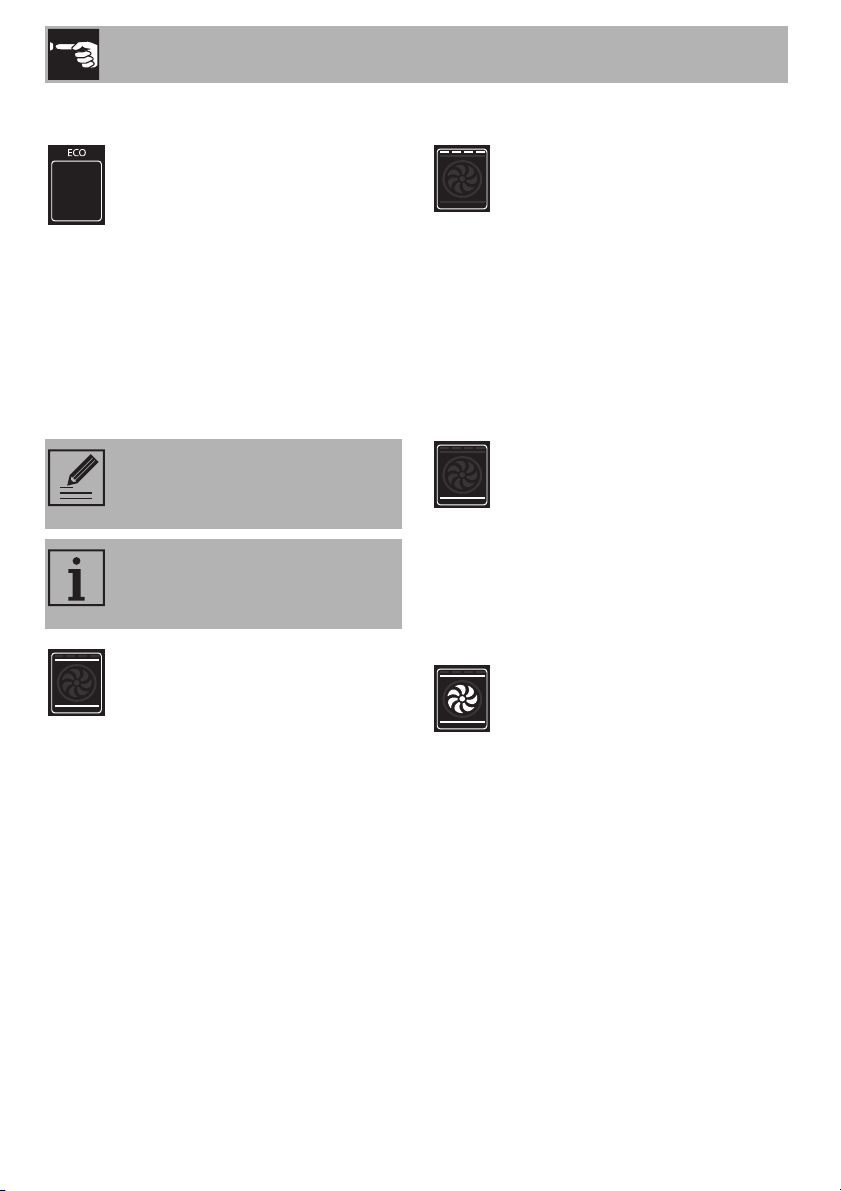
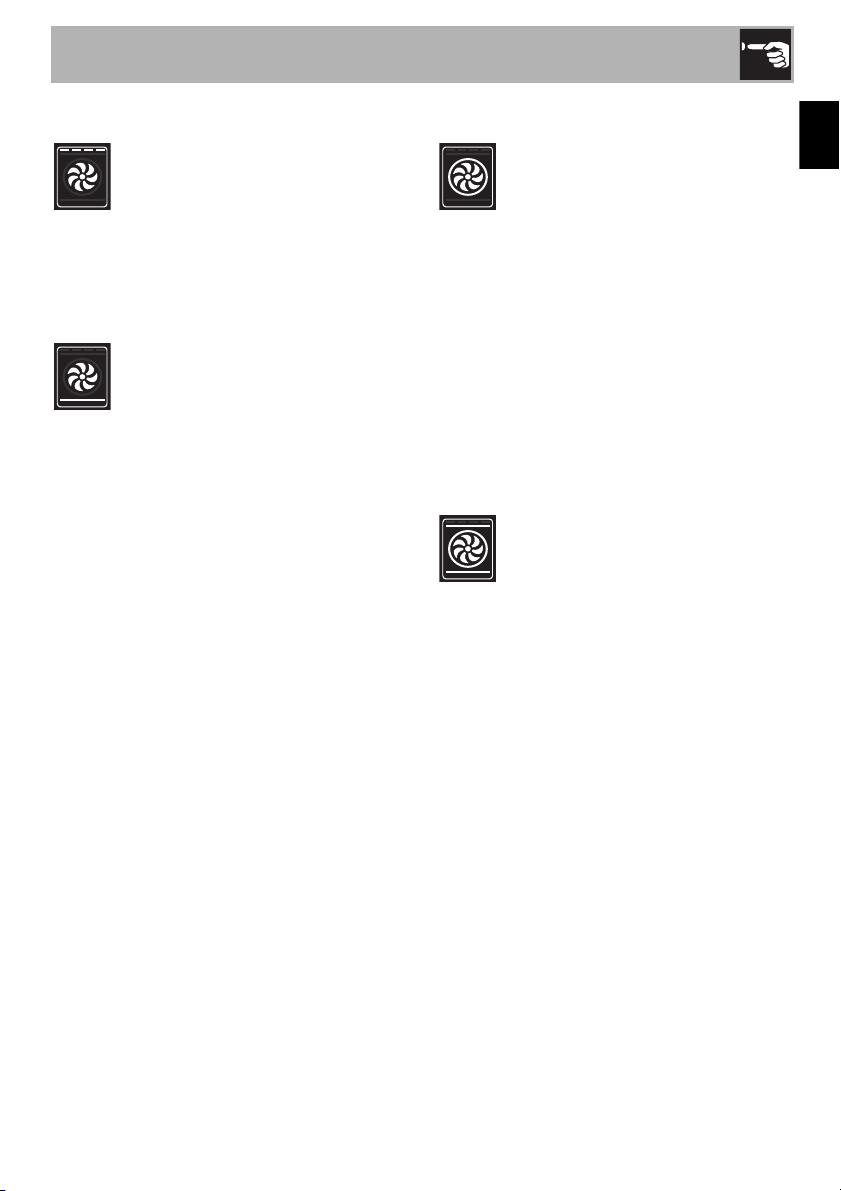
List of functions
ECO
This function is particularly useful for
cooking on a single rack with
reduced energy consumption.
Ideal for cooking meat, fish and
vegetables. It is not recommended
for food which needs to rise.
To save as much energy as possible
and to reduce the cooking time, put
the food in the oven without
preheating it.
When using the ECO function,
avoid opening the oven door
while cooking.
When using the ECO function,
cooking times (and preheating, if
any) are longer.
Static
As the heat comes from above and
below at the same time, this system
is particularly suitable for certain
types of food. Conventional
cooking, also known as static
cooking, is suitable for cooking just
one dish at a time. It is perfect for
pies, bread and casseroles. It is also
suitable for fatty meats, such as duck
or goose.
Broiler
The heat coming from the broiler
element gives perfect broiling
results, especially for thin and
medium thickness meat, and gives
the food an even browning at the
end of cooking. Perfect for toasted
sandwiches or cheese toppings.
This function allows you to grill large
quantities of food, particularly meat,
evenly.
Lower element
The heat radiating only from the
bottom allows you to complete the
cooking/baking of foods that
require a higher base temperature,
without affecting their browning.
Perfect for cakes, pies, tarts and
pizzas.
Fan assisted
The operation of the fan, combined
with traditional cooking, ensures
uniform cooking even with complex
recipes. Perfect for meat roasts.
Use
17
EN
Convection broiler
The air that the fan produces softens
the set heat wave generated by the
broiler element, allowing for perfect
broiling, even of very thick cuts of
meat such as steaks, pork chops,
etc.
Fan + lower element
The combination of the fan with only
the lower heating element allows
cooking to be completed rapidly.
This system is recommended for
sterilizing or for finishing off the
cooking of foods that are already
well-cooked on the surface, but not
inside, which therefore need a little
more heat. Perfect for any type of
food.
Circular
The combination of the fan and the
circular element (incorporated in the
rear of the oven) allows you to cook
different foods on several levels, as
long as they require the same
temperature
and cooking time. Air circulation
ensures instant and uniform
distribution of heat. It will be
possible, for instance, to cook fish,
vegetables and biscuits
simultaneously (on different levels)
without mixing smells and flavors.
Turbo
The combination of convection
cooking and conventional cooking
allows you to cook different foods
on several levels extremely quickly
and efficiently, without mixing smells
and flavors. Perfect for large
volumes of food that call for intense
cooking.
For a rotisserie effect, set the
appliance to the maximum
temperature. Once the appliance
reaches the maximum temperature,
bring it back to the normal
temperature. By doing so, all the
liquids will be sealed in the meat,
keeping it from shrinking.
Use
18
Timer
1. Press the temperature knob once (twice if
already on). The display will show the
digits and the indicator
light will flash.
2. Turn the knob to set the duration (from 1
minute to 4 hours). After a few seconds,
the indicator light will stop flashing
and the countdown will begin.
3. Select the desired cooking function and
wait until the buzzer sounds to indicate
that the time is up. The indicator light
will flash.
4. To deactivate the buzzer, press or Turn
one of the two knobs.
5. To select another timer, Turn the
temperature knob.
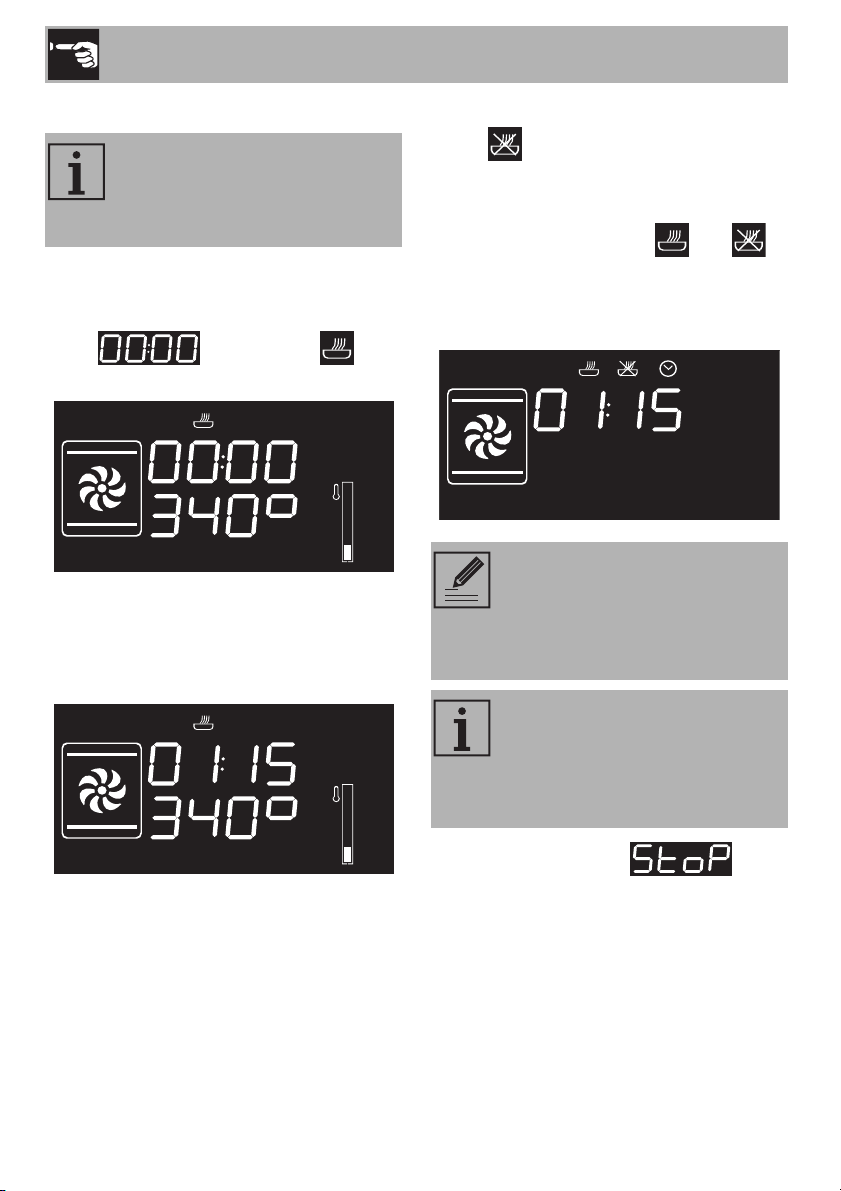
Timed cooking
1. After having selected a cooking function
and temperature, press the temperature
knob three times. The display will show
the digits and the
indicator light will flash.
This function does not turn the oven
off, but rather sounds a buzzer.
The timer can be activated both in
the cooking phase and in stand by.
To stop the timer, set the value to
zero
Timed cooking is the function
which allows a cooking operation
to be started and then ended after
a specific length of time set by the
user.
Activating timed cooking will
cancel any previously-set timers.
Use
19
EN
2. Turn the temperature knob to the right or
left to set the cook time from 00:01 to
12:59. Keep rotating the knob to
increase/decrease the setting quickly.
3. A few seconds after selecting the desired
cook time, the indicator light will
stop flashing and timed cooking has
begun.
4. Once done cooking, will
be displayed and a buzzer will sound.
5. To deactivate the buzzer, press or turn
one of the two knobs or open the door.
Modifying the settings during timed
cooking
When in operation, it is possible to change
the duration of timed cooking:
1. When the indicator light is solid and
the appliance is in cooking mode, press
the temperature knob twice. The
indicator light will begin to flash.
2. Turn the temperature knob to the right or
left to change the cook time that was
previously set.
To extend cooking in manual
mode, press the temperature knob
again. The appliance will resume
its normal operation with the
previously-selected settings.
To turn the buzzer off and select
one more timed cooking session,
turn the temperature knob to the
right.
To turn off the buzzer and select a
different cooking function, turn the
function knob to the right or left.
To shut off the appliance, keep the
function knob pressed.
Use
20
Programmed cooking
1. After having selected a cooking function
and temperature, press the temperature
knob three times. The display will show
the digits and the
indicator light will flash.
2. Turn the knob to the right or left to set the
cooking duration from 00:01 to 12:59.
Keep turning the knob to scroll through
quickly.
3. Press the temperature knob a fourth time.
The indicator light will flash. Turn the
knob to the right or left to set the time the
oven should turn off.
4. After a few seconds, the and
indicator lights will begin flashing. The
appliance will turn on at the
programmed start time.
5. Once done cooking, will
be displayed and a buzzer will sound.
Programmed cooking is the
function which turns the appliance
off automatically at a preset hour,
given a time set by the user.
To extend cooking in manual
mode, press the temperature knob
again. The appliance will resume
its normal operation with the
previously-selected settings.
In programmed cooking, the
appliance will turn on 10 minutes
in advance to allow it to reach the
appropriate cook temperature
(preheating).

Use
21
EN
6. To deactivate the buzzer, press or turn
one of the two knobs or open the door.
Modifying the settings during
programmed cooking
When in operation, the duration for
programmed cooking can be modified:
1. When the and indicator lights
are solid and the appliance is waiting to
start cooking, press the temperature knob
twice. The indicator light will begin
to flash.
2. Turn the temperature knob to the right or
left to change the cooking time that was
previously set.
3. Press the temperature knob again. The
indicator light will turn off and the
indicator light will start flashing. The
display will show the time the oven is to
turn off.
4. Turn the temperature knob to the right or
left to delay the time the oven is to turn
off.
5. After a few seconds, the and
indicator lights will stop flashing and the
programmed cooking will start up again
with the new settings.
2.5 Cooking tips
General tips
• Use a convection function to achieve
uniform cooking at several levels.
• Increasing the temperature does not
shorten cooking or baking times (the
food could be well cooked on the
outside and undercooked on the inside).
To shut off the appliance, keep the
function knob pressed.
For safety reasons, the end of
cooking time cannot be set without
having programmed the duration.
Modifying the cooking duration
makes it necessary to reset the
cooking stop time.

Use
22
Tips for cooking meats
• Cooking times vary depending on the
thickness and quality of the meat, and on
consumer tastes.
• Use a meat thermometer when cooking
roasts, or simply press on the roast with a
spoon. If it feels hard, it is ready;
otherwise, it needs to roast a bit longer.
Tips for cooking with the broiler and
convection broiler
• The meat can be grilled starting with a
cold oven or with the oven preheated if
you want to change the effect of the
cooking.
• With the convection broiler function, it is
recommended that the oven be
preheated before broiling.
• We recommend placing the food at the
center of the rack.
Tips for baking cakes and cookies
• It is preferable to use dark metal pans,
which help to absorb the heat better.
• The temperature and baking duration
depend on the quality and consistency
of the dough.
• To check whether the cake is baked
through, stick a toothpick into its highest
point at the end of the baking time. If the
dough does not stick to the toothpick, the
dessert is cooked.
• If the dessert goes flat when it comes out
of the oven, on the next occasion reduce
the set temperature by about 50°F,
selecting a longer cooking time if
necessary.
Tips for defrosting and proving
• With the wrapping removed, place
frozen foods into a lidless container and
place it on the first rack in the oven.
• Do not overlap foods.
• To defrost meat, use a rack placed on
the second level and a tray placed on
the first level. This way, the meat does not
remain in contact with the liquid from
thawing.
• The most delicate parts can be covered
with aluminum foil.
• For good proofing, place a container of
water at the bottom of the oven.
To save energy
• Turn off the oven a few minutes before
the time required. Cooking will continue
for the remaining minutes with the heat
already accumulated inside the oven.
• Do not open the oven door very often to
avoid heat loss.
• Always keep the inside of the appliance
clean.
• (Where present) If not used, remove the
pizza tray and place the cover in its
special location.
Use
23
EN
2.6 Special functions
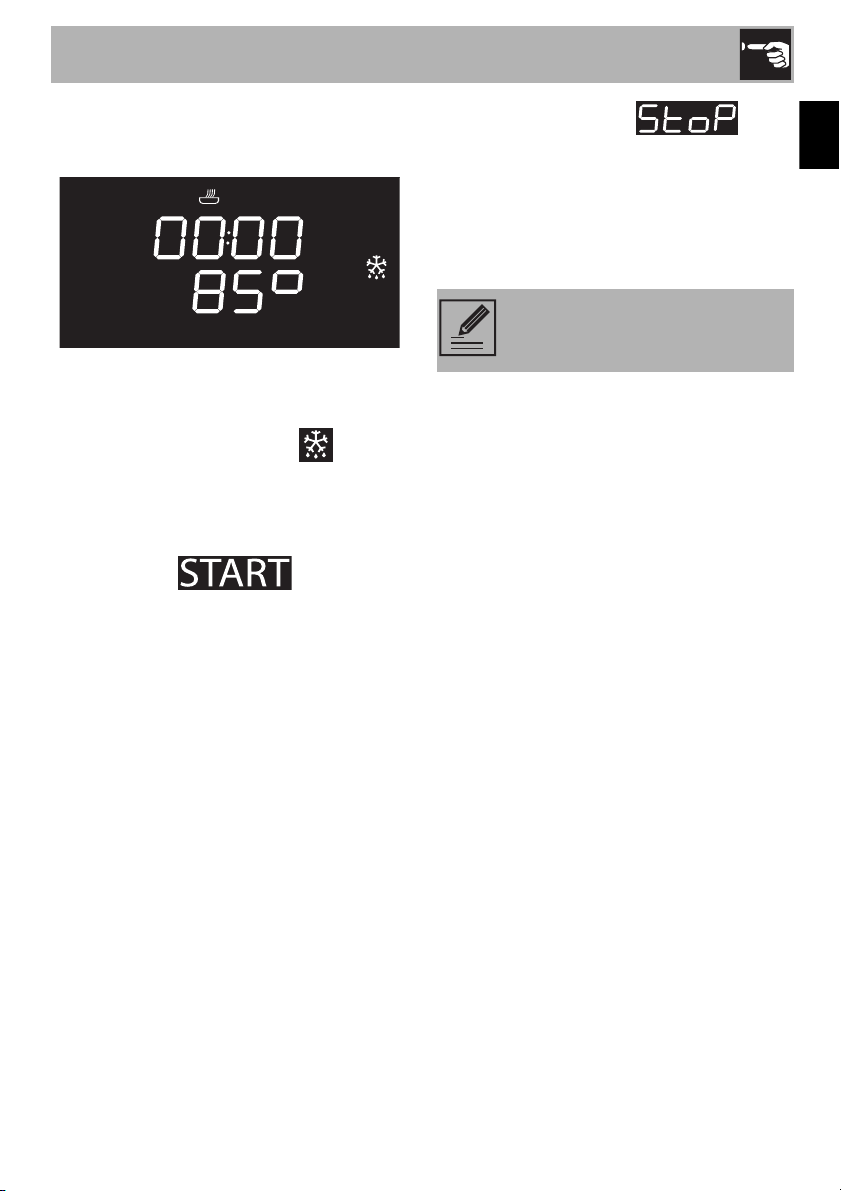
Defrost by time
1. Place the food in the oven.
2. Press and turn the function knob to select
the Defrost by time function .
3. Turn the temperature knob to set the
duration (from 1 to 99 minutes).
4. Press the temperature knob to confirm the
set duration. will begin to
flash.
5. Press the function knob to start the Defrost
by time function.
6. Once done cooking, will
be displayed and a buzzer will sound.
7. To deactivate the buzzer, press or turn
one of the two knobs or open the door.
8. Press the function knob for at least 3
seconds to exit the function.
IMPORTANT: cook the food after
it has been entirely defrosted.
Use
24
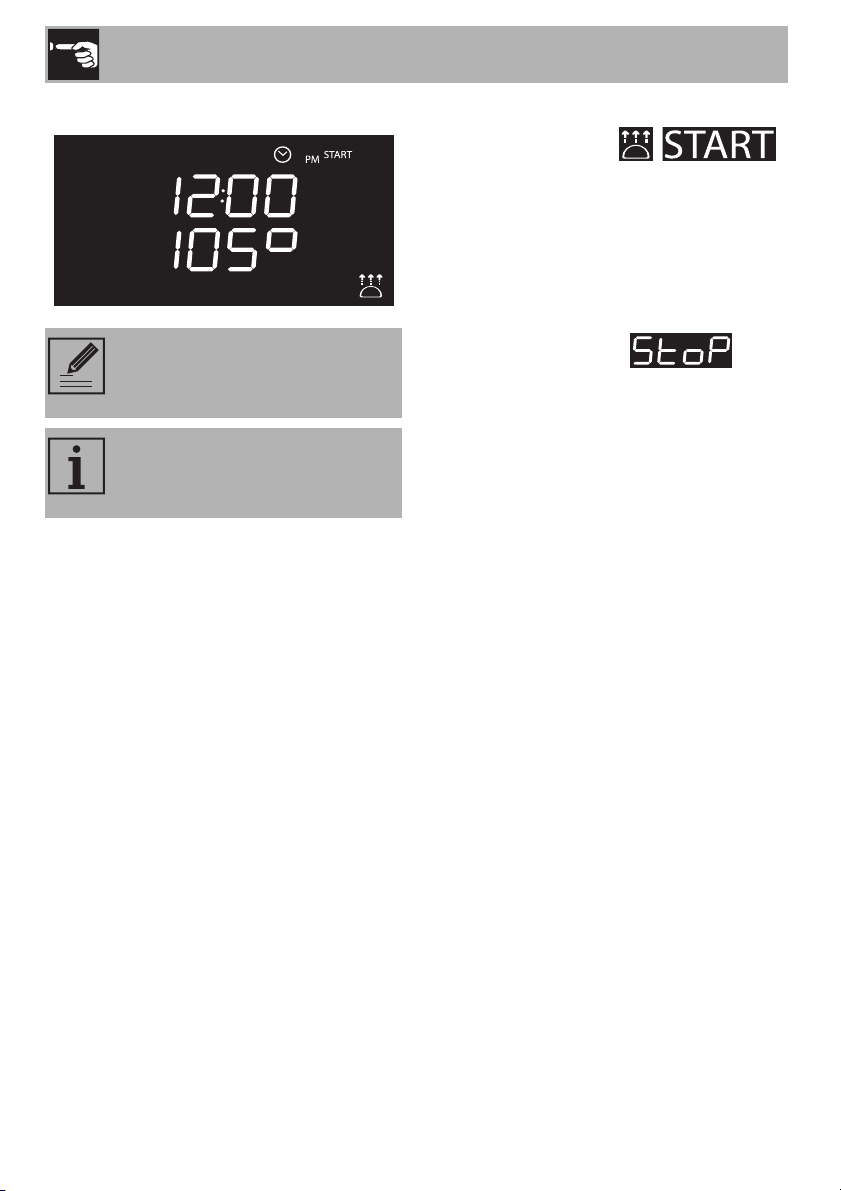
Proving
1. Place the dough that needs to be proved
on the second level.
2. Press and turn the function knob to select
the proving function .
will begin to flash.
3. Press the function knob to confirm the
function selection.
4. Turn the knob to set the proving duration
(from 00:00 to 13:00).
5. Press the function knob to start proving.
6. Once done cooking, will
be displayed and a buzzer will sound.
7. To deactivate the buzzer, press or turn
one of the two knobs or open the door.
8. Press the function knob for at least 3
seconds to exit the function.
It is not possible to modify the
temperature for the proving
function.
For good proving, place a
container of water at the bottom of
the oven.
Use
25
EN
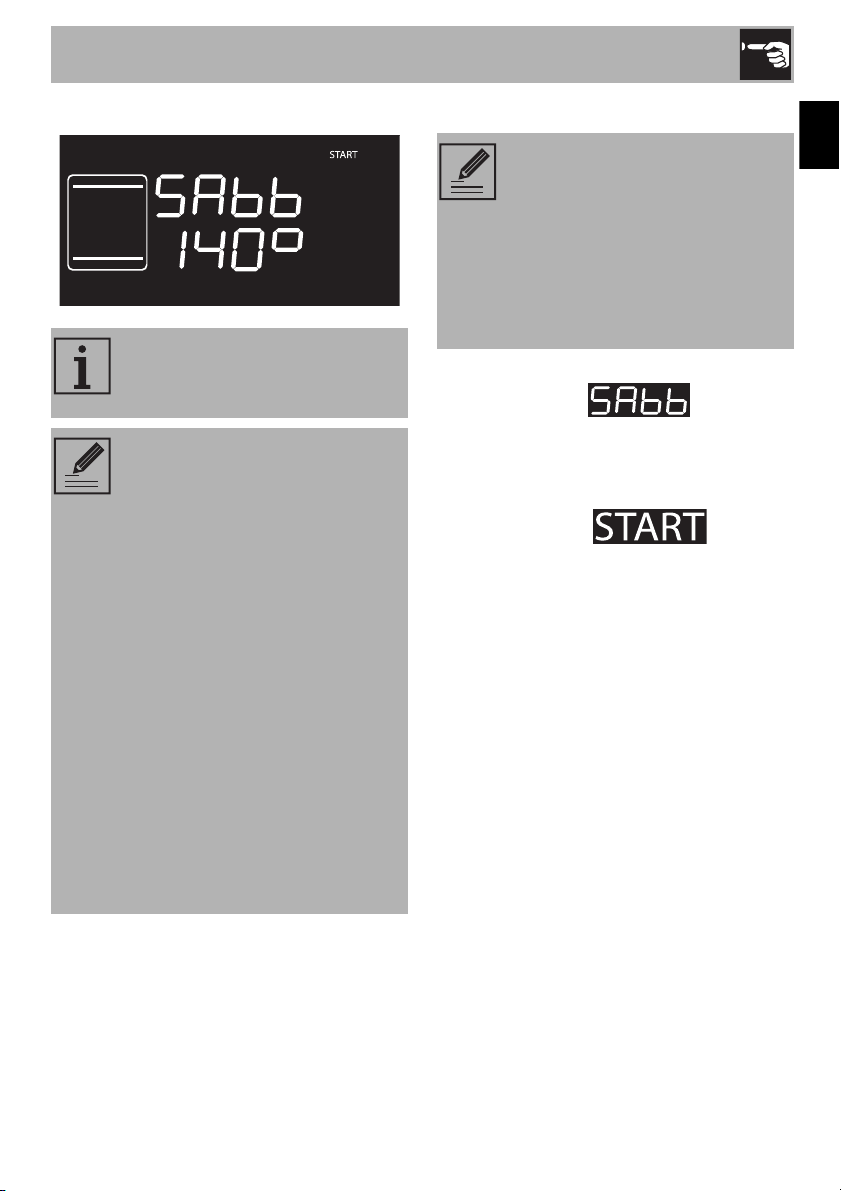
Sabbath
1. Press and turn the function knob to select
Sabbath mode .
2. Press and turn the temperature knob to
change the function's temperature.
3. Press the temperature knob to confirm the
set temperature. will begin
to flash.
4. Press the function knob to start Sabbath
mode.
5. Press the function knob for at least 3
seconds to exit the function.
This function makes it possible to
cook food in accordance with the
provisions of the Jewish rest day.
When in this mode, the appliance
will operate as follows:
• Cooking can continue for an
indefinite amount of time, no
timers or timed cooking can be
set.
• The oven will not preheat.
• The available cooking
temperature will be from 140-
210°F.
• The oven light will be off, any
actions such as opening the
door or manual operation
through the knob will not turn the
light on.
• The fan will be deactivated.
• The knob lights and buzzers will
be deactivated.
After having activated Sabbath
mode, parameters cannot be
modified.
Turning or pressing the knobs will
have no effect; the only knob that
will be active is the function knob
to be able to turn the appliance
off.

Use
26
Defrost by weight
1. Place the food in the oven.
2. Press and turn the function knob to select
‘defrost by weight’ indicated by
and by the illuminated
food symbols.
3. Press the function knob to confirm you
want to defrost by weight.
4. Turn the function knob to select the type
of food you want to defrost.
5. Turn the temperature knob to select the
type of weight (in grams) of the food you
want to defrost.
6. Press the function knob to confirm the
settings and start defrosting.
7. Once done, will be
displayed and a buzzer will sound.
8. To deactivate the buzzer, press or turn
one of the two knobs or open the door.
9. Press the function knob for at least 3
seconds to exit the function.
Preset parameters
* Defrost times may vary according to the
shape and size of the food.
This function makes it possible to
defrost food according to its
weight and type.
Icon Type
Weight
(g)
Time
(min)*
01 Meat 500 120
02 Fish 300 55
03 Fruit 300 35
04 Bread 300 25
Use
27
EN
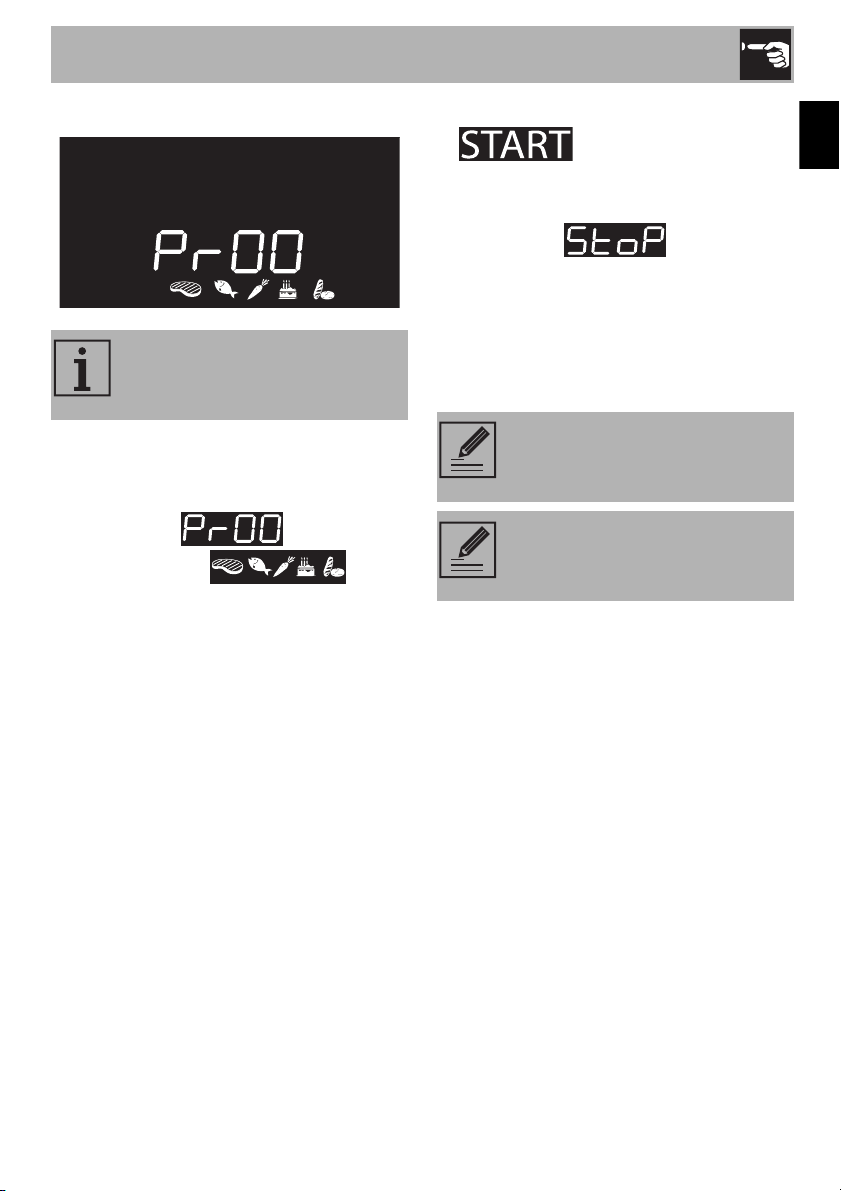
2.7 Automatic programs
1. Place the food in the oven.
2. Press and turn the function knob to select
the automatic cooking programs
indicated by and by the
illuminated food
symbols.
3. Press the function knob to confirm the
selection.
4. Turn the function knob to select the
program (see Automatic program chart).
5. Turn the temperature knob to select the
type of weight (in grams) of the food you
want to cook.
6. Once the oven is preheated,
will begin to flash. Place
the food in the oven and press the
function knob to start cooking.
7. Once done, will be
displayed and a buzzer will sound.
8. To deactivate the buzzer, press or turn
one of the two knobs or open the door.
9. Press the function knob for at least 3
seconds to exit the function.
The appliance’s automatic
programs are divided by type of
food to be cooked.
Automatic programs make it
possible to set programmed
cooking procedures.
To stop a function at any time,
press the function knob for at least
3 seconds.
Use
28
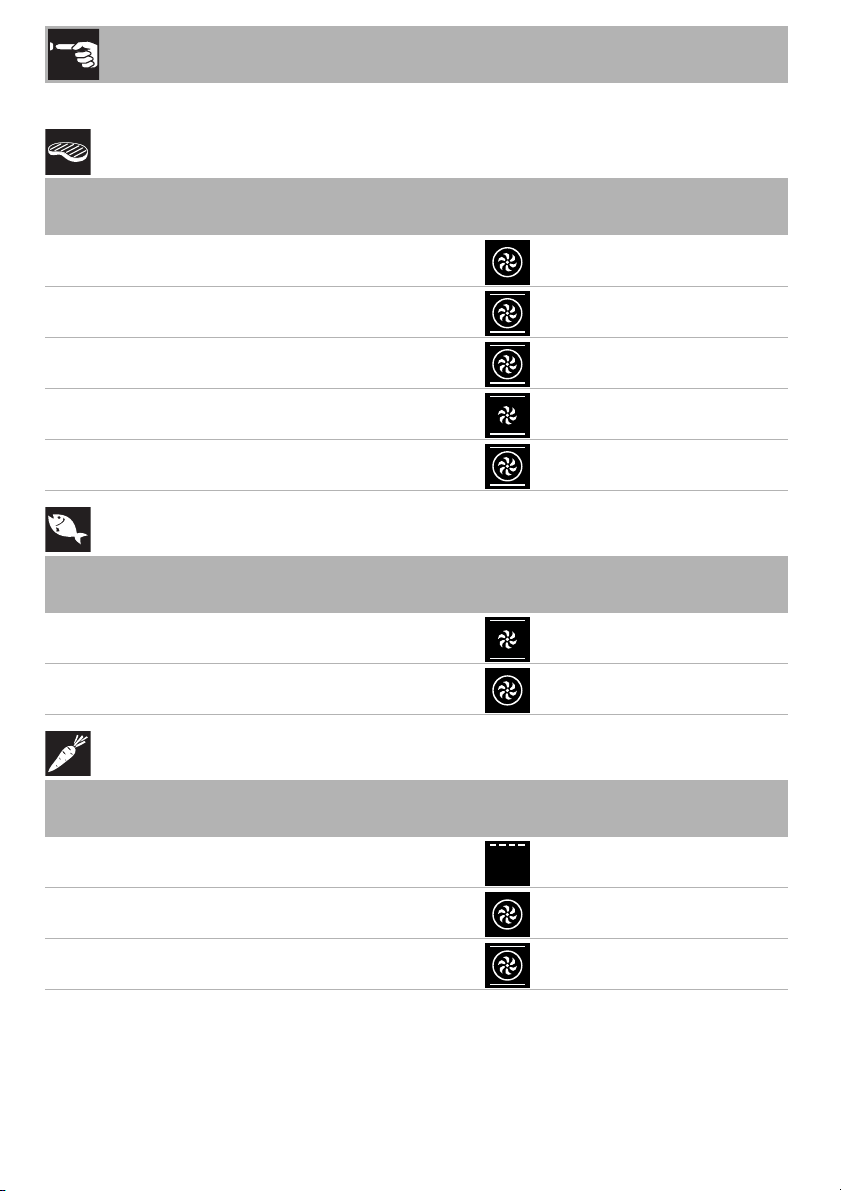
Automatic program chart
MEAT (01 - 05)
FISH (06 - 07)
VEGETABLES (08 - 10)
(1)
For grilling, we recommend cooking the items on each side, referring to the times
indicated in the chart. The longer cooking time refers to the first side, starting from when the
item is uncooked.
Pr Sub-category
Weight
(g)
Power Function
Temperature
(°F)
Time
(minutes)
01 Roast beef (medium)
1000 2 395 40
02 Pork loin
1000 2 380 75
03 Lamb (well done)
1000 2 380 110
04 Veal
1000 2 380 65
05 Roast chicken (whole)
1000 2 395 64
Pr Sub-category
Weight
(g)
Power Function
Temperature
(°F)
Time
(minutes)
06 Fresh fish (whole)
500 2 320 35
07 Frozen fish
500 2 320 45
Pr Sub-category
Weight
(g)
Power Function
Temperature
(°F)
Time
(minutes)
08 Mixed, grilled
500 4 480
15 + 10
(1)
09 Roasted
1000 2 395 45
10 Roasted potatoes
1000 2 430 40
Use
29
EN
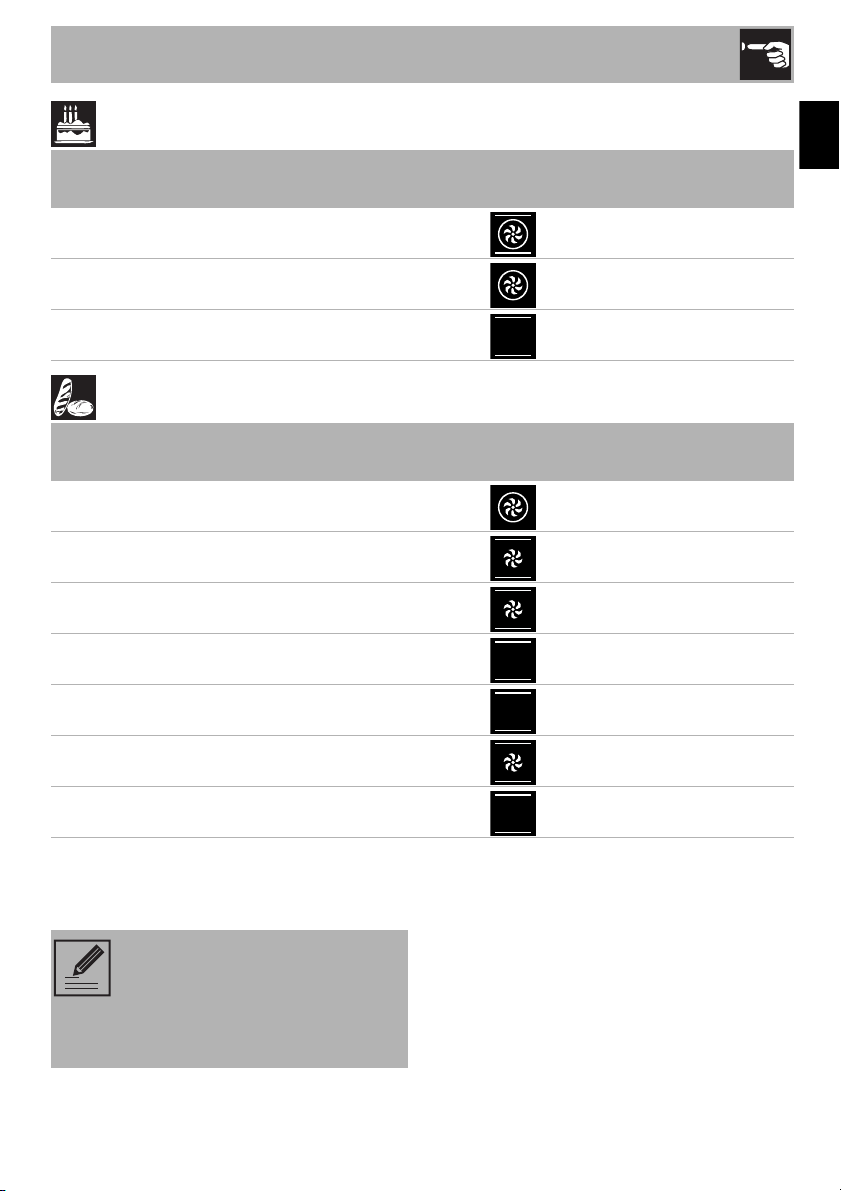
DESSERTS (11 - 13)
BREAD - PIZZA - PASTA (14 -20)
(2)
(Models without a baking stone) The stone must be placed on the bottom of the oven.
Pre-baked frozen pizza cooked on a baking stone does not require different cooking times
based on its weight.
Pr Sub-category
Weight
(g)
Power Function
Temperature
(°F)
Time
(minutes)
11 Cookies
600 2 320 18
12 Muffins
500 2 320 18
13 Tart/Pie
800 2 340 40
Pr Sub-category
Weight
(g)
Power Function
Temperature
(°F)
Time
(minutes)
14 Proofed bread (loaf)
1000 2 395 30
15 Deep dish pizza
1000 1 540 7
16 Pizza on a baking stone
500
1
(2)
540 4
17 Baked pasta
2000 1 430 40
18 Lasagna
2000 1 450 35
19 Paella
500 2 380 25
20 Quiche Lorrain
1000 1 395 40
The times indicated in the table do
not include preheating times and
refer to whole items. If the food is
cut into smaller portions, the
cooking time will decrease.
Use
30
2.8 Secondary menu
This appliance has a hidden “secondary
menu” allowing the user to:
• Activate or deactivate the child lock
mode.
• Activate or deactivate the Showroom
mode (which disables all the heating
elements so that only the control panel
works).
• Activate or deactivate the low power
(Eco Logic) mode.
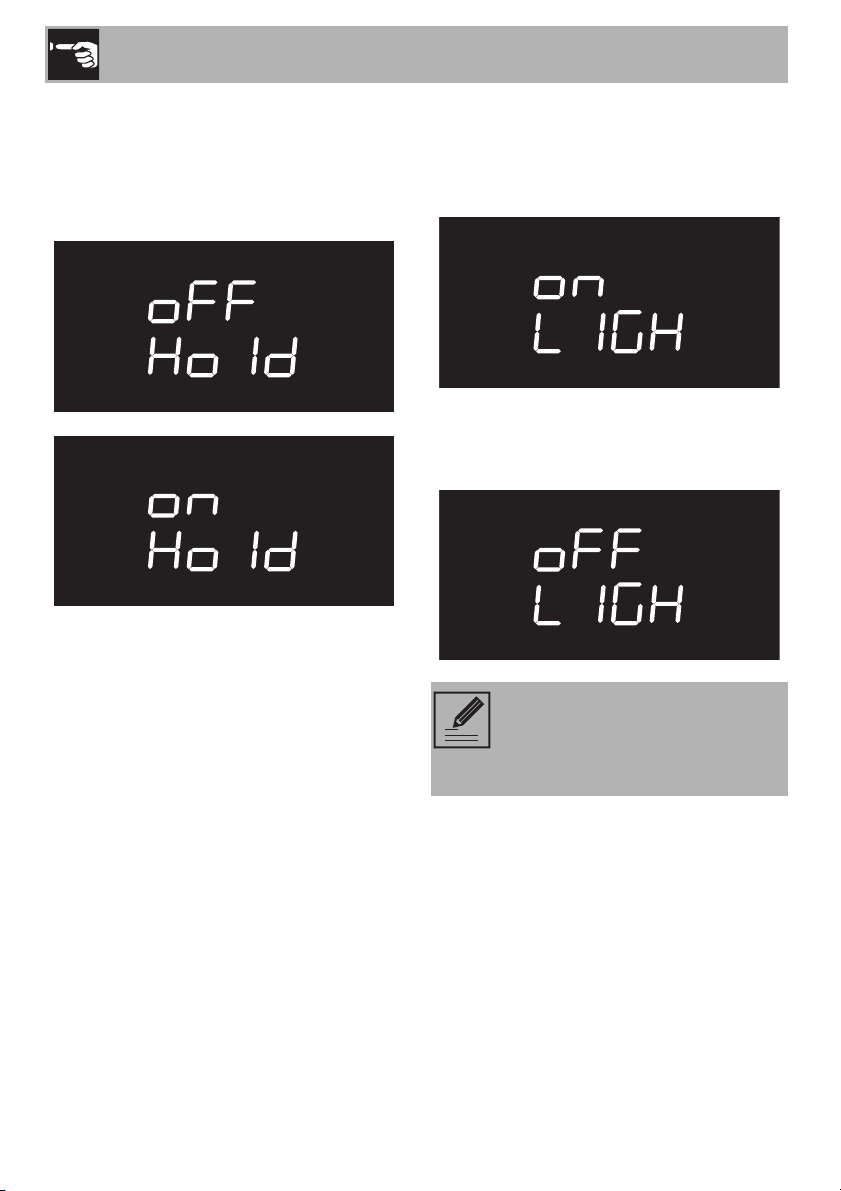
• Activate or deactivate the ‘Keep Warm’
mode.
• Activate or deactivate the light timing
mode (Eco Light).
With the appliance in stand-by mode
1. Activate the inner light, quickly turning the
temperature knob.
2. Press and hold the temperature knob for
5 seconds.
3. Turn the temperature knob to the right or
left to change the setting (ON/OFF).
4. Press the temperature knob to go to the
next mode.
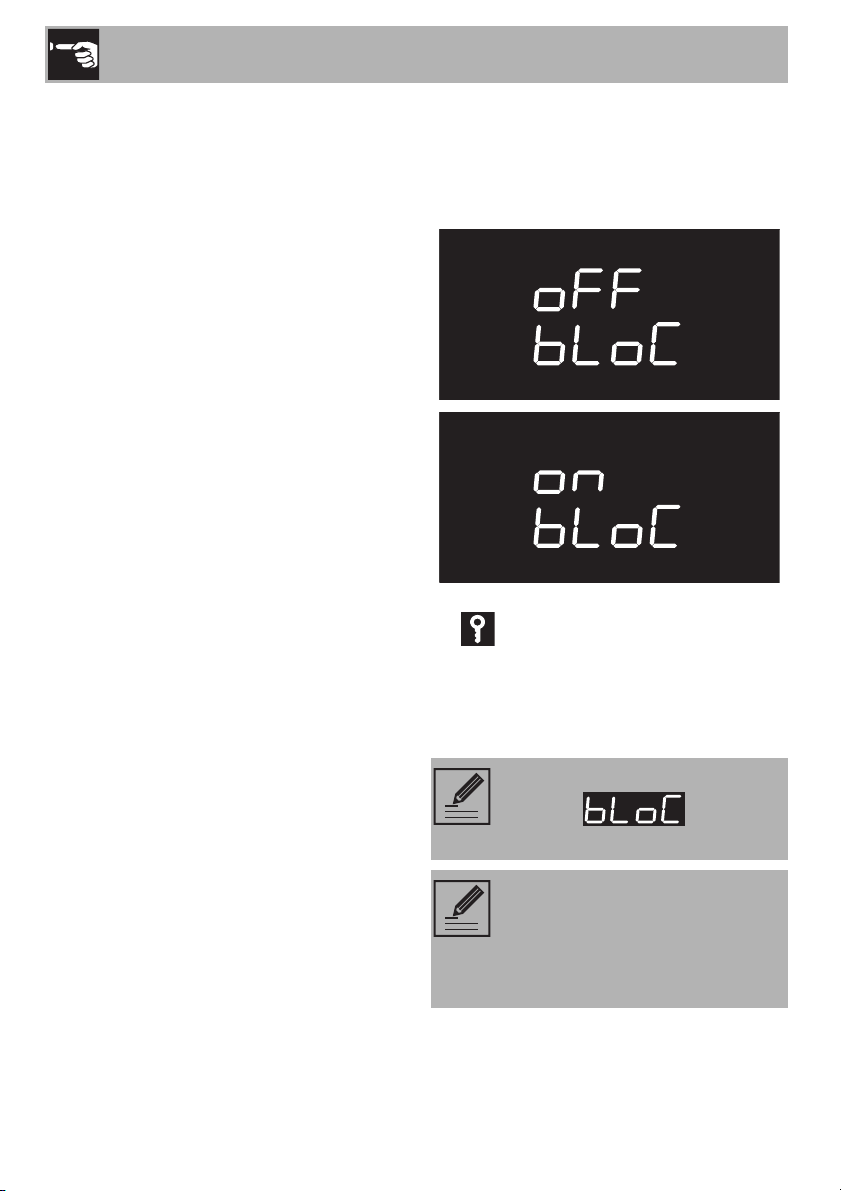
Child lock mode
This mode automatically blocks the
appliance's commands after a minute of
normal operation without any intervention
by the user.
When normally operating, it is indicated by
the indicator light.
To disconnect the temporary lock during
cooking, press the temperature knob for 5
seconds. One minute after the last setting
the lock will become active again.
If the position of the knobs is
changed, will be
displayed for a few seconds.
It is possible to instantly turn the
appliance off, even with the child
lock mode activated, by pressing
and holding the function knob for 3
seconds.
Use
31
EN
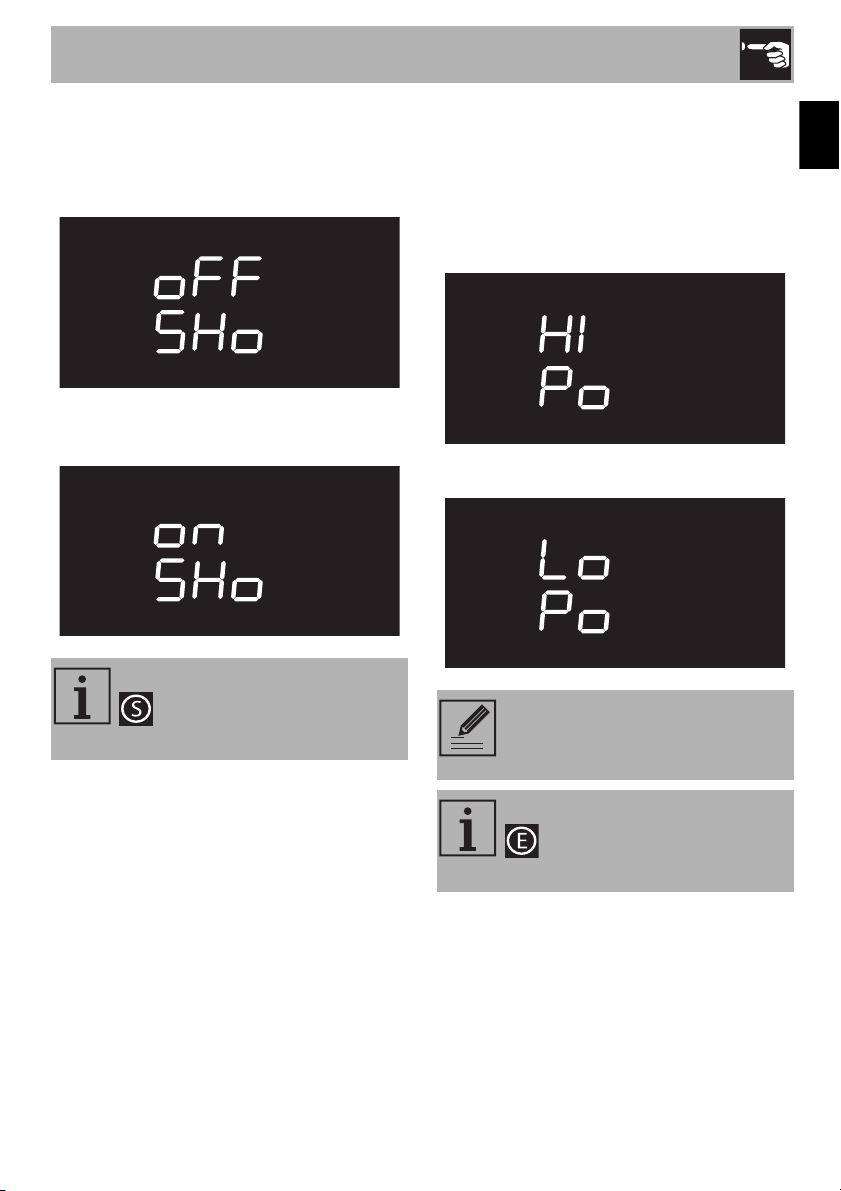
Showroom mode (only for showrooms)
This mode deactivates the appliance’s
heating elements, yet keeps the control
panel active.
To use the appliance normally, set this
mode to OFF.
Low Power (Eco-logic) Mode
This mode limits the power used by the
appliance.
It is indicated for using multiple home
appliances at the same time.
HI: normal power.
LO: low power.
When the mode is activated, the
indicator light will appear on
the display.
By activating low power mode,
preheating and cooking times may
be extended.
When the mode is activated, the
indicator light will appear on
the display.
Use
32
Keep Warm Mode
After food has been cooked for a preset
amount of time (if it isn’t interrupted), this
mode keeps the just-cooked food warm (at
a low temperature) for about 1 hour.
Light timing (Eco-light) Mode
For even greater energy savings, the light is
automatically turned off after a minute once
cooking begins.
To deactivate the function which turns the
light off (i.e., to keep the light on after one
minute), set this mode to OFF.
Manually turning the appliance on
or off will still be possible by
rotating the temperature knob to
the right, in either of the settings.

Cleaning and Maintenance
33
EN
3 Cleaning and maintenance
3.1 Warnings
3.2 Surface cleaning
To maintain the surfaces, you must clean
them regularly after each use once they
have cooled down.
Ordinary daily cleaning
Always use only specific products that do
not contain abrasives or chlorine-based
acids.
Pour the product on a damp cloth and wipe
the surface, rinse thoroughly and dry with a
soft fabric or microfiber cloth.
Food stains or residues
Do not use steel wool or sharp scrapers:
they will damage the surface.
Use ordinary, non-abrasive products, with
the aid of wooden or plastic tools if
necessary. Rinse thoroughly and dry with a
soft fabric or microfiber cloth.
Do not let sugar-based food residues (e.g.
jam/jelly) dry within the appliance as they
can ruin the coating on the inside of the
appliance.
Improper use
Risk of damage to surfaces
• Do not use steam jets to clean the
appliance.
• Do not use cleaning products containing
chlorine, ammonia or bleach on the
steel parts or those with metallic surface
finishes (e.g. anodizing, nickel or
chrome plating).
• Do not use abrasive or corrosive
detergents on the glass parts (e.g.
powder products, stain removers or
metal scouring pads).
• Do not use rough or abrasive materials
or sharp metal scrapers.
We recommend using cleaning
products distributed by the
manufacturer.
Cleaning and Maintenance
34
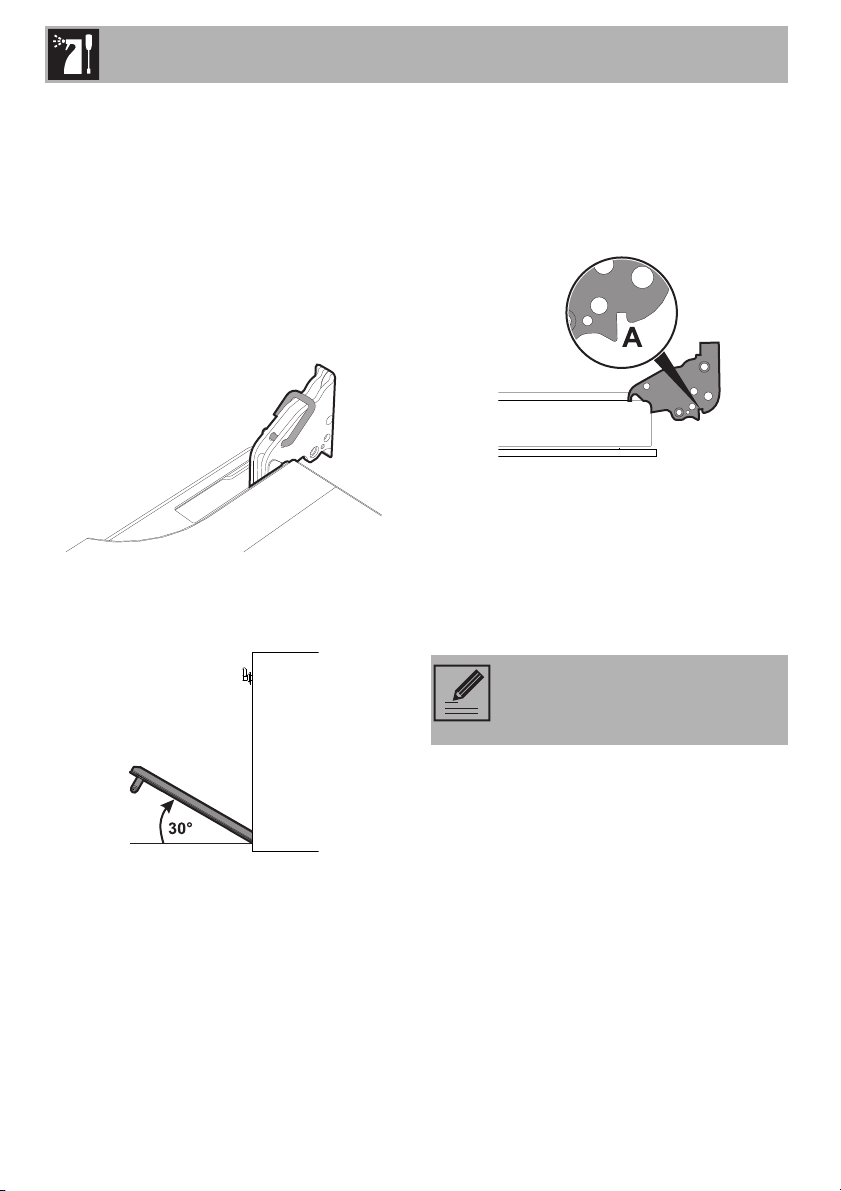
3.3 Cleaning the door
Removing the door
To facilitate cleaning, we recommend that
you remove the door and place it on a
towel.
To remove the door, proceed as follows:
1. Open the door completely and insert two
pins into the holes in the hinges, as
shown in the image.
2. Grasp the door on both sides with both
hands. Lift it, forming an angle of about
30°, and remove it.
3. To remount the door, insert the hinges into
the slots on the oven, making sure that the
grooves A fit tightly in the slots. Lower the
oven door and once it is in position,
remove the pins from the holes in the
hinges.
Cleaning the door glazing
We recommend always keeping the glass
doors thoroughly clean. Use paper towels.
If there are tough to clean spots, use a
damp sponge and regular detergent.
We recommend using cleaning
products distributed by the
manufacturer.
Cleaning and Maintenance
35
EN
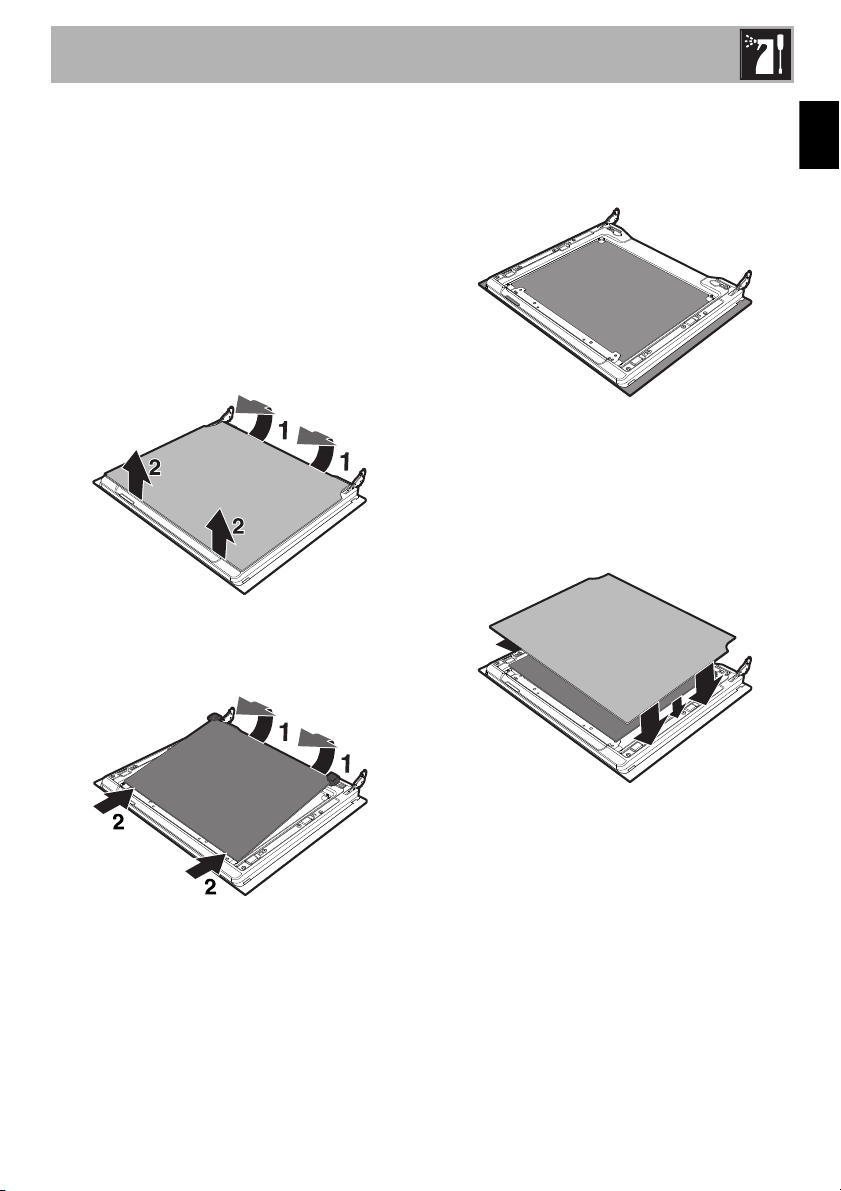
Removing the inner glass
To facilitate cleaning, the inner glass panels
of the door can be removed.
1. Remove the inner glass panel by pulling it
gently upward at the rear, moving it as
indicated by the arrows (1).
2. Then pull the front part of the glass panel
upwards (2). This way, the four pins
attached to the glass panel are
disengaged from their grooves in the
door.
3. Some models have an intermediate glass
panel. Remove the intermediate panel by
lifting it upwards.
4. Clean the external glass panel and the
one you just removed. Use paper towels.
If there are tough to clean spots, use a
damp sponge and mild detergent.
5. Reinsert the glass panels in the reverse
order of removal.
6. Reposition the inner glass panel. Make
sure you center and insert the four pins
into their grooves in the door, using a
little pressure.
Cleaning and Maintenance
36
3.4 Cleaning inside the oven
Proper maintenance of the oven's interior
requires that it be cleaned regularly, after
allowing it to cool.
Avoid leaving dried up food inside the oven
because it could damage the enamel
surface.
Before cleaning, take out all removable
parts.
To make cleaning easier, we recommend
the removal of:
• the door;
• the frame supports for racks/trays;
•the seals.
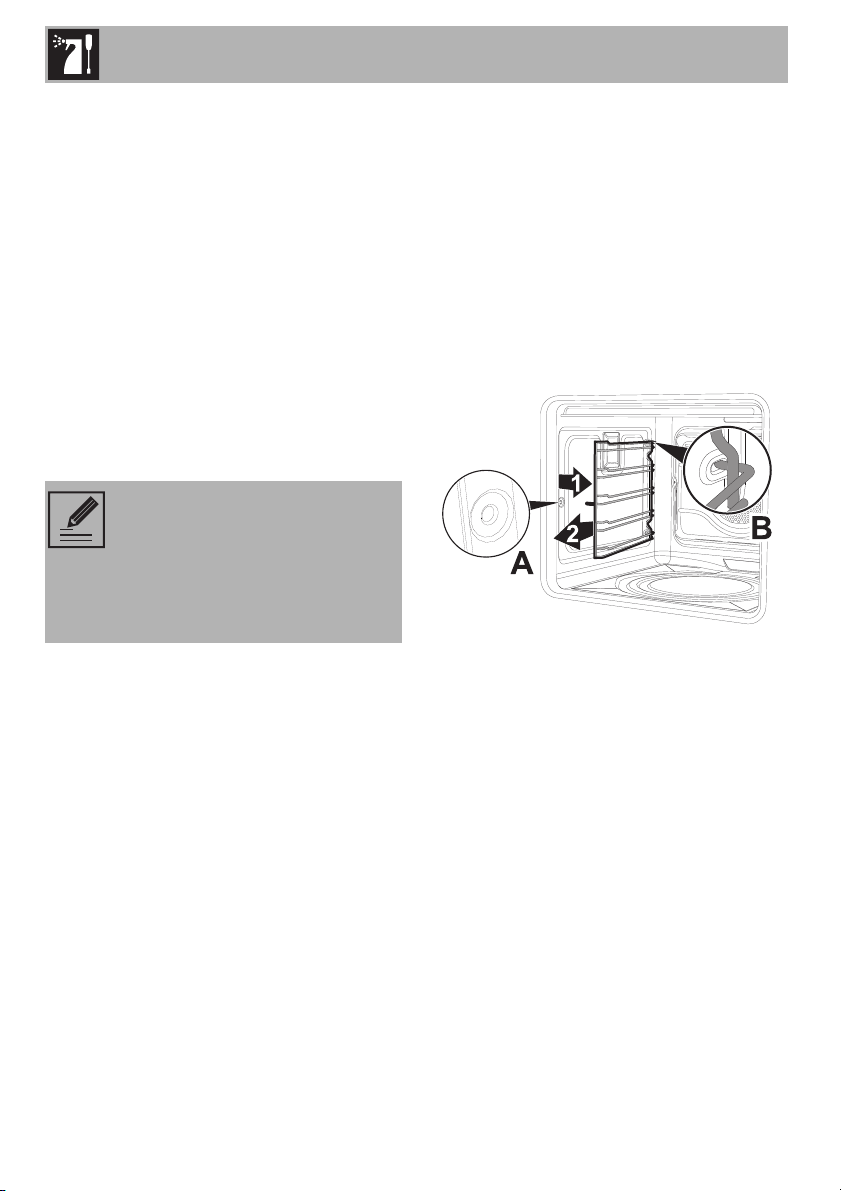
Removal of the frame supports for racks/
trays
Removing the guide frames makes it easier
to clean the sides of the oven. This must be
done each time you use the automatic
cleaning cycle (only on some models).
To remove the guide frames:
• Pull the frame towards the inside of the
oven to unhook it from its housing A, and
then slide it out of the grooves at the
back B.
• When you have finished cleaning the
oven, repeat the procedures indicated
above to reposition the guide frames.
If you are using specific cleaning
products, we recommend
operating the appliance at the
maximum temperature for about
15-20 minutes to remove any
residues.
Cleaning and Maintenance
37
EN
3.5 Vapor Clean
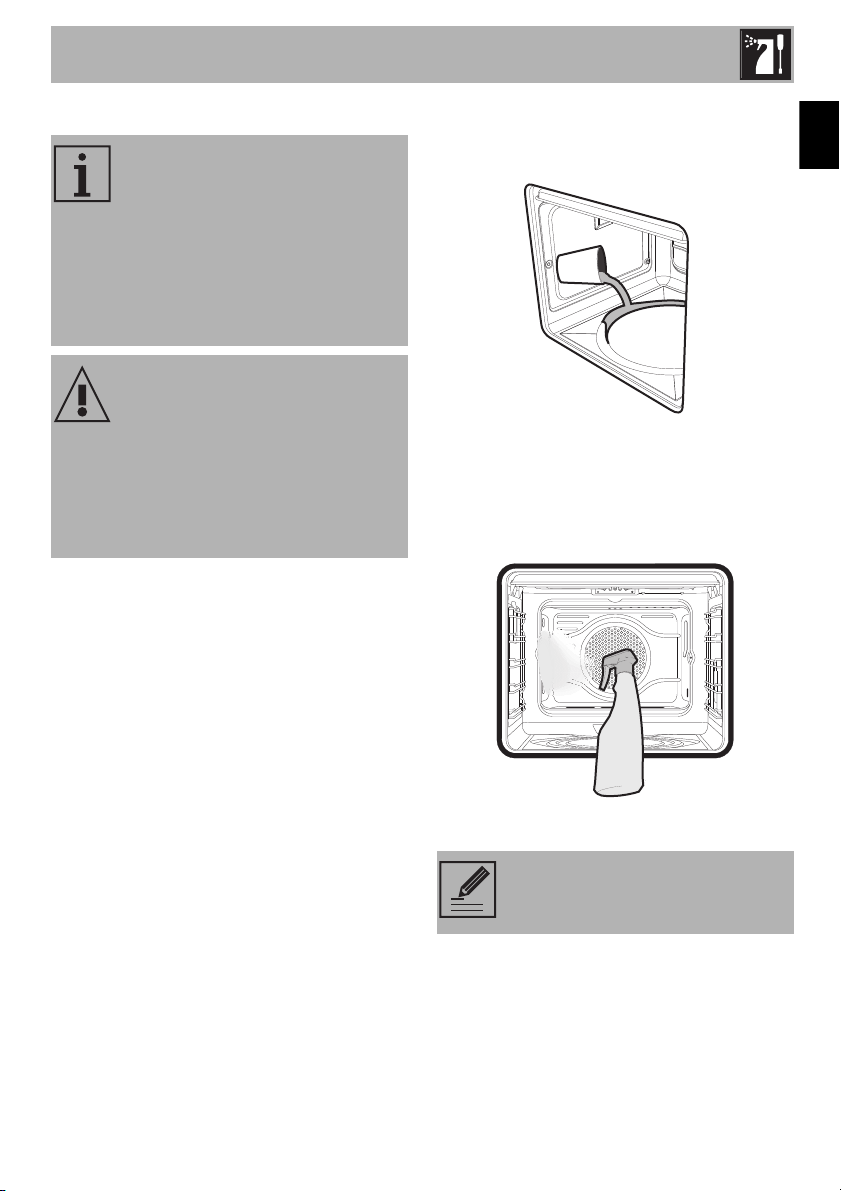
Preliminary operations
Before starting Vapor Clean:
• Remove all accessories inside the oven.
• Pour approx 40 cc of water on the
bottom of the oven. Make sure it does
not overflow out of the recess.
• Using a spray bottle, spray a solution of
water and dish soap inside the oven. Aim
the nozzle at the side walls, above,
below and towards the deflector while
spraying.
• Close the door.
Vapor Clean is an assisted
cleaning procedure that helps
remove dirt and food residue.
Thanks to this process, it is possible
to clean the inside of the oven with
great ease. Food residue is
softened by the heat and water
vapor, making it easy to remove.
Improper use
Risk of damage to surfaces
• Remove any food or spill residues from
the inside of the oven.
• Carry out the operations for assisted
cleaning only while the oven is cold.
We recommend at least 20
sprays.
Cleaning and Maintenance
38
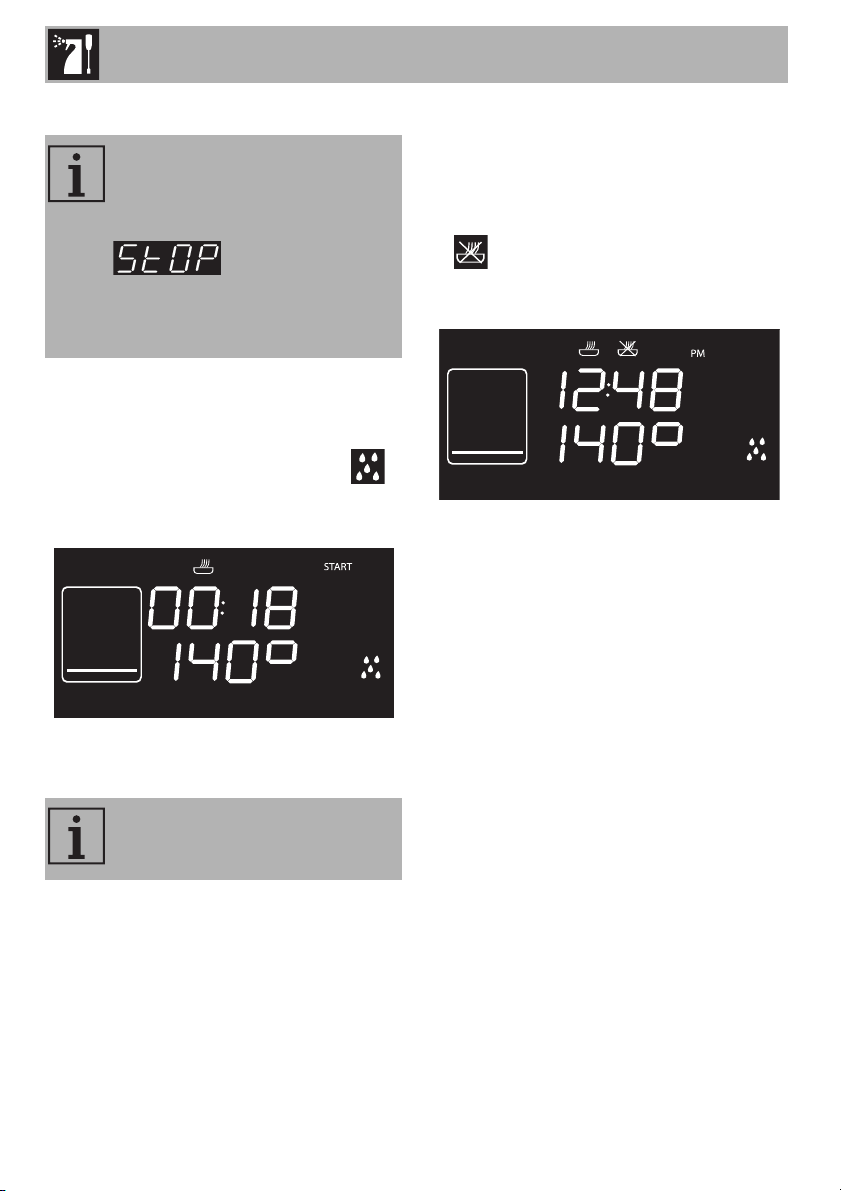
Vapor Clean Settings
1. Press the function knob to activate the
appliance.
2. Turn the function knob to the left or right
to select the Vapor Clean function .
The length and temperature of the
cleaning cycle will be displayed.
3. Press the temperature knob to start the
Vapor Clean cycle.
Programmed Vapor Clean
Like normal cooking functions, Vapor Clean
can also be set to finish at a certain time.
1. After having selected the Vapor Clean
function, press the temperature knob. The
indicator light will begin to flash. The
display will show the time the operation
will be completed.
2. Turn the temperature knob to the right or
left to delay the time the oven is to turn
off.
3. Press the temperature knob to confirm the
time the function is to end.
4. Press the function knob. The appliance
will turn on at the programmed start time.
If the temperature inside the oven is
hotter than that allowed for the
Vapor Clean cycle, it will
immediately be paused and
will be displayed. Let
the appliance cool down before
starting the assisted cleaning
function.
The temperature and time settings
cannot be changed by the user.
Cleaning and Maintenance
39
EN
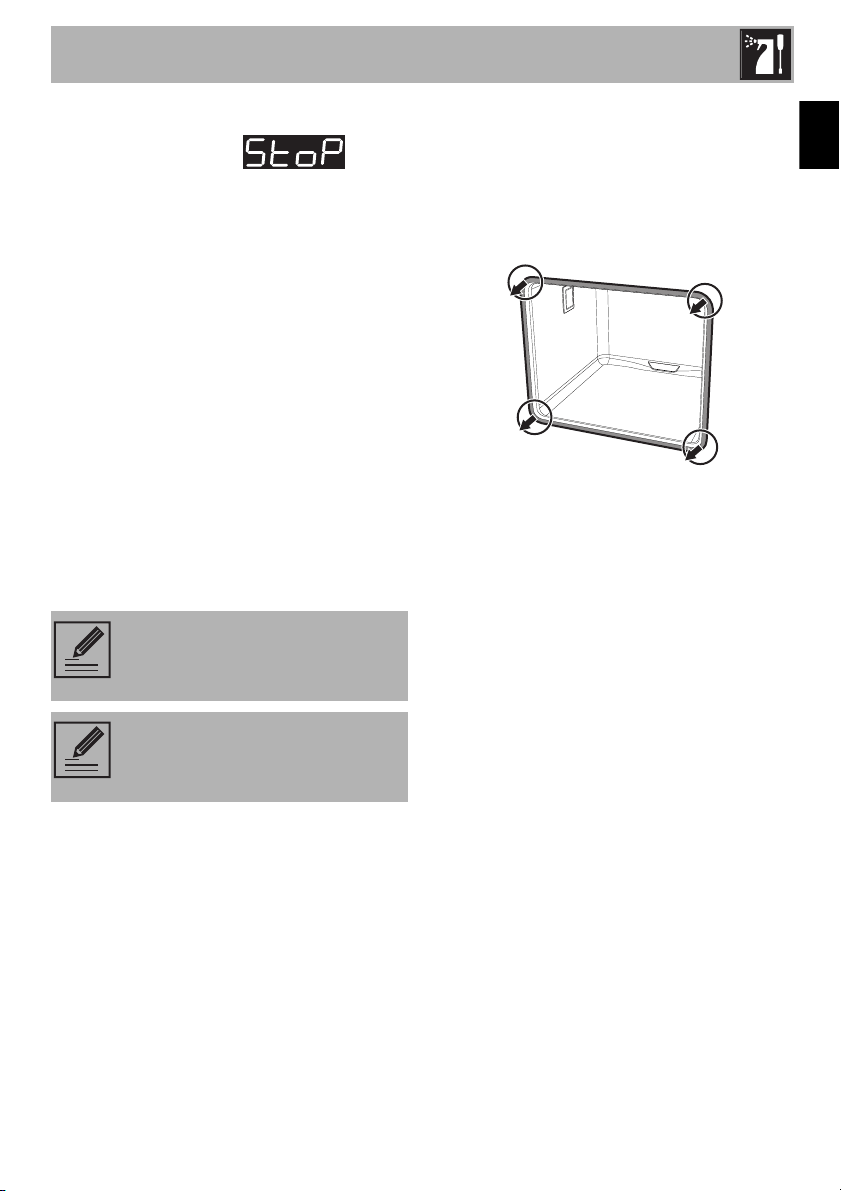
End of the Vapor Clean cycle
At the end of the cycle, will be
displayed and a buzzer will sound (which
can be turned off by pressing the
temperature knob).
1. Press the function knob for at least 3
seconds to exit the function.
2. Open the door and clean the least-
stubborn residue with a microfiber cloth.
3. Use a scratch-proof brass scrubber on
the toughest residues.
4. For fat residues, use products specifically
formulated for cleaning ovens.
5. Remove any remaining water from inside
the oven.
For greater hygiene and to ensure food
does not absorb unpleasant odors, dry the
inside of the oven using the convection
setting at 320°F for about 10 minutes.
3.6 Extraordinary maintenance
Removing and re-inserting the gasket
To remove the oven’s gasket:
• Unhook the hooks located at the four
corners and pull the gasket out.
To re-insert the oven’s gasket:
• Hook the hooks located at the four
corners of the gasket.
Tips for maintenance of the oven gasket
The oven gasket must be soft and elastic.
• To keep the gasket clean, use a soft
sponge and rinse with warm water.
We recommend using rubber
gloves while carrying out these
tasks.
To make it easier to manually clean
the most hard-to-reach spots, we
suggest removing the door.
Cleaning and Maintenance
40
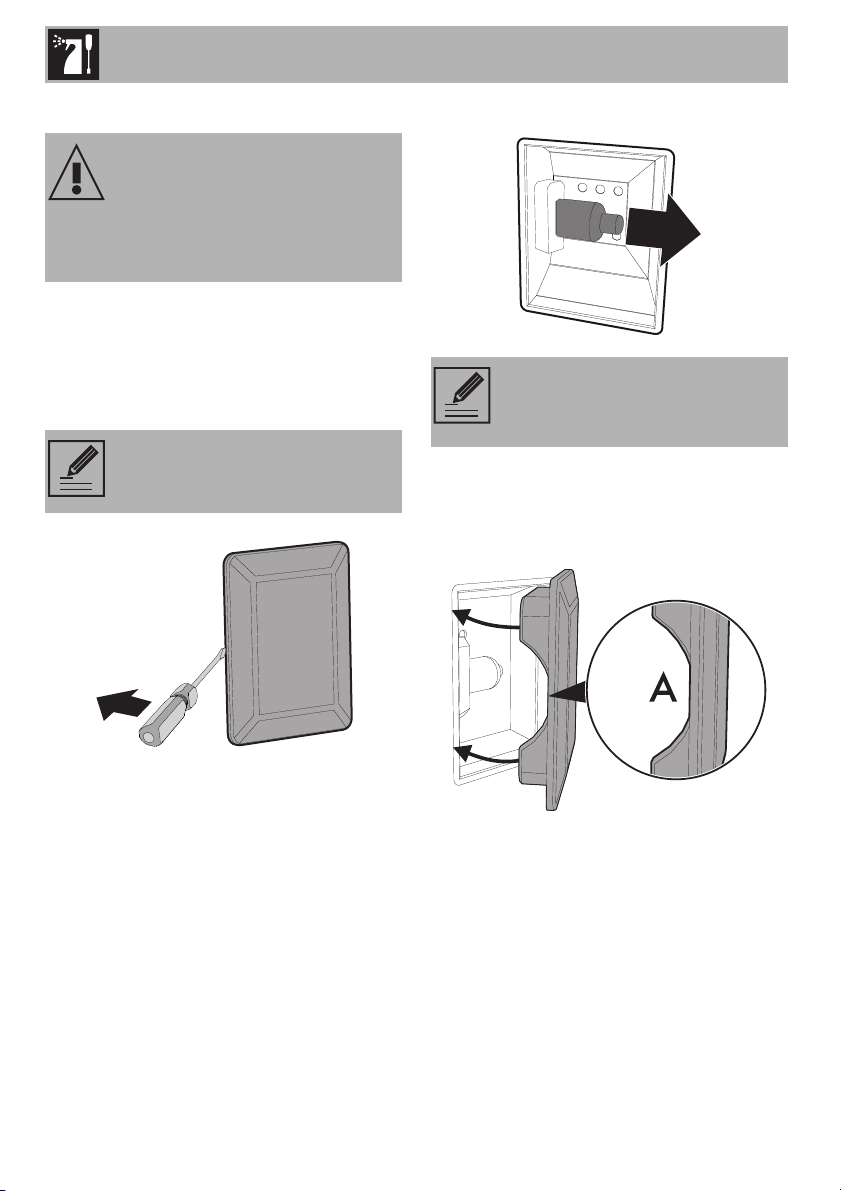
Replacing the oven light
1. Remove all accessories inside the oven.
2. Remove the frame supports for racks/
trays.
3. Remove the light cover using a tool (e.g.
a screwdriver).
4. Loosen and remove the light bulb.
5. Replace the bulb with a similar one
(40 W).
6. Reattach the cover. Leave the inside of
the glass molding (A) facing the door.
7. Press the cover firmly so that it adheres
tightly to the light bulb holder.
Live parts
Danger of shock
• Switch off the electrical supply to the
appliance.
Be careful not to scratch the enamel
of the oven walls.
Do not touch the halogen bulb with
your fingers; cover them with an
insulating cloth.

Cleaning and Maintenance
41
EN
What to do if...
The display is completely off:
• Check the main power supply.
• Check whether an omnipolar switch
upstream from the oven feed line is in the
“ON” position.
The appliance does not heat up:
• Check whether the “showroom” mode
has been set (for further details see the
“Secondary menu” section).
The controls do not respond:
• Check whether the “child lock” mode
has been set (for further details see the
“Secondary menu” section).
The cooking times are longer than those
indicated in the table.
• Check whether the “low power (eco-
logic)” mode has been set (for further
details see the “Secondary menu”
section).
If the door is opened during a convection
function, the fan will stop:
• This is not a fault. It is a normal operation
of the appliance, useful when cooking
foods in order to avoid excessive heat
escaping. When the door is closed, the
oven will return to normal operation.
If the problem has not been
resolved or there are other types of
faults, contact your local technical
assistance center.
If other “ERRx” error messages
appear:
Note the error message, function
and temperature set and contact
Customer Service.

PAGE INTENTIONALLY LEFT BLANK