Loading ...
Loading ...
Loading ...
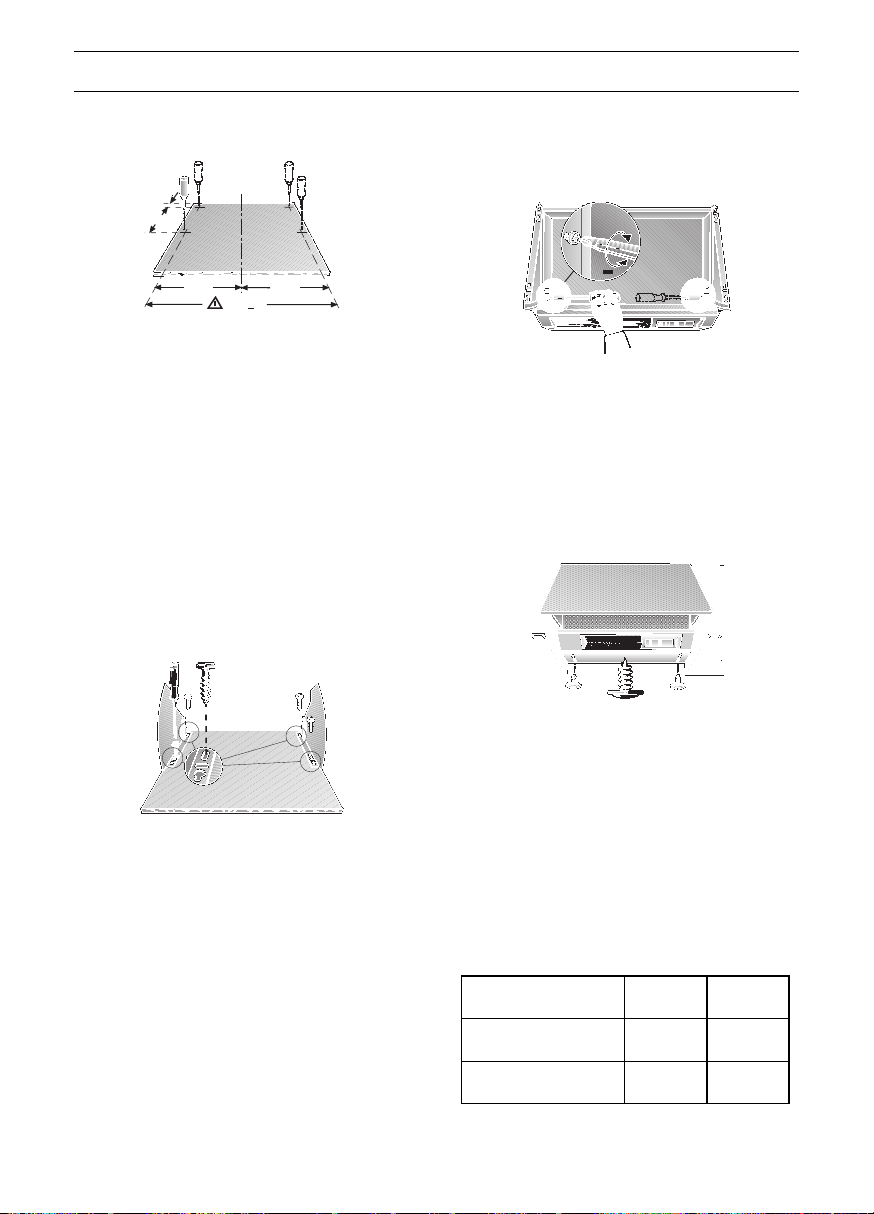
5. The two screws to the right and left insi-
de the housing can be used to adjust
door gliding according to the weight of
the door.
Turning the screws clockwise will make the
door more difficult to move.
Mounting wall covering rail:
The gap between the hood and the rear wall
can be dressed with the enclosed covering rail.
Screw-fasten the covering rail to the under-
side of the extractor hood.
Refit the grease filter.
If the unit door has to be removed:
Pull the red plastic catches in the housing
on both sides inwards to release the door,
which can then be pulled out towards you.
Weight in kg
We reserve the right to construction changes within the
context of technical development.
Appliance version
Exhaust air
Recirculating
air
single motor 6,5 7,8
dual motor 8,0 9,3
1.
2.
+
2. Mark the fixing points on the door. For
dimensions of vertical screw fixings, see:
If the top edge of the door is not flush with
the top edge of the cabinet, amend the
dimensions accordingly.
If the tops of the cabinets are not installed
flush with each other, the door must be
mounted correspondingly higher.
The screw locations on the door can be
marked directly on the door in situ. If you
are doing this, leave the door carriers in the
appliance. Position the door, align it and
mark the back.
Keep precisely to the dimension 570 ± 2.
3. Screw the door carriers to the door,
making sure your left-right orientation is
correct.
4. Insert the complete door into the extrac-
tor hood
Check that the door meets the stops on
both sides when pulled out. This means
that it is safely locked in place.
The red plastic catches can only be
released if the door is not swung out to the
stop.
+
41
250
570
285
285
2
Installation
67
Loading ...
Loading ...
Loading ...