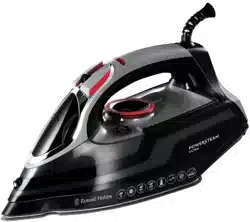
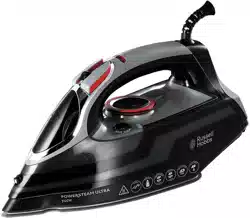
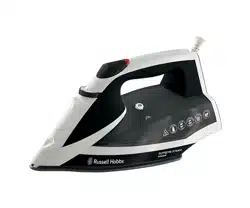
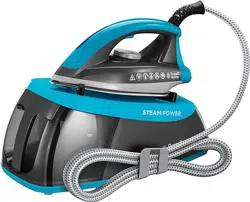
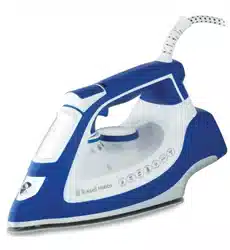
USER MANUAL
BEFORE USING FOR THE FIRST TIME
- Fill the water tank with clean water, and then empty the water to ensure the tank is clean of any manufacturing residues. Refill the tank.
- The iron may give off an odour and small amount of vapour when switched on for the first time. This is normal and will stop as the element cures.
- Press the
 burst of steam button 3 or 4 times, to prime and flush clean water through the burst of steam pump.
- Press the
 cool spray mist button 3 or 4 times, to prime and flush clean water through the cool spray mist pump.
- Iron an old piece of dampened cotton fabric or linen, to clean the soleplate.
PREPARATION
Check for textile care symbols ( ) on items to be ironed.
Iron fabrics needing low temperatures  first, then those that need medium temperatures
  , and finish with those needing high temperatures
  .
.
TEMPERATURE SETTING GUIDE

NOTE: If the instructions on the fabric label differ from this guide, follow the instructions on the label.
FILLING
You may use the iron with tap-water, however if you live in a hard water area, you should use distilled water (not chemically descaled or softened water).

If you buy distilled water, check it is marked as suitable for use in irons.
- Unplug the iron from the wall power outlet.
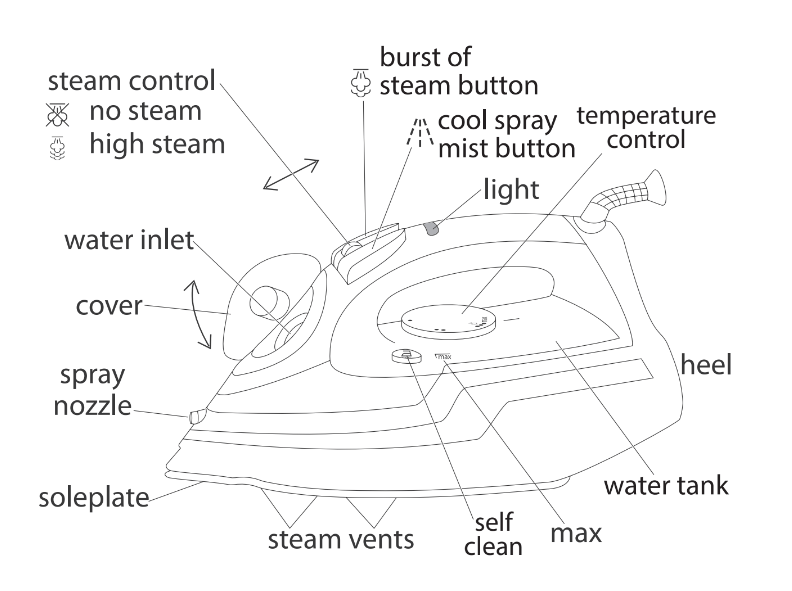
- Set the steam control to
 no steam.
- Lift the cover of the water inlet to the side to open it.
- Hold the iron with the soleplate horizontal.
- Fill slowly, to let the air in the tank escape, otherwise you will cause an air lock and the water may overflow.
- Do not fill past ‘max’, or water may spill whilst in use.
- Wipe up any spillage.
SWITCHING ON
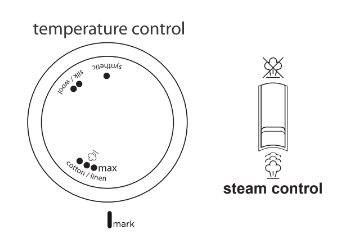
- Turn the temperature control dial to ‘synthetic’ and set the steam control to no steam.
- Sit the iron on its heel.
- Plug the power cord into the wall power outlet, and switch it on. The red power ON safety light will illuminate.
- Turn the temperature control dial to bring the desired setting on the dial next to the mark on the tank.
- When the iron reaches the set temperature, the light will switch off.
- The Temperature Ready light will cycle ON and OFF as the thermostat operates to maintain temperature.
REDUCING TEMPERATURE
This can take time, as the iron has to lose the heat it has built up. It is best to organise your ironing so that you do not need to reduce the temperature.
STEAM IRONING
When steam ironing, you must set the temperature control dial above  , to ensure the iron is in the steam temperature range. Make sure the water tank is full.
- Move the steam control to the setting you want.
- Once the light switches off, you can commence ironing.
- The steam control is variable. Choose a position between the no steam and
 high steam that best suits your steam requirements.
NOTE: When steam ironing at the lower end of the steam temperature range, it is preferable to set the steam control to a low steam setting, in order to reduce the incidence of water droplets.
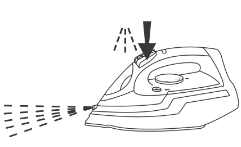
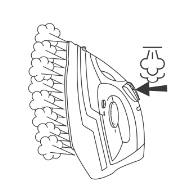
COOL SPRAY MIST
NOTE: Water spotting affects some fabrics. Test this out on a hidden part of the fabric first. The cool spray mist works with dry or steam ironing, as long as there is water in the tank.
- Check that there is water in the tank.
- Lift the iron off the fabric.
- Aim the cool spray mist nozzle at the fabric.
- Press the cool spray mist button – you may have to press it 2 or 3 times to pump water through the system.
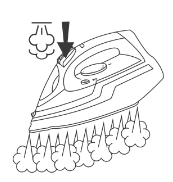
BURST OF STEAM
Burst of steam works with both dry and steam ironing, as long as there is water in the tank, and the temperature control dial is set above .
- Check that there is water in the tank.
- Check that the temperature control dial is set above .
- Wait until the light switches off.
- Press the burst of steam button – you may have to press it 2 or 3 times to pump water through the system.
- Leave 3 seconds between bursts, to allow the iron temperature to recover.
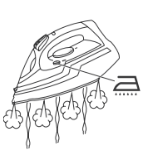
DRY IRONING
If you are going to be dry ironing only, there is no need to fill the water tank.
- Move the steam control to no steam.
- Set the temperature control dial to the desired setting.
- Wait until the light switches off, then commence ironing.
VERTICAL STEAM
Vertical steaming removes wrinkles from hanging clothes, hanging curtains, and furnishing fabrics.
- Check that there is water in the tank.
- Turn the temperature control dial to ‘max’.
- Wait until the light switches off.
- Check that there is nothing behind the fabric that may be damaged by the steam or heat.
- Check that pockets, turn-ups, and cuffs are empty.
- Hold the iron, with the soleplate vertical, close to (but not touching) the fabric.
- Press the burst of steam button. You may have to press it 2 or 3 times to pump water through the system.
- Leave 3 seconds between bursts, to allow the temperature to recover.
AFTER USE
- Turn the temperature control dial to ‘synthetic’, move the steam control to no steam.
- Unplug the iron.
- Lift the cover of the water inlet to the side to open it.
- Hold the iron over a sink, turn it upside down, and drain the water from the tank.
CAUTION: The water may be hot.
- Sit the iron on its heel.
- Leave it to cool down completely.
- When it is cold, wipe off any moisture, and close the water inlet cover.
- Store the iron on its heel, to avoid corrosion and damage to the soleplate.

SELF CLEAN
To prevent residues building up, use the Self Clean button regularly, at least monthly in normal water areas, more often in hard water areas. You will require a sink or a large bowl to catch the water coming out of the soleplate.
- Fill the tank to the ‘max’ level.
- Sit the iron on its heel.
- Plug the power cord into the wall power outlet, and switch it on.
- Turn the temperature control dial to ‘max’. Wait until the temperature light switches off.
- Hold the iron over the basin or bowl, with the soleplate facing down.
- Press the Self Clean button and hold, whilst gently moving the iron to and fro over the sink or bowl.
CAUTION: Keep clear of the escaping water and steam.
- Water and steam will wash any residues through the soleplate, and into the sink or bowl.
- Release the self clean button when done.
- Empty the remaining water from the tank.
- Turn the temperature control dial to ‘synthetic’, move the steam control to no steam.
- Unplug the iron, and sit the iron on its heel to cool.
- When it is cold, wipe off any moisture.
- Store the iron on its heel, to avoid corrosion and damage to the soleplate.
CLEANING
- Unplug the iron when not in use, and before cleaning.
- Allow the iron to cool down completely before cleaning and storing away.
- Wipe outer surfaces with a damp cloth. If necessary, use a little dishwashing liquid.
- Remove spots, or burnt on fabrics, by ironing a damp cotton or linen cloth with the iron hot.
- Take care not to scratch the soleplate.
- Do not immerse the iron in water or any other liquid.
- Do not use harsh or abrasive cleaning agents, solvents or scourers on the soleplate as these will damage the coating.
IMPORTANT SAFEGUARDS
When using electrical appliances, basic safety precautions should always be followed, including, but not limited to the following:
- To protect against electrical hazards, do not immerse the power cord, plug or iron in water or any other liquid.
- Do not use outdoors or in damp or moist areas.
- Do not touch hot surfaces, always use the appliance handles.
- This appliance is not intended for use by persons (including children) with reduced physical, sensory or mental capabilities, or lack of experience and knowledge, unless they have been given supervision or instruction concerning use of the appliance by a person responsible for their safety.
- This appliance must be attended whilst plugged in.
- Ensure the iron is standing on its heel and with the soleplate clear of any surrounding objects when switching on.
- Ensure the iron is unplugged during filling and emptying.
- Always turn off and unplug from the wall power outlet when not in use.
- To avoid possible burns, ensure the appliance is off and has cooled before cleaning.
- To disconnect, turn off the wall power outlet, then grasp and pull the plug from the wall outlet. Never pull by the cord.
- Do not operate this appliance with a damaged cord/plug or after the appliance has been dropped, damaged or has malfunctioned in any manner. Contact Customer Service for examination, adjustment, repair or replacement.
- There are no user serviceable parts. If repairs are required, they must be performed by the manufacturer or a suitably qualified person in order to avoid a hazard.
- Do not use on an inclined or unstable surface.
- Keep the iron and the power cord away from the edge of tables or countertops and out of reach of children and persons with reduced physical, sensory and mental capacities.
- Ensure the power cord does not present a tripping hazard.
- Do not place on or near any heat sources.
- Follow the instructions when cleaning this appliance.
- Do not use this appliance for other than its intended purpose.
- Do not leave the iron unattended when switched on or where it may be touched by children or persons with reduced physical, sensory and mental capacities while it is still hot.
- This appliance is not a toy. Children should be supervised to ensure they do not play with the appliance.
- This appliance is not intended to be operated by means of an external timer or separate remote control system.
- For added safety, electrical appliances should be connected to a power outlet that is protected by a residual current device (RCD), also often referred to as a ‘Safety Switch’. Your switchboard may already incorporate an RCD. If unsure, call an electrician for verification and fitting if necessary.
TROUBLE SHOOTING
My iron doesn't produce any steam.
The steam control may have been set to the no steam position. Set the steam control to a steam position.
There is no water in the tank and/or the settings are not set correctly.
- Step 1: Ensure there is water in the tank.
- Step 2: Set to the appropriate steam and temperature setting - When steam ironing, you must set the steam control to steam and the temperature control to a temperature equal to or higher than the steam symbol on the dial.
The mains power switches off when I switch my iron on or when the iron is in use. Can the appliance cause a power failure?
- Step 1: Check that the connection to the plug is secure and not loose and also check how many appliances are using the same output. Failure could be caused by over current in your mains.
- Step 2: Check the iron's power cord for visible signs of damage (e.g. kinks, flaring of the braiding). Remove the rest of the appliances and switch it on again.
- Step 3: if the mains power goes off again, contact the Russell Hobbs Customer Service Department on 0345 658 9700.
The steam boost function or vertical steam boost function on my iron doesn't work.
- The (vertical) steam boost function has been used too often within a very short period. Put the iron in a horizontal position and wait for a while before using the (vertical) steam boost function again.
- The iron is not hot enough. Set the temperature dial to a temperature suitable for steam ironing.
The Spray function or Spray button on my iron isn't working (properly).
- Make sure there is enough water in the tank and check that the spray button is able to spring back on its own after pressing.
- If the spray nozzle hole is blocked, you can clean it carefully with a sharp needle or pin.
The indicator light isn't working (properly).
- Make sure the iron is plugged into a working mains power and set the temperature dial to a desired position.
- It is normal for the orange pilot light to turn on and off during ironing. It comes on as the iron is heating up, and goes off when it is hot enough.
Smoke comes out of the appliance.
- Some parts of the appliance have been slightly greased and as a result, the appliance may produce some smoke when it is switched on for the first time.
- Also, if there is remaining water in the soleplate from the last usage, the smoke observed may actually be water evaporating. However, these will stop after a short while.
The soleplate coating is scratched/worn away.
- Your iron has multiple thin layers of coating and light scratches will not impede the performance of the iron. You can continue using the iron as per normal.
My iron leaves shiny patches on fabrics.
- Fabrics can acquire shiny patches if they are ironed at too high temperatures. Try a lower temperature setting.
- Also, to prevent shiny patches, you can put a cloth (e.g. a tea towel) between the iron and the fabric.
What type of water should I use?
- Your appliance has been designed to be used with tap water.
Water drips from the holes of the soleplate during ironing. What should I do?
There may be several reasons for this:
- Your iron produces a lot of steam. Steam could have condensed on the ironing board cover, making it wet and cause water marks on your garment when the iron is pressed on it.
- Ironing aids or fragrance water could have been added to the water tank. This can cause problems with the steaming function, causing water to leak. Use only tap water or distilled water or a mixture of these two types of water.
- Steam setting is being used at too low a temperature - The steam function should be switched to "no steam" when using the iron at lower temperatures or the water tank shoud be emptied. Steam surge/shot/spray being used too rigorously - try using these facilities more slowly.
Water drops appear on the garment during ironing or drip on to the floor.
- The water droplets may appear on the garments when you have steam ironed for a while. This happens because steam has condensed on the ironing board.
- Dry the wet spots on the garment and the ironing board cover by passing the iron over them without pressing the steam button. If the underside of the ironing board is wet, wipe it dry.
-
Make sure you use a mesh-top ironing board with a thick felt material as this minimises steam condensation on the ironing board.
How do I remove the stains on the soleplate?
- To remove a stain, wipe the soleplate with a moist cotton cloth without heating up the iron.
- For stubborn stains, soak a cotton rag or pot towel in water & lemon juice, then heat up the iron to 'max' temperature and run the soleplate over the rag.
SERVICE
If you ring, have the model number to hand, as we won’t be able to help without it. It’s on the rating plate (usually underneath the product).
The product isn’t user-serviceable. If it isn’t working, read the instructions, check the plug fuse and main fuse/circuit breaker. If it’s still not working, consult your retailer.
If that doesn’t solve the problem, ring Customer Service for advice. If they tell you to return the product to us, pack it carefully, include a note with your name, address, day phone number, and what’s wrong. If under guarantee, say where and when purchased, and include proof of purchase (till receipt). Send it to:
Customer Service, Spectrum Brands (UK) Ltd, Fir Street, Failsworth, Manchester M35 email: supportrussellhobbs telephone: 0345 658 9700 (local rate number)
Please note: If you have purchased the product within the last 6 months, please contact the retailer in the first instance to deal with any matters relating to warranty