Loading ...
Loading ...
Loading ...
en Trouble shooting
24
--------
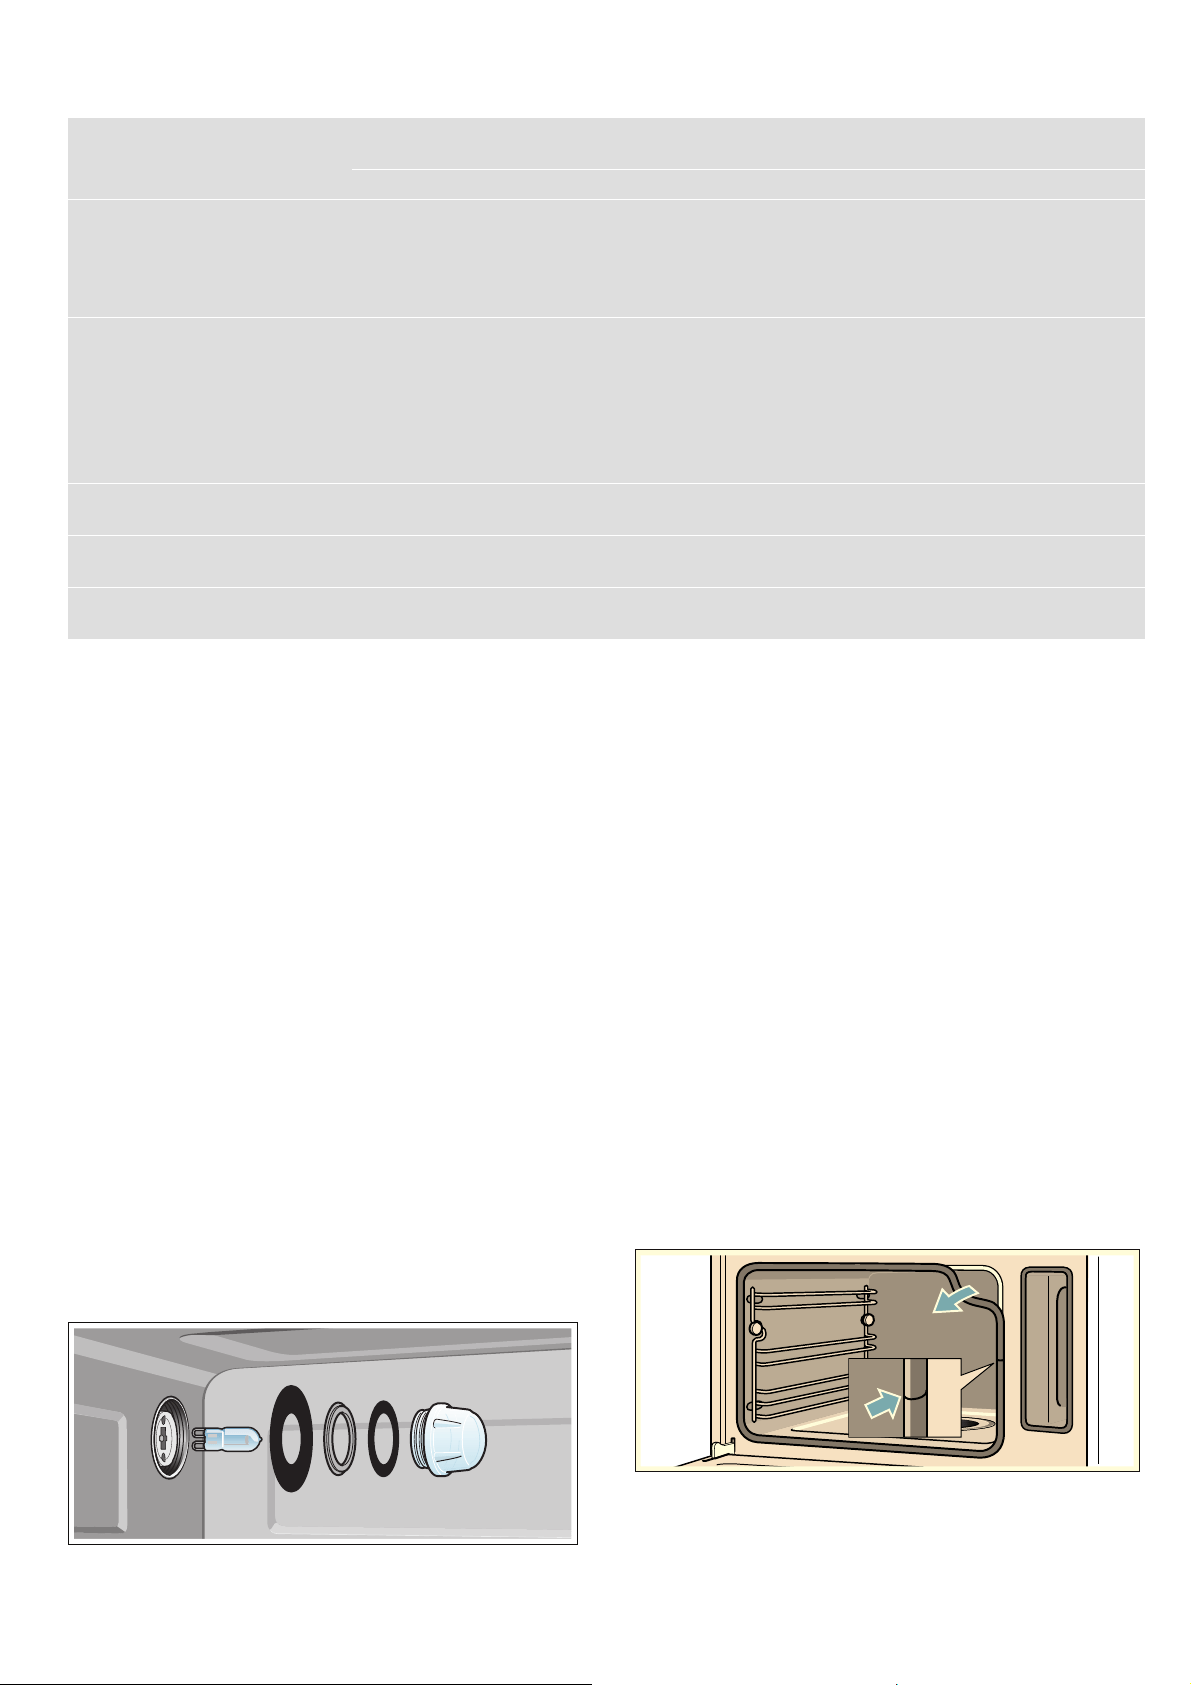
Replacing the cooking compartment bulb
Heat-resistant 230 V/25 W halogen bulbs with seals are
available from the after-sales service. Please specify the
E number and FD number of your appliance.
:Warning – Risk of electric shock!
When replacing the cooking compartment bulb, the
bulb socket contacts are live. Before replacing the bulb,
unplug the appliance from the mains or switch off the
circuit breaker in the fuse box.
:Warning – Risk of burns!
The appliance becomes very hot. Never touch the
interior surfaces of the cooking compartment or the
heating elements. Always allow the appliance to cool
down. Keep children at a safe distance.
1. Unplug the appliance from the mains or switch off
the circuit breaker in the fuse box.
2. Turn the cover anti-clockwise to remove it.
3. Remove the bulb.
Insert the new bulb, making sure that the pins are in
the correct position.Push the bulb in firmly.
Caution!
Only operate the appliance with the glass cover and
seals.
4. Slide the new seals and the clamping ring onto the
glass cover in the right order.
5. Screw the glass cover with the seals back on again.
6. Connect the appliance to the power supply and
carry out commissioning again.
Replacing the glass cover or seals
If the glass cover for the halogen bulb or the seals are
damaged, they must be replaced. A new glass cover
can be obtained from the after-sales service. Please
specify the E number and FD number of your appliance.
Changing the door seal
If the seal around the outside of the cooking
compartment is faulty, it must be replaced.
Replacement seals for your appliance can be obtained
from the after-sales service. Please specify the E
number and FD number of your appliance.
1. Open the appliance door.
2. Pull off the old seal.
3. Push in the new door seal at one point and pull it in
all the way round. The joint must be at the side.
4. Check again that the seal is correctly fitted in the
corners.
The appliance's display prompts you
to fill up the water tank even though it
is full.
The water tank has not been inserted properly Push in the water tank completely until you feel it
engage
The detection system is not working Call the after-sales service
The appliance's display prompts you
to fill up the water tank even though it
is not yet empty, or the water tank is
empty but no corresponding message
appears on the display
The water tank is dirty.The moving water level indica-
tors are jammed
Shake and clean the water tank. If the jammed parts
cannot be freed, obtain a new water tank from the
after-sales service
"Appliance heating" appears on the
display but the appliance is not reach-
ing the selected temperature
Automatic calibration values not optimal Restore the appliance's factory settings and repeat
the steps required for first-time operation ~ "Basic
settings" on page 18 ~ "Before using for the first
time" on page 10
The next time you use the steam function at 100 °C,
calibration will run automatically and more steam will
be produced
When you cook with steam, a lot of
steam is produced
The appliance is being automatically calibrated Normal procedure
When cooking with steam, a lot of
steam is produced repeatedly
The appliance is unable to calibrate itself automati-
cally if cooking times are too short
Reset the appliance to the factory settings and repeat
the calibration process
Steam escapes from the ventilation
slots during cooking
Normal procedure Not possible
Loading ...
Loading ...
Loading ...