Loading ...
Loading ...
Loading ...
Copyright © 2016 RCA Communications Systems
9
Prodigi
TM
RDR2000 Series Professional Digital Two-Way Radio Instruction Manual
RCA RDR2000
TM
Series Overview (continued)
Antenna
Top Button*
Channel Knob
LED Indicator
On/Off/Volume Knob
Speaker
Microphone
Display (RDR2550 / RDR2600)
Limited Keypad (RDR2550)
Full Keypad (RDR2600)
Side Button 1*
Push-to-Talk (PTT) Button
Side Button 2*
Side Button 3*
Accessories Connector
Screw-On Belt Clip
Battery
Battery Charging Contact Points
1
2
3
4
5
6
7
8
9
10
11
12
13
14
15
16
18
17
*
These buttons are programmable
by your RCA Communications
Systems Dealer only upon request
at the time of purchase.
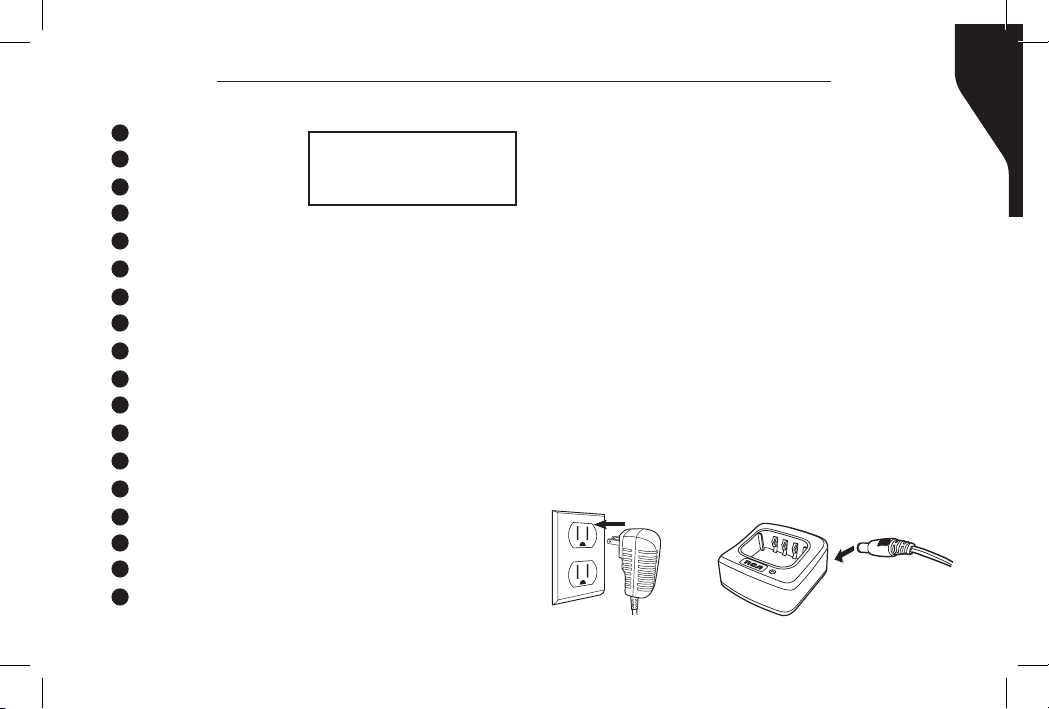
Preparing Your Radio for Initial Use
Setting Up Your Charger
1. Plug the adapter’s AC connector into the
AC outlet socket. (see image A)
2. Plug the adapter’s DC connector into the
DC socket on the back of the charger. (see
image B)
3. Place the radio with the battery attached,
or the battery alone, in the charger. (see
image C)
4. Make sure the battery contact is touching
the charging terminals. The charging
process begins when the red LED light
illuminates.
5. The green LED light will illuminate
approximately two hours later, indicating
the battery is fully charged.
Image A
Image B
Loading ...
Loading ...
Loading ...