• 7-day program schedules maximize comfort and economy.
• Armchair programming: Just pull thermostat from the wall to set schedules.
• EnergyStar® compliant to greatly reduce your heating/cooling expenses.
• One-touch temp control overrides program schedule at any time.
• Precise comfort control keeps temperature within 1°F of the level you set.
• Change/check reminders let you know when to service or replace filters, batteries and other critical components.
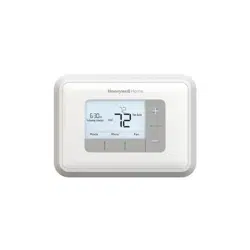
• Large touchscreen display with backlight is easy to read—even in the dark.
• Select models display and control summer humidity.
• Select models accommodate optional outdoor or indoor remote sensors.
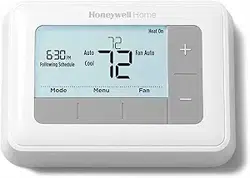
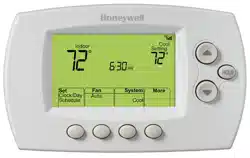
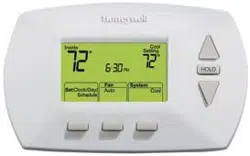
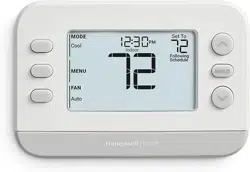
Quick reference to controls
Quick reference to status display
Other display messages:
• Cool On: Cooling system is activated
• Heat On: Heating system is activated
• Aux Heat On: Auxiliary heating system is activated
Programming & Operation
Clock setting
To set the current time display, press CLOCK, then press or to adjust the time. Press and hold or to advance the time more quickly.
Press DONE to save & exit (or press CANCEL to exit without changing the time).
Fan setting
Press FAN to select fan operation, then press DONE.
• On: Fan is always on.
• Auto: Fan runs only when the heating or cooling system is on.
• Circ: Fan runs randomly, about 35% of the time, not counting any run time with the heating or cooling system.
You can press FAN to override the fan settings you’ve programmed for different time periods (see page 11). If you select On or Circ, the setting you select will remain active until you press FAN again to select Auto (see page 27 for more information).
System setting
Press the SYSTEM button to select, then press DONE.
• Heat: Thermostat controls only the heating system.
• Cool: Thermostat controls only the cooling system.
• Off: Heating and cooling systems are off.
• Auto: Thermostat automatically selects heating or cooling depending on the indoor temperature.**
• Em Heat (only for heat pumps with auxiliary heat): Thermostat controls Emergency and Auxiliary Heat. Compressor is locked out.**
** Select models only
Save money by setting program schedules
It’s easy to program your system for maximum energy savings. You can program four time periods each day, with different settings for weekdays and weekends.
Set to the time you awaken and the temperature you want during the morning, until you leave for the day
Set to the time you leave home and the temperature you want while you are away (usually an energy-saving level)
Set to the time you return home and the temperature you want during the evening, until bedtime.
Set to the time you go to bed and the temperature you want overnight (usually an energy-saving level).
EnergyStar® settings for maximum cost savings
This thermostat is pre-set to use EnergyStar® program settings. We recommend these settings, since they can reduce your heating/cooling expenses by as much as 33%. (See next page to adjust times and temperatures of each time period.)
To adjust program schedules
1. Press SCHED, then EDIT.
2. Press day buttons (MON-SUN) to select day(s).
3. Press or to set Wake time for selected day(s).
4. Press or to set Heat and Cool temperature for this time period.
5. Press other time periods (LEAVE, RETURN, SLEEP) to set time and temperatures for each.
6. Press DONE to save & exit (or press CANCEL to exit without saving changes)
Program schedule override (temporary)
Press or to immediately adjust the temperature. This will temporarily override the temperature setting for the current time period.
The new temperature will be maintained only until the time you set. When the timer expires, the program schedule will resume and set the temperature to the level you’ve programmed for the current time period.
To cancel the temporary setting at any time, press CANCEL (or SCHED). The program schedule will resume.
Program schedule override (permanent)
Press HOLD to permanently adjust the temperature. This will turn off the program schedule.
Whatever temperature you set will be maintained 24 hours a day until you manually change it or press CANCEL (or SCHED) to cancel “Hold” and resume the program schedule.
Vacation hold
This feature can suspend the program schedule for extended periods of time.
Press or to set the temperature you want, then press or to set the time of day you want the schedule to resume when you return. Press HOLD twice, then press or to select the number of days.
Whatever temperature you set will be maintained 24 hours a day for the number of days you select. After this number of days have elapsed, the previously programmed schedule will resume at the time you set.
If you return earlier than expected, press CANCEL (or SCHED) to cancel “Hold” and resume the program schedule.
Special features
Auto Changeover: When set to Auto, the thermostat automatically selects heating or cooling depending on the indoor temperature.
Adaptive Intelligent Recovery: This feature allows the thermostat to “learn” how long the furnace and air conditioner take to reach programmed temperature settings, so the temperature is reached at the time you set. For example: Set the Wake time to 6 am, and the temperature to 70°. The heat will come on before 6 am, so the temperature is 70° by the time you wake at 6. The message “Recovery” is displayed when the system is activated before a scheduled time period.
Compressor Protection: This feature forces the compressor to wait a few minutes before restarting, to prevent equipment damage. During the wait time, the message “Wait” is displayed on screen.
Screen lock
To prevent tampering, the screen can be partially or fully locked.
When partially locked, the screen displays SCREEN LOCKED for several seconds if a locked key is pressed. To unlock the screen, press any unlocked key while SCREEN LOCKED appears on the screen.
When the screen is fully locked, no keys function. To lock or unlock the screen, see advanced function 0670 on page 25.
Screen cleaning
Press SCREEN to lock the screen for cleaning. The screen will remain locked for 30 seconds so you can clean the screen without changing any settings.
After 30 seconds, press DONE to resume normal operation, or press SCREEN again if you require more time for cleaning.
About your new thermostat Humidity level display (select models)
Select models can display the current indoor humidity level.
(If an optional outdoor sensor is installed, the outdoor temperature is shown instead of the humidity level. Press MORE to display the humidity level.)
About your new thermostat Dehumidification control (select models)
Select models allow you to decrease summer humidity.
The thermostat monitors humidity. When humidity increases, the thermostat runs the air conditioner longer to reduce humidity (up to 3°F below your cooling temperature setting).
Press MORE until the humidity screen is displayed, then press or to set the desired humidity level.
Press DONE to save and exit, or press CANCEL to exit without saving changes.
About your new therm
Batteries are optional (to provide backup power) if your thermostat was wired to run on AC power when installed.
Install fresh batteries immediately when the LO BATT warning begins flashing. The warning flashes about 30 days before batteries are depleted.
Even if the warning does not appear, you should replace batteries once a year, or before leaving home for more than a month.
Grasp thermostat and pull to remove fom wallplate
Advanced functions
1. Press SYSTEM
2. Press and hold blank center key until the display changes.
3. Change settings as required (see pages 22-25).
4. Press DONE to exit & save changes.
Year setting (first two digits)
Function 0120
Press / to change the first two digits of the year:
Options :
20 = Year 20xx
21 = Year 21xx
Year setting (second two digits)
Function 0130
Press / to change the last two digits of the year:
Options :
01 - 99 (i.e., 2001 - 2099)
Month setting
Function 0140
Press / to change the current month:
Options :
01 - 12 (i.e., January - December)
Date setting
Function 0150
Press / to change the current date:
Options :
01 - 31
Program schedule on/off
Function 0320
Press / to set the temperature display format:
Options :
0 Fahrenheit
1 Celsius
Daylight savings time on/off
Function 0330
The thermostat is pre-programmed to automatically adjust to daylight savings time. Press /to select an option:
Options :
0 Off: No adjustment for daylight savings time
1 On: Auto-change to daylight savings time (through 2006, and for areas that do not use the new 2007 DST calendar)
2 On: Auto-change to daylight savings time (2007 and beyond, for areas that use the new 2007 DST calendar)
Function 0500
This feature displays an alert to remind you to change the furnace filter. Press / to set the desired reminder interval:
Options :
0 Off (no reminder to change furnace filter)
1 Reminder after 10-day run time (about 1 month)
2 Reminder after 30-day run time (about 3 months)
3 Reminder after 60-day run time (about 6 months)
4 Reminder after 90-day run time (about 9 months)
5 Reminder after 120-day run time (about 1 year)
6 Reminder after 365-day run time (about 3 years)
Humidifier pad change reminder
Function 0510
This feature displays an alert to remind you to change the humidifier pad. Press / to set the desired interval:
Options :
0 Off (no reminder to change humidifier pad)
1 Reminder after 3 months
2 Reminder after 6 months
3 Reminder after 1 year
UV lamp change reminder
Function 0520
This feature displays an alert to remind you to change the ultraviolet lamp. Press / to set the desired interval:
Options :
0 Off (no reminder to change UV lamp)
1 Reminder after 1 year
Program schedule periods
Function 0540
Press / to set the number of program periods:
Options :
2 Two program periods (Wake, Sleep)
4 Four program periods (Wake, Leave, Return, Sleep)
Clock format
Function 0640
Press / to set the clock display format:
Options :
12 12-hour clock (i.e., “3:30 pm”)
24 24-hour clock (i.e., “15:30”)
Screen lock
Function 0670
Press / to choose a screen lock setting (see page 16):
Options :
0 Screen is unlocked (fully functional)
1 All functions locked except temperature controls and CANCEL key
2 Screen is fully locked
In case of difficulty
Display is blank
• Check circuit breaker and reset if necessary.
• Make sure power switch at heating & cooling system is on.
• Make sure furnace door is closed securely.
• If thermostat is battery powered, make sure fresh AAA alkaline batteries are correctly installed (see page 20).
No response to key presses (or temperature will not change)
• Check to make sure the thermostat is not locked (see page 25). Make sure heating and cooling temperatures are set to acceptable ranges:
• Heat: 40° to 90°F (4.5° to 32°C)
• Cool: 50° to 99°F (10° to 37°C)
Backlight is dim
• If thermostat is battery-powered, make sure fresh AAA alkaline batteries are correctly installed (see page 20).
• If thermostat is AC-powered battery-powered, a dim display is normal. The backlight remains on at a low level, and brightens when a key is pressed.
Heating or cooling system does not respond
• Press SYSTEM to set system to Heat. Make sure the temperature is set higher than the Inside temperature.
• Press SYSTEM to set system to Cool. Make sure the temperature is set lower than the Inside temperature.
• Check circuit breaker and reset if necessary.
• Make sure power switch at heating & cooling system is on.
• Make sure furnace door is closed securely.
• If “Wait” is displayed, the compressor protection timer is on. Wait 5 minutes for the system to restart safely, without damaging the compressor (see page 15).
Display shows Fan Auto and On or Auto and Circ at the same time
• This is normal operation. Auto indicates the thermostat is following the programmed fan setting. If Auto and On is shown, the fan is scheduled for “On” during this period (see page 7).
Optional remote sensors (select models)
If an outdoor sensor is installed, the current outdoor temperature is displayed.
If an indoor remote sensor is installed, the display shows the indoor temperature at the location of the sensor. (The internal sensor in the thermostat is disabled.)
If more than one indoor sensor is installed, the display shows an average of temperature readings from all sensors.
Troubleshooting
Symptom
Possible Cause
Action
Display does not come on.
Thermostat is not being powered.
Check for 24 Vac between C and Rc. Check that AAA batteries are installed correctly and are good.
Temperature settings do not change.
The upper or lower temperature limits were reached.
Check temperature setpoints. Check Installer Setup Numbers 0600 and 0610; modify as needed.
The keypad is fully locked.
Check Installer Setup Number 0670 to change keypad locked options.
Heating or cooling does not come on.
Thermostat minimum off-time is activated.
Wait up to five minutes for the system to respond.
System selection is not set to Heat or Cool.
Set system Selection to correct position
System type Selection is incorrect.
Check Installer Setup Number 0170 and make sure correct System type is chosen.
Thermostat is calling for Heat (Heat on) or Cool (Cool on) but no heating or cooling is running.
Heating or cooling equipment is not operating.
Check wiring.
Check Installer Setup Number 0170 and make sure correct system type is chosen. Verify operation of equipment in System Test mode.
Heat does not turn on (Heat On is solid in the display)
Heating equipment failure.
Check for 24 Vac at the equipment on the secondary side of the transformer between power and common. If voltage is not present, check the heating equipment to find the cause of the problem.
Check for 24 Vac between the heat terminal (W) and transformer common. If 24 Vac is present, the thermostat is functional. Check the heating equipment to find the cause of the problem.
Loose or broken wire connection between thermostat and heating equipment.
Check for 24 Vac between the heat terminal (W) and transformer common. If voltage is not present, check wire connection (loose or broken) between the thermostat and the heating equipment.
Cooling does not turn on (Cool On is solid in the display).
Cooling equipment failure.
Check for 24 Vac at the equipment on the secondary side of the transformer between power and common. If voltage is not present, check the cooling equipment to find the cause of the problem.
Check for 24 Vac between the cool terminal (Y) and transformer common. If 24 Vac is present, the thermostat is functional. Check the cooling equipment to find the cause of the problem.
Loose or broken wire connection between thermostat and cooling equipment
Check for 24 Vac between the cool terminal (Y) and transformer common. If voltage is not present, check the wire connection (loose or broken) between the thermostat and the cooling equipment.
Fan does not turn on in a call for heat (electric furnace).
Fan Control in Heating is set to Gas or Oil Furnace (Setting 0180).
Set Fan Control in Heating to Electric Furnace (Setting 0180).
Heat pump puts out cool air in the heat mode and warm air in the cool mode.
Changeover Valve (Installer Setup Number 0190) is not configured to match the changeover required by the installed heat pump.
Set Changeover Valve (Installer Setup Number 0190) to match the changeover required by the installed heat pump.
Both the heating and cooling equipment are running at the same time.
The heating equipment is not a heat pump but the System Type (Installer Setup Number 0170) is set to Heat Pump.
Set System Type (Installer Setup Number 0170) to match the installed heating and/or cooling equipment.
Heating and cooling wires are shorted together.
Separate the shorted heating and cooling wires.
Heating equipment is running in the cool mode.
Heating equipment is not a heat pump but System Type (Installer Setup Number 0170) is set to Heat Pump.
Set System Type (Installer Setup Number 0170) to match the installed heating and/or cooling equipment.
Heating equipment does not turn off and heat temperature setting is set below room temperature (Heat On is not in the display).
Heating equipment is not a heat pump but System Type (Installer Setup Number 0170) is set to Heat Pump.
Set System Type (Installer Setup Number 0170) to match the installed heating and/or cooling equipment.
Cannot set the system setting to Heat.
System Type (Installer Setup Number 0170) is set to Cool Only
Set System Type (Installer Setup Number 0170) to match the installed heating and/or cooling equipment.
Cannot set the system setting to Cool.
System Type (Installer Setup Number 0170) is set to Heat Only or Heat Only with Fan
Set System Type (Installer Setup Number 0170) to match the installed heating and/or cooling equipment.
Heat On is not in the display
System setting is not set to Heat and/or temperature setting is not set above room temperature.
Set the system setting to Heat and set the temperature setting above the room temperature.
Cool On is not in the display
System setting is not set to Cool and/or the temperature setting is not set below room temperature.
Set the system setting to Cool and set the temperature setting below the room temperature.
Wait is in the display.
Compressor minimum off timer is active.
Wait up to five minutes for the cooling or heating (heat pump) equipment to turn on.
ìScreen Lockedî appears on the screen and all or some of the keys do not respond.
The keypad is fully or partially locked.
Check Installer Setup Number 0670 to change keypad locked options.


 or
or to adjust the time. Press and hold


 Set to the time you awaken and the temperature you want during the morning, until you leave for the day
 Set to the time you leave home and the temperature you want while you are away (usually an energy-saving level)
 Set to the time you return home and the temperature you want during the evening, until bedtime.
 Set to the time you go to bed and the temperature you want overnight (usually an energy-saving level).
 or
or  to set Wake time for selected day(s).


 /
/  to change the first two digits of the year: