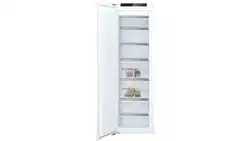
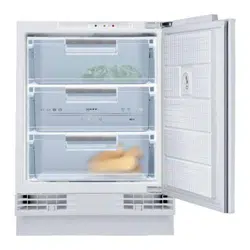
Familiarise yourself with the parts of your appliance.
Appliance
You can find an overview of the parts of your appliance here. → Fig. 1
Controls
Freezer shelf
Frozen food container
Rating plate
Ventilation grille
Note: Deviations between your appliance and the diagrams may differ with regard to their features and size.
Controls
The controls are used to configure all functions of your appliance and to obtain information about the operating status. → Fig. 2
The temperature controller sets the temperature of the freezer compartment.
switches the appliance on or off.
switches Super freezing on or off.
switches the warning signal off.
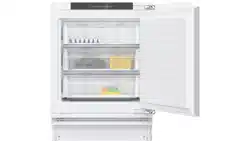
Installation and connection
You can find out where and how best to install your appliance here. You will also learn how to connect your appliance to the power supply.
Scope of delivery
After unpacking all parts, check for any transport damage and check the completeness of the delivery. If you have any complaints, contact your dealer or our after-sales service
The delivery consists of the following:
Built-under appliance
Equipment and accessories1
Installation material
Installation instructions
Operating instructions
Customer service booklet
Warranty enclosure2
Energy label
Product data sheet
Information on the energy consumption and noises
Installing and connecting the appliance
Requirement: The scope of delivery of the appliance is checked.
Observe the criteria for the appliance's installation location.
Install the appliance in accordance with the enclosed installation instructions.
Prepare the appliance for first use.
Electrically connect the appliance.
Preparing the appliance for the first time
Remove the informative material.
Remove the protective foil and transit bolts, e.g. remove the adhesive strips and carton.
Clean the appliance for the first time.
Connecting the appliance to the electricity supply
1. Insert the mains plug of the appliance's power cable in a socket nearby.
The connection data of the appliance can be found on the rating plate. → Fig. 1 / 4
2. Check the mains plug is inserted properly.
The appliance is now ready for use.
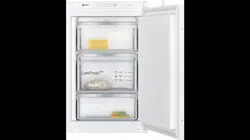
Features
Here you can see an overview of the features of your appliance and their use.
The features of your appliance depend on the model.
Accessories
Only use original accessories. These have been made especially for your appliance. Here you can find an overview of your appliance's accessories and how to use them.
The accessories for your appliance depend on the model.
Ice pack
Use the ice pack for temporarily keeping food cool, e.g. in a cool bag.
Tip: If a power failure or malfunction occurs, the ice pack can be used to slow down the thawing process for the stored frozen food.
Ice cube tray
Use the ice cube tray to make ice cubes
Making ice cubes
1. Fill the ice cube tray with water up to ¾ and place in the freezer compartment.
If the ice cube tray is stuck to the freezer compartment, loosen with a blunt implement only (e.g. spoon handle).
2. To loosen the ice cubes, twist the ice cube tray slightly or hold briefly under flowing water.
Basic operation
You can find out everything you need to know about operating your appliance here.
Switching on the appliance
1. Press .
The appliance begins to cool.
2. Switch off the warning signal with .
goes out as soon as the set temperature has been reached.
3. Set the required temperature.
Operating tips
Once you have switched on the appliance, the set temperature is only reached after several hours. Do not put in any food in the appliance until the temperature is reached.
The front panels of the housing are temporarily heated slightly. This prevents condensation in the area of the door seal.
When you close the door of the freezer compartment, a vacuum may be created and you may not be able to open the freezer door again immediately. Wait a moment until the vacuum is offset.
The refrigeration system may cause several areas of the freezer shelves to frost quickly. The frost has no effect on the function or the energy consumption of the appliance. If frost or ice thicker than 5 mm has formed on the entire surface of the freezer shelf, the appliance must be defrosted.
Switching off the appliance
Press
The appliance stops cooling.
Setting the temperature
After you have switched on the appliance, you can set the temperature.
Setting the freezer compartment temperature
▶ Use a coin to set the temperature at the temperature controller.
The higher the number, the lower the temperature.
The middle setting is recommended by the factory
Defrosting
Observe the information when you want to defrost your appliance.
Defrosting in the freezer compartment
As the frozen food must not start thawing, the freezer compartment does not defrost automatically. A layer of hoarfrost in the freezer compartment impairs refrigeration of the frozen food and increases power consumption.
Defrosting the freezer compartment
Regularly defrost the freezer compartment.
Switch on Super freezing approx. four hours before defrosting. → "Switching on Super freezing", This means that the food reaches very low temperatures and it can be stored for longer at room temperature.
Remove the frozen food container with the frozen food and temporarily place it in a cool location. Place ice packs (if available) on the frozen food.
Switch off the appliance.
Disconnect the appliance from the power supply. Unplug the appliance from the mains or switch off the circuit breaker in the fuse box.
To accelerate the defrosting process, place a pan of hot water on a trivet in the freezer compartment.
Wipe up the condensation water with a soft cloth or sponge.
Rub the freezer compartment dry with a soft, dry cloth.
Electrically connect the appliance.
Switch on the appliance.
Reinsert the frozen food containers with the frozen food.
Cleaning and servicing
To keep your appliance working efficiently for a long time, it is important to clean and maintain it carefully.
Preparing the appliance for cleaning
Find out how to prepare your appliance for cleaning.
Switch off the appliance.
Disconnect the appliance from the power supply. Unplug the appliance from the mains or switch off the circuit breaker in the fuse box.
Take out all of the food and store it in a cool location. Place ice packs (if available) onto the food.
If there is a layer of hoarfrost, allow this to defrost.
Remove all fittings from the appliance.
Cleaning the appliance
Clean the appliance as specified to ensure that it is not damaged by incorrect cleaning or unsuitable cleaning products.
Prepare the appliance for cleaning.
Clean the appliance, the fittings and the door seals clean with a dish cloth, lukewarm water and a little pH-neutral washing-up liquid.
Dry thoroughly with a soft, dry cloth.
Insert the fittings.
Electrically connect the appliance
Switch on the appliance.
Putting the food into the appliance.
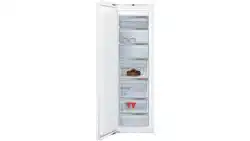
Cleaning the ventilation grille
1. Remove the ventilation grille for cleaning.
To do this, depress the clips in the ventilation openings and simultaneously remove the ventilation grille forwards.
→ Fig. 3
2. Clean the ventilation grille with lukewarm soapy water and a dish cloth.
3. Let the ventilation grille dry completely and insert it.
Troubleshooting
You can rectify minor faults on your appliance yourself. Read the troubleshooting information before contacting after-sales service. This will avoid unnecessary costs.
Malfunctions
Errors
Cause
Troubleshooting
The appliance is not working.
No displays light up.
The mains plug has not been inserted properly.
▶ Connect the mains plug.
Fuse has been tripped.
▶ Check the fuses.
The power has failed.
1. Check whether the power is on.
2. Place ice packs (if available) on the frozen food.
The refrigeration unit is switching on more frequently and for longer.
The appliance door was opened frequently.
▶ Do not open appliance door unnecessarily
The ventilation openings are covered up.
▶ Remove any obstructions from in front of the ventilation openings.
Information on display panel
Errors
Cause
Troubleshooting
A warning signal sounds andlights up.
Different causes are possible.
▶ Press .
The alarm is switched off.
The ventilation openings are covered up.
▶ Remove any obstructions from in front of the ventilation openings.
Larger quantities of fresh food have been put in.
▶ Do not exceed the max. freezing capacity.
→ "Freezing capacity"
Noise
Errors
Cause
Troubleshooting
Appliance has a humming sound.
Not a fault. A motor is running, e.g. refrigerating unit, fan.
No action required.
The appliance bubbles, buzzes or gargles.
Not a fault. Refrigerant flows through the pipes.
No action required.
The appliance clicks.
Not a fault. Motor, switches or solenoid valves are switching on or off.
No action required.
The appliance makes noises.
The appliance is not level.
▶ Align the appliance using a spirit level. If required, place something underneath it.
Fittings wobble or stick.
▶ Check the removable fittings and, if required, replace these.
Containers are touching.
▶ Move the containers apart.
Super freezing is switched on.
No action required.
Odours
Errors
Cause
Troubleshooting
The appliance has an unpleasant smell.
Different causes are possible.
Prepare the appliance for cleaning.
Clean the appliance.
Clean all food packaging.
To prevent odours from forming, store strong smelling food in airtight containers.
After 24 hours, check whether odours are still forming.
Q: I have just defrosted my neff built in freezer, switched back on put green light on , should I press the yellow one on , and should the yellow one be on permanent as well , Thankyou Reply


 switches the appliance on or off.
 switches Super freezing on or off.
 switches the warning signal off.
 .
. .
.