Loading ...
Loading ...
Loading ...
12
6.
Connect the outlet end of the drain hose to a
standpipe or other drain inlet. Examples are shown
below.
9 CAUTION
APPLIANCE DAMAGE COULD OCCUR IF DRAIN
WATER FLOWS BACK INTO THE APPLIANCE
In all drain conditions, scenarios, or connections
you must ensure:
▯ The drain water from the hose is free flowing and
not obstructed allowing adequate water flow.
▯ Drain opening is not sealed in any way and
ventilated enough not to cause a back siphon.
▯ The end of the drain hose does not protrude into
the pumped out or standing water.
▯ Be sure to follow all local codes and regulations
in draining the condensate water to a suitable
drain.
Examples of connections:
▯ Plumbing box or Standpipe connection:
For most plumbing box installations (with adjacent
washer) the plastic elbow supplied with the dryer will
not be used and must be removed from the dryer
drain hose.
1.
Fasten the dryer drain hose to the washer drain/elbow
as shown in picture “A”. Secure with plastic ties
supplied.
9 CAUTION
Do not over tighten plastic ties pinching or
causing a restriction in the drain hose.
2.
Place drain hose assembly into standpipe as shown in
picture “B”.
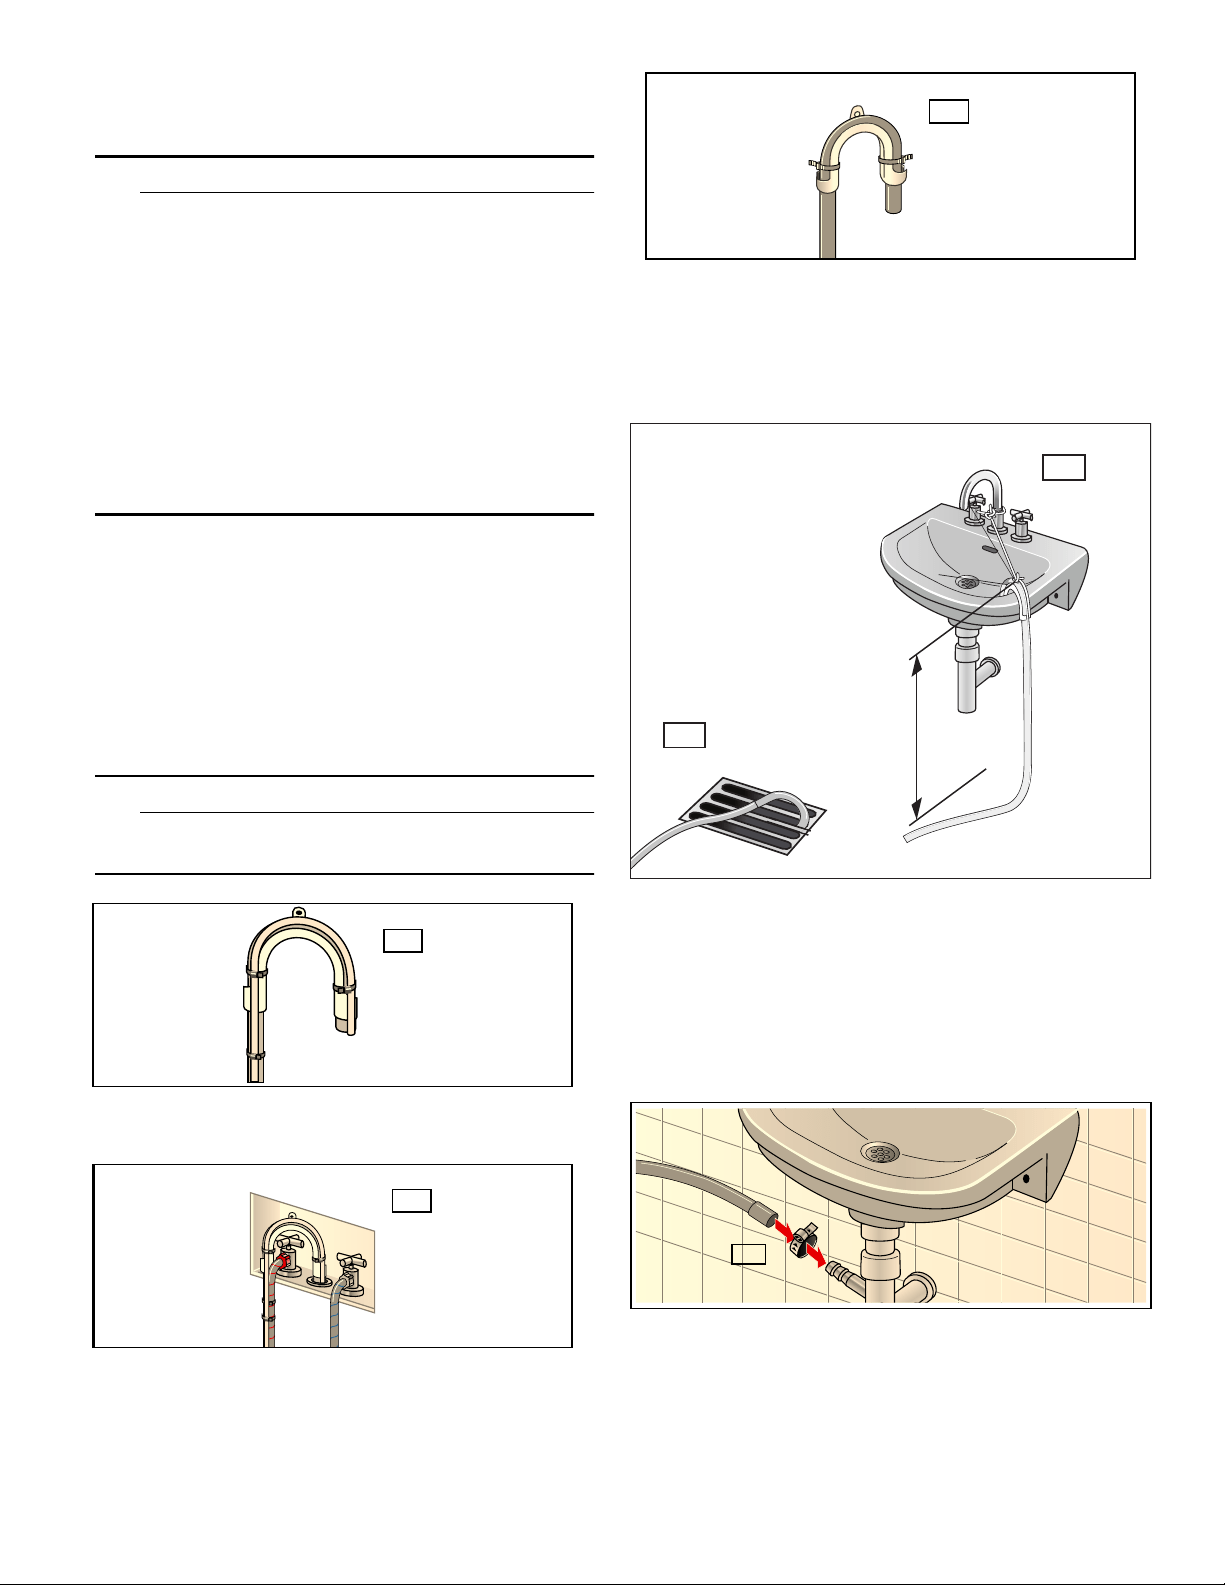
▯ Sink/Basin or Floor drain:
If using the elbow supplied on the hose re-position
elbow closer to the drain end of hose and fasten with
the plastic ties as shown in picture “C”.
Secure hose and/or elbow as shown below. Basin “D”
or floor “E”.
NOTICE: Examples shown are for reference only. Not all
fittings, connectors, nuts, brackets, ties, etc. are supplied
to accommodate every application.
Maximum height of drain is 39 in. (100 cm).
▯ Sink Drain Pipe:
Attach and secure drain hose as shown below in
picture “F”.
Use a standard hose clamp available from your local
hardware store.
NOTICES
▯ Examples shown are for reference only. Not all fittings,
connectors, nuts, brackets, ties, etc. are supplied to
accommodate every application.
▯ Ensure there are no kinks or crimps along the entire
lenght of hose.
$
%
&
'
(
PD[LQ
FP
)
Loading ...
Loading ...
Loading ...