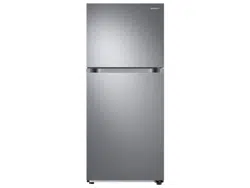
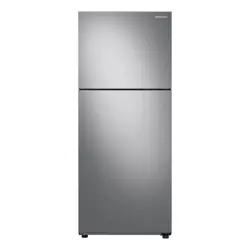
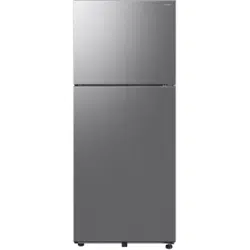
User Manual Refrigerator
Operations
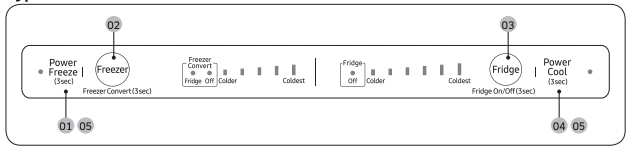
Feature panel
Type A
Type B
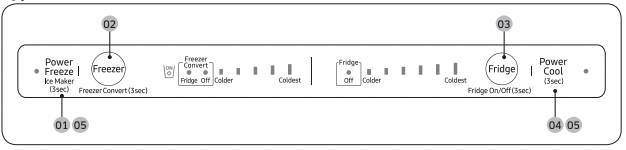
01 Power Freeze / Ice Maker (applicable models only)
02 Freezer / Freezer Convert
03 Fridge / Fridge On/Off
04 Power Cool
05 Sabbath mode
01 Power Freeze / Ice Maker (applicable models only)
Power Freeze
Power Freeze speeds up the freezing process at maximum fan speed. The freezer keeps running at full speed for several hours and then returns to the previous temperature.
- To activate Power Freeze, press and hold Power Freeze for 3 seconds (Type A), or press and release Power Freeze within 3 seconds (Type B). The corresponding indicator
 lights up, and the refrigerator will speed up the freezing process for you.
- For Type B, do not hold down Power Freeze for 3 seconds or more. This will activate the ice maker, not Power Freeze.
- To deactivate, press and hold Power Freeze for 3 seconds (Type A), or press and release Power Freeze within 3 seconds (Type B). The freezer returns to the previous temperature setting.
- To freeze large amounts of food, activate Power Freeze for at least hours before putting food in the freezer.
- The freezer keeps running at full speed for 50 hours and then returns to the previous temperature.
NOTE
Using Power Freeze increases power consumption. Make sure you turn it off and have the Freezer return to its previous temperature if you no longer need Power Freeze on.
Ice Maker (applicable models only)
By default, the refrigerator is set to make ice with the ice maker indicator on.
To disable this function, press and hold Ice Maker for 3 seconds. We recommend disabling the function in the following cases:
- The ice bucket is already full of ice.
- You want to decrease power consumption.
- When removing the ice maker while it is operating, the ice maker automatically turns off, and the ice maker button (holding down Power Freeze) will be disabled.
- If reattaching the removed ice maker while the refrigerator is on, the ice maker automatically turns on.
02 Freezer / Freezer Convert (3 sec)
Freezer
The Freezer button can be used to set the freezer temperature.
CAUTION
• To prevent system failure or food spoiling, do not set the temperature to Colder in summer (when temperatures are above 95 °F (35 °C)).
• Do not store glass bottles containing liquid in the freezer. Glass bottles will crack or break into pieces when the liquid freezes.
Freezer Convert
You can use the freezer as a freezer only, set the entire refrigerator including the freezer to Fridge mode, or turn off the freezer. To change the default freezer mode, press and hold Freezer Convert for 3 seconds to enter the selection mode. Then, press Freezer Convert to select a desired mode.
The mode changes in this sequence: Fridge -> Off -> Freezer, then back to Fridge.
- If you select Fridge, the fridge indicator turns on. The freezer will operate in Fridge mode with refrigerator temperatures (above freezing). Power Freeze will be deactivated if active, and Ice On will turn off if enabled.
- If you select Off, the Off indicator turns on. The freezer will be turned off.
- If you switch to Fridge or Off mode, the ice maker automatically turns off after 15 seconds. Empty the ice bucket before you select these modes.
- If you select Freezer, the freezer temperature indicators turn on and the freezer will operate as a freezer (with temperatures below freezing).
- If you switch back to Freezer mode from Fridge or Off mode, the ice maker automatically turns on.
Your changes will be set and activated after 10 seconds. To cancel or change the mode again, press and hold Freezer Convert again for 3 seconds. Then, follow the instructions above.
NOTE
- If you press and hold Freezer Convert for 3 seconds in other modes, the refrigerator switches to selection mode where you can press Freezer Convert to select a different mode.
- When the fridge or the freezer is set to Off mode, the temperature of the fridge or the freezer remains under 59 °F (15 °C) to prevent mold and odors. The refrigerator will use less electricity.
- The fridge and the freezer cannot be powered off independently.
- Do not store food or beverages in the refrigerator when the refrigeration or freezer functions are set to 'Off mode'. 59 °F (15 °C) is not cool enough to prevent spoilage.
WARNING
• Do not put glass bottles containing liquid in the freezer. When you cancel Freezer Convert and the freezer returns to freezer mode, the liquid in the glass bottles will freeze which can cause the glass bottles to break or burst in the freezer.
• Make sure to remove frozen foods from the freezer before you use Freezer Convert to convert the freezer to Fridge mode. Frozen foods will melt and spoil as the temperature increases.
• Make sure to remove chilled foods from the freezer before using Freezer Convert to change the freezer to Freezer mode. Chilled foods may freeze as the temperature decreases.
NOTE If you want to use Freezer Convert, we strongly recommend that you use plastic containers to store food, especially vegetables.
03 Fridge / Fridge On/Off (3 sec)
Fridge
To adjust the fridge temperature, press Fridge to select the corresponding temperature.
CAUTION
• In winter, do not set the temperature control to Coldest. This may cause problems with the cooling performance.
• In summer, do not set the temperature control to Colder. This may also cause problems with the cooling performance.
Fridge On/Off
Press and hold Fridge for 3 seconds to select Fridge On/Off. The temperature indicator will turn off and the Fridge On/Off indicator will turn on.
NOTE
• In Fridge On/Off mode, the temperature of the fridge or freezer remains under 59 °F (15 °C) to prevent mold and odors. The refrigerator uses less electricity.
• Do not store food or beverages in the refrigerator when the refrigeration or freezer functions are set to 'Off mode'. 59 °F (15 °C) is not cool enough to prevent spoilage.
04 Power Cool (3 sec)
Power Cool
Power Cool speeds up the cooling process at maximum fan speed. The fridge keeps running at full speed for several hours and then returns to the previous temperature.
- To activate Power Cool, press and hold Power Cool for 3 seconds. The corresponding indicator
 lights up, and the refrigerator will speed up the cooling process for you.
- To deactivate Power Cool, press and hold Power Cool again for 3 seconds. The fridge returns to the previous temperature setting.
- To cool large amounts of food completely, make sure you have activated Power Cool at least 24 hours in advance.
NOTE
Using Power Cool increases power consumption. Make sure you turn it off and have the Fridge return to its previous temperature if you no longer need Power Cool on.
Cooling Off mode
North American (US, Canada) Models Only
Cooling Off mode (also called Shop mode), is designed for use by retailers when they are displaying refrigerators on the shop floor. In Cooling Off mode, the refrigerator’s fan motor and lights work normally, but the compressors do not run, and the refrigerator and freezer do not get cold.
- To start Cooling Off mode, press and hold Power Freeze, Freezer and Fridge simultaneously for 5 seconds during normal operation. The refrigerator chime sounds and the temperature LEDs will light up sequentially from left LED to right LED.
- To cancel Cooling Off mode, press and hold Power Freeze, Freezer and Fridge simultaneously again for 5 seconds.
Special features
Your refrigerator and its special functions may differ from the images and functions presented in this section depending on your model and country.
Ice making (applicable models only)
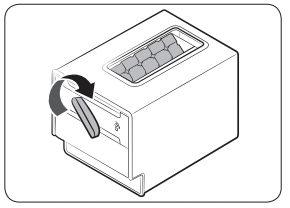
Twist ice maker
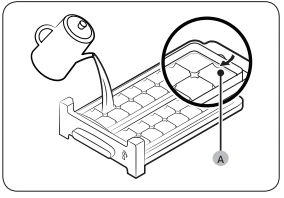
- 1. Open the freezer door, and slide open the ice tray.
- 2. Fill the tray with water up to the maximum level (A) marked on the inner rear of the tray.
- 3. Slide the tray back into position.
NOTE The ice making time depends on your temperature settings.
NOTE
- Make sure the ice bucket is in place under the ice tray.
- To dispense the ice cubes, turn the handle of the bin to the right to empty half of the ice cubes into the bin. Then, turn it to the left to empty the other half.
- Take out the bin by slightly twisting and pulling to the front.
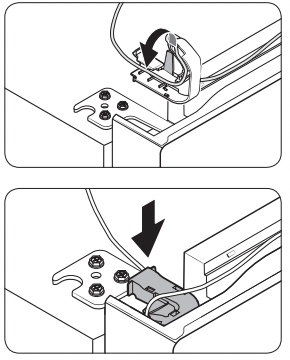
Auto ice maker (applicable models only)
For first-time use
- Let the ice maker make ice for 1-2 days.
- Discard the first 1-2 buckets of ice to remove impurities in the water supply system.
- When the upper ice tray is full, use the lower ice tray
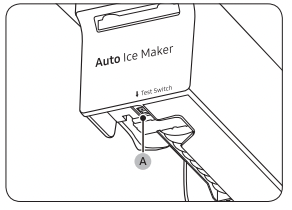
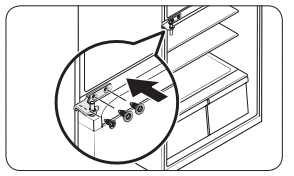
If the auto ice maker does not make ice, remove the ice bucket and press Test Switch (A) to check if the auto ice maker operates properly.
Maintenance
Door reversal (applicable models only)
WARNING
- Tilting/laying the refrigerator requires minimum of 2 people.
- Disconnect power source and water line before reversing the doors.
- If the unit is allowed to lay on its back or side for more than an hour, let it stand for 15 minutes after it is returned to the upright position before plugging it in.
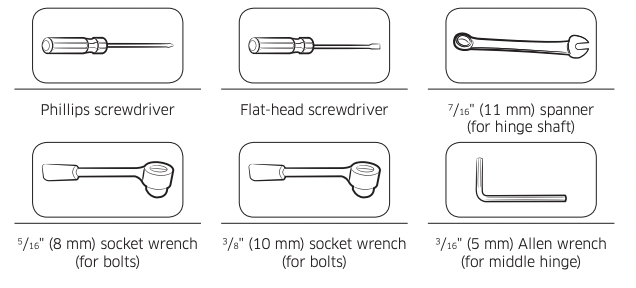
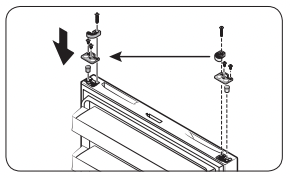
Tools required (not provided)
Accessories (provided)

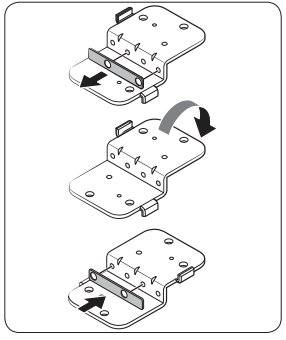
* Hinge cover is located on the top table. (refer to page 47.)
CAUTION Throughout the entire reversing procedure, keep all the small parts (screws, caps, etc.) of the refrigerator away from children or infants for safety reasons.
Step-by-step instructions
STEP 1 Remove the doors

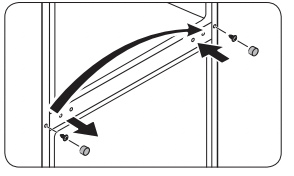
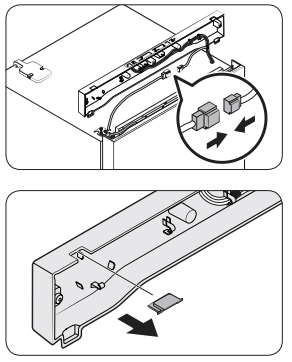
- 1. Use a Phillips screwdriver to loosen the screws (x3) in three holes on the top table. Then, gently pull out the top table.
- 2. Decouple the wire connectors.
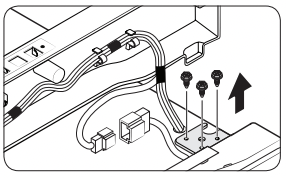
- 3. Loosen the bolts on the top hinge.
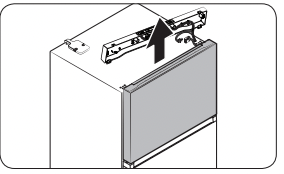
- 4. Gently lift up the freezer door to remove it.
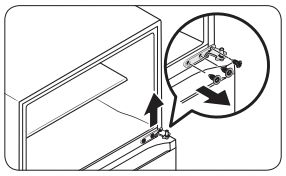
- 5. Use the screwdriver and the wrench to loosen the bolts and remove the middle hinge.
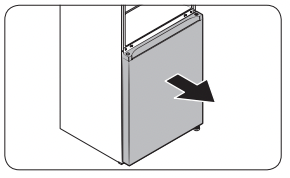
- 6. Gently slide the fridge door out of the hinge shaft, and then pull up to remove.
STEP 2 Remove the hinges and shafts
To facilitate the reversing process, gently lay the refrigerator down on a flat floor covered by a cushion or rug.
- 1. Use the screwdriver to remove the bottom hinge.
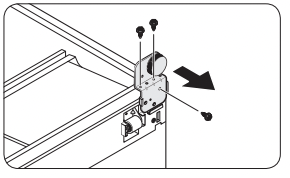
- 2. Remove the levelling leg on the opposite side by turning it counterclockwise.
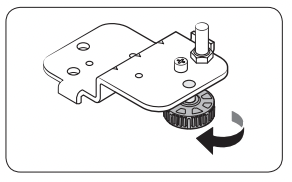
- 3. Remove the levelling leg from the bottom hinge by turning it counter clockwise.
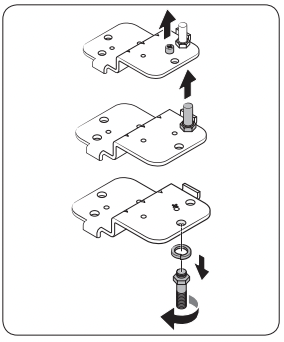
- 4. Use the screwdriver to remove the hinge bolt. Then, use the wrench to remove the door shaft, and then the leg bolt with the spring washer.
- 5. Detach the hinge shim manually, which has been attached using double-sided tape. Turn the bottom hinge over, and then reattach the hinge shim to the opposite side.
STEP 3 Reverse the auto closer (freezer door only)
Now stand the refrigerator back upright with care, and then do the following.
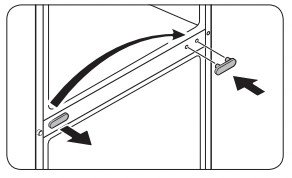
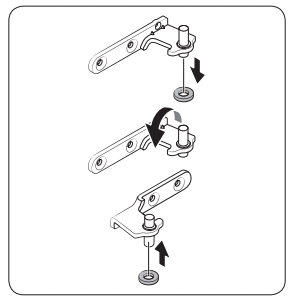
- 1. Remove the auto closer and the stopper from the bottom of the fridge door. Then, reinsert them on the opposite side of the fridge door as shown.
- 2. Use a flat-head screwdriver to remove the hinge grommet.
- 3. Reinsert the hinge grommet on the opposite side.
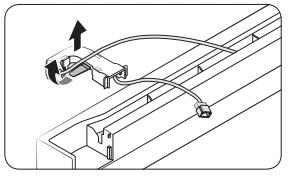
STEP 4 Reverse the bar cover and the top hinge
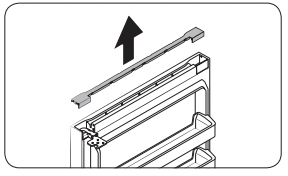
- 1. Pull up to remove the bar cover on the top of the freezer door.
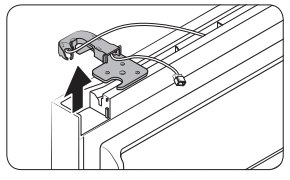
- 2. Remove the top hinge with its cover.
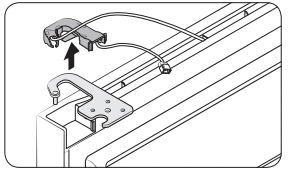
- 3. Separate the top hinge from the hinge cover.
- 4. Arrange the door wire in the hinge cover.
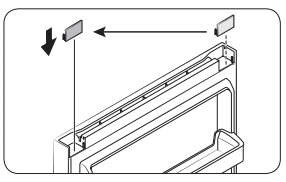
- 5. Remove the cap spacer, and then reinsert it on the opposite side.
- 6. Remove the door shaft from the top hinge, flip it 180 degrees as shown, and then reinsert it .
STEP 5 Reattach the doors on the opposite side
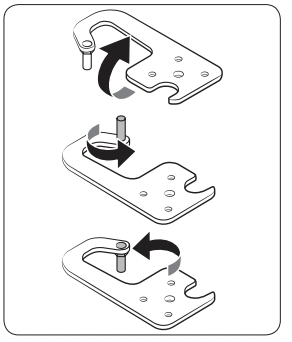
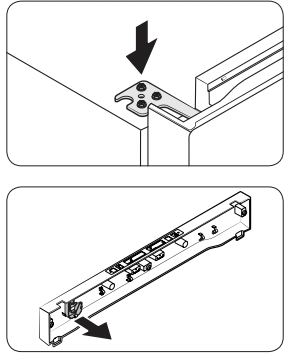
- 1. Use a flat-heat screwdriver to remove the middle-hinge screw cap, and then reinsert it on the opposite side.
- 2. Use the flat-heat screwdriver to remove the flange-screw cap to reveal the flange screw. Use a Phillips screwdriver to remove the flange screw, and then tighten it on the opposite side. Finally, close the flange-screw cap on the opposite side.
- 3. Remove the grommet ring from the middle-hinge shaft, and then reinsert the ring on the other side of the shaft. See the figure for visual reference.
- 4. Reverse the middle hinge and insert it on the opposite side. Then, tighten the hinge with the screws.
- 5. Use the flat-head screwdriver to remove both the hinge grommet on one side and the hinge-hole cap on the other side. Reinsert them on their respective opposite side.
- 6. Gently slide the fridge door into the correction position so that it fits.
- 7. Gently slide the freezer door into the correction position so that it fits.
STEP 6 Reverse the shaft and the leg
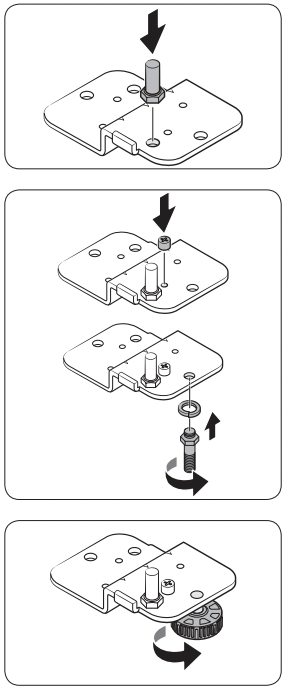
- 1. Reverse the bottom hinge, insert the door shaft into it, and then tighten the door shaft.
- 2. Insert the hinge bolt and the spring washer, and then the leg bolt into the bottom hinge. Then, tighten them by turning them clockwise.
- 3. Insert the hinge-side levelling leg, and then tighten it by turning it clockwise.
- 4. Insert the bottom hinge in the opposite side, and then tighten it.
- 5. Insert and tighten the other levelling leg by turning it clockwise.
STEP 7 Reattach the remaining parts
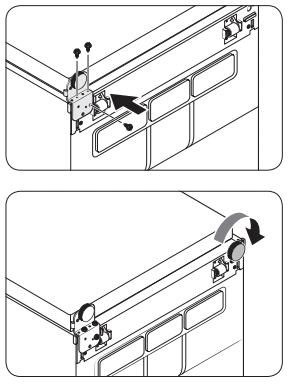
- 1. Insert and tighten the top hinge on the opposite side.
- 2. Detach the hinge cover manually from the top table.
- 3. Arrange the door wire in the hinge cover before placing the hinge cover onto the top hinge.
- 4. Connect the wire connectors.
- 5. Remove the hinge hole cap from the top table, and then reinsert it on the opposite side.
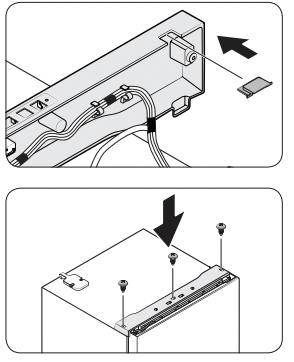
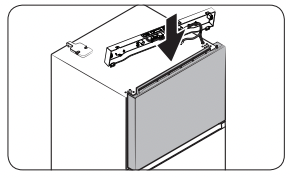
- 6. Insert the top table, and then fix it firmly to the refrigerator using the screws (x3).
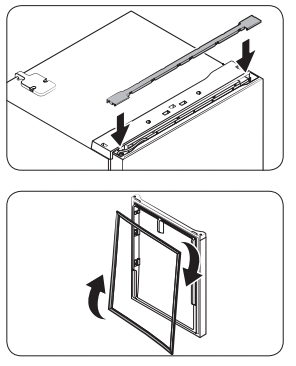
- 7. Insert the bar cover.
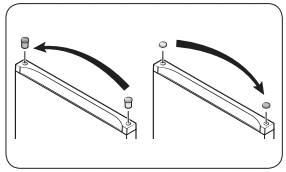
- 8. Remove the fridge door and freezer door gaskets. Turn them clockwise by 180 degrees, and then reattach them.
NOTE In the future, you might want to return the doors to their initial position (before the doors were reversed). In that case, refer to the instructions on the previous pages, but switch the doors, hinges, and covers back to their initial positions.
Handle and care
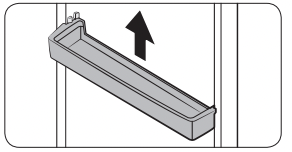
Shelves (fridge/freezer)
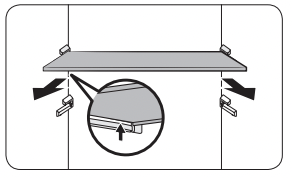
To remove the shelf, hold it with both hands and lift to release from the rear hooks. Then, pull it halfway to the front.
Fresh room
Slide out the sliding shelf of the Fresh room.
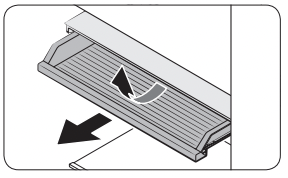
Vegetable drawers
Gently lift up the front of the drawer, and then slide it out.
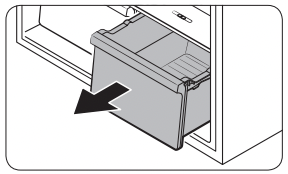
Vegetable shelf
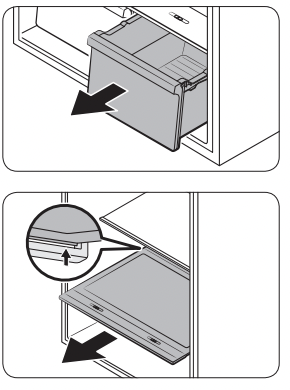
- 1. Gently lift up the front of the drawer, and then slide it out.
- 2. Hold the vegetable shelf with both hands, and then slide it out.
Door shelves
Lift up the door shelf slightly, and then pull it out .
CAUTION To prevent accidents, empty the door guards before removing.
Cleaning
Regularly use a dry cloth to remove all foreign substances such as dust or water from the power plug terminals and contact points.
- Unplug the power cord of the refrigerator.
- Use a moistened, soft, lint-free cloth or paper towel to clean the refrigerator’s interior and exterior.
- When done, use a dry cloth or paper towel to dry the refrigerator well.
- Plug in the power cord of the refrigerator to turn the refrigerator on.
NOTE
If you have removed any removable parts such as shelves for cleaning, refer to the overall layout in the Refrigerator at a glance section to make sure you have re-inserted them correctly.
WARNING
- Do not use benzene, thinner, home/car detergent, or Clorox™ to clean your refrigerator. They may damage the surface of the refrigerator and cause a fire.
- Do not spray water onto the refrigerator. This may cause electric shock.
Replacement
Lamps
The lamps are not user-serviceable. To replace the lamps of the refrigerator, contact a local Samsung service center.
Troubleshooting
If you encounter a problem with the refrigerator, first check the tables starting below, and then try the suggested solutions. If none of the suggested solutions resolve your problem, please visit our website at samsung or call Samsung Customer Care at 1-800-SAMSUNG (726-7864).
General
Temperature
Fridge/freezer does not operate. Fridge/freezer temperature is warm.
Power cord is not plugged in properly.
- Properly plug in the power cord.
Temperature control is not set correctly.
- Set the temperature lower.
Refrigerator is located near a heat source or in direct sunlight.
- Keep the refrigerator away from direct sunlight or a heat source.
Not enough clearance between refrigerator and sides/rear.
- We recommend that the gap between the refrigerator and nearby walls (or cabinets) is more than 50 mm.
The refrigerator is overloaded. Food is blocking the refrigerator vents.
- Do not overload the refrigerator. Do not allow food to block ventilation.
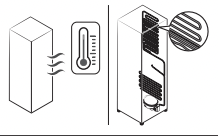
Fridge/freezer is over-cooling.
Temperature control is not set correctly.
- Set the temperature higher.
Interior wall is hot.
Refrigerator has heat-proof piping in the interior wall.
- To prevent condensation from forming, the refrigerator has heat-proof piping in the front corners. If the ambient temperature rises, this equipment may not work effectively. This is not a system failure.
Odors
Refrigerator has odors.
Spoiled food.
- Clean the refrigerator and remove any spoiled food.
Food with strong odors.
- Make sure strong smelling food is wrapped airtight.
Frost
Frost around the vents.
Food is blocking the vents.
- Make sure no food blocks the refrigerator vents.
Frost on interior walls.
Door is not closed properly.
- Make sure food does not block the door. Clean the door gasket.
Fruits or vegetables are frozen.
Fruits or vegetables are stored in the Fresh/ChefZone.
- The Fresh/Chef Zone is only for meat/fish.
Condensation
Condensation forms on the interior walls.
If door is left open, moisture enters the refrigerator.
- Remove the moisture and do not leave the door open for extended periods of time or open the door frequently.
Food with high moisture content.
- Make sure food is wrapped airtight.
Auto Ice Maker
The ice maker does not produce ice.
The freezer room is not cold enough.
- Make sure the cold air outlet is not clogged.
The ice maker is turned off.
- Make sure the ice maker is turned on. Press and hold Power Freeze for 3 seconds, and check if the corresponding indicator turns on.
The wire connector of the ice maker is not connected properly.
- Make sure the wire connector from the wire housing is connected properly.
The water line flowing to the ice maker is bent or kinked.
- Make sure the water line in the rear of the refrigerator is not bent or kinked.
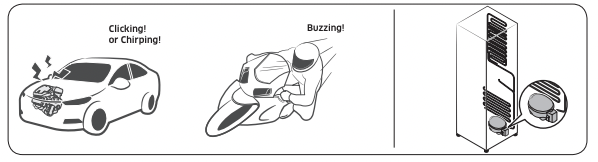
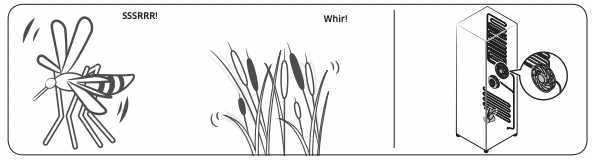
Do you hear abnormal sounds from the refrigerator?
Before calling for service, review the information below. Note that you will be charged for any service calls related to normal operating sounds in which no defects were found. If you have any questions about sounds your refrigerator is making, please call Samsung Customer Care at 1-800-SAMSUNG (726-7864).
These sounds are normal.
- When starting or ending an operation, the refrigerator may make sounds similar to a car engine ignition. As the operation stabilizes, the sounds will decrease.
- While the fan is operating, these sounds may occur. When the refrigerator reaches the set temperature, no fan sound will occur.
- During a defrost cycle, water may drip on the defrost heater, causing sizzling sounds.
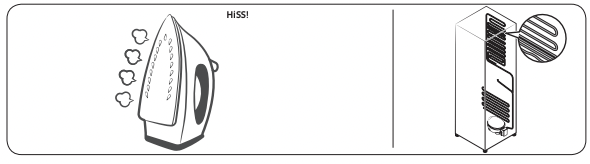
- As the refrigerator cools or freezes, refrigerant gas moves through sealed pipes, causing bubbling sounds.
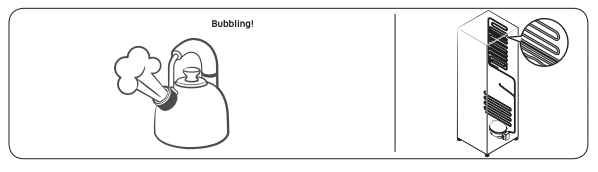
- As the refrigerator temperature increases or decreases, plastic parts contract and expand, creating knocking noises. These noises occur during the defrosting cycle or when electronic parts are working.
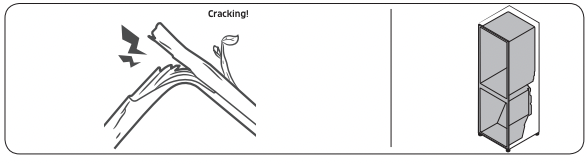
- For ice maker models: When the water valve opens to fill the ice maker, buzzing sounds may occur.
- Due to pressure equalizing when you open and close the refrigerator door, whooshing sounds may occur.