STACKING KIT INSTALLATION INSTRUCTIONS (WASHER & DRYER ONLY)
 CAUTION : Two people are required to lift the dryer on to the washer.
WARNING : These washer and dryer are not suitable for mobile home or RV installation.
Dryer
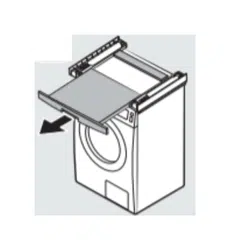
STEP 1 Have two persons place the dryer on a non-slippery floor. Then, have one person tilt the dryer to the side. Do not lay the dryer down. The dryer may be scratched.
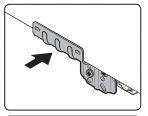
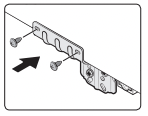
STEP 2-1 SKK-7*, SKK-8*: Check if the legs are tightened up, and then insert the stacking support guides in the rectangular holes of the dryer’s base until you hear a clicking sound. You don’t need to remove the legs.
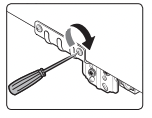
STEP 2-2 SKK-BB: Disassemble legs, and Snap the stacking support guides into the rectangular holes in the dryer base and secure each with two(2) screws Phillips-pan head (6006-001174)
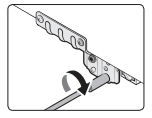
STEP 3 Repeat the same step above on the other side.
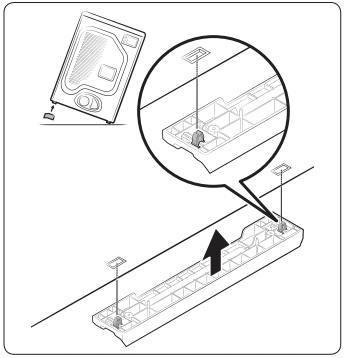
STEP 4 Bottom view of the dryer after assembling the Stacking Support Guides to the dryer base.
* Use a stacking-kit compatible with the purchased model.
Washer (Stacking kit: SKK-7*, SKK-8*, for 27” models)
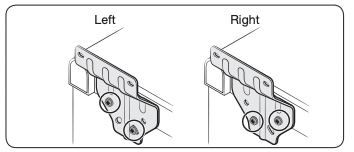
CAUTION : You need to use the proper rear bracket depending on your washer model. (There are 2 different rear brackets : DC61-04160A, DC61-04955A)
5-1) DC61-04160A : WF5*K**, WF4*H**, WF4*K**, WF4*M**, WF4*N**, WF18H**, WF20H**, WF20M**, WF22H**, WF22K**, WF15K**, WF16J65**
DO NOT TIGHTEN SCREWS COMPLETELY
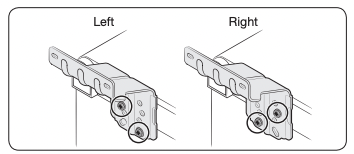
STEP 5-1 LOOSELY assemble the Rear Brackets (DC61-04160A) to the washer as shown below. Use two (2) Screws-Hex Head (6002-001431) with washers (DC60-00044A) in each washing machine Top Cover tail, per bracket.
Before installing the rear bracket, loosen two screws (Screw-Hex) on the Cover Top that is secured to the frame.
5-2) DC61-04955A : WF5*R**, WF4*R**
DO NOT TIGHTEN SCREWS COMPLETELY STEP
5-2 LOOSELY assemble the Rear Brackets (DC61-04955A) to the washer as shown below. Use two (2) Screws-Hex Head (6002-001431) with washers (DC60-00044A) in each washing machine Top Cover tail, per bracket.
* Before installing the rear bracket, loosen two screws (Screw-Hex) on the Cover Top that is secured to the frame.
Washer (Stacking kit: SKK-BB, for 30” models)
WF56H**
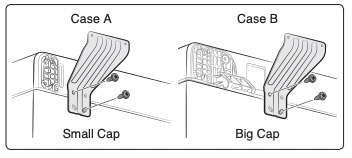
STEP 5-3 Loosely assemble the Rear Bracket (DC61-03846A) to the washer as shown above in either case A or Case B, Use (2) Screws-Hex Head (6009-001476) with washers (DC60-00044A) to the each hole of Cover Top and Frame.
Case A only : Before installing the rear bracket, loosen two screws (Screw-Hex) on the Cover Top that is secured to the frame.
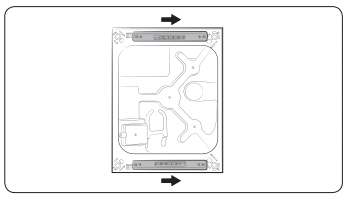
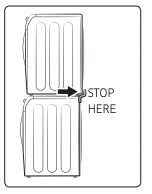
STEP 6 Lift and position dryer into the position on the washer shown above, slide dryer backwards to make contact with rear brackets.
CAUTION : To prevent noise, check the followings.
- Make sure the washer is level.
- Make sure the dryer’s leveling legs are tightened up. (Stacking kit: SKK-7*, SKK-8*, for 27” models
STEP 7 Align rear brackets with mounting holes on the rear of dryer as shown above.
STEP 8 LOOSELY assemble rear brackets to the back of the dryer using two (2) Screws- Phillips Pan Head (6006-001174) for each rear bracket as shown above.
STEP 9 Extra screws may be included with this kit. Tighten screws on the dryer side of the rear bracket.
WARNING : Additional gas hook-up components are required for gas dryer.
STEP 10 Tighten screws on the washer side of the rear bracket.
* DO NOT REVERSE THE ORDER OF STEPS 9 & 10.
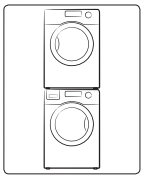
STEP 11 Stacked Unit is now ready to be installed. Refer to detailed installation instructions packed with products.
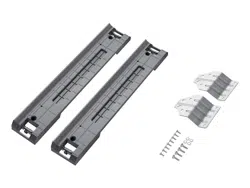
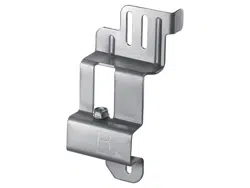
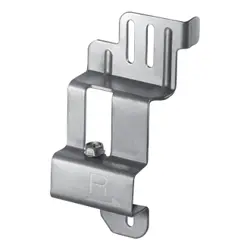
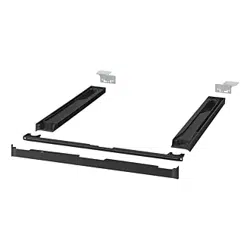
Stacking kit components

Rear Bracket (WF5*K**, WF4*H**, WF4*K**, WF4*M**, WF4*N**, WF18H**, WF20H**, WF20M**, WF22H**, WF22K**, WF15K**, WF16J65**)

Rear Bracket (WF56H**)
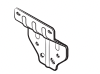
Rear Bracket (WF5*R**, WF4*R**)

Screw-Hex Head SKK-BB (M5, L10) SKK-7*, SKK-8* (M5, L16)

Screw Phillips-Pan Head (M4, L12)

Washer (ID5, OD10)
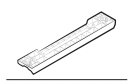
Stacking Support Guide
About This Product
The Samsung SKK-8K Laundry Stacking Kit is compatible with most Samsung 27" wide front load washers and dryers and saves you space in your home. To utilize your limited laundry space efficiently, you can use the stacking kit to fasten and organize your units with the dryer on top of the washer.