Loading ...
Loading ...
Loading ...
STEP3 : PREPARETHEVENtiNG BLOWER
WALL VENTED iNSTALLATiON
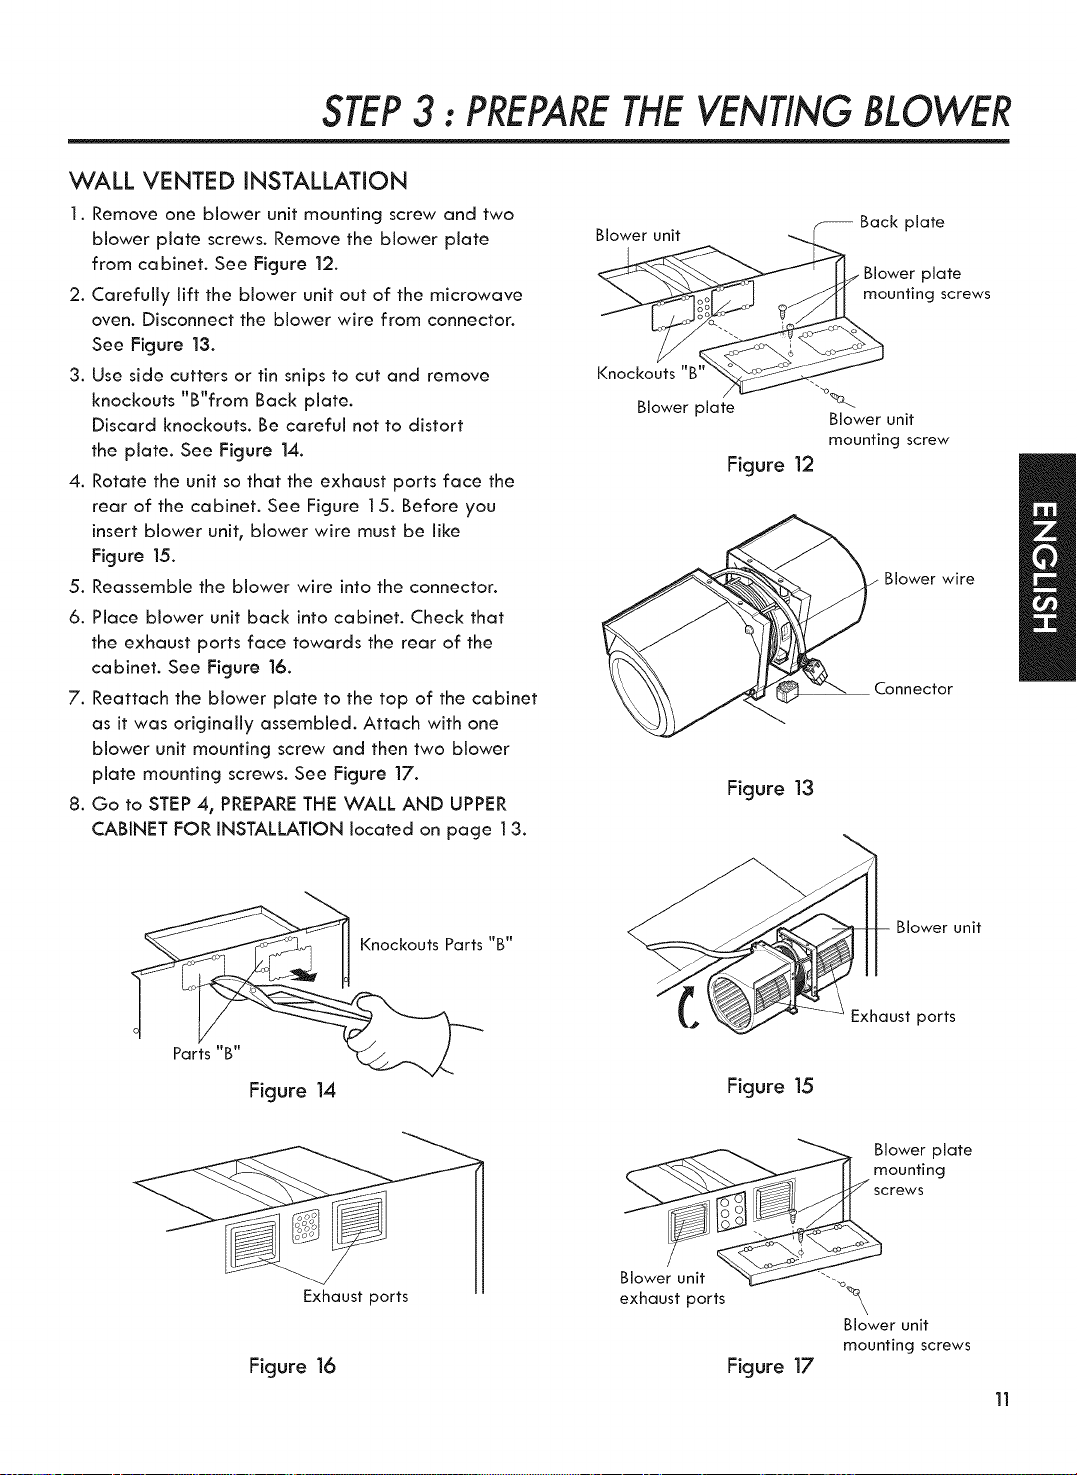
1. Remove one blower unit mounting screw and two
blower plate screws. Remove the blower plate
from cabinet. See Figure 12.
2. Carefully lift the blower unit out of the microwave
oven. Disconnect the blower wire from connector.
See Figure 13.
3. Use side cutters or tin snips to cut and remove
knockouts "B"from Back plate.
Discard knockouts. Be careful not to distort
the plate. See Figure 14.
4. Rotate the unit so that the exhaust ports face the
rear of the cabinet. See Figure 15. Before you
insert blower unit, blower wire must be like
Figure 15.
5. Reassemble the blower wire into the connector.
6. Place blower unit back into cabinet. Check that
the exhaust ports face towards the rear of the
cabinet. See Figure 16.
7. Reattach the blower plate to the top of the cabinet
as it was originally assembled. Attach with one
blower unit mounting screw and then two blower
plate mounting screws. See Figure 17.
8. Go to STEP 4, PREPARE THE WALL AND UPPER
CABINET FOR INSTALLATION located on page 13.
BaCk plate
Blower plate
unting screws
_. . /-_I-_ ".o
Bower p ate -_
Blower unit
mounting screw
Figure 12
Blower wire
Connector
Figure 13
_ "B"
Figure 14
Figure 15
Blower unit
Exhaust ports
Exhaust ports
Figure 16
B_cOWer plate
m?unJ_ng
Blower unit _
"-o
exhaust ports
Blower unit
mounting screws
Figure 17
11
Loading ...
Loading ...
Loading ...